Spooktacular Witches’ Finger Cookies with Ghoulish Red Velvet Hot Chocolate for Halloween
Conjure up some Halloween magic with these eerily delicious Witches’ Finger Cookies, perfectly paired with a rich, velvety red hot chocolate ‘blood’ for the ultimate spooky treat!
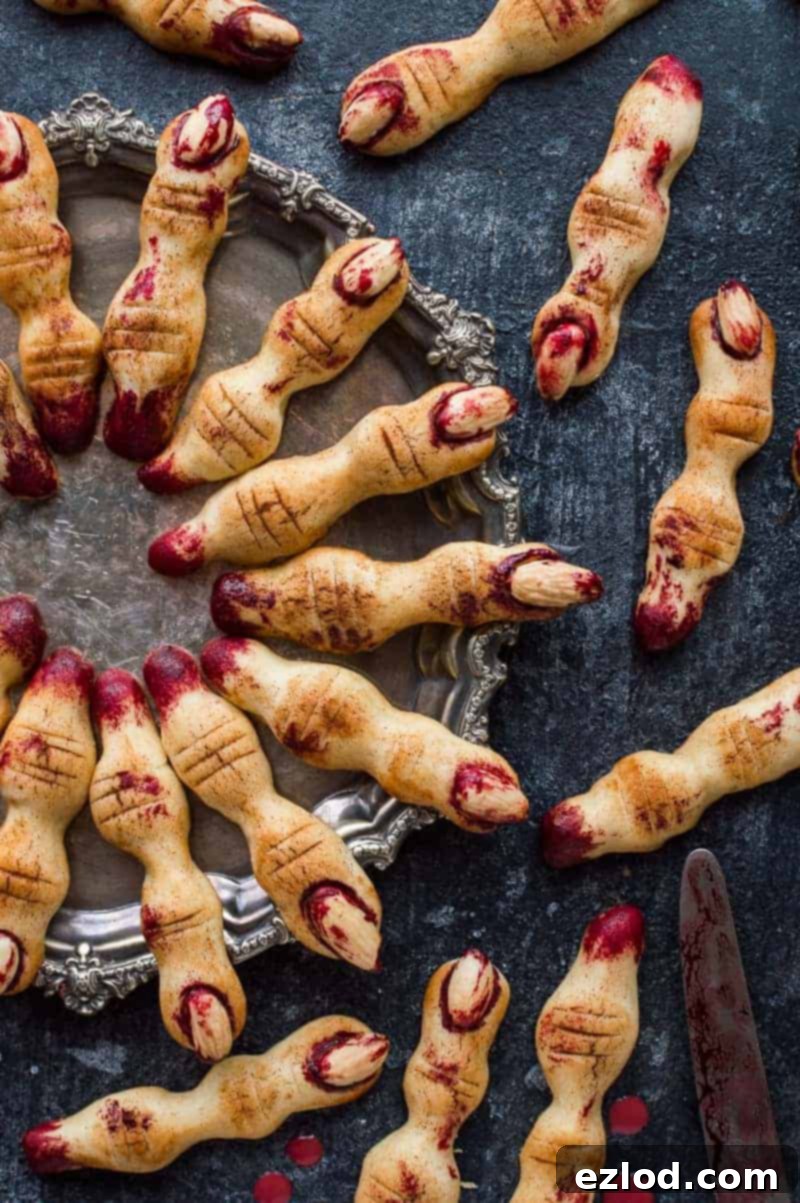
As the air grows crisp and the nights lengthen, the spirit of Halloween beckons with its promise of playful frights and delectable delights. This year, step up your spooky treat game with a duo that’s guaranteed to be the star of any ghoulish gathering: Witches’ Finger Cookies served alongside a rich, crimson Red Velvet Hot Chocolate. These aren’t just any Halloween cookies; they are an experience, offering a perfect blend of creepy aesthetics and irresistible flavor. Prepare to amaze your guests and delight your family with these homemade, hauntingly good treats!
The Irresistible Allure of Witches’ Finger Cookies
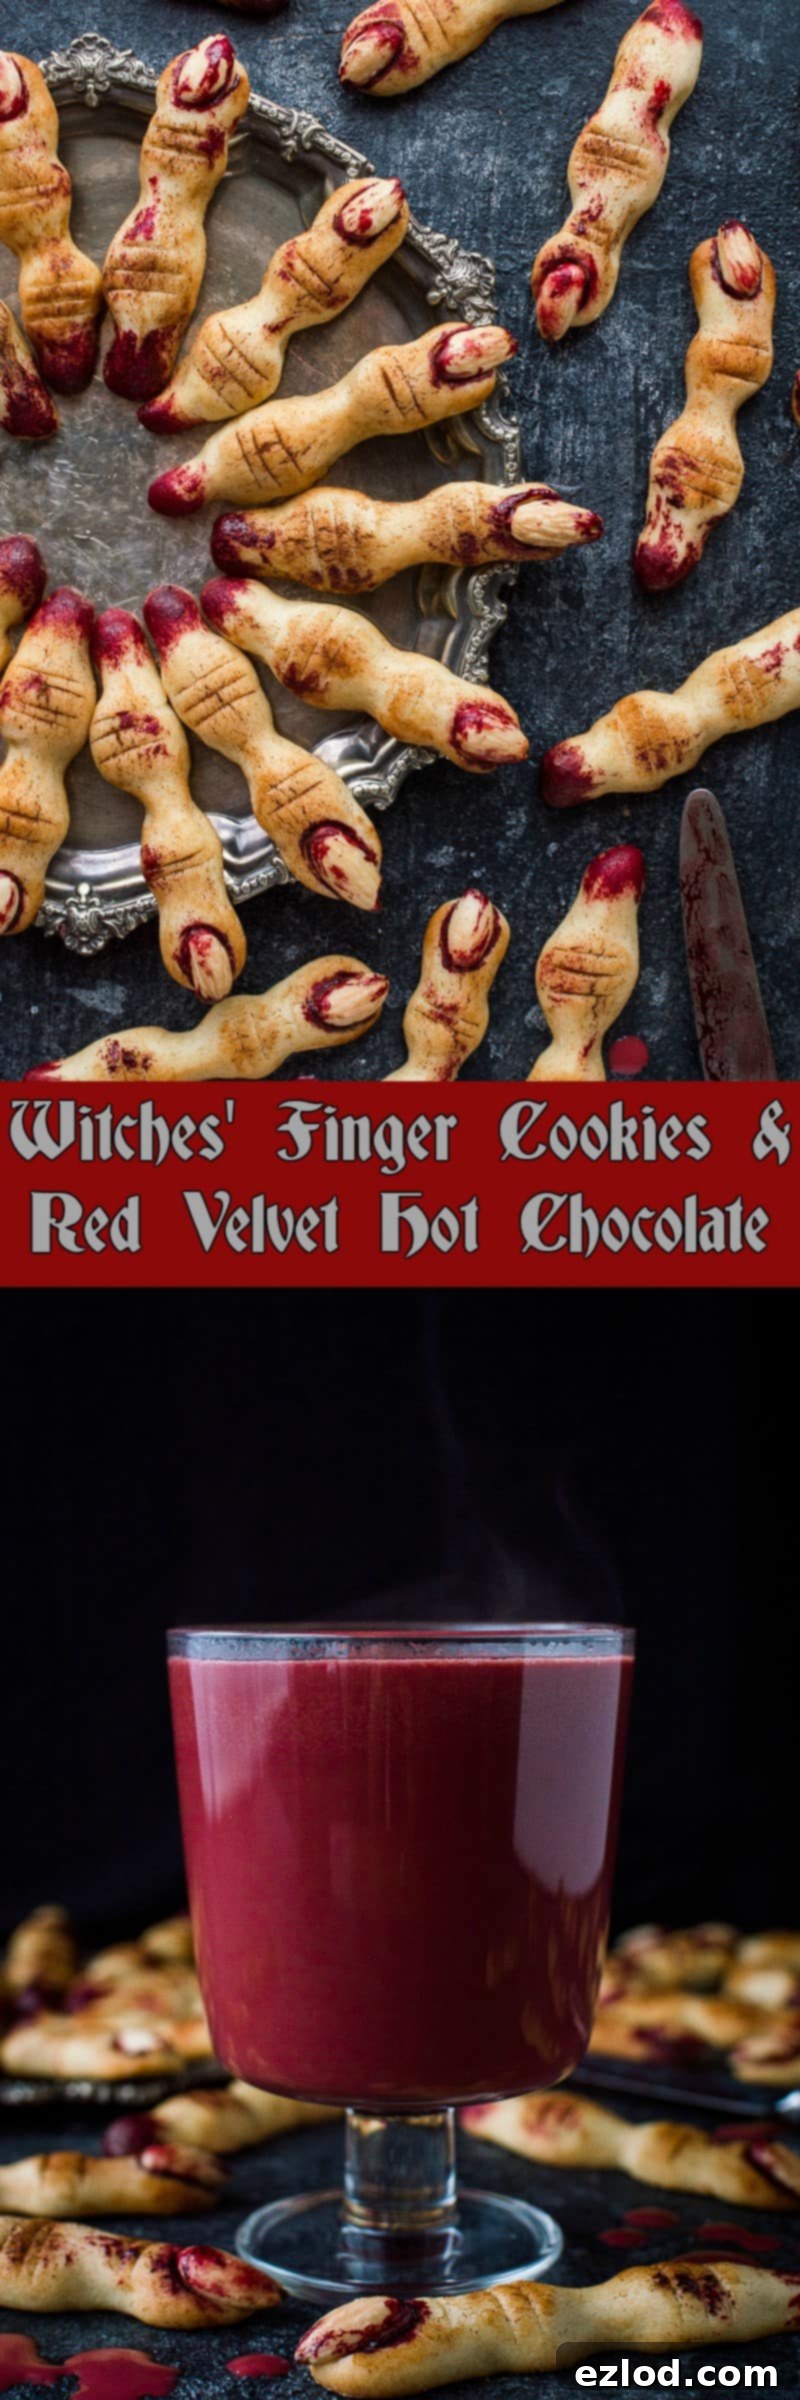
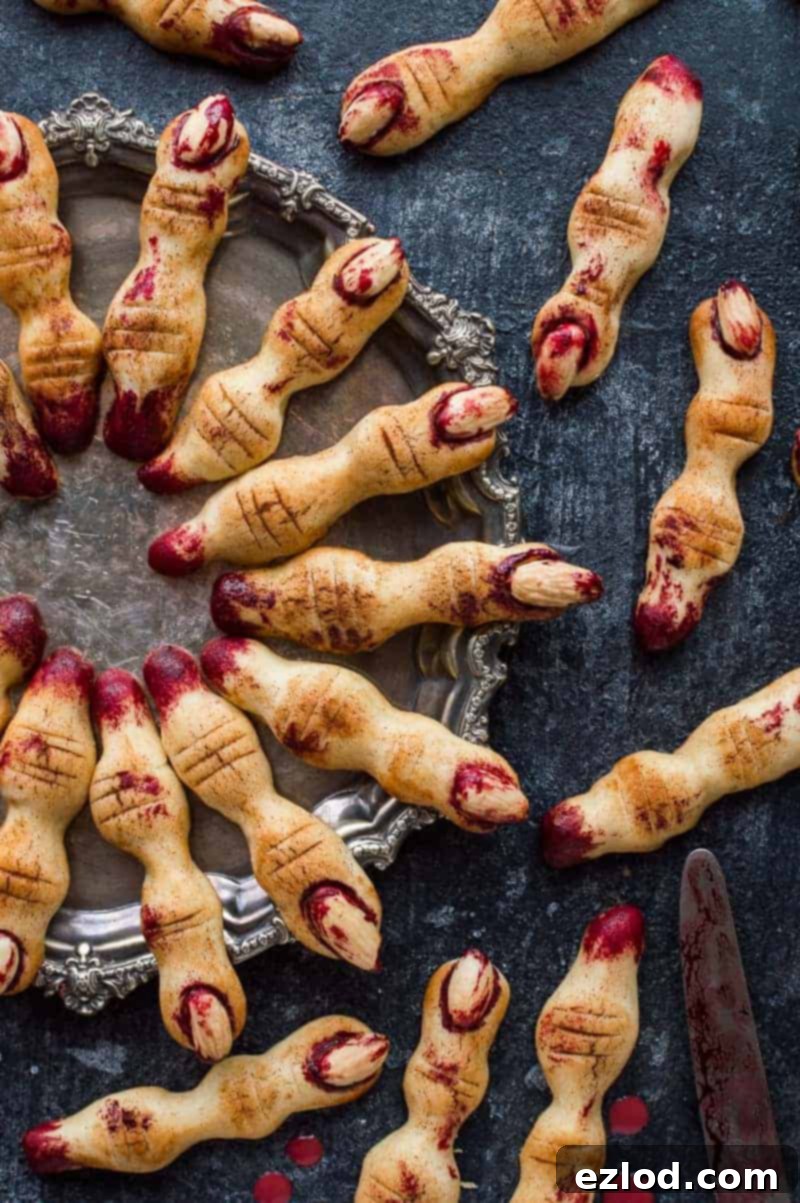
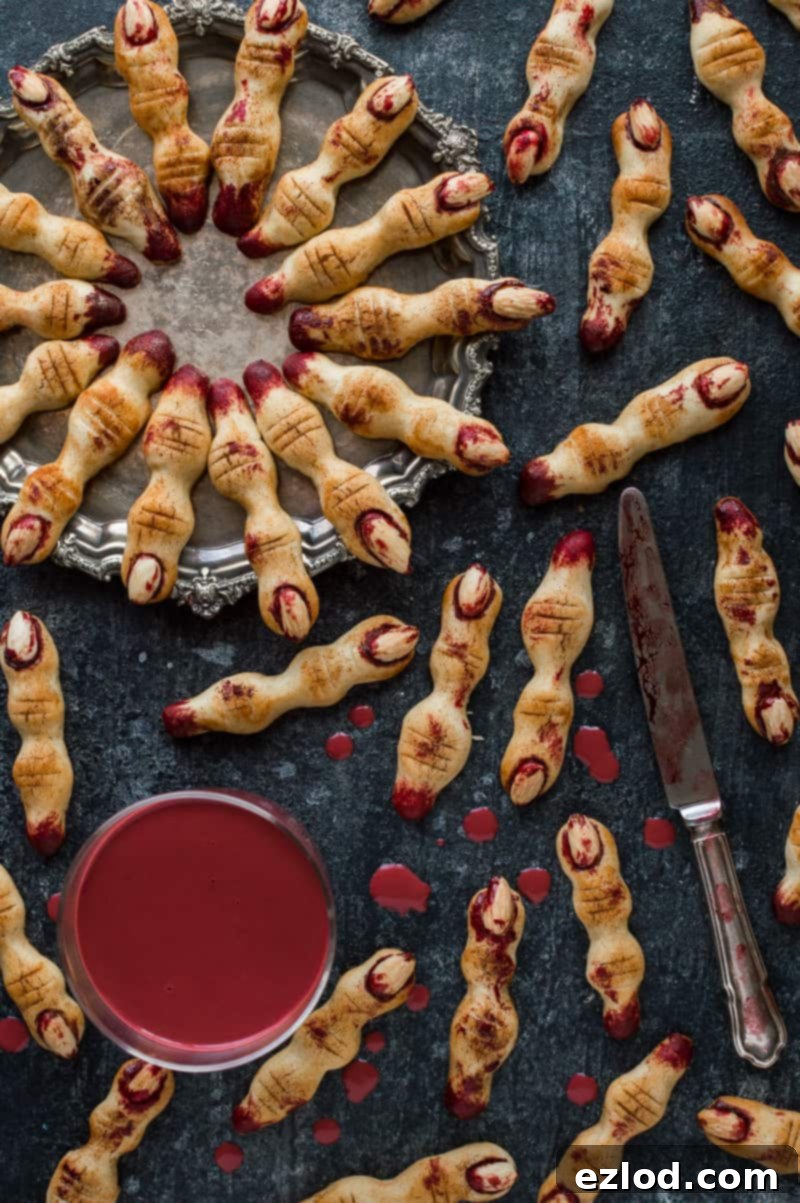
Halloween finger cookies have long captivated imaginations, becoming a beloved tradition for those who love to blend culinary creativity with spooky fun. Our version of Witches’ Finger Cookies takes this classic concept to a new level of delicious creepiness. Each cookie begins with a foundation of buttery, tender shortbread dough, expertly molded into delightfully knobbly, finger-like shapes. The key to their uncanny realism lies in the details: a halved blanched almond firmly pressed into one end serves as a remarkably convincing (and slightly unsettling) fingernail. To complete the gory effect, a touch of vibrant red gel food coloring is applied to simulate fresh ‘blood,’ while a dusting of ground cinnamon provides a ‘dirty’ appearance, making them look as though they’ve just emerged from a witch’s cauldron. They’re deliciously grotesque, making them an instant conversation starter and a guaranteed hit for any Halloween party or family treat night.
Crafting the Perfect Ghoulish Dip: Red Velvet Hot Chocolate
What better to dip a witch’s finger into than a steaming mug of rich, ‘bloody’ hot chocolate? Our Red Velvet Hot Chocolate is more than just a colorful drink; it’s a luxurious, intensely flavored beverage designed to perfectly complement the cookies. Many “red velvet” hot chocolate recipes simply rely on red food coloring, but they often miss the nuanced flavor profile of genuine red velvet cake—a delicate balance of vanilla, a subtle hint of chocolate, and a distinctive tang traditionally derived from buttermilk. The challenge with buttermilk in hot beverages, however, is its tendency to curdle.
To capture that signature tang without any risk, I’ve ingeniously incorporated vegan cream cheese into this hot chocolate recipe. This not only imparts the characteristic tangy note found in red velvet cake and its iconic cream cheese frosting but also adds an incredible creaminess and thickness to the drink. The result is a truly indulgent hot chocolate that tastes remarkably like liquid red velvet cake, creating the ideal consistency for dipping. If your preference leans towards a thinner hot chocolate, the cornflour can be omitted without compromising the rich flavor. The recipe is conveniently portioned for a single mug, allowing you to easily scale up for multiple servings, making it perfect for a cozy Halloween evening or a large celebration.
Bringing Your Spooky Treats to Life: The Baking Process
Despite their elaborate appearance, Witches’ Finger Cookies are surprisingly enjoyable to make. The most artistic part of the process is shaping each individual finger, which, while requiring some time and patience, is incredibly rewarding and a wonderful way to get into the Halloween spirit. This hands-on activity makes for a memorable baking project, whether you’re working solo or with little helpers.
A critical step for these cookies to maintain their intricate, gnarled shapes and prevent excessive spreading in the oven is thorough chilling and freezing before baking. This firming process ensures the buttery dough holds its form, resulting in perfectly creepy fingers. Another fantastic aspect of this recipe is its make-ahead potential: you can prepare the dough, shape the cookies, and then freeze them for later baking. Once baked and artfully decorated, these delicious yet unsettling cookies can be stored in an airtight container for several days, allowing you to prepare them well in advance of your Halloween festivities and minimize last-minute stress.

How To Make Witches’ Finger Cookies: A Detailed Guide
(For precise measurements and comprehensive instructions, please refer to the detailed recipe card located at the bottom of this page.)
1. Preparing the Perfect Shortbread Dough
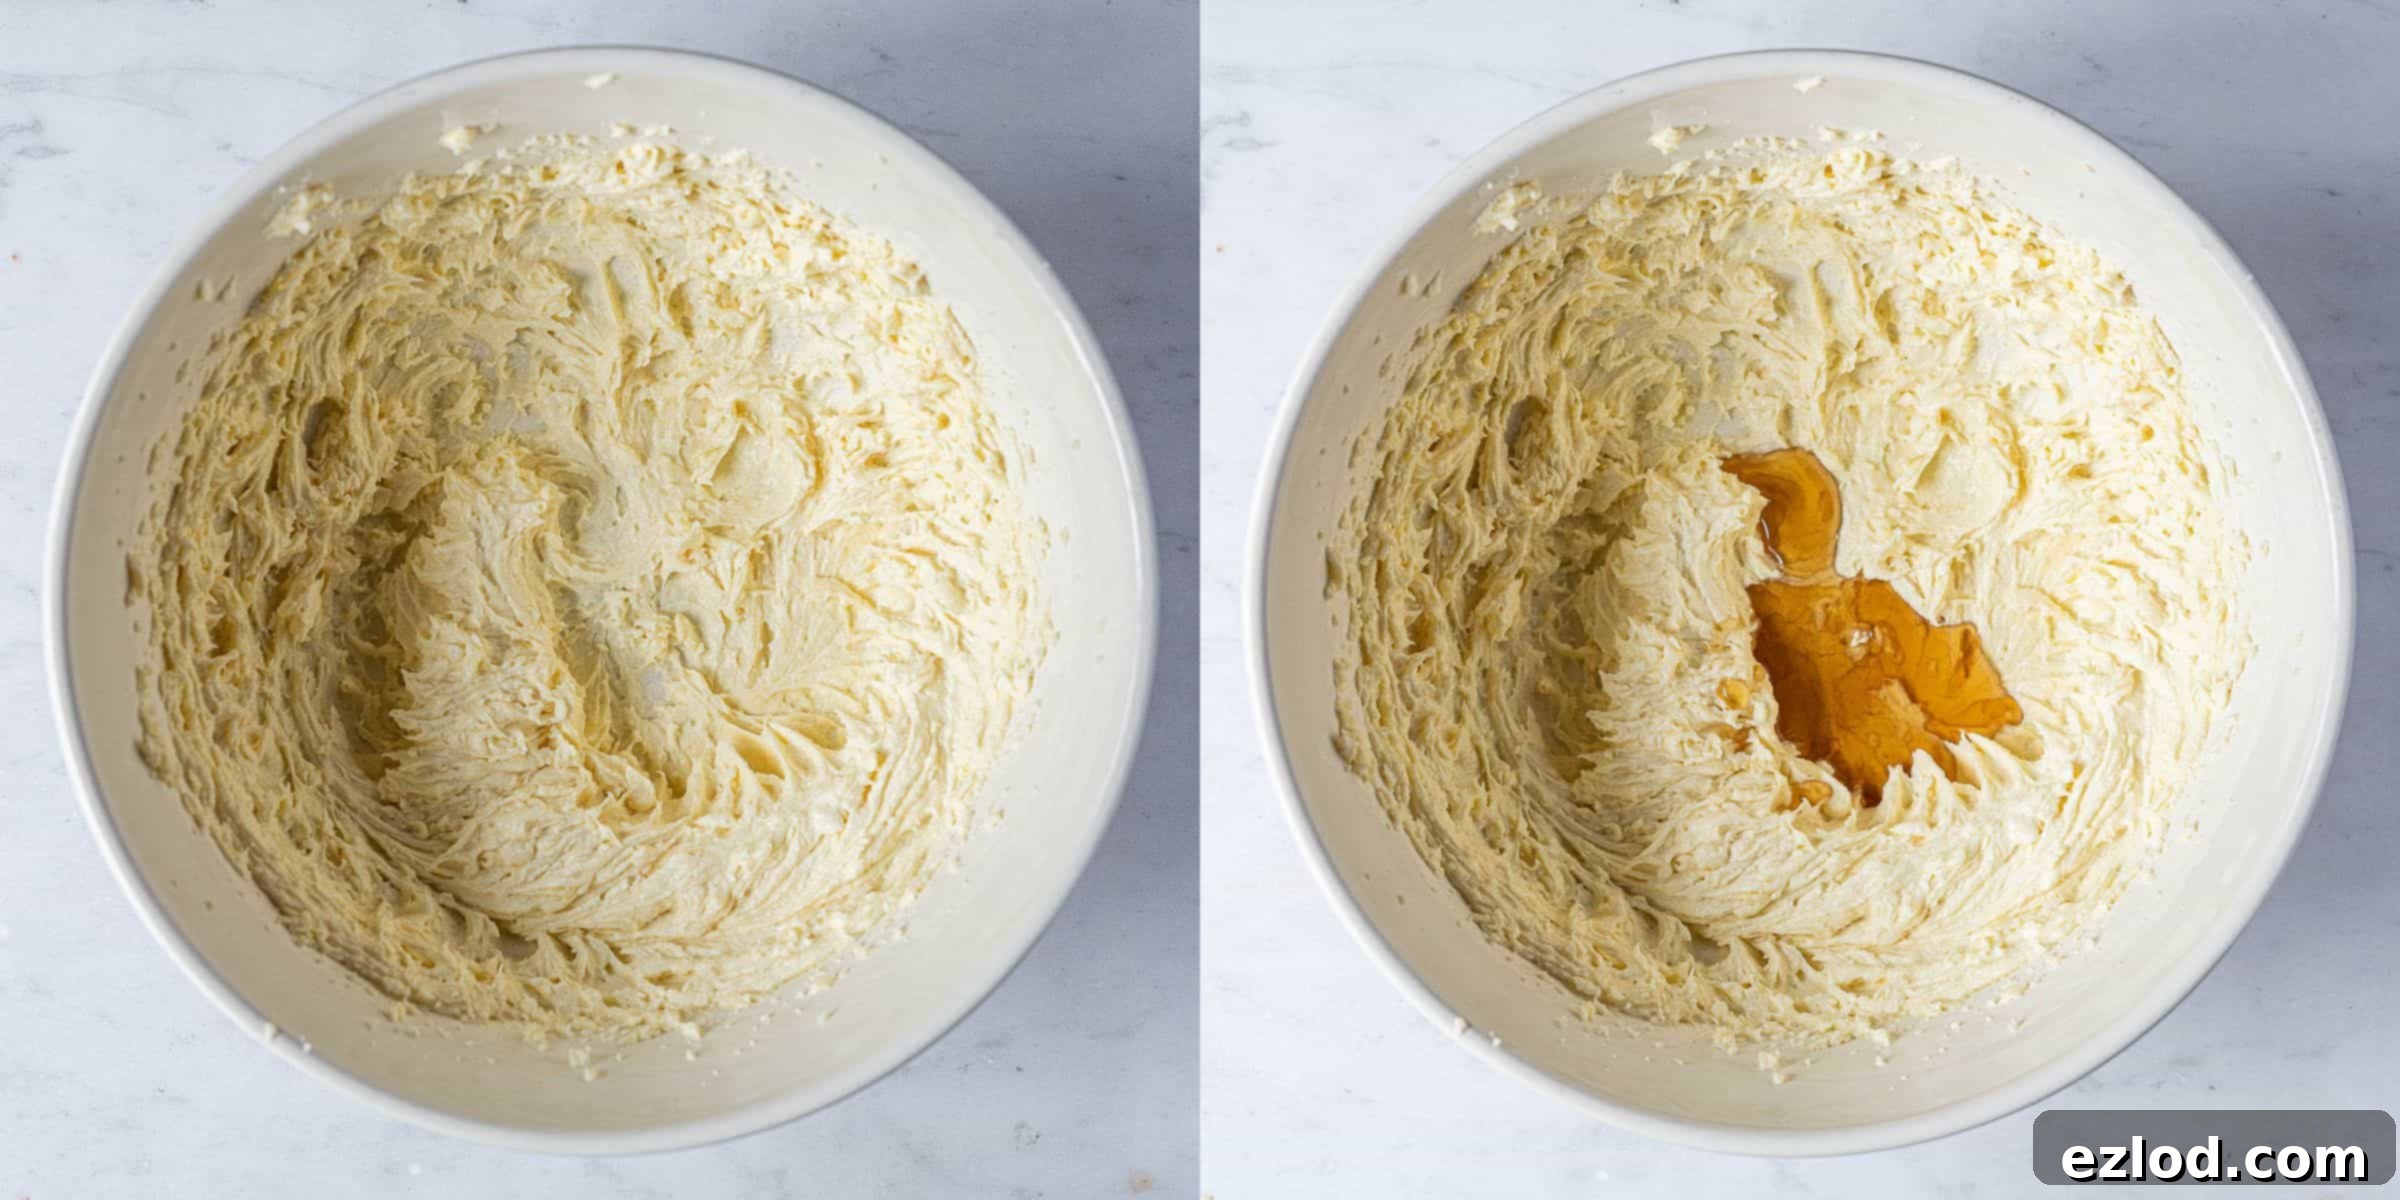
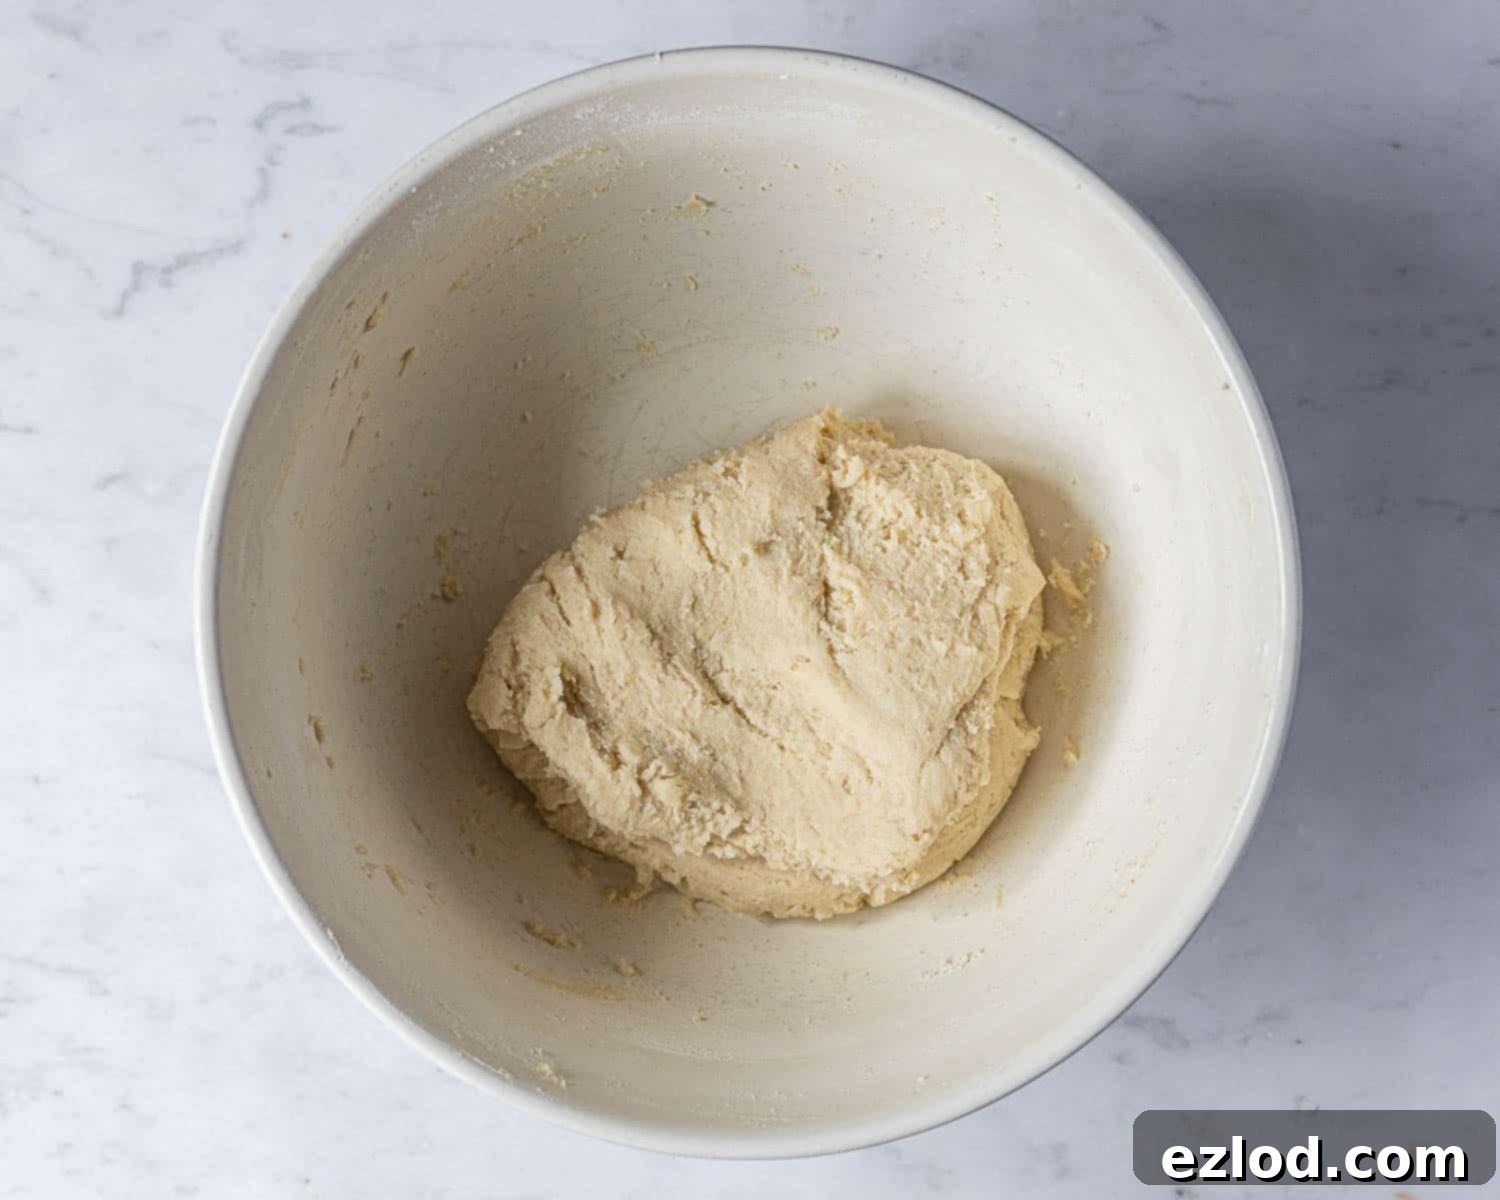
Start by creaming together the softened vegan block butter and icing sugar in a large bowl. An electric mixer works wonders here, helping to create a light, airy, and evenly combined mixture—essential for a tender shortbread. Incorporate the vanilla and almond extracts, whisking until they are fully blended. These extracts imbue the cookies with a delightful depth of flavor. In a separate bowl, sift together the plain (all-purpose) flour, cornflour (cornstarch), and salt to ensure no lumps and even distribution. Gradually add this dry mixture to your wet ingredients, along with the unsweetened non-dairy milk. Mix carefully until a cohesive dough begins to form. Be mindful not to overwork the dough; excessive kneading can develop gluten, leading to a tough cookie rather than the desired crumbly texture. A brief hand-knead until smooth is all that’s needed. Once formed, cover the dough and chill it in the fridge for at least 30 minutes. This chilling period is crucial as it firms up the butter, making the dough much easier to handle and shape.
2. Shaping the Uncannily Realistic Fingers
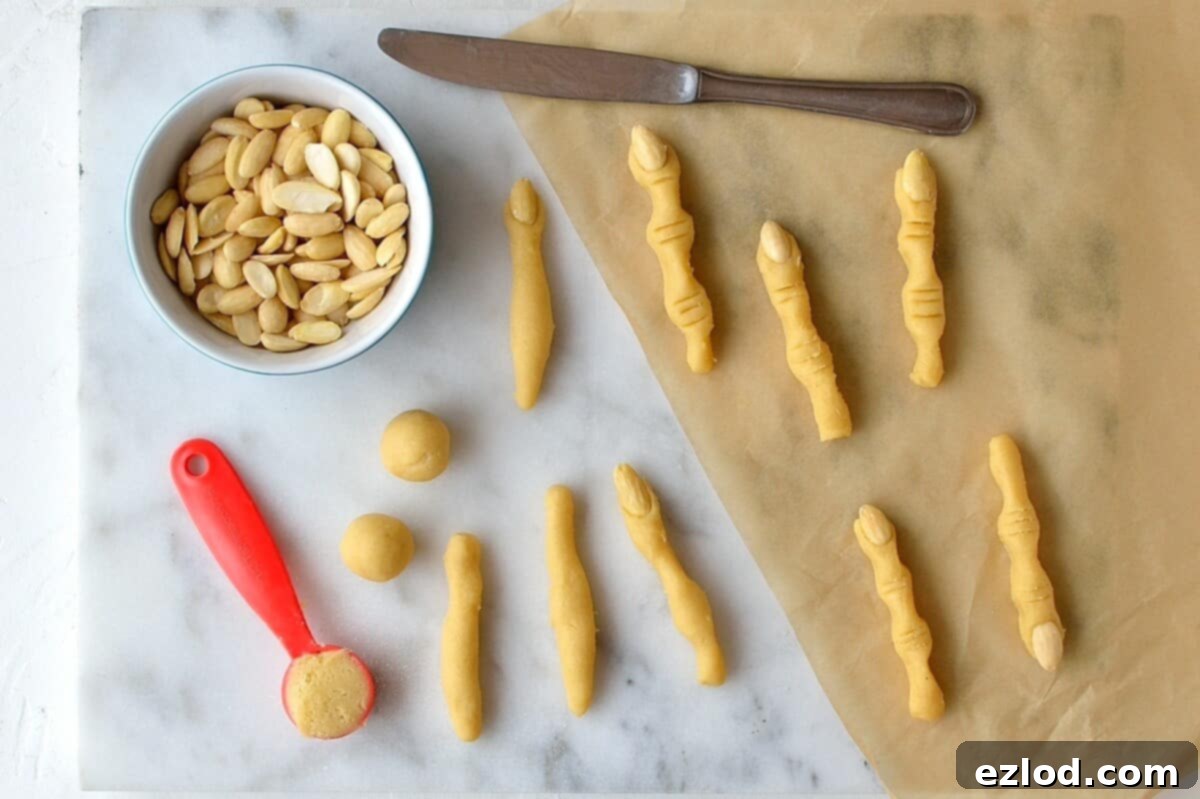
Line a couple of baking sheets with baking parchment; this prevents sticking and ensures easy removal. To manage the dough effectively and maintain its chill, work with about a quarter of the dough at a time, keeping the rest refrigerated. Measure out approximately ½ tablespoon quantities for each cookie. It’s important not to use more, as larger portions tend to spread more in the oven and may lose their delicate finger shape. Roll each measured portion into a small ball, then gently roll it into a log shape, roughly the length of a finger. Now for the crucial detail: press a halved blanched almond firmly into one end of the log to form a gruesome fingernail. Lightly flour your hands to prevent sticking, then meticulously shape the dough around the almond and along the log to create a knobbly, realistic finger. Remember that the cookies will expand slightly during baking, so aim to make them a little thinner than your desired final thickness. Use the back of a knife or a skewer to gently make indentations at the ‘knuckles,’ further enhancing the illusion of a witch’s bony digit. The more attention to detail here, the spookier the final effect will be!
3. Freezing and Baking to Perfection
Once all your ghoulish fingers are shaped, arrange them well-spaced apart on the prepared baking sheets. This spacing is vital to prevent them from merging as they freeze and bake. Place the baking sheets in the freezer for a minimum of 20 minutes, or until the cookies are completely solid. This often-underestimated step is absolutely critical; it helps prevent the cookies from spreading too much in the oven, ensuring that their intricate finger shapes are preserved. While your cookies are chilling, preheat your oven to 200°C/180℃ fan/400°F/gas mark 6. Once frozen, transfer the cookies to the hot oven and bake for approximately 10 minutes. Watch them closely; they should be pale golden, indicating they are perfectly cooked through while retaining their tender texture. You will likely need to bake them in batches, so keep any unbaked cookies in the freezer until it’s their turn.

4. Decorating for a Gory, Realistic Finish
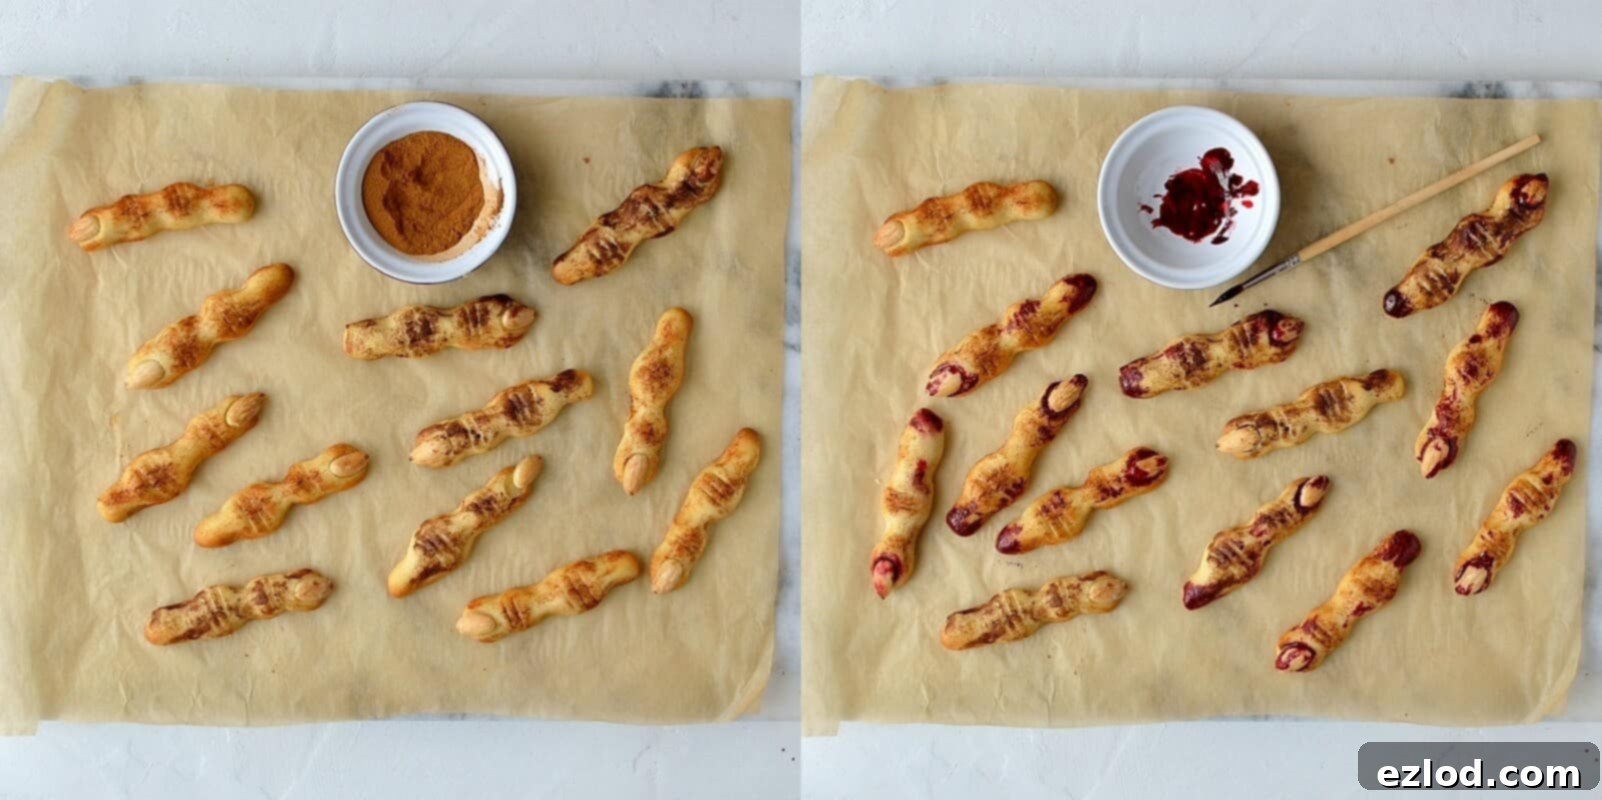
Allow the baked cookies to cool completely on the tray before attempting any decoration. Patience at this stage will prevent delicate cookies from breaking. Once cool, it’s time to add the finishing touches that truly bring these Witches’ Finger Cookies to life (or rather, undeath!). If any blanched almond fingernails have come loose during baking, use a tiny dab of melted chocolate to securely re-adhere them. For that authentic, ‘just-dug-out-of-the-grave’ look, rub a small amount of ground cinnamon into the creases of the knuckles and joints. This creates a convincing ‘dirt’ effect, adding to their eerie charm. Finally, for the ultimate horrifying detail, use a fine, food-only paintbrush to carefully apply red gel food coloring around the edges of the nails and on the ‘stumps’ of the fingers, vividly simulating fresh ‘blood’. If the gel coloring feels too thick or too intensely dark, you can thin it slightly with a drop of vodka or water for easier application and a more translucent, gruesome effect. Once the food coloring has dried, your terrifyingly tasty Witches’ Finger Cookies are ready to be unveiled!
Top Tips for Perfect Halloween Treats
Achieving bakery-quality spooky treats at home is easier than you think with these expert tips:
- Embrace Metric Measurements: For consistently superior baking results, I strongly advocate for using metric measurements with a digital scale over traditional cup conversions. Cup measurements can be incredibly imprecise, leading to varied outcomes. A digital scale ensures accuracy, promoting uniform bakes and often a tidier kitchen experience.
- Mind Your Dough: The secret to tender shortbread lies in gentle handling. Avoid overworking the cookie dough. Mix it just until it comes together smoothly, then stop. Overmixing develops gluten, which will result in tough, chewy cookies instead of the melt-in-your-mouth shortbread texture you’re aiming for.
- Chilling is Crucial: Never skip the chilling and freezing steps for the cookie dough! These stages are absolutely vital for preventing the cookies from spreading excessively in the oven, ensuring those intricately shaped fingers maintain their spooky, slender form.
- Creative Use of Leftover Dough: This recipe yields a generous batch of Witches’ Finger Cookies, ideal for large Halloween gatherings. If you find yourself with extra dough or prefer to make fewer finger cookies, don’t let it go to waste! Simply roll out the remaining dough on a lightly floured surface and use other Halloween-themed cookie cutters (think ghosts, pumpkins, or bats) to create additional festive treats. Bake these cut-out cookies at 180°C/160°C fan/350°F/gas mark 4 for 11-15 minutes, or until they are lightly golden.
- Customize Your Hot Chocolate: The Red Velvet Hot Chocolate can be easily adjusted to suit your taste. Feel free to add more granulated sugar if you prefer a sweeter drink, or a touch more cocoa powder for a deeper chocolate flavor. Remember, the red food coloring is primarily for visual impact, so add it gradually until you achieve your desired shade of ‘blood.’ For an extra decadent touch, top with vegan whipped cream and a sprinkle of cocoa!
More Spooky Halloween Recipes to Explore:
- Jack-O-Lantern Pumpkin Pies
- Tombstone Cupcakes
- Pentagram Apple Pies
- Vegan Red Velvet Cupcakes
- Soul Cakes
- Vegan Vanilla Sugar Cookies
- Pumpkin Chocolate Marble Bread
If you tried this deliciously eerie recipe, I’d love to hear how it went! Please rate it, leave a comment below, or tag @domestic_gothess on Instagram and use the hashtag #domesticgothess to share your spooky creations! Happy haunting!
All images and content on Domestic Gothess are copyright protected. If you wish to share this recipe, please do so by utilizing the provided share buttons. Please do not screenshot or repost the full recipe or content; instead, include a direct link back to this post. Your support helps keep this blog brewing!

Print
Witches’ Finger Cookies And Red Velvet Hot Chocolate (vegan)
Ingredients
Witches’ Finger Cookies
- 200 g vegan block butter softened
- 135 g (1 cup) icing (powdered) sugar
- 1 ¼ teaspoons vanilla extract
- ¾ teaspoon almond extract
- 330 g (2 ¾ cups) plain (all-purpose) flour
- 30 g (3 packed Tablespoons) cornflour (cornstarch)
- ½ teaspoon salt
- 40 g (8 teaspoons) unsweetened non-dairy milk (I use soy)
- 110 g (¾ cup) blanched almonds halved
- ground cinnamon
- red gel food colouring
- a little melted chocolate if needed
Red Velvet Hot Chocolate (per 1 cup):
- 2 Tablespoons vegan cream cheese
- 240 ml (1 cup) unsweetened non-dairy milk (I use soy)
- 1 teaspoon cornflour (cornstarch)
- 40 g (1.5 oz) dark chocolate chopped
- ½ teaspoon vanilla extract
- ½ Tablespoon granulated sugar
- pinch salt
- red gel food colouring
Instructions
Witches’ Finger Cookies
-
To make the witch finger cookies: Place the butter and icing sugar in a large bowl and whisk with an electric mixer until just combined. Add the vanilla and almond extracts and whisk again to mix.
-
Sift together the flour, cornflour and salt and add to the bowl along with the milk. Mix until it forms a dough, knead the dough by hand very briefly, just until it is smooth. Cover and place in the fridge for at least half an hour.
-
Line a couple of baking sheets with baking parchment. Working with ¼ of the dough at a time, leaving the rest in the fridge, measure out ½ Tablespoon quantities of dough (don’t use more than this or your cookies will end up way too big). Roll each into a ball then roll out into a log shape.
-
Press a blanched almond into one end to form a fingernail, then lightly flour your hands and use them to shape it into a knobbly finger shape. The cookies will spread a little in the oven so you need to make sure that you make them quite thin – thinner than you want the cookies to end up. Use the back of a knife to make indentations in the knuckles to make them look more like fingers.
-
Place the shaped cookies well spaced apart on the prepared baking sheets then place them in the freezer for at least 20 minutes, until frozen solid (this helps stop them spreading in the oven).
-
Meanwhile, heat the oven to 200°C/180℃ fan/400°F/gas mark 6. Bake the cookies for about 10 minutes, until pale golden. You will need to bake them in batches, keep the rest of the cookies in the freezer.
-
Leave the cookies to cool on the tray. When you are ready to decorate, use a little melted chocolate to stick on any fingernails that have come loose. Rub a little bit of ground cinnamon into the creases in the joints to make them look dirty.
-
Use a fine, food-only paintbrush to paint some red gel food colouring around the edge of the nails and on the ‘stumps’. If you find that the colouring is too thick to paint or too dark in colour then you can thin it with a drop of vodka or water. Once the food colouring has dried, store the cookies in an airtight container.
Red Velvet Hot Chocolate:
-
To make the hot chocolate, stir together the cornflour and a drop of the milk to form a slurry. Place the cream cheese in a saucepan and whisk in the cornflour slurry until smooth. Gradually whisk in the rest of the milk. Add the chocolate, vanilla extract, sugar and salt to the pan and place over a medium heat.
-
Cook, stirring regularly, until the chocolate has melted and the mixture has thickened. Remove from the heat and stir in some red gel food colouring, a little at a time, until you reach the desired shade.
Notes
- See post above for step-by-step photos.
- As with all of my baking recipes I really do recommend using the metric measurements with a digital scale rather than the cup conversions. Cups are a wildly inaccurate measuring system and you will get far better, more consistent results using a scale, not to mention that it is also easier and less messy than cups!
- For an even more intense “blood” effect, consider drizzling extra red gel food coloring over the hot chocolate just before serving.
- These cookies are perfect for themed parties, school events, or simply a fun baking project with family.
- For a truly vegan treat, ensure all your ingredients (butter, milk, cream cheese, chocolate) are certified vegan.
