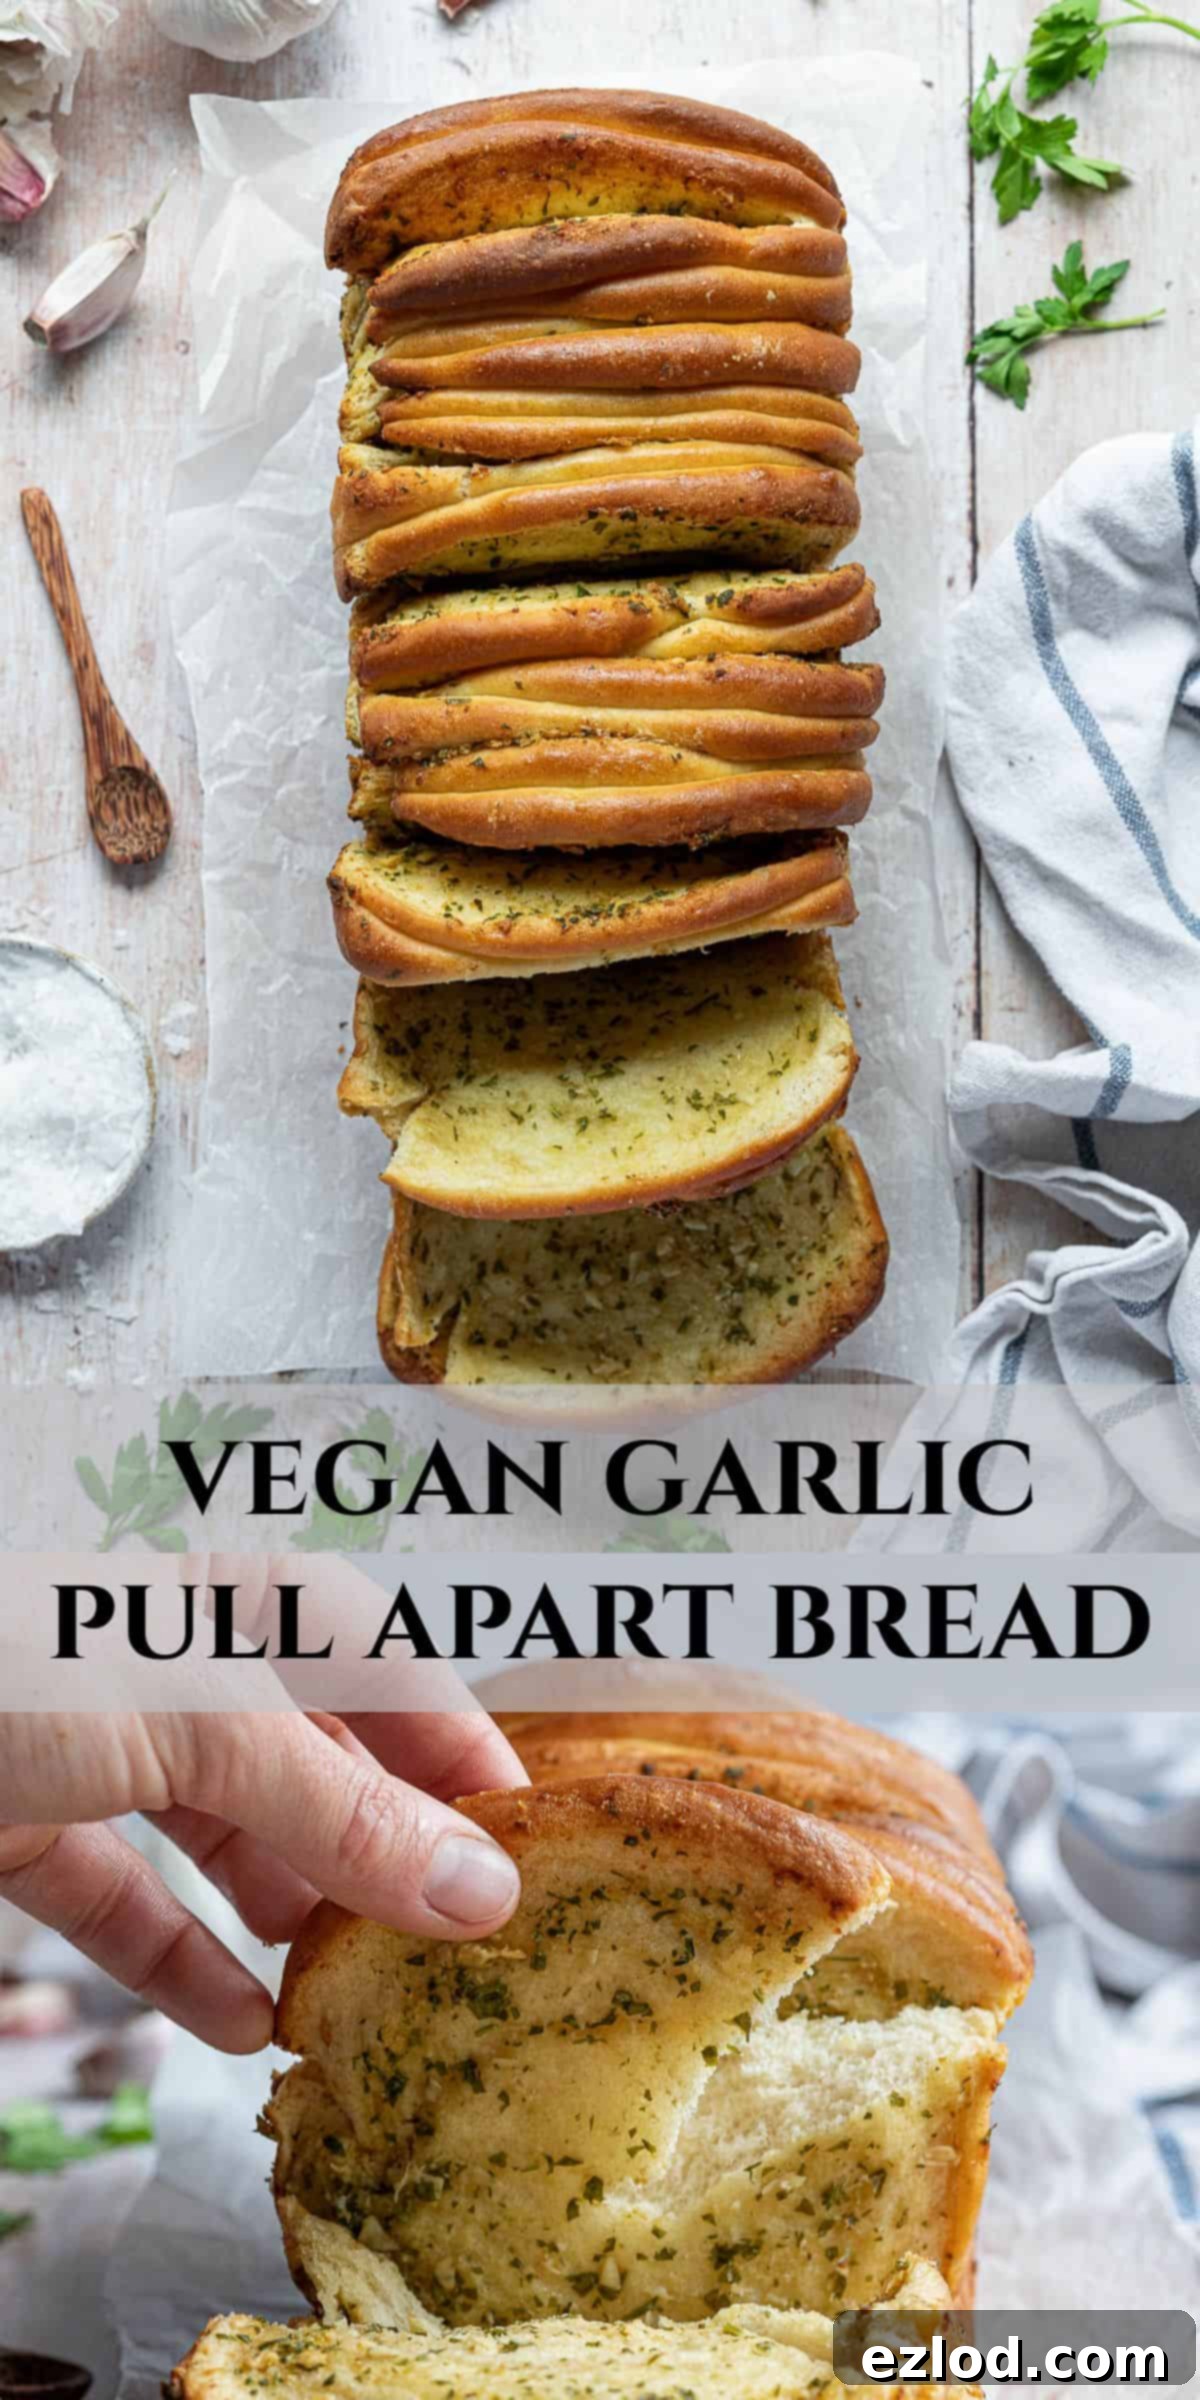
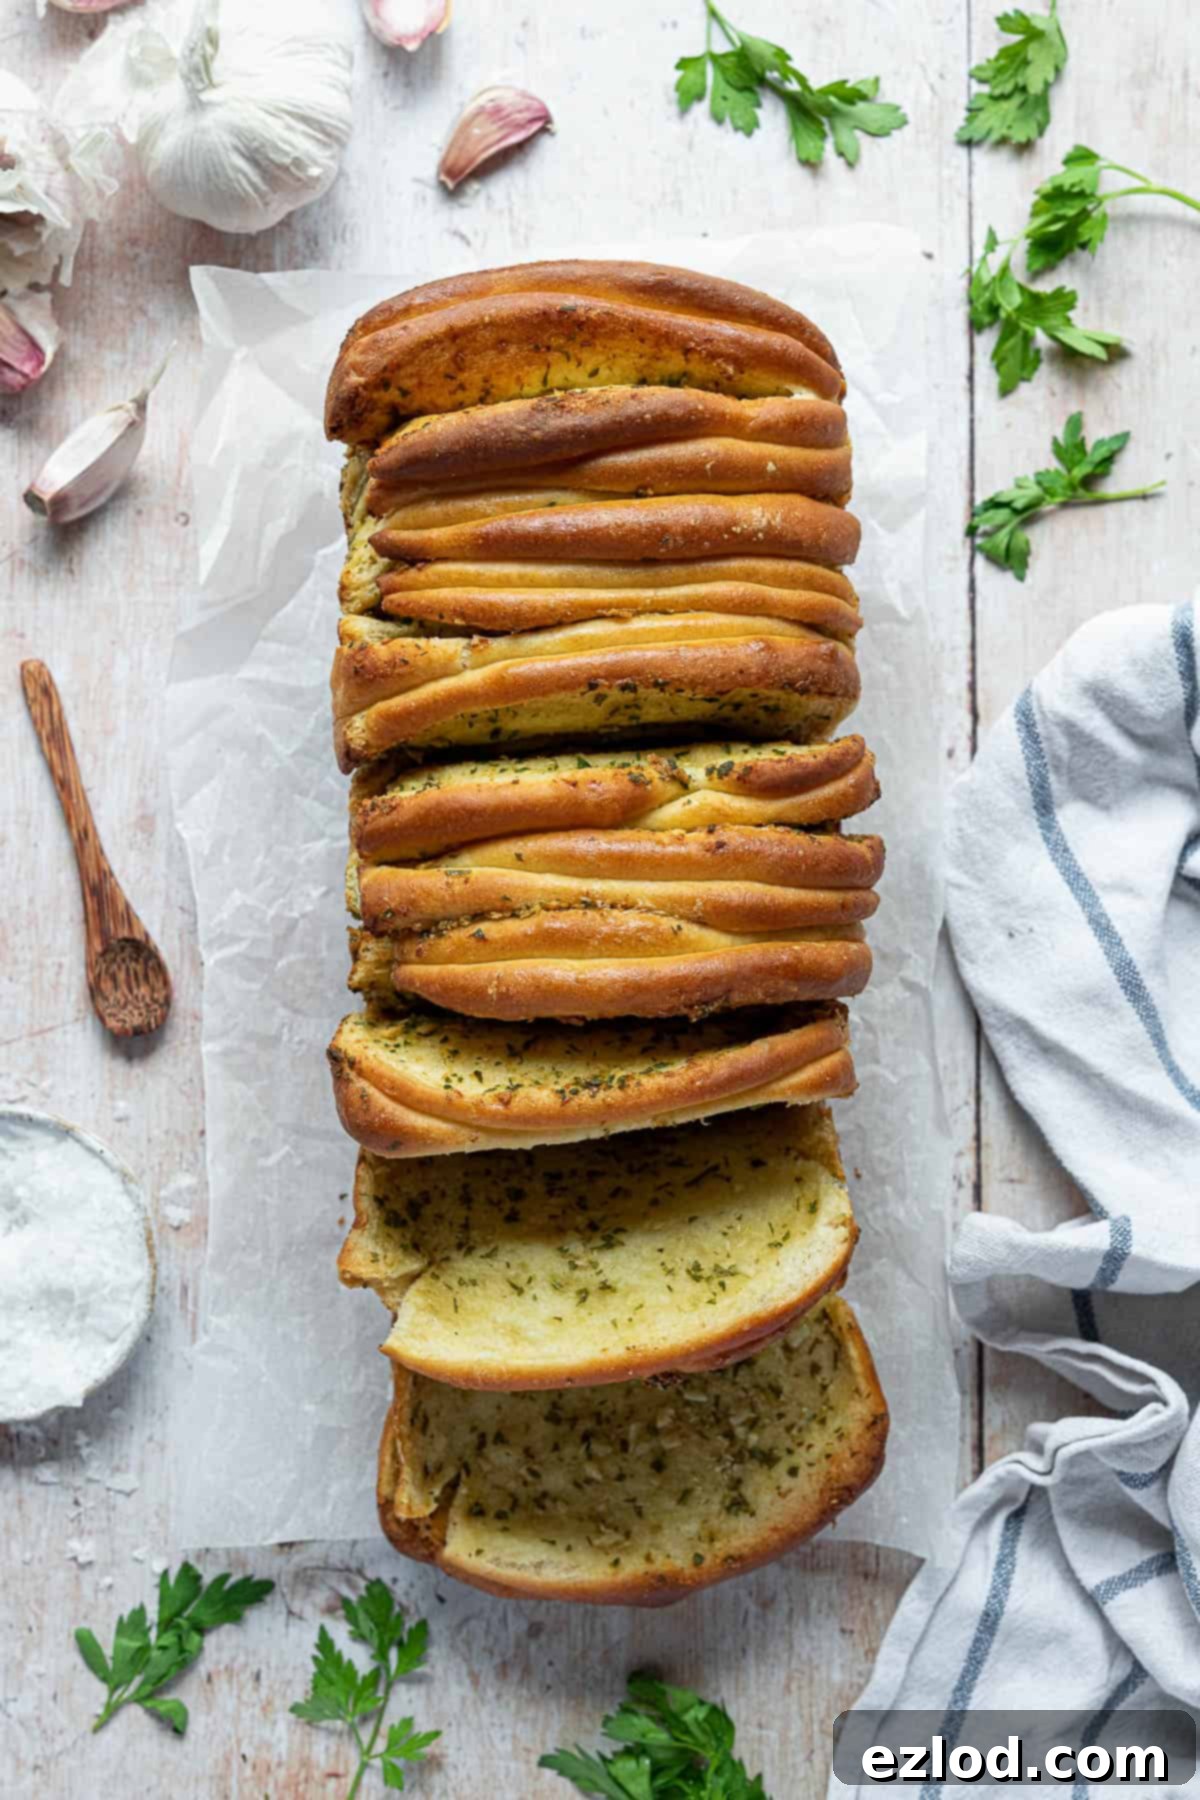
The Ultimate Vegan Garlic Pull Apart Bread: Irresistibly Soft, Fluffy & Flavorful
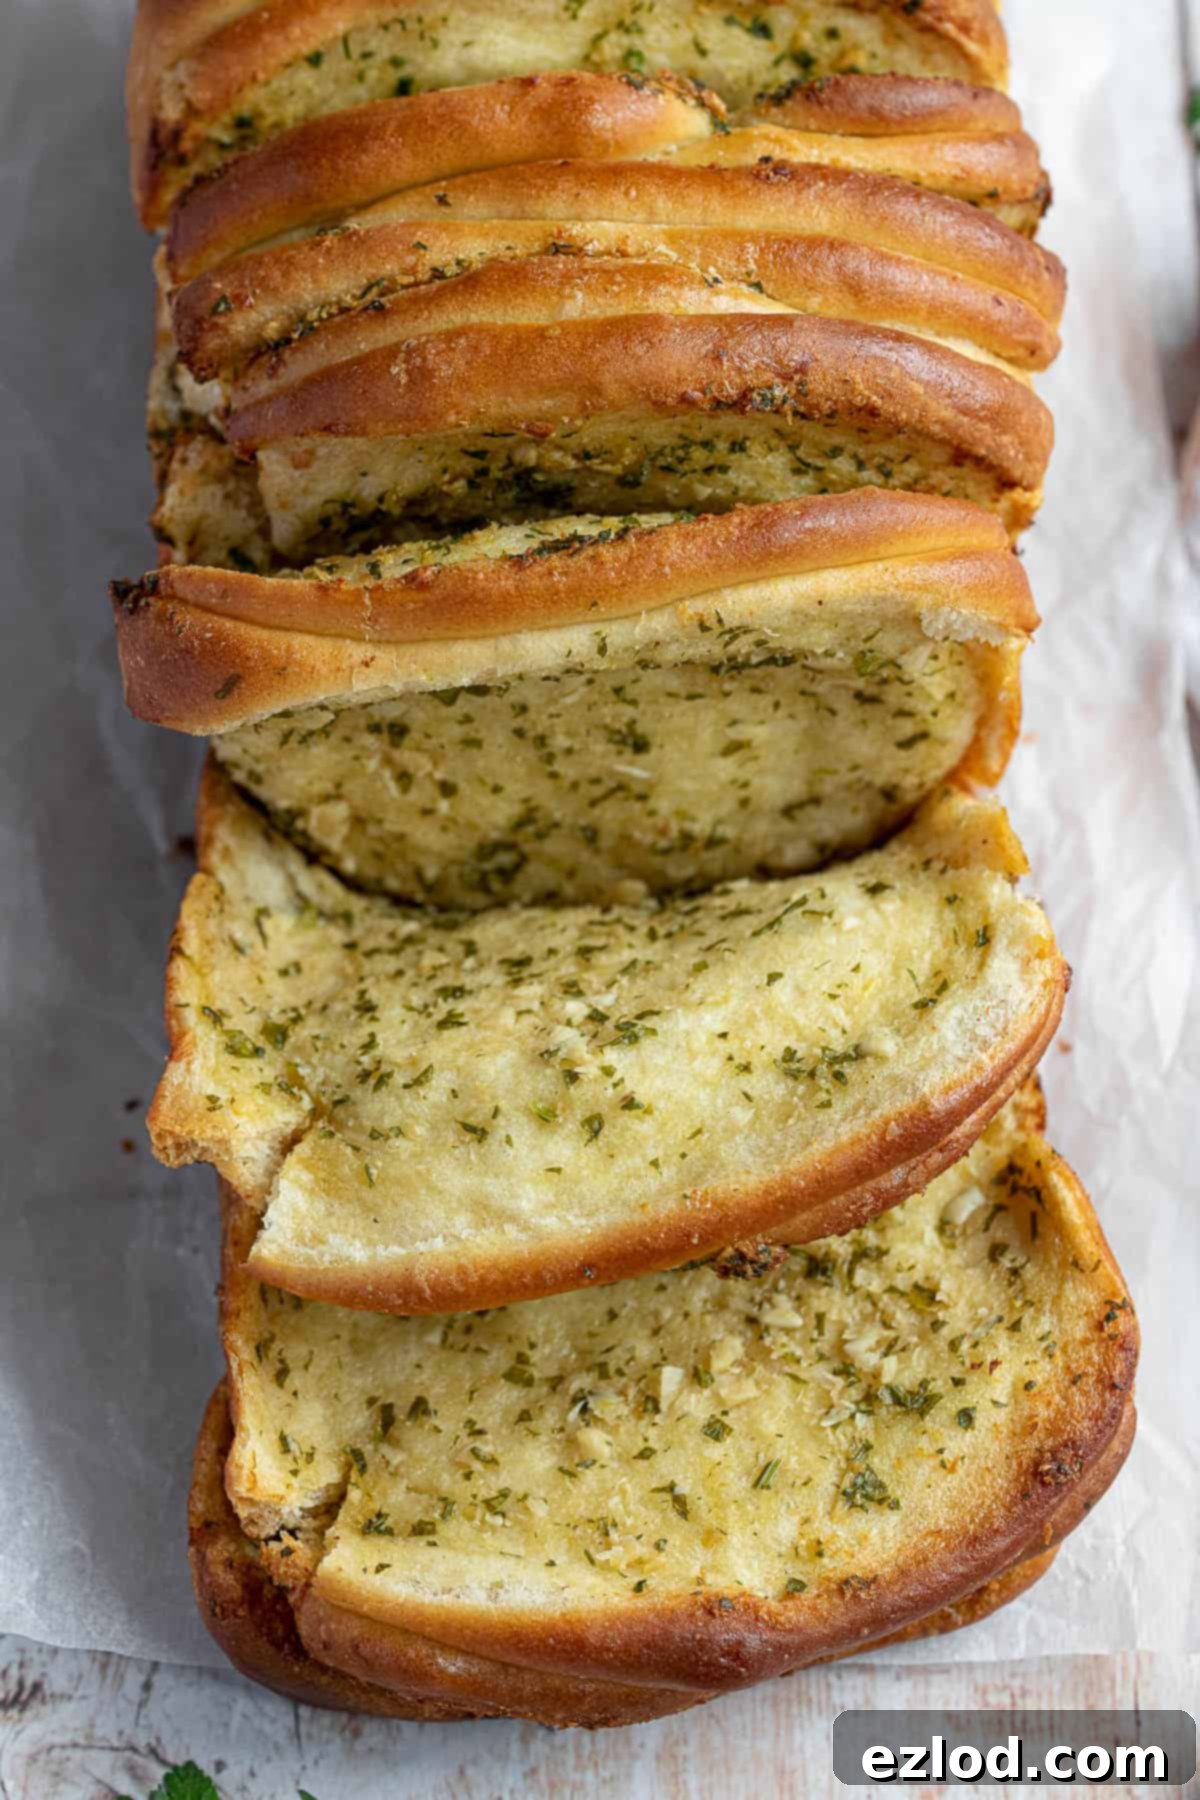
Indulge in this truly irresistible vegan garlic pull apart bread, a culinary masterpiece that is super soft, incredibly fluffy, and perfectly designed for sharing. Each bite offers a delightful contrast – crisp on the outside, yet wonderfully tender on the inside, all thanks to a generous filling of aromatic herby garlic butter. Prepare for an experience that is utterly moreish and guaranteed to become a household favorite!
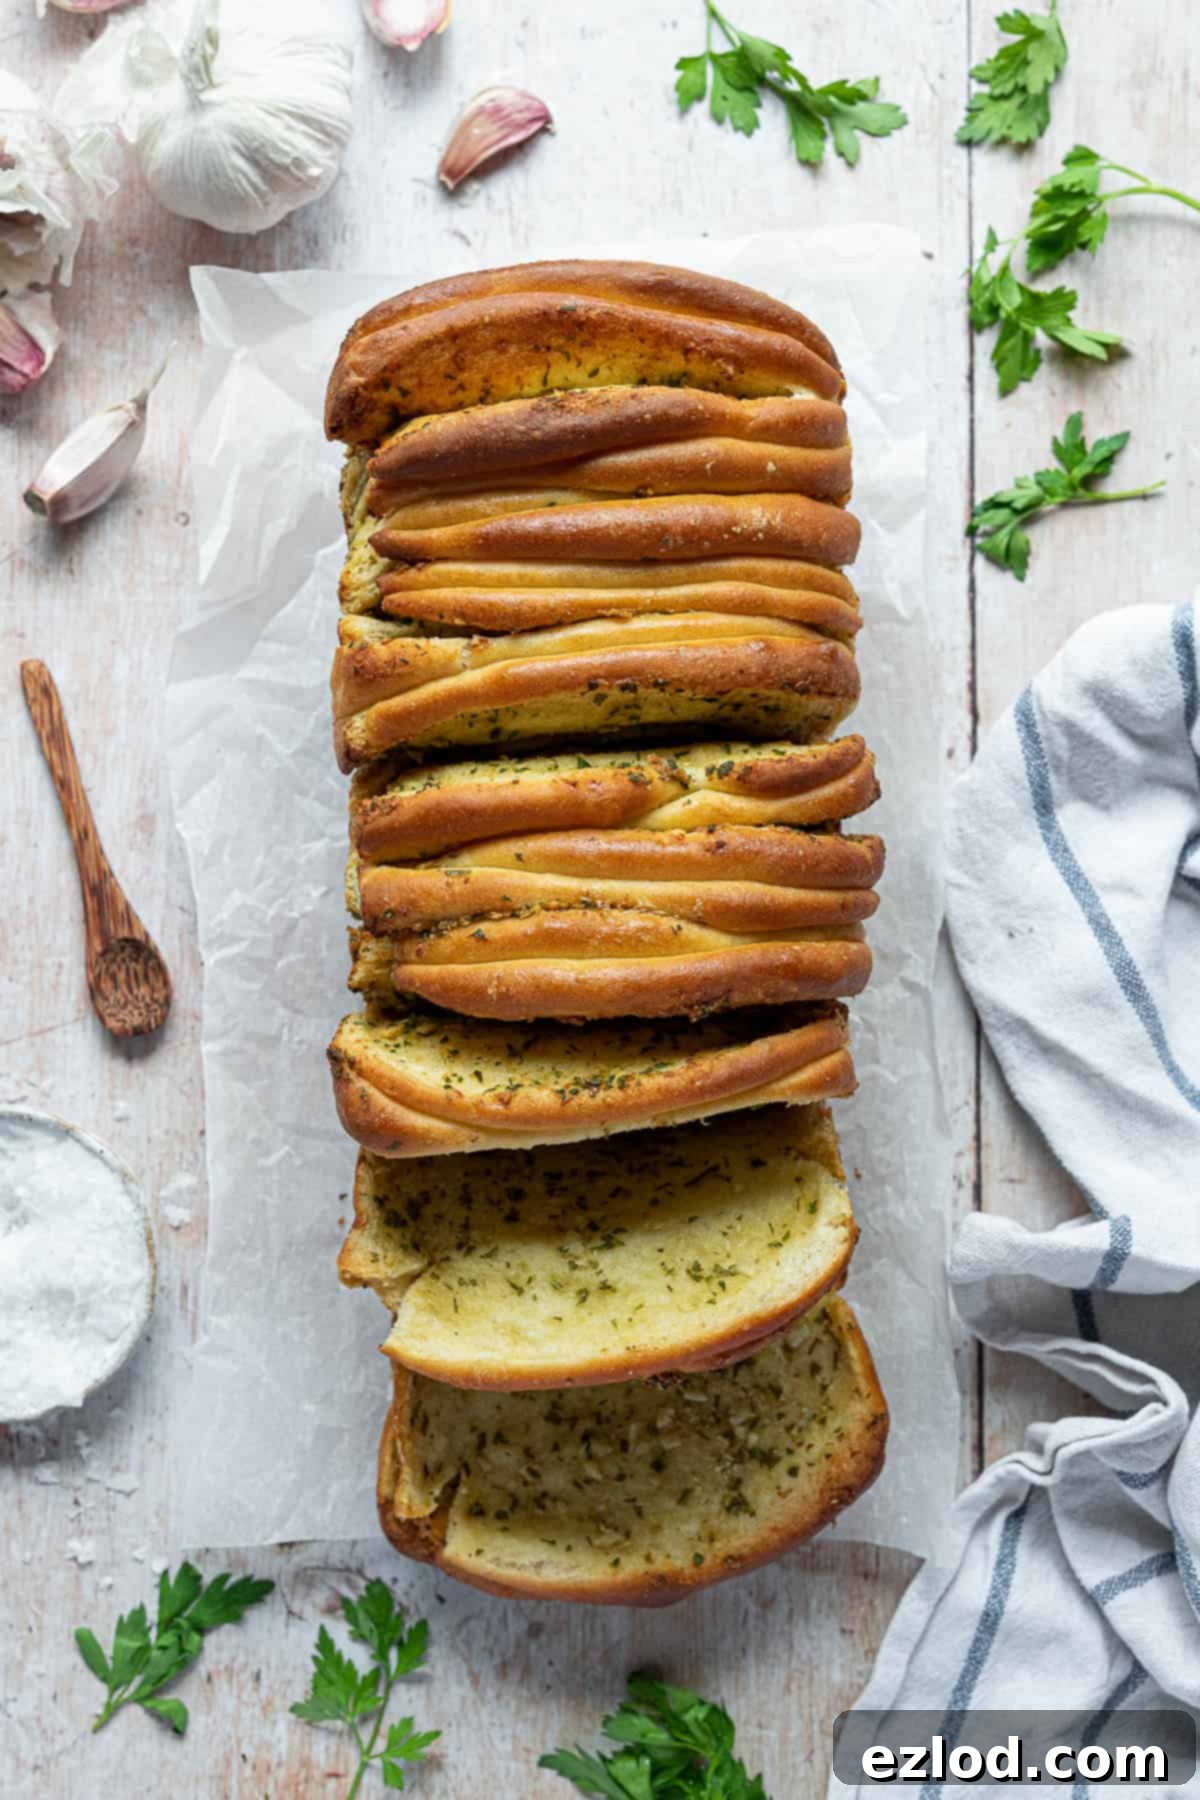
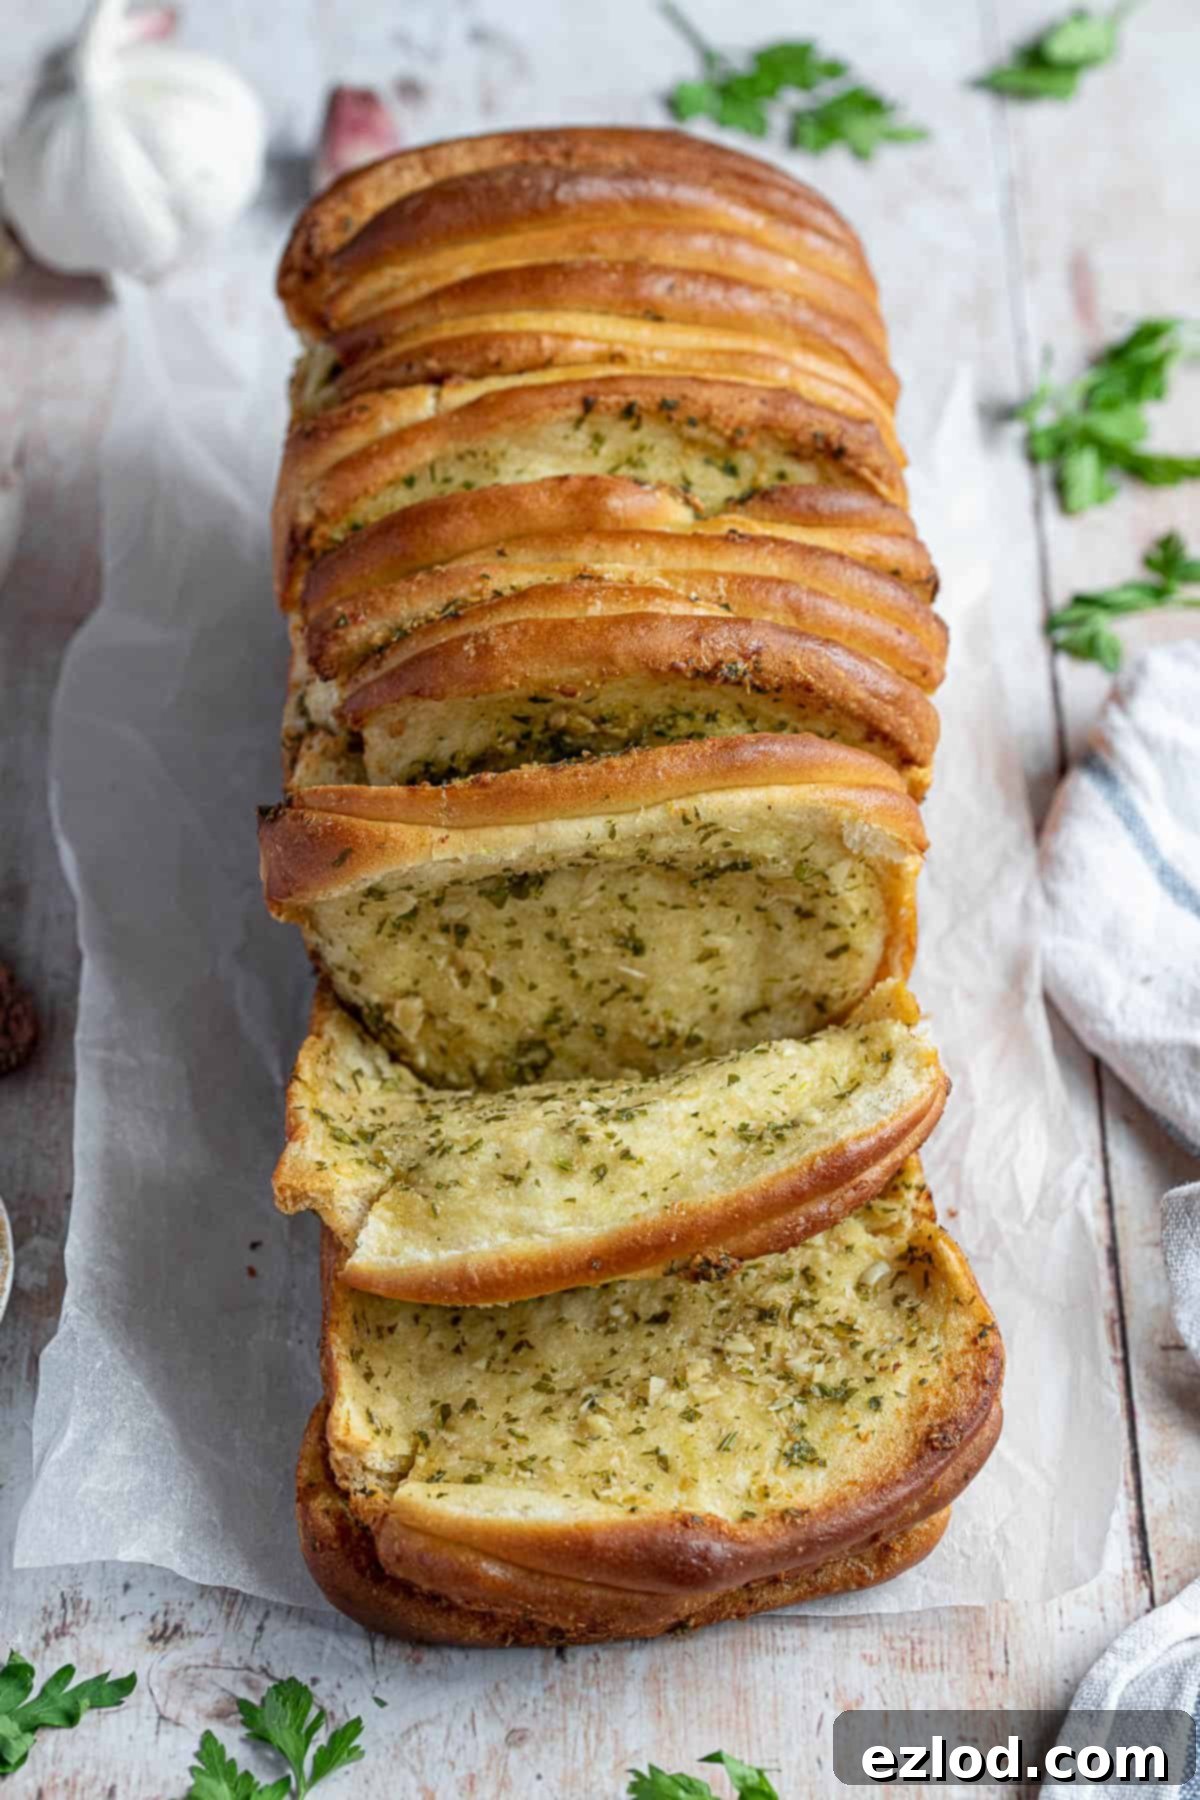
This vegan garlic pull apart bread is, without exaggeration, one of the most addictive and satisfying creations to ever emerge from my kitchen. Imagine soft, warm, and wonderfully fluffy bread, generously filled with a decadent, aromatic herb garlic butter. The best part? There’s no need for slicing; simply tear off a piece and savor the moment!
This versatile bread is an excellent companion to a multitude of dishes. Serve it alongside hearty lasagne or a rich spaghetti bolognese, perfect for soaking up every last drop of sauce. It’s also fantastic for dunking into your favorite creamy vegan soups, a standout addition to any buffet, or simply enjoyed on its own as a delightful snack. Confession: I’ve been known to (greedily!) devour half a loaf by myself, still warm and fragrant from the oven.
The secret behind its extraordinary softness and fluffiness lies in the ingenious tangzhong method. If you’re unfamiliar, don’t fret; it’s surprisingly simple to execute and guarantees a superior bread texture. This is the very same technique I employed for my widely popular vegan Hokkaido milk bread, a recipe that has won over countless home bakers with its exceptional results.
Understanding the Tangzhong Method for Superior Bread
So, what exactly is tangzhong? It’s a Japanese bread-making technique, often referred to as a “water roux” or “starter.” Essentially, you take a small portion of the recipe’s flour and liquid (in this case, non-dairy milk) and cook them together over gentle heat, much like making a roux, until the mixture transforms into a thick, pudding-like paste. This paste is then cooled before being incorporated into the main bread dough.
The magic of the tangzhong method lies in its ability to pre-gelatinize the starches present in the flour. When starches are heated in the presence of liquid, they swell and can absorb significantly more water than they would at room temperature. In fact, flour can absorb nearly twice as much hot liquid as lukewarm liquid typically used in yeasted doughs.
This pre-gelatinization process not only allows the flour to absorb more moisture but also creates a stable structure that retains this extra liquid throughout the entire bread-making journey – from kneading to baking and even cooling. The increased water content leads to a higher rise in the oven, as more internal steam is generated, working in conjunction with the carbon dioxide produced by the yeast. The result is a loaf that is exceptionally soft, wonderfully moist, and stays fresh for a remarkably longer period, resisting the tendency to dry out quickly.
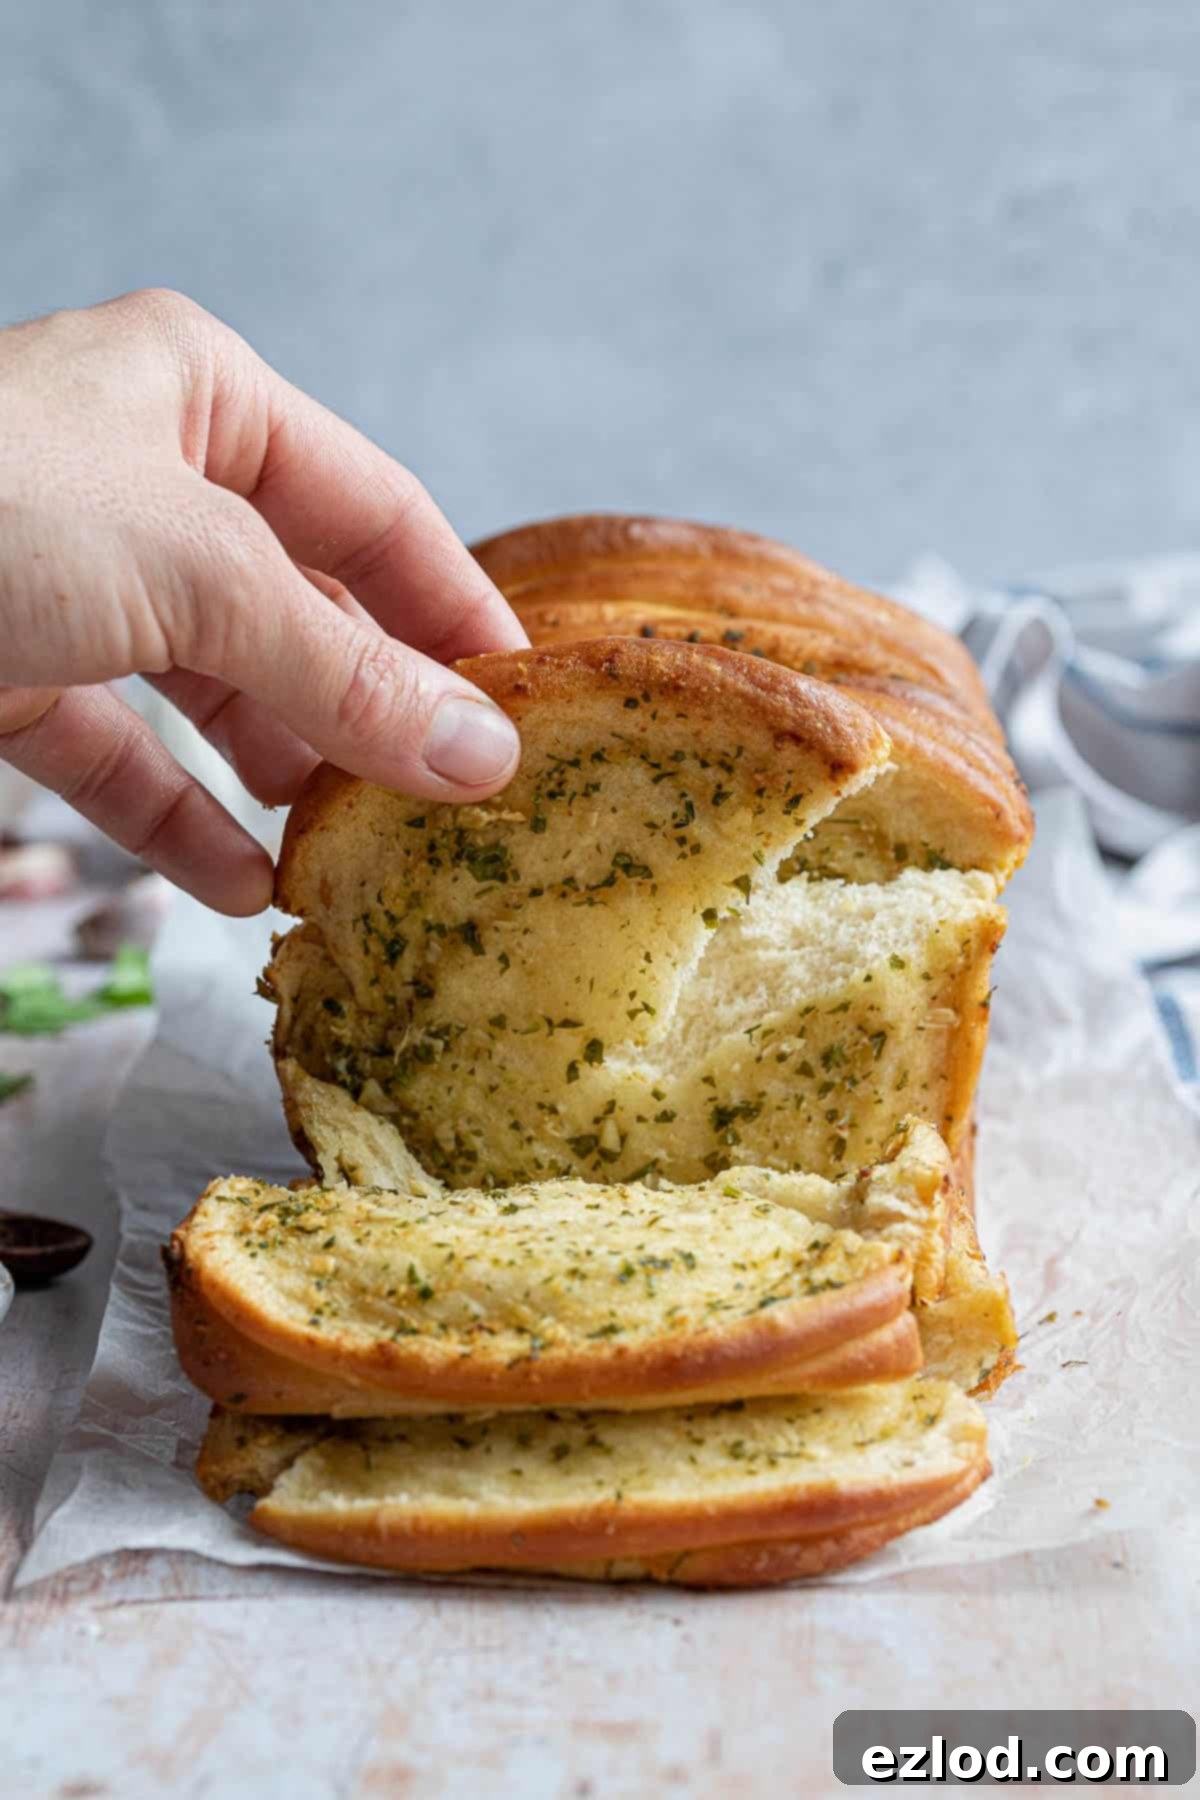
Essential Ingredients for Your Vegan Garlic Pull Apart Bread
Crafting this incredible bread requires a few key ingredients. Here’s a breakdown of what you’ll need and why each component is important:
- Bread Flour: For that signature soft, fluffy, and slightly chewy texture, white bread flour is my top recommendation. Its higher protein content (compared to all-purpose flour) develops more gluten, which is crucial for the bread’s structure and elasticity. While plain (all-purpose) flour can be used in a pinch, expect a slightly different, less chewy texture. I strongly advise against using wholemeal flour, as it will result in a much denser loaf, not ideal for this light and airy pull apart bread.
- Non-Dairy Milk: My go-to for baking is always unsweetened soy milk. Its high protein content closely mimics the properties of dairy milk, yielding excellent results in terms of texture and browning. However, any unsweetened non-dairy milk will work. Just be sure to avoid sweetened varieties, as they can alter the flavor profile of the bread. Oat milk is a good second choice if soy is not available.
- Instant Yeast: I prefer instant yeast for its convenience – it can be added directly to the dry ingredients without prior activation. This saves a step and simplifies the process. If you only have active dry yeast, refer to the “What Kind of Yeast?” section below for specific instructions on how to use it.
- Sugar: A small amount of sugar is essential. It acts as “food” for the yeast, helping it to activate and the dough to rise beautifully. Caster sugar is what I typically use, but granulated sugar works just as well. If you prefer a more natural sweetener, coconut sugar is also an option. However, avoid artificial sugar substitutes or sweeteners, as they do not provide the necessary food for the yeast and will negatively impact the rise and texture of your bread.
- Salt: A non-negotiable ingredient in bread making! Salt not only enhances the flavor of the bread, balancing the sweetness and richness, but it also helps to control the yeast’s activity, contributing to a more even rise and stronger gluten development. Do not omit it.
- Vegan Butter: You’ll need vegan butter or margarine for both the dough and the incredibly flavorful filling. While I often advocate for block vegan butter in other baking applications, a good quality tub variety (not a low-fat spread) is perfectly suitable here. I’ve had great success with Flora Original, but any reliable vegan butter substitute will do.
- Garlic: And lots of it! For an intensely aromatic and bold garlic flavor, I use a generous eight large cloves in the filling. If you prefer a slightly milder garlic kick, you can reduce this to five cloves. Freshly crushed garlic is key for the best flavor.
- Parsley: Freshly chopped parsley adds a beautiful herby note and vibrant color to the garlic butter. Feel free to experiment with other finely chopped fresh herbs that you enjoy; rosemary and thyme would both make excellent additions.
- Nutritional Yeast: This is an optional but highly recommended ingredient for the garlic butter filling. A touch of nutritional yeast (often called “nooch”) imparts a subtle, cheesy, umami flavor that beautifully complements the garlic and herbs, elevating the overall taste profile.
How To Create Your Own Vegan Garlic Pull Apart Bread: A Step-by-Step Guide
(For precise measurements and detailed instructions, please refer to the comprehensive recipe card located at the bottom of this page.)
For optimal flavor and ease of handling, I often choose to prepare this vegan garlic pull apart bread over two days. Making the dough and allowing it to undergo its first rise slowly in the refrigerator overnight results in a cold, more manageable dough that’s easier to roll out, and a deeper, more complex flavor in the finished bread. However, if time is of the essence, you can certainly complete the entire process in a single day.
Preparing the Tangzhong:
- Begin by placing the specified amount of flour into a small saucepan. Gradually whisk in the non-dairy milk, ensuring a smooth mixture free of any lumps.
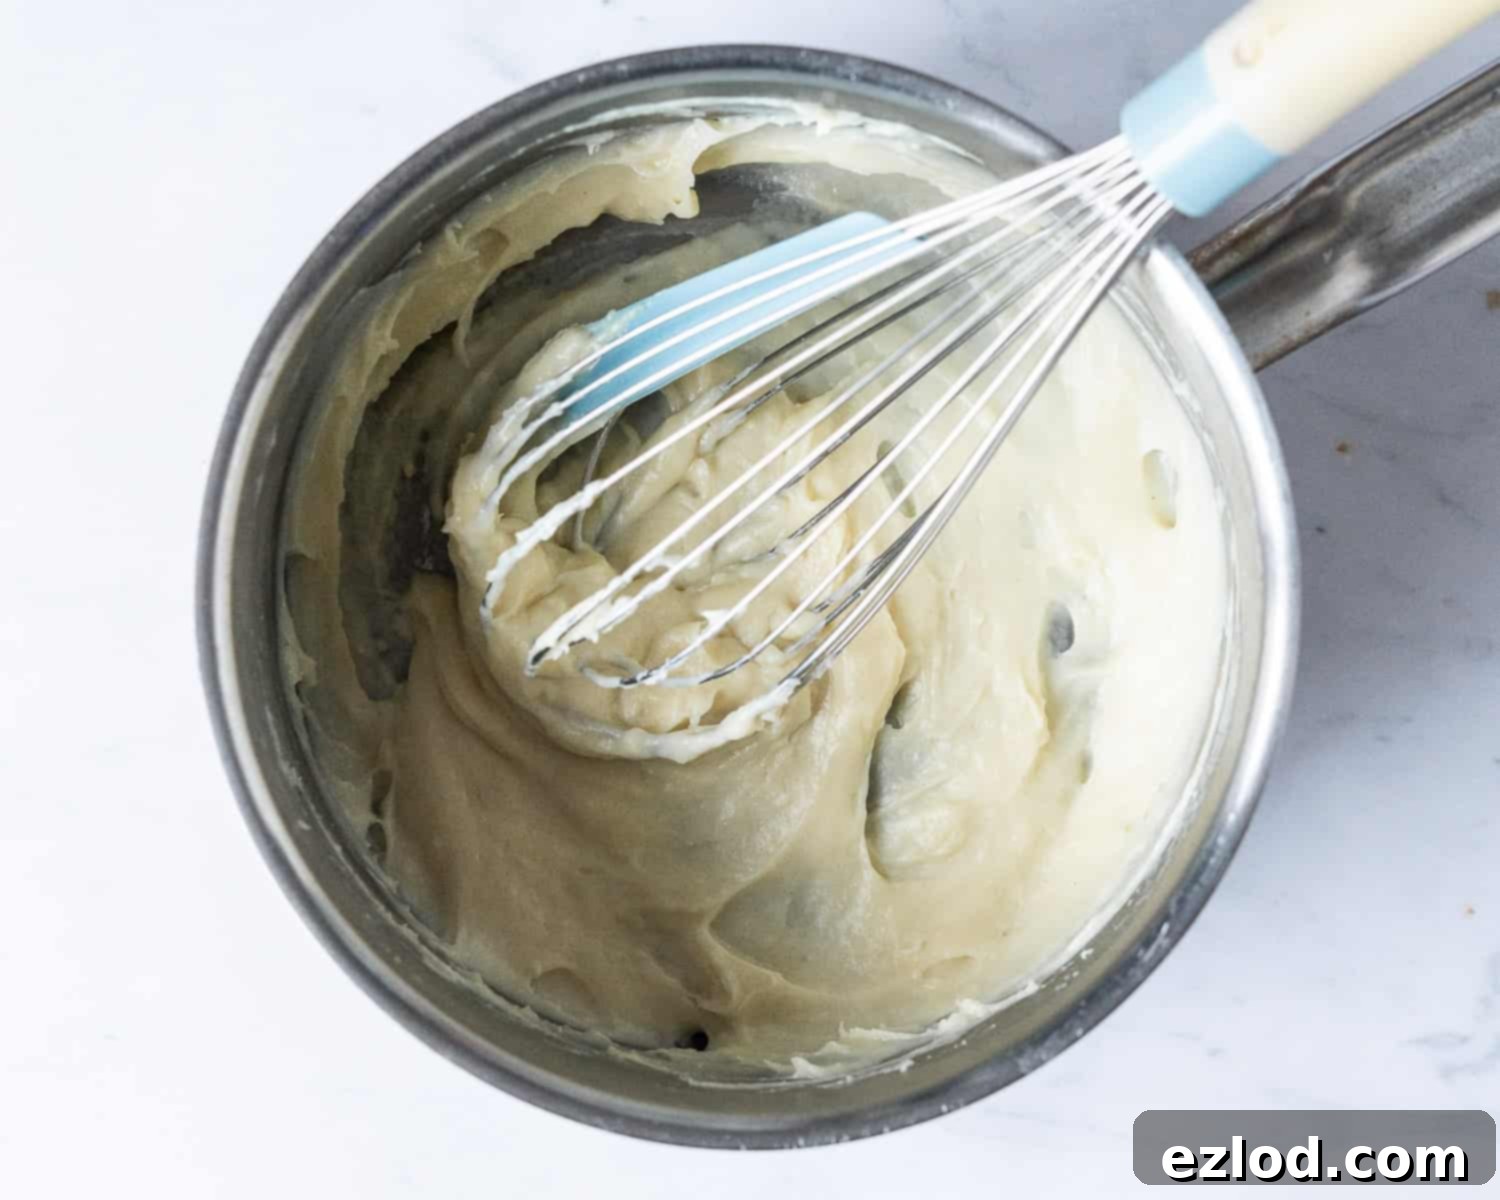
- Place the saucepan over a medium-low heat. Continue whisking constantly to prevent burning and promote even thickening. Cook until the mixture transforms into a thick, paste-like or pudding-like consistency. It should be visibly thicker and gelatinous.
Mixing the Dough:
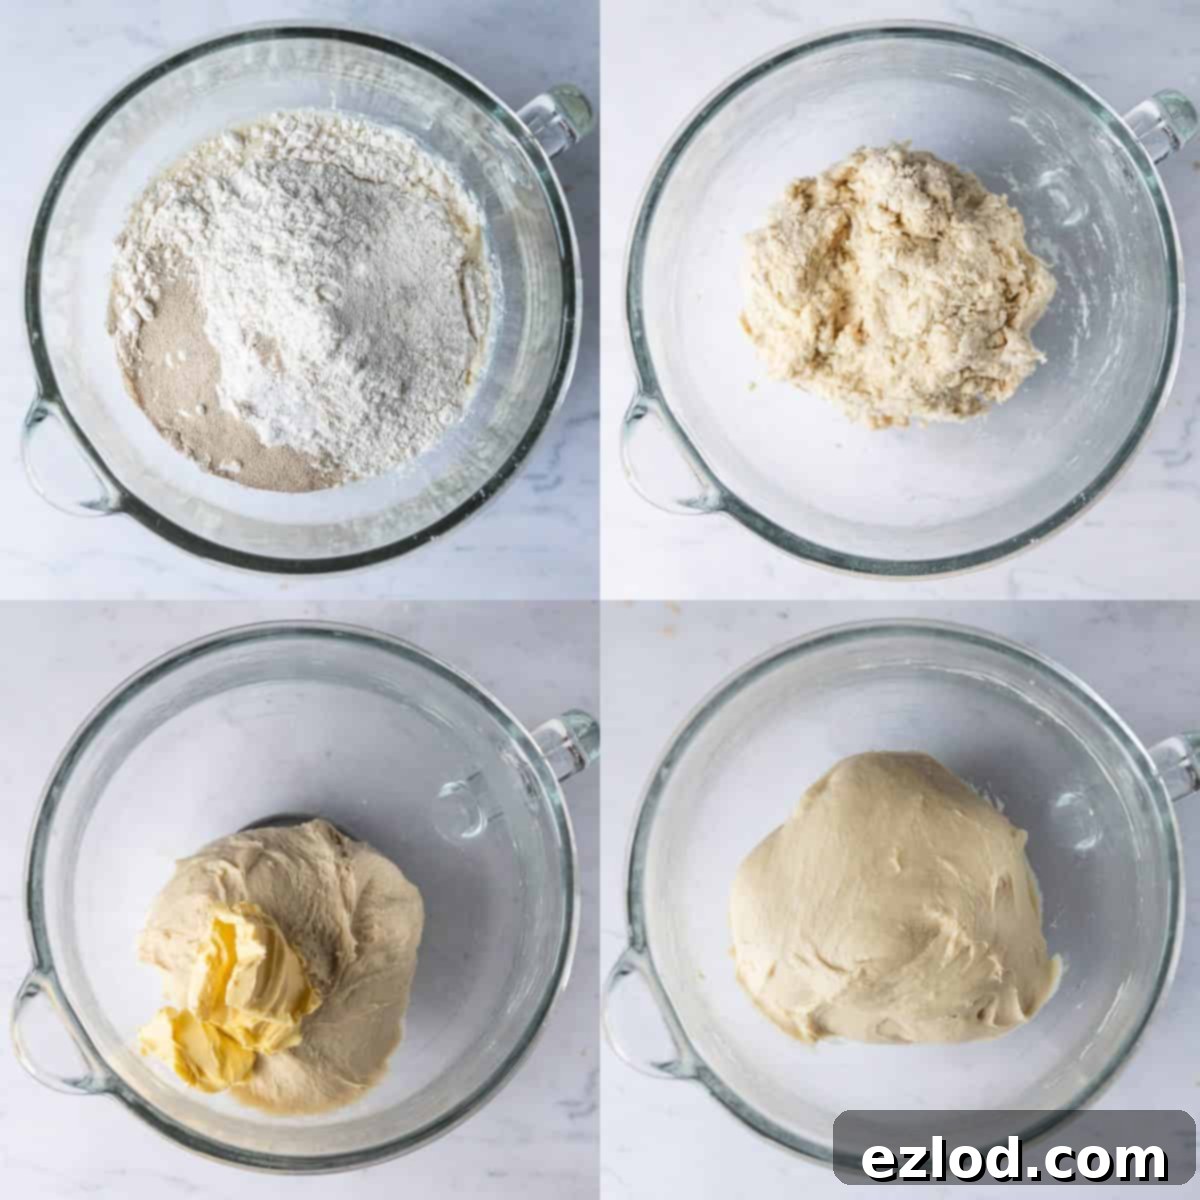
- Carefully scrape the warm tangzhong into the bowl of a stand mixer equipped with a dough hook attachment. Pour the remaining cold non-dairy milk directly over the tangzhong. This helps to rapidly cool down the tangzhong, preventing its residual heat from harming the yeast later.
- Add the sugar, salt, and the main quantity of bread flour to the bowl, followed by the instant yeast. Stir briefly by hand until a rough, shaggy dough forms. Then, set the stand mixer to a medium speed and knead. Continue mixing until the dough becomes smooth, elastic, and stretchy. This kneading process can take approximately 7-10 minutes.
- Introduce the softened vegan butter to the dough. Continue kneading for another 5 minutes, or until the butter is fully incorporated, and the dough achieves a smooth, elastic consistency that no longer feels greasy to the touch. You may need to stop the mixer occasionally to scrape down the sides of the bowl.
- The dough should remain soft and slightly sticky, but it should pull away cleanly from the sides of the bowl. If it appears excessively wet, add a very small amount of extra flour, a tablespoon at a time, until the desired consistency is reached. Exercise caution, as adding too much flour will result in a dry and tough bread.
First Rise:
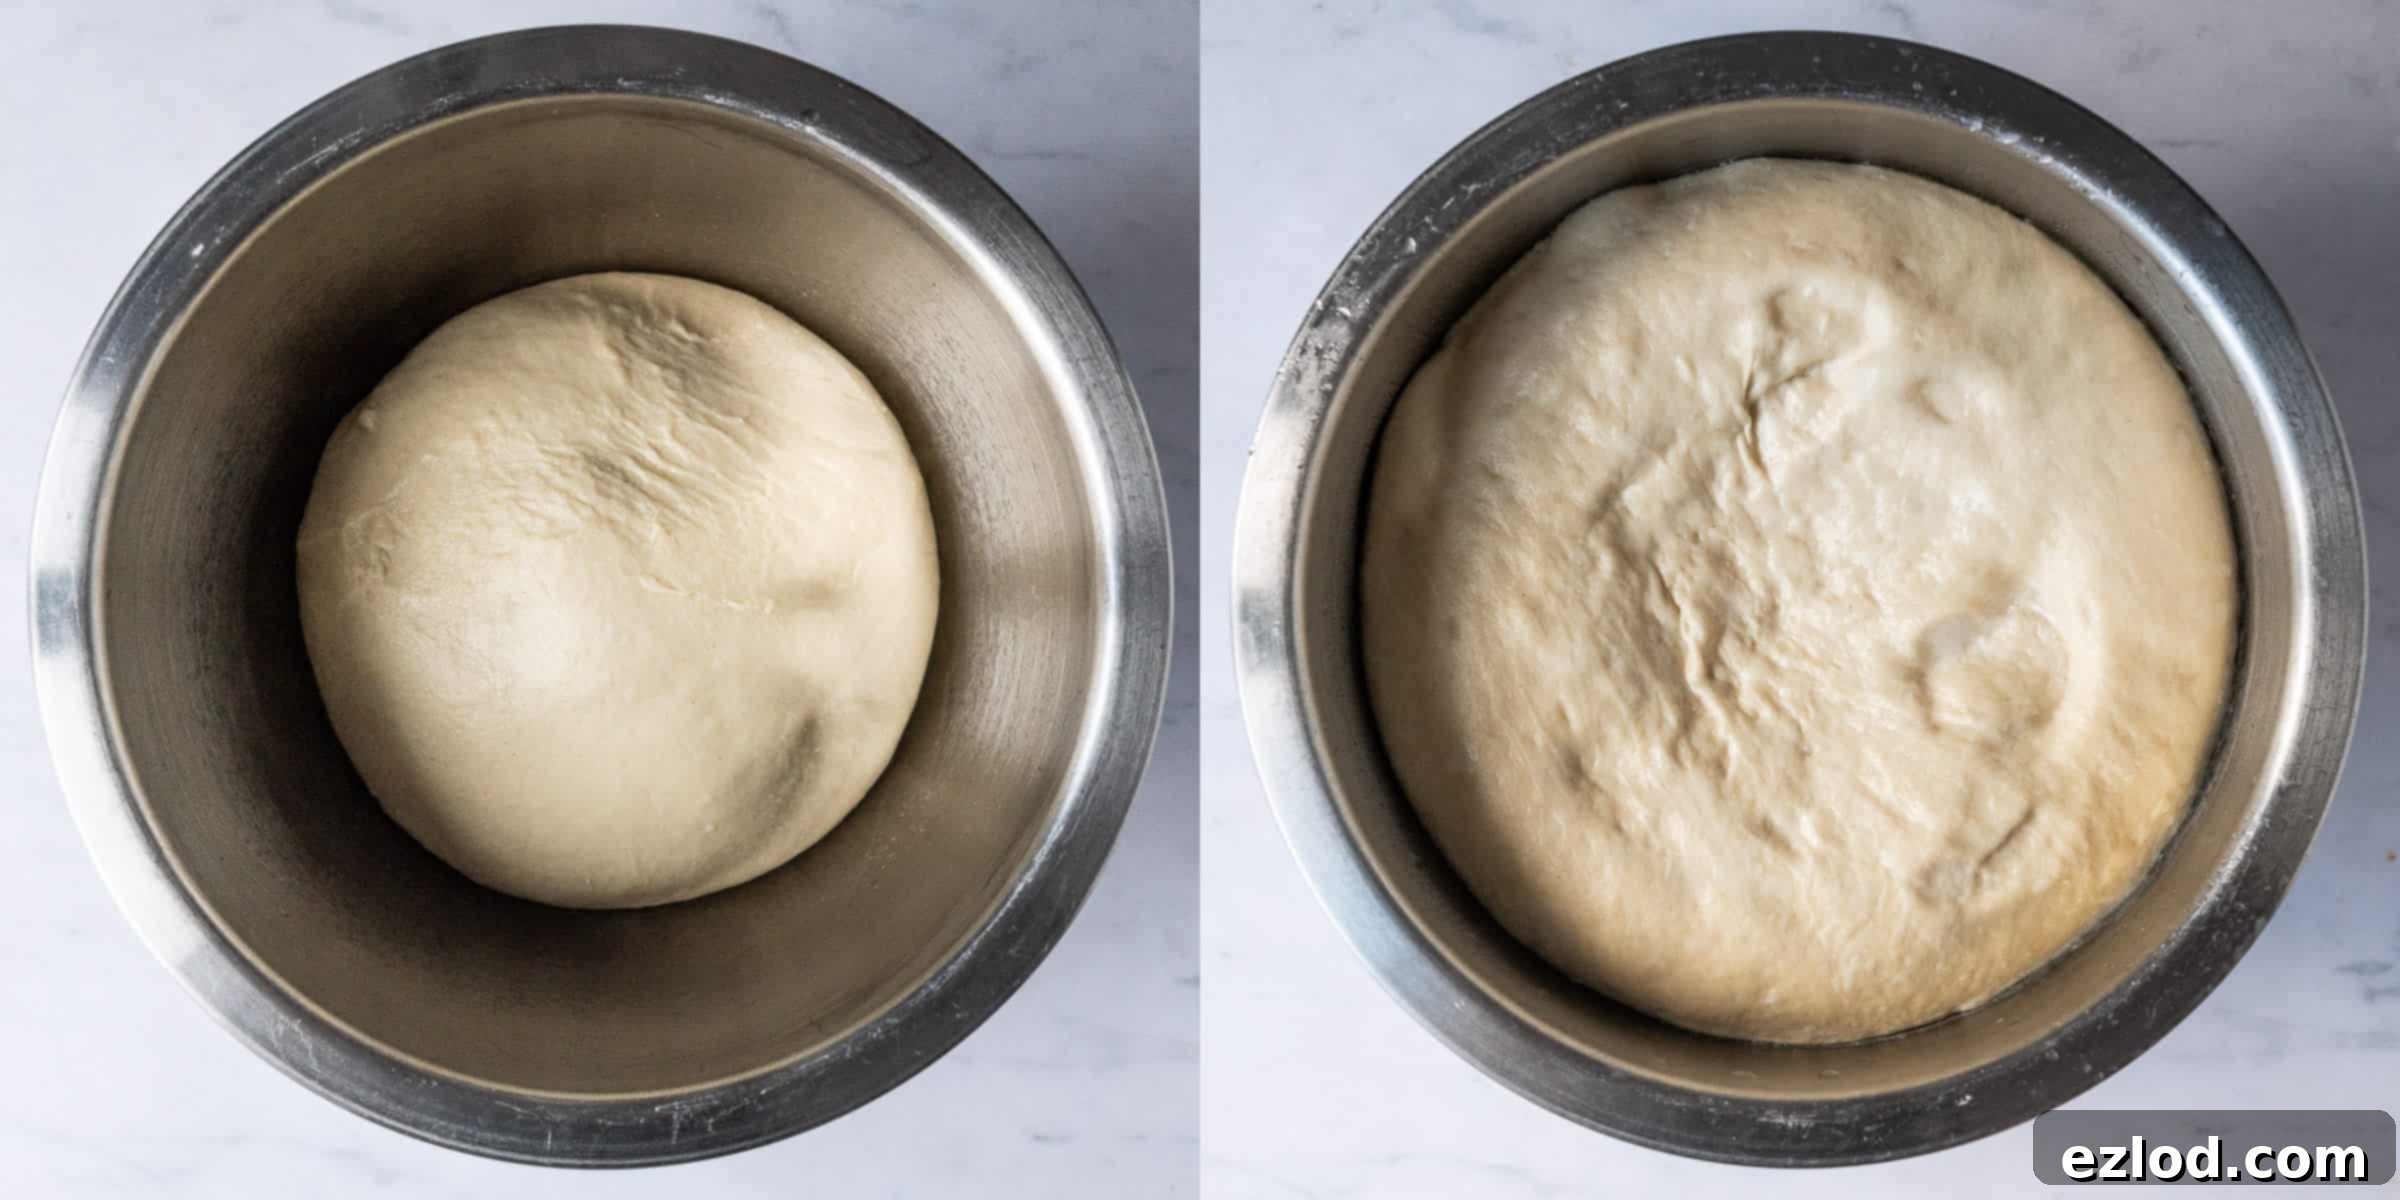
- Transfer the dough to a lightly oiled bowl, turning it once to coat. Cover the bowl loosely with plastic wrap or a clean damp cloth. For its first rise, you have two options: either place it in the refrigerator overnight (which enhances flavor and makes it easier to work with) or in a warm spot at room temperature for 1-2 hours, or until it has visibly doubled in size.
Preparing the Herby Garlic Butter Filling:
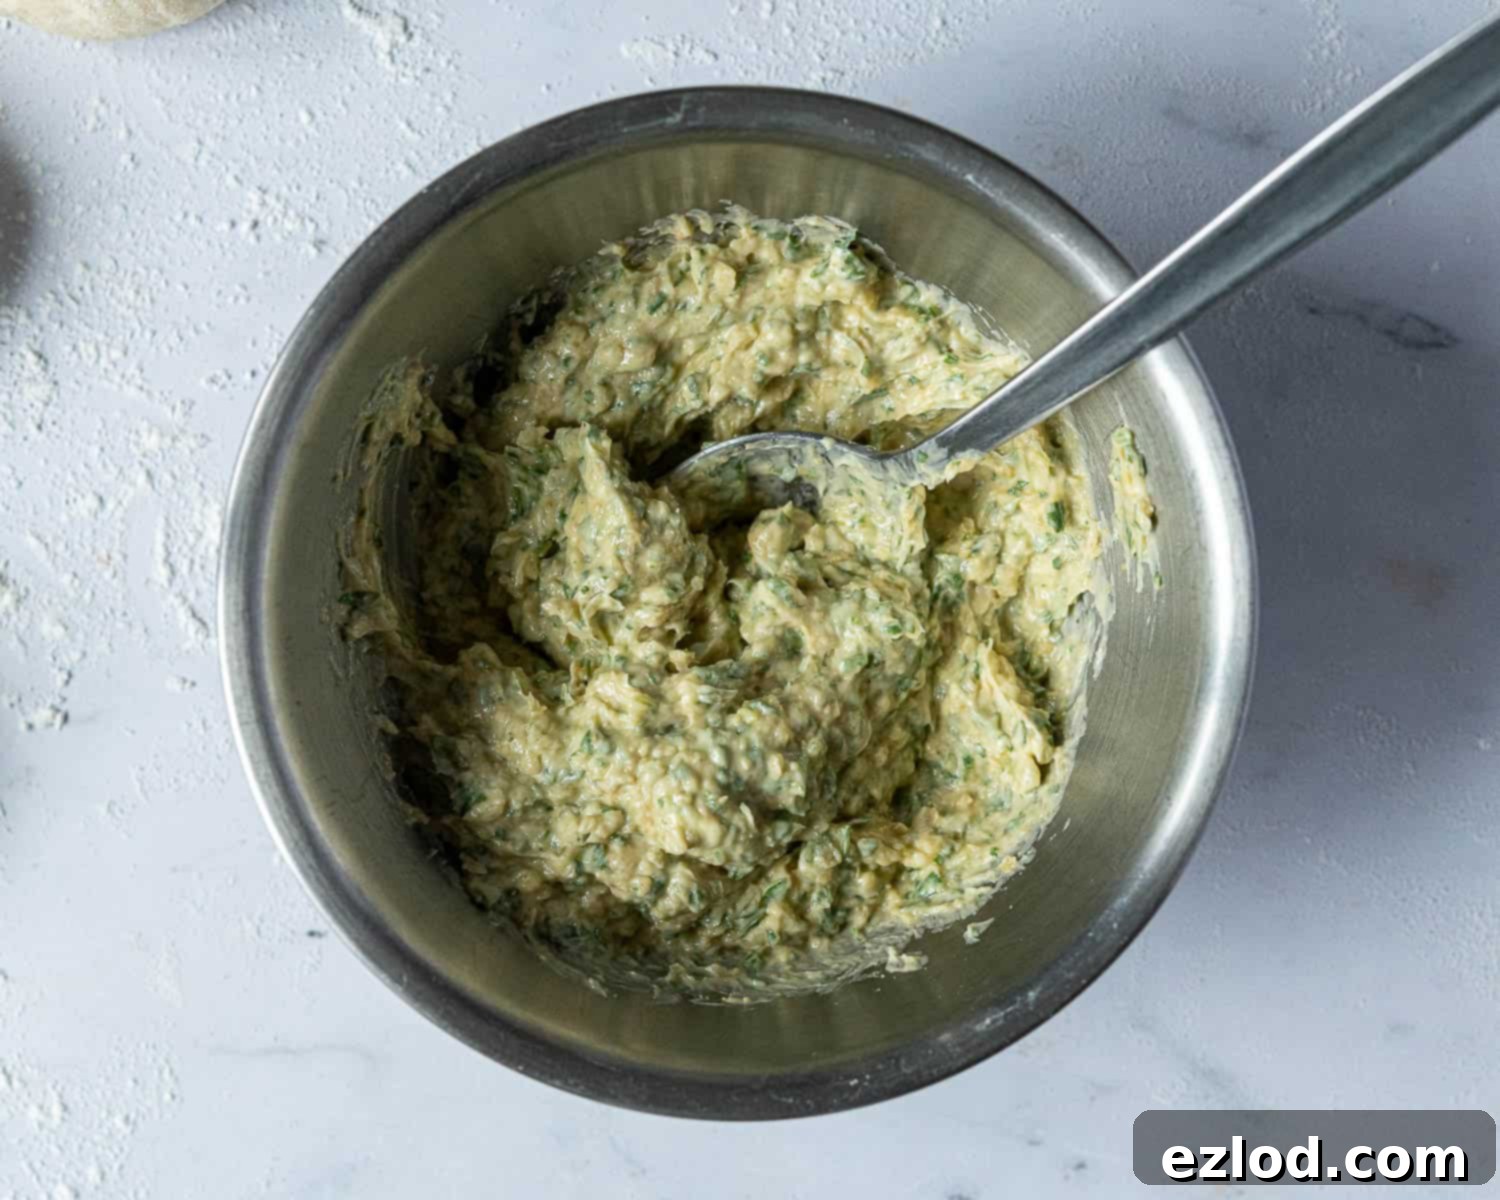
- While the dough is rising, prepare the flavorful filling. In a medium bowl, combine the softened vegan butter, freshly crushed garlic, finely chopped fresh parsley, nutritional yeast (if using), and salt. Mix thoroughly until all ingredients are well combined. Cover and store the filling in the refrigerator until it’s time to shape the loaf. If your vegan butter was a non-spreadable block, remember to take it out of the fridge about an hour before shaping to allow it to soften sufficiently.
How To Shape Your Beautiful Pull Apart Loaf:
- Once the dough has completed its first rise and doubled in size (either overnight or at room temperature), gently “knock back” the dough. This involves deflating it by briefly kneading it for about 30 seconds to release any large air bubbles.
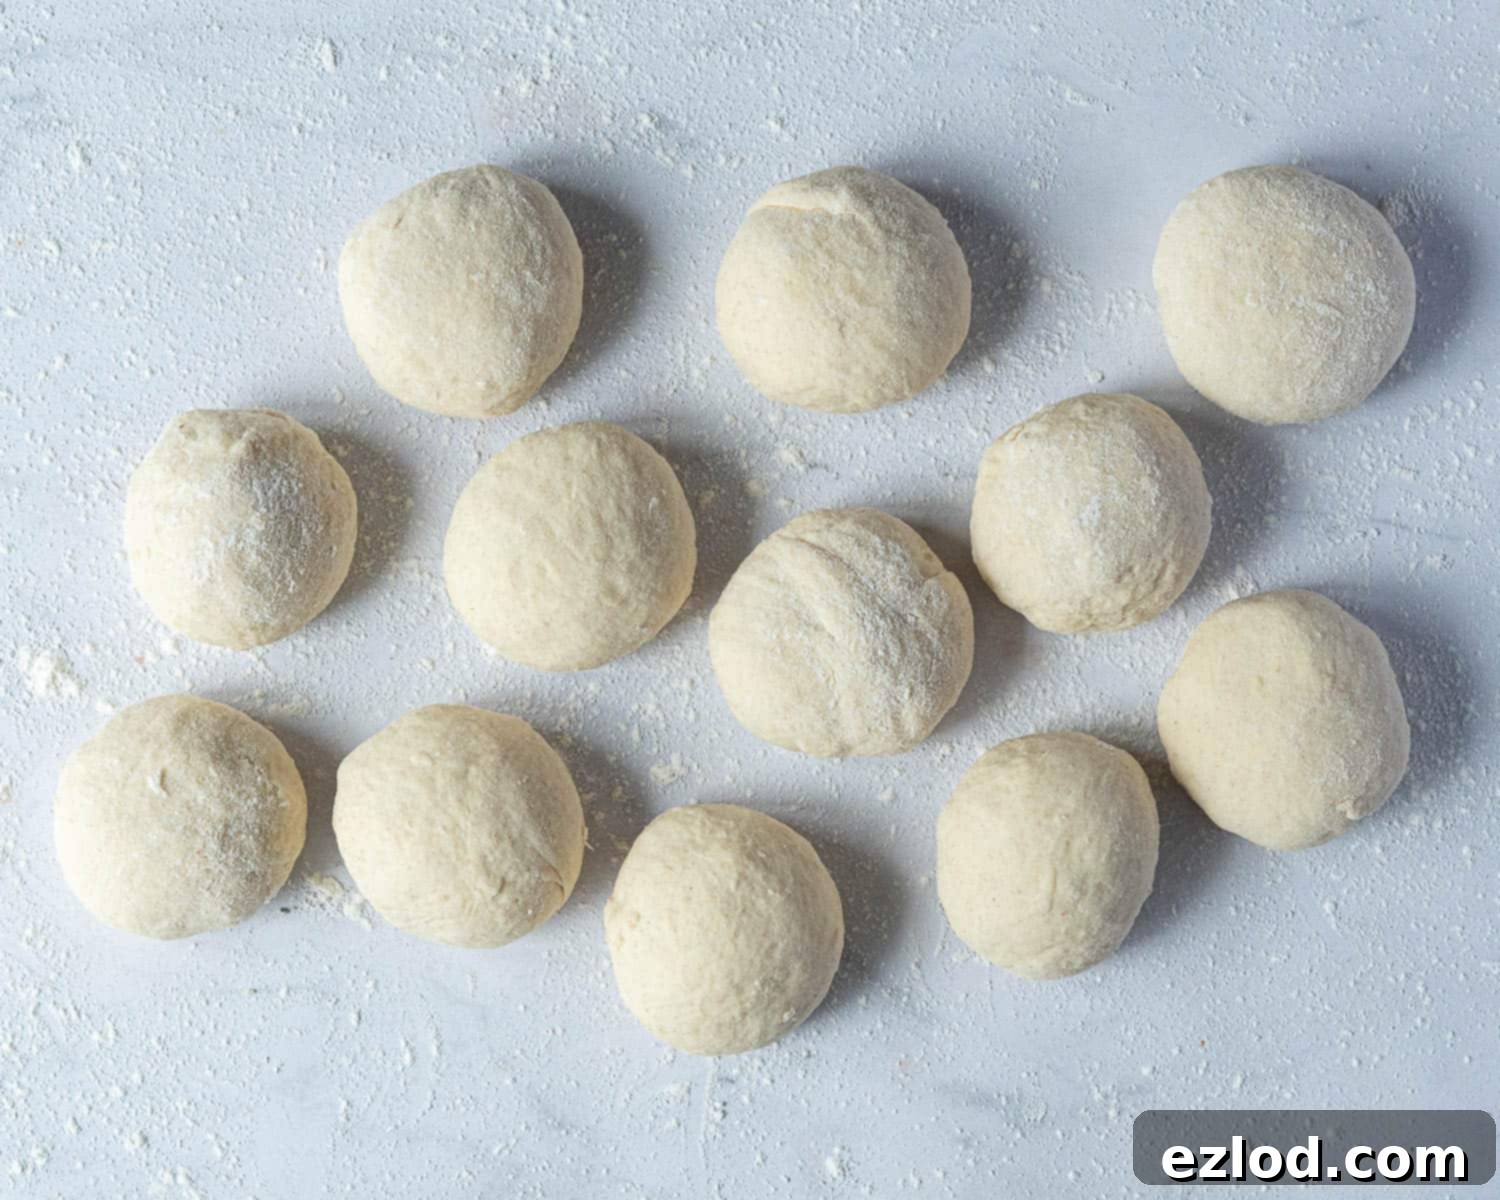
- On a lightly floured surface, divide the dough into 12 equal pieces. For best results, use a kitchen scale to ensure each piece is the same weight, promoting even baking. Roll each piece into a smooth ball.
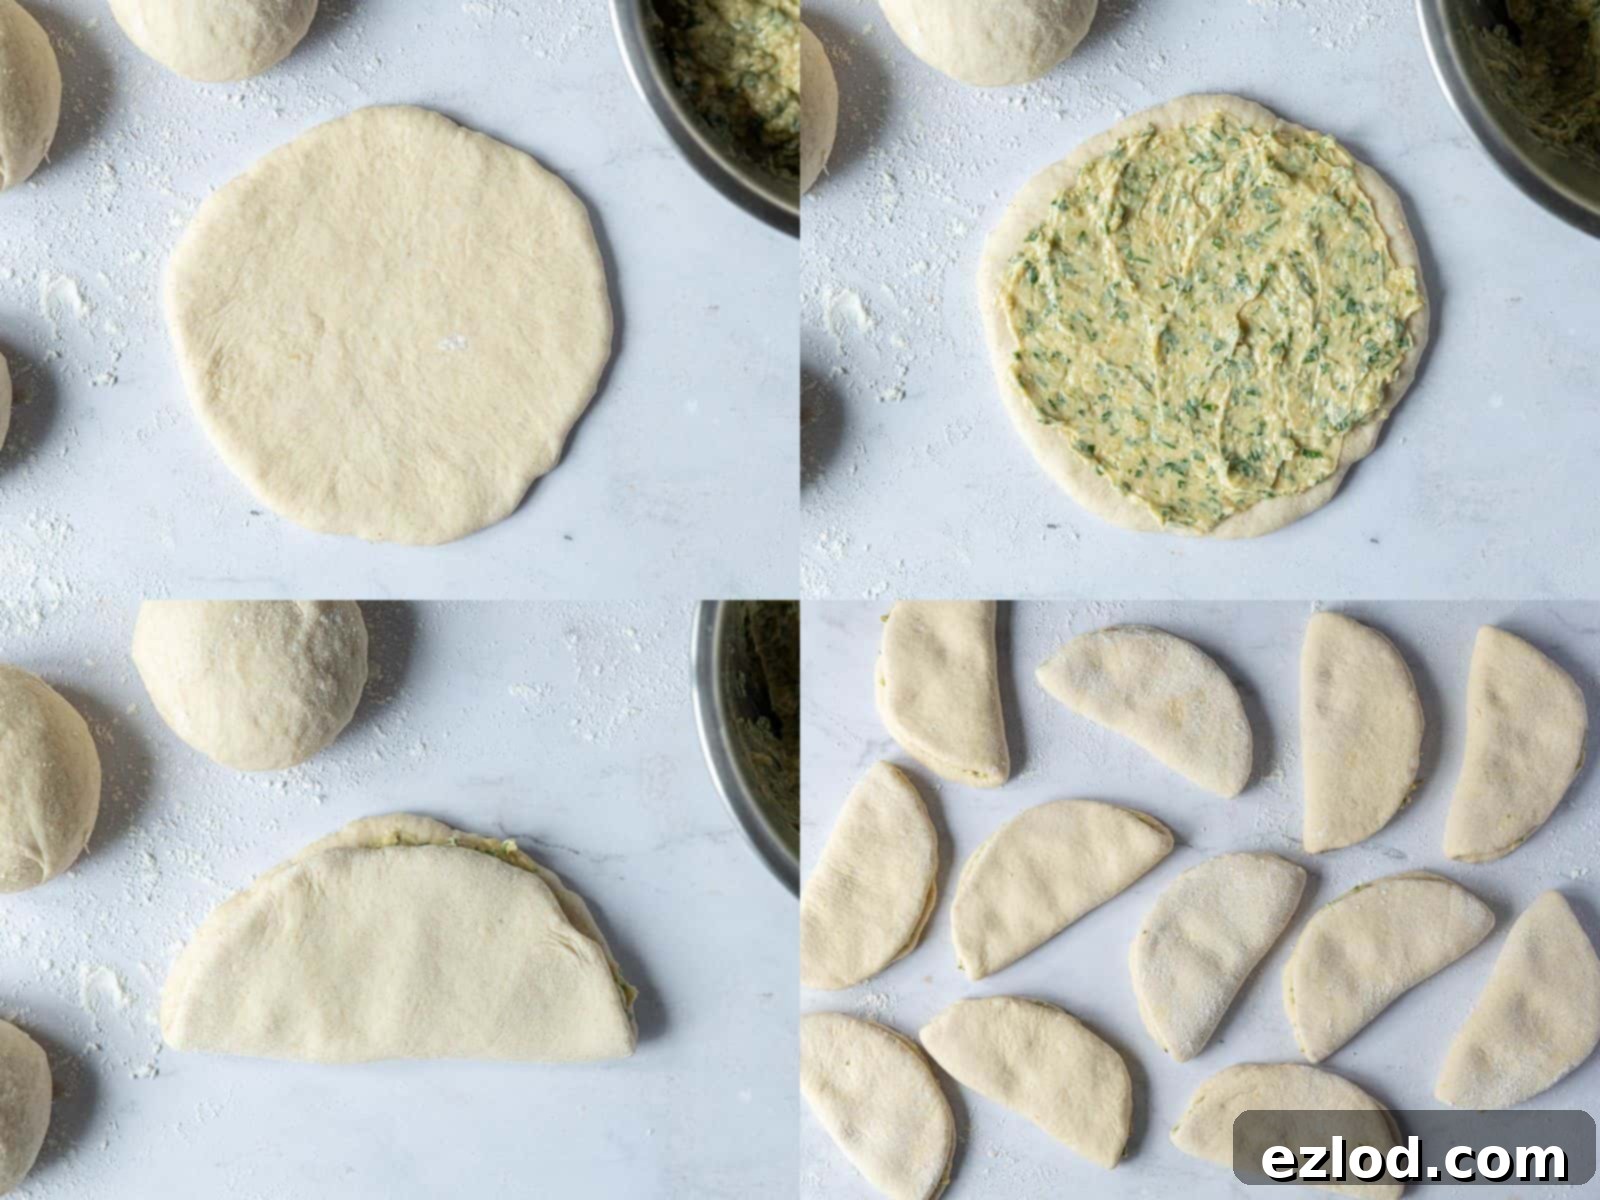
- Take each dough ball and roll it out on a lightly floured surface into a roughly circular shape, approximately 10-11.5 cm (4-4.5 inches) in width. Perfect circles are not necessary!
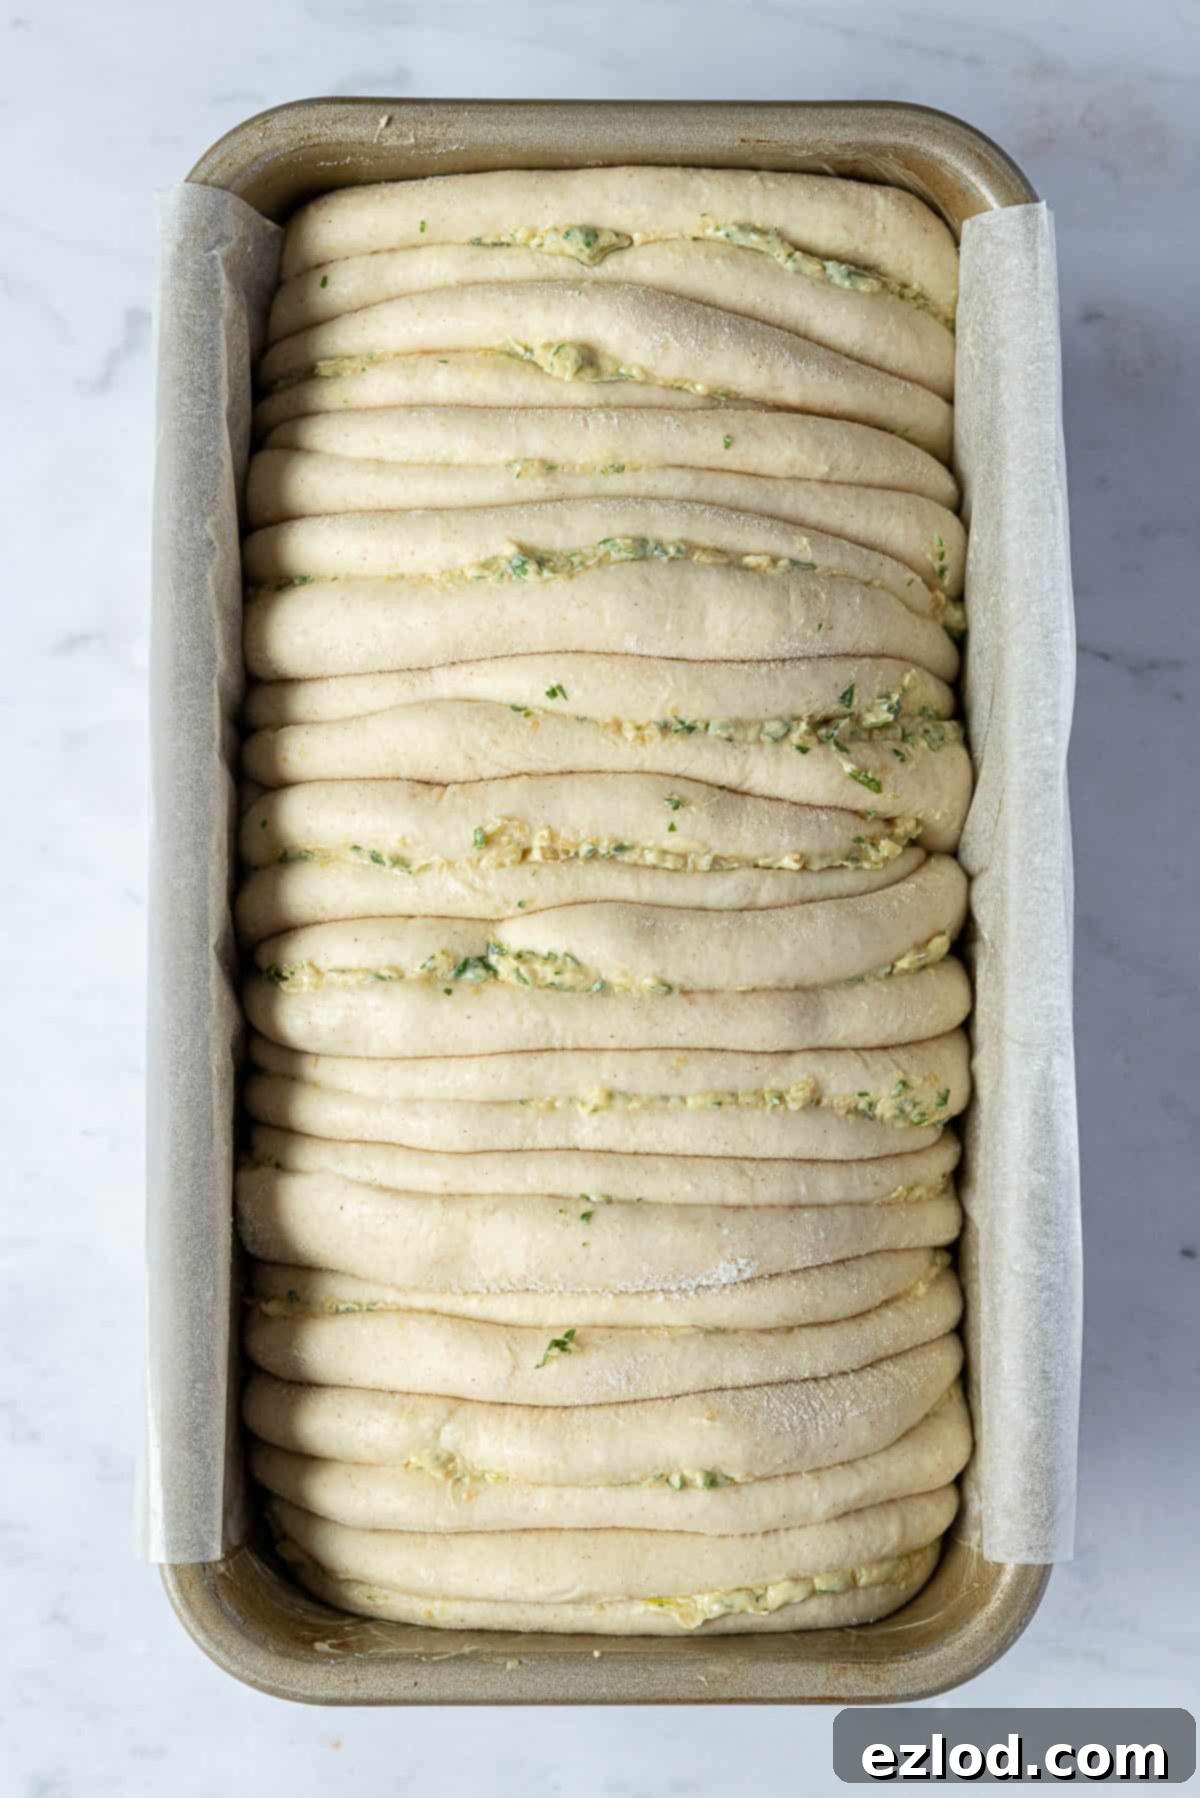
- Spread a dollop of the prepared garlic butter filling evenly over one half of the rolled-out dough circle. Then, fold the dough in half, creating a semi-circle, much like a taco, to encase the delicious filling. Gently press the edges to seal. Repeat this process with all the remaining dough balls and the entire garlic butter filling.
- Grease an approximate 11.5 x 21.5 cm (8.5 x 4.5 inch) loaf tin and line it with a strip of baking parchment, ensuring some overhang on both sides. This “sling” will make it incredibly easy to lift the baked bread out later.
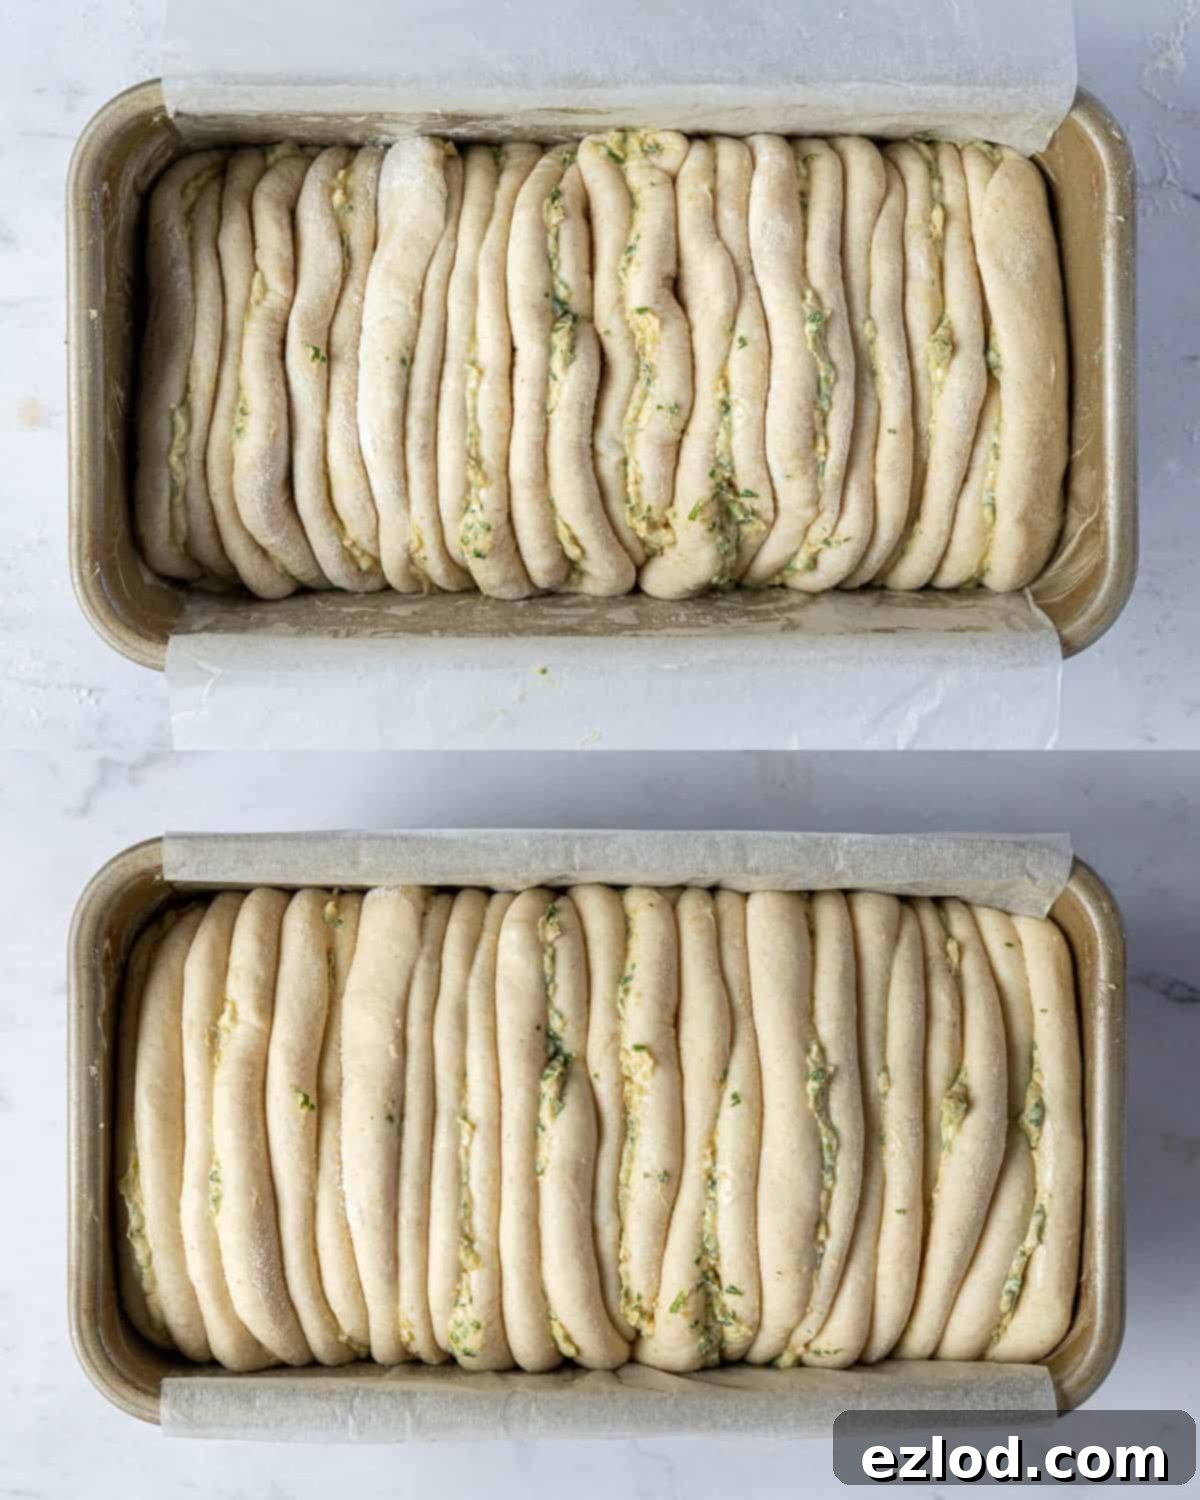
- Arrange the folded dough pieces in the prepared loaf tin, placing them with the folded edge facing down. You will likely need to gently squish them together a bit to fit them snugly into the tin.
- Loosely cover the loaf tin with plastic wrap or a clean tea towel and allow it to undergo its second rise in a warm spot until the bread pieces appear puffy and have expanded, which usually takes about 45-75 minutes. To test if it’s ready, gently press a finger into the dough; it should spring back slowly and leave a slight indentation. If it springs back immediately, it needs more time. If it deflates, it’s over-proofed, so keep a close eye on it!
Baking Your Garlic Pull Apart Bread:
- About 15 minutes before the bread is ready for baking, preheat your oven to 180°C (160°C fan/350°F/gas mark 4).
- Before placing it in the oven, gently brush any exposed surfaces of the dough with a little non-dairy milk. This encourages a beautiful golden-brown crust. Bake for approximately 50 minutes. The bread should be a deep golden color. For precise doneness, use a probe thermometer inserted into the center of the loaf; it should register at least 90°C (194°F). If the top begins to brown too quickly before the baking time is complete, you can loosely cover it with a piece of aluminum foil.
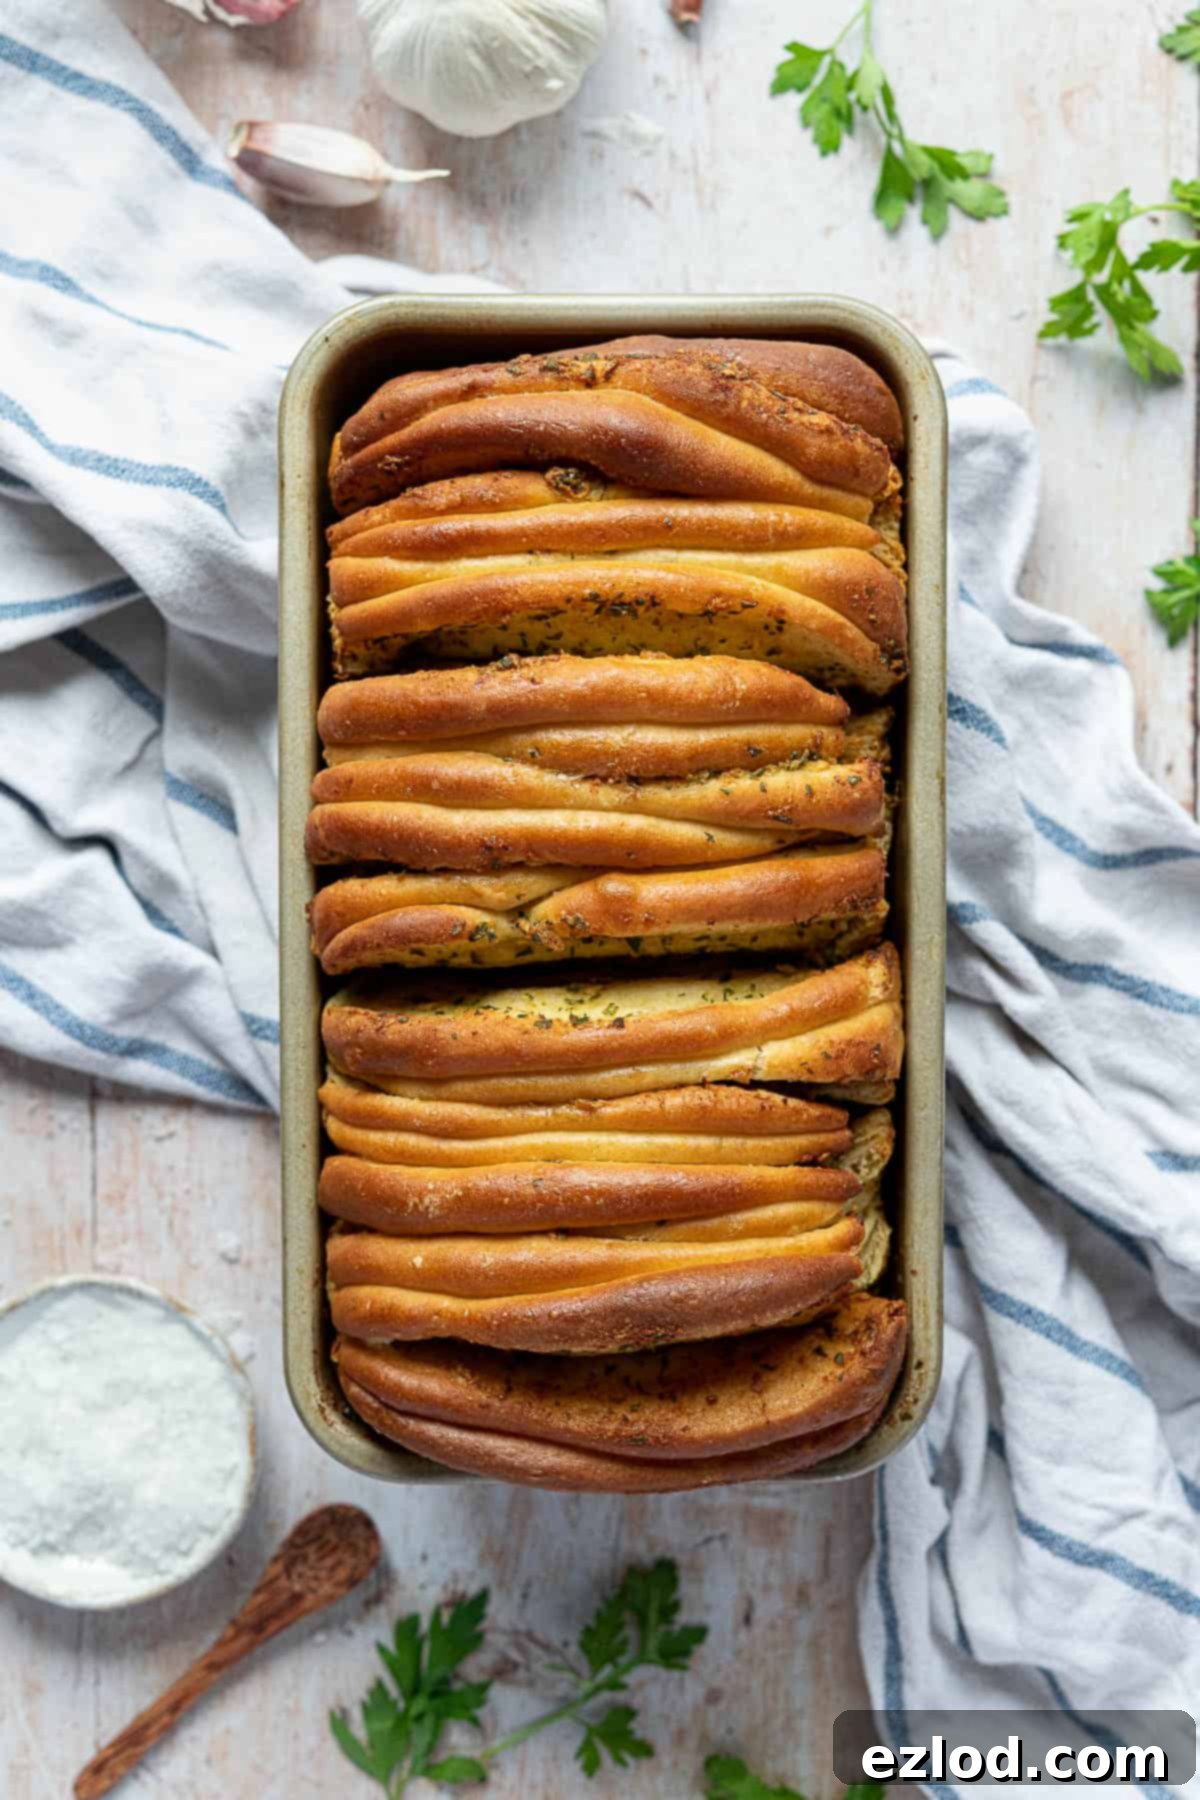
- Once baked, remove the loaf from the oven and allow it to cool in the tin for 10 minutes. Then, using the parchment paper sling, carefully lift the bread out and transfer it to a wire rack. Let it cool for at least 30 minutes before tearing into it and serving. This allows the internal structure to set and prevents it from being gummy.
Expert Tips for Perfect Vegan Garlic Pull Apart Bread:
- Accurate Measuring is Key: As with all my baking recipes, I wholeheartedly recommend using metric measurements with a digital kitchen scale instead of cup conversions. Cups are notoriously inaccurate and inconsistent. Using a scale ensures precise ingredient ratios, leading to far better and more reliable results, not to mention less mess! For liquid ingredients, weighing them in grams on a scale is also highly accurate (e.g., 140g milk for tangzhong is 140ml).
- Check Your Yeast: Always ensure your instant or active dry yeast is fresh and within its expiration date. Old or inactive yeast is a common culprit for bread that fails to rise, leading to disappointment.
- Flour Consistency: The exact amount of flour needed can fluctuate slightly due to variations in different brands and their absorption rates. Start with the quantity provided in the recipe. If your dough appears overly wet, add a tiny bit more flour, a tablespoon at a time, until it reaches the correct consistency. Remember, this is meant to be a soft and somewhat sticky dough; resist the urge to add too much flour, as this will result in a dry and dense bread.
- Choosing Non-Dairy Milk: While any unsweetened non-dairy milk can work, unsweetened soy milk truly yields the best results for baking due to its higher protein content, which mimics dairy milk more closely. Unsweetened oat milk is my preferred second choice.
- Temperature Affects Rise Time: The ambient temperature of your kitchen will significantly impact how quickly your dough rises. On warmer days, it will rise faster, while colder environments will slow the process. If you opt for an overnight cold rise in the fridge, expect the second rise at room temperature to take a bit longer than if both rises were done at room temperature.
- Overnight Rise for Flavor: If your schedule allows, a slow, overnight rise in the refrigerator for the first proof is highly beneficial. It not only divides the workload, making the baking process less rushed, but also develops a deeper, more nuanced flavor in the bread.
- Serving Temperature: For the ultimate flavor and texture experience, serve this vegan garlic pull apart bread warm. However, it’s crucial to allow it to cool for at least 30 minutes after baking before you start tearing into it. This cooling period allows the steam to redistribute and the crumb structure to set, preventing a gummy texture.
Navigating Different Types of Yeast:
I consistently use instant yeast for my bread baking because it offers unparalleled convenience; it can be mixed directly with the dry ingredients without needing to be activated in liquid beforehand. If possible, I highly recommend purchasing instant yeast.
However, if active dry yeast is your only option, you can still successfully make this bread, though the method will require a slight adjustment:
- Use 10g (3 tsp) of active dry yeast.
- Prepare the tangzhong as directed. Once cooked, scrape it into a separate bowl and cover its surface directly with clingfilm or greaseproof paper to prevent a skin from forming. Allow it to cool completely to room temperature.
- Instead of using cold milk for the dough, it should be lukewarm (around 38-43°C or 100-110°F), never hot. Test it by dipping your finger – it should feel comfortably warm, not scalding, as excessively hot liquid will kill the yeast.
- In a small bowl, combine the active dry yeast with the lukewarm milk and a pinch of sugar. Let this mixture sit for 10-20 minutes, or until it becomes visibly foamy and bubbly, indicating the yeast is active.
- Once the yeast mixture is active and the tangzhong is cool, proceed with the rest of the recipe as written, adding the activated yeast mixture to the stand mixer bowl along with the other dough ingredients.
Clever Ways to Speed Up Dough Rising Time:
If your kitchen is on the colder side and you’d like to accelerate the dough’s rising process, here are a couple of helpful tricks:
- Warm Oven Method: Preheat your oven to its lowest temperature setting for just a couple of minutes, then switch it off. Open the oven door for about 30 seconds to allow some of the intense heat to escape. Carefully test the warmth inside with your hand; it should feel pleasantly warm, similar to a warm summer day, but not hot. A too-hot environment will kill your yeast, so always err on the side of caution. Place the covered dough into this warm, turned-off oven and close the door. On particularly cold days, you might need to briefly re-warm the oven after a while, but often, a single warming is sufficient.
- Steam Method: Alternatively, place a heat-proof bowl or a small loaf tin filled with boiling water on the bottom rack of your (cold, switched-off) oven. Then, place your covered dough on the middle shelf. Close the oven door. The steam from the boiling water will create a warm, humid environment, ideal for encouraging the dough to rise more quickly and efficiently.
Knowing When Your Bread is Perfectly Baked:
The most reliable way to ascertain if your bread is thoroughly baked is to check its internal temperature using a probe thermometer. The center of the loaf should register at least 90°C (194°F). Overbaked bread will turn out dry, while under-baked bread means you’ll be faced with unappetizing raw dough – a definite no-go! Since all ovens vary, a one-size-fits-all baking time is virtually impossible, making a thermometer an invaluable tool.
I highly recommend investing in a good probe thermometer; it’s an incredibly versatile and handy kitchen gadget that will elevate all your baking endeavors.
If you don’t own a thermometer, a common alternative is to tap the bottom of the loaf; it should sound hollow. Another method is to insert a wooden skewer or toothpick into the center of the loaf; it should slide in and out smoothly with minimal resistance and emerge clean, indicating the bread is cooked through.
Storage and Freezing Tips for Your Garlic Pull Apart Bread:
How Long Will It Keep?:
This vegan garlic pull apart bread is undoubtedly at its peak on the day it’s baked, offering the freshest flavor and softest texture. However, it will remain deliciously soft for a couple of days when stored in an airtight container at room temperature. For the best experience on subsequent days, a quick warm-up in the oven or microwave will refresh its softness and revive its aromatic qualities.
Can I Freeze This Vegan Garlic Pull Apart Bread?:
Absolutely! This vegan garlic pull apart bread freezes exceptionally well, whether you prefer to freeze it as a whole loaf or in individual slices. To maintain maximum freshness, allow the bread to cool completely after baking, then freeze it on the same day it was made. Wrap it tightly in plastic wrap and then in foil, or place it in an airtight freezer-safe container to protect it from freezer burn. When you’re ready to enjoy it, simply allow it to defrost at room temperature. For a delightful refresh, warm it in a low oven for 5-10 minutes before serving, which will restore its original softness and aroma.
Can I Make It Gluten-Free?:
Unfortunately, this particular recipe is not suitable for a gluten-free adaptation using gluten-free flour blends. Creating truly excellent gluten-free bread is a highly specialized skill, and the entire recipe structure would require a complete overhaul to achieve comparable results without gluten. As gluten-free baking is not my area of expertise, I cannot provide reliable guidance on adapting this specific recipe.
For successful gluten-free baking, it is always best to seek out and use recipes specifically designed to be gluten-free, rather than attempting to modify a gluten-containing recipe, which often leads to disappointing outcomes.
Discover More Delicious Vegan Bread Recipes:
- Vegan Hokkaido Milk Bread
- Vegan White Sandwich Bread
- Vegan Brioche
- Vegan Challah
- Vegan Pesto Bread
- Easy Flatbreads (Vegan, No Yeast)
- Vegan Beer Pretzels
- Vegan Pulla Bread (Cardamom Bread)
- Vegan Wholemeal Sandwich Bread
If you’ve tried this delightful recipe for vegan garlic pull apart bread, I would absolutely love to hear from you! Please take a moment to rate it, leave a comment below with your thoughts, or share your delicious creation on Instagram and tag @domestic_gothess using the hashtag #domesticgothess. Your feedback is truly appreciated!
All images and content featured on Domestic Gothess are protected by copyright. If you wish to share this recipe, please do so by utilizing the provided share buttons. Please refrain from screenshotting or posting the recipe or content in its entirety.
Print
Vegan Garlic Pull Apart Bread
Ingredients
Tangzhong:
- 25 g (scant ¼ cup) white bread flour
- 140 g (½ cup + 4 tsp) unsweetened non-dairy milk (soy is best)
Dough:
- 160 g (⅔ cup) unsweetened non-dairy milk (soy is best) cold
- 25 g (2 Tbsp) caster or granulated sugar
- 1 tsp salt
- 350 g (2 + ¾ cups + 1 Tbsp) white bread flour (plus extra as needed)
- 7 g (2 ¼ tsp) instant yeast
- 30 g (2 Tbsp) vegan butter/spread (I used Flora original)
Filling:
- 110 g (½ cup) vegan butter/spread (I used Flora original)
- 8 cloves garlic peeled and crushed
- 2 Tbsp finely chopped fresh parsley
- 2 Tbsp nutritional yeast
- ¼ tsp salt
Instructions
-
I like to split making these over two days – I make the dough and refrigerate it overnight for it’s first rise. The cold dough is easier to roll out and the slow rise results in a better flavour. You can do it all on the same day if you prefer though.
-
To make the tangzhong, place the flour in a saucepan and gradually whisk in the milk to avoid lumps.
-
Place the pan over a medium/low heat and whisk constantly until the mixture has thickened to a paste/pudding-like consistency.
-
Scrape the tangzhong into the bowl of a stand mixer fitted with a dough hook and pour the rest of the cold milk on top. This will cool the tangzhong down so that the heat doesn’t kill the yeast.
-
Add the sugar, salt and flour and finally the yeast. Stir until it forms a rough dough then set the stand mixer to a medium speed and mix until the dough is smooth and stretchy, this can take about 10 minutes.
-
Add the vegan butter and knead for about another 5 minutes until it is fully incorporated and the dough is smooth, elastic and no longer feels greasy. You may need to scrape down the sides of the bowl a couple of times.
-
The dough should still be soft and sticky, but it should pull away from the sides of the bowl cleanly. If it seems too wet then you can knead in a little extra flour, a tablespoon at a time. Be careful though, this is meant to be a soft dough and adding too much extra flour will make the bread dry.
-
Place the dough in a lightly oiled bowl, cover and place in the fridge to rise overnight, or in a warm spot for 1-2 hours, until doubled in size.
-
To make the filling, mix together the vegan butter, crushed garlic, finely chopped parsley, nutritional yeast and salt. Cover and store in the fridge until needed. If you have used a non-spreadable variety of butter then make sure you take it out of the fridge about an hour in advance of shaping the loaf so that is has time to soften up.
-
The following day (or once the dough has doubled in size at room temperature), knock back the dough and give it a brief 30 second knead to knock out the air bubbles.
-
Divide the dough into 12 even pieces and shape each one into a ball.
-
Roll each ball out on a lightly floured surface into a circle about 10-11.5 cm/4-4.5 inches wide. They don’t need to be exactly round.
-
Spread a dollop of the garlic butter over the circle then fold it in half like a taco, encasing the filling. Repeat with the rest of the balls of dough, using all of the filling.
-
Grease an approx 11.5 x 21.5 / 8.5 x 4.5 in loaf tin and line with a strip of baking parchment, leaving some overhanging on either side so that you can easily lift the bread out once it is baked.
-
Arrange the dough pieces folded edge down in the loaf tin. You will probably have to squish them together a bit to fit them in.
-
Loosely cover and leave to rise until puffy, about 45-75 minutes. If you gently press the dough with your finger it should spring back slowly, and maybe leave a slight indentation. If it springs back quickly then it needs a little longer, and if the dough deflates then it is over-prooved so keep an eye on it!
-
When the bread is nearly ready, preheat the oven to 180°C/160°C fan/350°F/gas mark 4.
-
Gently brush any exposed dough with a little milk, then bake the loaf for 50 minutes. It should be deep golden and a probe thermometer inserted into the centre should reach at least 90°C/194°F.* If the top is starting to get too dark before the time is up then you can loosley cover it with tin foil.
-
Allow to cool in the tin for 10 minutes then carefully lift it out onto a wire rack and leave to cool for about 30 minutes before serving.
Notes
- See post above for tips, details and step-by-step photos. If you have a question I may have already answered it above!
- As with all of my baking recipes I really do recommend using the metric measurements with a digital scale rather than the cup conversions. Cups are a wildly inaccurate measuring system and you will get far better, more consistent results using a scale, not to mention that it is also easier and less messy than cups!
- I find it easier to weigh out the liquid ingredients using my scale, which is why I have given the amounts in grams. The quantity is the same if using a measuring jug (140ml milk for the tangzhong and 160ml for the dough).
- *If you don’t have a thermometer then a toothpick inserted into the centre of the loaf should go in and out smoothly with little resistance and come out clean.
