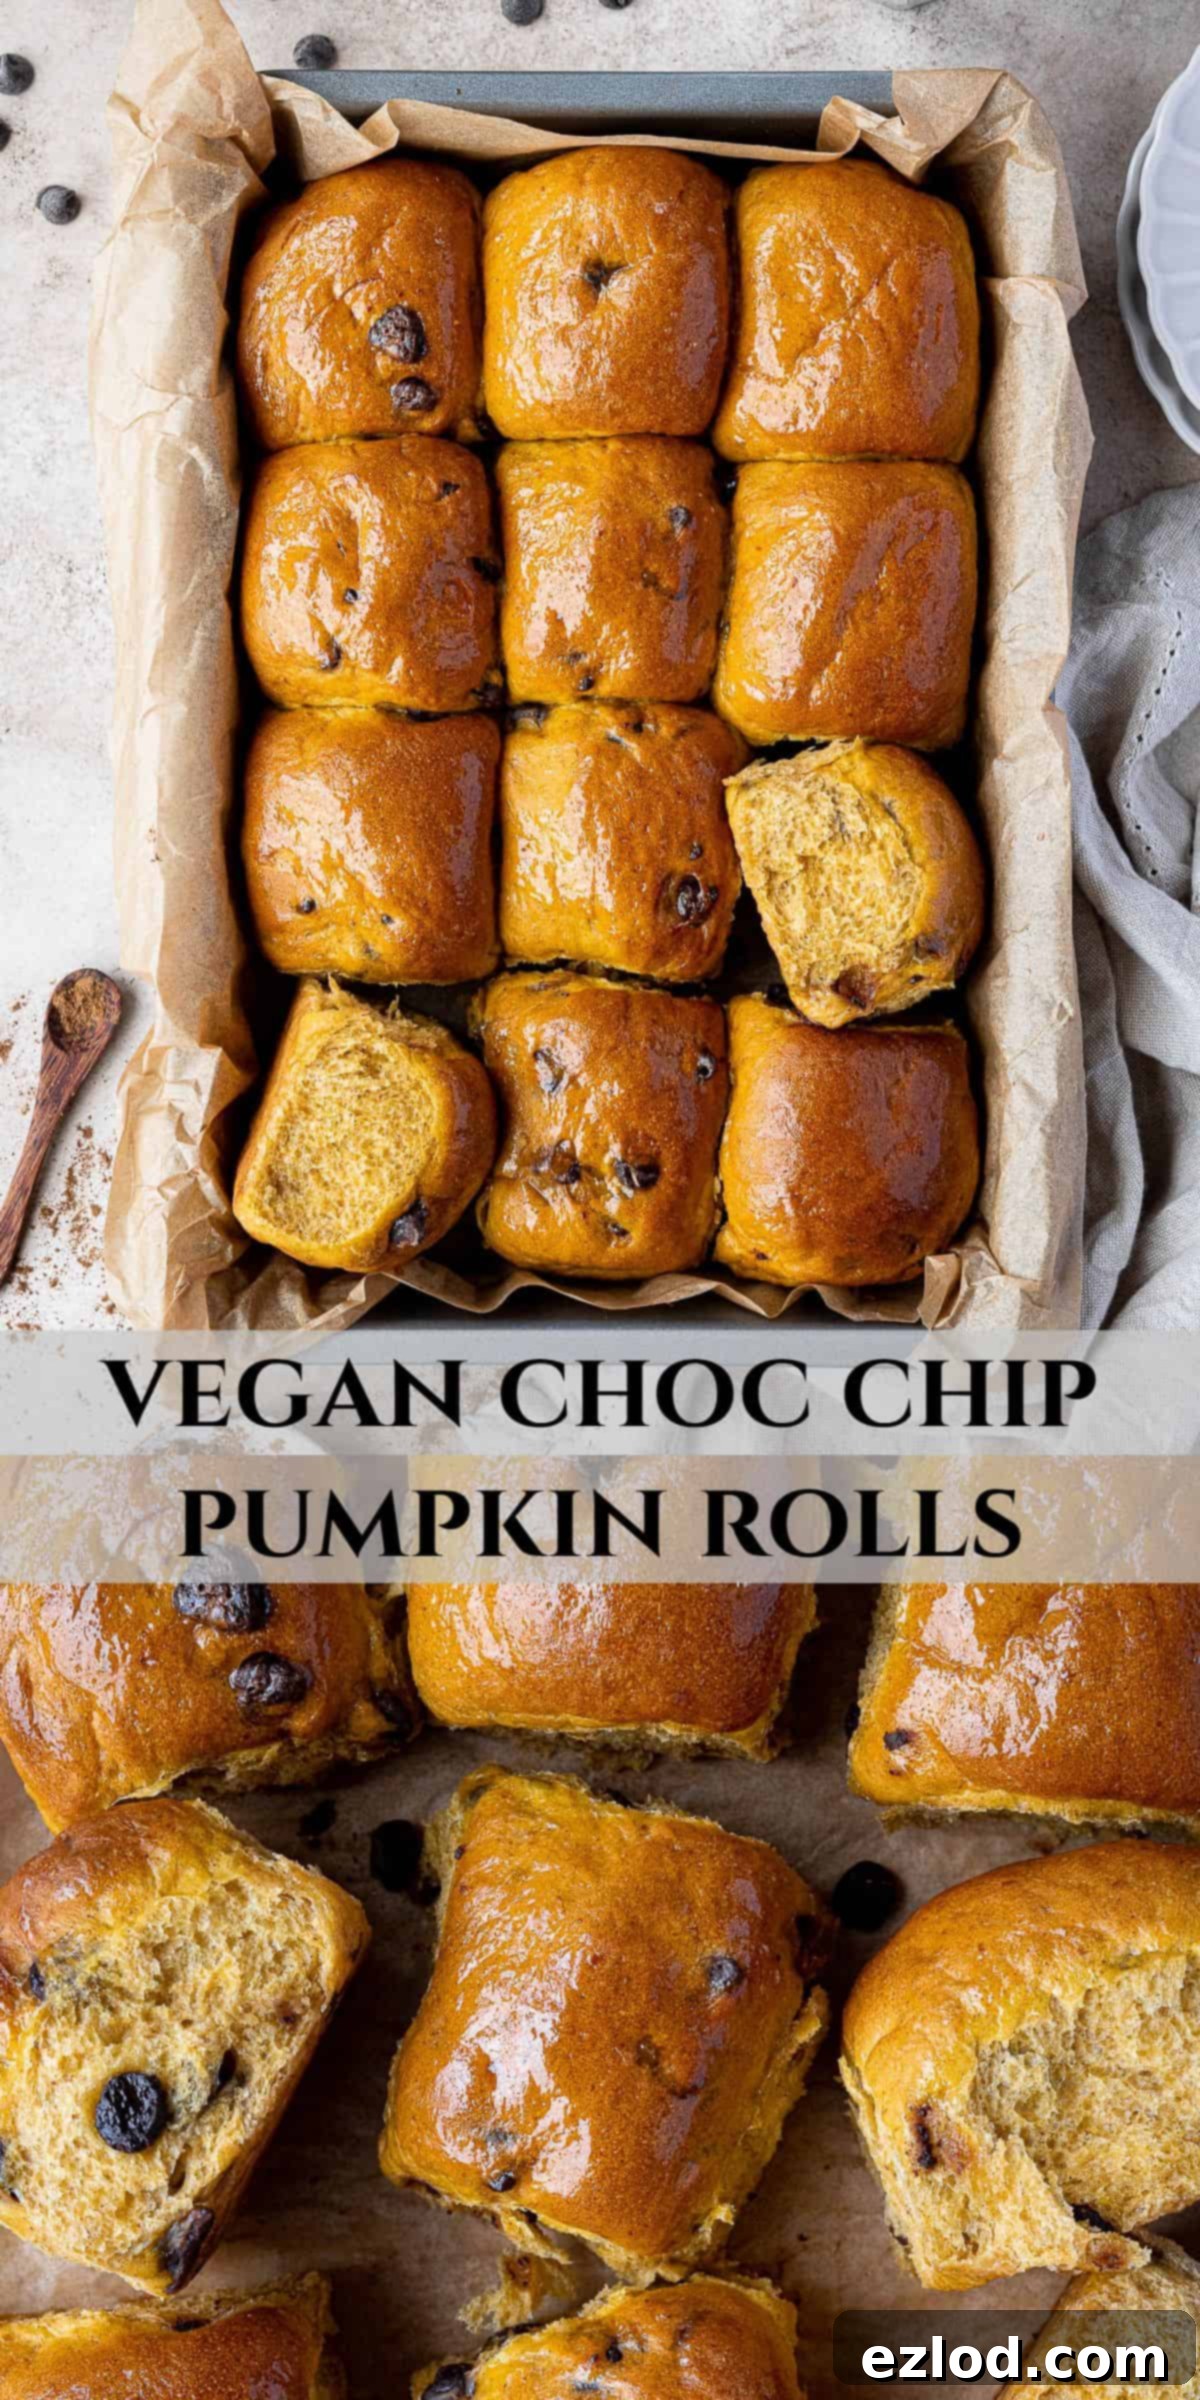
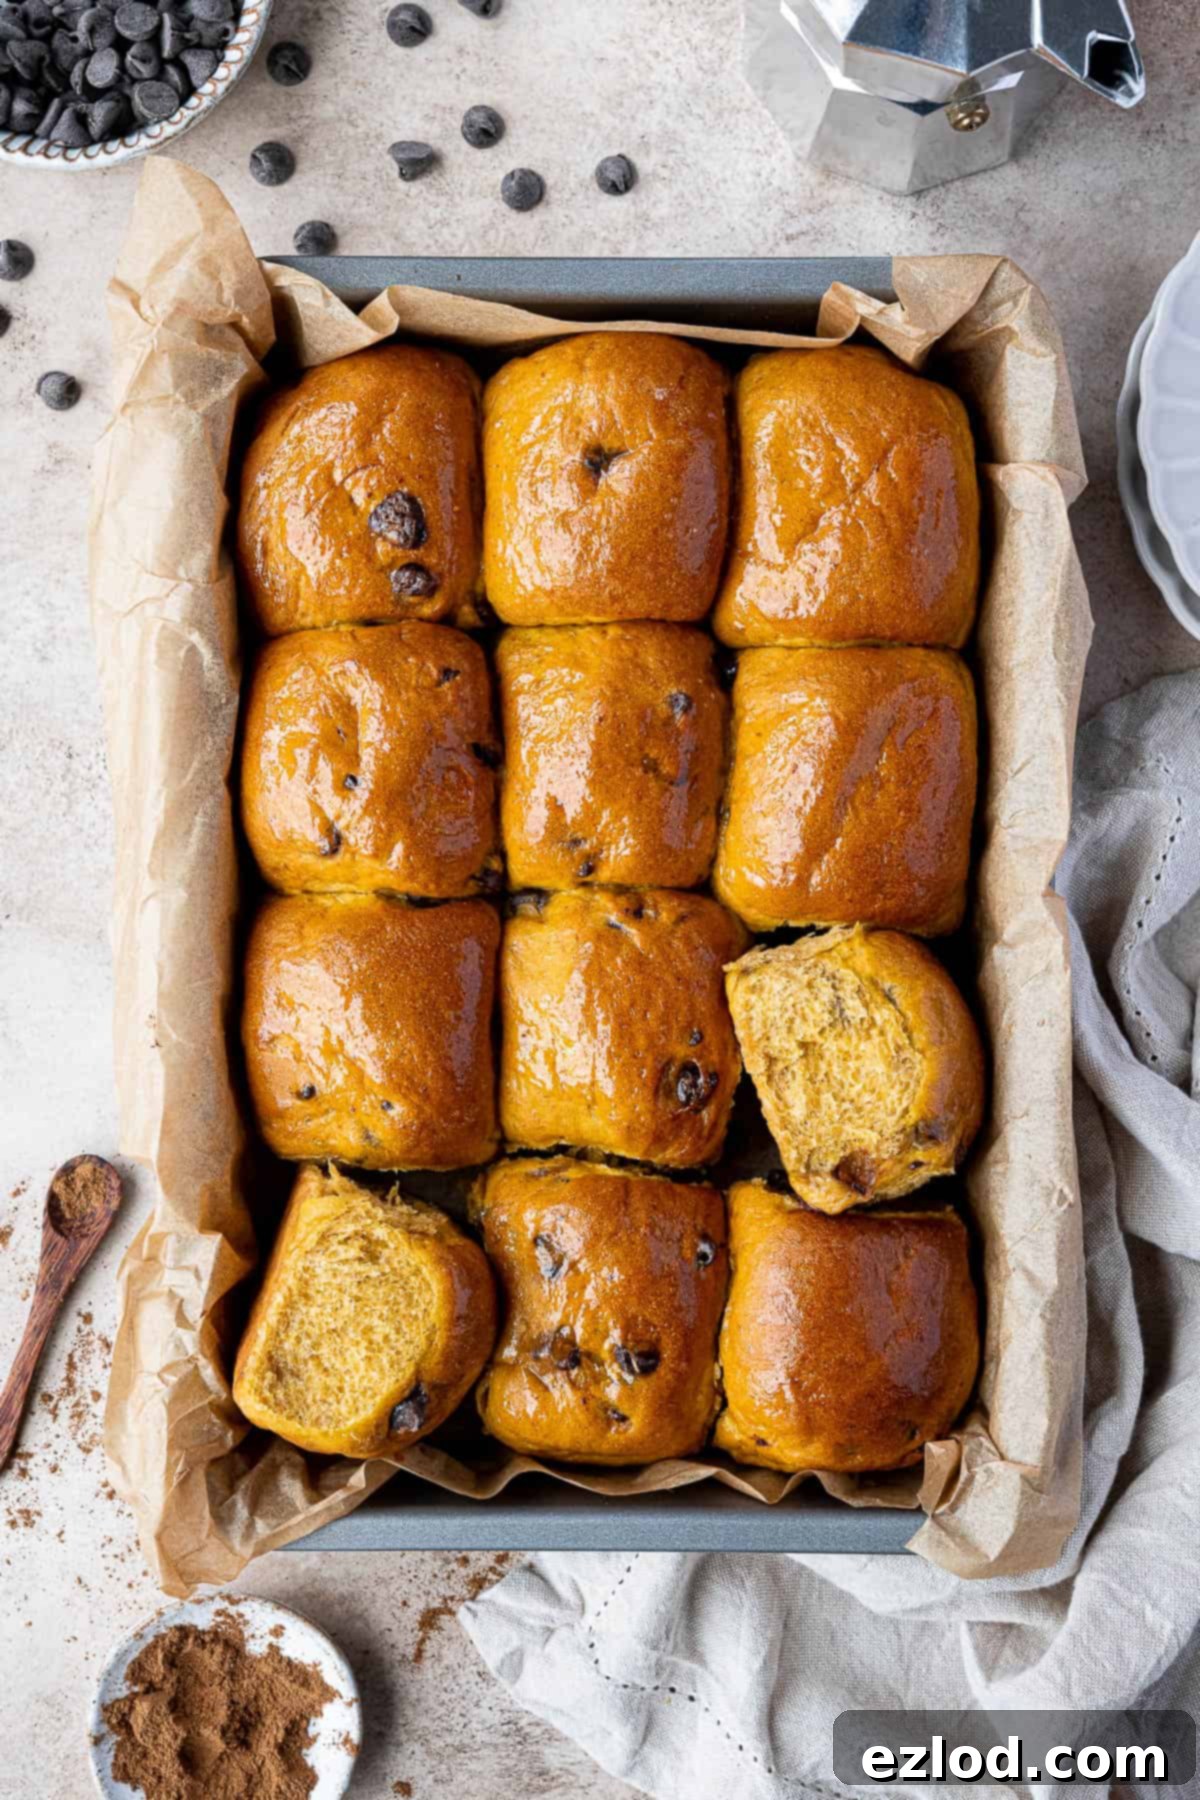
Irresistibly Soft Vegan Chocolate Chip Pumpkin Rolls: Your Ultimate Autumn Baking Guide
Embrace the cozy flavors of autumn with these incredible vegan chocolate chip pumpkin rolls! Imagine sinking your teeth into a roll that’s not just soft and fluffy, but also delightfully sweet, spiced with pumpkin, and generously studded with melty chocolate chips. These aren’t just any ordinary bread rolls; they’re a true seasonal treat, perfect for a comforting breakfast, a satisfying snack, or even a delightful dessert after a meal. What makes them exceptionally soft and keeps them fresh for longer? The secret lies in the clever Japanese tangzhong method, a simple technique that yields an impossibly tender crumb without needing excessive amounts of fat. Don’t let the name intimidate you – it’s surprisingly easy to master!
These sweet vegan pumpkin bread rolls are a celebration of fall. Each bite offers a harmonious blend of warm pumpkin spice, rich chocolate, and the comforting chewiness of perfectly baked bread. Their vibrant orange hue, thanks to the pumpkin puree, makes them as visually appealing as they are delicious. They’re incredibly versatile too – enjoy them warm and plain, slather them with your favorite peanut butter or jam, spread a generous layer of vegan chocolate hazelnut spread, or even slice them in half, toast lightly, and add a dollop of vegan butter. The tangzhong method ensures that these rolls maintain their incredible softness for days, making them ideal for meal prepping or sharing with loved ones.
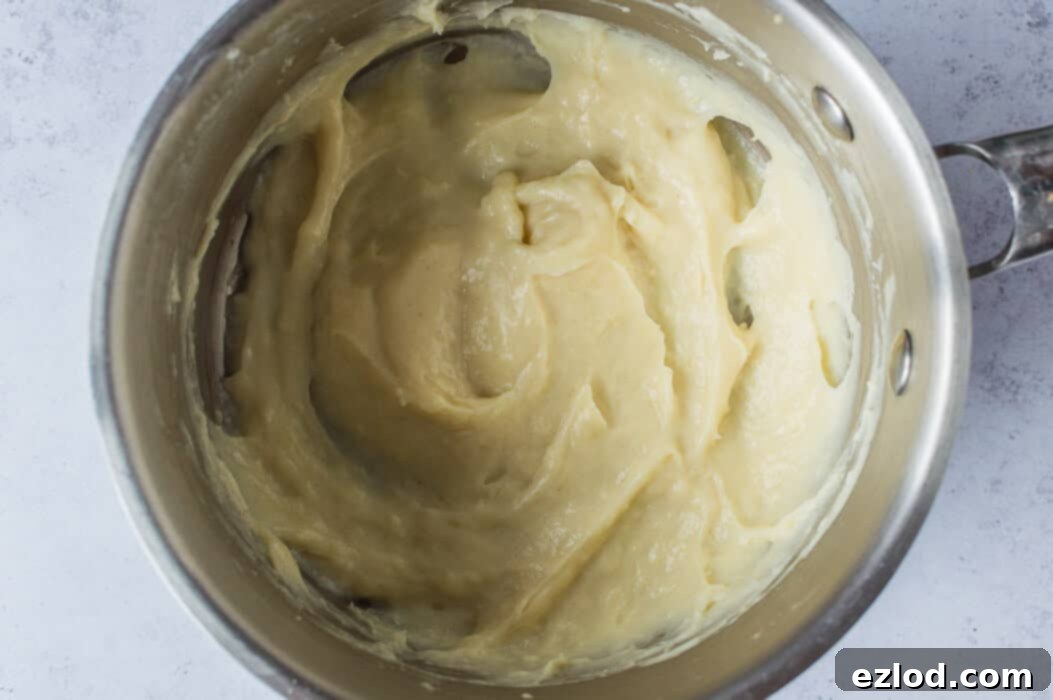
The tangzhong method, also known as a water roux, is a brilliant technique borrowed from Asian baking. It involves cooking a small portion of the flour and liquid (in this case, non-dairy milk) into a thick, pudding-like paste before adding it to the main dough. This process gelatinizes the starches in the flour, allowing them to absorb and retain significantly more moisture. The result? Bread that’s incredibly soft, moist, and stays fresh for a remarkably longer period compared to conventional bread. It’s a simple step that makes a huge difference in the final texture of your rolls, elevating them from good to absolutely extraordinary.
Essential Ingredients for Your Vegan Chocolate Chip Pumpkin Rolls
Crafting these delectable pumpkin rolls requires a few key ingredients, each playing a vital role in achieving their perfect texture and flavor. Using high-quality ingredients will always yield the best results, so let’s dive into what you’ll need:
For the Tangzhong (Water Roux):
- White Bread Flour: This is crucial for developing strong gluten, which contributes to the rolls’ chewy yet soft structure. Bread flour has a higher protein content than all-purpose flour, making it ideal for yeast breads. While all-purpose flour can work, the texture might be slightly less resilient and fluffy. Avoid wholemeal or whole wheat flour, as its higher fiber content can result in a denser, heavier roll.
- Unsweetened Non-Dairy Milk: Soy milk is my top recommendation for baking due to its higher protein content, which closely mimics dairy milk and interacts well with gluten development. However, any unsweetened non-dairy milk like almond, oat, or cashew will also work beautifully. Ensure it’s unsweetened to control the overall sweetness of the rolls.
For the Dough:
- Pumpkin Puree: The star ingredient, bringing not only its distinctive autumnal flavor but also a beautiful natural orange color and essential moisture to the dough. Always use plain canned pumpkin puree, not pumpkin pie filling, which contains added spices and sugar that would alter the recipe’s balance. Homemade pumpkin puree works wonderfully too, just ensure it’s cooled to prevent activating the yeast prematurely.
- Cold Unsweetened Non-Dairy Milk: Used in the main dough mixture, keeping it cold helps to quickly cool down the warm tangzhong and ensure the yeast isn’t exposed to excessive heat, which could kill it. Again, soy milk is preferred for its protein content.
- Light Brown Soft Sugar: This sugar adds a deep, molasses-like flavor that complements the pumpkin and spices, as well as providing sweetness. It also helps with the browning of the crust and tenderizes the crumb. Coconut sugar, granulated sugar, or caster sugar can be substituted, but avoid liquid sweeteners like maple syrup or agave, as they can drastically alter the dough’s hydration and texture.
- White Bread Flour: As with the tangzhong, bread flour is preferred here for its excellent gluten-forming properties. It contributes to the desired chewy, soft, and airy texture of the rolls.
- Instant/Fast Action Yeast: For convenience and reliability, instant yeast is highly recommended. It can be added directly to the flour without prior activation, saving time. If you only have active dry yeast, refer to the “What Kind of Yeast?” section below for instructions on how to activate it. Always check the expiry date of your yeast; old yeast can lead to a flat, dense bread.
- Salt: A non-negotiable ingredient in bread baking. Salt enhances the flavor of all other ingredients, regulates yeast activity, and strengthens the gluten structure. Do not skip it, even if you’re trying to reduce sodium, as it profoundly affects the taste and texture of the final product.
- Pumpkin Spice (Optional): A ready-made pumpkin spice blend is convenient and widely available. In regions where it might be harder to find, you can create your own blend with cinnamon, ginger, nutmeg, and allspice. Feel free to adjust the amount to your taste or omit it entirely if you prefer a simpler chocolate pumpkin roll.
- Vegan Butter/Margarine: Adds richness, tenderness, and a lovely flavor to the rolls. While block vegan butter is generally recommended for baking consistency, a good quality tub margarine (ensure it’s not a low-fat variety) can also be used here. Make sure it’s softened to room temperature for easier incorporation into the dough.
- Chocolate Chips: Dark chocolate chips are typically vegan, but always double-check the ingredients list to ensure they don’t contain any dairy. They provide pockets of rich, melty chocolate that perfectly balance the spiced pumpkin flavor.
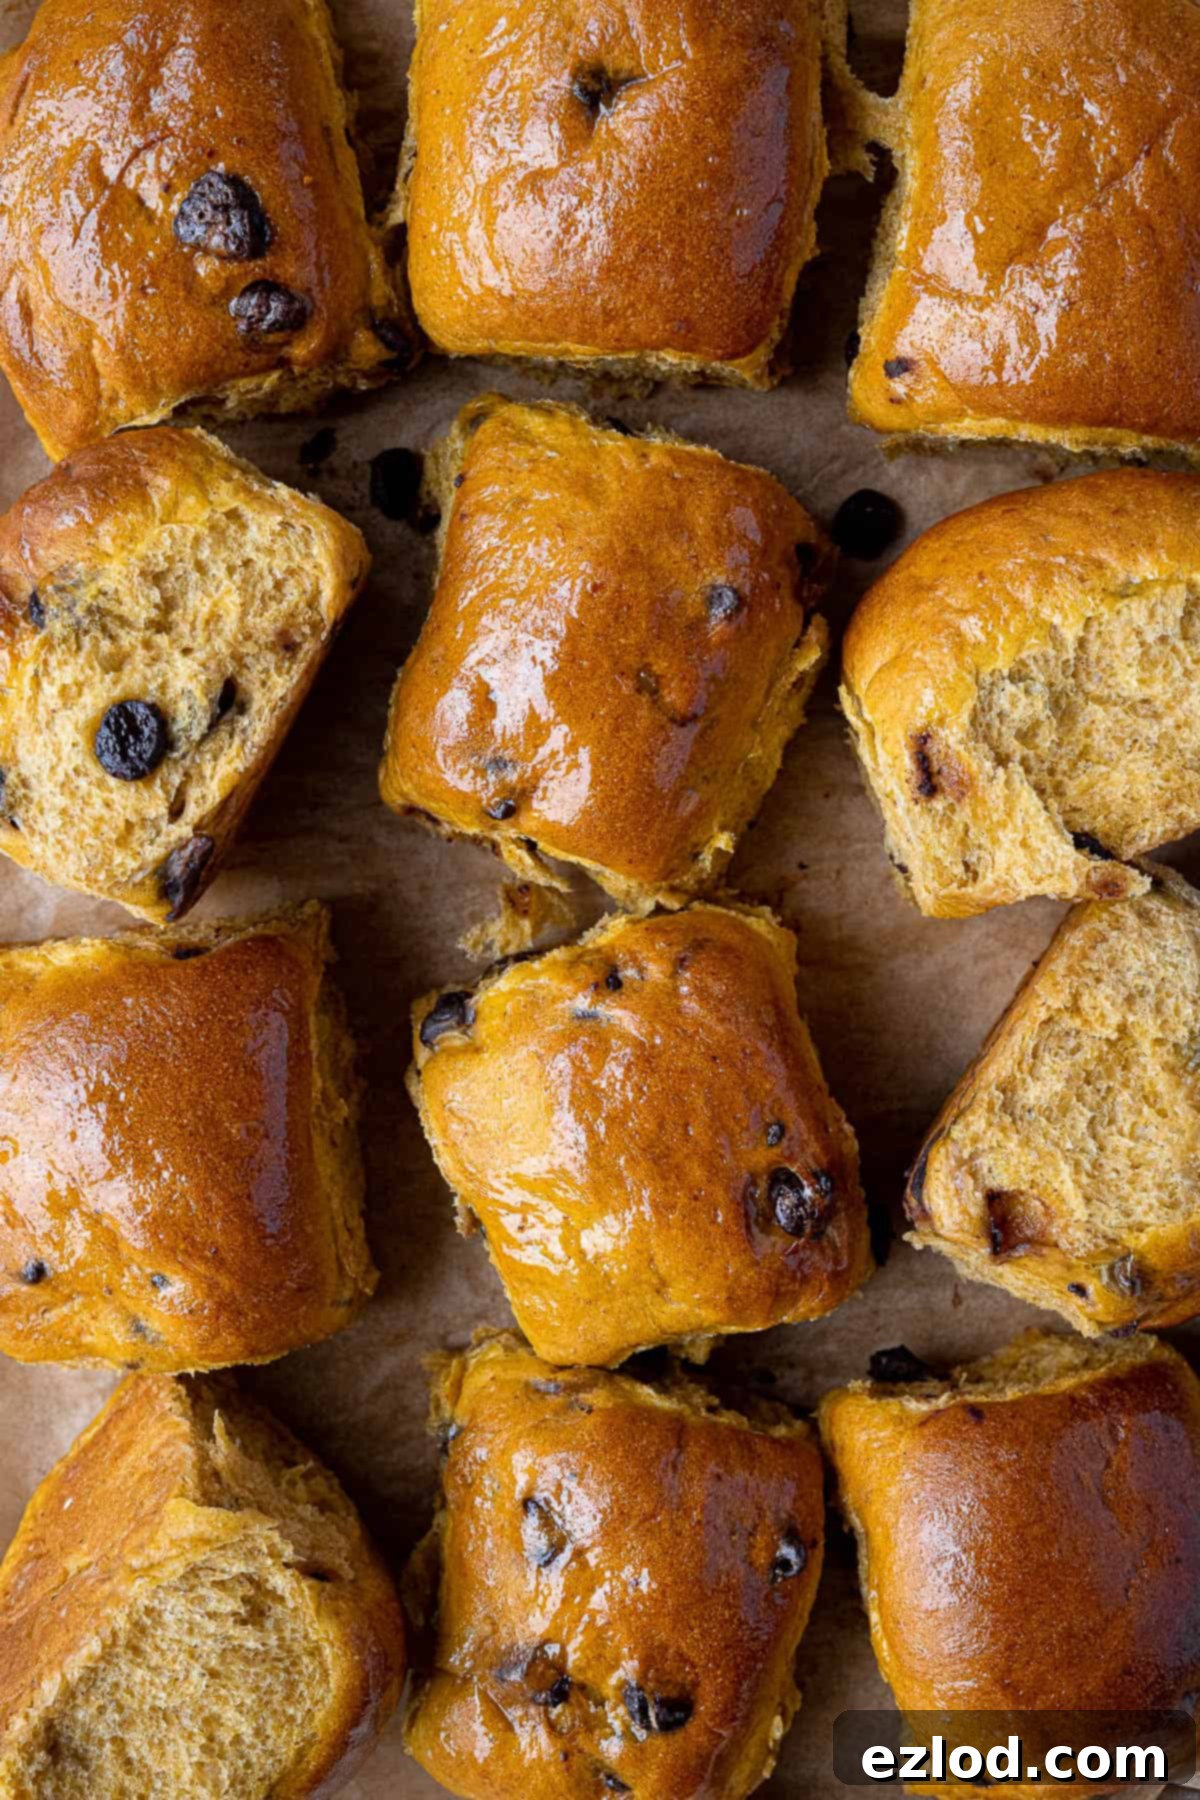
Step-by-Step Guide: Crafting Your Chocolate Chip Pumpkin Rolls
(Detailed measurements and full instructions are provided in the comprehensive recipe section at the end of this page.)
1. Prepare the Tangzhong (Water Roux):
In a small saucepan, combine the bread flour and gradually whisk in the non-dairy milk until no lumps remain. This initial mixing is key to a smooth roux. Place the saucepan over a medium-low heat. Whisk continuously and gently. The mixture will begin to thicken, transforming into a thick, translucent paste or a pudding-like consistency. This usually takes only a few minutes. Once thickened, remove from heat immediately.
2. Combine Wet Ingredients with Tangzhong:
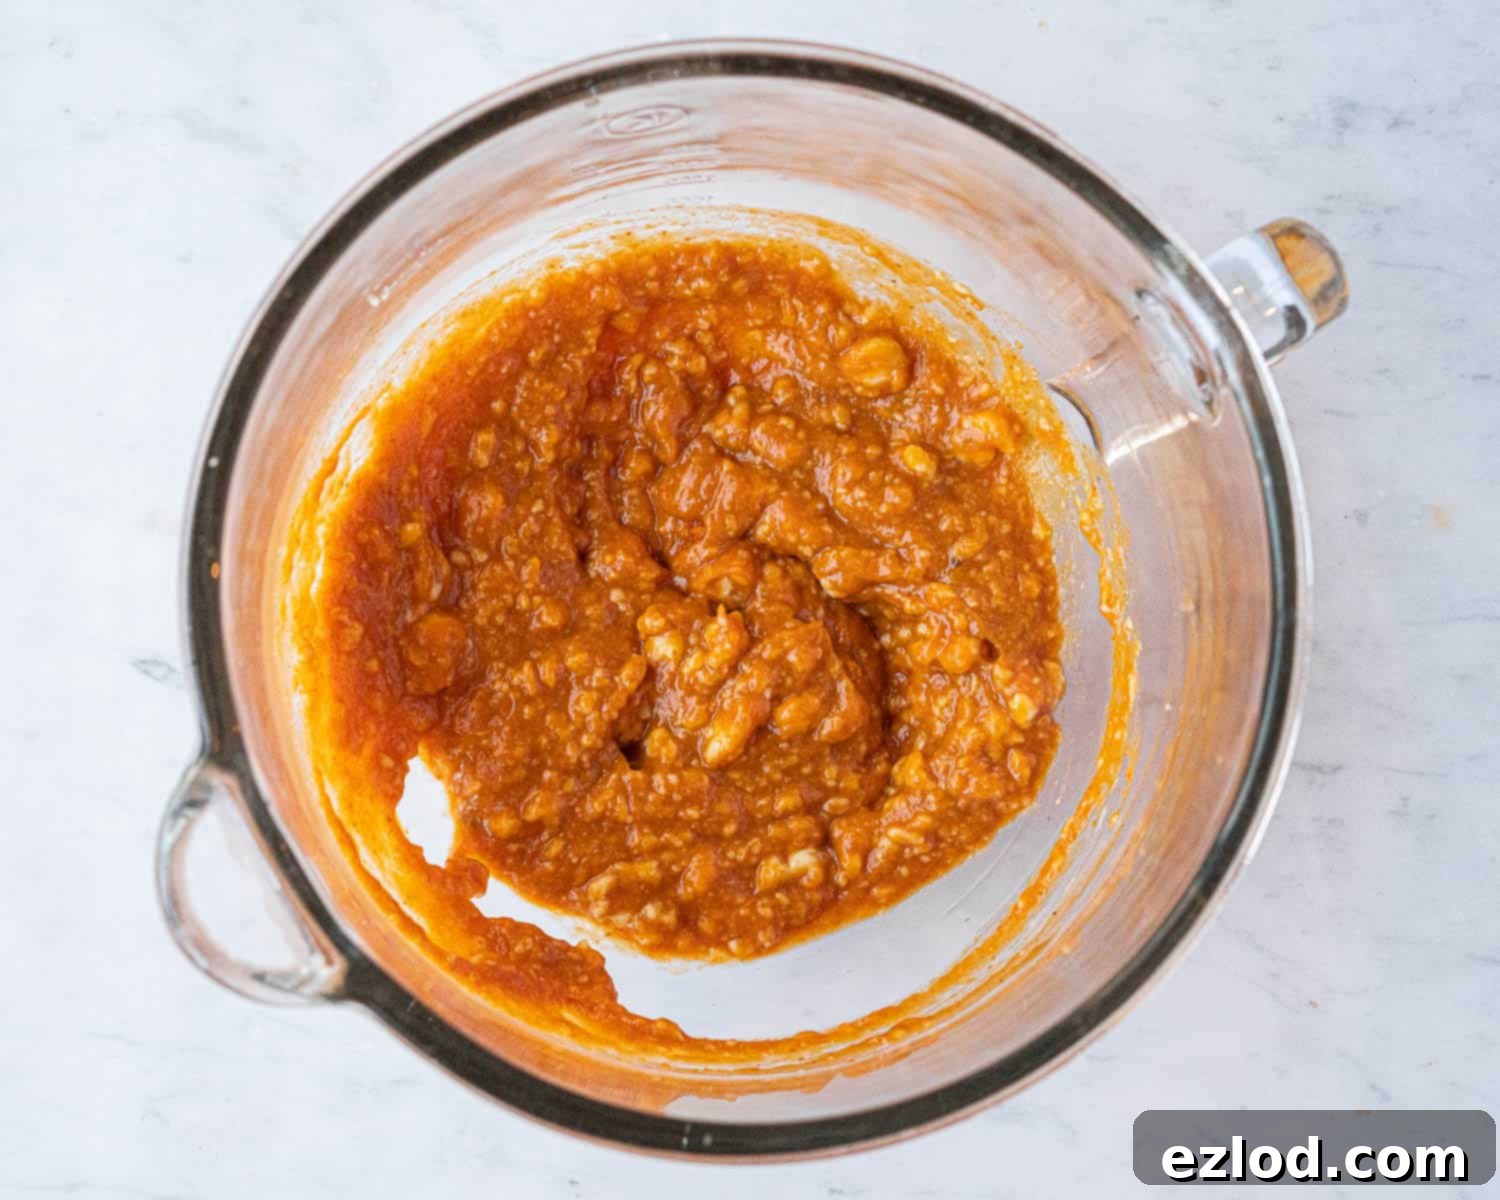
Scrape the warm tangzhong mixture into the bowl of a stand mixer fitted with a dough hook. Add the cold non-dairy milk, pumpkin puree, and light brown soft sugar. Stir these ingredients together until roughly combined. The goal here is to help cool down the tangzhong; don’t worry if it’s a bit lumpy at this stage, as it will smooth out later. Cooling the tangzhong is crucial to protect the yeast from excessive heat.
3. Add Dry Ingredients and Initial Mixing:
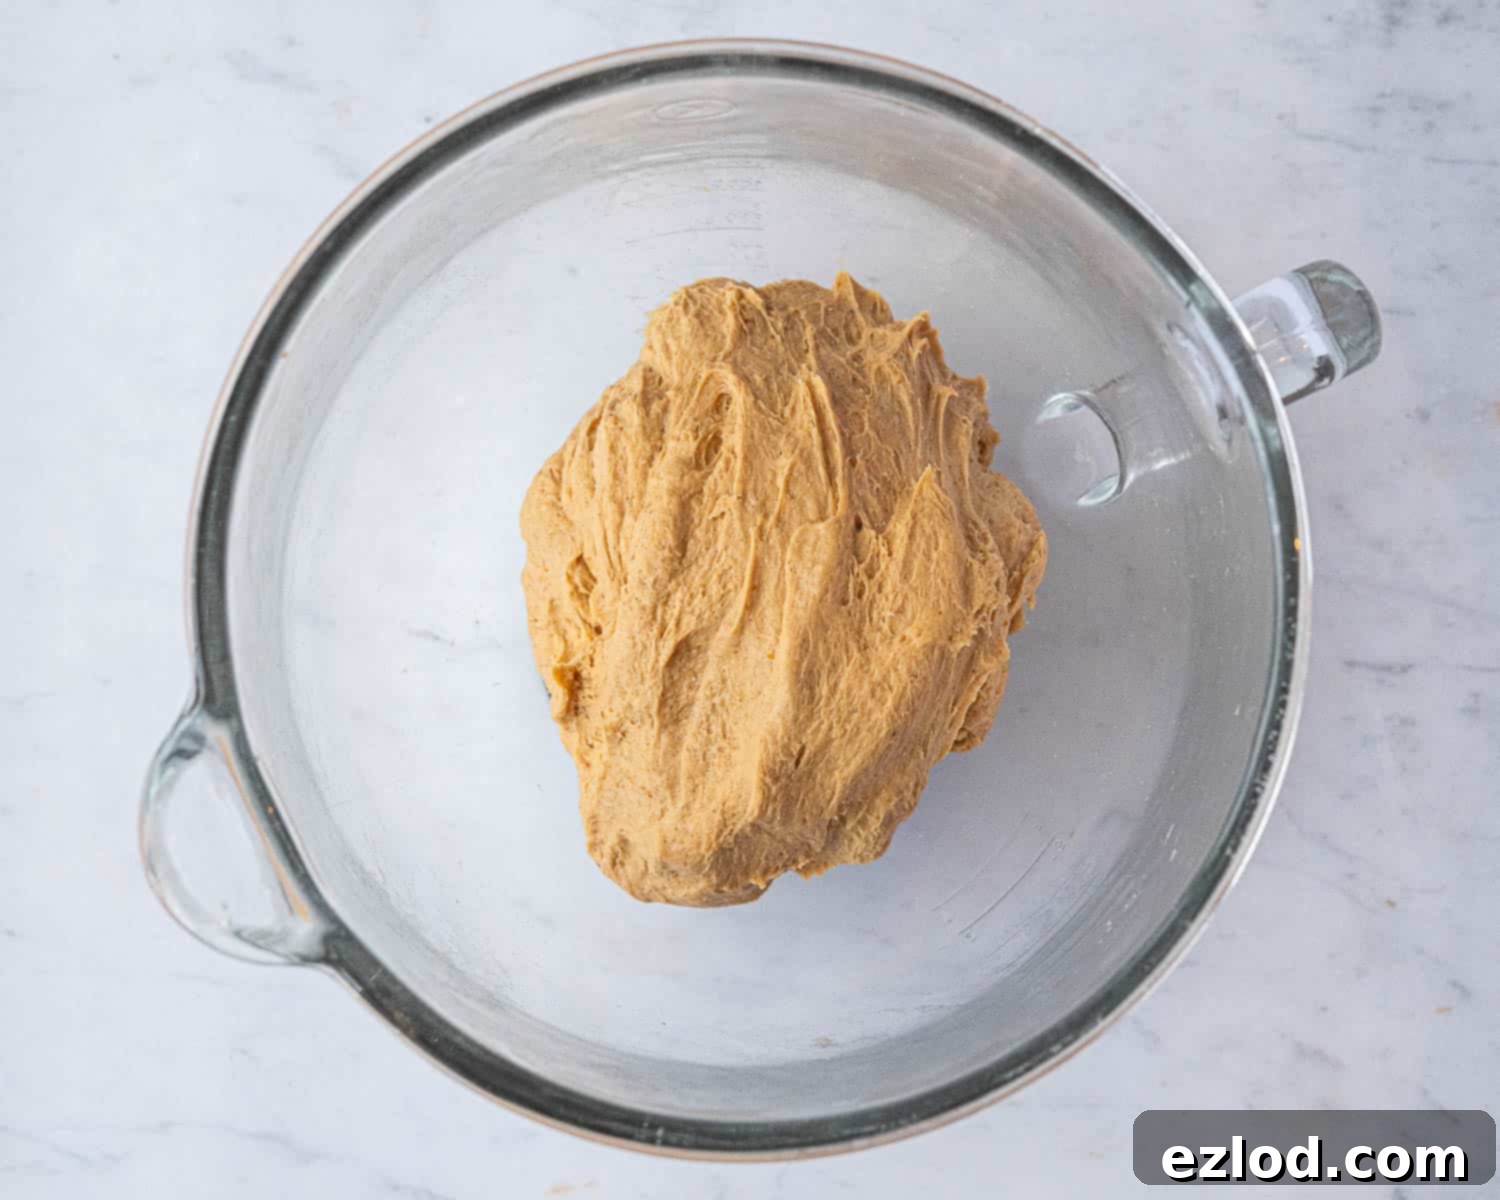
To the bowl with the wet ingredients, add the remaining bread flour, instant yeast, pumpkin spice (if using), and salt. It’s a good practice to add the salt on one side of the bowl and the yeast on the other, preventing direct contact that can sometimes inhibit yeast activity. With the stand mixer on a low speed, mix for approximately 4 minutes. During this time, the ingredients will come together to form a shaggy, rough dough. Increase the mixer speed to medium and continue mixing. The dough will transform, becoming smoother, more cohesive, and beginning to develop elasticity.
4. Incorporate Vegan Butter and Final Kneading:
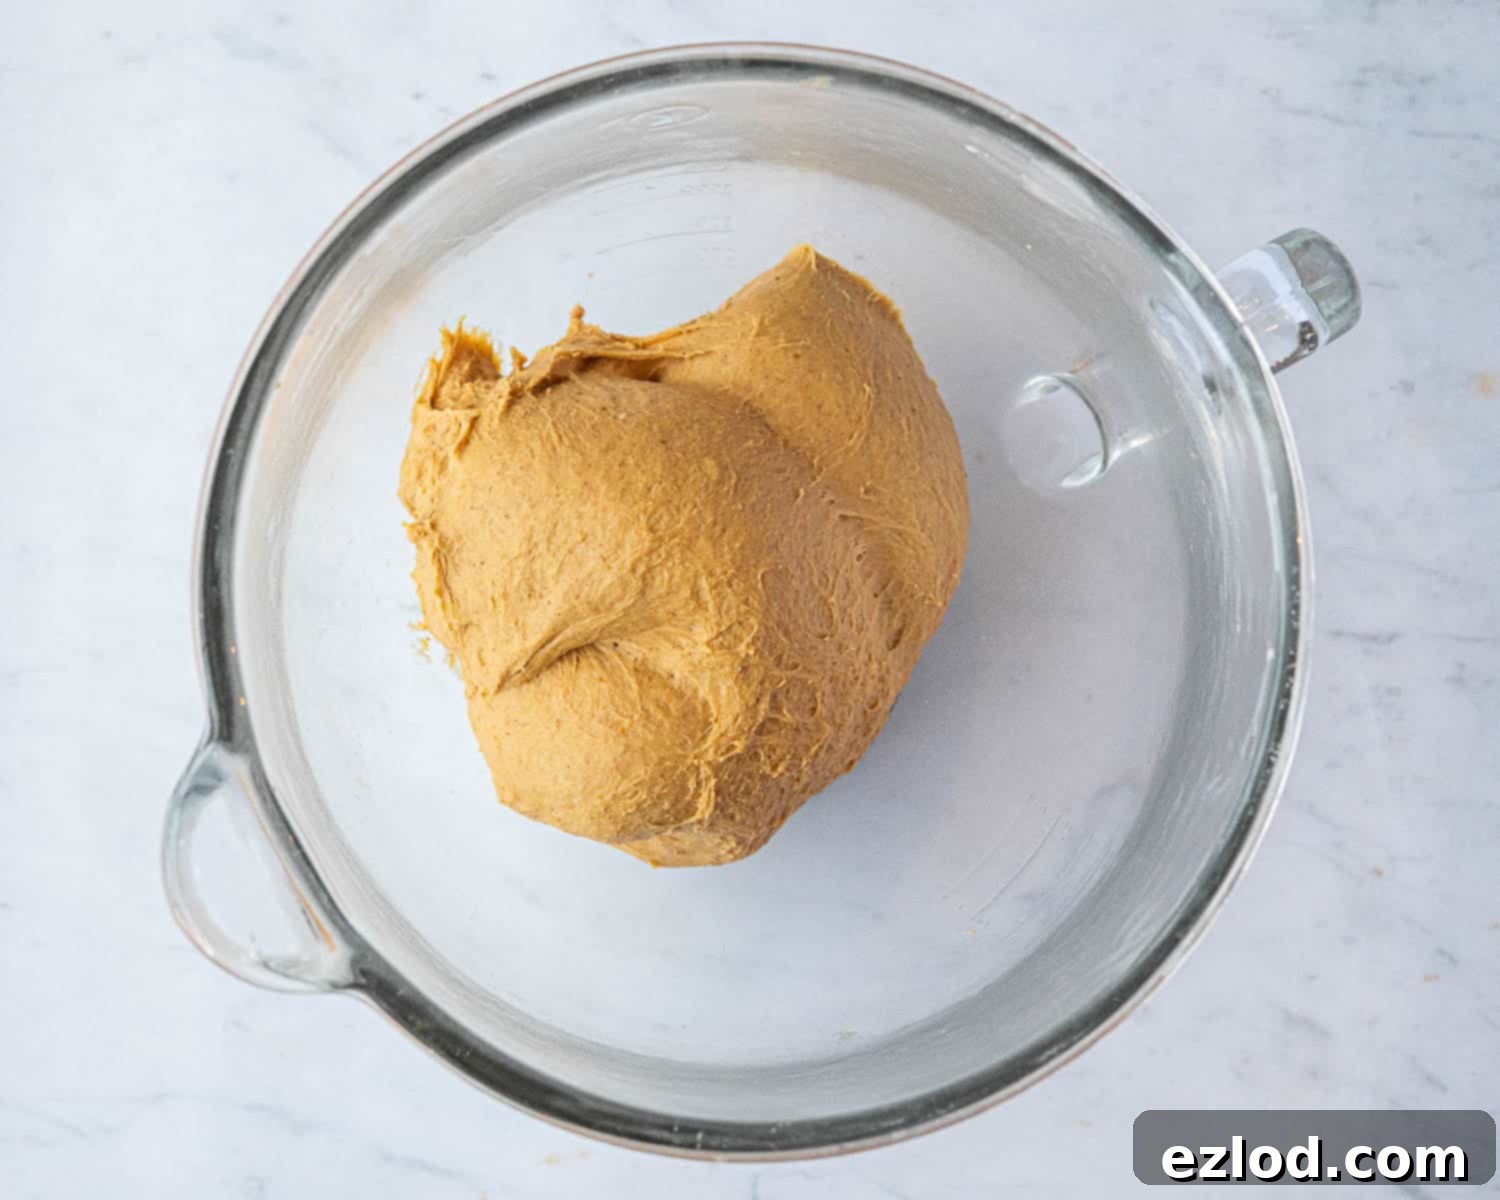
Add the softened vegan butter to the dough. Continue mixing on medium speed. This stage is important; the butter will initially make the dough seem greasy and slippery, but as kneading continues, it will be fully absorbed. The dough will become incredibly smooth, elastic, and will cleanly pull away from the sides of the bowl. This process usually takes 8-10 minutes, ensuring optimal gluten development for a soft and airy crumb.
5. First Rise (Bulk Fermentation):
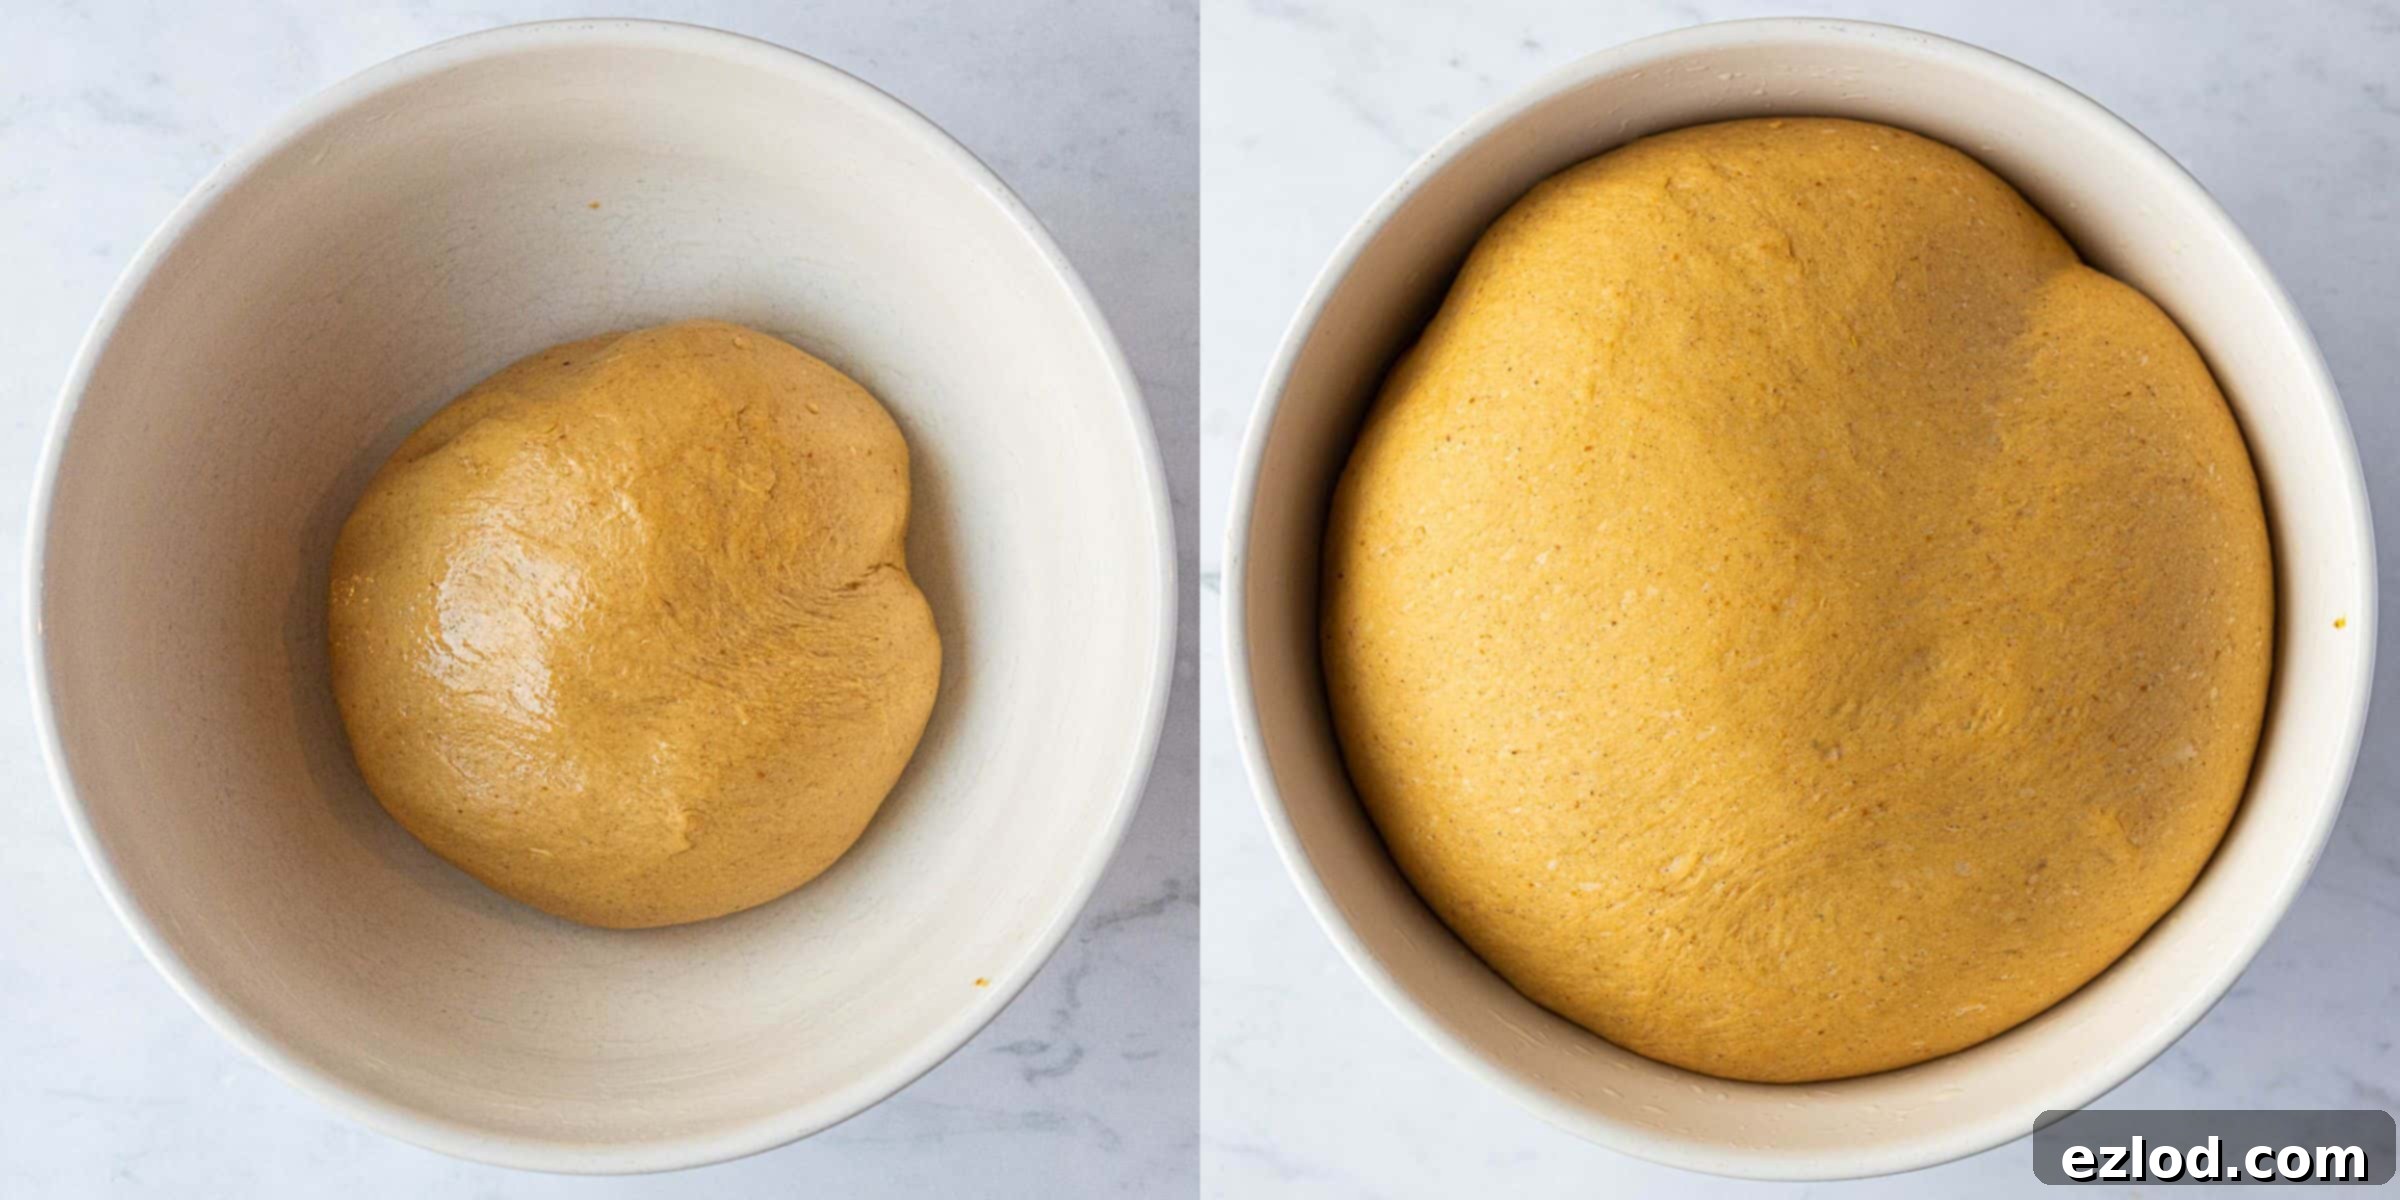
Lightly oil a clean bowl. Transfer the kneaded dough to this bowl, turning it once to coat lightly in oil. Cover the bowl with plastic wrap or a damp tea towel and set it aside in a warm place to rise. The goal is for the dough to double in size, which typically takes about 1.5 to 2 hours, depending on the ambient temperature. A warm, draft-free environment is ideal for optimal rising.
6. Add Chocolate Chips:
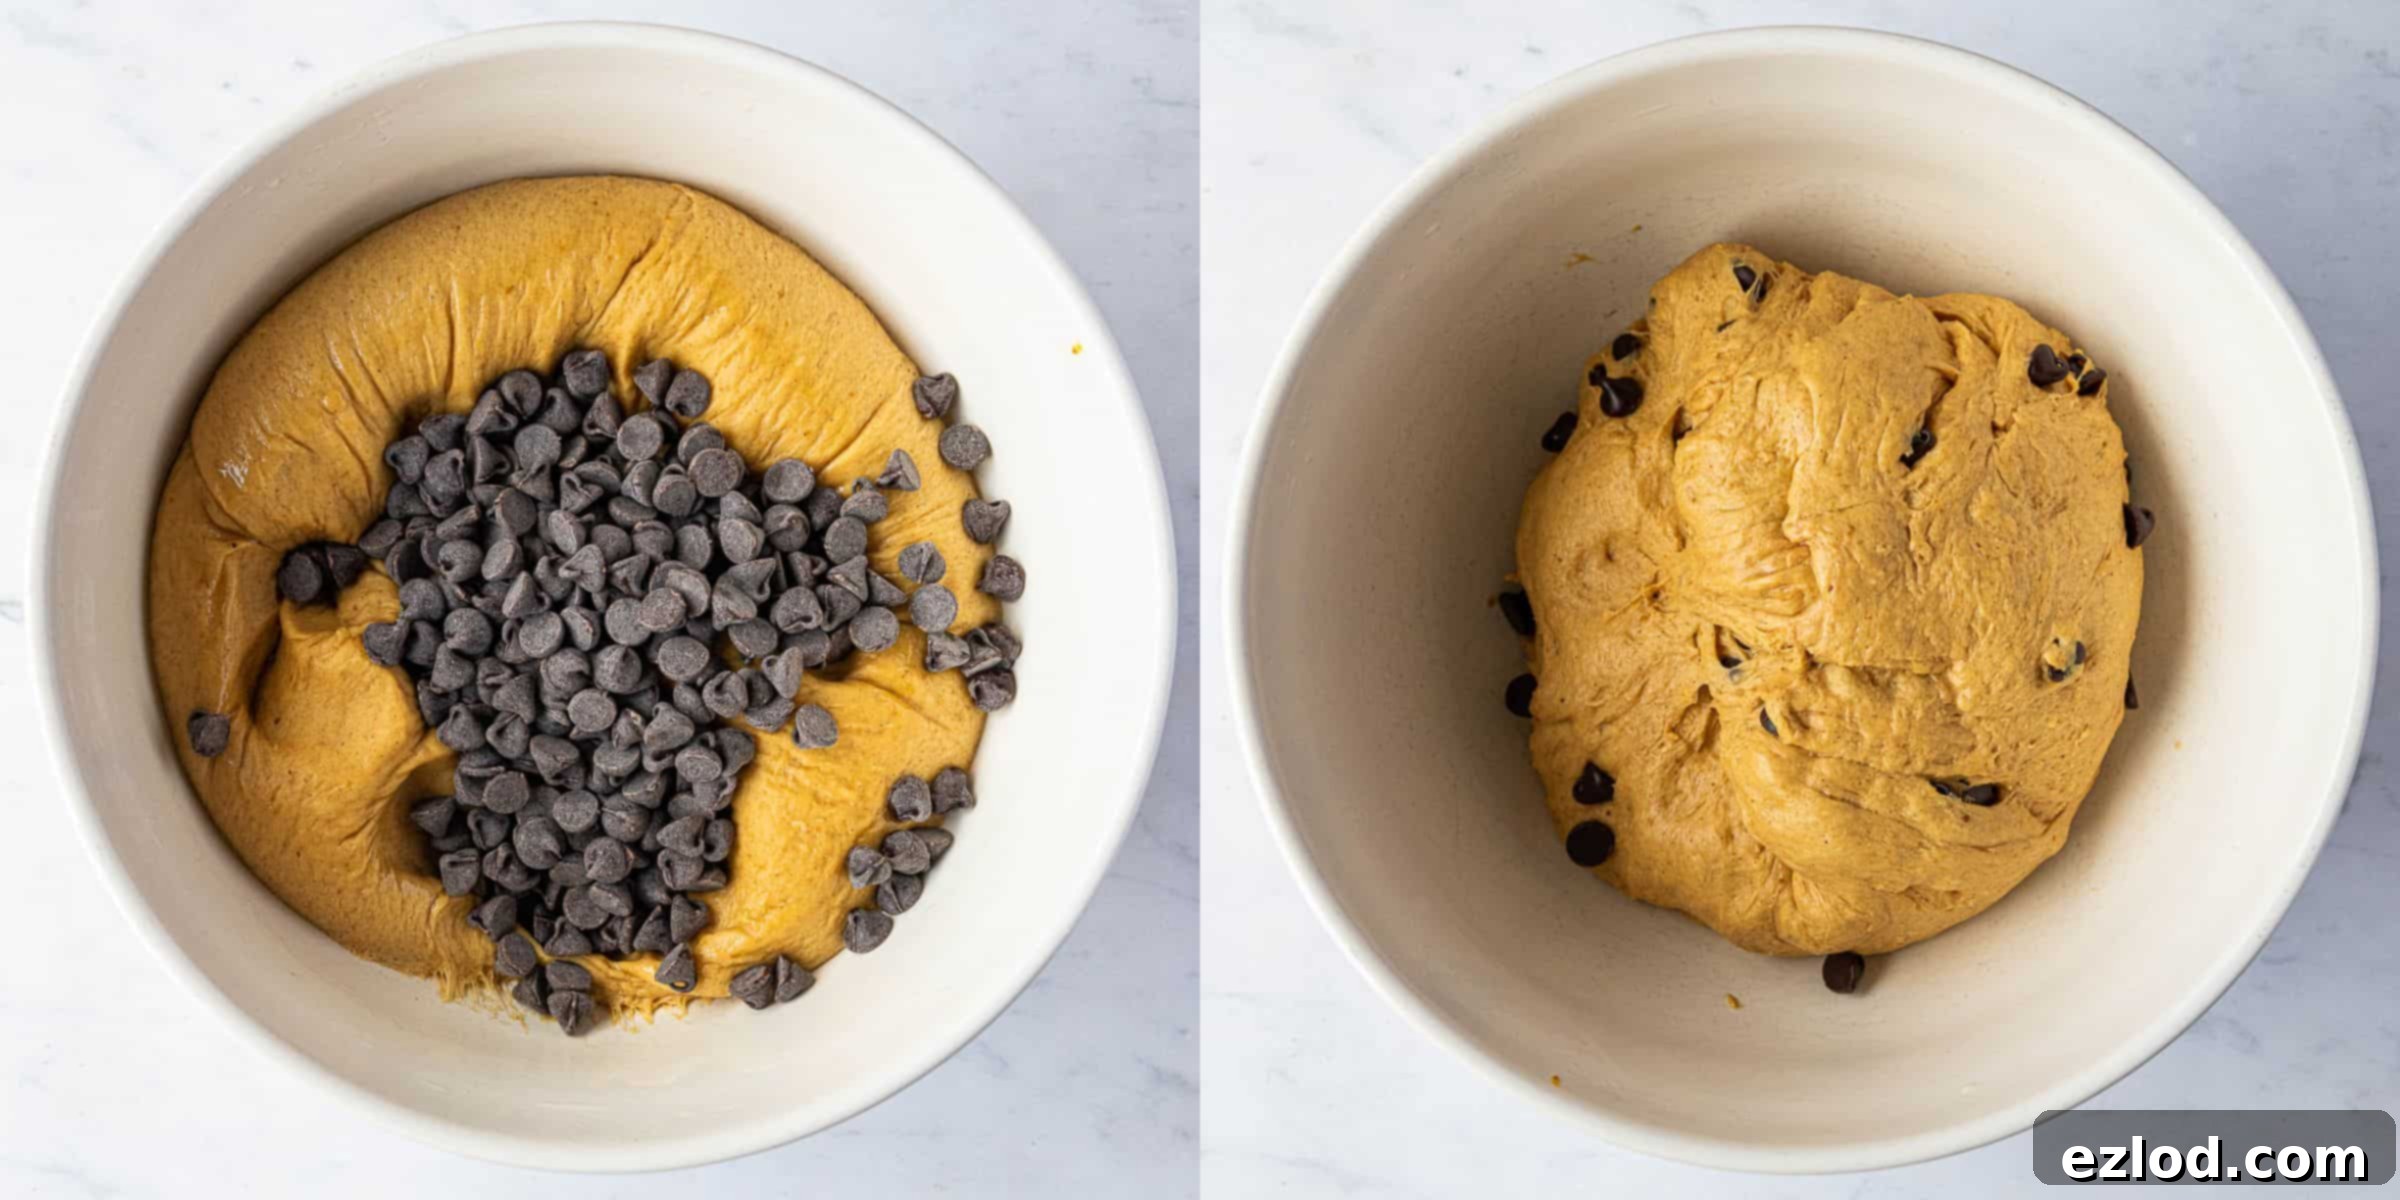
Once the dough has doubled, gently punch it down to release the air. This process is called “degassing.” Turn the dough out onto a lightly floured surface or a clean countertop. Scatter the chocolate chips over the dough. Knead the dough gently for a few minutes until the chocolate chips are evenly distributed throughout. Be careful not to overwork the dough at this stage.
How To Shape Your Vegan Chocolate Chip Pumpkin Rolls:
Achieving perfectly round, smooth rolls is easier than you think with these simple shaping steps:
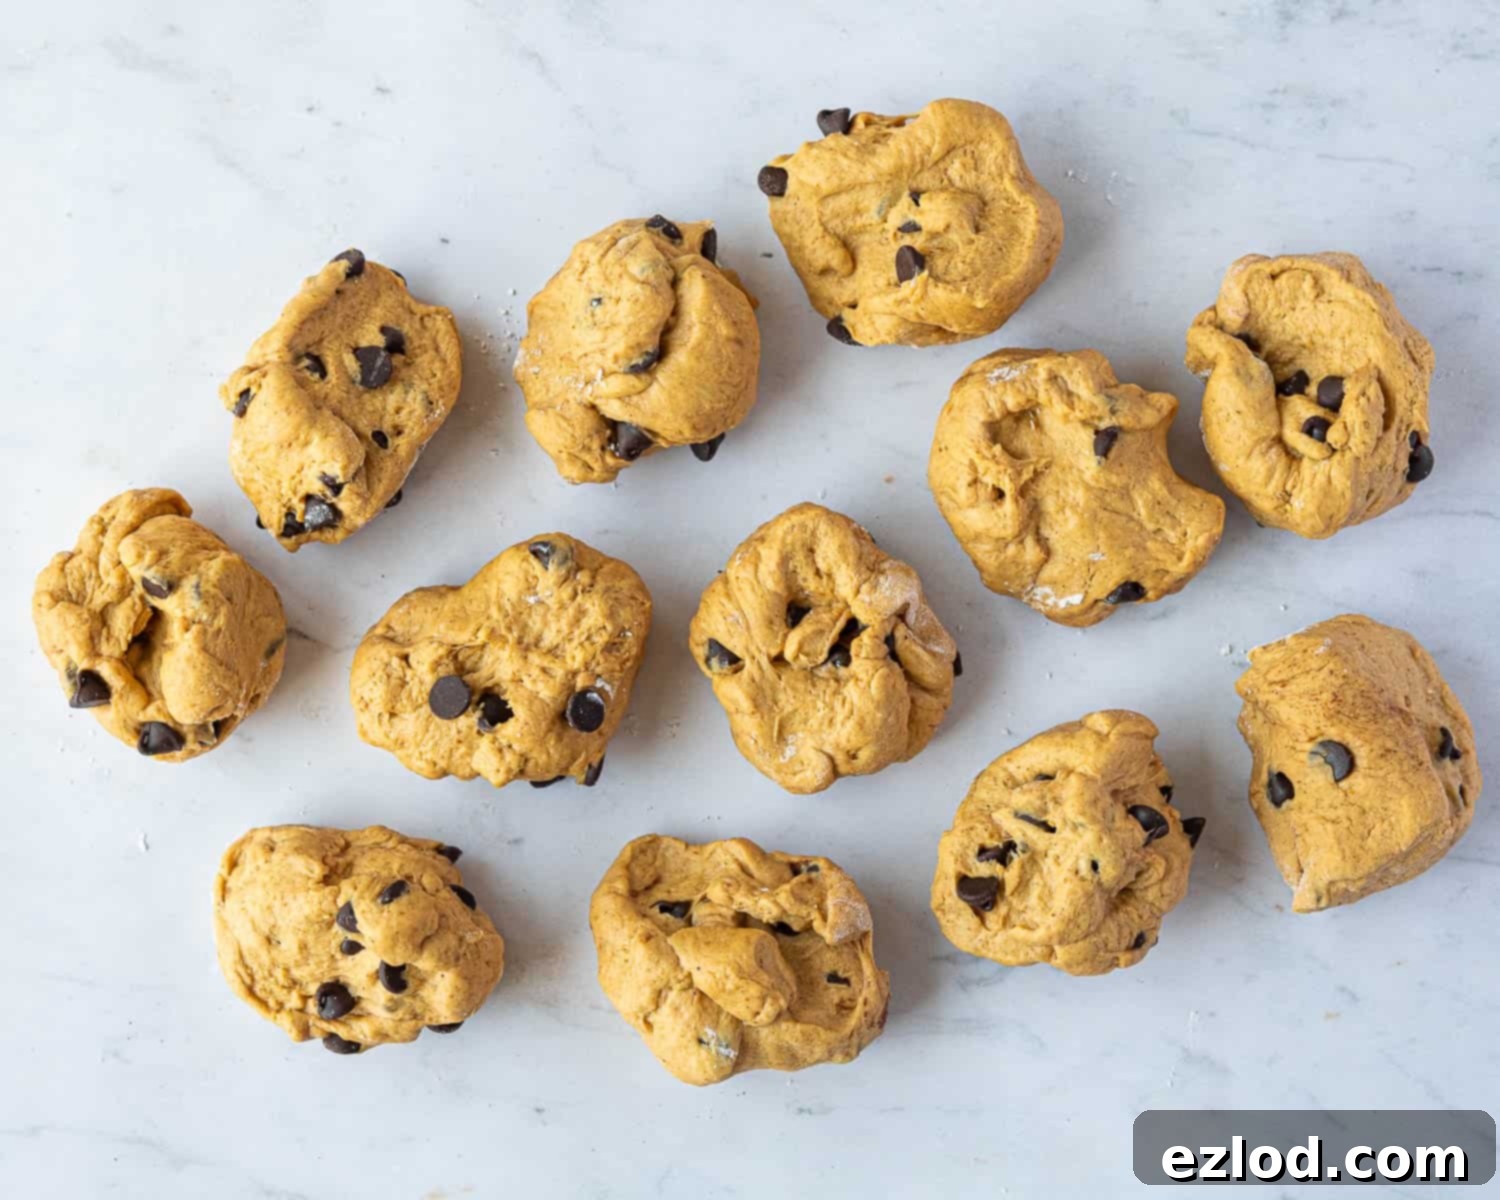
First, divide the dough into 12 equal pieces. For accuracy and consistency, using a digital kitchen scale to weigh each piece is highly recommended. Aim for approximately 70-75 grams per piece.
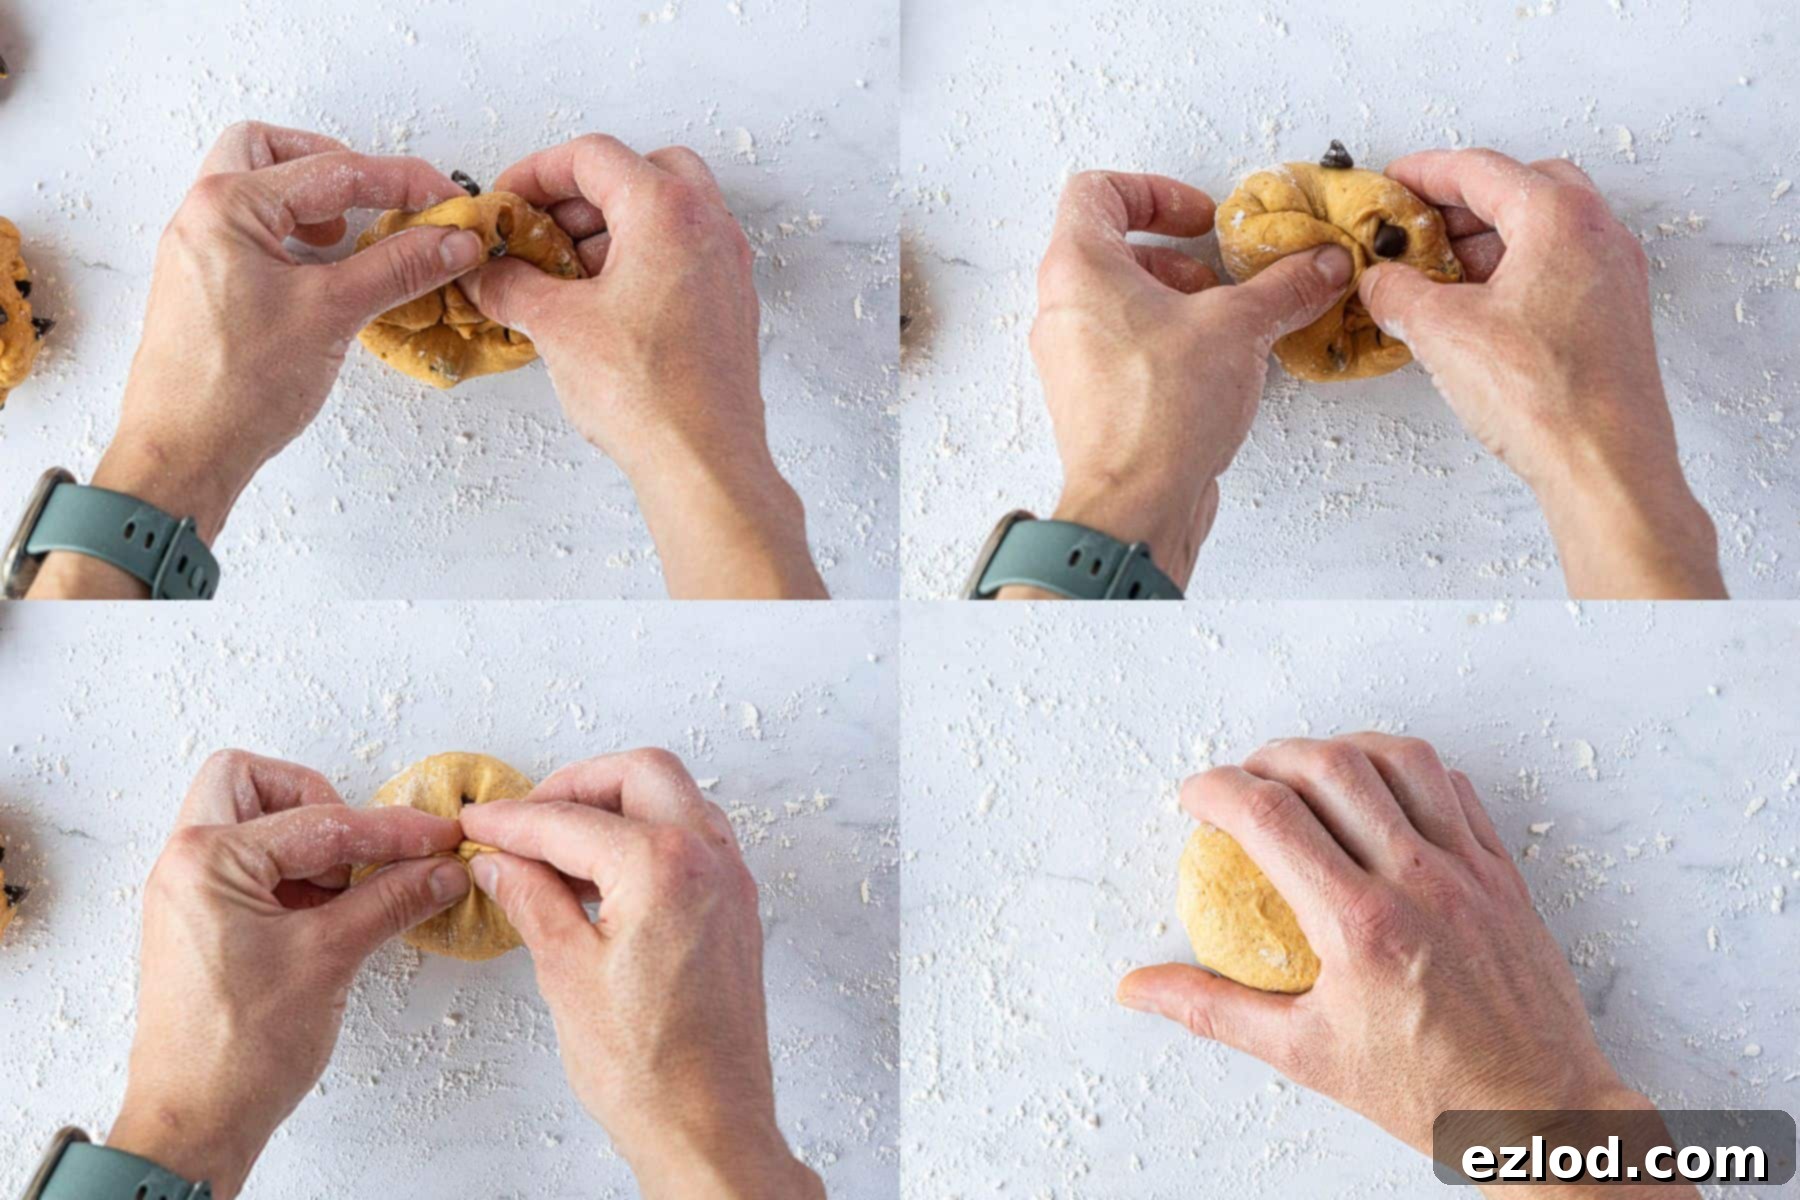
Take one piece of dough. Flatten it slightly, then gather all the edges towards the center, pinching them firmly together to create a smooth top surface and a sealed bottom. This technique helps to create tension on the dough’s surface, which contributes to a nice, round roll. Try your best to tuck any exposed chocolate chips inside to prevent them from burning during baking. Flip the ball over so the pinched seam is underneath. Cup your hand over the top of the dough ball, applying gentle pressure, and roll it in a circular motion on your countertop. This motion will further smooth out the surface and create a taut, even sphere. Repeat for all remaining dough pieces.
7. Second Rise (Proofing):
Line an approximately 20 x 30 cm (8 x 12 inch) baking tin with parchment paper. Arrange the shaped dough balls evenly spaced in the prepared tin. Loosely cover the tin with plastic wrap or a damp cloth and allow them to rise in a warm spot until they look puffy and have nearly doubled in size again. This second rise typically takes about 45-75 minutes. A good test for readiness is the “poke test”: gently press a finger into the dough; if it springs back slowly and leaves a slight indentation, it’s ready. If it springs back quickly, it needs more time. If it deflates, it’s over-proofed, so keep a close eye on it!
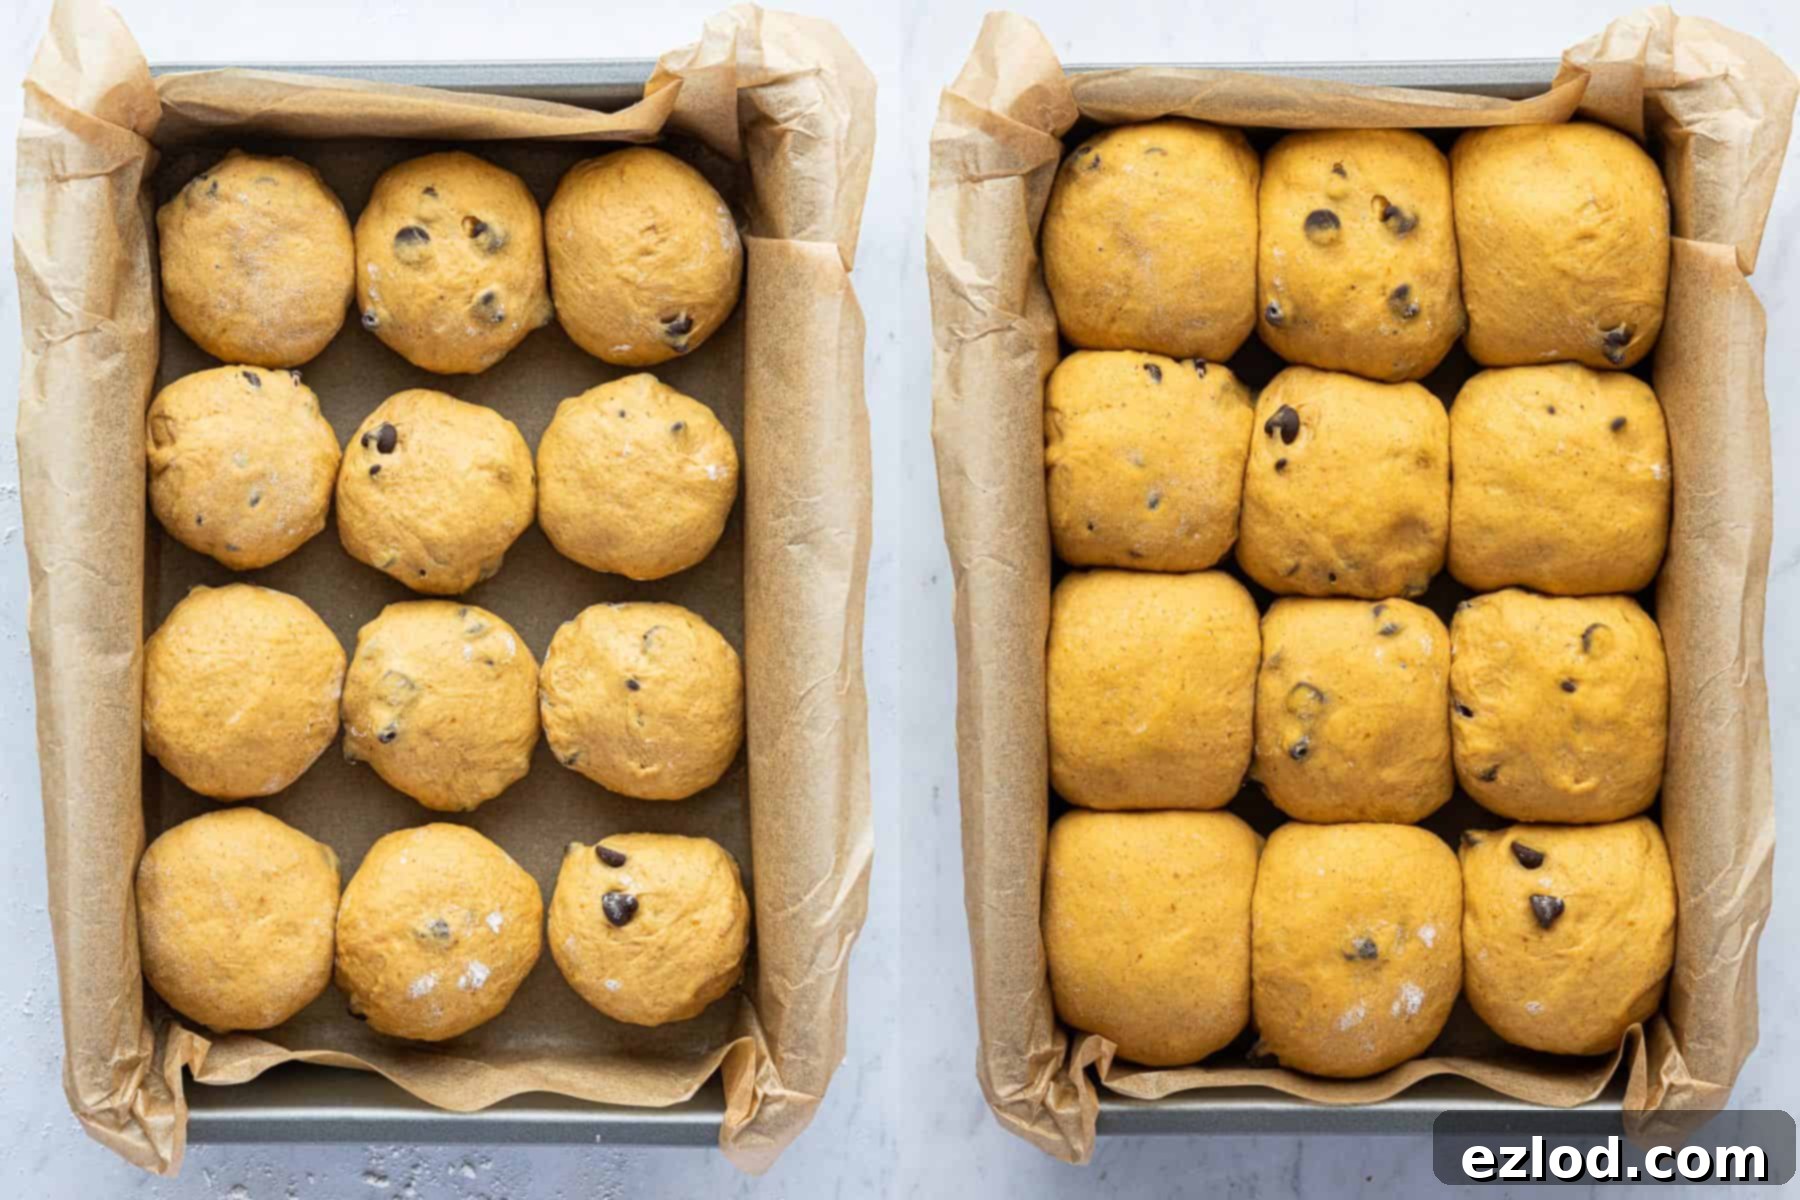
8. Bake to Golden Perfection:
While the rolls are completing their second rise, preheat your oven to 180°C (160°C fan/350°F/Gas Mark 4). In a small bowl, whisk together the milk and maple syrup for the glaze. Just before baking, gently brush the tops of the risen rolls with this mixture. This glaze will give them a beautiful golden-brown, shiny crust. Bake for 25-30 minutes, or until the rolls are deeply golden and sound hollow when tapped on the bottom. For absolute certainty, a probe thermometer inserted into the center of a roll should read at least 90°C/194°F.
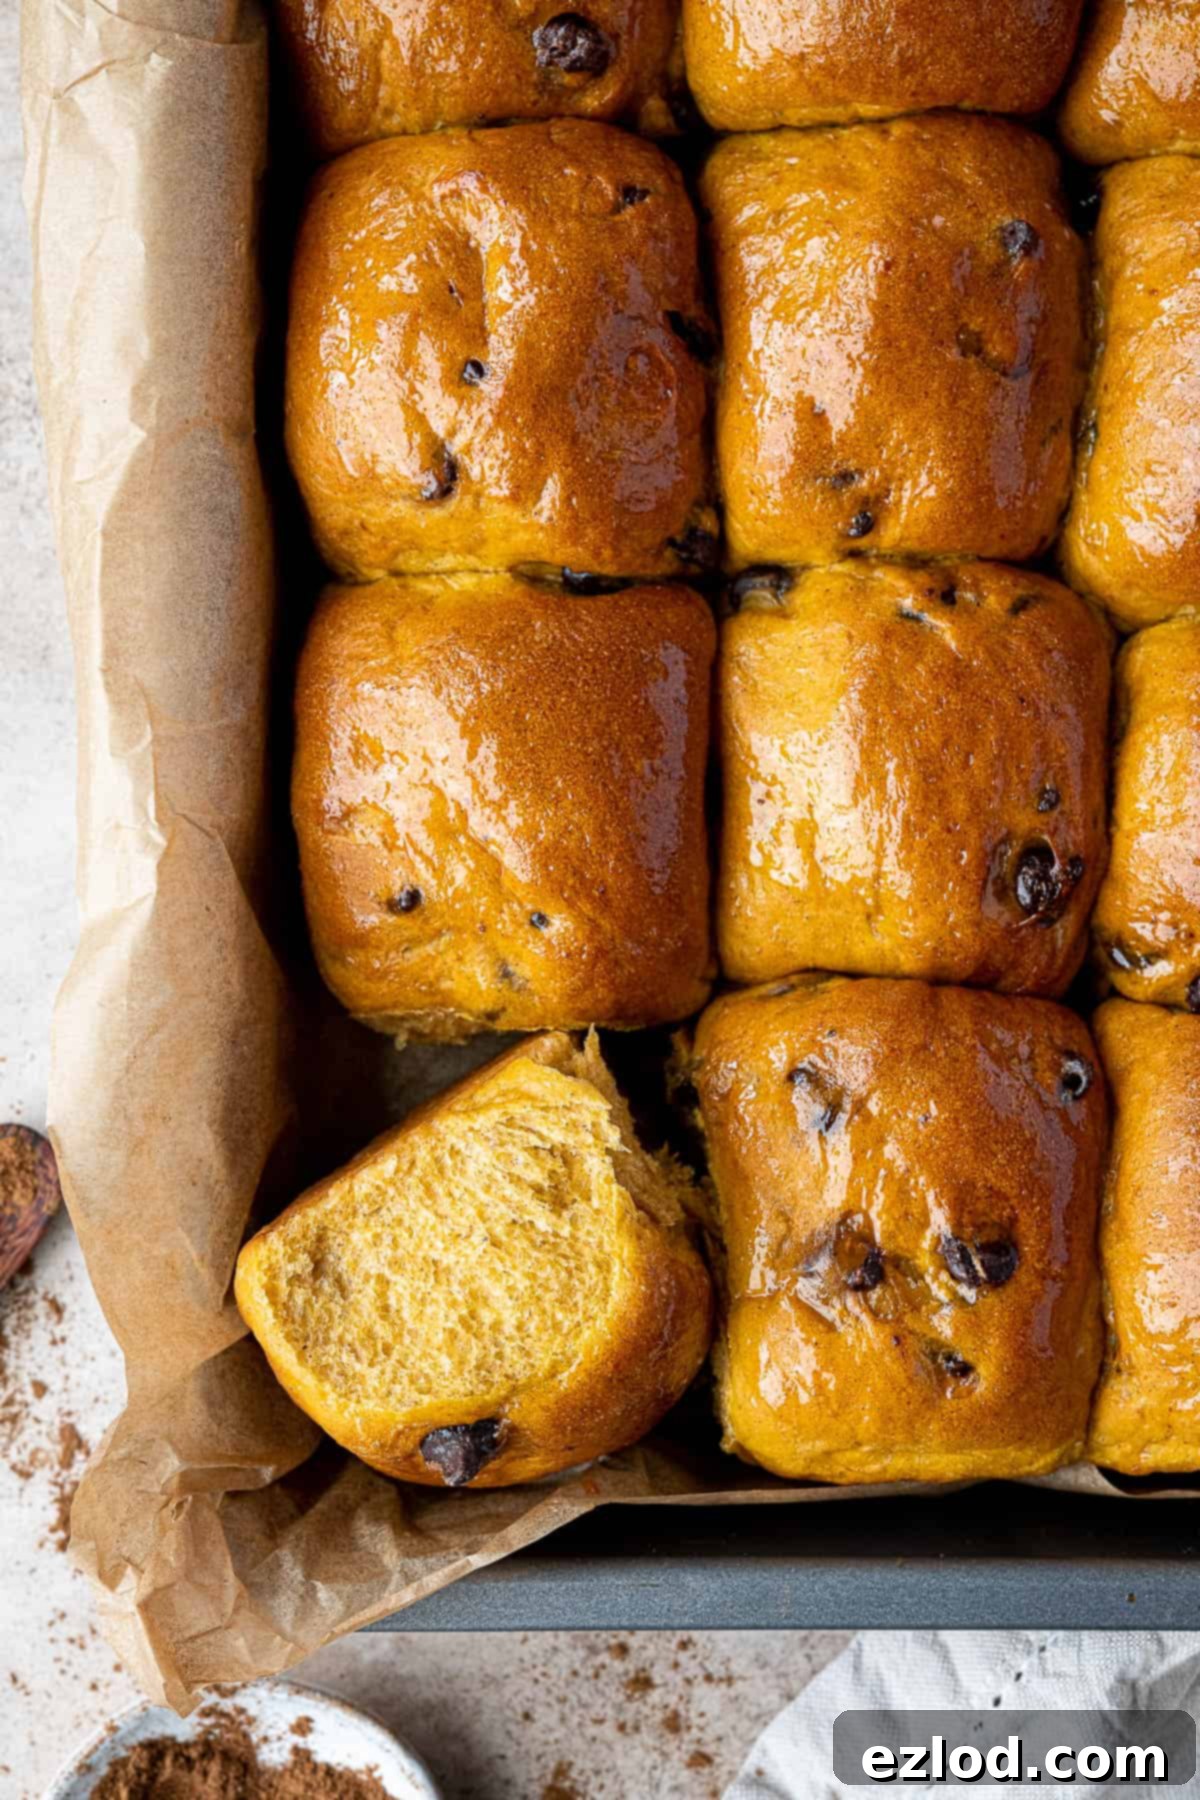
9. Cooling:
Once baked, allow the rolls to cool in the tin for about 10 minutes. This helps them set and prevents them from collapsing. After 10 minutes, carefully transfer them to a wire rack to cool completely for at least 30 minutes before serving. Enjoy them warm for the ultimate experience!
Expert Tips for Perfect Vegan Pumpkin Rolls Every Time
Even seasoned bakers appreciate a few pointers to ensure success. Here are my top tips for achieving the best possible chocolate chip pumpkin rolls:
- Embrace Metric Measurements: For all my baking recipes, I cannot stress enough the importance of using metric measurements with a digital kitchen scale. Unlike volumetric cup measures, which can be wildly inaccurate and vary significantly, a scale provides precise and consistent results. This precision is especially crucial in bread making, where slight variations in flour or liquid can dramatically impact the dough’s hydration and the final texture of your rolls. It also makes for a cleaner, less messy baking process!
- Check Your Yeast’s Vitality: Yeast is a living organism, and its activity diminishes over time. Always check the expiration date on your yeast packet. If your yeast is old or has been improperly stored, it may not activate properly, leading to bread that fails to rise and results in dense, heavy rolls. If unsure, test a small amount in lukewarm water with a pinch of sugar; it should become foamy within 5-10 minutes.
- Dough Consistency is Key: The amount of flour required can sometimes vary slightly. Factors like the specific brand of flour (different brands absorb different amounts of liquid) and even the humidity in the air can affect the dough’s hydration. Always start with the quantity given in the recipe. If your dough feels excessively sticky or wet, add a very small amount of extra flour, a tablespoon at a time, until it reaches the right consistency. Conversely, if it feels too stiff, add a tiny bit more milk. Remember, this recipe is designed for a soft, slightly sticky dough, which contributes to the rolls’ ultimate tenderness. Avoid adding too much flour, as this will result in dry, crumbly bread.
- The Benefits of an Overnight Rise: For an even deeper flavor and a more convenient baking schedule, consider giving your dough its first rise overnight in the refrigerator. The cold temperature slows down the fermentation process, allowing the yeast to develop more complex flavors. This also breaks up the workload, meaning you can prepare the dough one day and bake fresh rolls the next morning. Just be aware that after a cold first rise, the second rise at room temperature will take longer.
- Temperature Affects Rising Time: The environment plays a significant role in how quickly your dough rises. On warm, humid days, the dough will proof much faster than on cooler days. Always observe the dough itself (looking for it to double in size) rather than strictly adhering to the exact rising times specified, as these are estimates. If you opt for the overnight fridge rise, remember the dough will be very cold, and the second proofing will take more time to come to temperature and rise.
- Perfecting the Glaze: Brushing the rolls with a mixture of non-dairy milk and maple syrup before baking not only gives them a beautiful shine but also helps to create a soft, golden crust. If you don’t have maple syrup, you can use just non-dairy milk, or for an alternative, a brush of aquafaba (the liquid from a can of chickpeas) can also achieve a lovely shine.
Can I Knead The Dough By Hand?
Absolutely! While a stand mixer makes quick work of this recipe’s relatively soft and sticky dough, hand kneading is entirely possible. Be prepared for a good arm workout and a slightly longer kneading time to achieve the desired smooth, elastic consistency. The key to successful hand kneading is not to add excessive flour to your work surface. Too much added flour will make the dough dry and tough. Instead, lightly oil your hands and the countertop if the dough becomes too sticky to handle. A bench scraper is an invaluable tool for hand kneading, helping you gather and scrape the sticky dough off the surface with ease.
What Kind Of Yeast Should I Use?
As mentioned, I highly recommend using instant yeast (also known as fast-action or quick-rise yeast) for its convenience. It can be mixed directly with the dry ingredients without needing to be proofed first, saving a step and ensuring a consistent rise. However, if you only have active dry yeast, you can certainly still make these rolls with a slight adjustment to the method:
- You’ll need approximately 10g (3 teaspoons) of active dry yeast for this recipe.
- Prepare the tangzhong as instructed. Once cooked, scrape it into a bowl and cover it directly with plastic wrap or parchment paper to prevent a skin from forming. Let it cool completely to room temperature.
- For the main dough, use lukewarm non-dairy milk instead of cold milk. The temperature is crucial: it should feel comfortably warm to the touch (around 40-45°C or 105-115°F), but NOT hot. Milk that is too hot will kill the yeast, and too cold will hinder its activation.
- In a small bowl, combine the active dry yeast with the lukewarm milk and a pinch of the sugar from the recipe. Stir gently and let it sit for 10-20 minutes. You’ll know it’s activated when it becomes bubbly and foamy on the surface.
- Once activated, proceed with the rest of the recipe as written, incorporating the foamy yeast mixture into your tangzhong and other liquid ingredients.
How To Speed Up The Dough Rising Time:
If your kitchen is on the cooler side and you’re eager to get your rolls baked, here are a couple of methods to create a warm, optimal environment for yeast activity:
- The Warm Oven Method: Briefly preheat your oven to its lowest temperature setting (around 50-70°C or 120-150°F) for just a couple of minutes. Then, switch off the oven completely and crack the door open for about 30 seconds to let out some of the intense heat. Carefully test the temperature with your hand; it should feel pleasantly warm, like a comfortable summer day, not hot. If it’s too hot, it will kill the yeast. Place your covered bowl of dough inside the warm, turned-off oven and close the door. On particularly cold days, you might need to re-warm the oven briefly after an hour or so, but often, a single warm-up is sufficient.
- The Steam Bath Method: Place a heat-proof bowl or loaf tin filled with boiling water on the bottom rack of your (cold, turned-off) oven. Place your covered dough on the middle rack. Close the oven door. The steam from the hot water will create a warm, humid environment, which is perfect for encouraging yeast to rise. This method is especially effective for preventing the dough from drying out.
How To Tell When Your Bread Is Fully Baked:
Ensuring your rolls are perfectly baked—not underdone and gummy, nor overbaked and dry—is essential. Here are the best ways to determine doneness:
- Use a Probe Thermometer (Recommended): The most accurate method is to check the internal temperature of a roll with a digital probe thermometer. Insert it into the center of a roll; it should read at least 90°C (194°F). This guarantees the bread is cooked through. Investing in a good probe thermometer is incredibly useful for all types of baking and cooking.
- The “Hollow Sound” Test: If you don’t have a thermometer, gently remove a roll from the pan and tap it on the bottom. A fully baked roll will produce a hollow sound. An underbaked roll will sound dull or dense.
- The Toothpick Test: Insert a toothpick or thin skewer into the center of a roll. It should slide in and out smoothly with minimal resistance and emerge clean, without any wet dough clinging to it.
Baking times are always approximate because oven temperatures can vary significantly. Trust your senses and these tests over strict timing to achieve perfectly baked rolls.
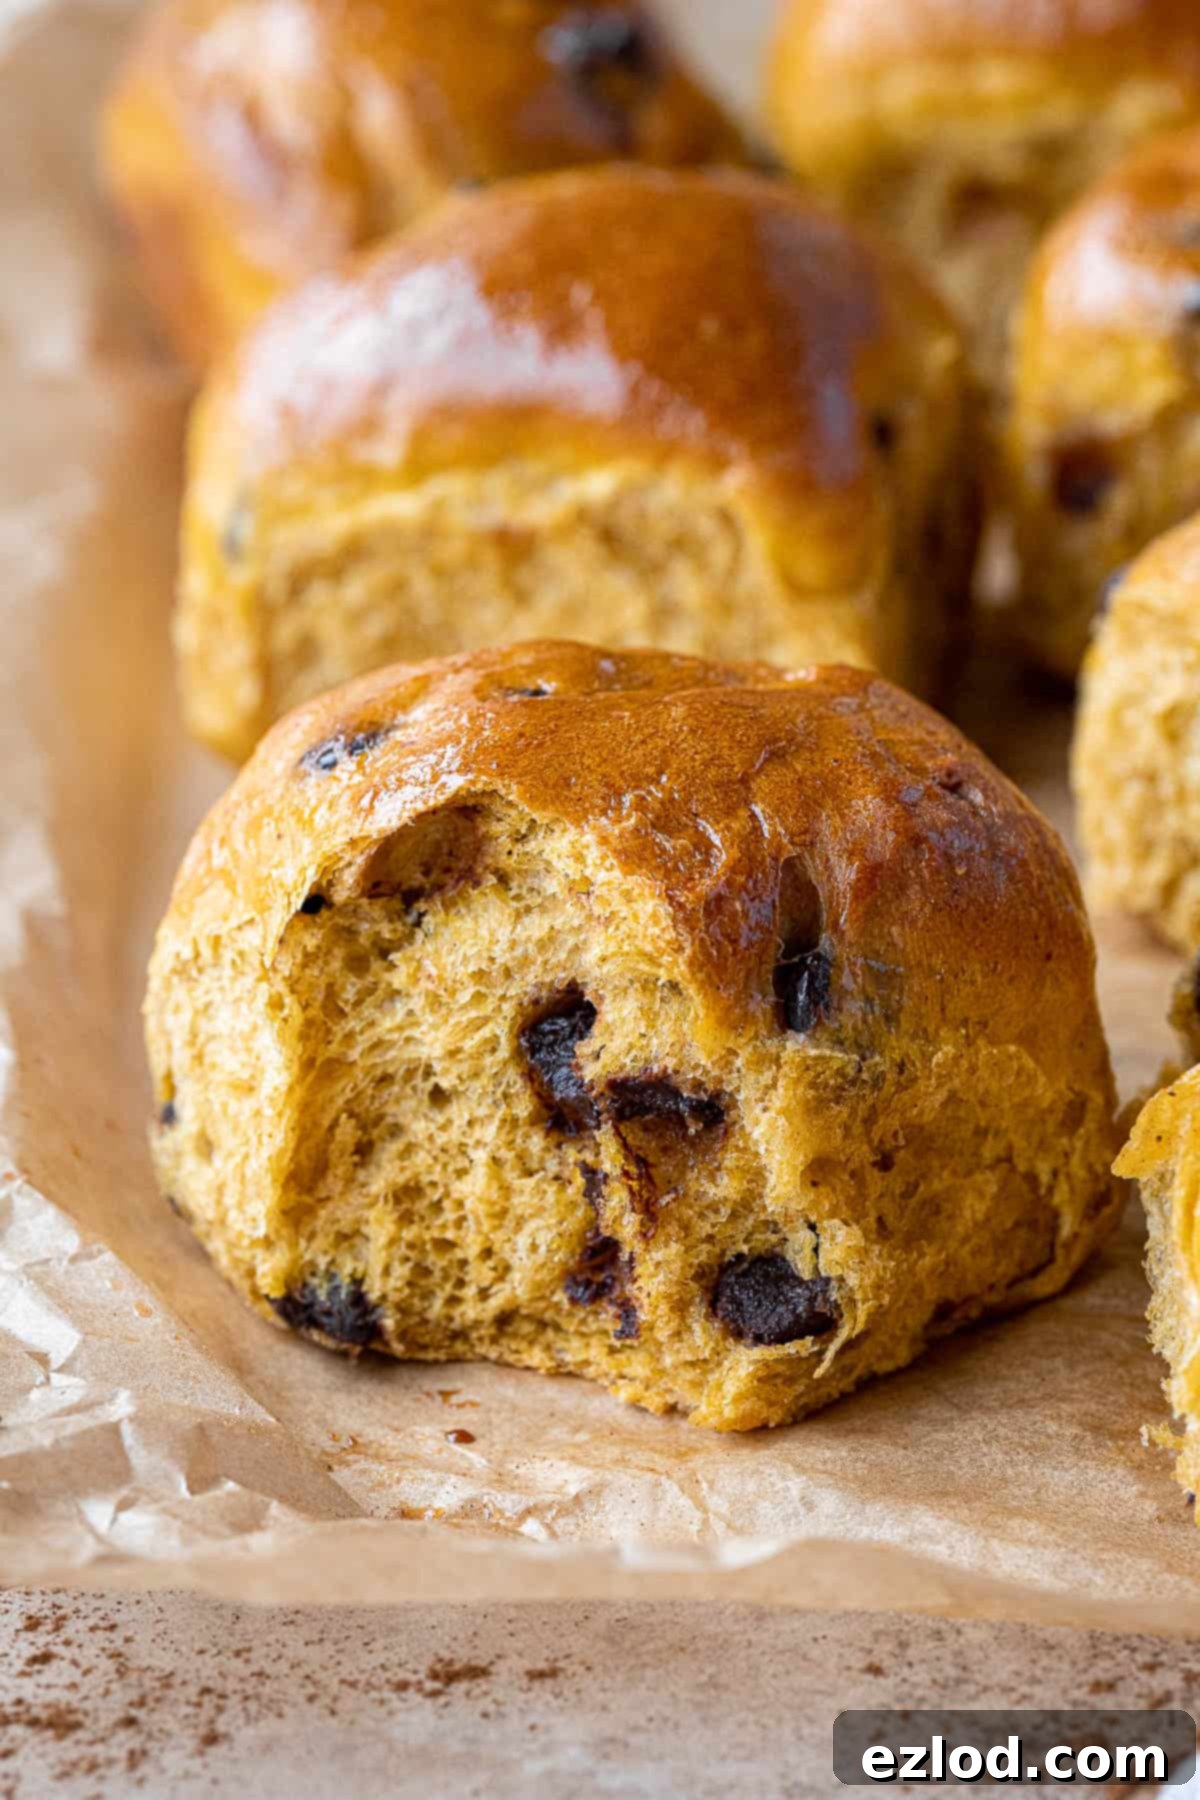
Storing Your Delicious Chocolate Chip Pumpkin Rolls
Like most homemade bread, these chocolate chip pumpkin rolls are at their absolute best when enjoyed on the day they are baked. The tangzhong method, however, is a game-changer for freshness, helping to keep them wonderfully soft for up to 3 days at room temperature. After the first day, you’ll find they are especially delightful if gently warmed for a few minutes in the oven or microwave before serving, which helps to refresh their texture and bring out their lovely aroma. Store them in an airtight container or a bread bin at room temperature. Avoid refrigerating bread, as the cool temperatures can actually cause it to go stale faster.
Can I Freeze These Pumpkin Rolls?
Yes, absolutely! These vegan pumpkin rolls freeze beautifully, making them perfect for future enjoyment or for having a ready supply of delicious treats. To maintain optimal freshness, it’s best to freeze them on the day they are baked, after they have cooled completely. Place the cooled rolls in a freezer-safe ziplock bag or airtight container, ensuring as much air as possible is removed to prevent freezer burn. They can be frozen for up to three months. When you’re ready to enjoy them, simply allow them to defrost at room temperature, then warm them gently in an oven or microwave to bring back their freshly baked softness and flavor.
Can This Recipe Be Adapted for Savory Pumpkin Dinner Rolls?
Definitely! This versatile dough base can easily be transformed into delicious savory pumpkin dinner rolls. To do so, simply omit the chocolate chips from the recipe. You’ll also want to significantly reduce the amount of sugar – halve it for a subtly sweet roll, or reduce it even further if you prefer a truly savory profile. The pumpkin spice can also be omitted, or you could swap it for savory herbs like rosemary, thyme, or sage to complement a dinner meal. Follow all other instructions for mixing, rising, shaping, and baking, and you’ll have wonderfully soft and flavorful pumpkin dinner rolls perfect for any autumn feast.
Can I Make These Rolls Gluten-Free?
Unfortunately, I do not recommend attempting to make these rolls gluten-free by simply substituting gluten-free flour. Baking gluten-free bread is a complex art that requires a fundamentally different approach and specific blends of flours and binders to achieve a desirable texture. This recipe relies heavily on the gluten development from wheat flour, especially with the tangzhong method, and adapting it for a gluten-free diet would require a complete overhaul. As gluten-free baking is not my area of expertise, I cannot provide reliable advice on modifications. For successful gluten-free results, it’s always best to seek out recipes specifically designed for gluten-free ingredients.
More Delightful Vegan Sweet Bread Recipes:
If you’ve enjoyed making these pumpkin rolls, you might love exploring other vegan sweet bread recipes. Here are some of my favorites:
- Vegan Belgian Buns
- Vegan Pumpkin Pecan Babka
- Almond Bread Twist
- Vegan Cinnamon Rolls
- Vegan Chocolate Babka
- Vegan Pumpkin Cinnamon Rolls
- Vegan Hot Cross Buns
- Maple Pecan Bread Wreath
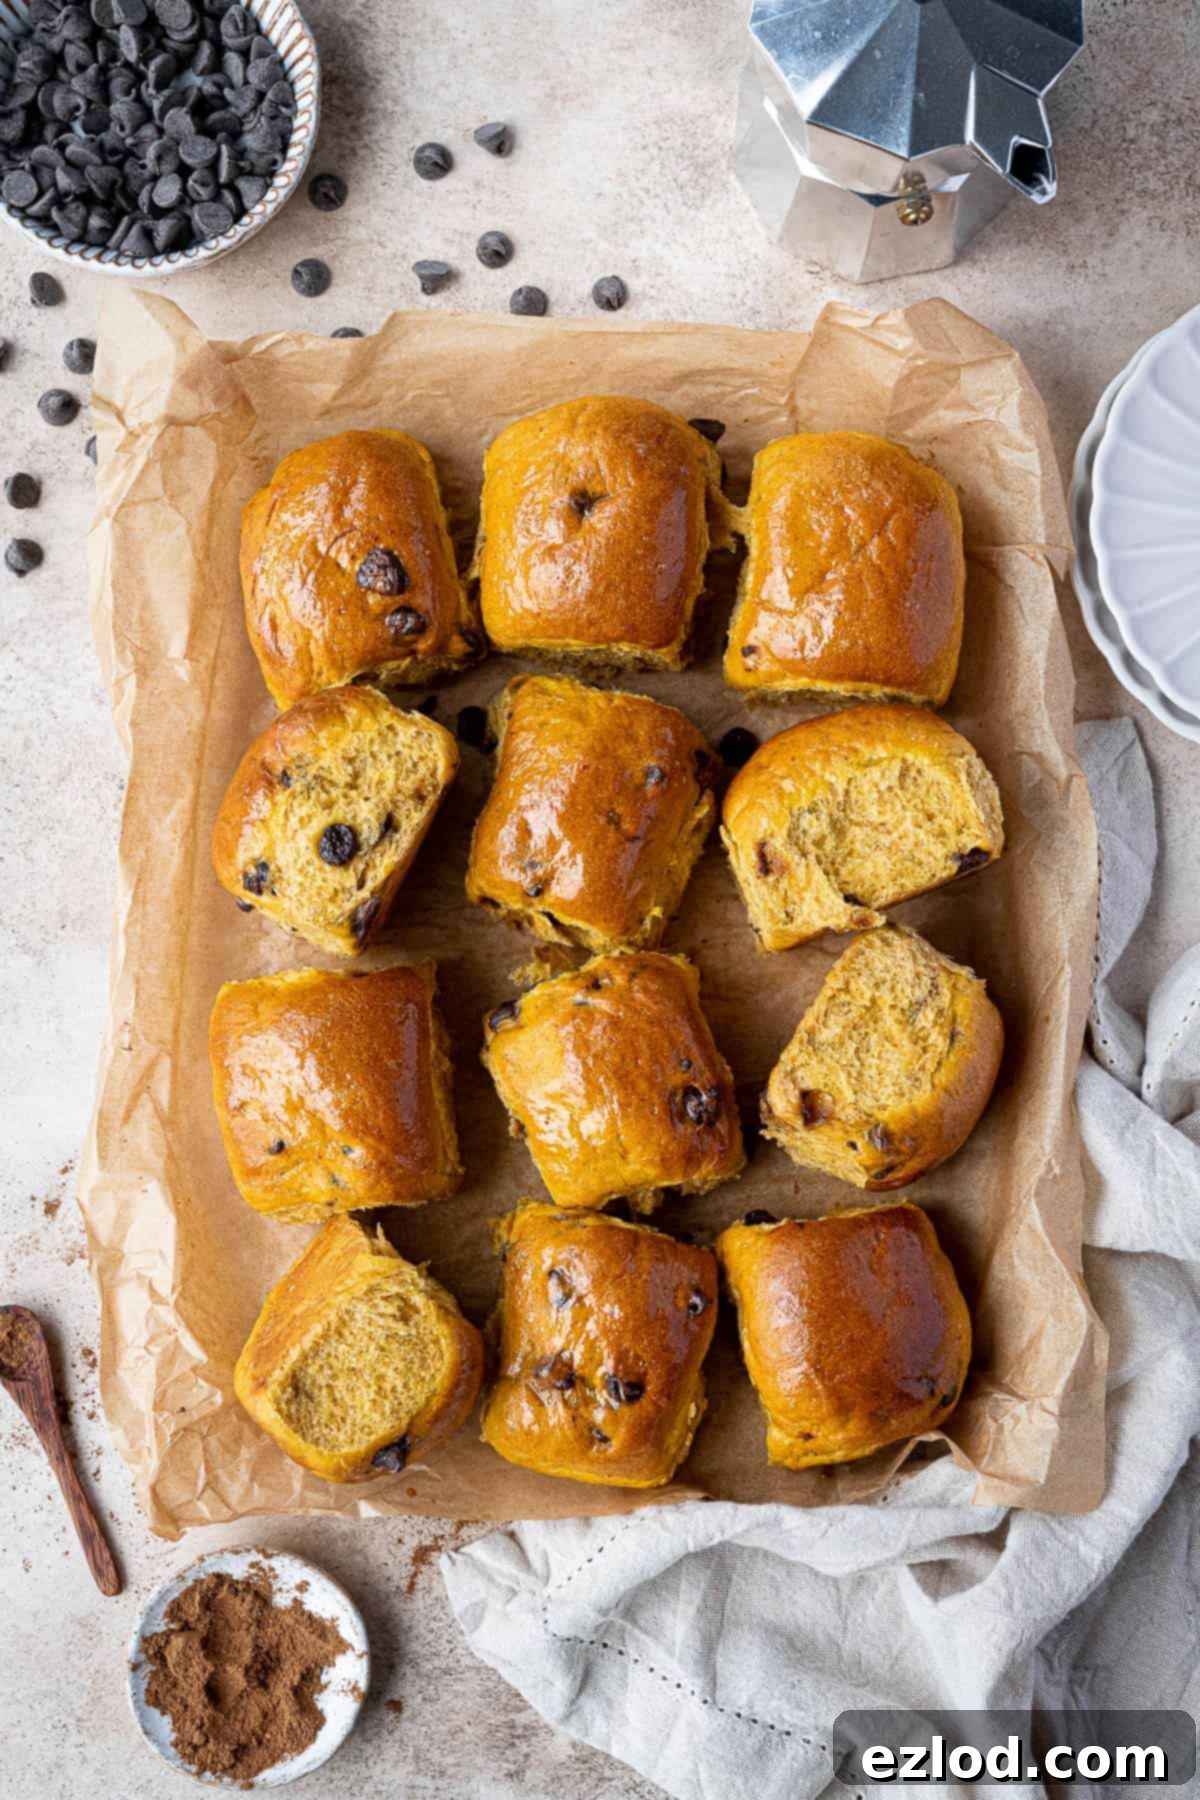
If you tried this delightful recipe, I’d love to hear how it turned out for you! Please rate it, leave a comment below, or share your creations by tagging @domestic_gothess on Instagram and using the hashtag #domesticgothess. Your feedback is greatly appreciated!
All images and content on Domestic Gothess are copyright protected. If you wish to share this recipe, please do so by using the provided share buttons. Do not screenshot or post the recipe or content in its entirety; instead, kindly include a direct link to this post for the complete recipe. Thank you for respecting intellectual property!
Vegan Chocolate Chip Pumpkin Rolls Recipe
Soft, fluffy, and sweet vegan pumpkin bread rolls bursting with chocolate chips. Made using the tangzhong method for incredible softness, these rolls are the ultimate autumnal snack or breakfast treat!
Recipe Summary
- Course: Breakfast, Snack
- Cuisine: American
- Keyword: bread, vegan, pumpkin, chocolate chip, rolls, autumn
- Prep Time: 1 hour
- Cook Time: 25 minutes
- Rising Time: 2 hours 30 minutes
- Servings: 12 rolls
- Author: Domestic Gothess
Ingredients
Tangzhong (Water Roux):
- 30 g (¼ cup) white bread flour
- 160 g (⅔ cup) unsweetened non-dairy milk (soy milk recommended)
Dough:
- 160 g (⅔ cup) pumpkin puree (cooled, not pie filling)
- 30 g (2 Tablespoons) unsweetened non-dairy milk (cold, soy milk recommended)
- 60 g (4 packed Tablespoons) light brown soft sugar
- 400 g (3 ¼ cups) white bread flour
- 8 g (2 ½ teaspoons) instant yeast
- 1 teaspoon salt
- 1 ½ teaspoons pumpkin spice (optional, adjust to taste)
- 35 g (2 Tablespoons + 1 teaspoon) vegan butter/margarine (softened)
- 150 g (5 oz) dark chocolate chips (ensure vegan-friendly)
Glaze:
- 1 Tablespoon non-dairy milk
- 1 Tablespoon maple syrup
Instructions
- Prepare the Tangzhong: In a small saucepan, whisk the 30g flour into the 160g non-dairy milk until smooth. Place over medium-low heat and whisk constantly until the mixture thickens into a paste-like consistency. Remove from heat.
- Combine Wet Dough Ingredients: Scrape the warm tangzhong into the bowl of a stand mixer fitted with a dough hook. Add the 160g pumpkin puree, 30g cold non-dairy milk, and 60g light brown soft sugar. Stir briefly to combine and help cool the tangzhong down.
- Add Dry Dough Ingredients: Add the 400g bread flour, 8g instant yeast, 1 teaspoon salt, and 1 ½ teaspoons pumpkin spice (if using) to the bowl. Ensure salt and yeast are not in direct contact initially.
- Initial Mixing: With the mixer on low speed, mix for about 4 minutes until a rough dough forms. Increase speed to medium and mix until the dough is smooth and stretchy, indicating initial gluten development.
- Incorporate Butter: Add the 35g softened vegan butter to the dough. Continue mixing on medium speed until the butter is fully incorporated, the dough is smooth, elastic, and no longer greasy, and it cleanly pulls away from the sides of the bowl.
- First Rise (Bulk Fermentation): Lightly oil a clean bowl. Transfer the dough, cover it, and let it rise in a warm, draft-free place until doubled in size (approximately 1.5 – 2 hours).
- Add Chocolate Chips: Gently punch down the risen dough to release air. Turn it out and add the 150g chocolate chips. Knead briefly until the chocolate chips are evenly distributed throughout the dough.
- Divide the Dough: Divide the dough into 12 equal pieces. For best results, use a kitchen scale for accuracy (each piece should be around 70-75g).
- Shape the Rolls: Shape each piece into a smooth ball by gathering the edges towards the center and pinching them closed. Flip the ball over, cup your hand over the top, and roll it gently on the counter until it’s a taut, smooth sphere. Tuck any exposed chocolate chips inside.
- Second Rise (Proofing): Line an approximately 20 x 30 cm (8×12 inch) baking tin with parchment paper. Arrange the shaped rolls in the tin, leaving a little space between them. Loosely cover and let rise in a warm spot until puffy and almost doubled (about 45-75 minutes). The “poke test” (slow spring back with slight indentation) indicates readiness.
- Preheat Oven & Prepare Glaze: Towards the end of the second rise, preheat your oven to 180°C (160°C fan/350°F/Gas Mark 4). In a small bowl, whisk together the 1 Tablespoon non-dairy milk and 1 Tablespoon maple syrup for the glaze.
- Glaze and Bake: Gently brush the tops of the risen rolls with the milk and maple syrup glaze. Bake for 25-30 minutes, or until the rolls are deeply golden brown and cooked through. An internal temperature of 90°C (194°F) is ideal.
- Cooling: Let the baked rolls cool in the tin for 10 minutes before carefully transferring them to a wire rack. Allow them to cool for at least 30 minutes before serving for the best texture and flavor.
Recipe Notes
- For more detailed tips, ingredient information, and step-by-step photos, please refer to the article above.
- Always use a digital kitchen scale for metric measurements for the most accurate and consistent baking results.
- If you don’t have a probe thermometer, the rolls are likely done if they sound hollow when tapped on the bottom, or if a toothpick inserted into the center comes out clean.
- This recipe is designed for a soft, slightly sticky dough, which contributes to the rolls’ ultimate tenderness. Avoid adding too much flour.
