The Ultimate Guide to Making Perfect Vegan Jam Doughnuts: Soft, Fluffy, and Irresistible
There’s nothing quite like the comforting taste of a freshly made doughnut, especially one that’s been lovingly crafted at home. These vegan jam doughnuts are a true delight, offering a nostalgic, satisfying treat that far surpasses anything you’ll find in a shop. Imagine biting into a pillowy soft, enriched yeast dough, perfectly fried to a golden crisp, dusted generously with sparkling sugar, and bursting with a sweet, sticky dollop of raspberry jam. Pure bliss!
Crafted with an eggless and dairy-free enriched yeast dough, these doughnuts are deep-fried to achieve an incredibly light texture and that classic, indulgent flavour we all crave. While traditional raspberry jam is a timeless choice, we’ll also explore a world of creative filling options to truly make them your own. Don’t let the idea of making yeasted dough or deep frying intimidate you – this comprehensive guide covers all the tips and details you need to create perfect, fluffy doughnuts every single time.
If you’re a fan of ring doughnuts rather than filled ones, you might also love our recipe for super light and fluffy vegan glazed doughnuts, offering another fantastic option for your sweet cravings.

Essential Ingredients for Your Vegan Jam Doughnuts:
Creating truly exceptional vegan jam doughnuts begins with selecting the right ingredients. Each component plays a vital role in achieving that perfect fluffy texture and rich flavour. Here’s a detailed breakdown of what you’ll need:
- Bread Flour: For that signature soft, fluffy, and slightly chewy texture, white bread flour is paramount. Its higher protein content develops gluten more effectively, which is crucial for the structure of yeasted doughs. While plain (all-purpose) flour can be used, the final texture won’t be quite as springy or satisfying. I strongly advise against using wholemeal flour, as it will result in dense and heavy doughnuts, lacking the desired lightness.
- Instant Yeast: My go-to for bread making is always instant yeast. Its convenience is unmatched as it can be added directly to the flour without any prior activation in liquid. This saves time and simplifies the process. If, however, you only have active dry yeast, don’t worry – I’ve included specific instructions below on how to properly activate it for this recipe.
- Sugar: Caster sugar is used in the dough itself because its fine granules dissolve quickly and evenly, ensuring a smooth dough without a grainy texture. Granulated sugar can be substituted if absolutely necessary, but ensure it’s fully dissolved. You’ll also need a generous amount of caster sugar for rolling the warm, fried doughnuts, giving them their characteristic sweet, crunchy coating. Again, caster sugar is best for this, but granulated can be used in a pinch for the coating.
- Non-Dairy Milk: Soy milk is my top recommendation for baking due to its higher protein content, which most closely mimics the properties of dairy milk in enriched doughs. This contributes to a tender crumb and helps with browning. Any unsweetened variety of non-dairy milk will work, but for the best results, opt for soy milk if it’s available. Always choose unsweetened to control the sweetness of the dough.
- Vanilla Extract: A splash of vanilla extract infuses the dough with a wonderful aromatic depth, enhancing the overall flavour profile of your doughnuts. While optional, it adds a lovely touch. If you don’t have any on hand, you can omit it without significantly compromising the structural integrity of the doughnut.
- Vegan Butter: While I typically recommend block vegan butter for most baking applications, a tub variety works perfectly fine here, provided it’s not a low-fat spread. These low-fat alternatives have a higher water content and won’t yield the same rich, tender results. I’ve had great success with brands like Flora Original, but any good quality, full-fat vegan butter alternative will do.
- Salt: Salt is an absolutely non-negotiable ingredient in bread making. It doesn’t just add flavour; it also controls yeast activity, strengthens the gluten structure, and prevents the dough from becoming bland. Do not omit it!
- Oil for Frying: As these are deep-fried doughnuts, you’ll need a substantial amount of oil. The key is to use an oil with a high smoking point to prevent burning and ensure even cooking. Excellent choices include vegetable oil, sunflower oil, or groundnut (peanut) oil. Avoid olive oil or butter, as their low smoking points will cause them to burn quickly.
- Jam: Raspberry jam is the beloved, traditional filling for jam doughnuts, and it offers a perfect balance of sweetness and tartness. However, feel free to experiment! Just ensure your chosen jam is not chunky, as it needs to be easily pipeable for filling the doughnuts. We’ll explore more creative filling ideas later on.

Step-by-Step Guide: Crafting Your Vegan Jam Doughnuts
(For precise measurements and a detailed recipe, please refer to the recipe card at the bottom of this page.)
Preparing the Dough: The Foundation of Fluffy Doughnuts
- To begin, combine the bread flour, sugar, instant yeast, and salt in a large mixing bowl. Whisk them together thoroughly to ensure all dry ingredients are well distributed. This initial step is crucial for even yeast activation and flavour development.
- Next, add the unsweetened non-dairy milk, melted vegan butter, and vanilla extract to the dry mixture. Mix these ingredients until they come together to form a soft, sticky dough. Don’t worry if it looks a bit messy at this stage; it’s exactly how it should be.
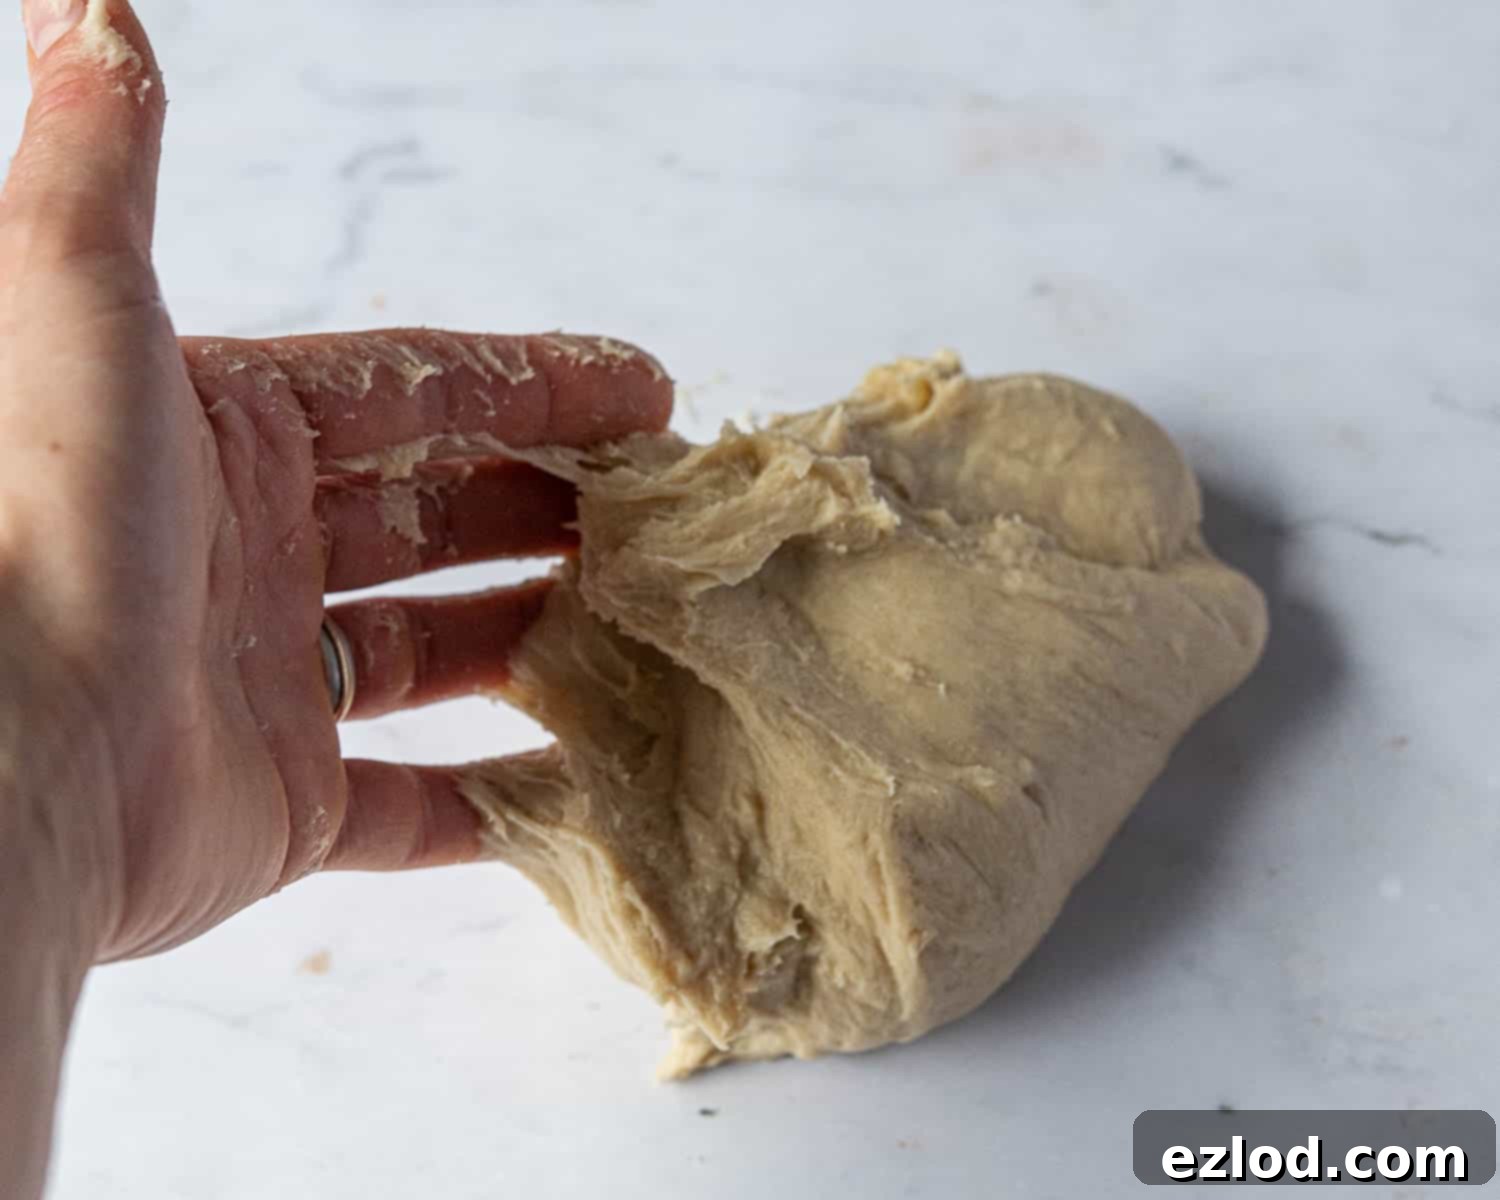
- Turn the dough out onto a clean, unfloured surface. Knead the dough vigorously for approximately 10 minutes. The goal is to develop the gluten, transforming the sticky mass into a smooth, supple, and elastic dough. It should still feel slightly tacky but not wet or unmanageable. If it’s excessively wet, add a tiny amount of extra flour, but be cautious not to add too much, as this can result in dry doughnuts.
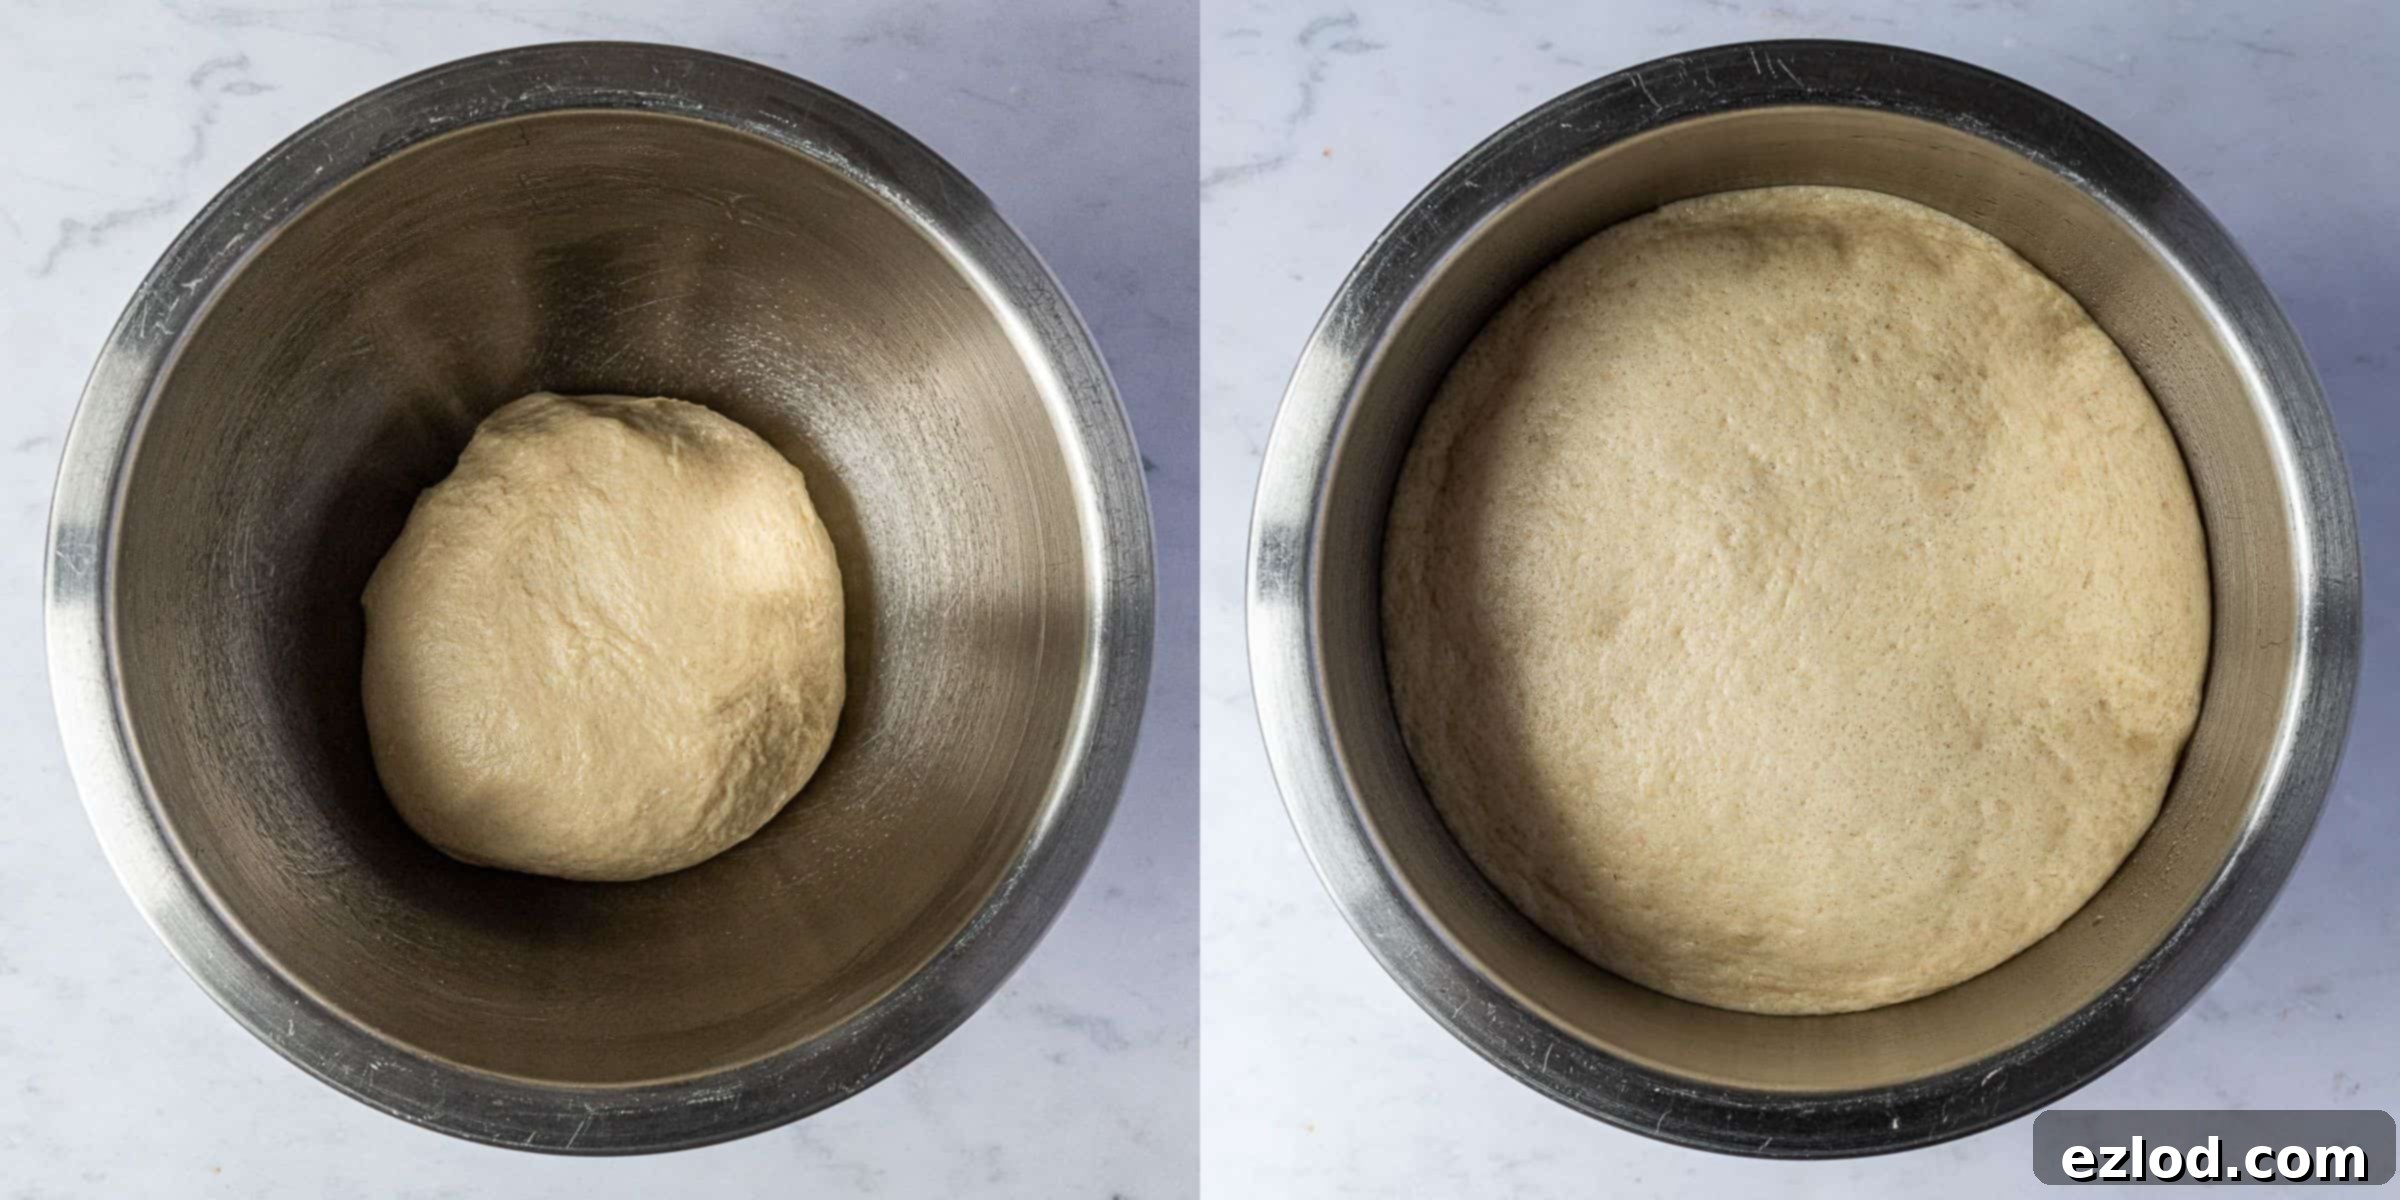
- Lightly oil a clean bowl. Place the kneaded dough into the bowl, turning it once to coat all sides with oil. Cover the bowl loosely with plastic wrap or a damp tea towel and leave it to rise in a warm spot until it has visibly doubled in size. This usually takes about 1 ½ to 2 hours at room temperature. For a deeper flavour and to break up your workload, you can also let it rise slowly overnight in the refrigerator.
- Once the dough has doubled, gently punch it down to release the air. Give it a brief knead for about 30 seconds to redistribute the yeast and eliminate any large air bubbles.

Shaping the Doughnuts: Achieving the Perfect Form
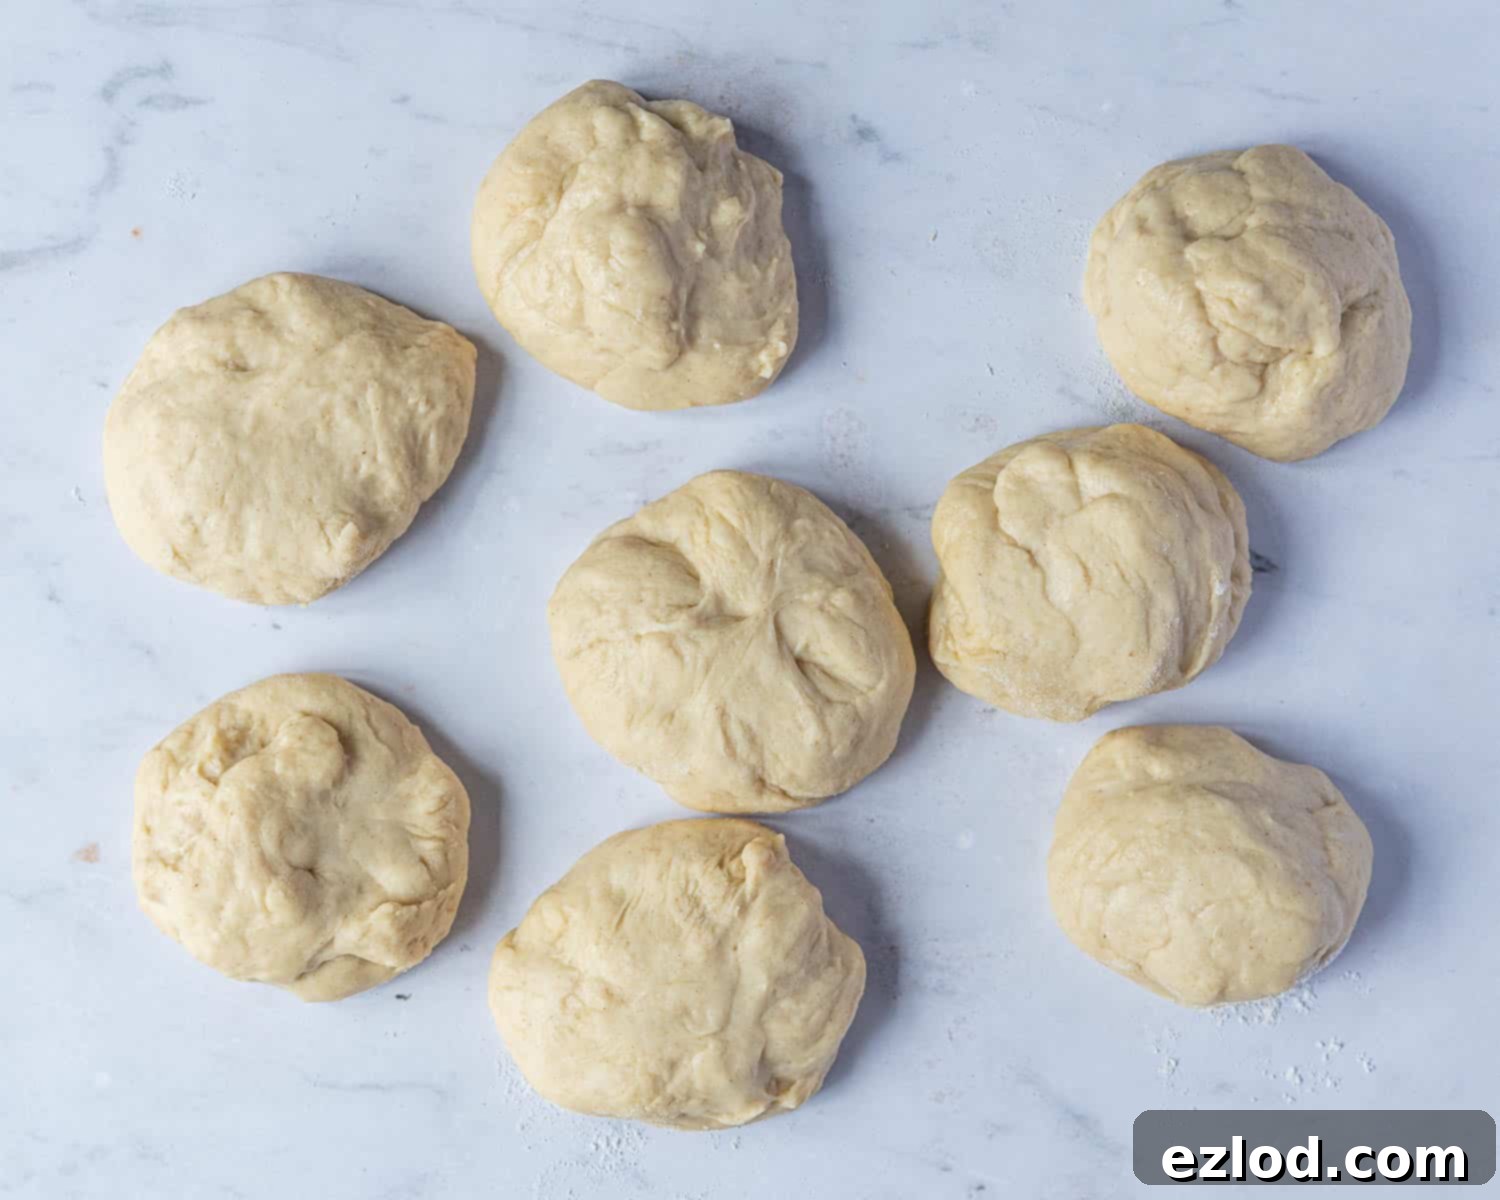
- Divide the dough into 8 equal pieces. For consistent sizing and even cooking, using a kitchen scale for this step is highly recommended. Each doughnut should be roughly the same weight.
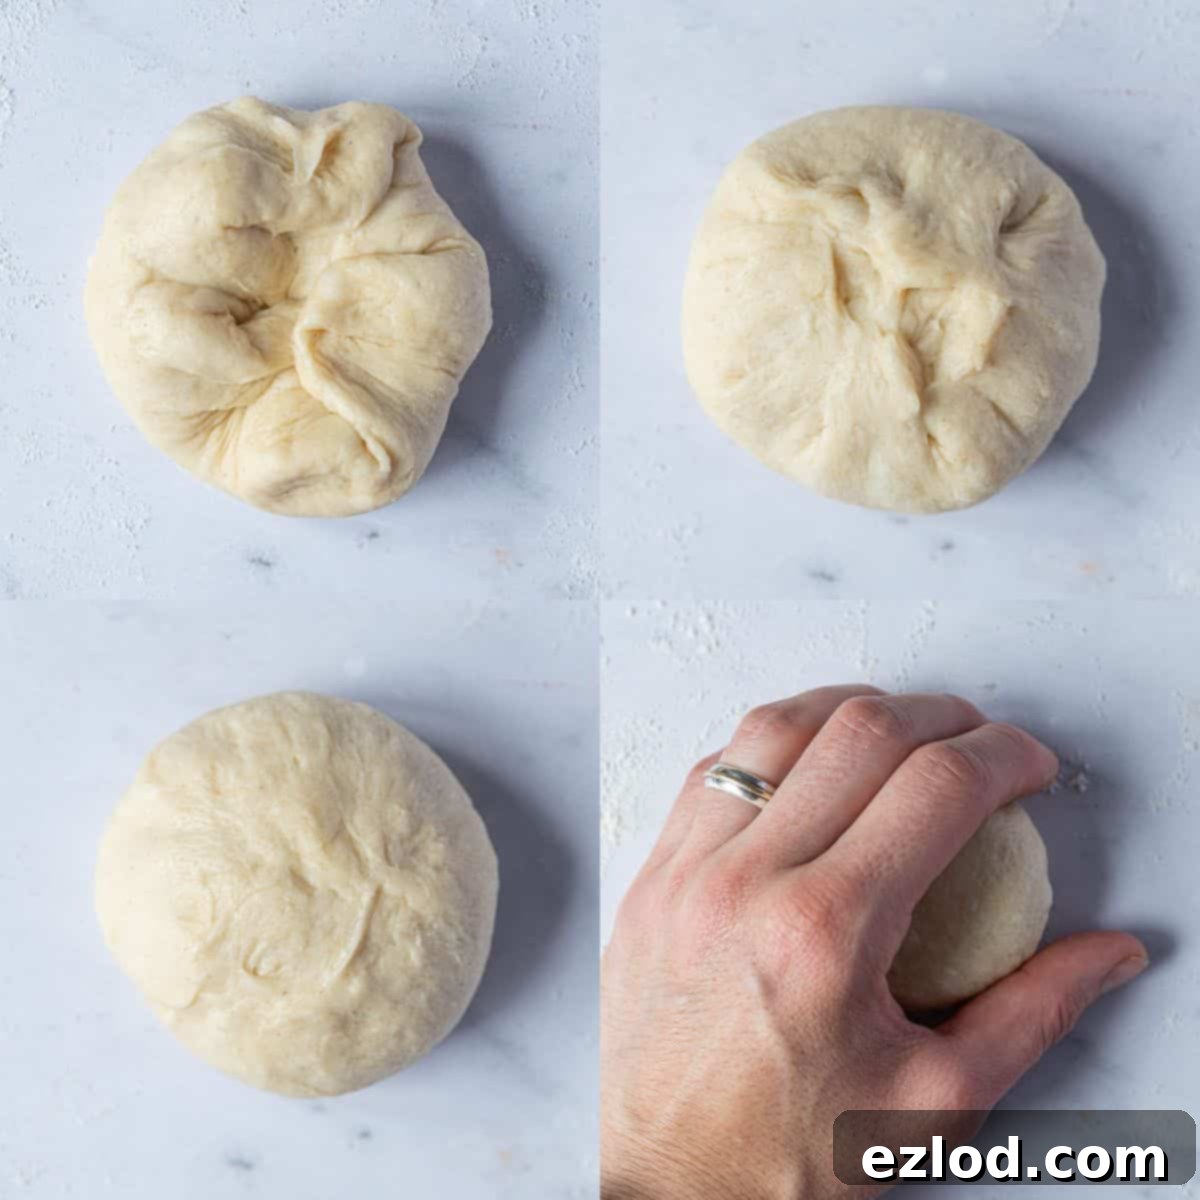
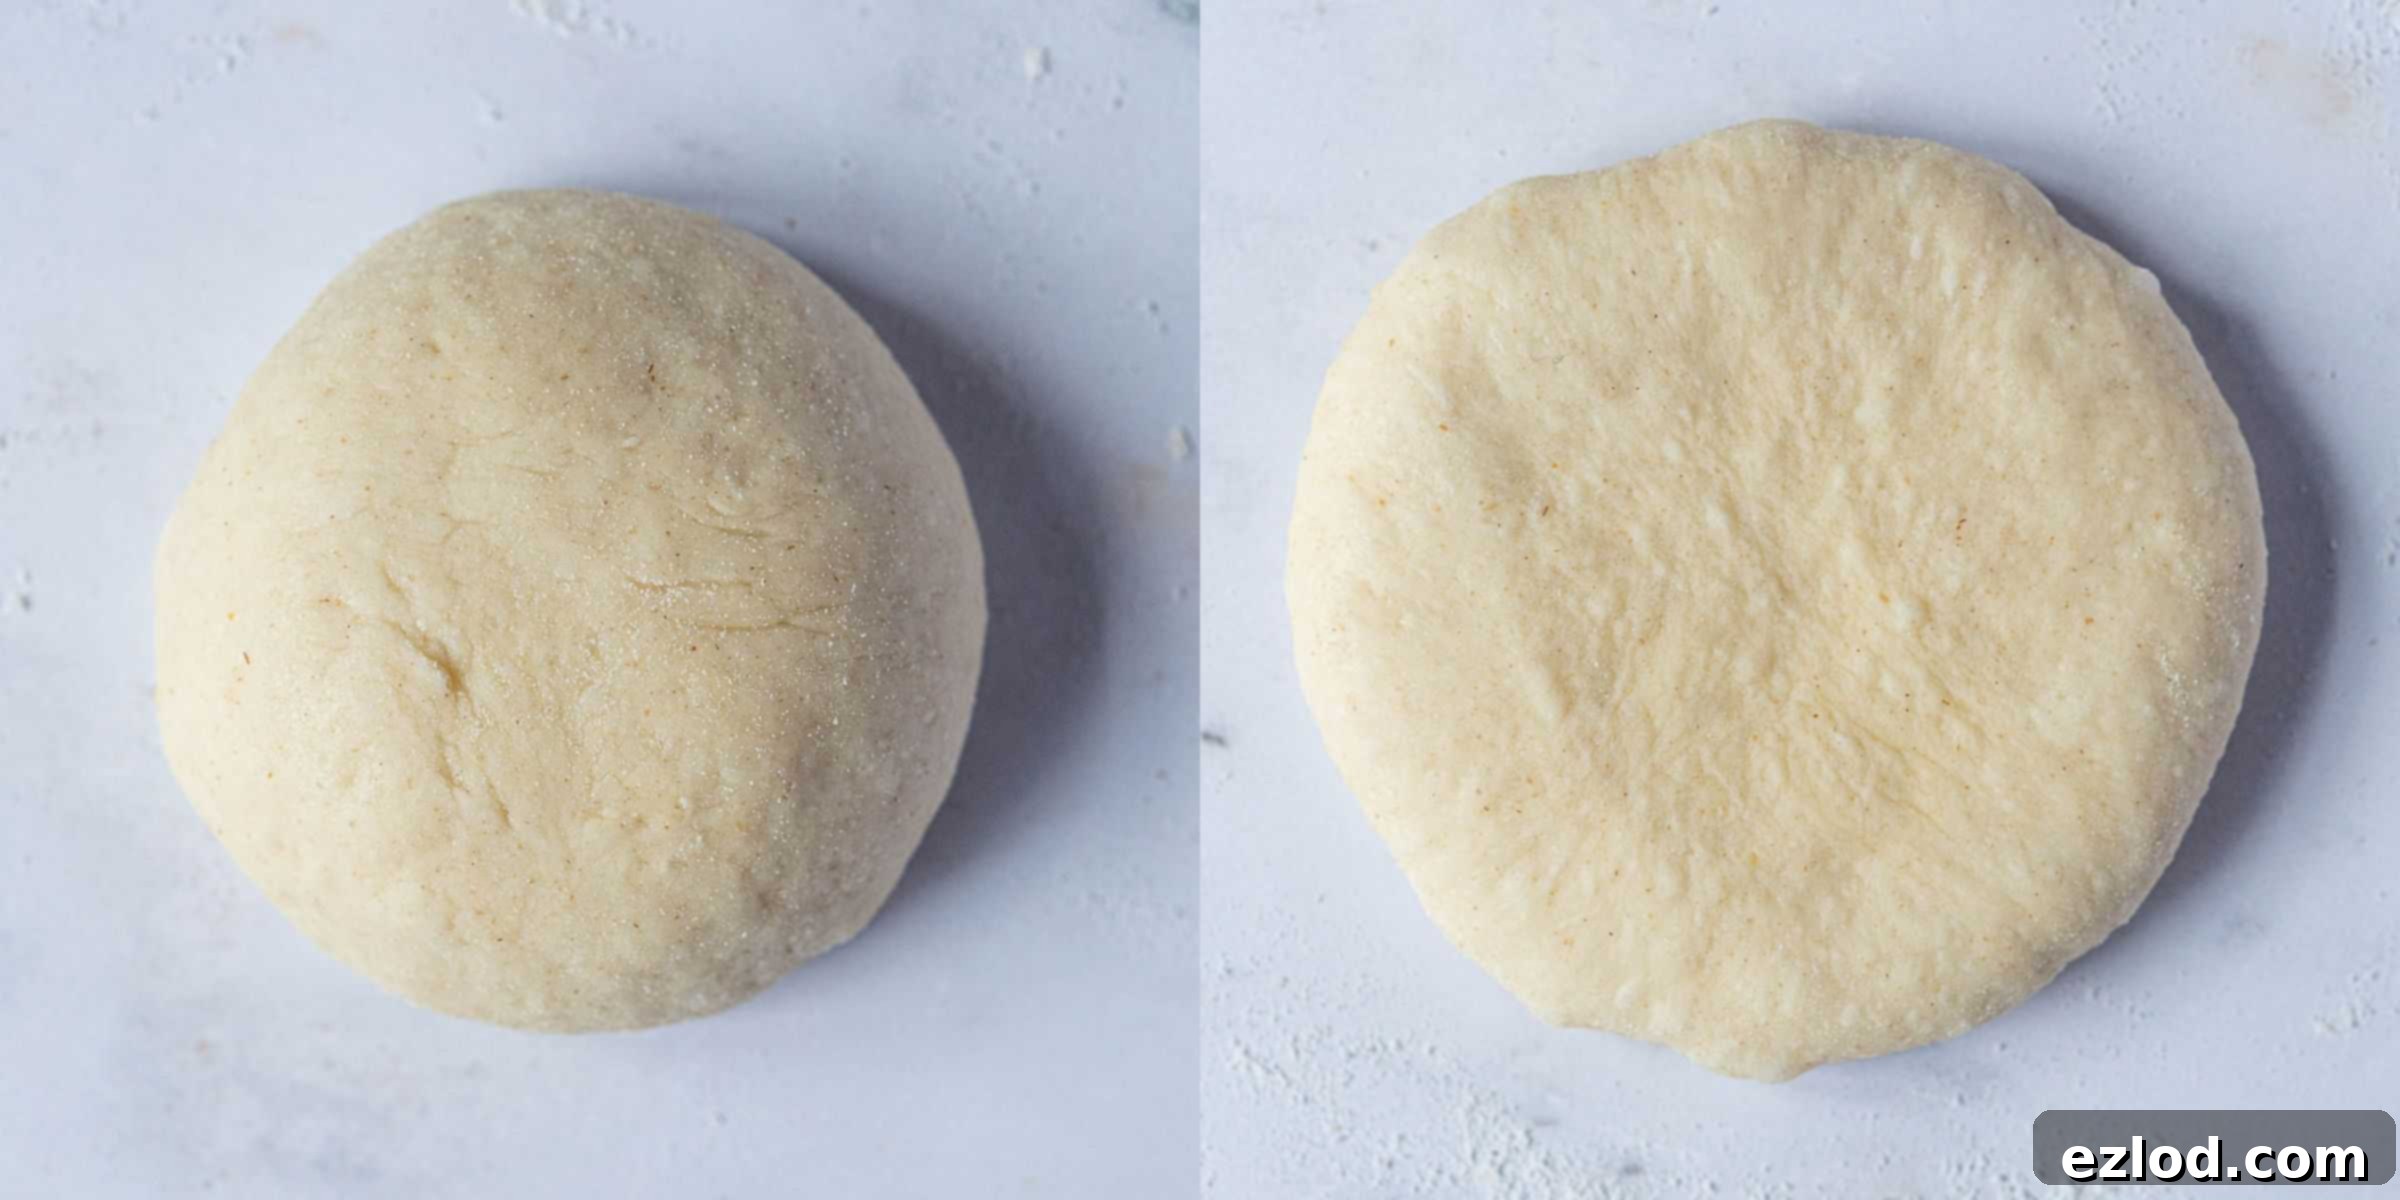
- Working on a lightly floured surface, take one piece of dough and shape it into a smooth ball. To do this, gather the edges of the dough and pinch them together at the bottom. Continue pinching and turning until you have a neat, well-sealed ball. Flip the ball over so the seam is underneath, cup it with your hand, and gently roll it against the surface in a circular motion until it is perfectly smooth and taut on top. This technique creates a beautiful, even surface for your doughnuts.
- With the palm of your hand, gently flatten each dough ball into a disc, aiming for a thickness of about 1 ½ – 2 cm (approximately ½ to ¾ inch). This helps create the classic jam doughnut shape. If you prefer exceptionally plump doughnuts, you can skip flattening them too much, but ensure they are still somewhat even for frying. Repeat this process for all remaining pieces of dough.
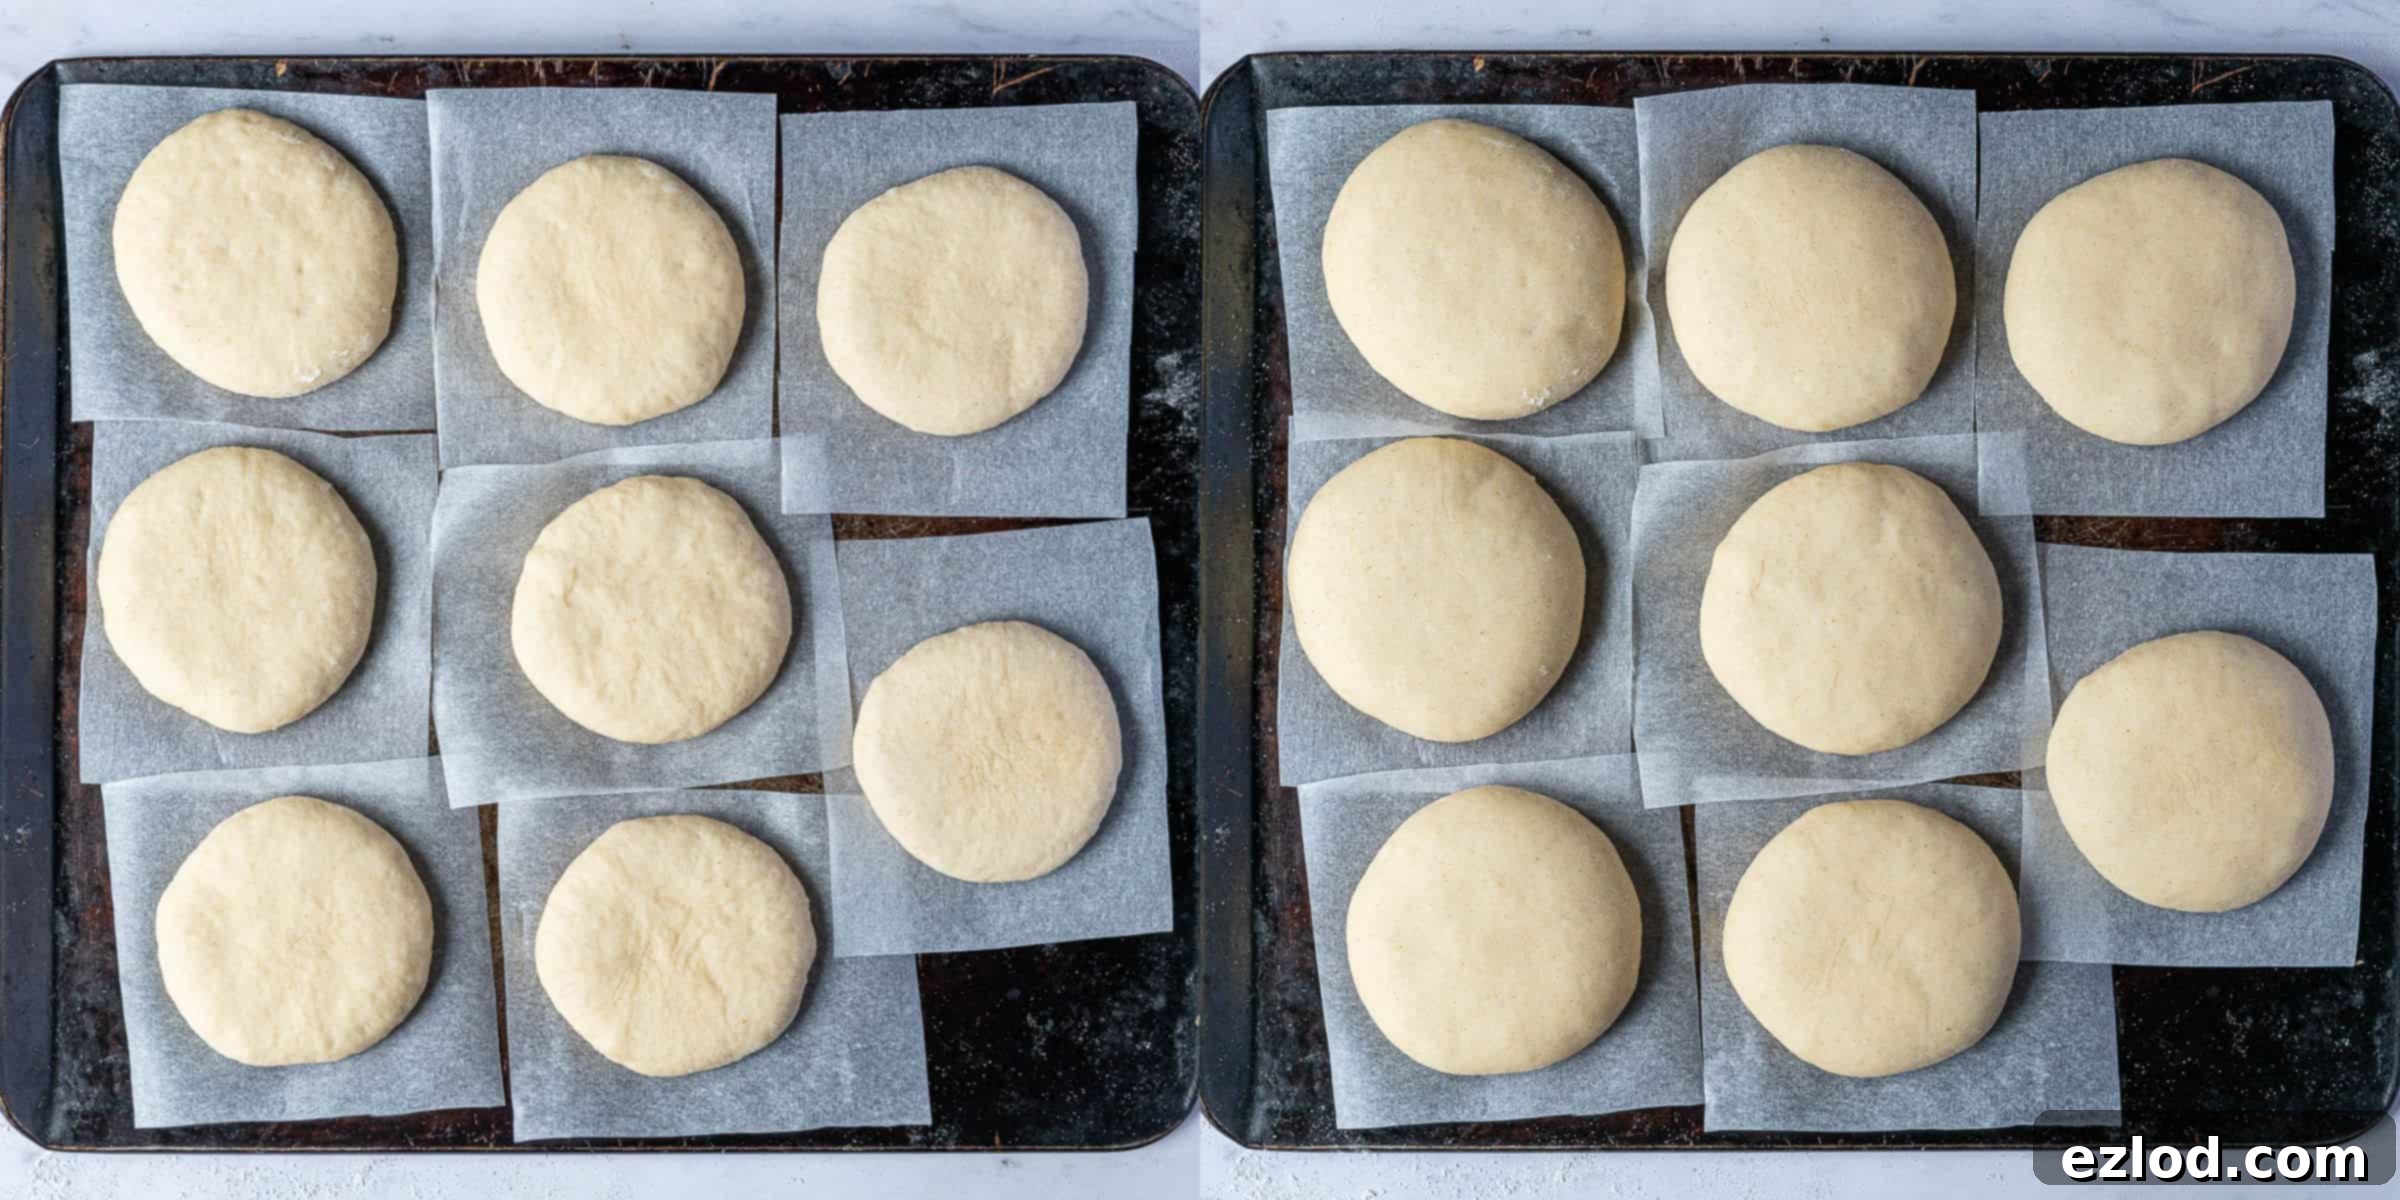
- Carefully place the shaped dough discs onto sheets of baking parchment on a baking sheet. This parchment will make it easier to transfer them to the fryer. Cover the doughnuts loosely with plastic wrap or a clean tea towel and let them rise again in a warm place until they appear puffy and light, which usually takes about 45 minutes.
- To check if your doughnuts are perfectly proofed, gently press one with a finger. If the indentation slowly springs back most of the way, they are ready. If it springs back quickly, they need a little more time. Crucially, if the dough deflates or doesn’t spring back at all, the doughnuts are over-proofed. In this case, you’ll need to gently punch them down, reshape them, and let them rise again.
Frying and Finishing Your Delicious Doughnuts:
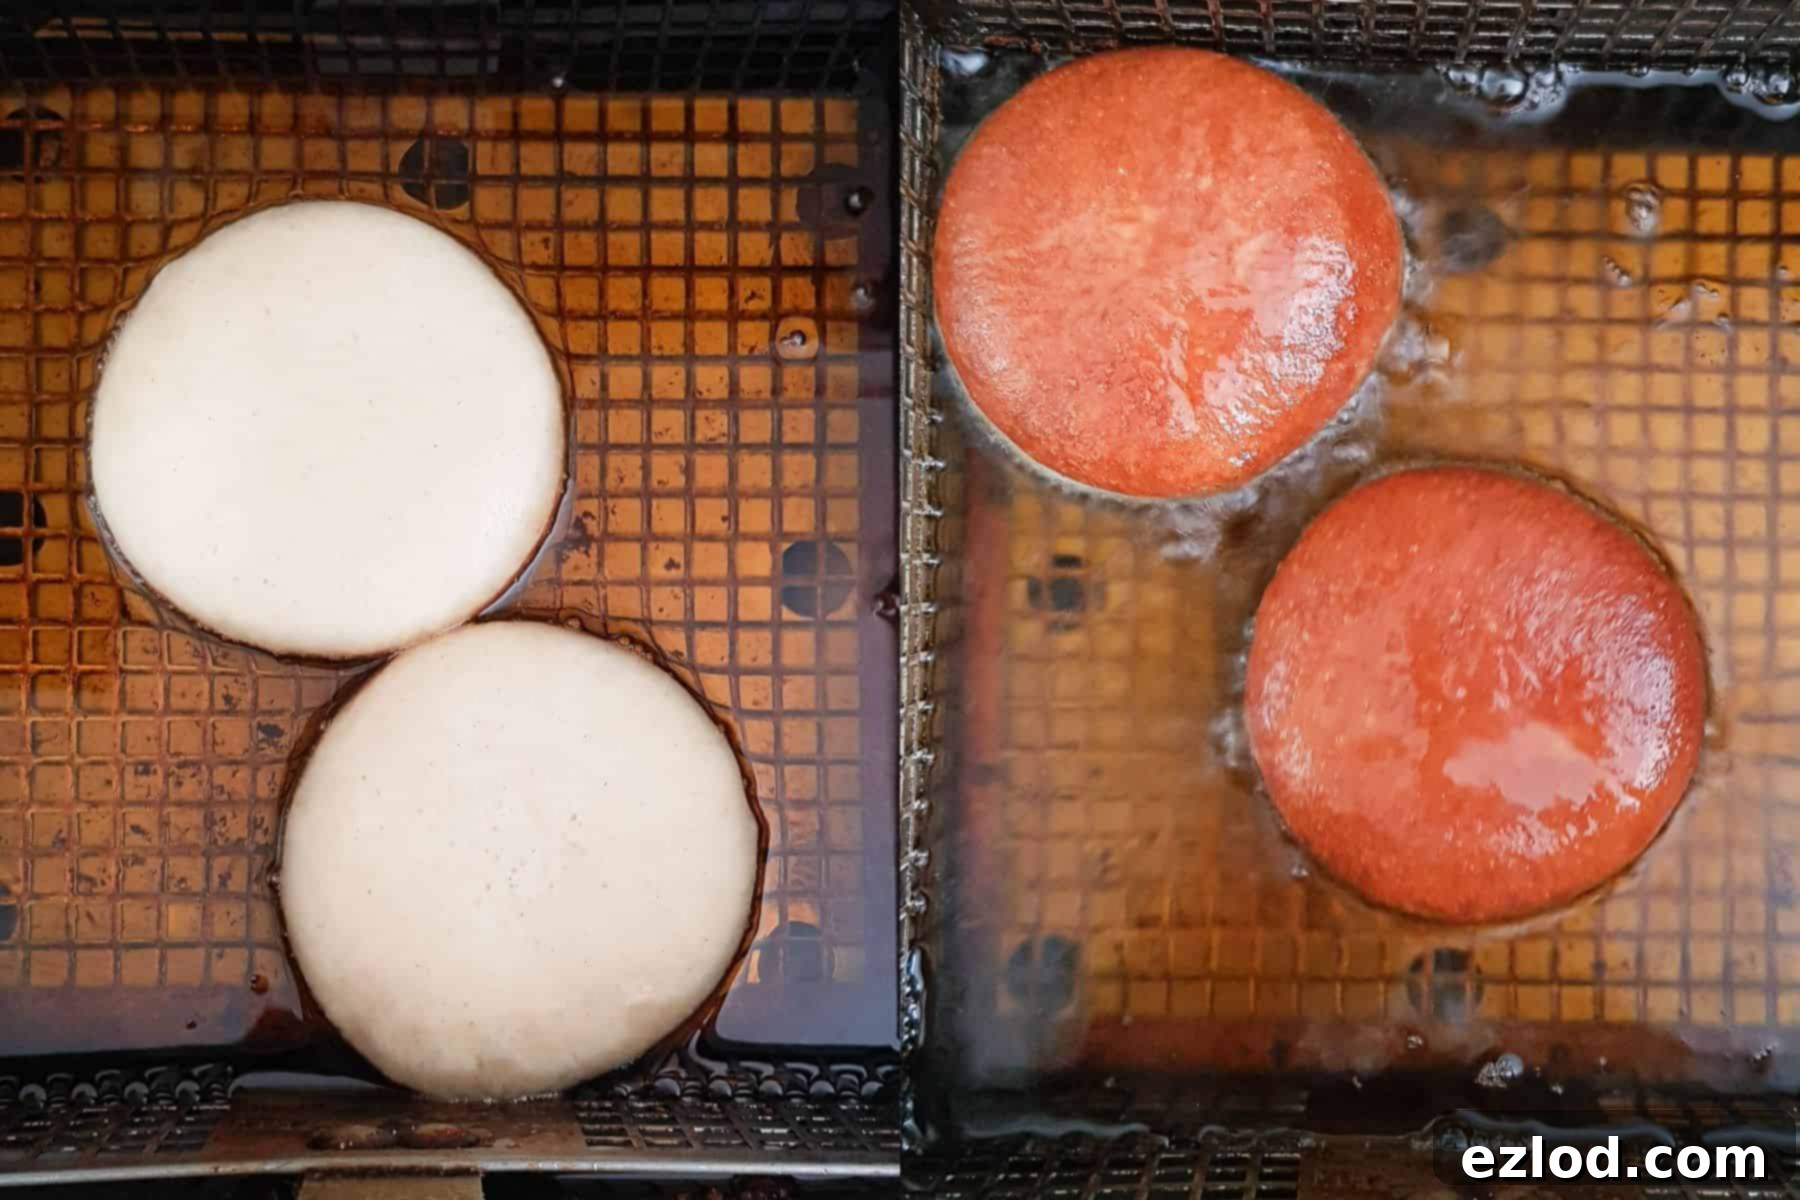
- As the doughnuts near the end of their second rise, prepare for frying. Heat your deep fat fryer to 170°C (340°F). Alternatively, if using a deep saucepan, use a thermometer to monitor the oil temperature carefully (see “A Word on Deep Frying” below). Fill a shallow bowl with caster sugar for coating, and line a plate with kitchen roll to drain the fried doughnuts.
- Cook the doughnuts in batches of two at a time to avoid overcrowding the fryer, which can lower the oil temperature. Gently slide them into the hot oil; they are delicate, so handle them minimally. Fry each side for 2 ½ minutes (use a timer for accuracy). They should turn a beautiful deep golden brown.
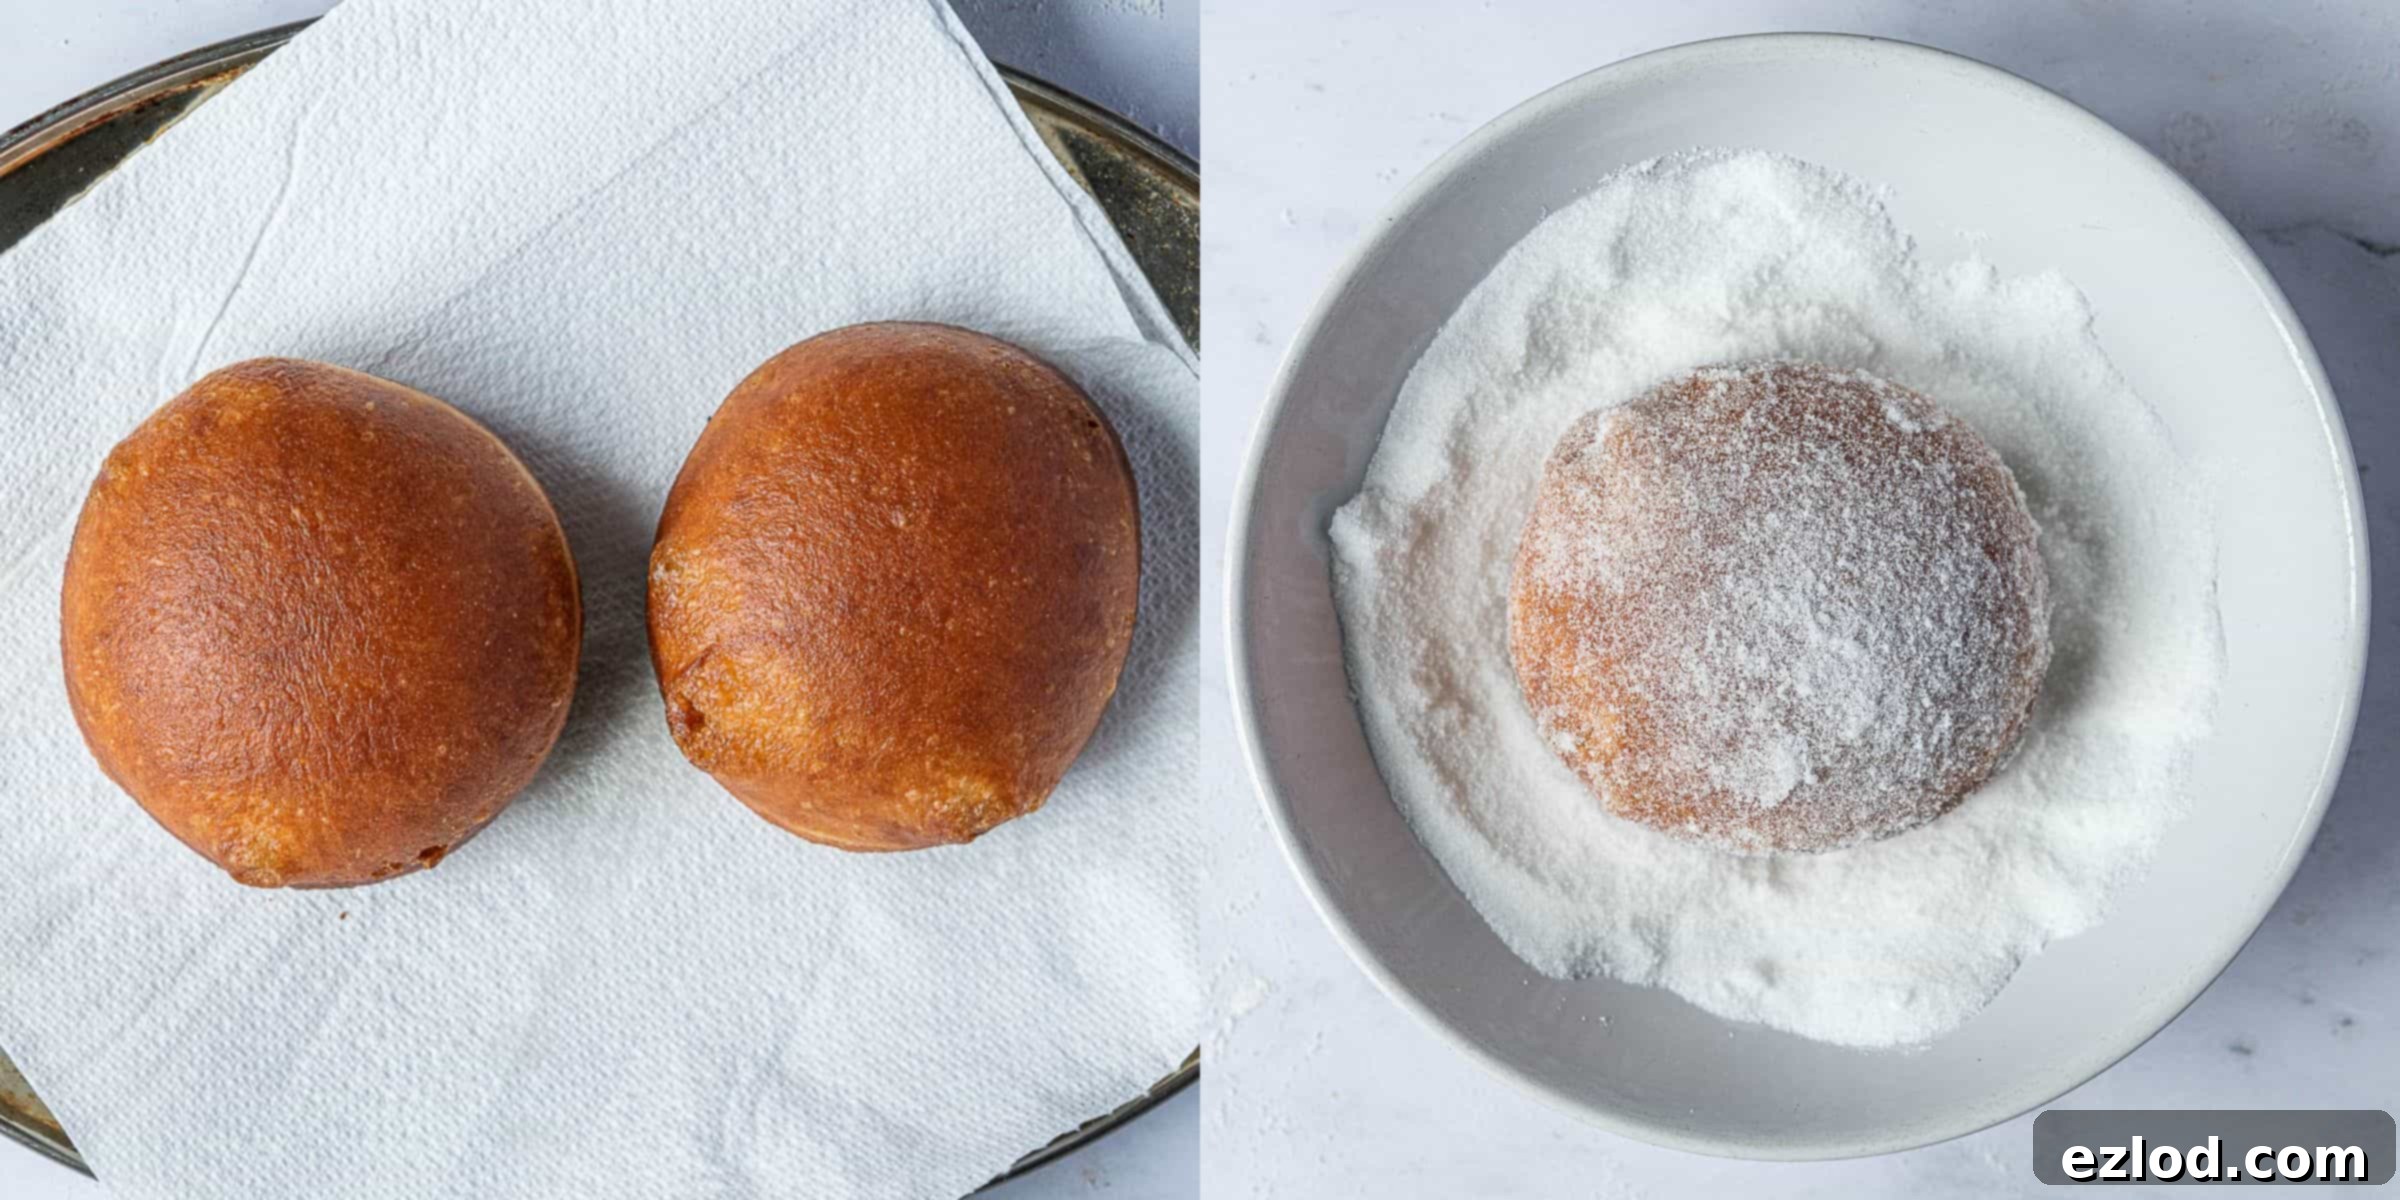
- Once fried, carefully remove the doughnuts using a slotted spoon and transfer them to the paper-towel-lined plate to drain excess oil. Immediately, while they are still warm, roll them generously in the caster sugar. The warmth helps the sugar adhere perfectly.
- To fill the doughnuts, use a skewer or a small, sharp knife to create a hole in the side of each. Gently wiggle the skewer or knife around inside to create a larger cavity for the jam.
- Transfer your chosen jam (ensure it’s not chunky) into a piping bag fitted with a medium round nozzle. A culinary syringe also works exceptionally well for this.
- Insert the nozzle into the hole you created in the side of the doughnut and pipe in a generous splodge of jam. Serve your homemade vegan jam doughnuts as soon as possible for the ultimate fresh and warm experience.

Expert Tips for Doughnut Perfection and Troubleshooting:
- Precision in Measurements: As with all baking, I cannot stress enough the importance of using metric measurements with a digital scale rather than cup conversions. Cups are notoriously inaccurate and can lead to inconsistent results. A scale ensures precision, better consistency, and often, less mess!
- Yeast Vitality: Always double-check the expiry date on your yeast. Old or inactive yeast is the most common reason for dough that fails to rise, leading to flat, heavy doughnuts.
- Flour Absorption: The exact amount of flour needed can vary slightly depending on the brand and humidity, as different flours absorb liquid differently. Start with the quantity specified in the recipe. If your dough feels excessively wet after initial mixing and kneading, add a tiny bit more flour, a teaspoon at a time. Remember, this is meant to be a soft and somewhat sticky dough; over-flouring will result in dry, dense doughnuts.
- Rising Time Variations: Dough rising times are highly dependent on ambient temperature. In warmer conditions, the dough will rise much faster than in a cool environment. If you opt for an overnight cold rise in the fridge, the subsequent second rise at room temperature will naturally take longer than if the first rise was done at room temperature.
- Overnight Cold Rise: For a deeper, more complex flavour and to conveniently split your baking process, consider allowing the dough to undergo its first rise overnight in the refrigerator. This slow fermentation enhances the doughnut’s taste and texture.
- Even Portions: Weighing the dough before dividing it into 8 equal portions ensures that each doughnut is uniformly sized. This consistency is key for even cooking and a professional appearance.
- Timing is Everything for Frying: Use a timer when frying your doughnuts. This ensures they cook thoroughly without burning, preventing raw centers.
- Checking for Doneness: The most reliable way to confirm your doughnuts are cooked through is with a probe thermometer. I aim for an internal temperature of 100°C (212°F) in the middle. Alternatively, a thin skewer inserted into the center should meet little resistance and emerge clean.
- Smooth Jam for Piping: If your chosen jam contains large fruit pieces, you’ll need to purée it with a stick blender or food processor until it’s completely smooth and pipeable. Chunks will clog your nozzle!
- Specialized Filler Nozzle: Investing in a specialist doughnut filler nozzle will significantly simplify and improve the filling process, allowing for a neat and even distribution of jam.
- Flavour Boost for Coating: For an extra layer of flavour, try adding a pinch of cinnamon or a blend of your favourite spices (like nutmeg or cardamom) to the caster sugar before rolling the warm doughnuts.

Understanding Yeast: Instant vs. Active Dry
As mentioned, I predominantly use instant yeast for its ease of use – it can be mixed directly into the dry ingredients without prior proofing. This streamlines the dough-making process significantly.
However, if active dry yeast is what you have, you can certainly use it with a slight modification to the method. You will need 10g (3 tsp) of active dry yeast. To activate it, gently warm the non-dairy milk (ensure it’s lukewarm, not hot, as excessive heat will kill the yeast) and mix it with the yeast and a small pinch of sugar. Let this mixture sit for 10-20 minutes. You should observe a foamy, bubbly layer forming on the surface, indicating the yeast is active and ready. Once proofed, proceed with the rest of the recipe as written, adding this yeast-milk mixture to your dry ingredients.
Clever Ways to Speed Up Dough Rising Time
If your kitchen is on the cooler side and you’re eager to accelerate the rising process, here are a couple of effective methods:
- Warm Oven Method: Preheat your oven to its absolute lowest temperature for just a few minutes. Then, switch it off and leave the oven door ajar for about 30 seconds to release some of the intense heat. Test the temperature with your hand – it should feel pleasantly warm, akin to a gentle summer’s day, not hot. An oven that’s too hot will unfortunately kill the yeast, so exercise caution. Place your covered dough inside the warm, switched-off oven and close the door. On particularly cold days, you might need to briefly re-warm the oven after some time, but often, one warming session is sufficient.
- Steam Bath Method: Alternatively, place an oven-safe bowl or loaf tin filled with boiling water at the bottom of your cold, switched-off oven. Position your covered dough on the middle rack above it. Close the oven door. The steam generated by the hot water will create a warm, humid environment, ideal for encouraging the yeast to work its magic and the dough to rise effectively.
A Crucial Note on Deep Frying: Safety First!
Deep frying can seem daunting, but with the right equipment and precautions, it’s manageable. By far, the safest and most efficient way to fry these doughnuts is using a thermostat-controlled electric deep fat fryer. These appliances maintain a consistent temperature, reducing the risk of oil overheating and ensuring perfectly cooked doughnuts.
If you must deep fry in a saucepan on the stovetop, extreme caution is necessary. Controlling the oil temperature in a saucepan can be challenging, and deep frying is a common cause of household fires. Please review these essential tips on how to deep fry safely before you begin.
- Choose the Right Pan: Always use a deep, heavy-bottomed saucepan. The doughnuts need to be fully submerged and “swimming” in the oil, never touching the bottom.
- Fill Level: Never fill your saucepan more than two-thirds full with oil. Overfilling significantly increases the risk of oil bubbling over when food is added, leading to dangerous spills and potential fires.
- Temperature Monitoring: A jam or confectionery thermometer is indispensable for stovetop frying. The oil temperature must be maintained precisely at 170°C (340°F). If the oil becomes too hot, the doughnuts will burn on the outside before they cook through in the middle. Conversely, if the oil is too cool, the doughnuts will absorb too much oil, resulting in a greasy, heavy texture. Maintain a vigilant eye on the thermometer and adjust your heat accordingly.
Creative Filling Ideas for Your Vegan Doughnuts:
While raspberry jam is the undisputed champion of traditional doughnut fillings, don’t limit your imagination! These versatile vegan doughnuts are perfect for experimenting with a variety of delicious fillings, as long as they are smooth and pipeable.
Here are some fantastic ideas to get your creative juices flowing:
- Fruit Curds: Bright, tangy, and bursting with flavour, fruit curds make an exquisite filling. Explore my recipes for vegan lemon curd, coconut lime curd, mango curd, and blood orange curd – all are perfectly suited.
- Vegan Pastry Cream: A rich, smooth, and decadent custard-like filling that adds a touch of sophistication.
- Biscoff Spread: Warm it gently to make it more fluid and easily pipeable. The caramelised biscuit flavour is utterly irresistible.
- Peanut Butter: For a delightful sweet and savoury combination, fill your doughnuts with a smooth peanut butter. You can also mix it with a touch of maple syrup for added sweetness, or go for a classic PB&J by adding both peanut butter and jam!
- Sweetened Apple Sauce: Ensure it’s puréed until perfectly smooth if it contains any chunks. This offers a comforting, fruity filling.
- Fruit Compote: Similar to apple sauce, any smooth fruit compote makes a wonderful filling. Again, purée it for a pipeable consistency.
- Vegan Chocolate Spread: Think vegan Nutella or any other rich, creamy chocolate spread. A universally loved indulgence!
- Chocolate Ganache: A luscious, intense chocolate ganache (cooled to a pipeable consistency) provides a truly luxurious filling.
Frequently Asked Questions About Vegan Jam Doughnuts:
Can I make these vegan jam doughnuts in advance?
Unfortunately, doughnuts are best enjoyed on the day they are made, ideally as fresh as possible. Their incredible soft texture and warm aroma diminish over time. Any leftover doughnuts will still be edible the following day if stored in an airtight container, but they won’t retain the same fresh softness. A quick reheat in the microwave for a few seconds can help refresh them before serving.
To prepare ahead while maintaining freshness, you can make the dough the day before and let it undergo its first rise slowly overnight in the refrigerator. This allows you to fry and fill them fresh in the morning.
Can I freeze homemade vegan doughnuts?
Yes, these vegan jam doughnuts can be frozen successfully! To best preserve their freshness, freeze them as soon as they have completely cooled after frying and sugaring. Wrap each doughnut individually in plastic wrap or foil to prevent freezer burn, then store them in an airtight freezer bag or container. They will keep well in the freezer for up to three months.
To enjoy, simply allow them to defrost at room temperature. For a refreshed texture, warm them briefly in the microwave for a few seconds before serving. While they won’t be quite as perfect as freshly made, and the sugar coating may dissolve slightly upon thawing, they remain a tasty treat!
Can I bake these doughnuts instead of frying them?
Technically, yes, you can bake the risen doughnuts. Place them on a baking sheet and bake at 180°C (160°C fan/350°F/gas mark 4) for approximately 15-20 minutes, or until they are deep golden brown and sound hollow when tapped on the bottom. After baking, brush them with a little melted vegan butter and roll them in sugar.
However, let’s be honest: a baked doughnut, while still a tasty sweet bread, is fundamentally different from a fried doughnut. It will have a texture closer to a soft bread roll than the light, airy, and slightly crisp exterior of a truly fried doughnut. If you’re aiming for that authentic, indulgent doughnut experience, frying is the way to go. That said, if I don’t want to fry all eight at once, I often fry a couple and bake the rest to enjoy as sweet rolls (brushing the tops with a little non-dairy milk before baking for a nice sheen).
Can I make this recipe gluten-free?
Unfortunately, this particular recipe cannot be successfully adapted for gluten-free flour. Creating good quality gluten-free yeasted bread is a complex art that requires a completely different formulation of ingredients and ratios. Gluten-free baking is a specialized area, and I am not an expert in it.
For delicious gluten-free doughnuts, your best bet is to seek out a recipe specifically designed to be gluten-free, rather than attempting to modify a conventional recipe. This will yield far superior results.
Discover More Vegan Sweet Bread Recipes:
- Vegan Glazed Doughnuts
- Vegan Chocolate Babka
- Maple Pecan Bread Wreath
- Vegan Cinnamon Rolls
- Almond Bread Twist
- Vegan Lemon Blueberry Rolls
- Vegan Hot Cross Buns

If you tried this recipe let me know how it went! Rate it, leave a comment or tag @domestic_gothess on Instagram and hashtag it #domesticgothess
All images and content on Domestic Gothess are copyright protected. If you want to share this recipe then please do so by using the share buttons provided. Do not screenshot or post the recipe or content in full, instead include a link to this post for the recipe.

Print
Vegan Jam Doughnuts
Ingredients
- 250 g (2 cups) white bread flour
- 25 g (2 Tbsp) caster (superfine) sugar
- 7 g (2 ¼ tsp) instant yeast
- ½ tsp salt
- 150 ml (½ cup + 2 Tbsp) unsweetened non-dairy milk (I use soy)
- 45 g (3 Tbsp) vegan butter melted
- 2 tsp vanilla extract
- vegetable oil for frying*
- 100 g (½ cup) caster sugar for rolling
- about 300 g (10 oz) jam (not chunky)
Instructions
-
To make the dough, mix the bread flour, sugar, yeast and salt together in a bowl.
-
Add the milk, melted butter and vanilla extract and mix to form a soft, sticky dough.
-
Knead the dough on an unfloured surface for about 10 minutes, until it is smooth, supple and stretchy. It should still be a bit sticky but not wet. If it is too wet you can add a teeny bit more flour but be careful not to add too much or the doughnuts will be dry.
-
Place the dough in an oiled bowl, cover, and leave to rise until doubled in size. About 1 ½ to 2 hours in a warm spot or overnight in the fridge.
-
Punch down the risen dough and give it a brief knead to get rid of any air bubbles.
-
Divide the dough into 8 even pieces. Use a scale for accuracy.
-
On a lightly floured surface, shape each piece into a ball. To do this, gather the edges up and pinch them together. Keep going until you have a neat, well-sealed ball. Flip the ball over, cup it with your hand over the top and roll it until it is smooth.
-
Flatten the ball with your hand into a disc about 1 ½ – 2cm thick. Repeat with the rest of the pieces of dough. (If you want really fat doughnuts then you don’t need to flatten them).
-
Place the discs of dough on a sheet of baking parchment on a baking sheet. Cover loosely and leave to rise until puffy, about 45 minutes. They are ready when the dough springs back slowly most of the way when you press it gently with a finger. If it springs back quickly then it needs a little longer, and if it deflates or doesn’t spring back at all then the doughnuts are over-prooved and you will need to knock them back, reshape them and let them rise again.
-
When the doughnuts are almost ready, heat a deep fat fryer to 170°C/340°F. Fill a shallow bowl with caster sugar and line a plate with kitchen roll.
-
Cook the doughnuts two at a time. Slide them carefully into the hot oil; they are delicate so handle them as little as possible. Cook for 2 ½ minutes (use a timer), then flip them over and cook for another 2 ½ minutes. They should be deep golden.
-
Remove using a slotted spoon and drain on kitchen paper. Roll the doughnuts in the caster sugar while they are still warm.
-
Use a skewer or small sharp knife to make a hole in the side of each doughnut. Wiggle it around a little bit to make the hole inside a bit bigger.
-
Place the jam in a piping bag fitted with a medium round nozzle. A syringe also works well.
-
Insert the nozzle into the hole you made in the side of the doughnut and pipe in a good splodge of jam. Serve as soon as possible.
Notes
- * The amount of oil that you need will vary depending on your fryer/pan. Check the manufacturers instructions if using a fryer. Or fill pan no more than ¾ full.
- See post above for tips, details and step-by-step photos. If you have a question I may have already answered it above!
- As with all of my baking recipes I really do recommend using the metric measurements with a digital scale rather than the cup conversions. Cups are a wildly inaccurate measuring system and you will get far better, more consistent results using a scale, not to mention that it is also easier and less messy than cups!
- If you aren’t sure if the doughnuts are cooked through, the best way to check is with a probe thermometer. I cook mine until they reach 100°C/212°F in the middle. Alternatively, a skewer inserted into the middle should meet little resistance and come out clean.

