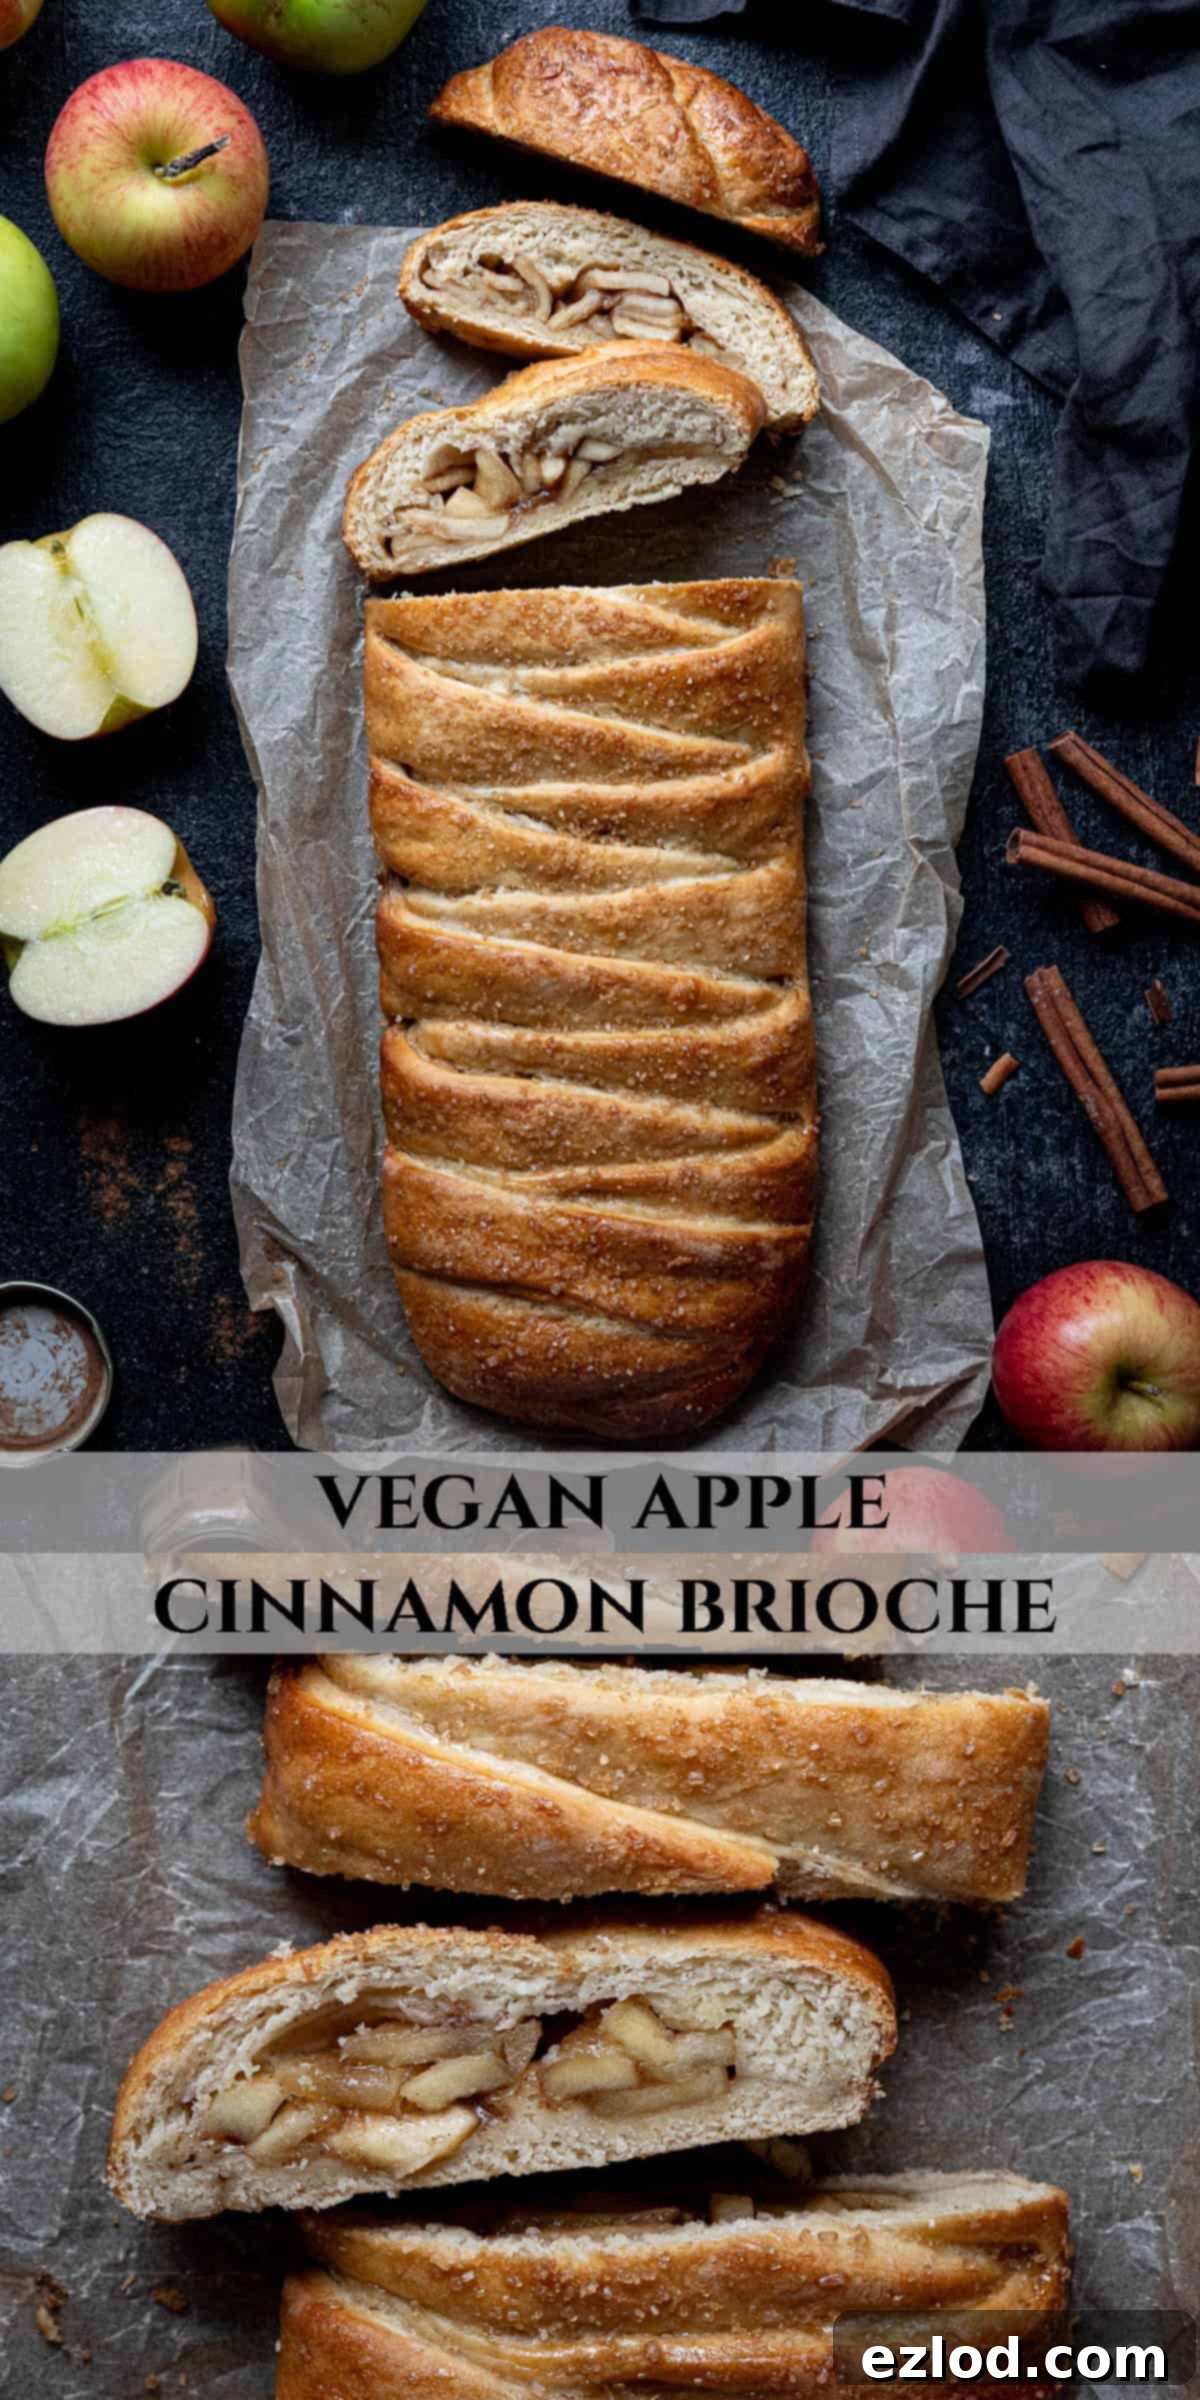
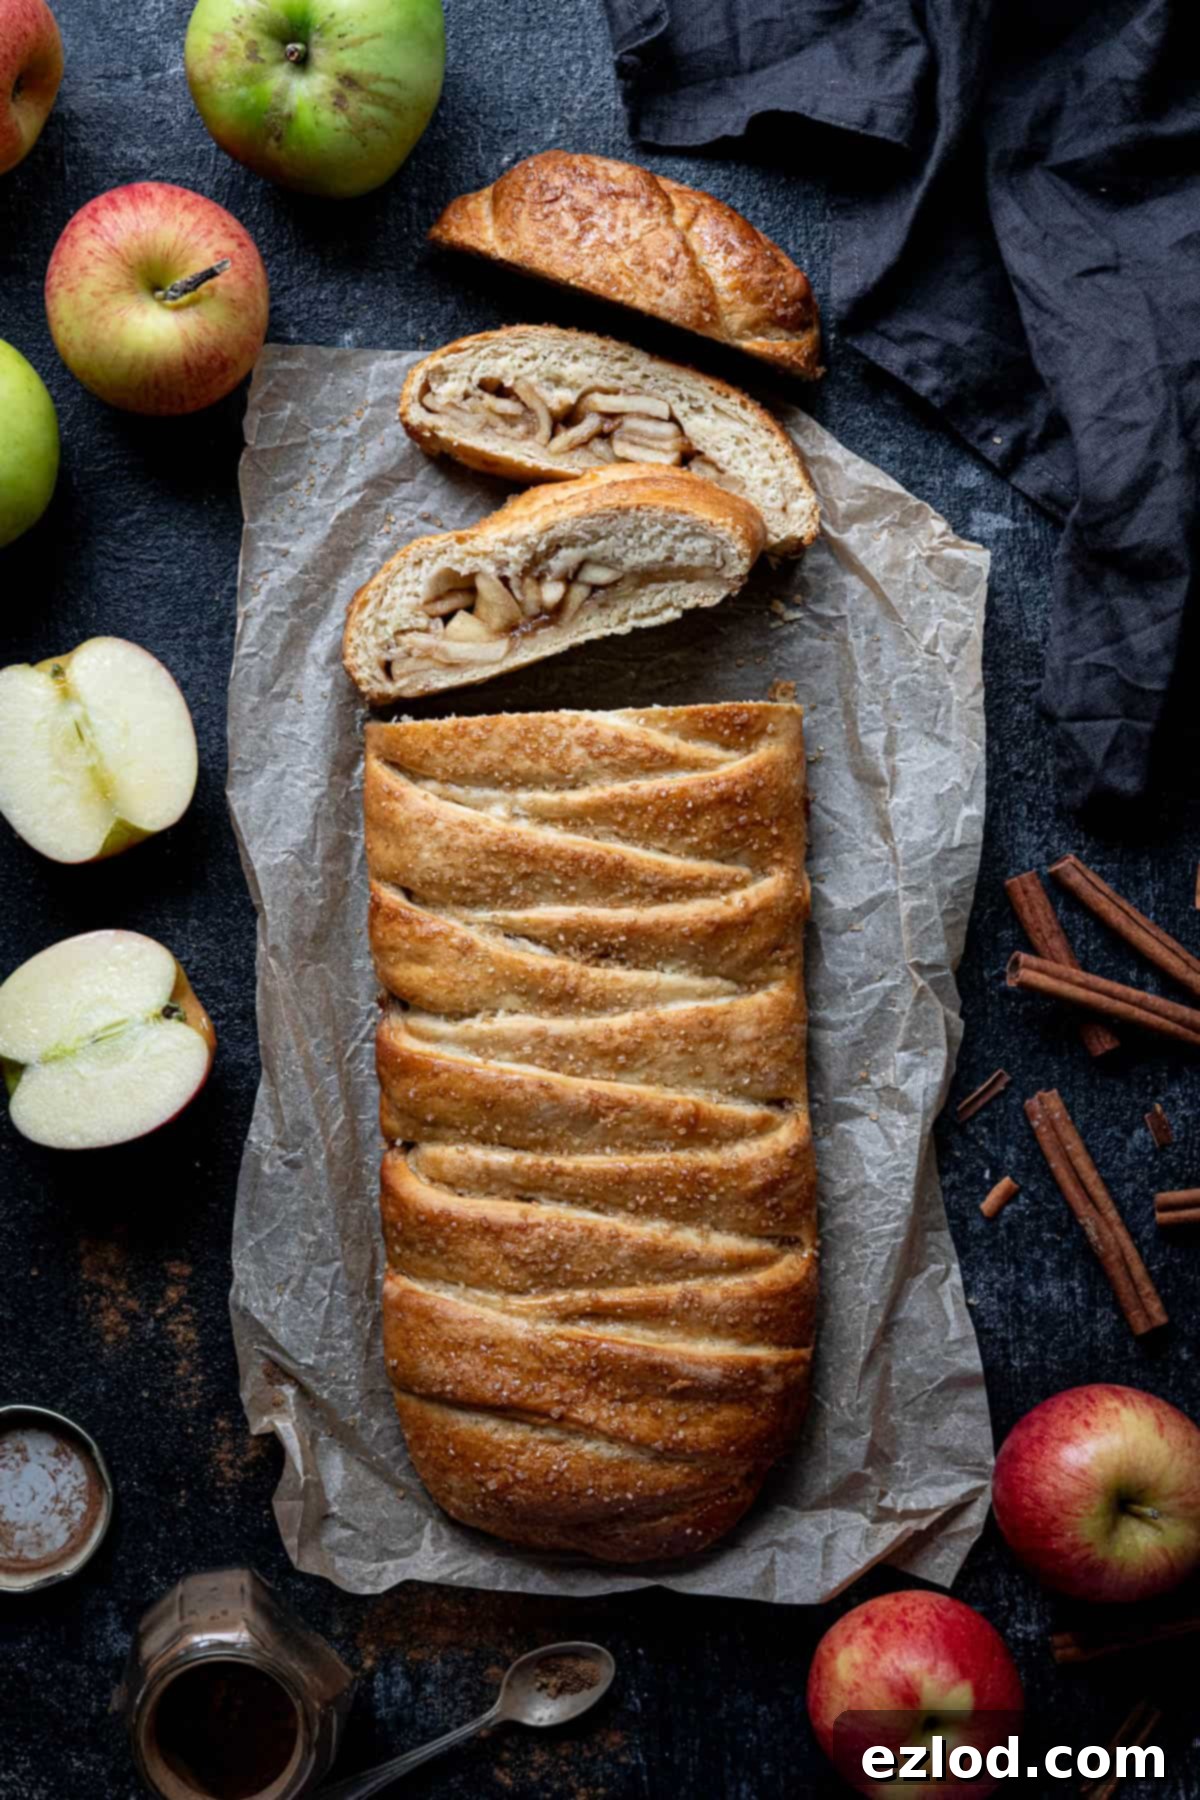
Ultimate Vegan Apple Cinnamon Brioche Recipe: Soft, Sweet & Braided Perfection
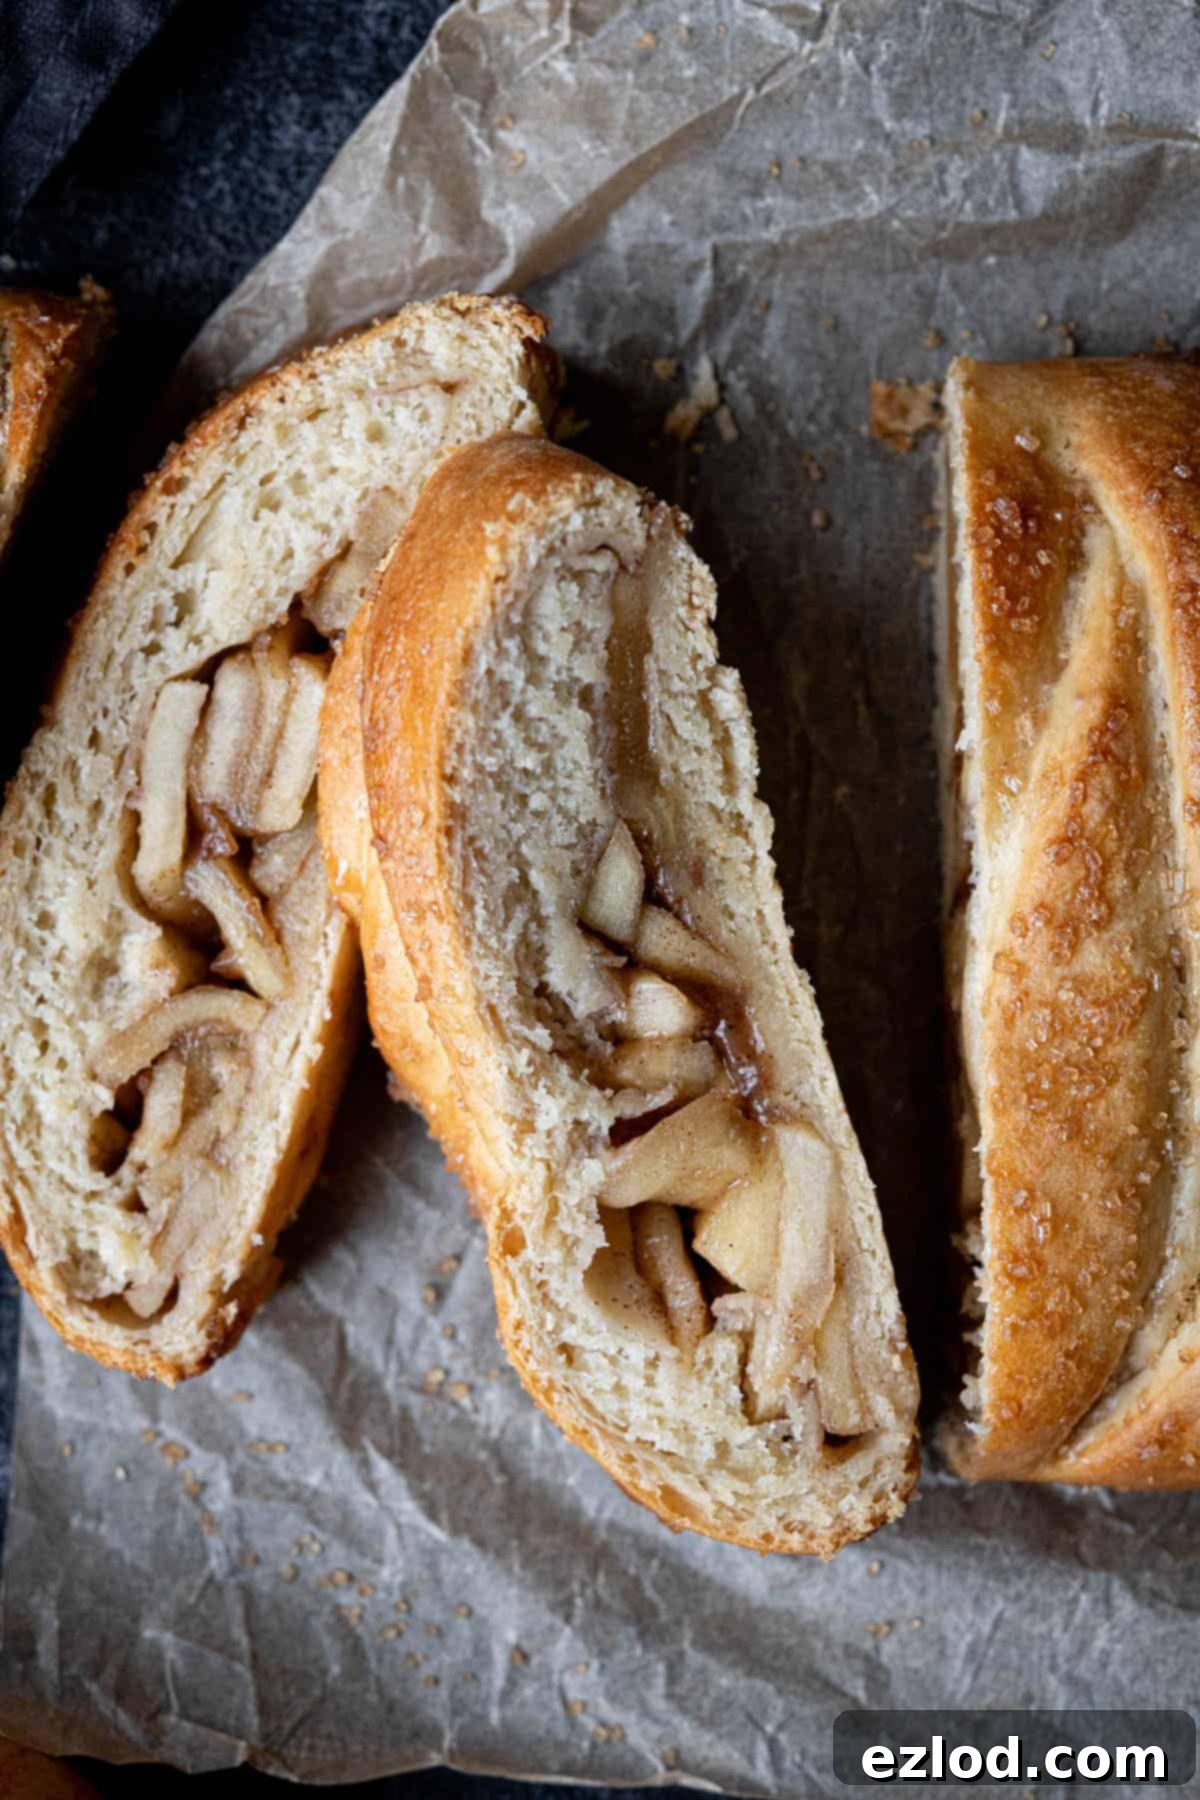
Welcome to a world of delightful aromas and comforting flavors with our incredible Vegan Apple Cinnamon Brioche. Imagine a perfectly soft, subtly sweet, and wonderfully fluffy brioche-style braided bread, generously filled with tender, juicy apples infused with warm cinnamon. This isn’t just a recipe; it’s an experience waiting to unfold in your kitchen, promising a treat that’s both visually stunning and incredibly delicious.
This exquisite bread is surprisingly easy to create, yet it looks like a masterpiece, making it an ideal choice for a fancy breakfast, a decadent brunch, a cozy afternoon tea, or a special snack. Each bite offers a harmonious blend of pillowy, rich dough and a sweet-spiced apple filling that will leave you craving more. It’s the perfect way to elevate any meal or simply indulge in a moment of pure comfort.
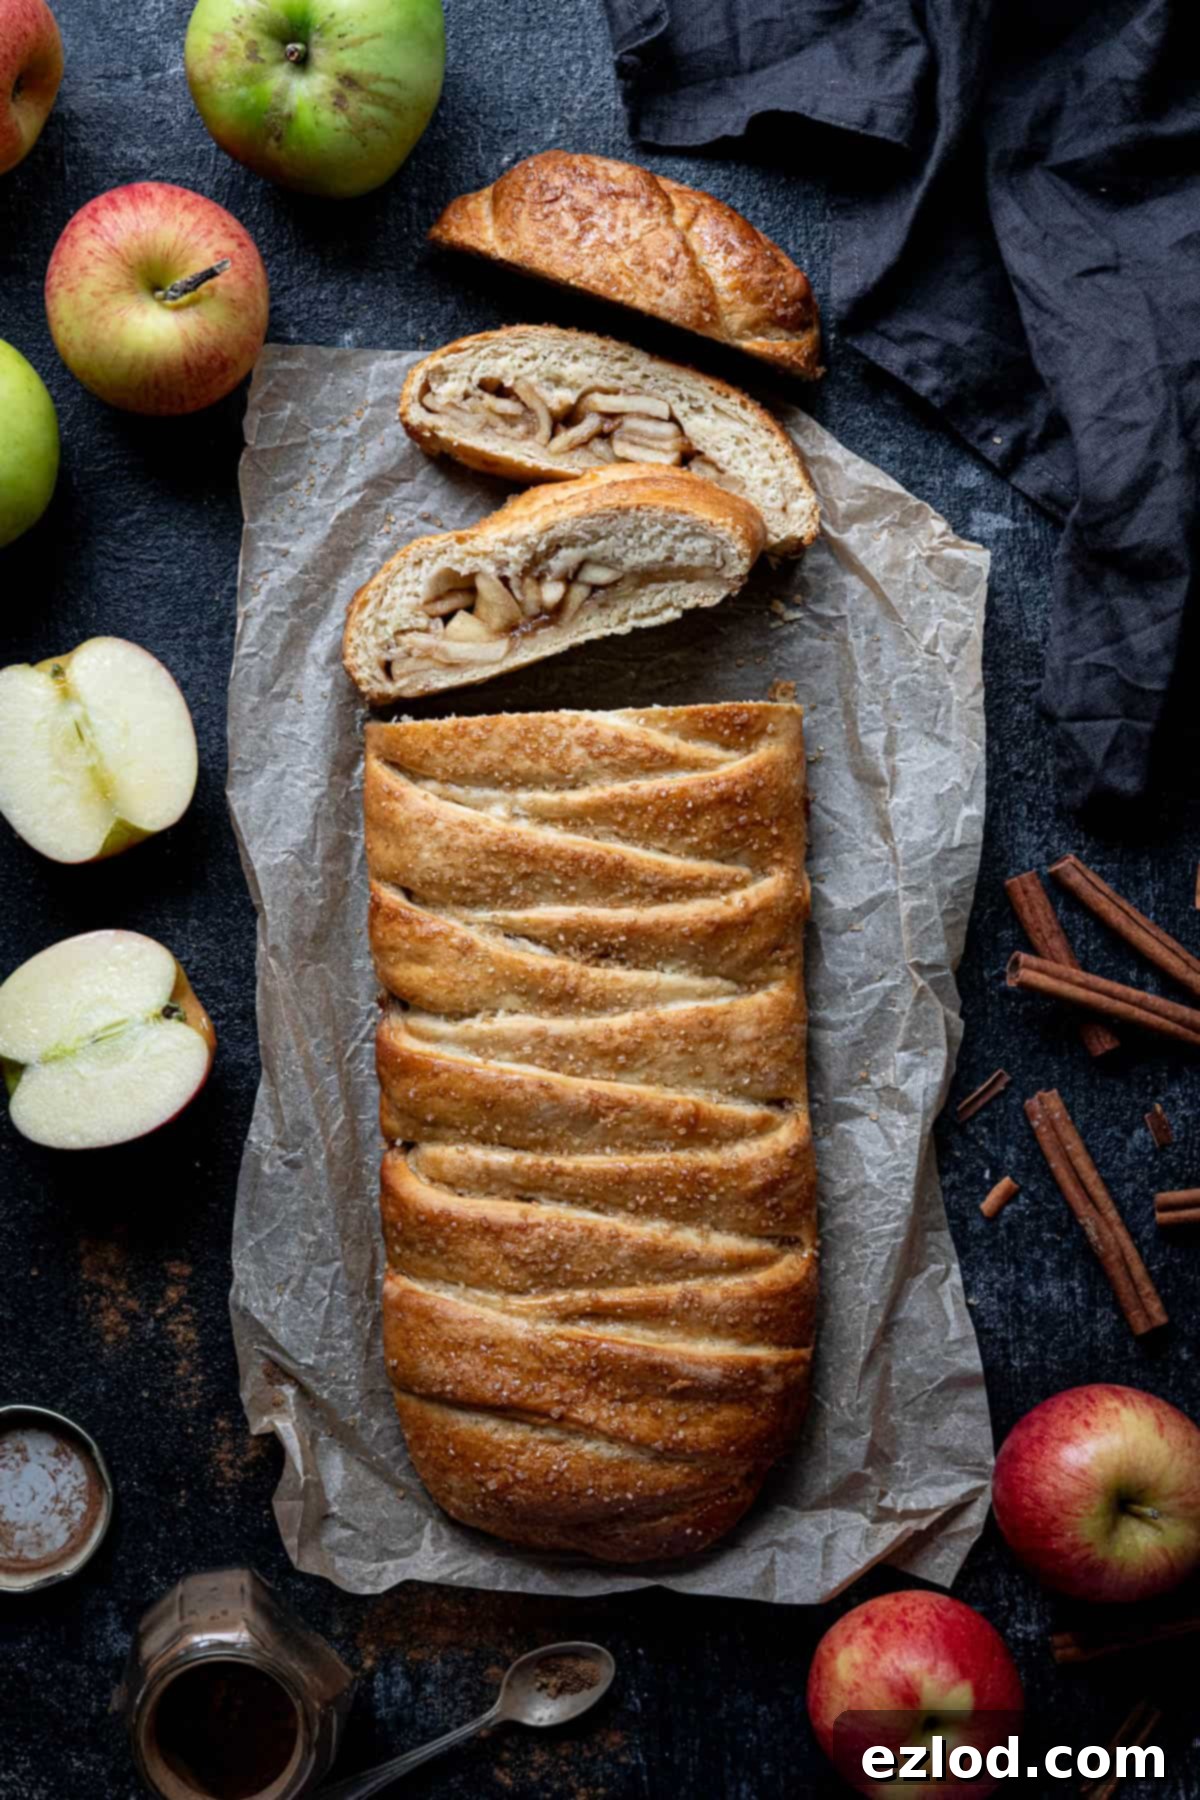
At the heart of this recipe is a tender, slightly sweet, and utterly moreish vegan brioche dough. It’s designed to be pliable and easy to work with, making the process enjoyable even for those new to bread making. What truly sets this recipe apart is the luscious apple filling, bursting with the inviting fragrance of cinnamon and sweet, cooked apples. The secret to its impressive appearance lies in a simple yet effective braiding technique, which requires minimal effort but delivers maximum visual impact.
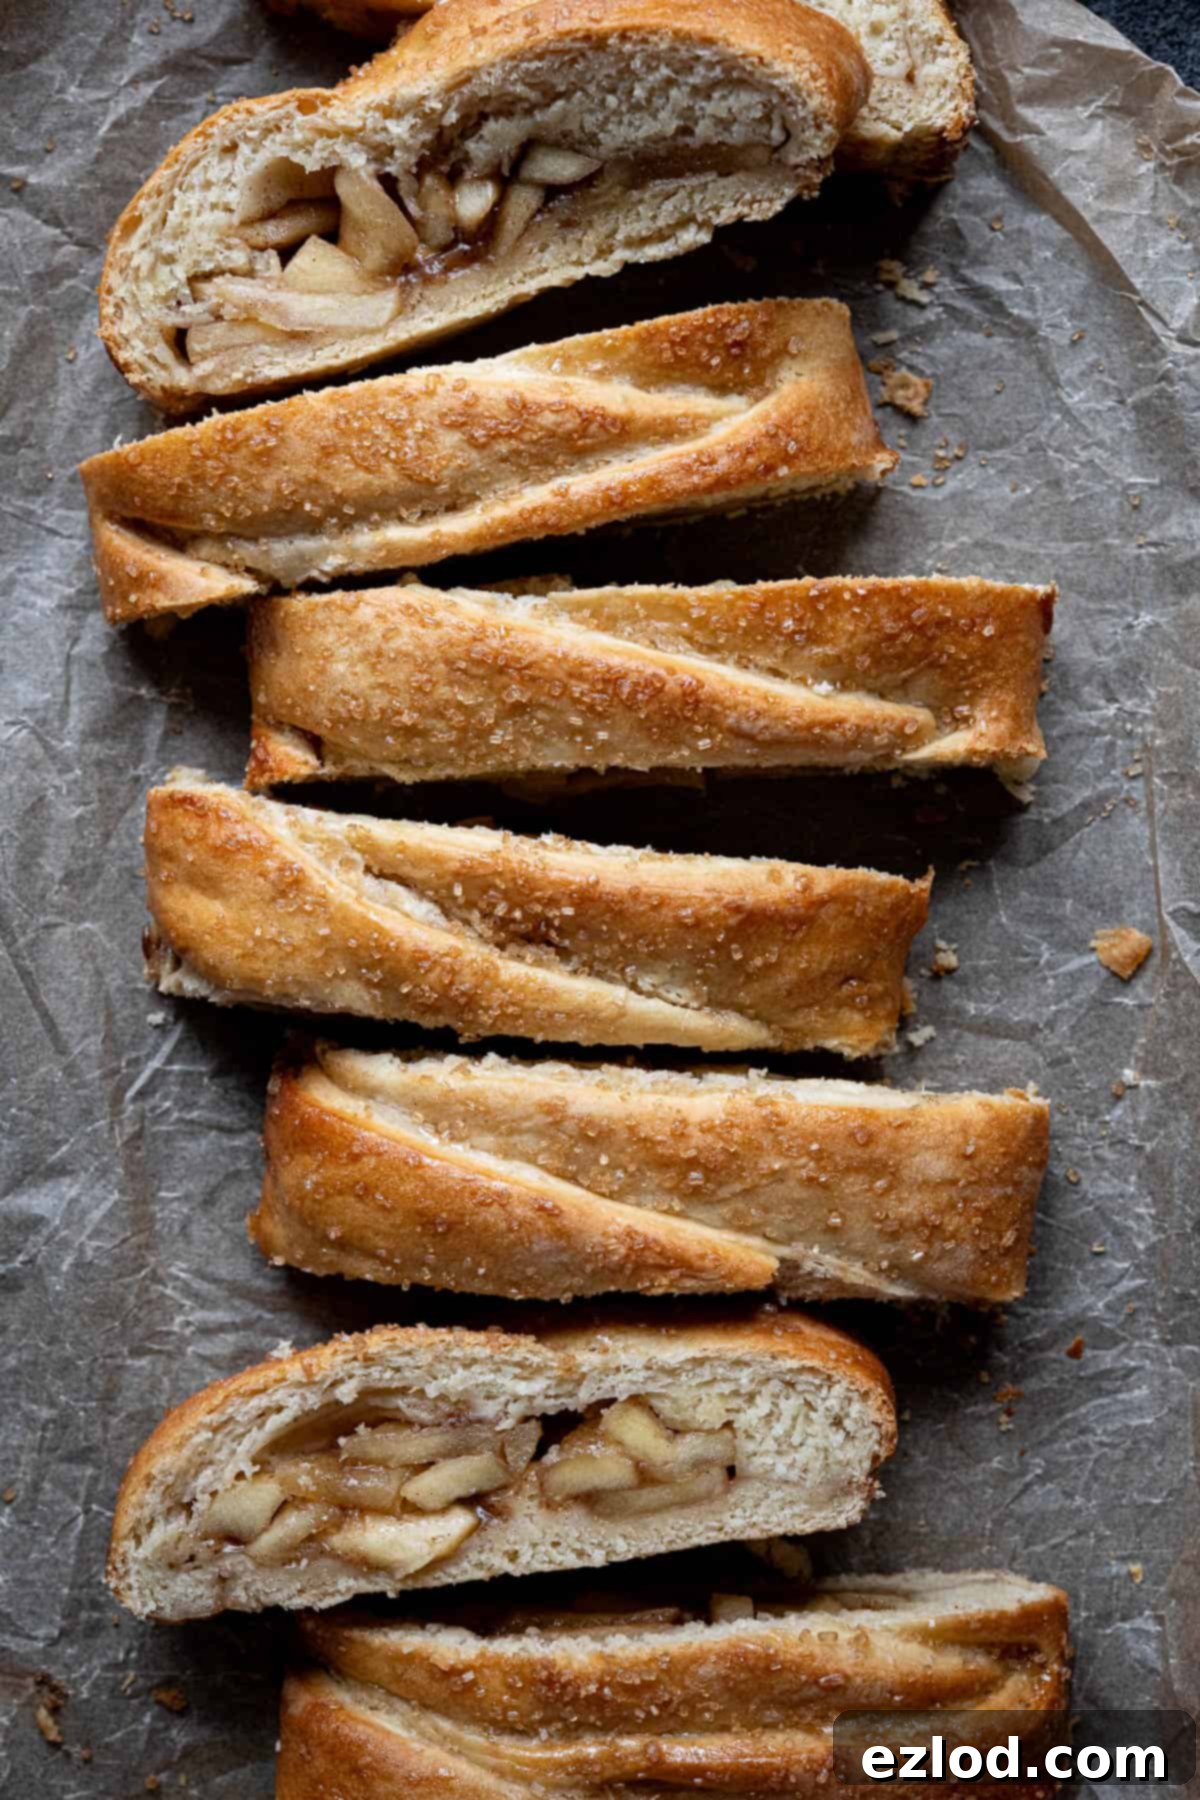
The magic happens when you roll out the dough into a simple rectangle. The sweet apple filling is then spread generously down the center, creating a flavorful core. The dough on either side is then cut into wide strips. These strips are gracefully folded over the filling, alternating sides, to create a stunning braided effect. It’s a technique that looks like you’ve spent hours meticulously crafting it, but in reality, it takes just a minute or two and very little coordination. The result is a beautifully presented loaf that’s as impressive to look at as it is to eat, making it perfect for sharing with loved ones or savoring on your own.
Whether you’re planning a special morning meal, hosting a relaxed brunch, or simply seeking a comforting treat to enjoy with a cup of coffee or tea, this apple cinnamon brioche is your perfect companion. Its irresistible flavor profile ensures that resisting a slice (or two!) will be a genuine challenge every time you pass through the kitchen. Trust us, it’s that delicious – a true testament to the joy and satisfaction of homemade vegan baking.
Key Ingredients for Perfect Vegan Brioche
Crafting the perfect vegan apple cinnamon brioche relies on understanding the role each ingredient plays. Here’s a detailed look at what you’ll need and why, ensuring you get the best possible results for this delightful braided bread:
Dough Ingredients
Bread flour: This is the backbone of our brioche. White bread flour is specifically chosen for its higher protein content, which is crucial for developing strong gluten networks. This results in the characteristic soft, fluffy, and delightfully chewy texture that defines traditional brioche. While plain (all-purpose) flour can be used if bread flour is unavailable, be aware that the final texture might not be as springy or open-crumbed. We strongly advise against using wholemeal flour, as its higher fiber content will produce a much denser loaf, straying from the light and airy brioche feel we’re aiming for.
Instant/fast action yeast: For convenience and consistent results, fast-action yeast is our go-to choice. Unlike active dry yeast, it doesn’t require prior activation in liquid, allowing you to add it directly to your dry ingredients. This simplifies the process and saves time, ensuring your dough rises beautifully and reliably every time. Always check the expiry date on your yeast package to ensure it’s fresh and active!
Salt: A non-negotiable ingredient in all bread making. Salt isn’t just for enhancing flavor; it also plays a crucial role in controlling yeast activity, preventing it from over-proofing too quickly, and strengthening the gluten structure. Without salt, your bread will be bland, might rise too rapidly, and could have a crumbly texture. Do not omit the salt – it’s essential for a balanced, flavorful, and structurally sound loaf.
Non-dairy milk: The liquid component for our brioche dough. Soy milk is often favored in vegan baking due to its higher protein content, which closely mimics the properties of dairy milk, contributing to a richer crumb and better browning. However, most unsweetened non-dairy milks like almond, oat, or cashew milk will work well. Just ensure it’s unsweetened to control the overall sweetness of the brioche, and lukewarm to activate the yeast effectively without shocking it.
Sugar: We use caster sugar in the dough because its fine granules dissolve quickly and evenly, ensuring a consistent sweetness throughout the bread. If caster sugar isn’t available, granulated sugar can be substituted. For the apple filling, light brown sugar is preferred as it adds a wonderful depth of flavor with delightful caramel notes that perfectly complement the apples and cinnamon. Dark brown sugar can also be used for an even richer, more molasses-like taste. For a delightful crunch and extra visual appeal, we recommend sprinkling either pearl sugar or demerara sugar on top of the loaf before baking. This creates a beautiful, sparkling crust with a satisfying textural contrast.
Vegan butter: For the best results and a truly rich, tender brioche, a high-quality block-style vegan butter, such as Flora Plant Butter or Naturli Vegan Block, is highly recommended. These block butters have a higher fat content and firmer consistency when softened, which is crucial for achieving the dough’s desired texture, elasticity, and classic brioche richness. While spreadable vegan butter will technically work, it can make the dough softer and potentially harder to handle and knead effectively, possibly resulting in a slightly less robust and tender texture.
Apple Filling Ingredients
Apples: The vibrant star of our filling! To achieve a pleasant balance of sweetness and tartness, a sharper variety of eating apple works best. Excellent choices include Braeburn, Cox, or Granny Smith apples. These varieties hold their shape well during cooking, preventing them from turning into mush, and provide a bright, lively flavor that cuts through the richness of the brioche, ensuring the filling isn’t overly sweet or cloying. Pairing them with a touch of lemon juice also helps maintain their fresh color and adds another layer of bright flavor.
Step-by-Step Guide: How To Make Vegan Apple Cinnamon Brioche
(For precise measurements and comprehensive, detailed instructions, please refer to the complete recipe card located at the bottom of this page.)
Step 1: Preparing the Dough Base
Begin by combining the dry ingredients for your brioche dough. In a large mixing bowl, thoroughly combine the white bread flour, instant yeast, salt, and caster sugar. It’s a good practice to initially add the yeast to one side of the bowl and the salt and sugar to the other before stirring, as direct contact between yeast and salt can inhibit yeast activity. Once these are well-distributed, pour in the lukewarm non-dairy milk and the vanilla extract. Mix everything together with a sturdy spoon or your hands until a shaggy, somewhat cohesive dough forms. It will look a bit rough and not perfectly smooth yet, which is exactly the desired consistency at this stage.
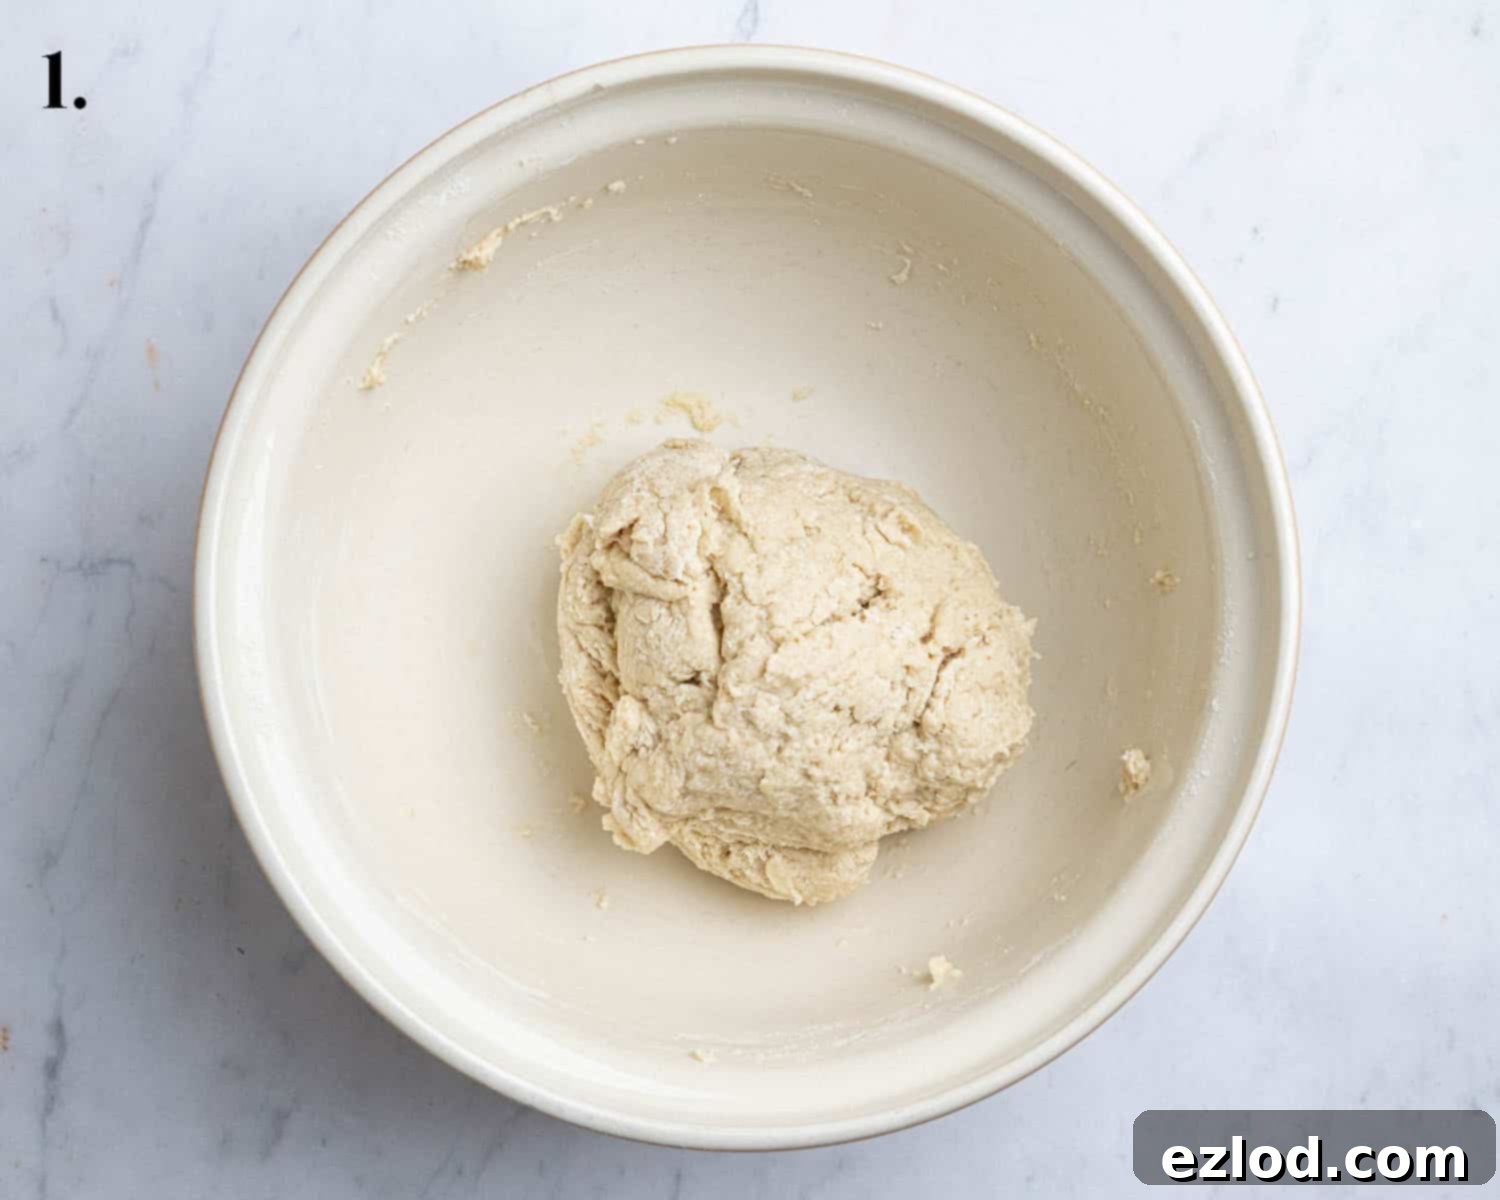
Step 2: Developing the Gluten for Elasticity
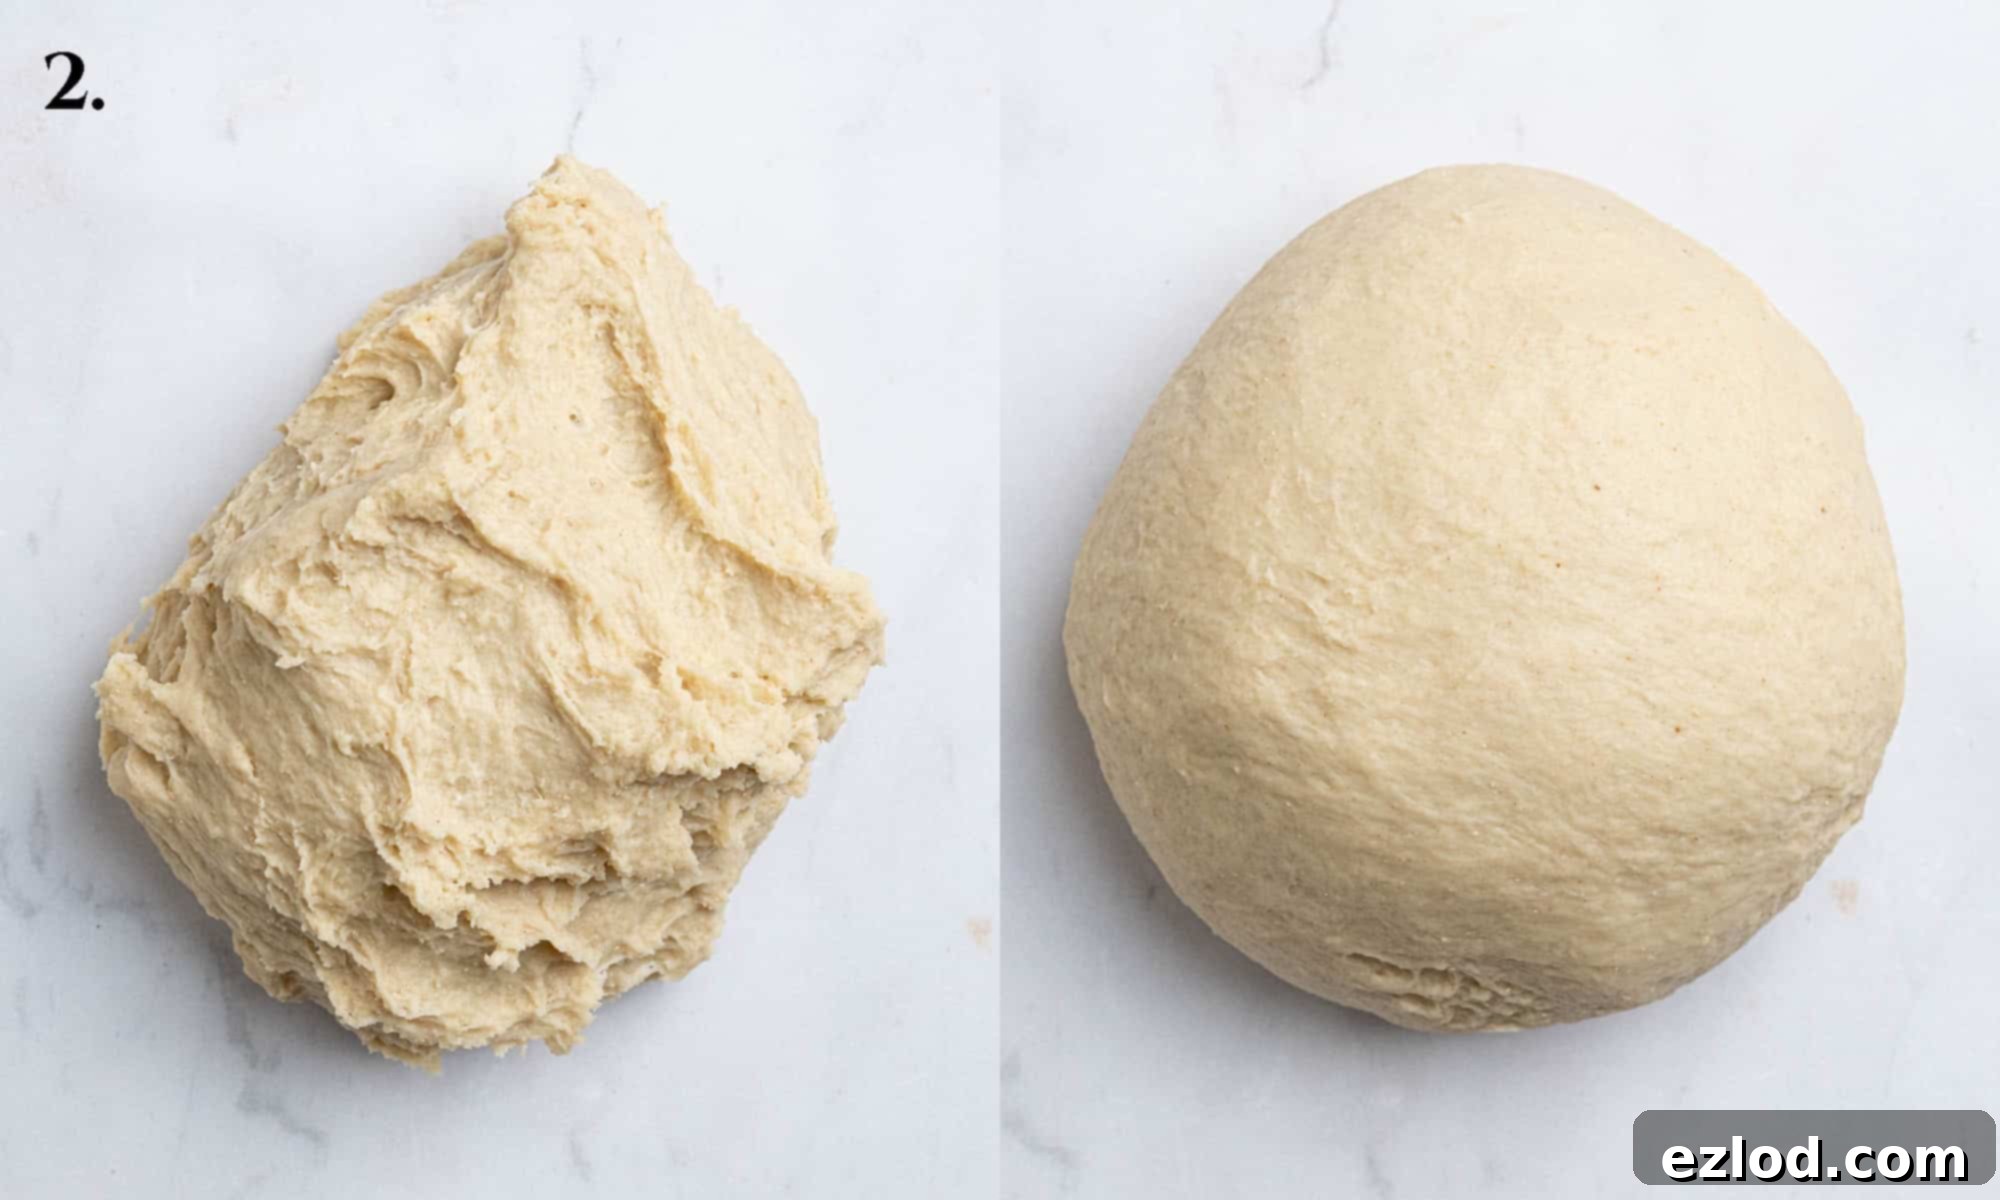
Turn the shaggy dough out onto a clean, un-floured work surface. At this stage, the dough will be quite sticky, but resist the urge to add more flour! Begin kneading with a strong, rhythmic motion, pushing the dough away from you and then folding it back. Continue kneading diligently for 5-10 minutes. As you work the dough, the gluten will develop, transforming the sticky mass into a smooth, elastic, and much less sticky dough that is a joy to handle. It should feel supple and bounce back when gently poked. If you prefer, a stand mixer fitted with a dough hook can make this step even easier, mixing on medium-low speed for about 7-8 minutes until the dough pulls away from the sides of the bowl.
Step 3: Incorporating Butter and First Rise for Richness
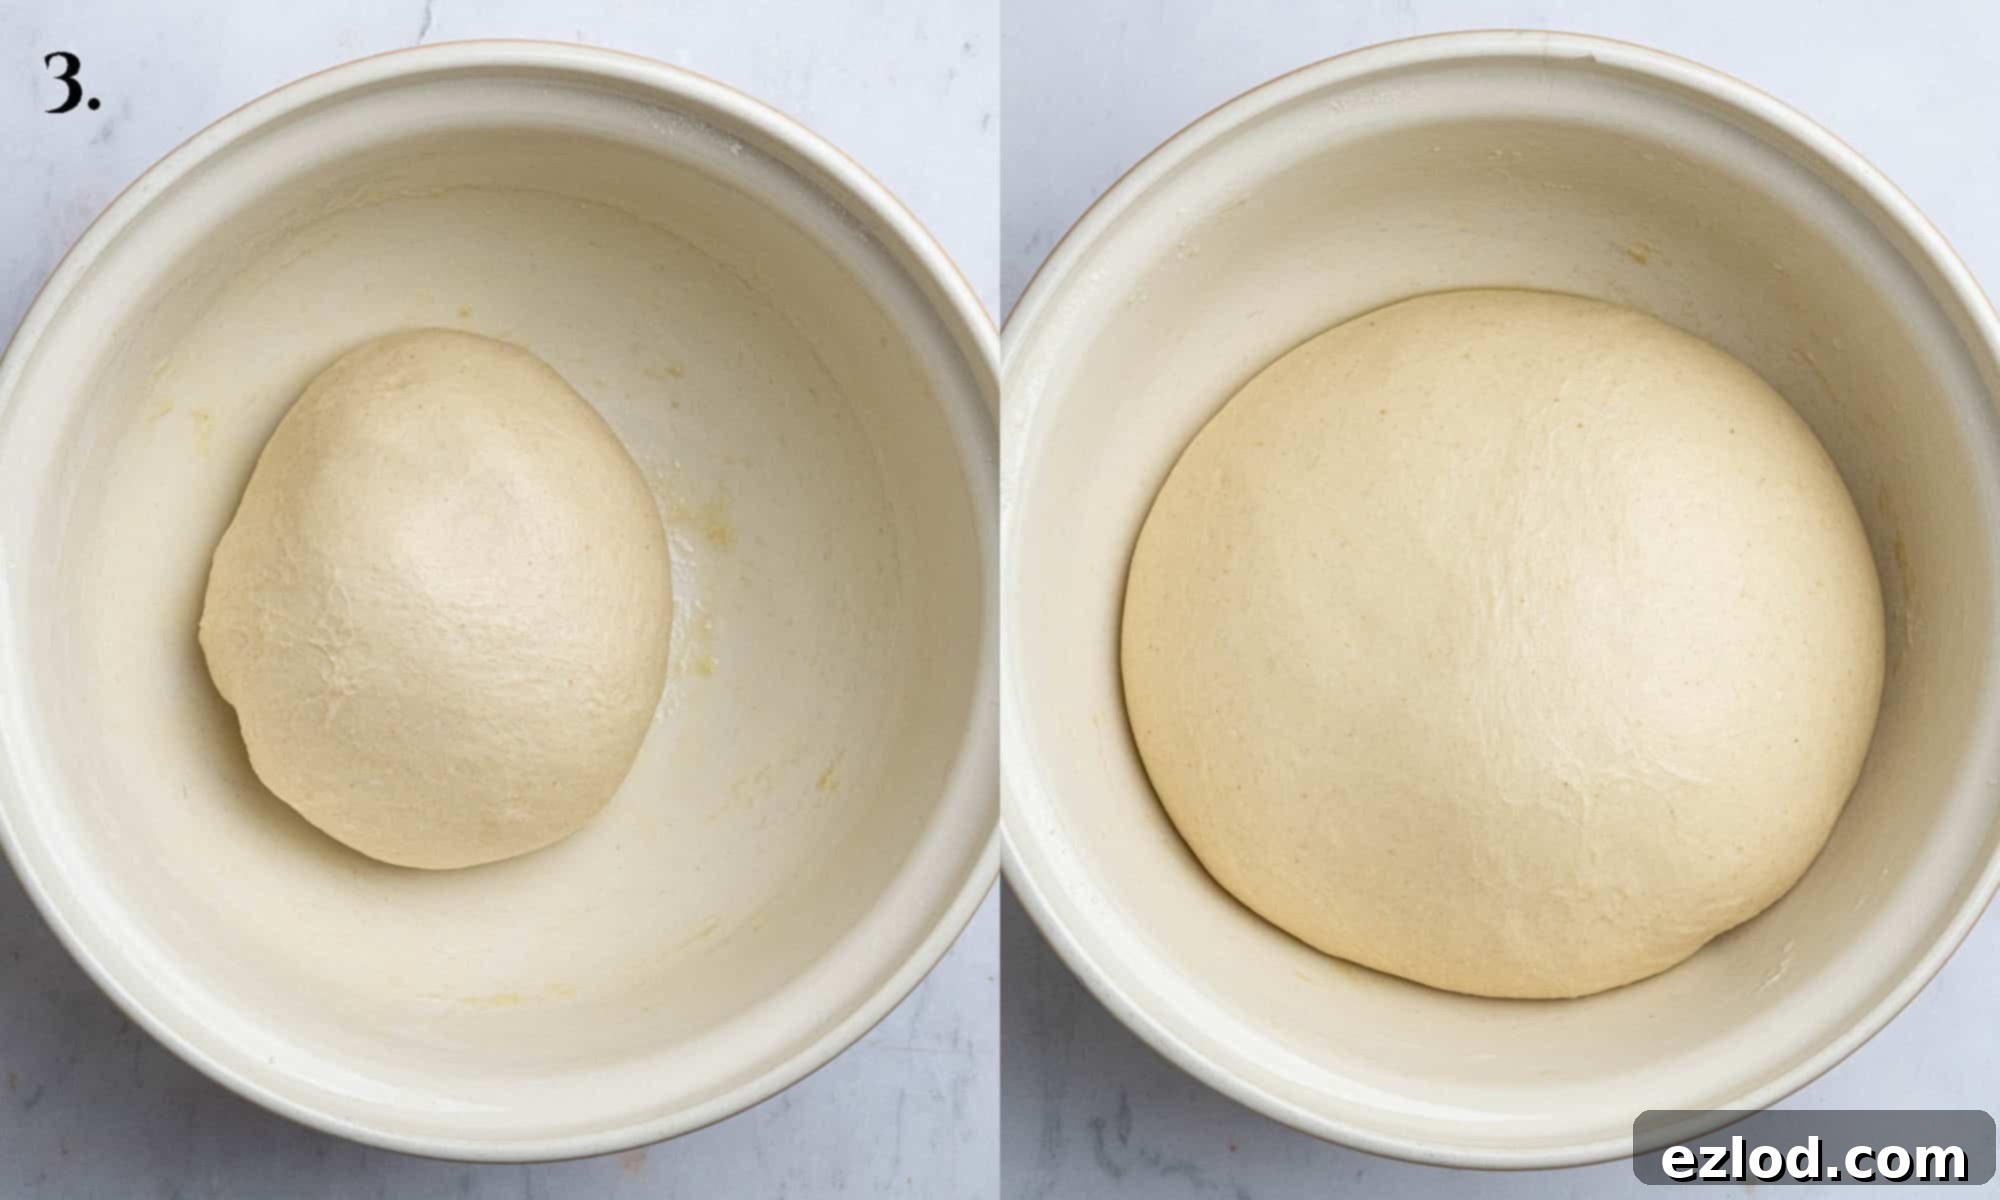
Now it’s time to add the softened vegan block butter. This step might seem a bit messy at first as the dough will become greasy and slippery from the butter, but persevere! Continue kneading until the butter is fully incorporated into the dough. The dough will eventually regain its smooth, elastic texture and no longer feel greasy. This process is vital as it enriches the dough, giving brioche its characteristic tender, rich crumb. Once the butter is completely mixed in, place the dough into a lightly oiled bowl, ensuring it’s turned once to coat all sides. Cover the bowl tightly with plastic wrap or a clean kitchen towel and let it rise in a warm, draft-free spot until it has visibly doubled in size. This typically takes 1-2 hours, depending on your room temperature and the activity of your yeast.
Step 4: Crafting the Delicious Apple Filling
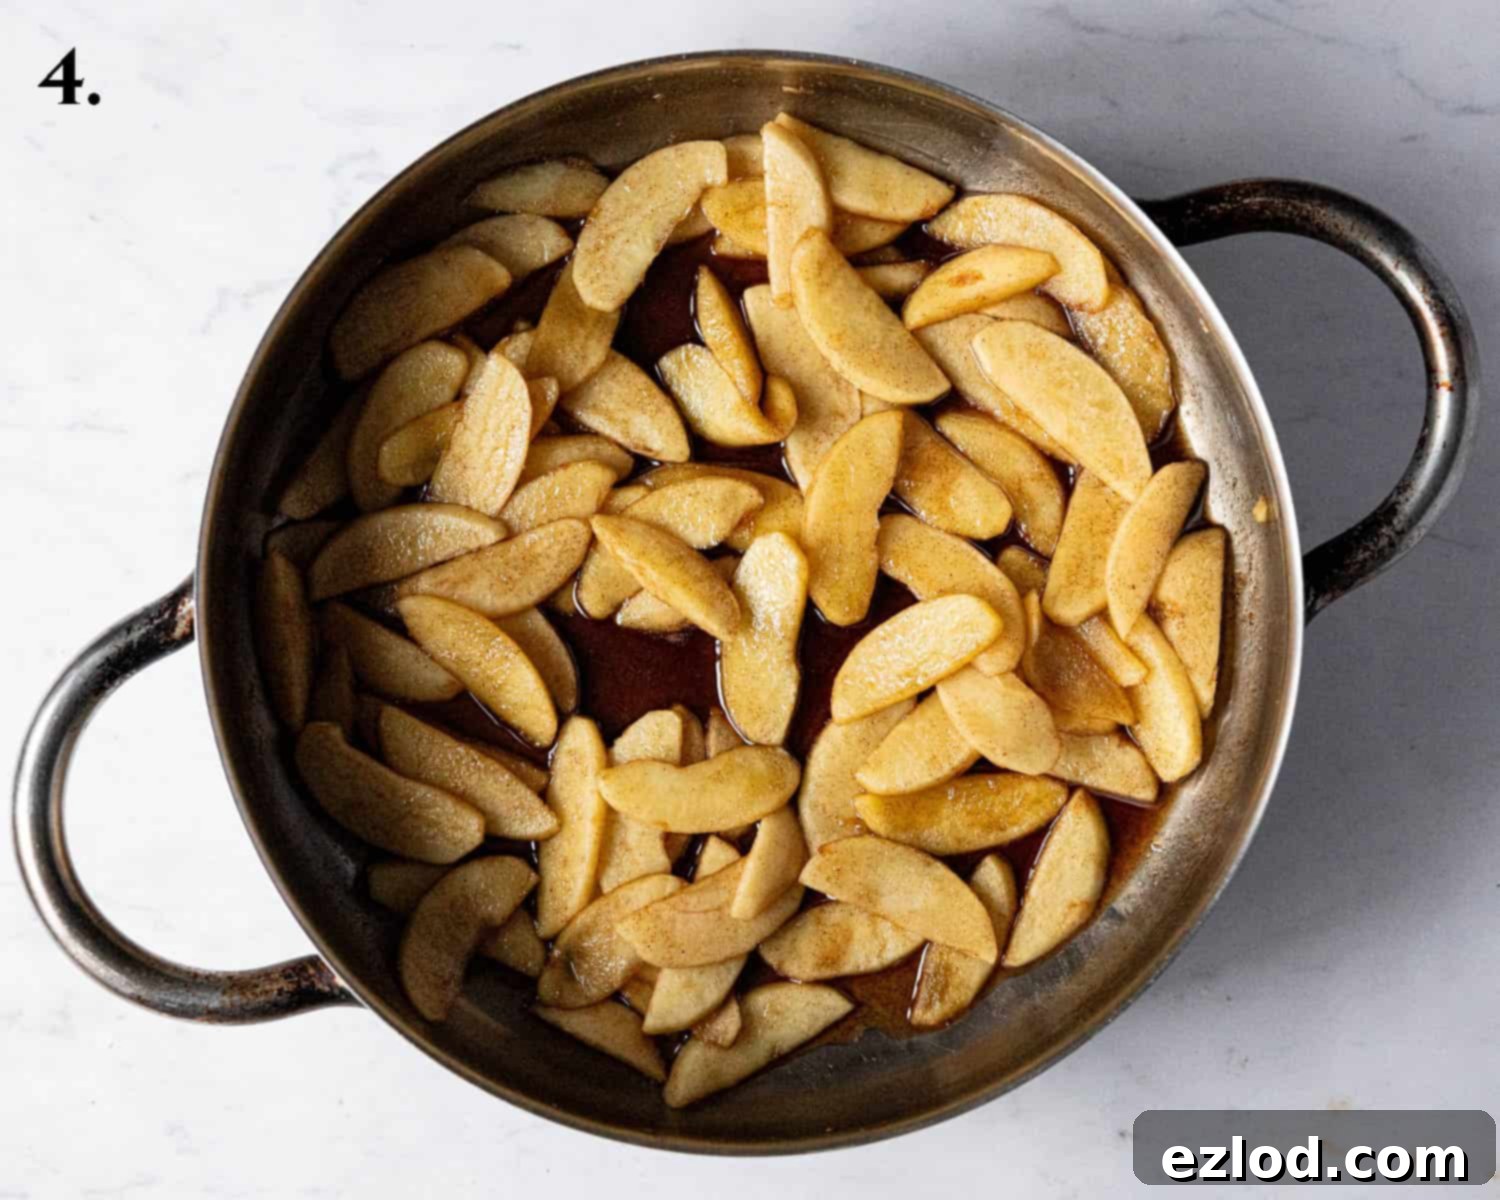
While your dough is undergoing its first rise, prepare the star of the show: the apple filling. Peel, core, and slice your chosen apples into thin, even pieces. Place them in a bowl and toss with a splash of lemon juice – this helps prevent browning and adds a touch of freshness. In a wide frying pan, melt the vegan butter over medium heat. Add the sliced apples, light brown sugar, ground cinnamon, a pinch of salt, and vanilla extract or paste. Stir everything together to ensure the apples are well coated with the spice mixture. Sauté gently, stirring occasionally, until the apples have softened slightly but still retain a little bite, and their juices have reduced into a thick, syrupy consistency. Remove from heat and set aside to cool completely. Once cooled, drain any excess liquid (which can be saved for another use!) and gently stir in a tablespoon of plain flour – this helps to further thicken the filling and prevent it from making the brioche soggy during baking.
Step 5: Shaping the Brioche Loaf – The Rectangle and Filling
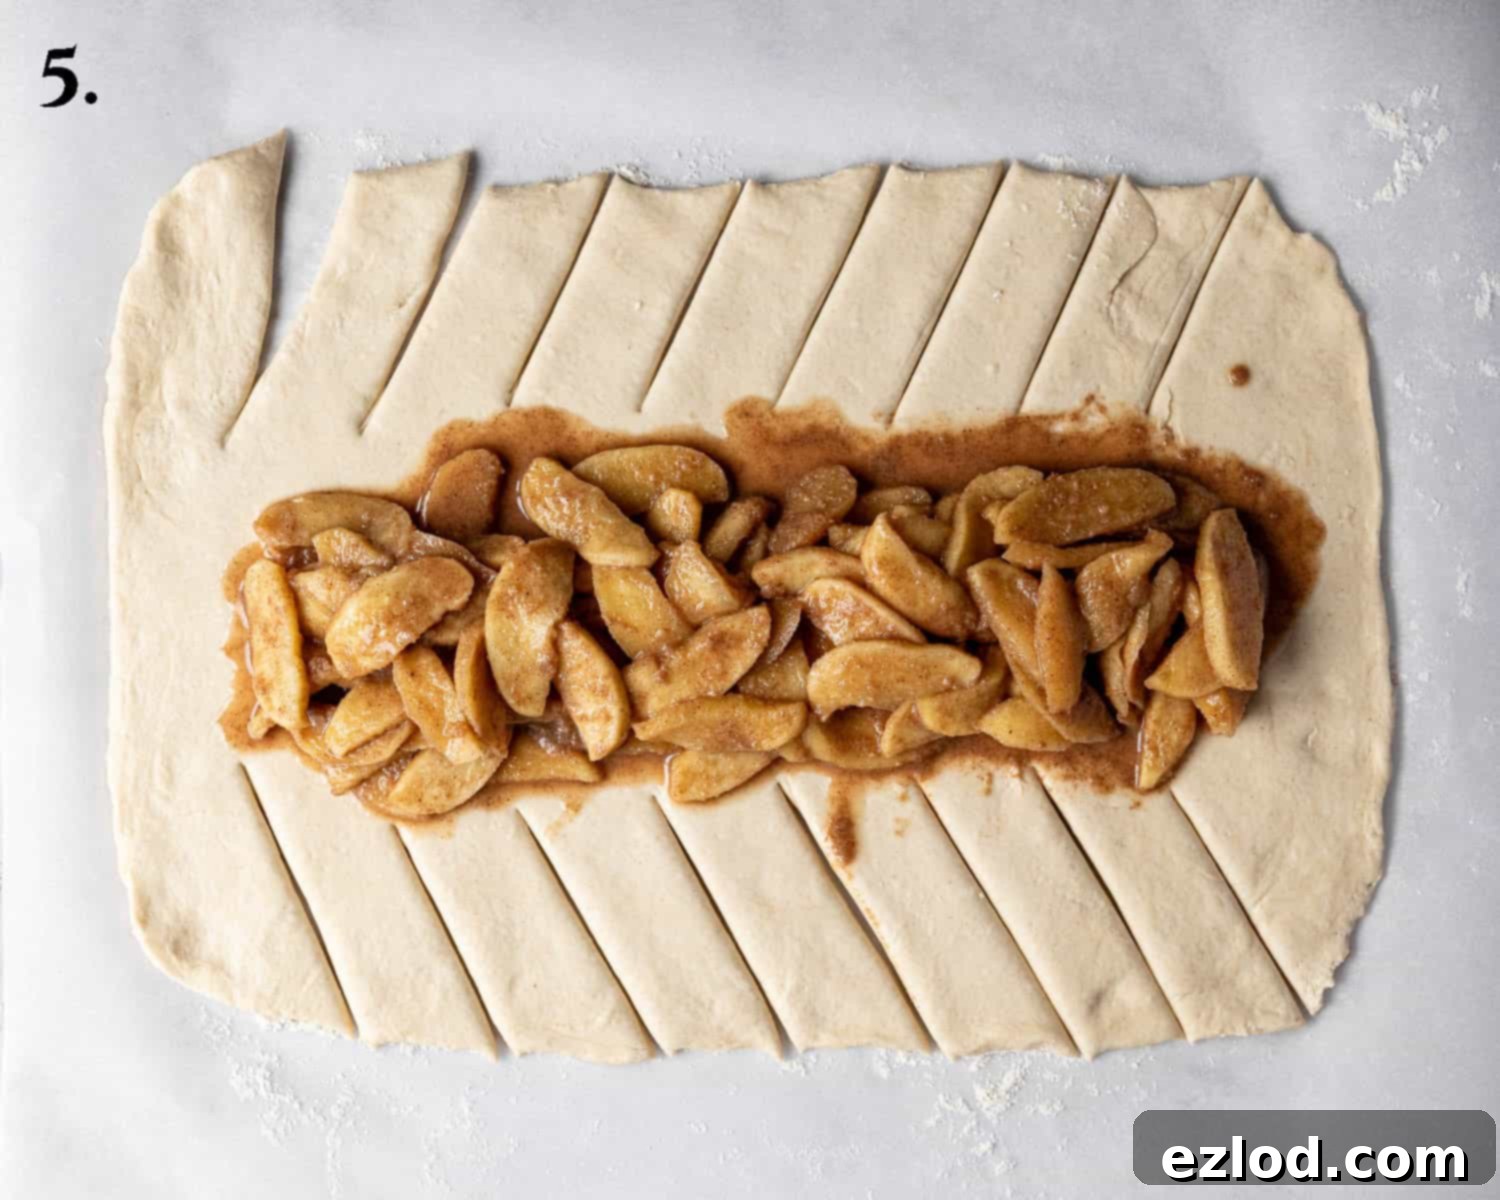
Once your dough has proudly doubled in size, gently punch it down to release the accumulated air. Transfer it to a lightly floured surface and give it a brief knead to ensure all air bubbles are knocked out, preparing it for shaping. Roll the dough out into a large, even rectangle, approximately 25 x 38 cm (10 x 15 inches). The dough should be relatively thin and consistent in thickness. Carefully transfer this dough rectangle onto a piece of baking parchment, then place the parchment and dough onto a baking tray. This makes it significantly easier to handle and transfer the delicate braided loaf later. Now, spoon the cooled apple filling neatly and evenly down the center third of the dough rectangle, ensuring you leave an equal border of plain dough on either long side, which will be used for braiding.
Step 6: The Signature Braid for a Stunning Presentation
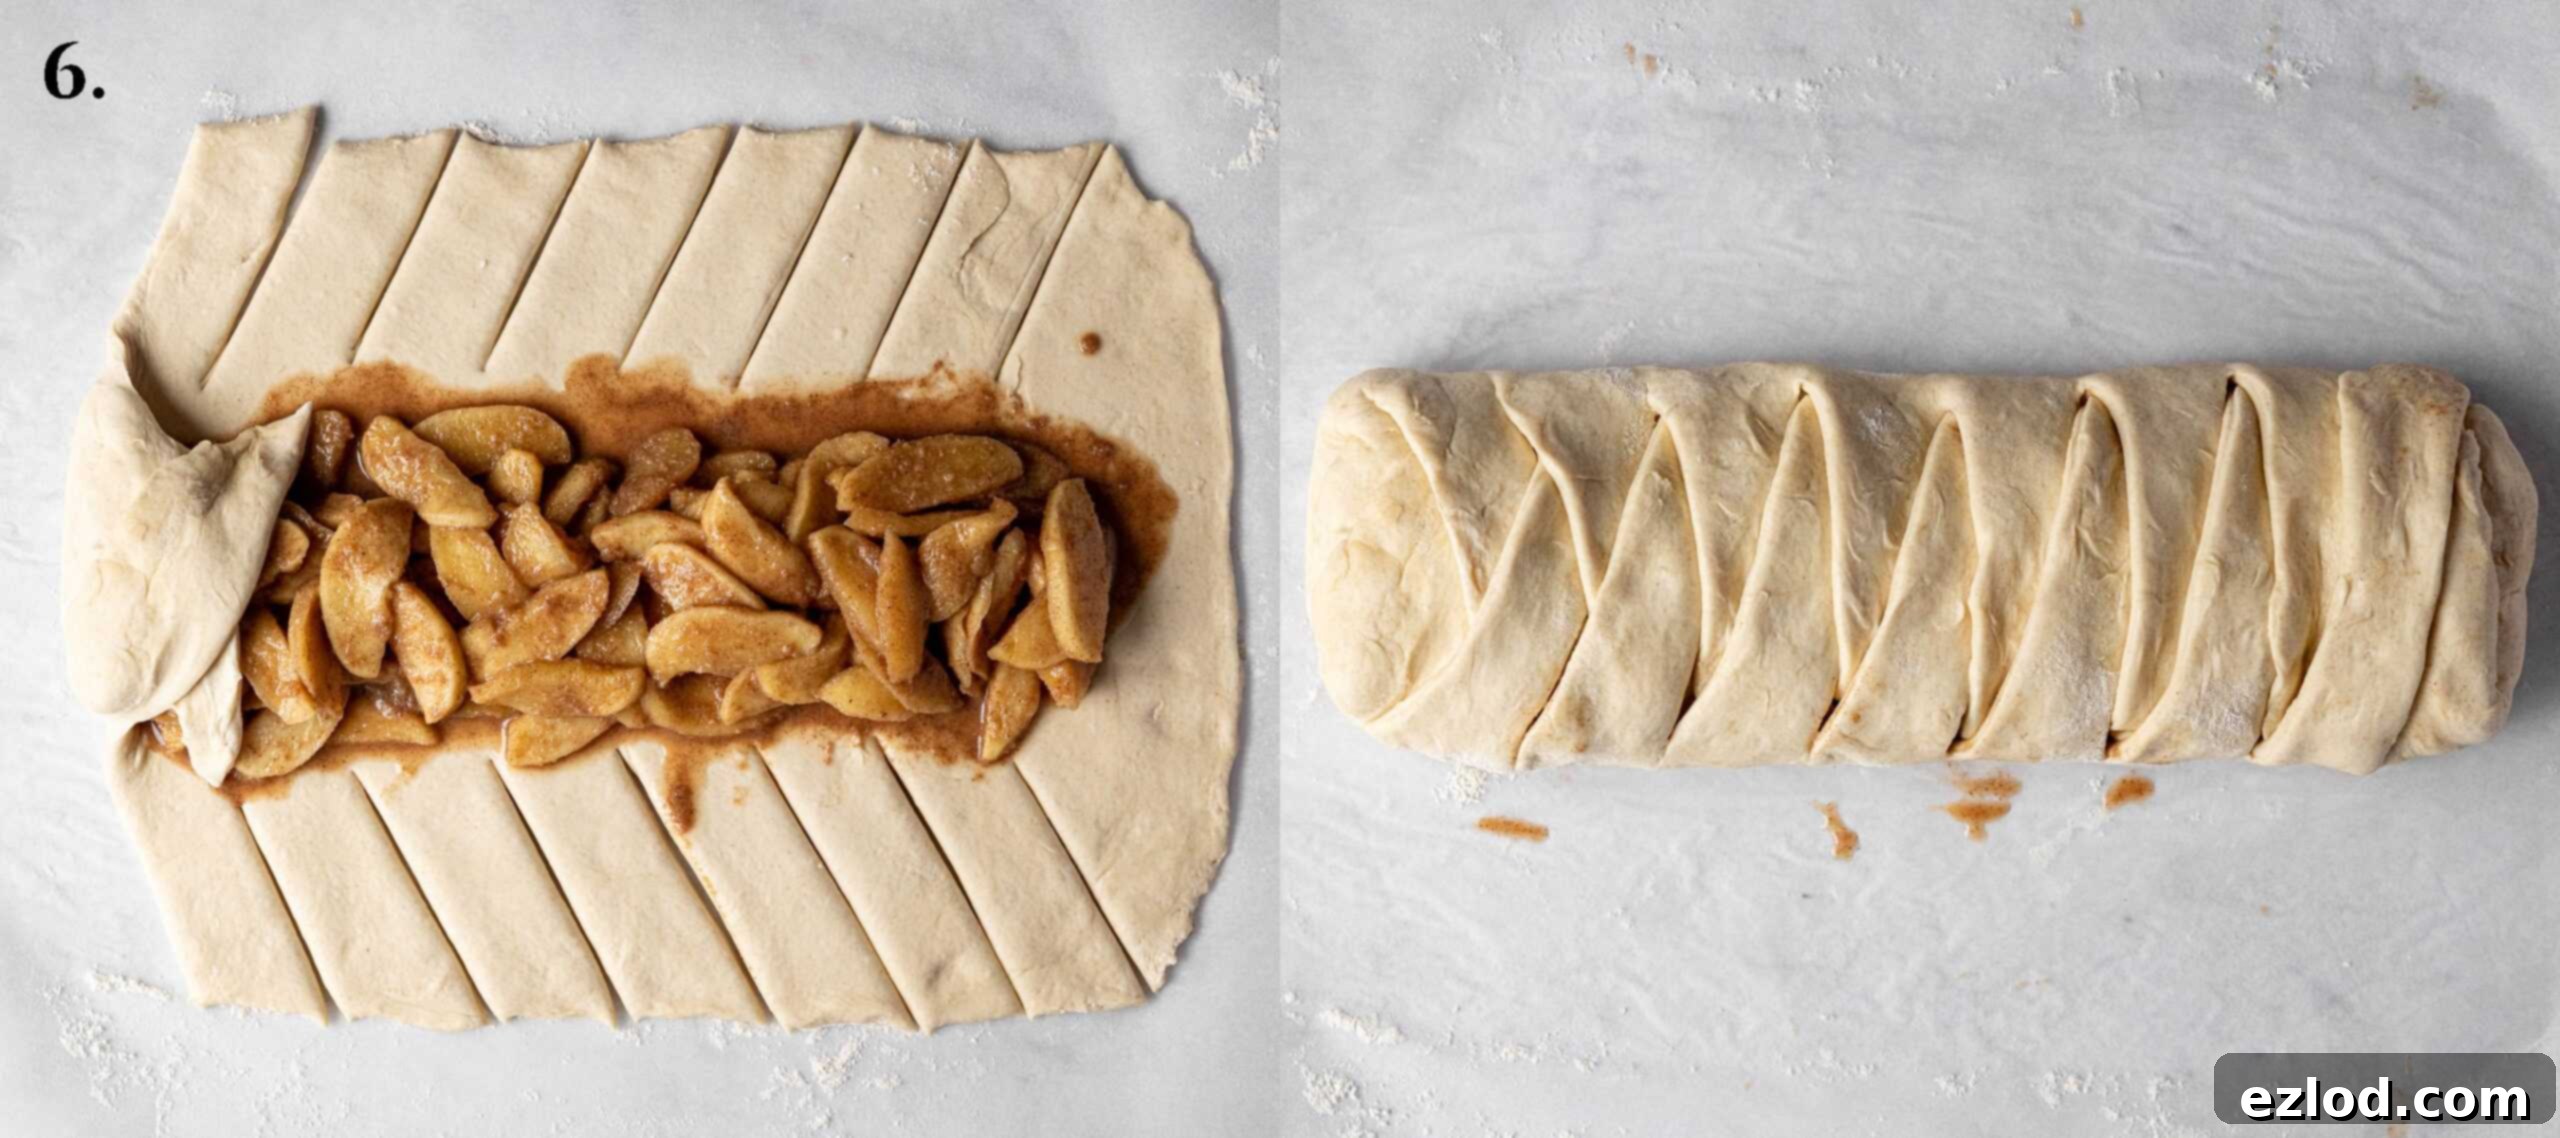
This is where the magic of the visual appeal happens! With a sharp knife or a pizza cutter, make diagonal cuts on both sides of the dough, extending from the edge of the apple filling to the outer edge of the dough. Each strip should be about 4 cm (1 ½ inches) wide, and it’s important to ensure you have the same number of strips on each side for a symmetrical braid. First, fold the short top and bottom ends of the dough over the apple filling to fully secure it and prevent the filling from escaping. Then, take one strip from the left side and fold it diagonally over the filling. Next, take a strip from the right side and fold it diagonally over the filling, neatly overlapping the previous strip. Continue this alternating pattern, crossing strips over the apple filling, until you reach the end of the loaf. This creates a beautiful, intricate basket-weave or braided appearance that will impress your guests and looks much more complicated than it actually is!
Step 7: Second Rise and Glazing Preparation
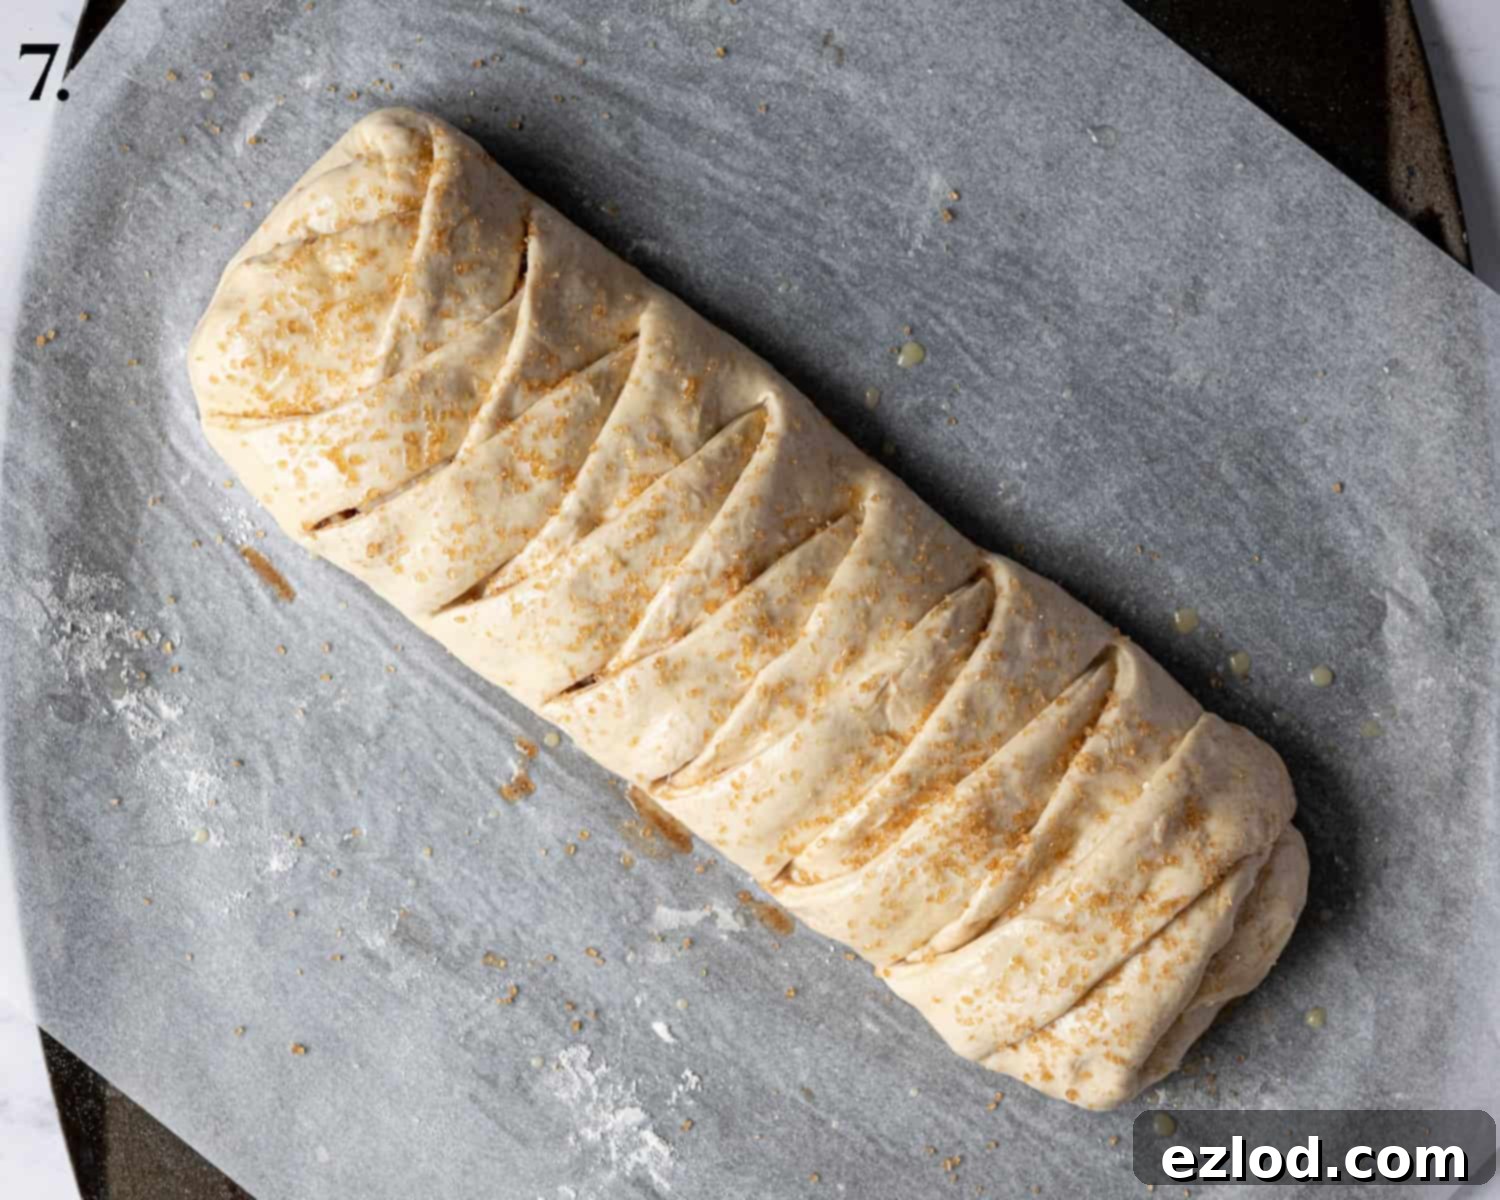
Once your brioche is beautifully braided, it needs its final proof. Loosely cover the entire loaf with a piece of lightly oiled cling film or a clean, damp kitchen towel. This prevents a skin from forming. Allow it to rise in a warm, draft-free spot for its second proof. This stage will take approximately 45 minutes to 1 hour, or until the loaf appears visibly puffy and springs back slowly when you gently press it with a finger, leaving a slight indentation. This indicates it’s ready for baking. While the dough is completing its final rise, preheat your oven to 180°C/160℃ fan/350°F/gas mark 4. Just before placing it in the oven, gently brush the risen brioche with a little non-dairy milk (like soy milk) to give it a beautiful golden sheen, and then generously sprinkle with demerara or pearl sugar for an extra layer of sweetness, texture, and visual appeal.
Step 8: Baking to Golden Perfection
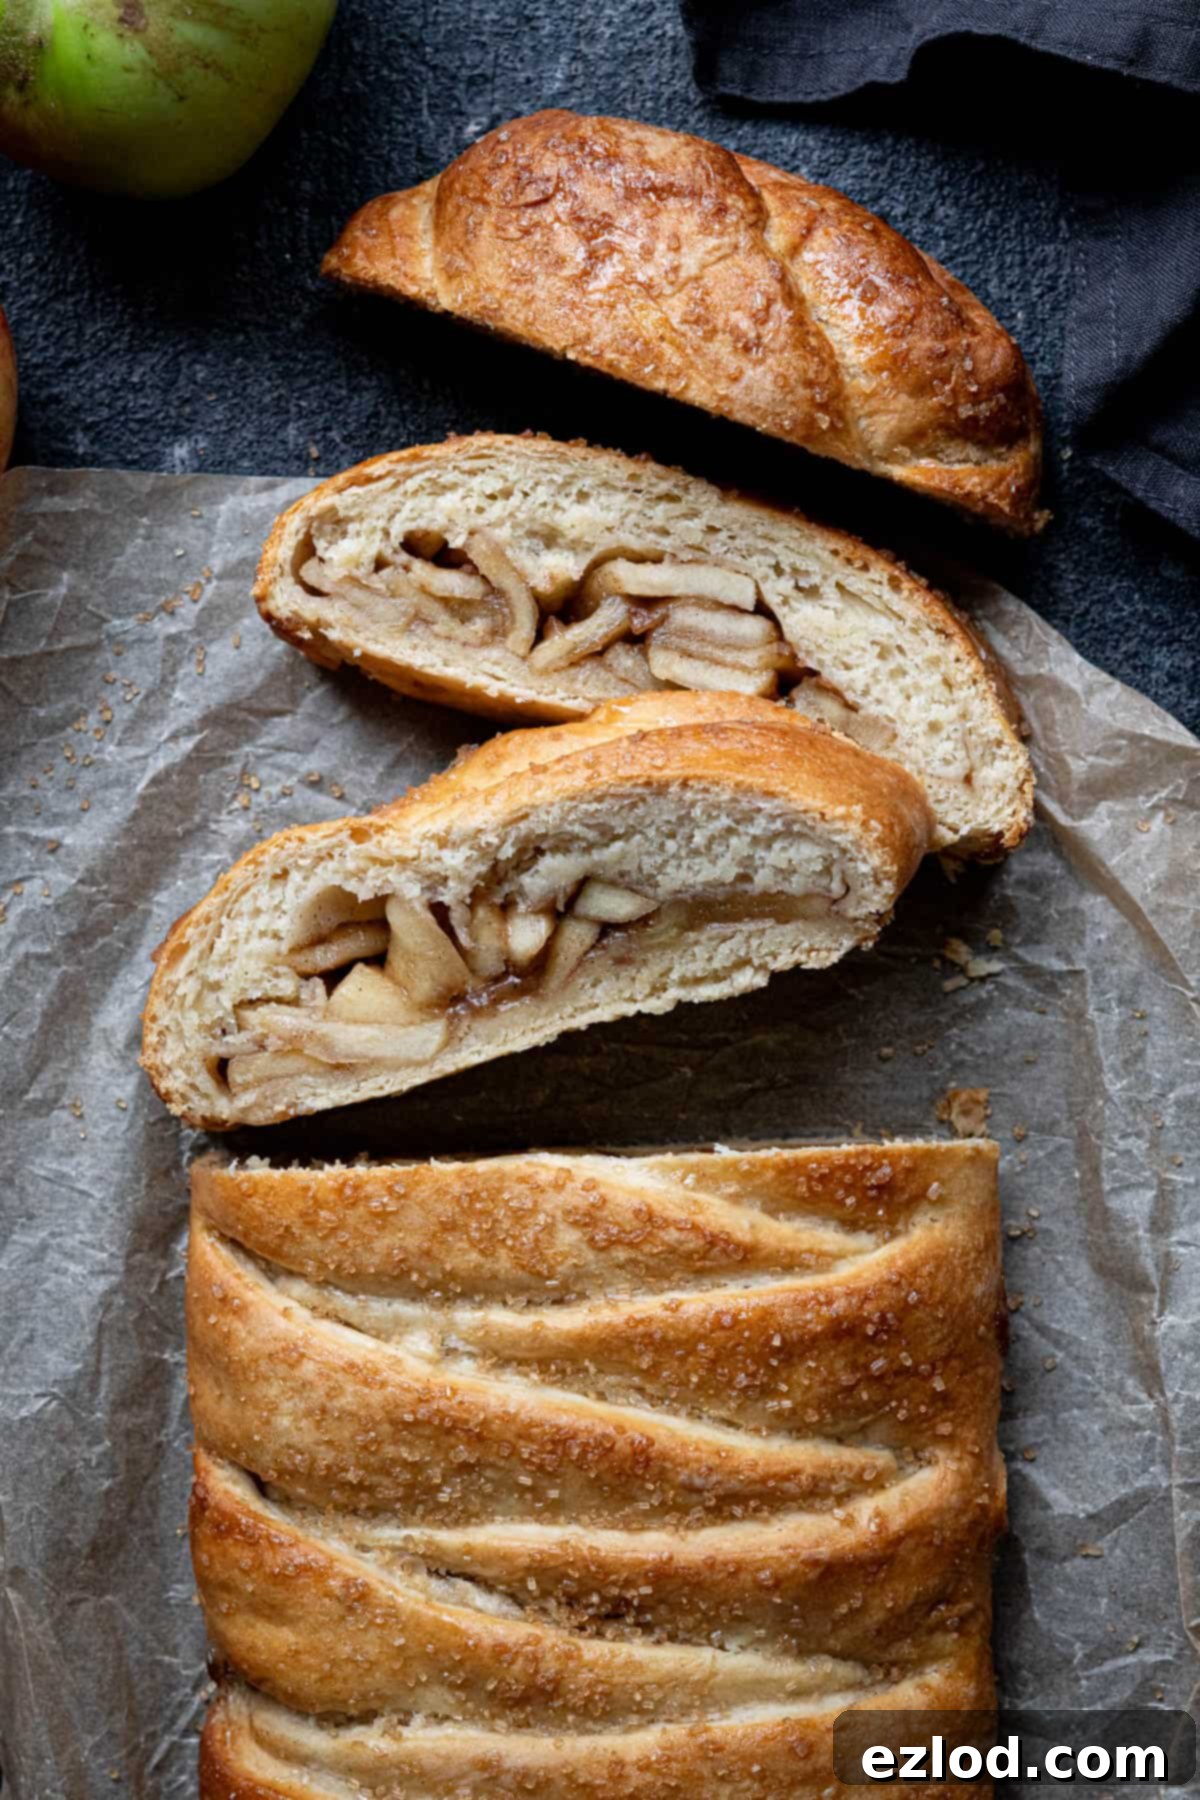
Carefully transfer the baking tray with your braided brioche into the preheated oven. Bake for approximately 40 minutes. Keep a close eye on the color development; if the brioche starts to brown too quickly towards the end of the baking time, loosely cover it with aluminum foil to prevent excessive browning while allowing the inside to cook thoroughly. The brioche is perfectly baked when it’s a beautiful golden brown all over and sounds hollow when gently tapped on the bottom. For ultimate precision and confidence that it’s cooked through, use a probe thermometer – insert it into the center of the loaf, and it should register an internal temperature of 90°C / 195°F. Once baked, remove the tray from the oven and let the brioche cool on the tray for about 10 minutes. This initial cooling helps the structure set. Then, carefully slide it onto a wire rack and allow it to cool completely before slicing. While it’s tempting to dive in immediately, allowing it to cool fully ensures the filling sets and the brioche structure stabilizes, resulting in the best possible texture and flavor.
Expert Tips for Baking Success
Achieving bakery-quality vegan apple cinnamon brioche is within reach with a few expert tips. These insights will help ensure your braided bread turns out perfectly every time:
- Precision is Key: Use a Digital Scale: As with all baking, especially delicate bread recipes like brioche, accuracy in measurements is absolutely paramount. Our recipes are meticulously developed using metric measurements in grams, and we wholeheartedly recommend using a digital kitchen scale over volumetric cup conversions. Cups are notoriously inaccurate and can lead to inconsistent results due to variations in how ingredients are packed. A scale ensures precision, delivers far better and more consistent results, and often leads to a less messy baking experience!
- Check Your Yeast’s Vitality: Yeast is a living organism, and its activity is the most crucial factor for a well-risen bread. Always check the expiry date on your yeast package before starting. Out-of-date or inactive yeast is a common culprit for bread that fails to rise, leading to significant disappointment. If you’re unsure about your yeast’s freshness, you can perform a quick test: dissolve a small amount (about a teaspoon) in a quarter cup of lukewarm non-dairy milk with a pinch of sugar. If it’s active, it should become foamy and bubbly within 5-10 minutes.
- Resist Adding Excess Flour: Brioche dough, by nature, is designed to be very soft and can be quite sticky, especially during the initial kneading stages. It’s a common temptation for bakers to add more flour to make the dough easier to handle. However, resist this urge unless the dough is excessively wet rather than just sticky. Adding too much flour will result in a dry, dense, and heavy bread, rather than the light, fluffy, and tender brioche you’re aiming for. Trust the process; the dough will become more manageable, smoother, and less sticky with continued kneading as the gluten develops.
- Overnight Rise for Enhanced Flavor: For an even deeper, more complex flavor profile and to conveniently break up your baking workload, consider giving the dough its first rise overnight in the refrigerator instead of at room temperature. A slow, cold proof allows the yeast to ferment gradually, developing richer notes and a more nuanced taste in the brioche. Simply place the oiled, covered bowl in the fridge after the initial knead and butter incorporation. Remember that a cold dough will take longer for its second rise once brought back to room temperature, so plan accordingly.
- Temperature Directly Affects Rise Time: The ambient temperature of your kitchen plays a significant role in how quickly your dough rises. On warmer days, your dough will proof much faster than on colder ones. Conversely, if you’ve opted for an overnight cold rise, the subsequent second rise at room temperature will naturally take longer as the dough needs to gradually come back up to temperature and reactivate. Therefore, it’s essential to pay attention to the dough itself and its visual cues (doubling in size, puffiness, slow spring-back when gently poked) rather than strictly adhering to the clock.
- Confirm Doneness with a Thermometer: Ovens can vary wildly in temperature and baking efficiency, making precise baking times difficult to predict universally. To ensure your brioche is perfectly cooked through and not underbaked (which can lead to a gummy texture) or overbaked (which can dry it out), the most reliable method is to use a probe thermometer. Insert it into the center of the loaf; the bread is done when it registers an internal temperature of 90°C / 195°F. This guarantees a safe, beautifully baked, and delicious result every time.
Frequently Asked Questions About Vegan Apple Cinnamon Brioche
For the absolute best taste and texture, this apple cinnamon brioche is most delicious when enjoyed on the very day it is baked. Its soft crumb and fresh apple filling are at their peak on day one. However, if you have leftovers, it can be stored for up to 2 days. To maintain freshness, keep it in an airtight container at a cool room temperature. If you live in a particularly warm or humid climate, or if your kitchen is consistently warm, it’s best to store it in the fridge to prevent premature spoilage and maintain its texture. Be aware that over time, the dough will naturally absorb some of the moisture and juices from the apple filling, which might slightly alter its texture, making it a little less fluffy.
While we don’t necessarily recommend baking and freezing the entire loaf with the intention of serving it much later (as the fresh texture is generally superior), any leftover slices of this delightful brioche freeze exceptionally well. To freeze, ensure the brioche has cooled completely. Wrap individual slices or the whole leftover loaf tightly in plastic wrap, then add an additional layer of aluminum foil to prevent freezer burn. It can be stored this way for up to 3 months. When you’re ready to enjoy, simply allow it to defrost at room temperature for a few hours. For a warmer, “freshly baked” treat, you can gently reheat defrosted slices in a toaster oven or microwave for a short burst.
Baking this brioche to be eaten fresh on the day is highly recommended for optimal quality and the best texture. However, there are excellent ways to prepare components in advance to streamline your baking day:
Dough: You can certainly give the dough its first rise overnight in the fridge instead of at room temperature. After the initial knead and butter incorporation (Step 3), let it rise for about an hour at room temperature to give it a head start, then transfer the covered bowl to the refrigerator overnight (up to 12-18 hours). On baking day, allow the cold dough to come up to room temperature for approximately half an hour before proceeding with shaping and the second rise (Step 6 onwards). This slow proofing also significantly enhances the flavor development of the brioche.
Apple Filling: The apple filling can also be made a day ahead of baking. Once cooked and cooled (Step 4), store it in an airtight container in the refrigerator. Bring it back to room temperature before assembling the brioche to ensure it mixes well and doesn’t chill the dough.
Unfortunately, this specific brioche recipe is not suitable for gluten-free flour substitutes. Achieving the characteristic light, fluffy, and chewy texture of brioche relies heavily on the gluten structure developed from wheat flour. Adapting a traditional or brioche-style bread recipe to be gluten-free is a complex process that requires a completely different formulation of flours, binders, and often, specific techniques to mimic the properties of gluten. It’s much more involved than a simple flour swap. As gluten-free baking is outside our area of expertise for this particular style of bread, we highly recommend seeking out a recipe that is specifically designed and tested to be gluten-free for the best and most successful results.
More Sweet Vegan Breads to Explore
- Lemon coconut pull-apart bread
- Jamaican spice bun
- Vegan banana monkey bread
- Vegan pumpkin pecan babka
- Almond bread twist
- Vegan stollen wreath
- Vegan chocolate babka
- Maple pecan bread wreath
- Plum and marzipan bread
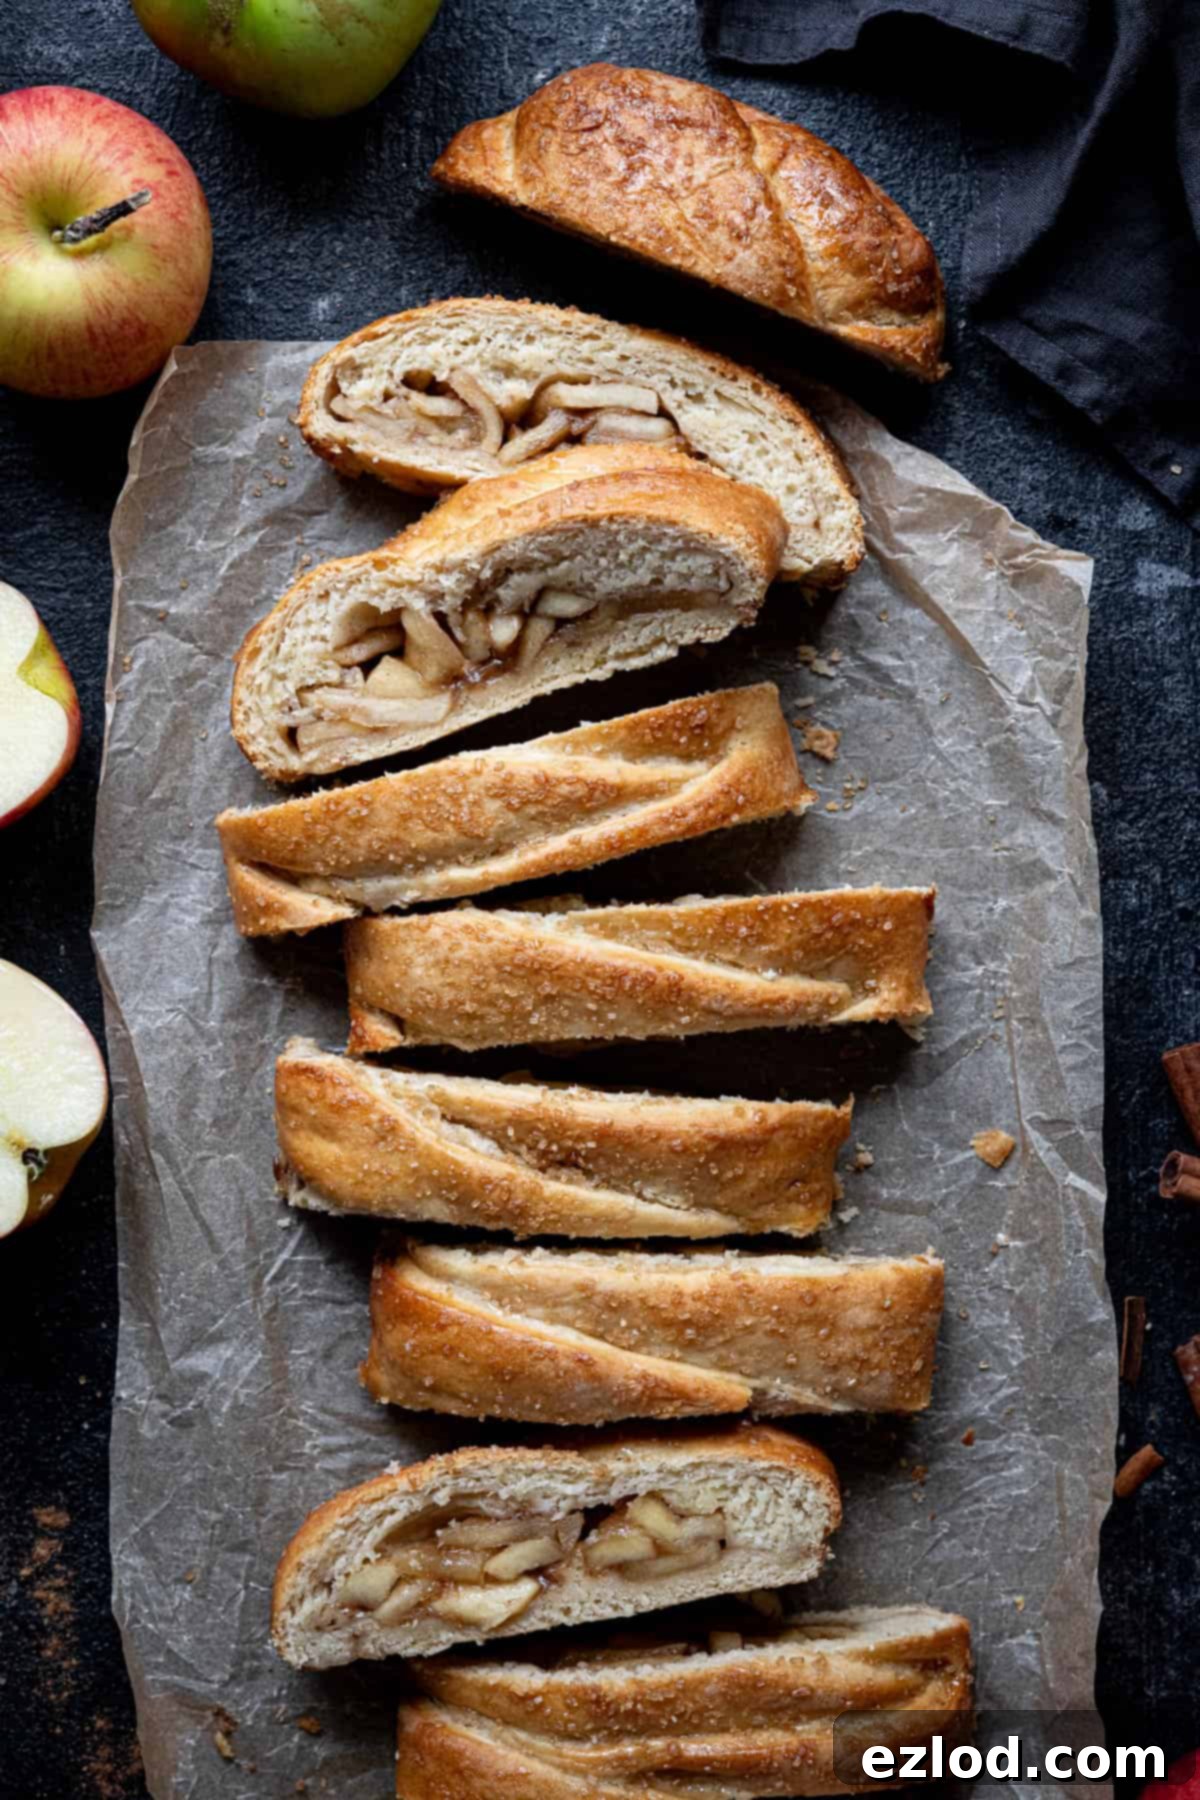
We hope you fall in love with this Vegan Apple Cinnamon Brioche as much as we have! If you try this recipe, we’d absolutely love to hear about it. Please take a moment to rate it, leave a comment below sharing your experience, or tag @domestic_gothess on Instagram and use the hashtag #domesticgothess. Your feedback is incredibly valuable to us and inspires us to create more delicious vegan recipes for you to enjoy!
All images and content on Domestic Gothess are copyright protected. If you wish to share this recipe with others, please do so by utilizing the convenient share buttons provided. We kindly request that you refrain from taking screenshots or posting the recipe or its content in full. Instead, we encourage you to include a direct link back to this original post for the complete recipe. Your understanding and cooperation help us continue to provide high-quality content and delightful recipes.

Print
Apple Cinnamon Brioche
Ingredients
Dough:
- 300 g (2 + ½ cups) white bread flour
- 7 g (2 ¼ teaspoons) fast action (instant) yeast
- 50 g (¼ cup) caster or granulated sugar
- ½ teaspoon salt
- 190 g (¾ cup + 2 teaspoons) unsweetened non-dairy milk (I use soy) lukewarm
- 1 teaspoon vanilla extract
- 50 g (3 ½ Tablespoons) vegan block butter softened
Filling:
- 600 g eating apples (about 4 medium apples)
- juice of 1 lemon
- 30 g (2 Tablespoons) vegan block butter
- 75 g (⅓ cup + 1 Tablespoon) light brown soft sugar
- 1 teaspoon ground cinnamon
- 1 teaspoon vanilla bean paste or extract
- pinch salt
- 1 Tablespoon plain (all-purpose) flour
- soya milk to glaze
- demarera sugar for sprinkling
Instructions
-
To make the dough, place the bread flour in a large bowl, add the yeast to one side and the salt and sugar to the other, stir to combine.
-
Add the lukewarm milk and the vanilla and mix to form a shaggy dough. Turn out onto an un-floured surface and knead for 5-10 minutes until smooth and elastic. The dough will be sticky at first but resist the temptation to add extra flour, it will become smooth after a minute or two of kneading (you may need to scrape it off the surface with a dough scraper). Of course you can knead it in a stand mixer if you have one.
-
Add the softened vegan butter. Continue to knead until the butter is fully incorporated and the dough is smooth and elastic. It may seem greasy and messy at first but keep kneading and I promise you the butter will all mix in and the dough will become smooth.
-
Once the butter is fully incorporated the dough should look smooth and silky and it should pull away from the work surface or sides of the bowl cleanly. It should still be soft and slightly sticky however
-
Place the dough in a lightly oiled bowl, cover and set aside to rise in a warm spot until doubled in size, about 1-2 hours.
-
While the dough is rising make the filling. Peel, core and slice the apples and place in a bowl with the lemon juice, toss gently to combine. Melt the butter in a wide frying pan and add the apples, sugar, cinnamon, salt and vanilla extract. Stir to combine then sauté gently until the fruit has softened slightly and the juices have reduced to a thick syrup, set aside to cool. Once the apples have cooled, pour off the excess juices then sprinkle over the tablespoon of flour and stir in gently.
-
Punch down the risen dough and give it a brief knead to knock out any air bubbles. Roll the dough out on a lightly floured surface into an approximately 25 x 38 cm/ 10 x 15 inch rectangle. Transfer the rectangle onto a piece of baking parchment and place on a baking tray. Spoon the apple filling down the centre.
-
Cut the dough surrounding the filling into diagonal strips about 4 cm/ 1 ½ inches wide, making sure to leave a border of uncut dough around the filling, there should be the same number of strips on either side.
-
Fold over the ends, then cross the cut strips of dough over the filling, alternating sides so that it looks like it has been braided.
-
Loosely cover the dough with oiled cling film and leave it to rise until it is puffy and springs back slowly when you press it gently with a finger – about 45 minutes to 1 hour. The bread is ready to bake when it looks puffy and if you gently press the dough with a finger it springs back slowly most of the way but leaves a small indentation. If it springs back quickly and fills in completely then it isn’t ready yet.
-
While the dough is rising preheat the oven to 180°C/160℃ fan/350°F/gas mark 4.
-
Gently brush the risen dough with soya milk and sprinkle with demarera or pearl sugar. Bake for about 40 minutes until golden and cooked through. Loosely cover with tin foil towards the end of baking if it starts to colour too much.
-
Leave the bread to cool on the tray for 10 minutes then carefully slide it onto a wire rack and leave to cool completely. Best eaten the day it is made but will keep for a couple of days in an airtight container.
Notes
- See post above for tips, details and step-by-step photos.
- As with all of my baking recipes I really do recommend using the metric measurements with a digital scale rather than the cup conversions. Cups are a wildly inaccurate measuring system and you will get far better, more consistent results using a scale, not to mention that it is also easier and less messy than cups!
