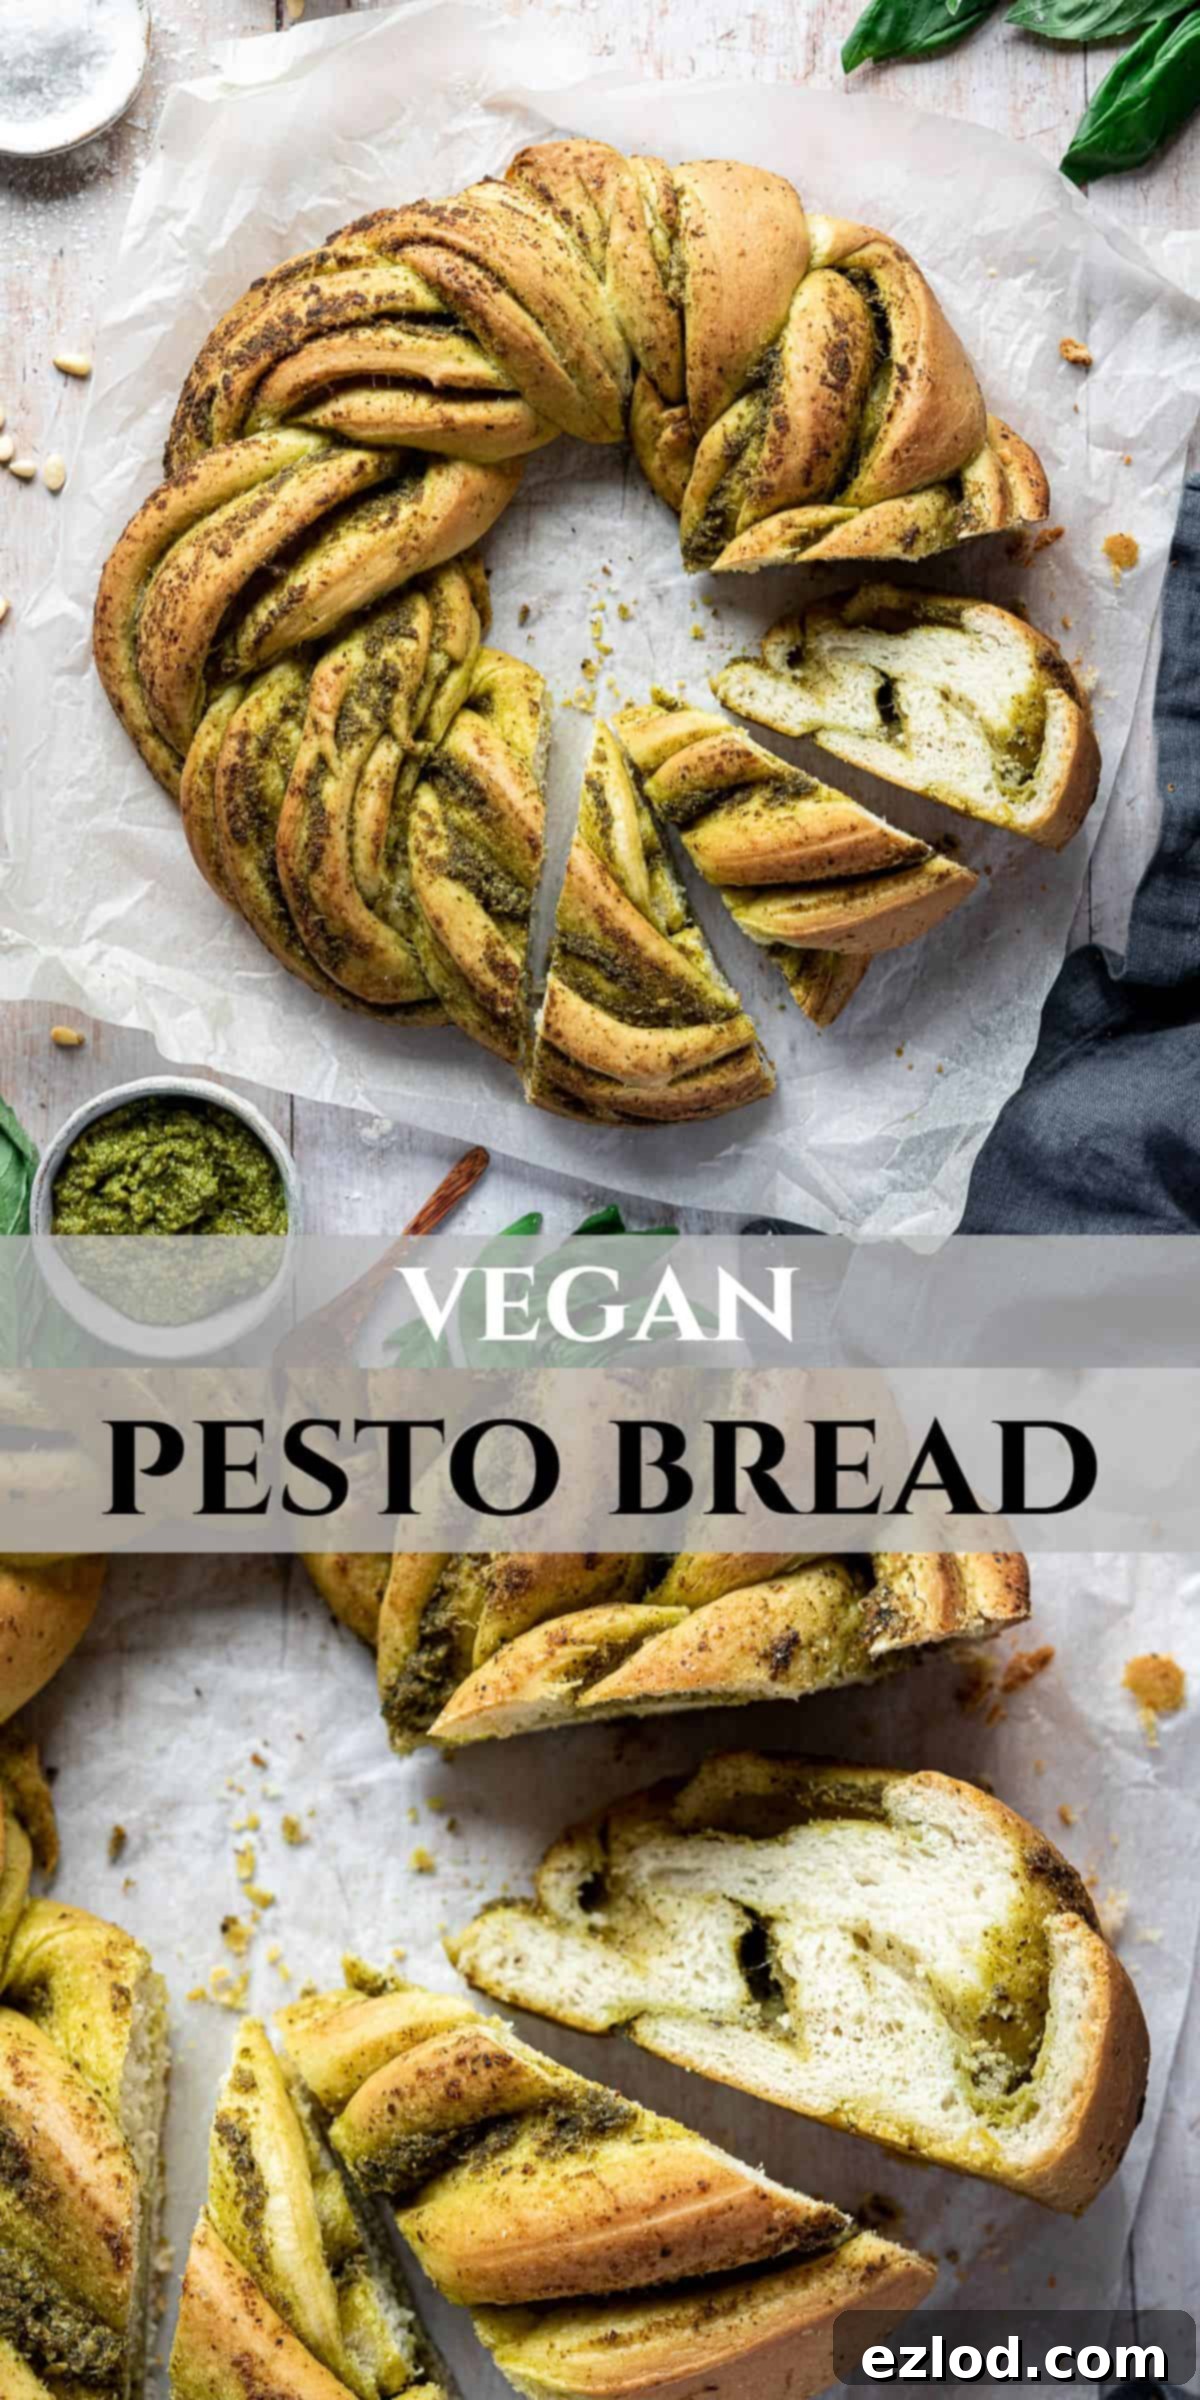
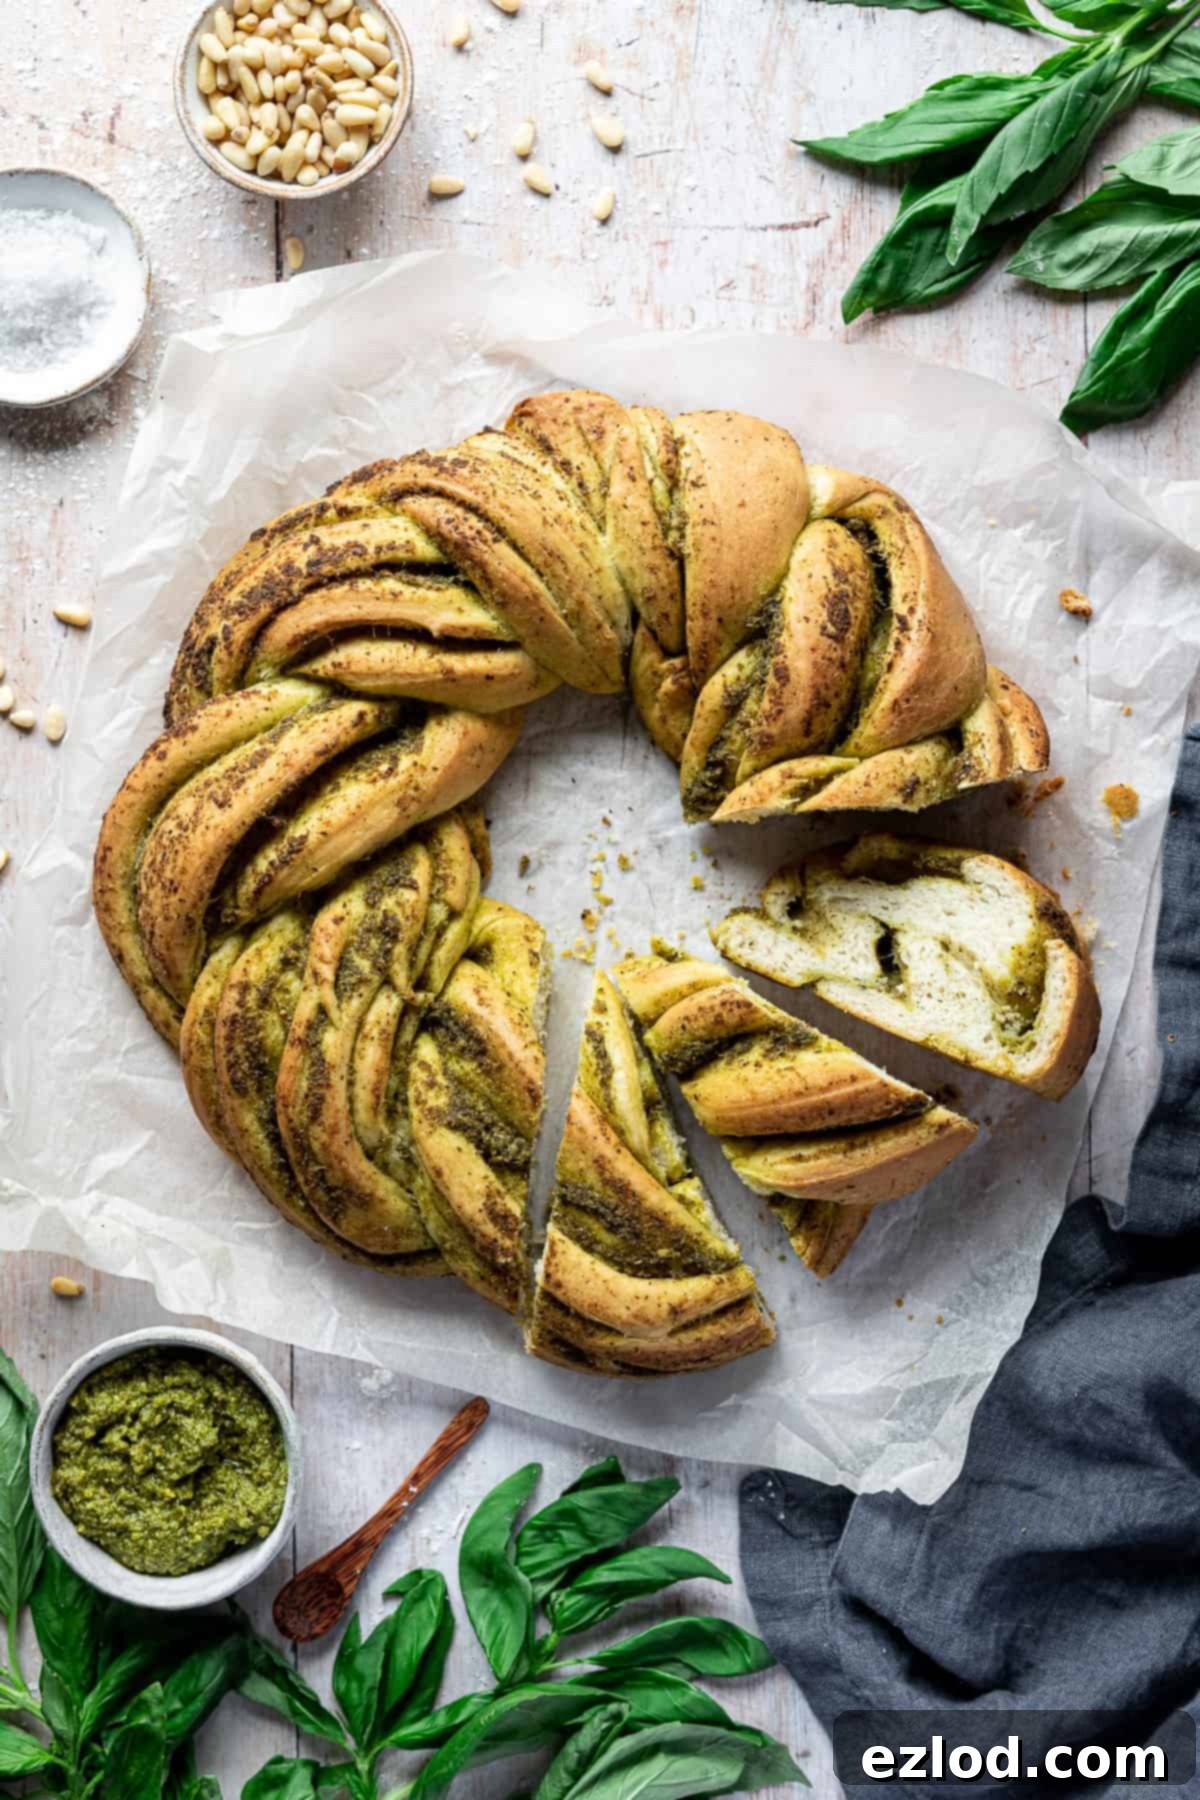
Irresistibly Delicious Vegan Pesto Bread Wreath: An Easy Homemade Recipe
Unleash your inner baker with this stunning yet surprisingly simple vegan pesto bread wreath! Not only does it look incredibly impressive, making it a perfect centerpiece for any gathering, but it’s also packed with an unforgettable savory flavor that will have everyone reaching for another slice. This recipe transforms soft, pillowy white bread dough into a vibrant, pull-apart masterpiece, generously layered with aromatic vegan pesto. Every bite offers a delightful contrast: a wonderfully crisp crust giving way to a tender, fluffy interior, all infused with rich, herbaceous goodness. Prepare to be completely addicted!
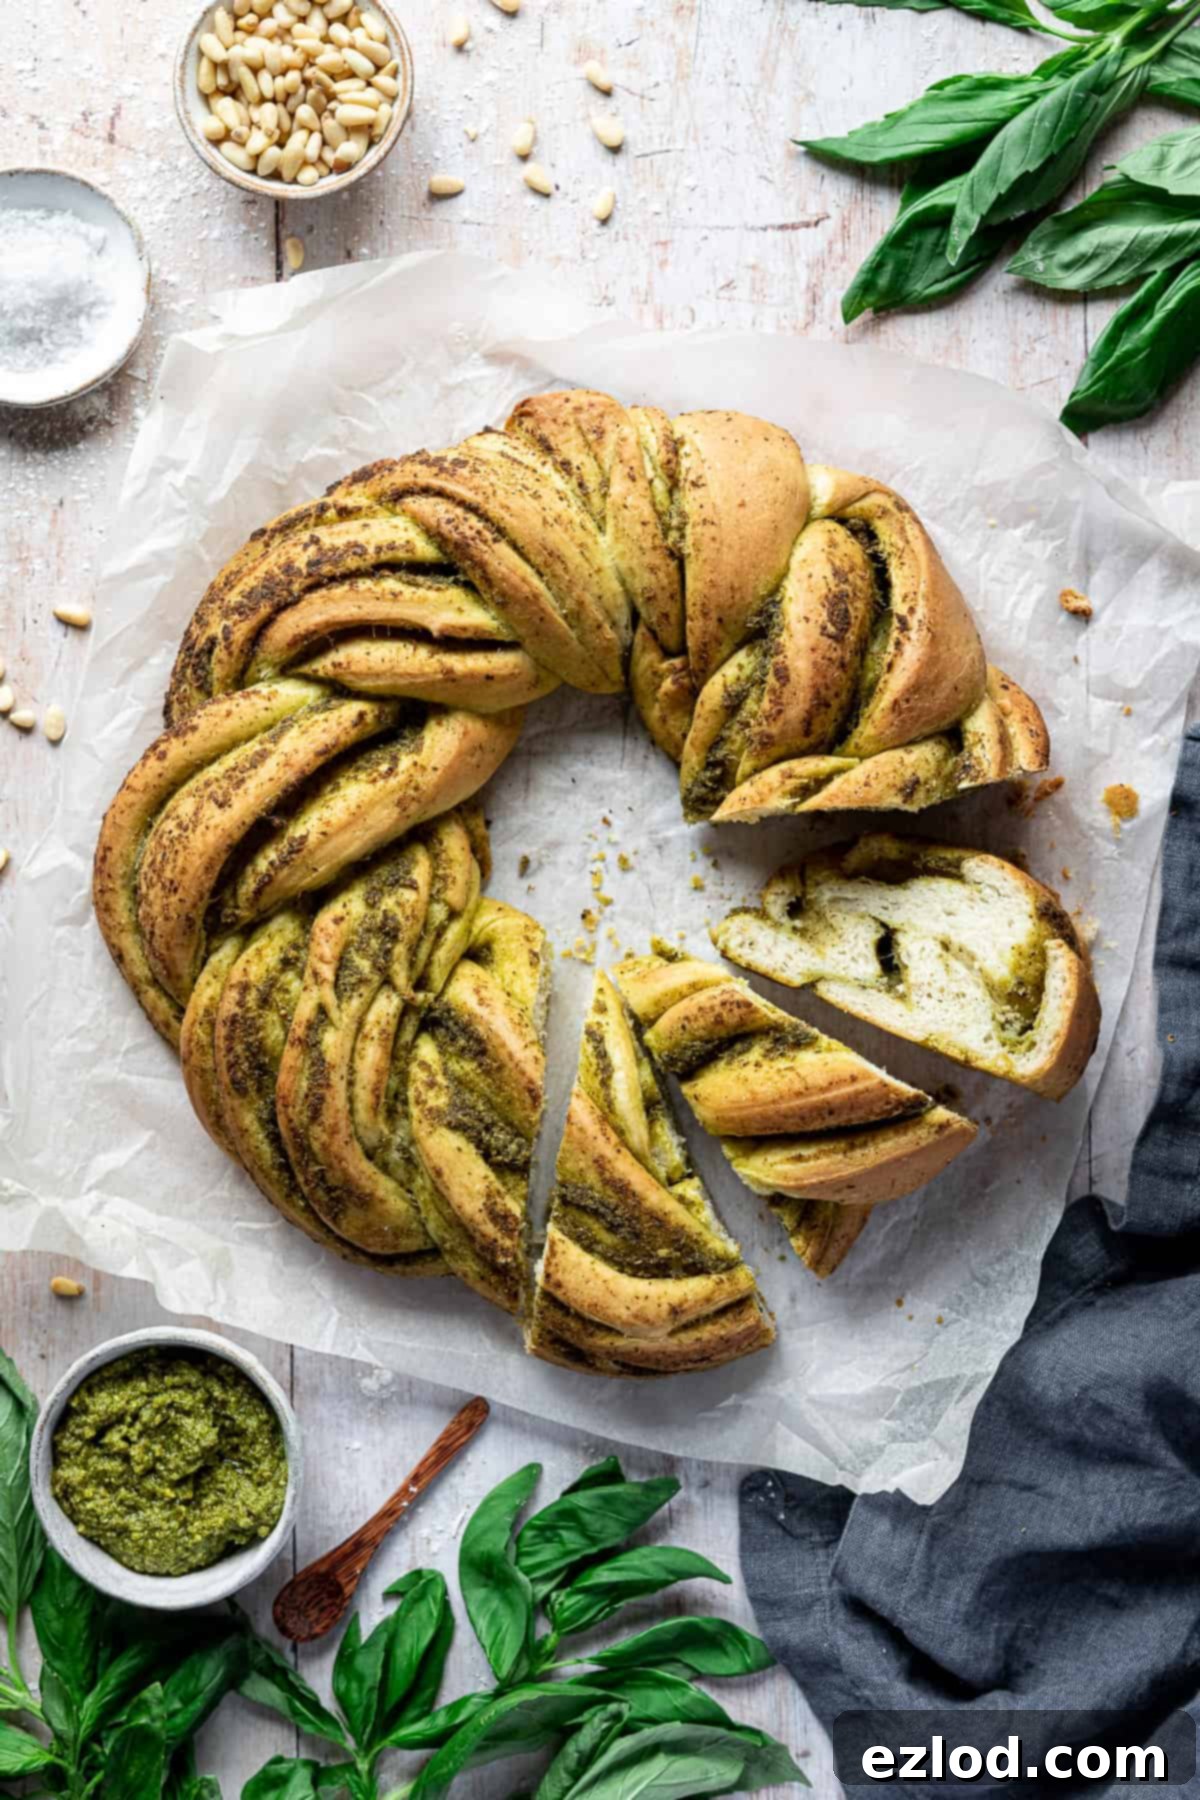
This beloved vegan pesto bread recipe first graced my kitchen way back in 2014, and after all these years, it remains a consistent favorite. Given its enduring popularity and the endless requests for a refreshed version, it was high time for a dazzling makeover, complete with new, vibrant photos and an updated, fully vegan approach. The beauty of this recipe lies in its deceptive simplicity. Despite its intricate appearance, the process is straightforward, yielding a loaf that not only wows visually but also delivers on taste and texture every single time.
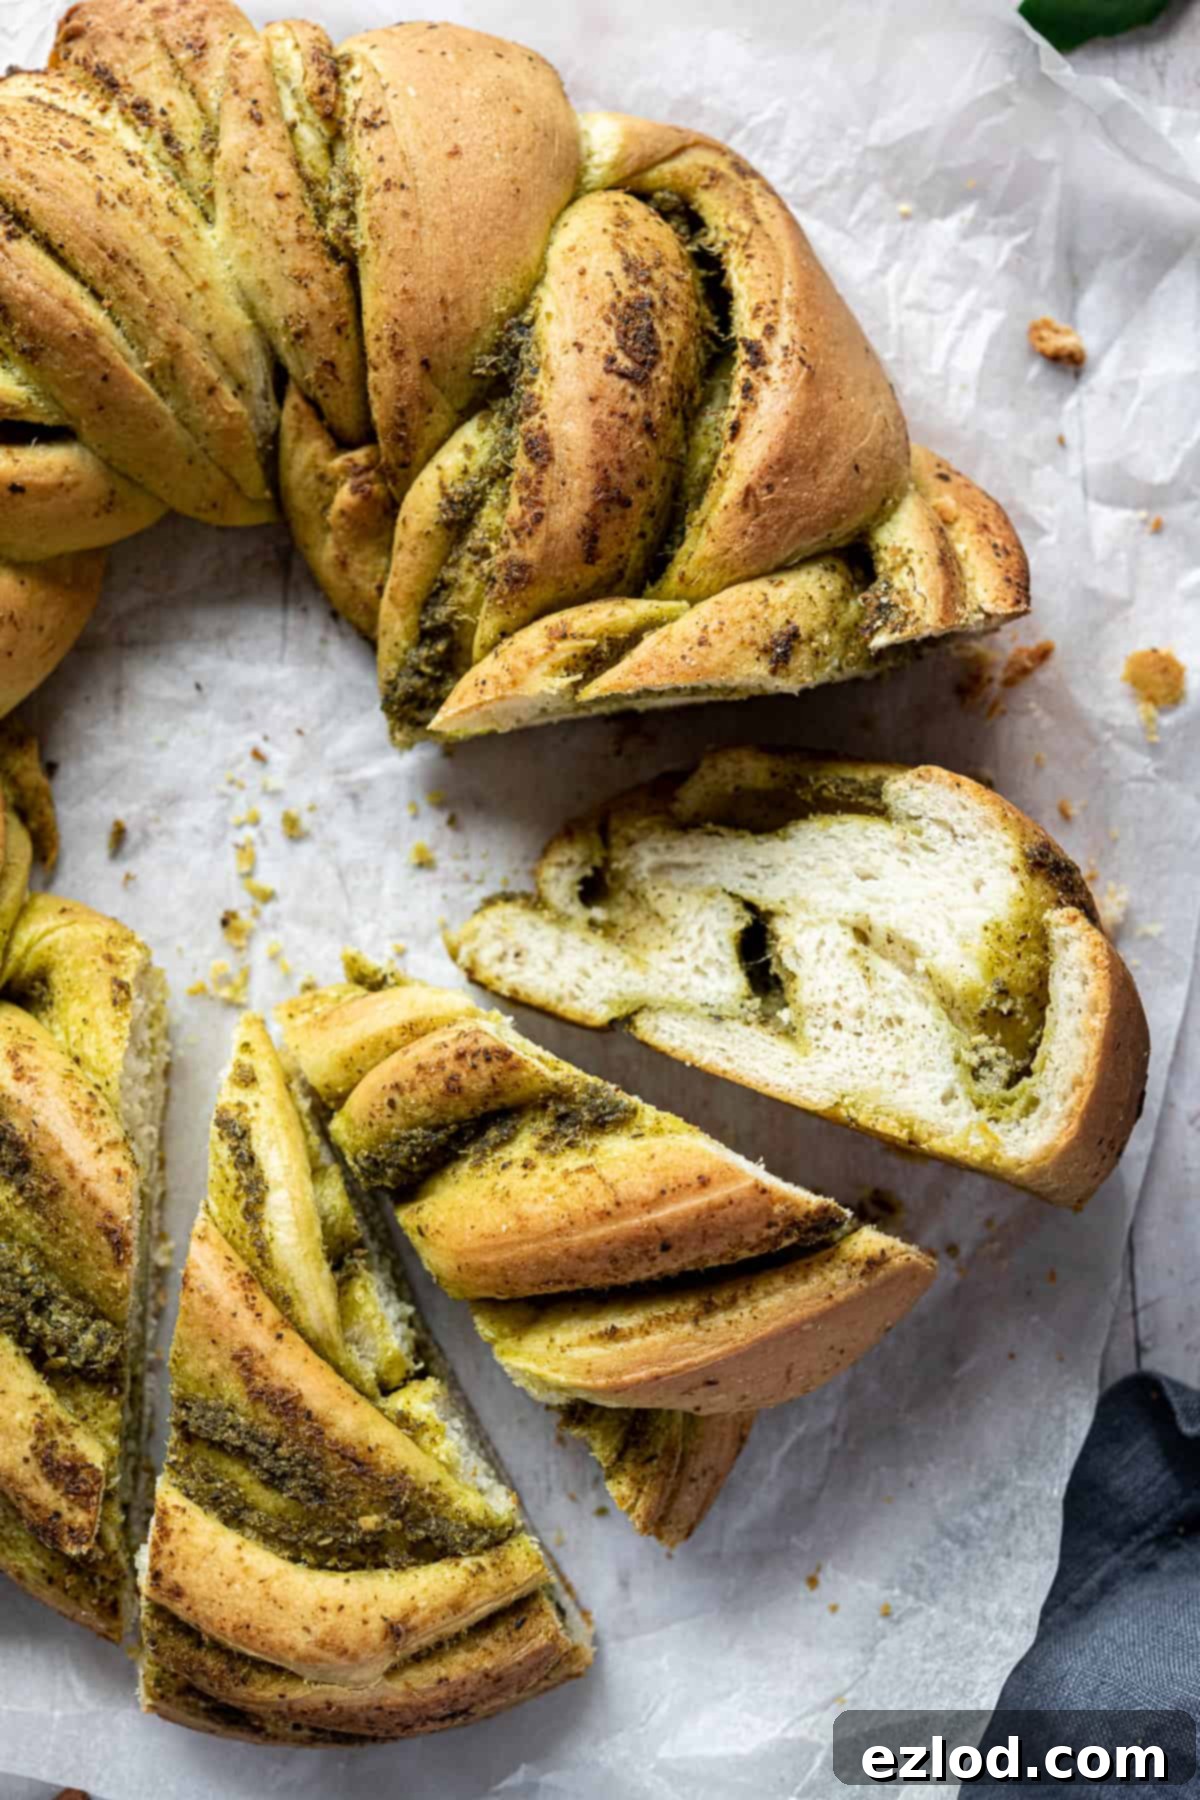
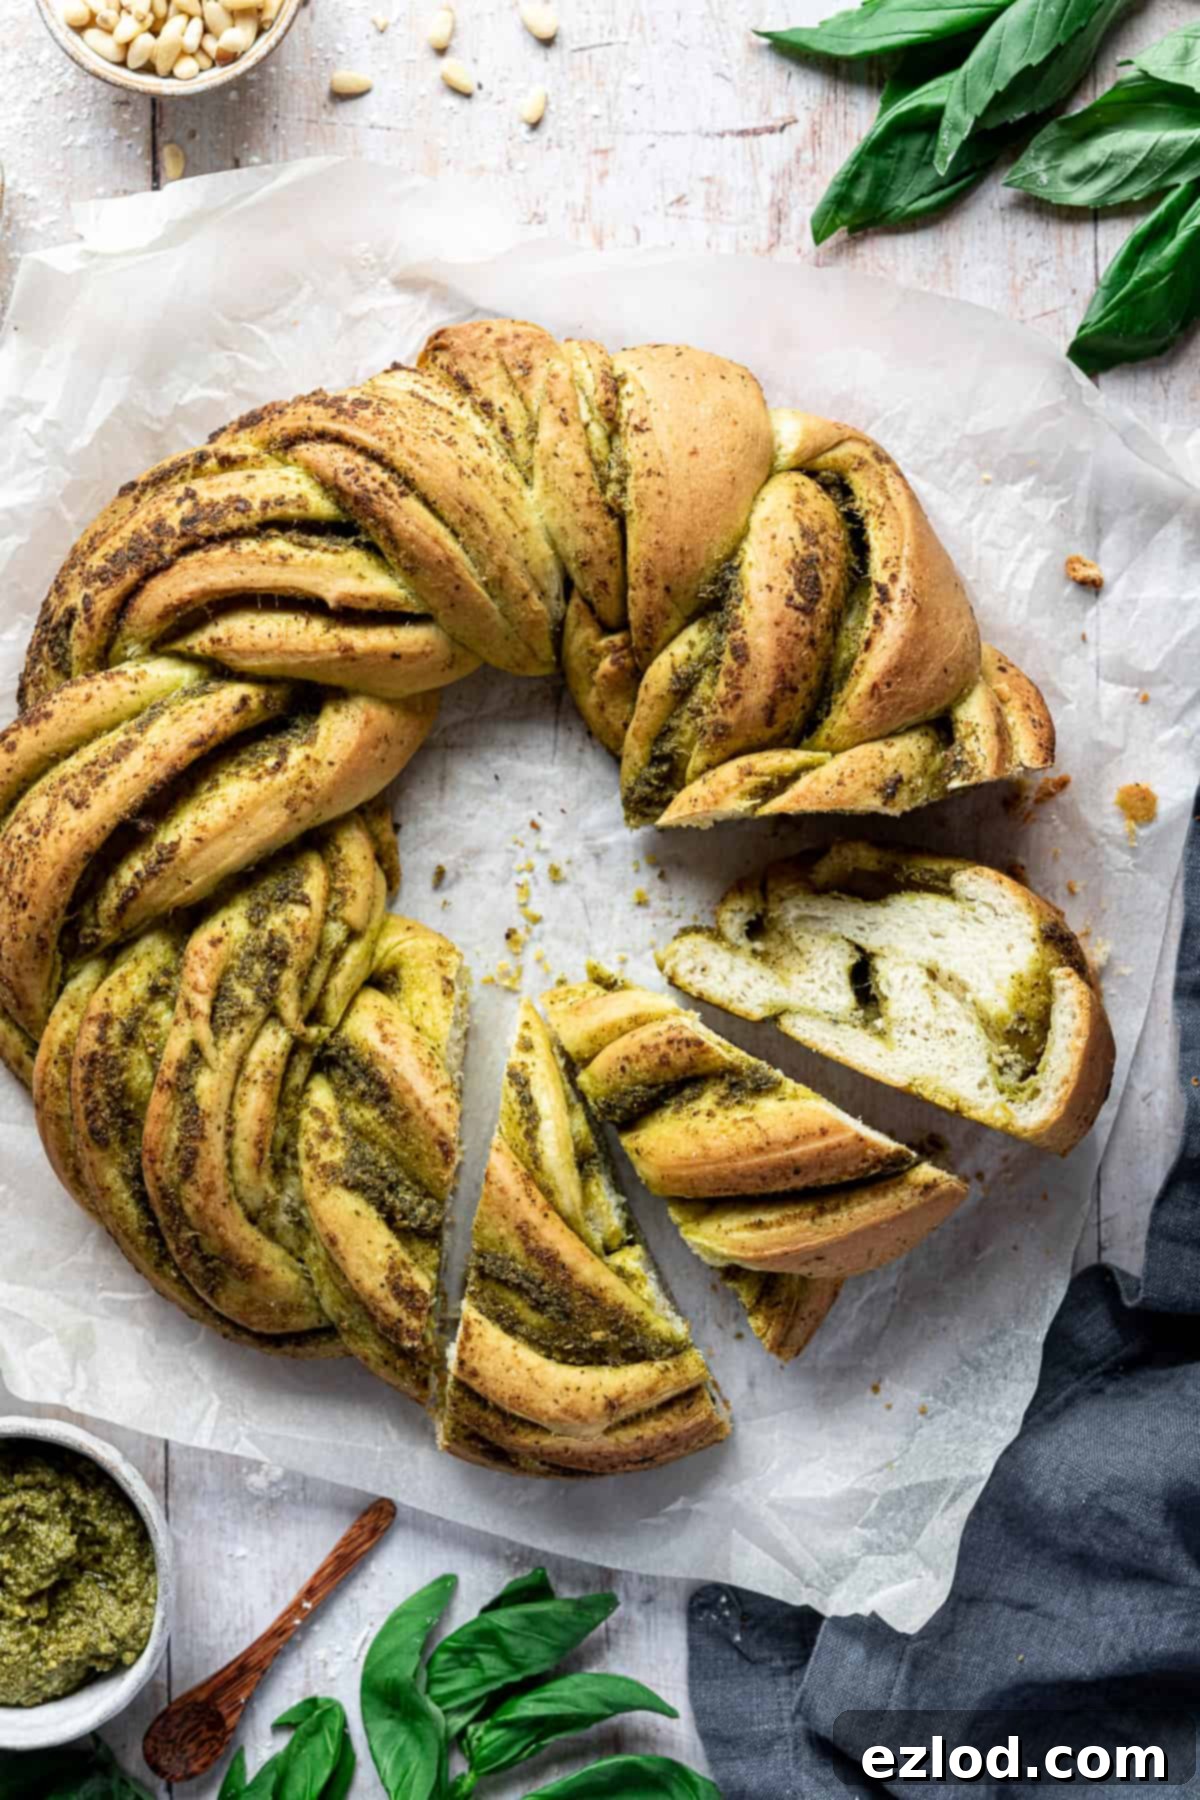
The resulting bread is a sensory delight: wonderfully soft and fluffy on the inside, providing a satisfying chew, while boasting a perfectly crisp, golden-brown crust. What truly sets this bread apart is the abundant layering of pesto within the dough. This ensures that each and every bite bursts with savory, garlicky, and herbaceous notes, creating an incredibly flavorful experience. Designed to be easily pulled apart, it’s ideal for sharing among friends and family, and absolutely perfect for dunking into hearty soups, creamy dips, or alongside your favorite pasta dishes. It’s more than just bread; it’s an experience.
Why You’ll Love This Vegan Pesto Bread Wreath
If you’re looking for a recipe that combines stunning presentation with incredible flavor and satisfying texture, this vegan pesto bread wreath is an absolute must-try. Here’s why it’s destined to become a staple in your kitchen:
- Impressive Presentation: The braided wreath shape makes this bread a true showstopper. It looks far more complicated to create than it actually is, instantly elevating any meal or gathering. Guests will be amazed by its beauty before they even take the first bite.
- Unforgettable Flavor: Layers of savory vegan pesto are woven throughout the soft bread dough, guaranteeing a burst of aromatic basil, garlic, and pine nut flavor in every single mouthful. It’s savory, herbaceous, and utterly addictive.
- Perfect Texture: Experience the best of both worlds with a bread that features a delightful crisp crust on the outside, giving way to an incredibly soft, fluffy, and tender crumb on the inside. It’s a texture paradise that melts in your mouth.
- Versatile Serving Options: This pesto bread is incredibly adaptable. Serve it as an elegant appetizer, a flavorful side dish with soups or salads, a unique addition to a brunch spread, or simply enjoy it on its own with a good olive oil for dipping. It’s also fantastic with a simple pasta dish.
- Easier Than It Looks: Don’t let the intricate appearance intimidate you! The shaping technique is quite simple and well-explained, making it an achievable baking project even for those who are new to bread making.
- Vegan-Friendly & Delicious: This recipe proves that vegan baking can be just as, if not more, delicious and satisfying than its traditional counterparts. It’s a fantastic option for anyone following a plant-based diet or looking to incorporate more vegan dishes into their repertoire.
Essential Ingredients for Your Vegan Pesto Bread:
Crafting this delicious vegan pesto bread wreath requires a few key ingredients, each playing an important role in achieving the perfect texture and flavor. Here’s a breakdown of what you’ll need and why:
- Bread Flour: For that signature soft, fluffy, and delightfully chewy texture, white bread flour is highly recommended. Its higher protein content leads to stronger gluten development, which is crucial for a bread with great structure and elasticity. While plain (all-purpose) flour can be used, expect a slightly less chewy result. It’s best to avoid wholemeal/whole wheat flour, as it can make the bread too dense and heavy for this specific recipe.
- Instant Yeast: My go-to for bread making is instant yeast. It’s wonderfully convenient as it can be added directly to the dry ingredients without needing prior activation in liquid. This saves time and simplifies the process. If active dry yeast is all you have, don’t worry – specific instructions for activating it are provided further down the page.
- Salt: A non-negotiable ingredient in any good bread recipe. Salt isn’t just for flavor; it also controls yeast activity, preventing the dough from rising too quickly, and strengthens the gluten structure. Do not be tempted to omit it, as your bread will lack depth of flavor and proper texture.
- Sugar: A small amount of sugar acts as food for the yeast, encouraging it to activate and multiply, which in turn helps the dough rise beautifully. Both caster sugar (superfine) or granulated sugar work perfectly here, offering the necessary boost without making the bread overly sweet.
- Olive Oil: Incorporating a mild olive oil into the dough adds richness, contributes to the bread’s softness, and enhances its overall flavor. It’s essential for creating a tender crumb. Opt for a mild variety rather than extra virgin, which can sometimes have too strong a flavor for baking. Any other neutral-flavored oil can also be substituted if preferred.
- Lukewarm Water: The water’s temperature is critical for activating the yeast without killing it. “Lukewarm” means it should feel warm to the touch, but not hot – ideally between 105-115°F (40-46°C). It’s the medium that brings all the ingredients together to form the dough.
- Vegan Pesto: The star flavor of this bread! You’ll need approximately 190g (6.5 oz) of high-quality vegan pesto. This can be a store-bought jar of your favorite vegan-friendly brand (Sacla is a good option mentioned previously), or you can whip up a batch of homemade vegan pesto. Both options yield fantastic results, so choose what’s most convenient for you.
Step-by-Step Guide: How to Make Vegan Pesto Bread
(For precise measurements and detailed instructions, please refer to the comprehensive recipe card located at the very bottom of this page.)
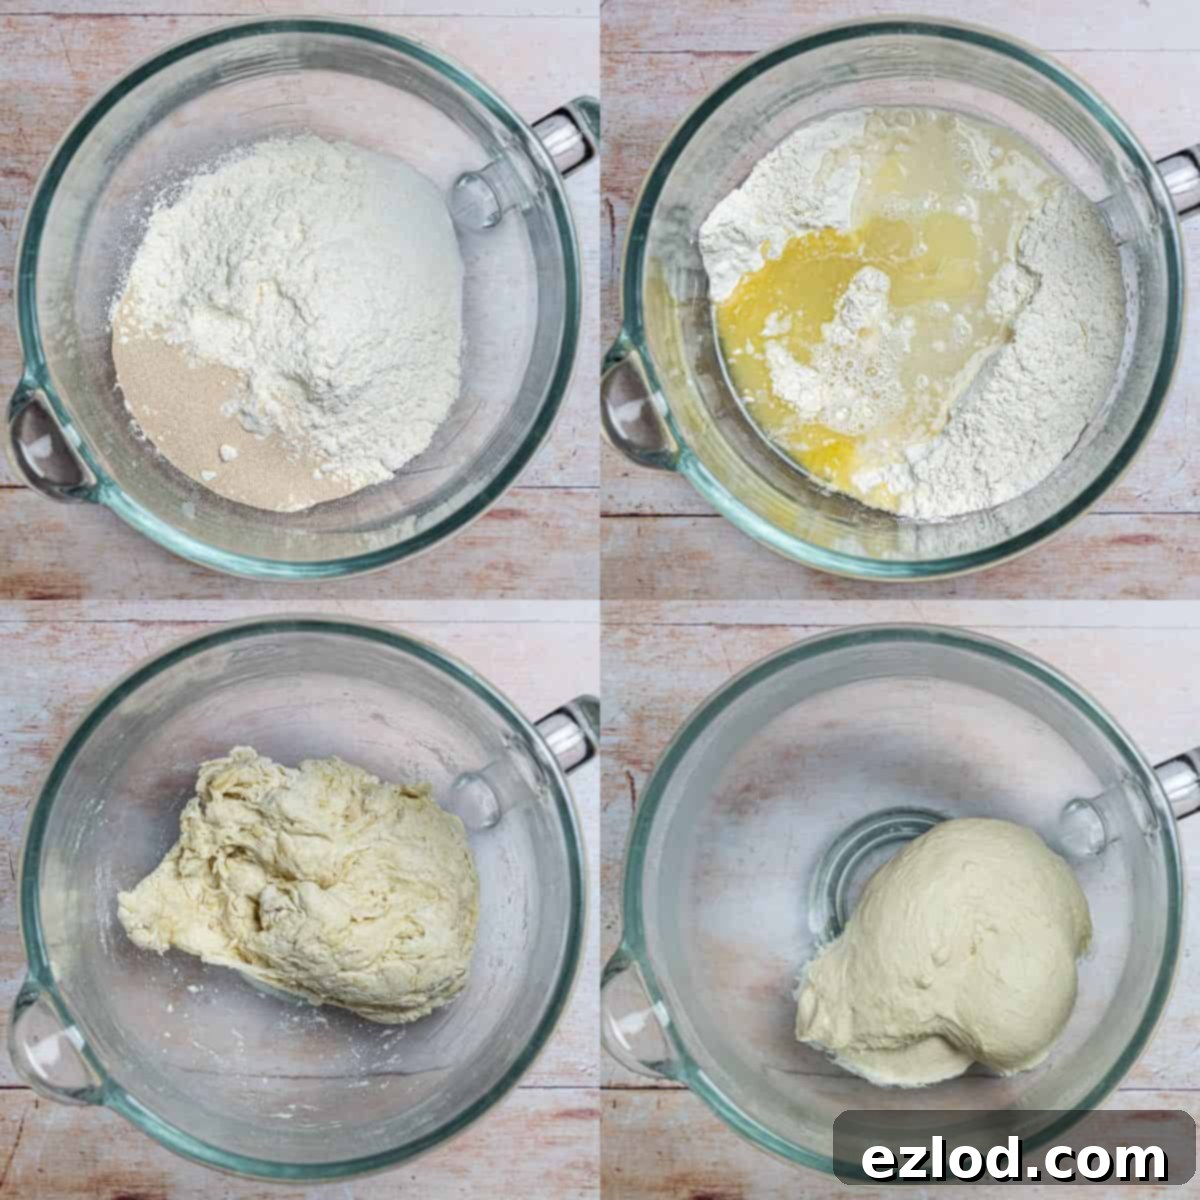
1. Prepare the Dough Base: Begin by placing the bread flour into a large mixing bowl. If you’re using a stand mixer, attach the dough hook and use its bowl. Carefully add the instant yeast to one side of the flour, and the salt and sugar to the opposite side. This separation is crucial, as direct contact with salt can inhibit or even kill the yeast. Once all components are in the bowl, stir them gently to combine.
2. Form a Shaggy Dough: Pour in the olive oil and approximately two-thirds of the lukewarm water. Mix everything together, either with a spoon, your hands, or the stand mixer, until a rough, “shaggy” dough forms. Gradually add more water, a tablespoon at a time, until the dough comes together into a cohesive, sticky mass. It should be sticky but not overly wet. The exact amount of water can vary based on flour type and humidity, so trust your judgment and the dough’s consistency.
3. Knead Until Smooth and Elastic: Turn the sticky dough out onto a clean, un-floured surface. Knead by hand for about 10 minutes, pushing the dough away from you and then folding it back, until it transforms into a smooth, elastic, and more manageable ball. If it feels too sticky, you can lightly oil your hands or the work surface, but resist the urge to add more flour, as this can lead to a dry, dense bread. As you knead, the gluten will develop, and the dough will become less sticky. For those with a stand mixer, simply let it knead on a medium speed for 5-10 minutes. The dough is perfectly kneaded when it passes the “windowpane test” – you should be able to stretch a small piece thin enough to see light through it without tearing.
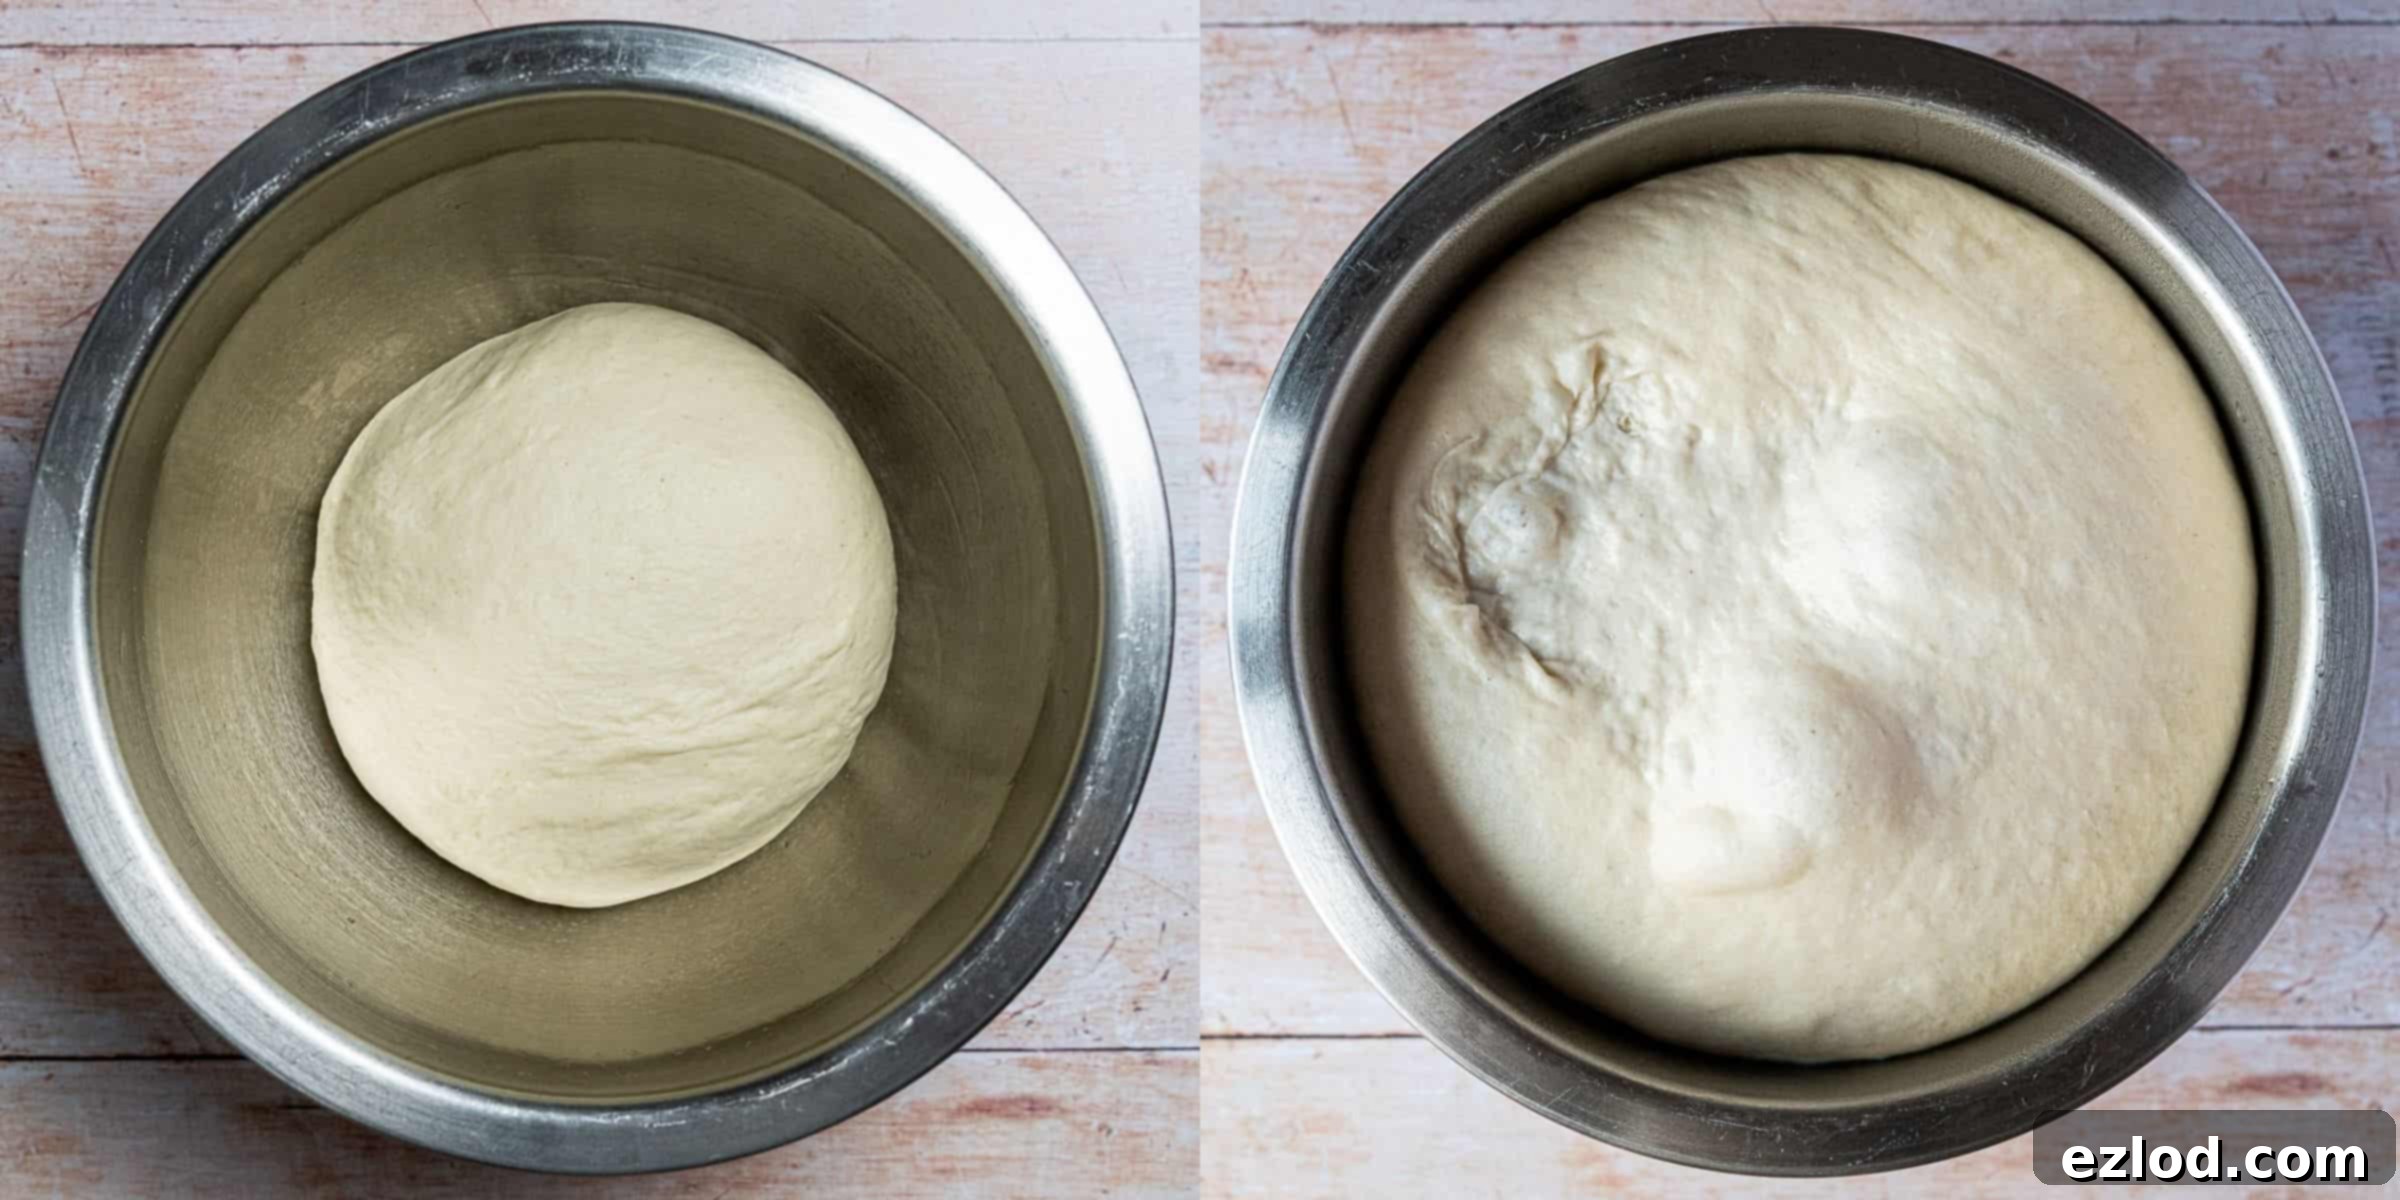
4. First Rise (Bulk Fermentation): Gently place the kneaded dough ball into a lightly oiled bowl, turning it once to coat all sides with oil. Cover the bowl loosely with cling film or a clean kitchen towel. Allow the dough to rise in a warm spot until it has doubled in size. This typically takes 1-2 hours, depending on your room temperature. Alternatively, for enhanced flavor development, you can place the covered bowl in the refrigerator overnight; just remember the subsequent rise times might be longer for cold dough.
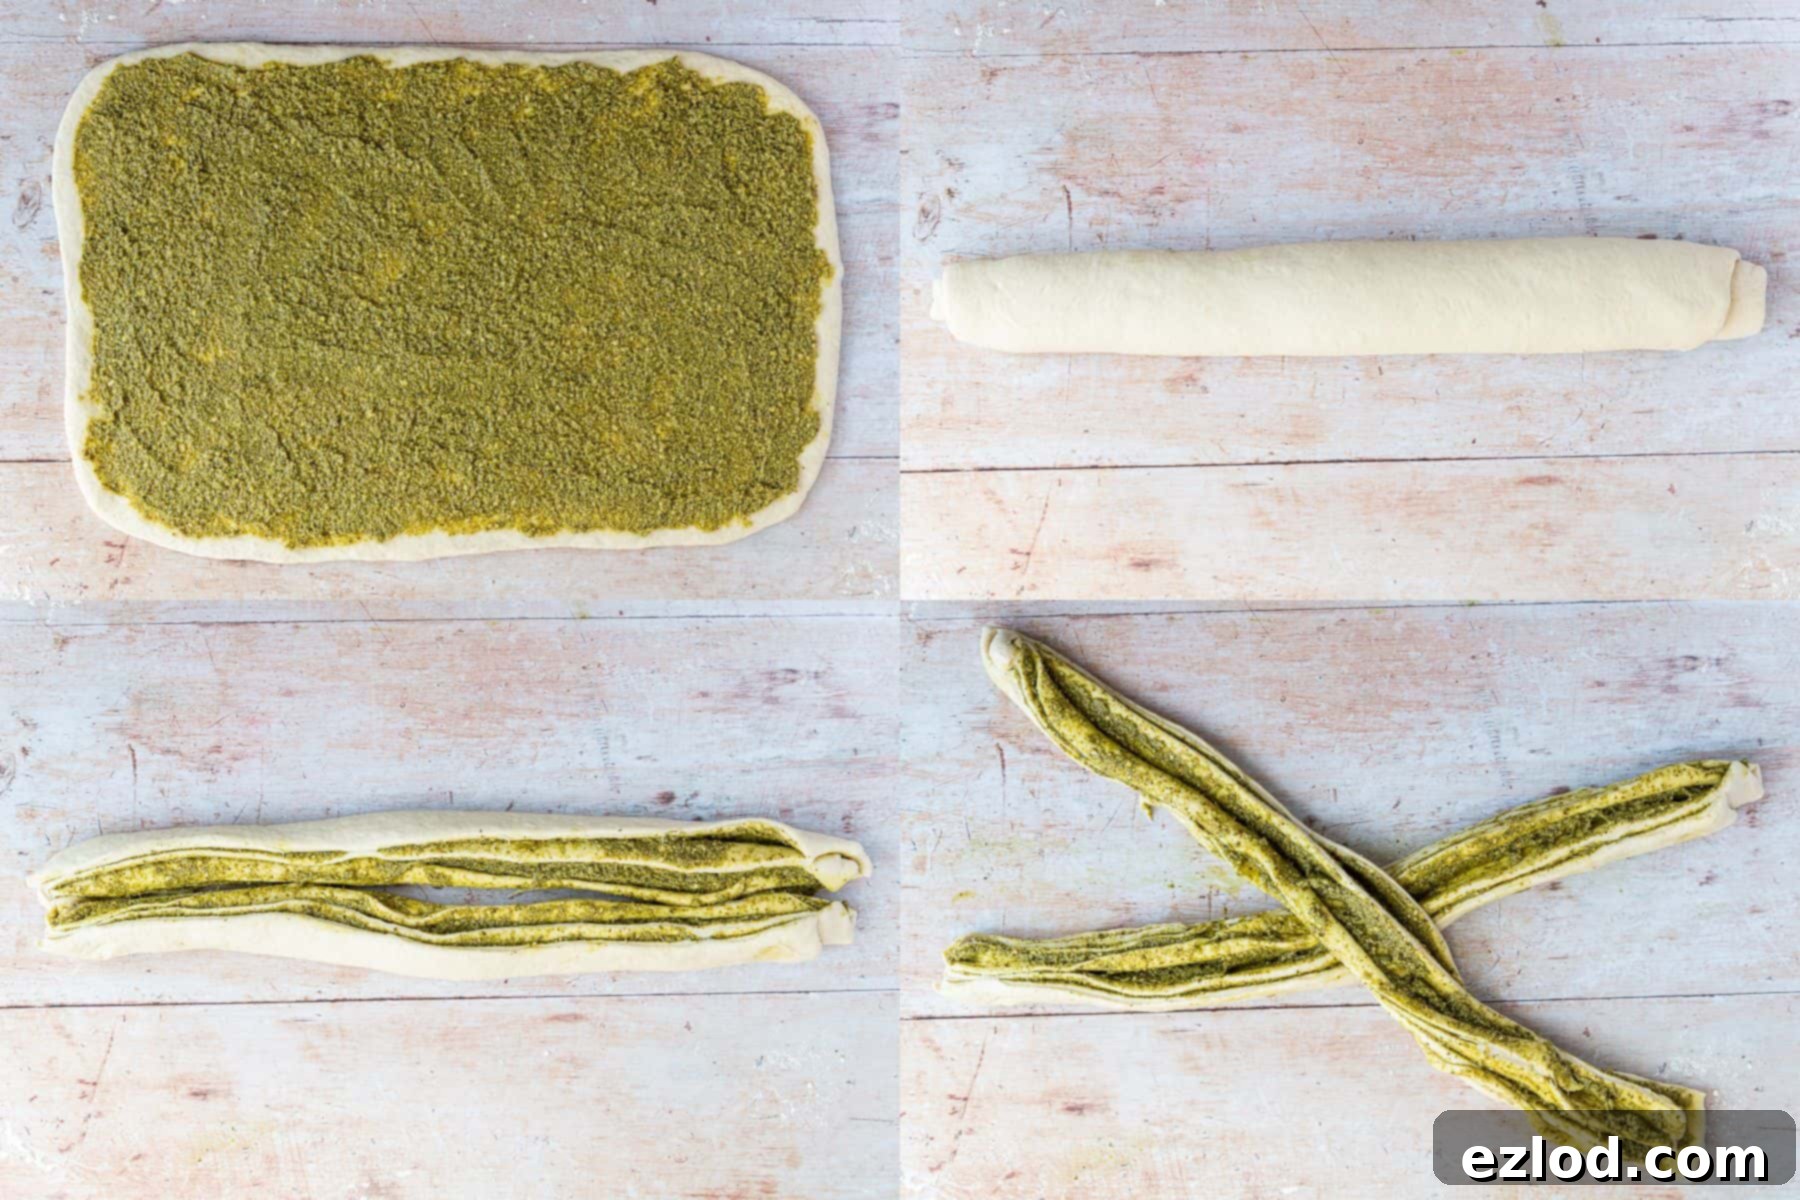
5. Roll, Spread, and Roll Again: Once the dough has successfully risen, gently “knock it back” by pressing out the air. Turn it out onto a lightly floured surface and use a rolling pin to shape it into a large rectangle, approximately 30 x 45cm (12 x 18 inches). Evenly spread the vegan pesto all over the surface of the dough, making sure to leave a clean 2cm (about ¾ inch) border around all edges. Starting from the long edge closest to you, tightly but gently roll the dough up, like a Swiss roll, into a firm log.
6. Prepare for Braiding: Line a baking sheet with baking parchment or lightly sprinkle it with semolina to prevent sticking. Carefully transfer the pesto-filled dough log to the prepared baking sheet. Using a very sharp knife or a bench scraper, carefully cut the log in half lengthwise, creating two long strips of dough, with the vibrant pesto layers exposed.
7. Braid into a Wreath: Position the two halves so that their cut sides are facing upwards. Lay one strip over the other to form an “X” shape in the middle. Now, carefully twist the two strips together, always keeping the cut, pesto-layered side facing up, until you have formed a beautifully braided length of dough. Once braided, gently loop this braid into a wreath shape, bringing the ends together and pinching them firmly to seal. Take your time with this step to maintain the intricate pattern.
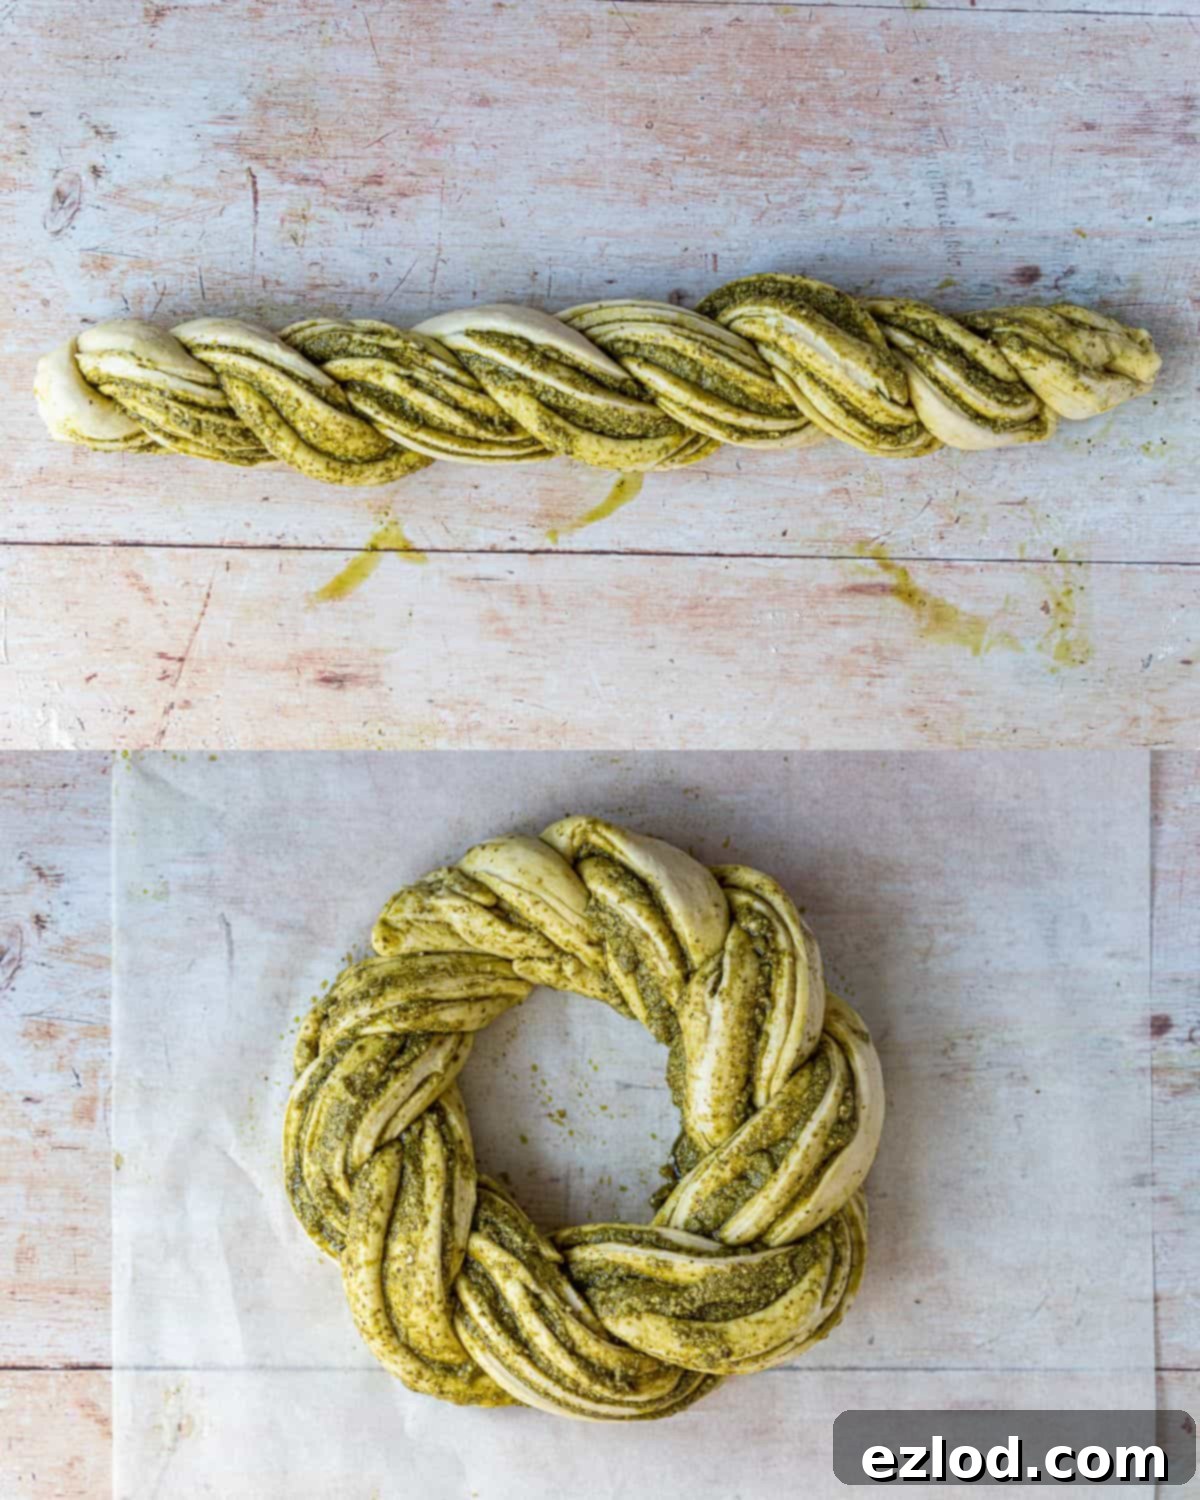
8. Second Rise (Proofing): Loosely cover the shaped pesto bread wreath on the baking sheet with cling film or a clean kitchen towel. Allow it to rise again for approximately 45 minutes to an hour, or until it looks visibly puffy and has increased in size. To check if it’s ready, gently press a finger into the dough; it should spring back slowly. If it springs back quickly, it needs a little more time to proof. During this rise, you might notice some oil from the pesto pooling on the baking sheet; simply blot this away gently with a piece of kitchen roll.
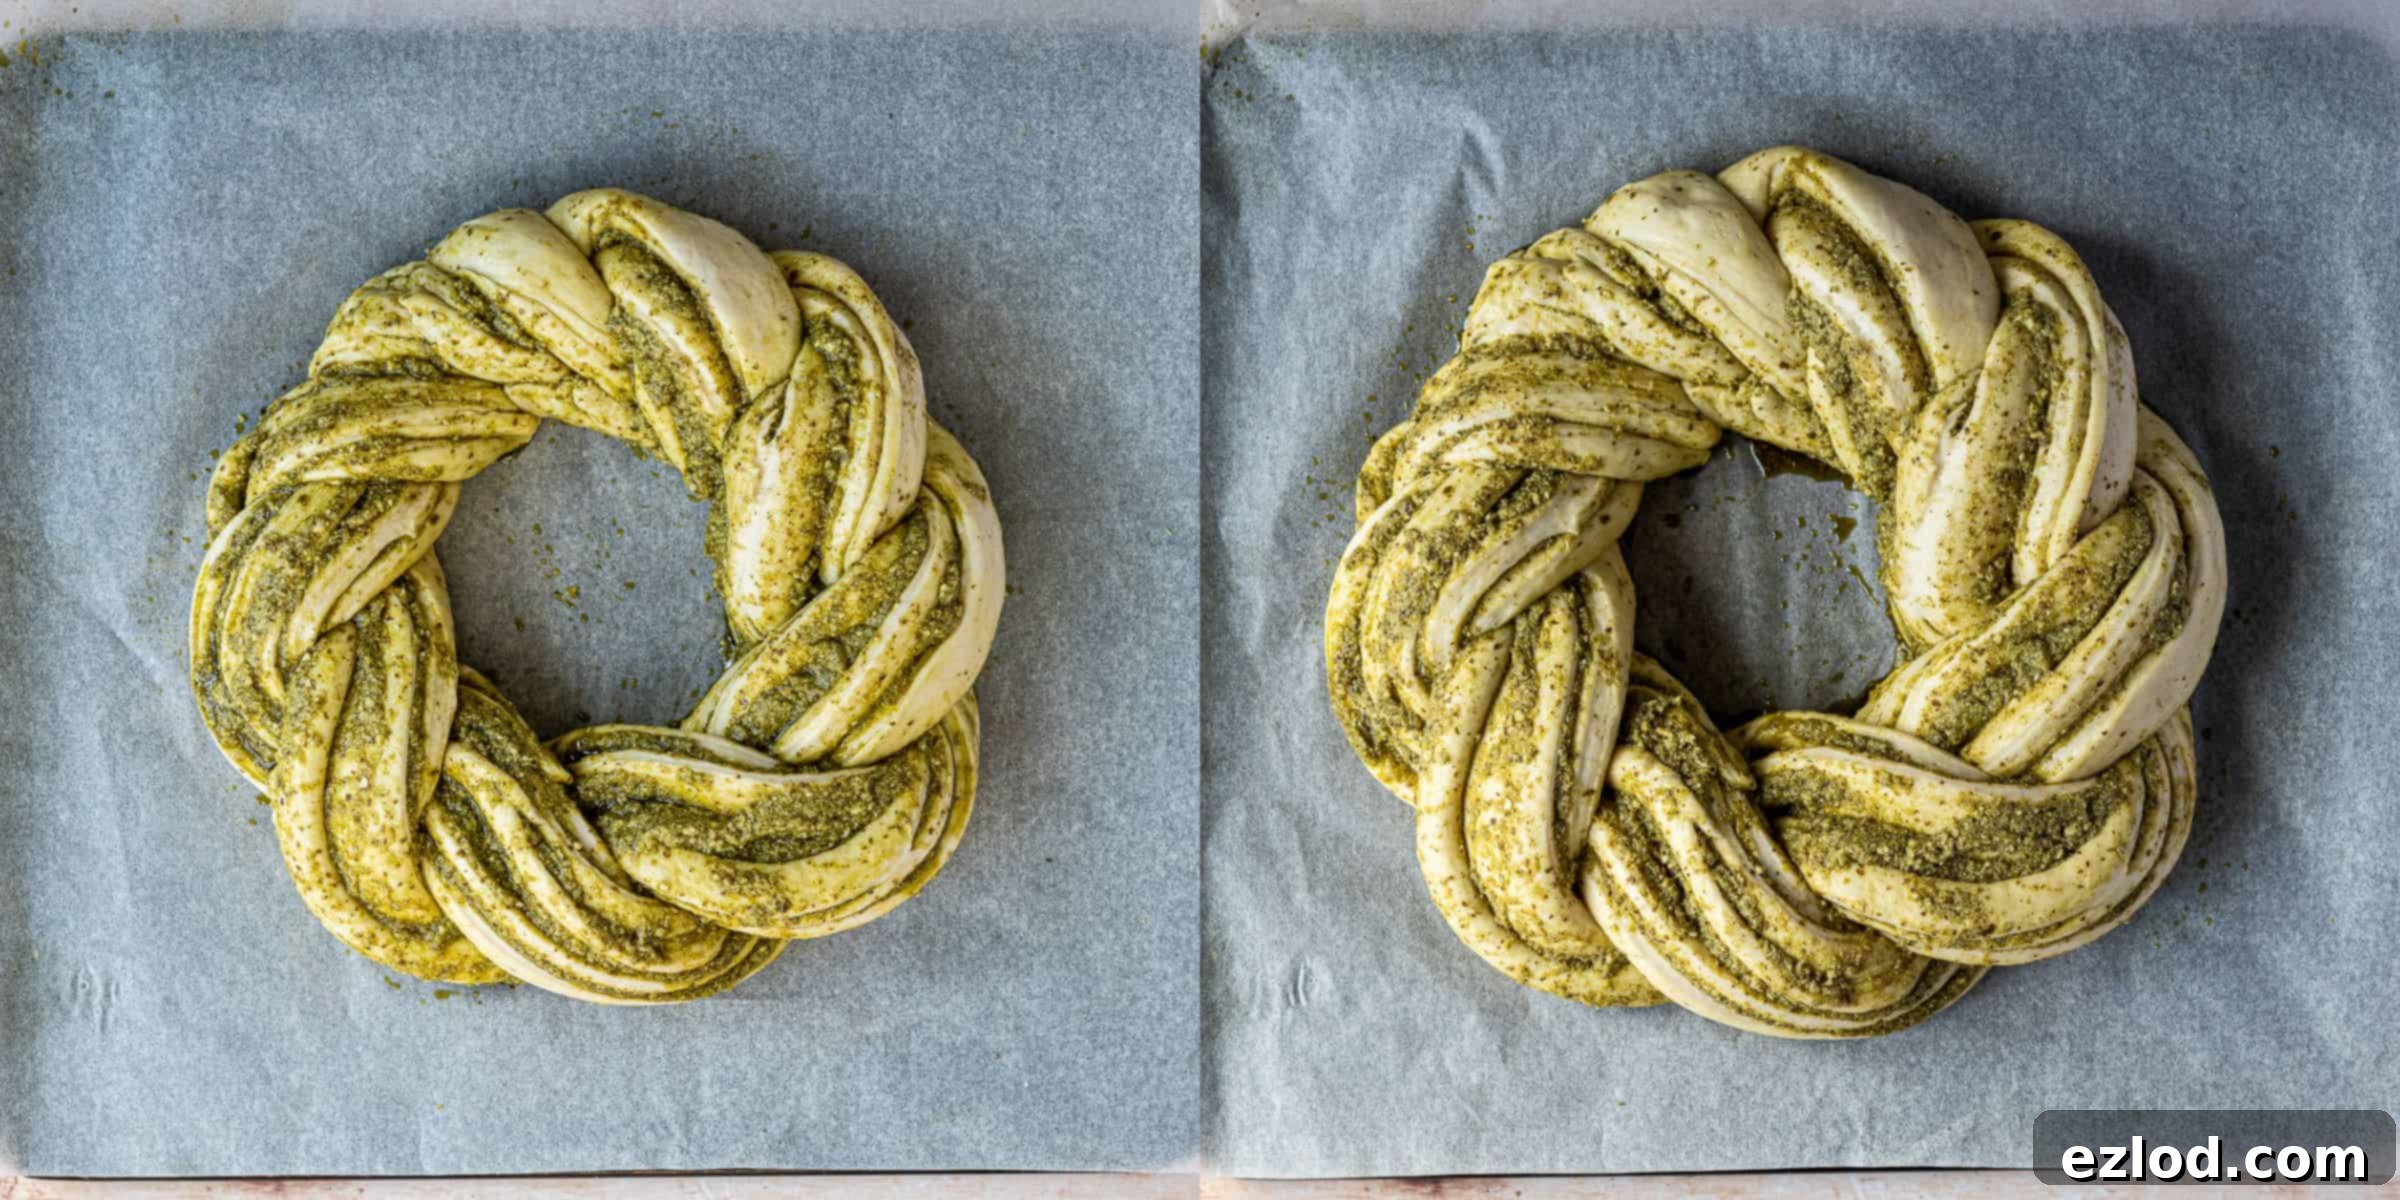
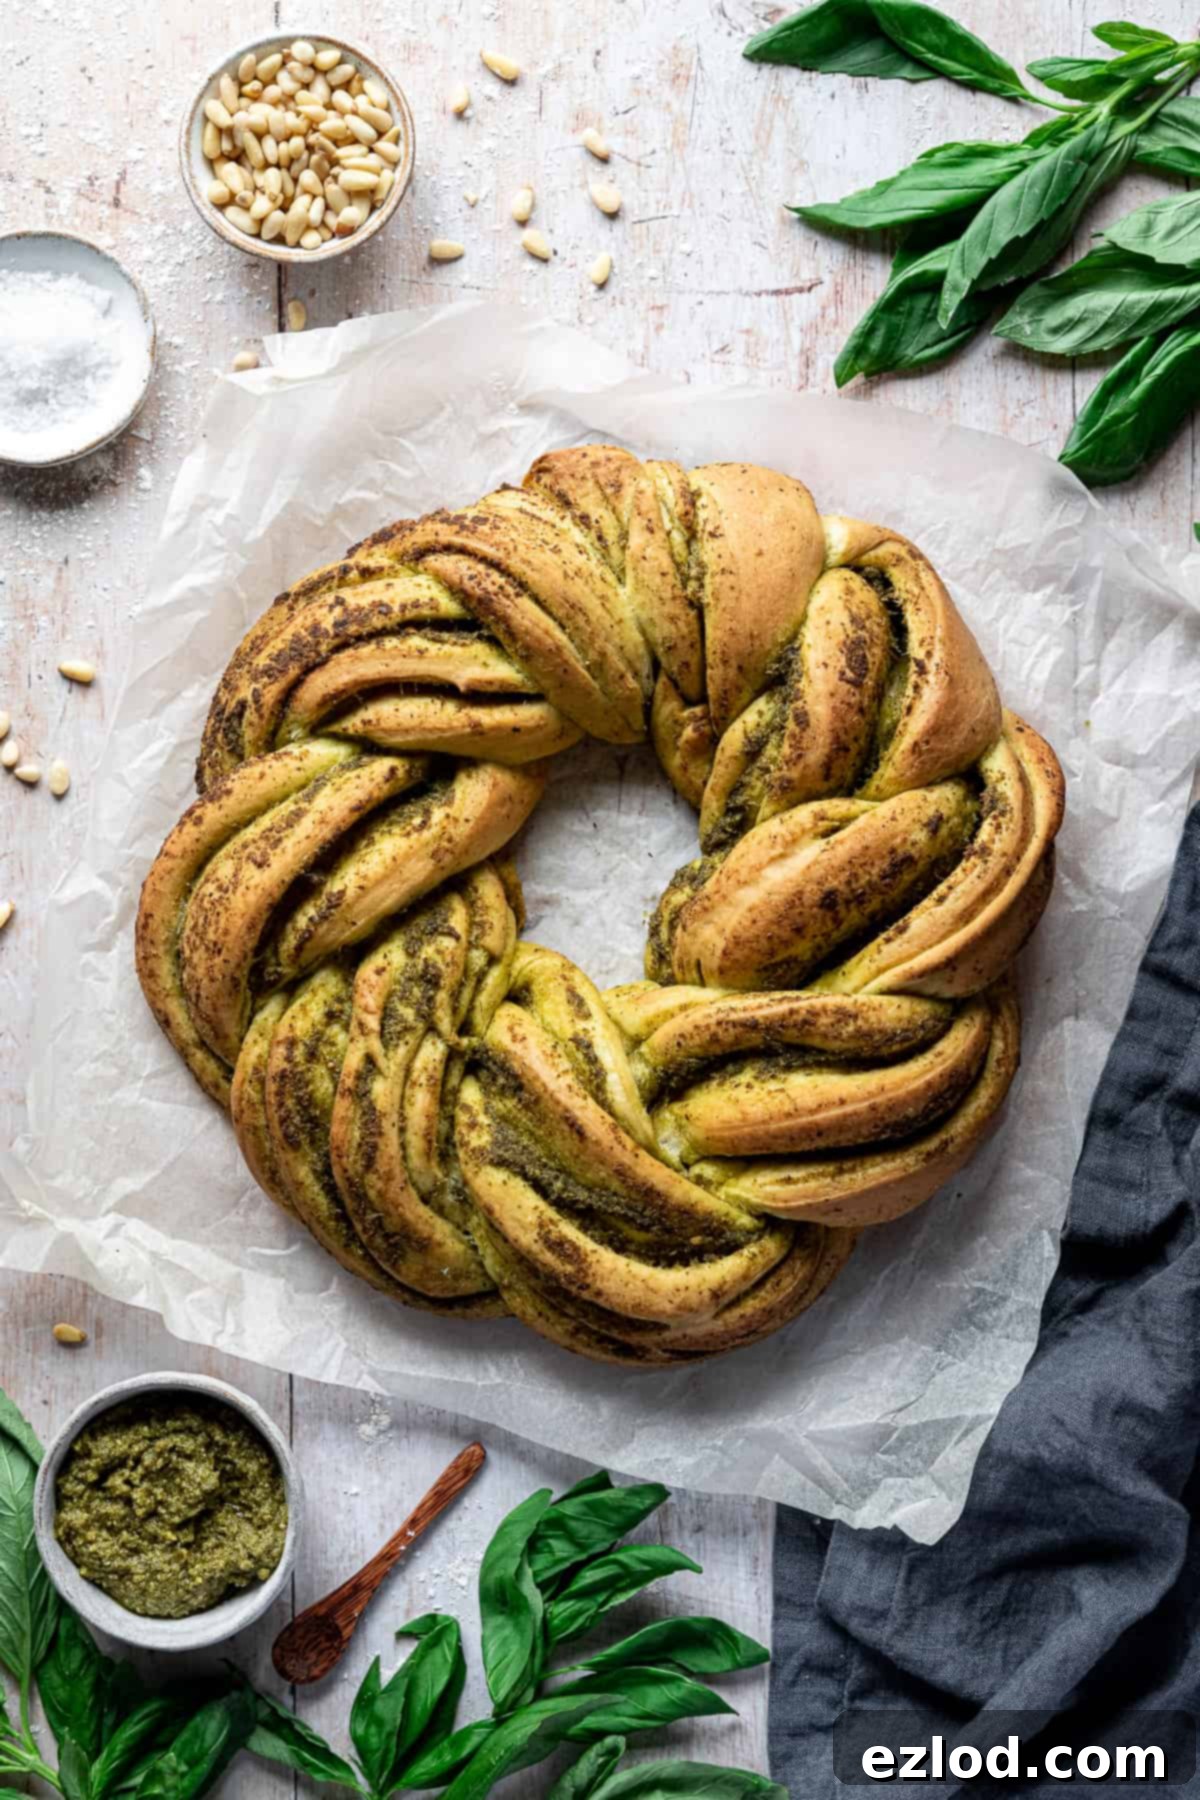
9. Bake to Golden Perfection: While your dough is undergoing its second rise, preheat your oven to 200°C/180°C fan/400°F/gas mark 6. Once the dough has sufficiently proved, place the baking sheet in the center of the preheated oven. Bake for 25-35 minutes, or until the bread is a beautiful golden brown and sounds hollow when tapped on the bottom. To be absolutely sure it’s cooked through, a probe thermometer inserted into the thickest part should read at least 90°C/194°F. If the bread begins to brown too quickly, loosely cover it with aluminum foil to prevent over-browning. Once baked, transfer the gorgeous pesto bread wreath to a wire rack to cool slightly before serving.
Expert Tips for the Perfect Vegan Pesto Bread:
Achieving a truly exceptional vegan pesto bread is all about precision and understanding your ingredients. Follow these expert tips for the best possible results:
- Accurate Measurements Are Key: For baking, especially bread, precision matters. I cannot stress enough the importance of weighing your ingredients using a digital kitchen scale, specifically the gram measurements provided. Cup conversions are notoriously inaccurate and can significantly affect the dough’s hydration and the final texture of your bread. A gram is always a gram, but the volume of a “cup” can vary depending on how ingredients are scooped and packed.
- Check Your Yeast’s Freshness: Old or inactive yeast is a common culprit for bread that fails to rise. Always ensure your instant yeast is within its expiry date. If you’re unsure, you can test it by dissolving a teaspoon of sugar and yeast in a quarter cup of lukewarm water; if it bubbles and foams within 5-10 minutes, it’s active.
- Resist Adding Extra Flour: It’s natural for bread dough, especially a well-hydrated one, to feel a bit soft and sticky initially. Resist the temptation to add excessive flour during kneading or shaping. While you can lightly flour your surface for rolling, adding too much flour to the dough itself will result in a dry, dense, and heavy bread, rather than the desired light, fluffy texture.
- Monitor Rising Times: The time it takes for dough to rise is highly dependent on the ambient temperature. On warmer days, your dough will prove much faster than on cooler days. Always rely on visual cues (doubled in size, puffy) and the finger-poke test rather than strict timing.
- Choose the Right Flour: While bread flour offers the ideal texture due to its higher protein content and gluten development, all-purpose (plain) flour can be used as a substitute if necessary. However, for the best chew and structure, bread flour is superior. Avoid using wholemeal/whole wheat flour, as its coarser texture and bran content can lead to a denser, heavier loaf.
- Consider an Overnight Rise for Enhanced Flavor: If your schedule allows, consider making the dough in the evening and placing it (covered) in the refrigerator for its first rise overnight. This slow, cold fermentation significantly deepens the flavor of the bread. Just remember that the second rise will likely take longer in the morning as the dough will need to come to room temperature and reactivate.
- Best When Fresh: Like most homemade breads, this vegan pesto bread is at its absolute best when enjoyed on the day it’s baked, still slightly warm from the oven. However, it will keep well for a couple of days when stored in an airtight container at room temperature.
Understanding Yeast: Instant vs. Active Dry
The type of yeast you use can slightly alter your bread-making process. Here’s what you need to know:
- Instant Yeast (Recommended): I primarily use instant yeast (also known as “fast-action” or “rapid-rise” yeast) because it’s incredibly convenient. It doesn’t need to be activated in liquid before use; you can simply mix it directly with your dry ingredients. This streamlines the process and is perfect for busy bakers. If you can, I highly recommend sourcing instant yeast for this recipe.
- Active Dry Yeast: If active dry yeast is the only type you have on hand, you can certainly still use it, but the preparation method will be slightly different. Active dry yeast requires “proofing” or “activating” first. To do this, stir 10g (3 teaspoons) of active dry yeast along with the sugar into the lukewarm water specified in the recipe. Let this mixture sit for 10-20 minutes. You should see it become foamy and bubbly, indicating the yeast is alive and active. Once proofed, proceed with the rest of the recipe as written, adding this yeast mixture where the water and yeast are called for.
Smart Ways to Speed Up Dough Rising Time:
Dough rising can sometimes feel like a test of patience, especially in a cold kitchen. Here are a couple of clever tricks to create a warm, optimal environment for your dough to proof more quickly:
- Warm Oven Method (Gentle Heat): If your room temperature is chilly, you can use your oven to create a cozy spot for your dough. Turn your oven on to its absolute lowest temperature setting for just a couple of minutes – literally just long enough to take the chill off. Then, switch the oven off completely and open the door for about 30 seconds to let some of the intense heat escape. Crucially, before placing your dough inside, test the warmth with your hand. It should feel pleasantly warm, like a comfortable summer day, but definitely not hot. Too much heat will kill the delicate yeast, preventing your bread from rising. Place your covered dough bowl inside the warmed, turned-off oven and shut the door. On particularly cold days, you might need to repeat the warming process once more after an hour or so, but often, one gentle warming is sufficient.
- Steam Bath Method (Warm and Humid): Another excellent method for creating a warm and slightly humid environment is to use steam. Place a heat-proof bowl or a loaf tin at the very bottom of your (cold, switched off) oven. Then, place your covered dough bowl on the middle rack. Fill the bowl at the bottom with boiling water and quickly close the oven door. The steam generated from the hot water will create a wonderfully warm and moist atmosphere, ideal for rapid yeast activity and dough rising. This method is particularly effective as it also provides a bit of humidity, which prevents the dough from drying out.
How to Know When Your Vegan Pesto Bread is Perfectly Baked:
Baking bread to perfection is a science and an art. While visual cues are helpful, the most reliable way to ensure your vegan pesto bread is baked through and through is by checking its internal temperature. Overbaked bread can become dry and tough, while under-baked bread means consuming raw, unappetizing dough. Here’s how to tell when it’s just right:
- The Probe Thermometer Method (Highly Recommended): Invest in a good quality probe thermometer; it’s an incredibly handy kitchen tool that will elevate all your baking (and cooking!) endeavors. Insert the thermometer into the thickest part of the bread (often the center of the wreath). For fully baked bread, the internal temperature should consistently read at least 90°C (194°F). This method eliminates guesswork and ensures consistent results. Keep in mind that baking times are always approximate, as oven temperatures can vary significantly.
- The Tap Test: If you don’t have a thermometer, gently tap the bottom of the baked loaf. It should sound hollow, indicating that the crumb is cooked through and there’s no dense, raw dough inside.
- The Toothpick Test (Less Reliable for Bread): While often used for cakes, a toothpick inserted into the center of a bread loaf should come out clean and with little resistance. However, this is less reliable for bread than for cakes, as a clean toothpick doesn’t always guarantee the internal temperature has reached the safe and optimal level.
Can I Freeze This Vegan Pesto Bread?
Absolutely! This vegan pesto bread freezes beautifully, making it perfect for meal prep or for saving leftovers. To preserve its freshness and quality, allow the bread to cool completely to room temperature before freezing. It’s best to freeze it on the same day it’s baked.
- Freezing Method: You can freeze the entire loaf whole or slice it first for individual portions. Wrap the bread tightly in plastic wrap, then place it in an airtight container or a heavy-duty freezer bag to protect it from freezer burn.
- Defrosting: To enjoy, simply allow the bread to defrost at room temperature. This can take several hours for a whole loaf or less for individual slices.
- Reheating (Optional): If you’ve frozen the whole loaf, you can refresh it in a low oven (around 160°C/325°F) for 5-10 minutes once it has defrosted. This will help to crisp up the crust and warm the interior, making it taste almost as good as freshly baked.
Can I Make It Gluten-Free?
Unfortunately, I’m afraid this specific recipe is not suitable for gluten-free flour substitutions. Creating successful gluten-free bread is a highly specialized skill, as gluten-free flours behave very differently from wheat-based flours. The entire recipe, including ingredient ratios and techniques, would need a complete overhaul to account for the lack of gluten structure.
As gluten-free baking is not my area of expertise, I cannot confidently advise on how to adapt this particular recipe. For the best results, I strongly recommend seeking out a recipe that has been specifically developed and tested to be gluten-free, rather than attempting to modify a non-gluten-free recipe. This will save you frustration and ensure a delicious outcome.
Serving Suggestions for Your Vegan Pesto Bread Wreath
This savory vegan pesto bread wreath is incredibly versatile and pairs beautifully with a variety of dishes. Here are some delicious ways to enjoy it:
- With Soups: It’s the ultimate accompaniment to a warm bowl of tomato soup, minestrone, or any creamy vegetable soup. The crusty edges and soft, pesto-filled interior are perfect for soaking up every last drop.
- As an Appetizer: Serve it as a gorgeous pull-apart appetizer at parties or gatherings. Simply place it on a board, perhaps with some extra olive oil or a balsamic glaze for dipping, and let everyone enjoy.
- Alongside Salads: Complement a fresh green salad or a hearty pasta salad with slices of this flavorful bread. Its savory notes beautifully balance lighter, crispier dishes.
- For Brunch: Elevate your brunch spread! It pairs wonderfully with scrambled tofu, roasted vegetables, or a simple avocado toast for a truly satisfying start to your day.
- With Pasta: Replace traditional garlic bread with this pesto-infused version alongside your favorite vegan pasta dishes. It adds an extra layer of herbaceous flavor that’s hard to beat.
- Cheese Board Companion: If you enjoy vegan cheeses, this bread is a fantastic addition to a plant-based cheese board, offering a rich, savory contrast to various textures and flavors.
Discover More Delicious Vegan Bread Recipes:
If you loved making this vegan pesto bread, you’ll be thrilled to explore other incredible plant-based bread recipes that are just as satisfying and delightful. Expand your baking repertoire with these fantastic options:
Vegan Pulla Bread
Experience the comforting flavors of Finland with this vegan version of classic braided cardamom bread. It’s incredibly soft, subtly sweet, and wonderfully aromatic, making it perfect served with plant-based butter, jam, or alongside a steaming cup of coffee.
Vegan Cinnamon Rolls
Indulge in these utterly delicious vegan cinnamon rolls, crafted using the innovative tangzhong method. This technique results in an incredibly soft, fluffy, squishy, and utterly moreish texture that will make them an instant favorite for breakfast or dessert.
Vegan Hokkaido Milk Bread
Discover a vegan interpretation of the world’s softest and fluffiest bread. This Hokkaido milk bread boasts a truly cloud-like texture, making it perfect for breakfast, snacking, or as a delightful side with any meal.
Maple Pecan Bread Wreath
This impressive vegan maple pecan couronne is a genuine showstopper, ideal for an indulgent breakfast, a festive brunch, or any occasion where you want to impress with a sweet, rich, and beautifully crafted bread.
If you tried this recipe and loved it, please let me know your thoughts! Rate it, leave a comment below, or share your creation on Instagram by tagging @domestic_gothess and using the hashtag #domesticgothess. Your feedback is truly appreciated!
*All images and content on Domestic Gothess are copyright protected. If you wish to share this recipe, please do so by utilizing the share buttons provided. Unauthorized screenshotting or full reproduction of the recipe or content is prohibited.*

Print Recipe
Vegan Pesto Bread
Ingredients
- 400 g (3 ¼ cups) white bread flour
- 8 g (2 ½ tsp) fast action yeast
- 1 tsp salt
- 2 tsp sugar
- 3 Tbsp mild olive oil
- 250 ml (1 cup) lukewarm water
- 190 g (6 ½ oz) vegan pesto (store-bought or homemade)
Instructions
-
Place the bread flour in a large bowl (or the bowl of a stand mixer fitted with a dough hook). Add the yeast to one side and the salt and sugar to the other side (ensure salt does not directly touch the yeast as it can kill it). Stir gently to combine all dry ingredients.
-
Pour in the olive oil and two-thirds of the lukewarm water. Mix together using your hands, a spoon, or the stand mixer until a shaggy, uneven dough forms. Gradually add more water, a little at a time, until all the flour is incorporated and the dough comes together into a sticky, but not overly wet, consistency. You may not need all the water, or you might need a tiny bit more, depending on your flour and environment.
-
Turn the dough out onto a clean, un-floured surface. Knead by hand for approximately 10 minutes until it becomes smooth, elastic, and more pliable. If the dough is too sticky, you can lightly grease your hands or the surface with a tiny bit of olive oil, but avoid adding extra flour as it can lead to dry bread. The dough will become less sticky as gluten develops during kneading.
-
If using a stand mixer, let it do the kneading for you on a medium speed for 5-10 minutes. The dough is ready when it is smooth and elastic and passes the “windowpane test” (a small piece can be stretched thin enough to see light through without tearing). It should still feel slightly tacky but not wet.
-
Place the ball of kneaded dough into a lightly oiled bowl, turning it once to coat. Cover the bowl loosely with plastic wrap or a clean kitchen towel. Leave it to rise in a warm spot until it has visibly doubled in size, which typically takes about 1-2 hours. Alternatively, for a deeper flavor, you can place it in the fridge overnight; allow extra time for the second rise if using this method.
-
Once the dough has risen, gently “knock it back” to release the air. Turn it out onto a lightly floured surface and roll it into a large rectangle, approximately 30 x 45cm (12 x 18 inches). Evenly spread the vegan pesto all over the dough, leaving a clean 2cm (¾ inch) border around the edges.
-
Starting from the long edge closest to you, carefully roll the dough up tightly but gently, like a Swiss roll, into a log shape.
-
Line a baking sheet with baking parchment or sprinkle it lightly with semolina. Transfer the dough roll to the prepared baking sheet. Using a very sharp knife or a bench scraper, cut the roll cleanly in half lengthwise, exposing the pesto layers.
-
Turn the two halves so that the cut, pesto-exposed sides are facing upwards. Lay one strip over the other to form an “X” shape on the baking sheet.
-
Carefully twist the two halves together, always keeping the cut sides facing up to highlight the pesto layers, until the entire length of dough is braided. Once braided, loop the dough into a wreath shape, bringing the ends together and firmly pinching them to seal the join.
-
Loosely cover the shaped wreath and let it rise for about 45 minutes to an hour, or until it looks puffy and has visibly increased in size. To test for readiness, gently press a finger into the dough; it should spring back slowly. If it springs back quickly, it needs a little more time.
-
While the dough is undergoing its second rise, preheat your oven to 200°C/180°C fan/400°F/gas mark 6. You might observe some oil from the pesto pooling on the baking sheet during this proofing stage; if this occurs, gently blot it up with a piece of kitchen roll.
-
Once the dough has fully proved, place the baking sheet in the center of the preheated oven. Bake for 25-35 minutes, or until the bread is beautifully golden brown and sounds hollow when tapped on the bottom. For an accurate measure of doneness, a probe thermometer inserted into the thickest part should register at least 90°C/194°F.
-
If you notice the bread browning too quickly during baking, loosely cover it with a piece of aluminum foil to prevent over-darkening. Once baked to perfection, carefully transfer the hot pesto bread wreath to a wire rack and allow it to cool completely before slicing and serving.
Notes
- For the absolute best results, it’s crucial to follow this recipe closely. As always, I strongly recommend weighing your ingredients using a digital kitchen scale and adhering to the gram measurements. Cup conversions can be inaccurate for baking and may lead to inconsistent outcomes. A gram is always a precise measurement, whereas cup volumes can vary widely.
- Resist the urge to add more flour to the dough than specified. The dough is designed to be slightly soft and sticky. Incorporating too much flour will result in a dry, dense bread instead of the desired light and fluffy texture.
- The rising time for your dough will be influenced by the ambient temperature. In warmer environments, the dough will rise much faster compared to colder conditions. Always observe the dough’s appearance (doubled in size, puffy) and use the finger-poke test rather than relying solely on a timer.
- You have the flexibility to make this vegan pesto bread all in one day, or you can prepare the dough in the evening and allow it to undergo its first rise slowly overnight in the refrigerator (covered). If opting for the overnight rise, be aware that the second rise may take a bit longer in the morning, as the dough will be cold and need to warm up.
- This vegan pesto bread is truly at its peak flavor and texture when enjoyed on the day it is baked. However, any leftovers can be stored in an airtight container at room temperature for up to two days. For longer storage, see the freezing instructions above.
