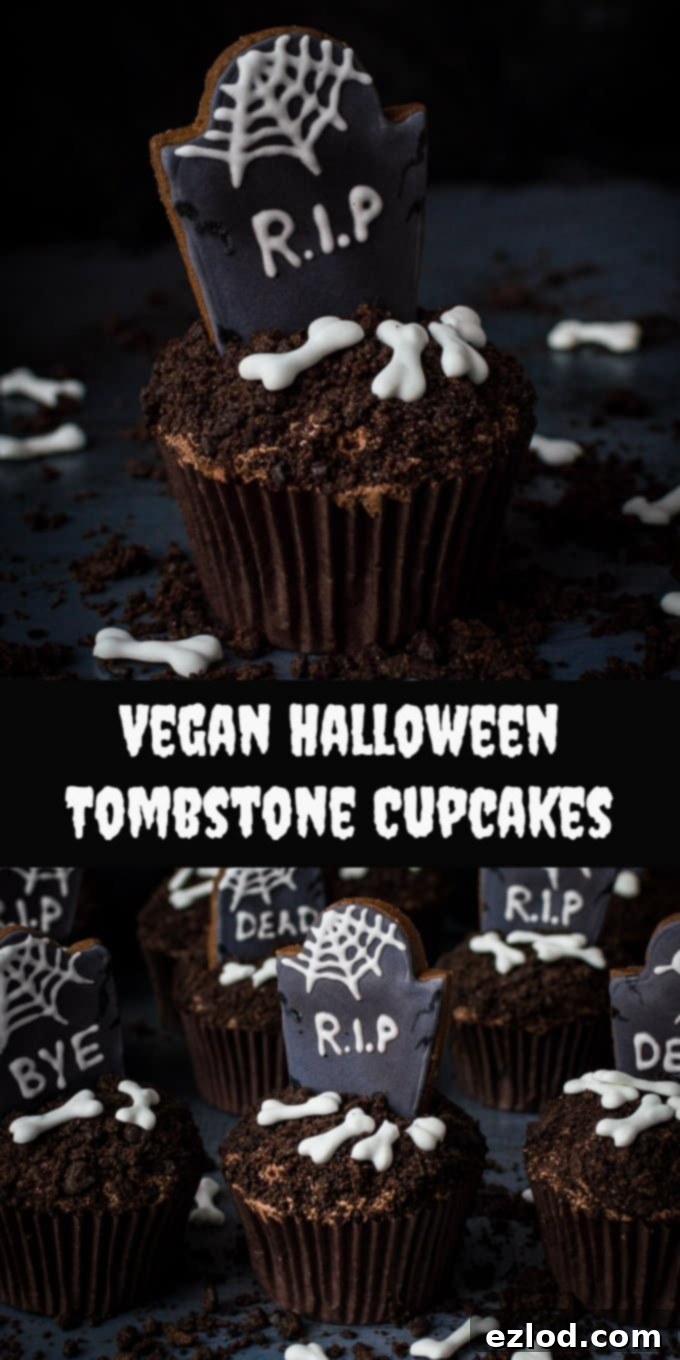
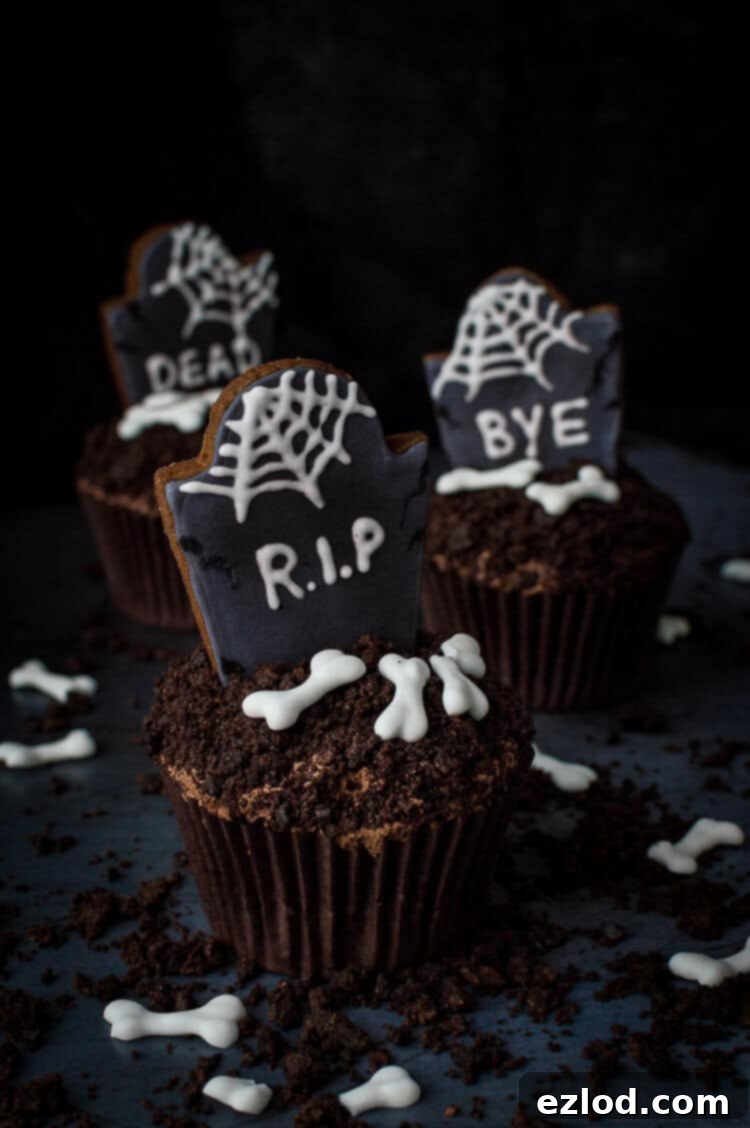
Spooktacular Vegan Halloween Tombstone Cupcakes: Your Guide to Graveyard Delights!
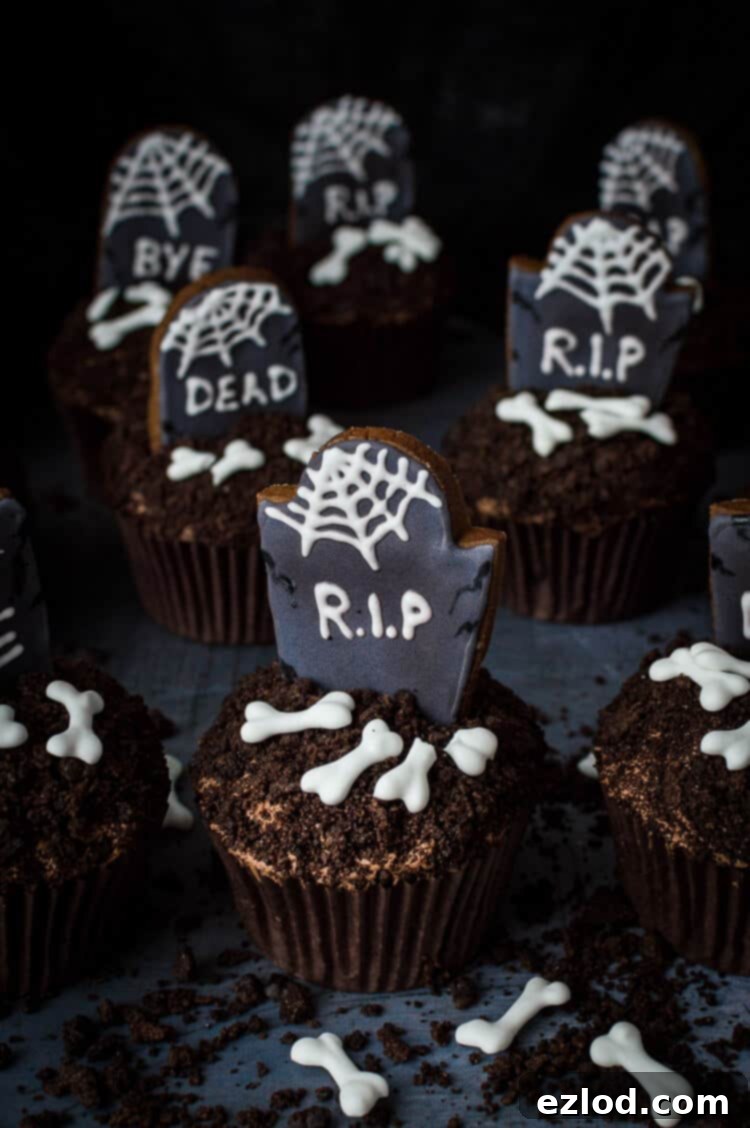
Prepare for a hauntingly delicious Halloween with these impressive vegan chocolate graveyard cupcakes! Featuring intricate gingerbread tombstones, crumbly cookie “dirt,” and eerie royal icing bones, these treats are seriously spooky, utterly delicious, and completely dairy-free. This comprehensive guide includes step-by-step photos and detailed instructions to help you create a show-stopping dessert that will delight all your ghoulish guests.
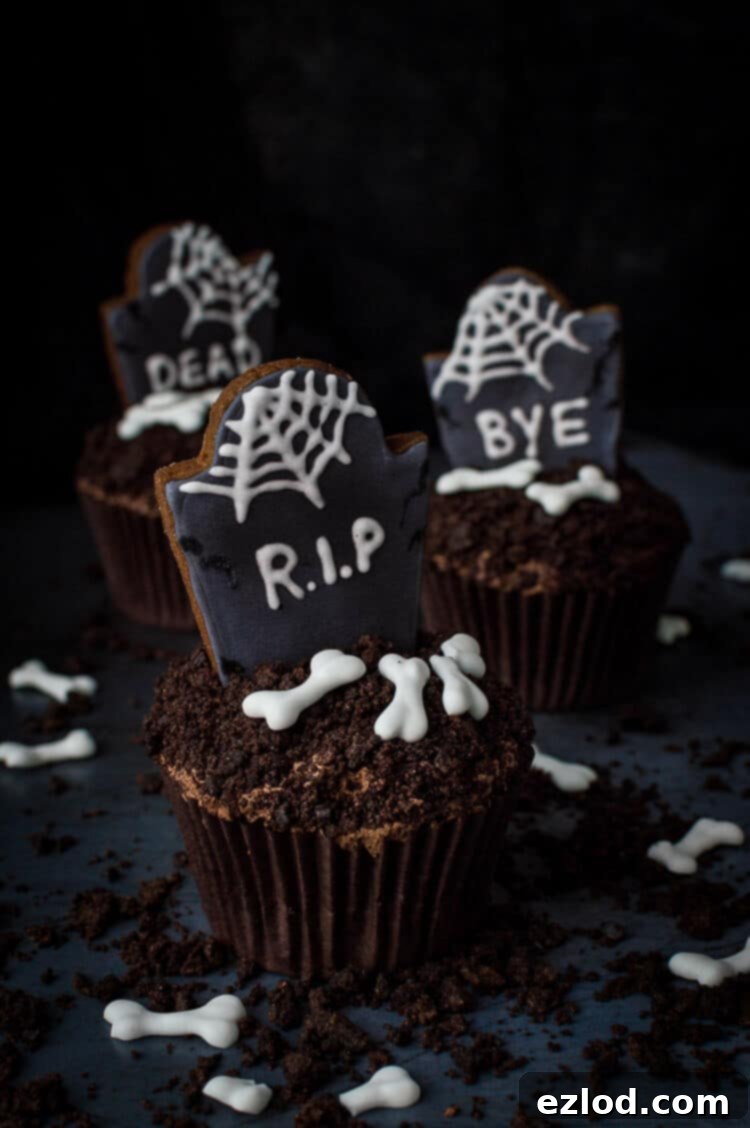
As the leaves begin to turn and a chill fills the air, thoughts inevitably drift to Halloween – a season for costumes, carved pumpkins, and, of course, delightfully frightful treats! While my blog boasts a collection of spooky cakes and other eerie edibles, I realized a glaring omission in my Halloween repertoire: cupcakes! Despite a plethora of ideas brewing, none had quite made it from concept to creation until now.
It was high time to rectify this oversight, and I’m thrilled to present one of my top Halloween dessert ideas brought to life: these incredibly spooky and utterly irresistible vegan Halloween tombstone cupcakes. They’re not just a dessert; they’re a centerpiece for your Halloween party, guaranteed to garner gasps of delight and admiration.
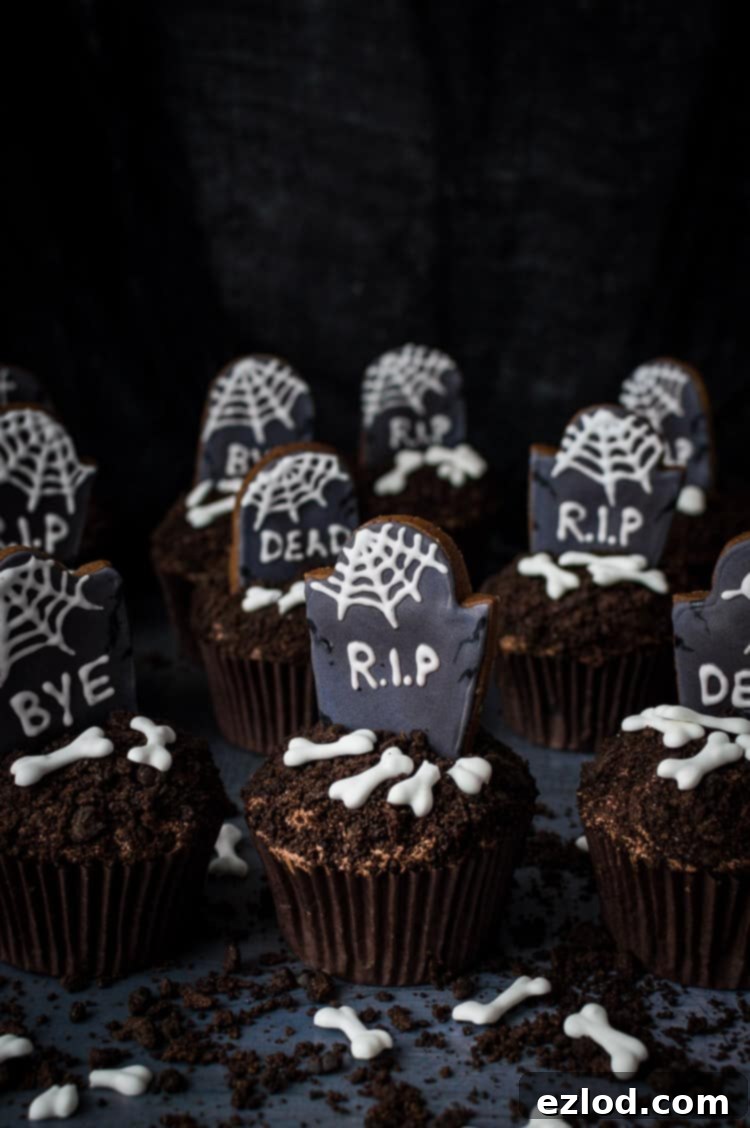
The foundation of these graveyard delights begins with an adaptation of my hugely popular and undeniably delicious vegan chocolate fudge cake recipe. This versatile cake base transforms beautifully into perfectly moist and rich cupcakes, providing the ideal canvas for our spooky decorations.
Each decadent vegan chocolate cupcake is generously crowned with a light and fluffy vegan chocolate buttercream, then meticulously coated in crushed chocolate sandwich biscuits. I opted for chocolate-filled Oreos, but Bourbon biscuits or any other favourite variety of vegan chocolate biscuits would work wonderfully, creating the perfect edible “dirt” for our miniature graveyard scene.
The star attractions, the tombstones, are crafted from my signature easy, crisp vegan gingerbread. This provides a sturdy yet edible structure for the decorations. They are then adorned with vegan royal icing, a brilliant creation made with aquafaba (the magical liquid from a tin of chickpeas) instead of traditional egg whites. Not only is it incredibly easy to whip up, but it also means no more worries about consuming raw egg whites, making it a fantastic option for everyone, not just vegans!
Beyond decorating the gingerbread tombstones, I also utilized some of the versatile royal icing to pipe delicate little bones. These add an extra layer of macabre charm to the cupcakes. The icing dries beautifully, becoming firm and stable, though it does require a bit of patience – about 4-5 hours. To manage your time effectively and ensure everything is perfectly set, I highly recommend making these Halloween cupcakes over two days. However, if you’re an early bird, a single day of focused baking and decorating is entirely achievable!
Two-Day Baking & Decorating Schedule for Spooky Success:
Day One (or Early Morning Bake):
- Bake and cool your sturdy gingerbread tombstones.
- Prepare the vegan royal icing.
- Pipe the intricate royal icing bones and set them aside to dry.
- Outline and flood your gingerbread tombstones with grey royal icing for that authentic grave look.
Day Two (or Afternoon Assembly):
- Add the final cobweb and personalized writing details to your dry tombstones.
- Bake the rich vegan chocolate cupcakes (you can also bake these on day one if preferred, storing them in an airtight container).
- Whip up the luscious vegan chocolate buttercream.
- Assemble your impressive graveyard cupcakes, adding the cookie dirt, tombstones, and bones.
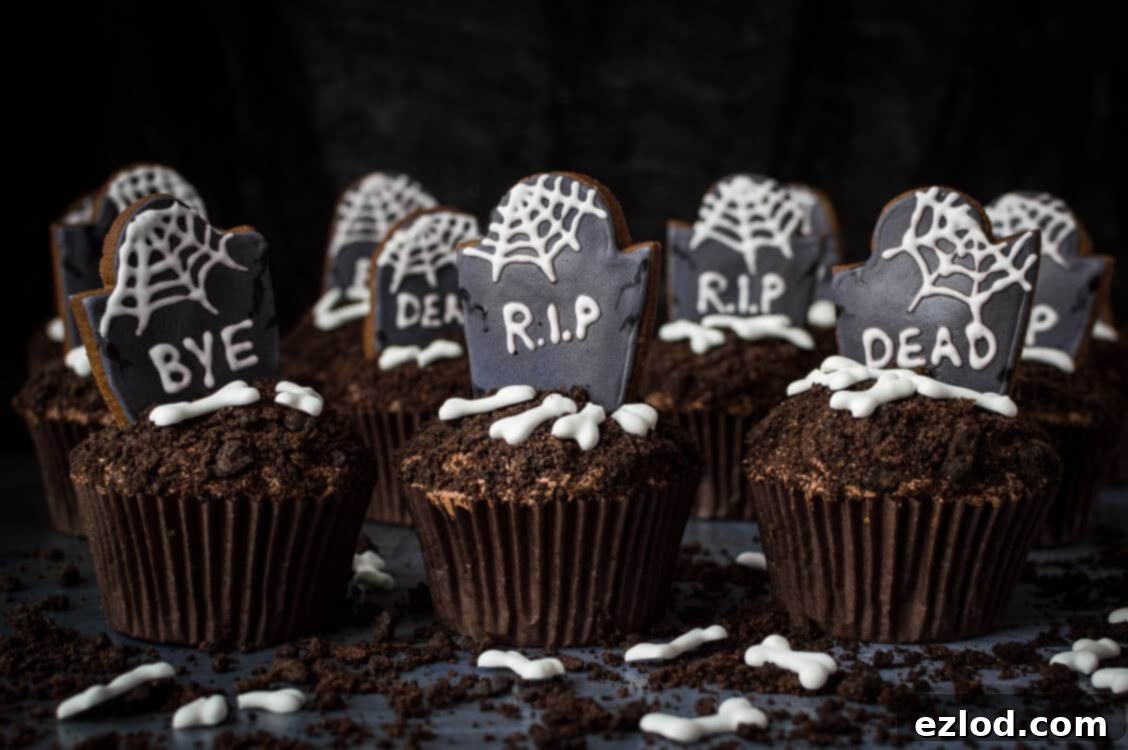
Don’t be daunted by the seemingly extensive list of steps! Each component of these vegan Halloween treats is straightforward to make. The most time-consuming part is undoubtedly the intricate decoration of the gingerbread tombstones, which allows for immense creativity. If you’re short on time but still want to achieve a spooky effect, you can simplify the process by making a half batch of royal icing, skipping the grey base colour for the tombstones, and simply piping white lettering or designs directly onto the gingerbread. This still yields an impressive result with less fuss.
For the best flavour and texture, these tombstone cupcakes are ideally enjoyed on the day they are assembled. However, they will remain wonderfully fresh and delicious for a couple of days when stored properly in an airtight container at room temperature. These spooky chocolate cupcakes are perfect for any Halloween gathering, school party, or simply as a fun baking project with family.
How To Make Spooky Vegan Tombstone Cupcakes: A Step-by-Step Guide
(For a complete list of ingredients and precise measurements, please refer to the detailed recipe card below.)
*For optimal baking results and consistency, it is highly recommended to follow the recipe closely and utilize gram measurements with a digital kitchen scale, rather than relying on less accurate cup conversions. Using gram measurements will ensure the best possible outcome for your delicious vegan Halloween cupcakes.*
Crafting Your Spooky Gingerbread Tombstones:
Begin your eerie edible creations by preparing the gingerbread tombstones. In a sturdy saucepan, gently melt together the coconut oil, light brown soft sugar, golden syrup, treacle, and water over a low heat until smooth and combined. Remove from heat and vigorously whisk in the ground cinnamon, ginger, cloves, and bicarbonate of soda. Finally, stir in the plain flour until a cohesive dough forms.
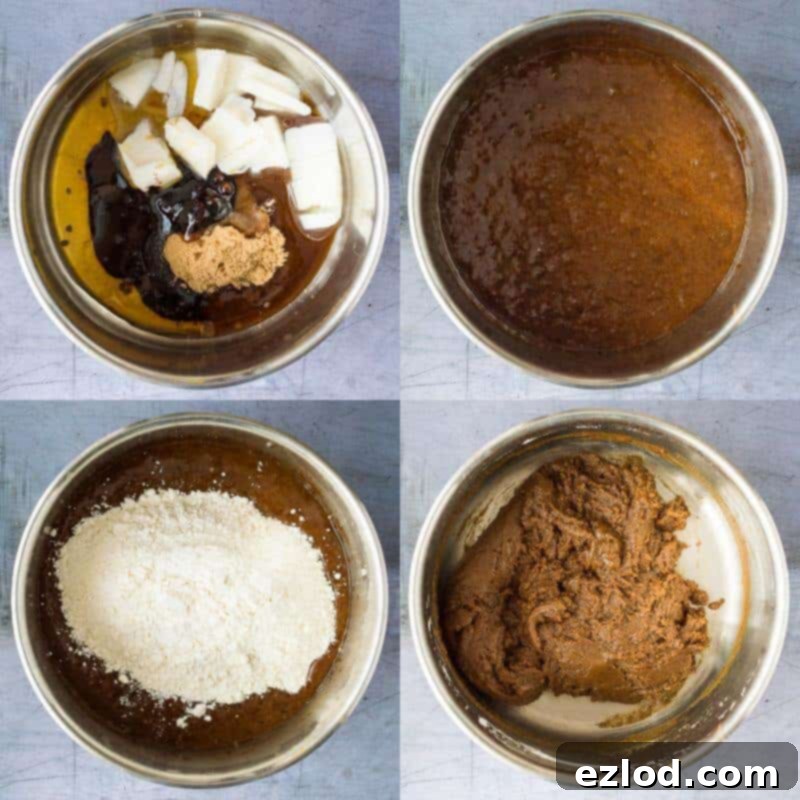
Cover the pan and transfer the dough to the refrigerator for approximately one hour, or until it becomes firm enough to handle. Once chilled, shape the dough into a ball and roll it out thinly on a lightly floured surface. Aim for an even thickness to ensure consistent baking.
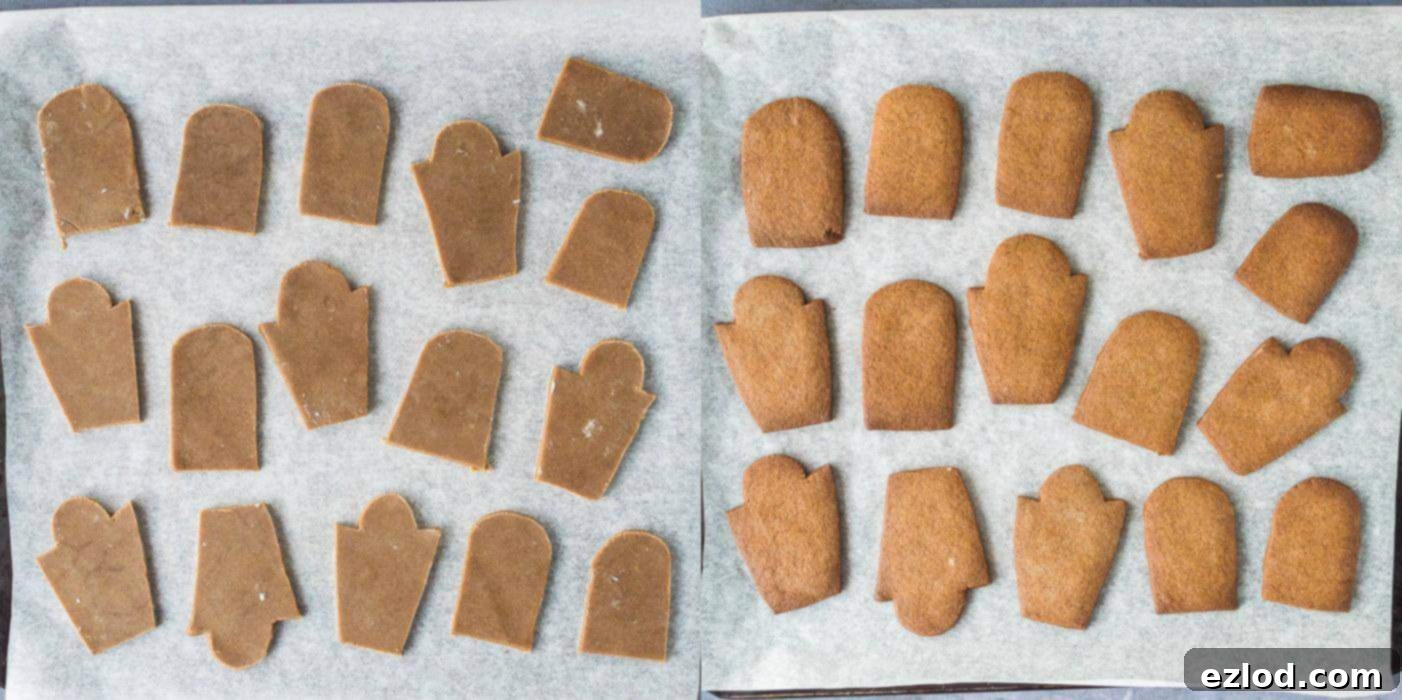
Using a sharp knife, carefully cut out various tombstone shapes. Remember, these need to fit atop your cupcakes, so avoid making them excessively large. They also require sufficient height to be securely inserted into the cupcakes – I found that shapes around 7-7.5cm tall by 4cm wide worked perfectly. While I possess a tombstone cookie cutter, it was too large for cupcakes, so I used it merely as a guide for more intricate outlines. Embrace variety; a mix of different shapes and sizes will enhance the authentic graveyard aesthetic.
You’ll need 12 tombstones for a standard batch of cupcakes. However, it’s wise to bake a few extra to account for any breakages or to allow you to select the best-looking ones for your final display. Don’t discard the dough scraps; re-roll and cut more shapes until all the dough is used – it’s enough for extra biscuits!
Carefully transfer the cut tombstones to two baking sheets lined with baking parchment. Place them in the freezer for about 15 minutes while your oven preheats to 180°C (350°F / Gas Mark 4). This freezing step helps them hold their shape during baking. Bake the biscuits for approximately 10 minutes, or until their edges are lightly golden. Once baked, transfer them to a wire rack to cool completely. Store cooled gingerbread tombstones in an airtight container until ready to decorate.
Preparing Perfect Vegan Royal Icing:
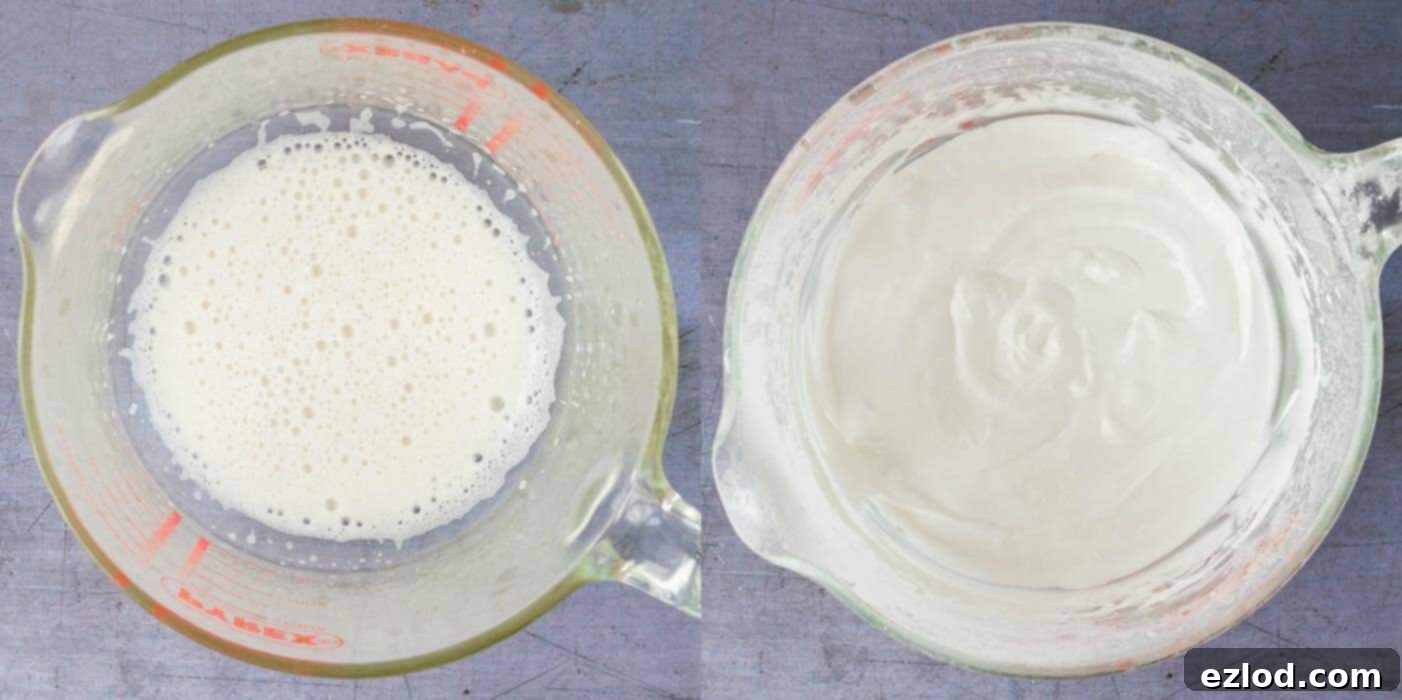
To create the essential vegan royal icing, pour the aquafaba into a clean mixing bowl and whisk with an electric mixer until it becomes light and foamy. Gradually add the sifted icing sugar, continuing to whisk until the mixture transforms into a thick, glossy, and pipeable icing. Note that aquafaba may take a little longer than egg whites to reach this consistency, but be cautious not to over-beat it.
The ideal piping texture is thick and smooth, yet still possesses a slight fluidity. If your icing appears too runny, incorporate a little more sifted icing sugar. Conversely, if it’s too thick, a drop or two of lemon juice or water will help thin it to the perfect consistency.
Always keep the vegan royal icing covered with a damp cloth or cling film when not in use to prevent it from drying out and forming a crust at room temperature.
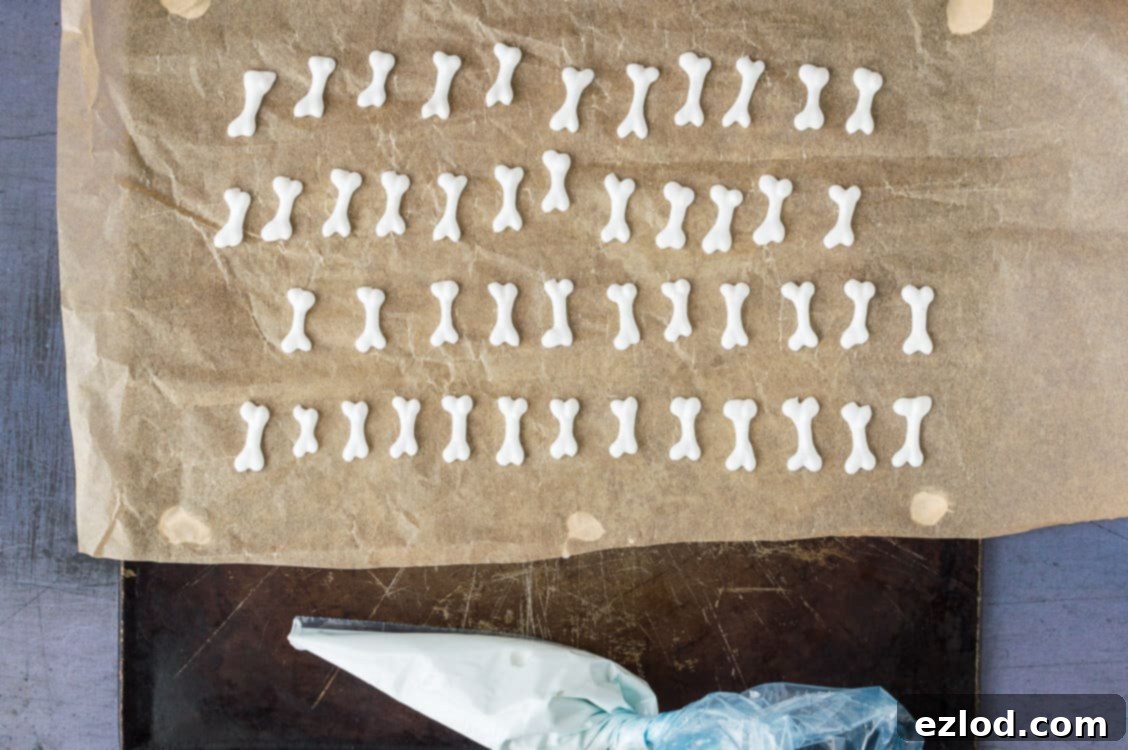
Scoop a few spoonfuls of the pristine white royal icing into a piping bag fitted with a very small round nozzle (ideally 1-2mm) or a disposable piping bag with just the very tip snipped off.
On a piece of baking parchment, pipe small, eerie bone shapes. To prevent the parchment from sliding, dab a tiny bit of icing under each corner to secure it to a baking tray. You’ll need approximately three bones per cupcake, so aim to pipe around 50 for good measure (don’t worry, once you get the knack, these are incredibly quick to pipe!). Set the piped bones aside at room temperature to dry completely. Drying time typically takes about 4 hours, but this can vary based on your room’s temperature and humidity.
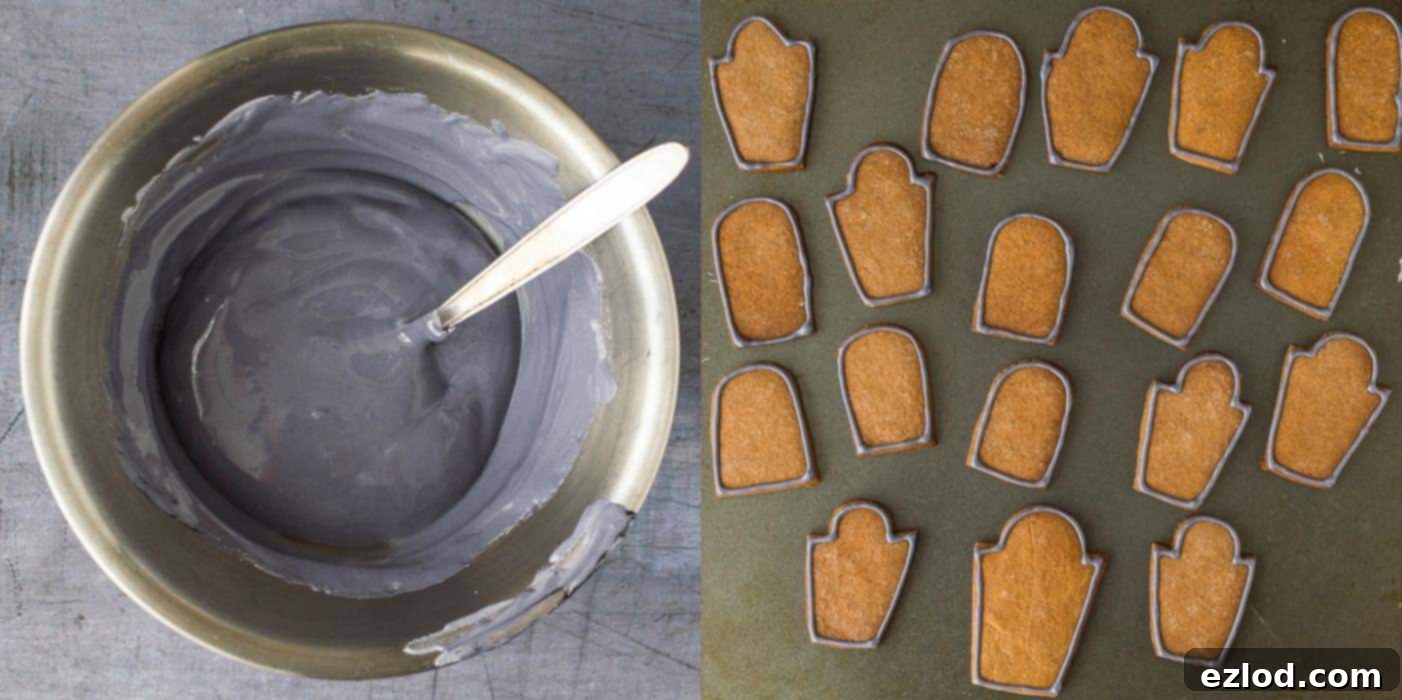
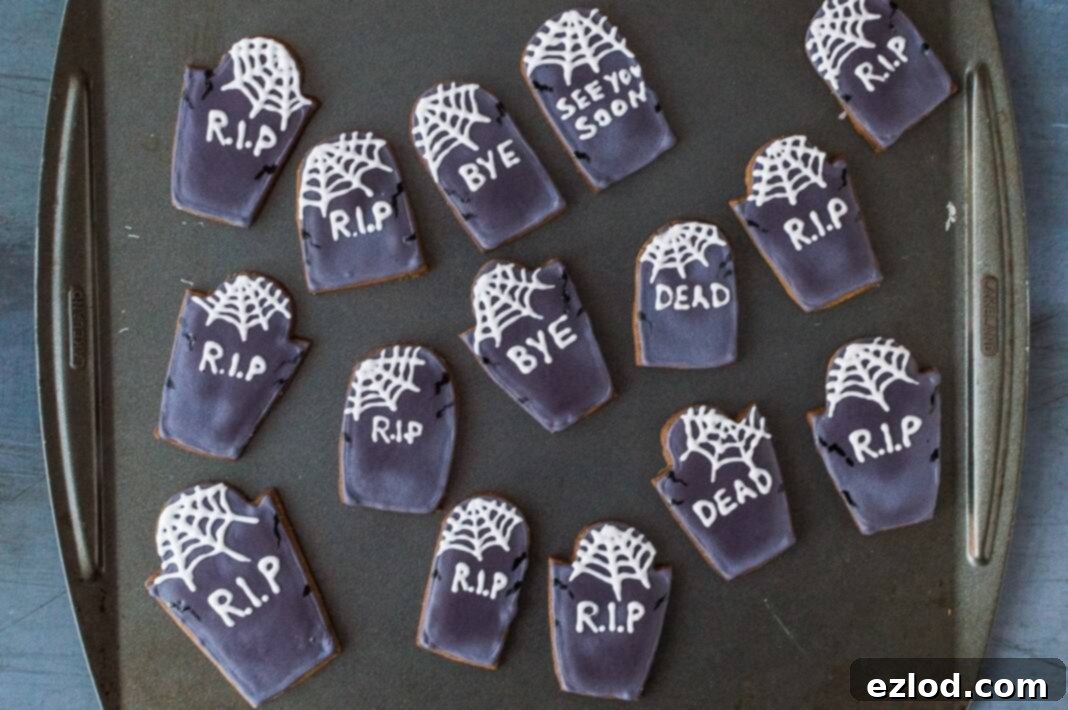
Next, take a few more spoonfuls of the royal icing and place them in a separate bowl. Stir in a small amount of vegan black gel food colouring to achieve a desired grey shade for the tombstones. Remember that the colour will deepen slightly as it sets, so aim for a couple of shades lighter than your final desired hue. (A word of caution: I used Sugarflair black extra, which unfortunately yielded a more purple than grey tone. For a true grey, consider a different shade like Sugarflair licorice next time.)
Transfer this grey icing into a piping bag fitted with the same small round nozzle (1-2mm). With steady hands, carefully pipe a crisp border around the entire edge of each gingerbread tombstone. This border will serve as a dam for the flood icing.
Prepare another small batch of grey icing for flooding. This time, stir in a few drops of lemon juice or water until the icing reaches a flooding consistency – it should be thin enough to spread but not so thin that it runs over the piped border. Gently spoon some of this thinned grey icing inside the piped border of each tombstone. Use a small teaspoon or toothpick to carefully nudge the icing towards the edges, ensuring the entire surface within the border is evenly covered.
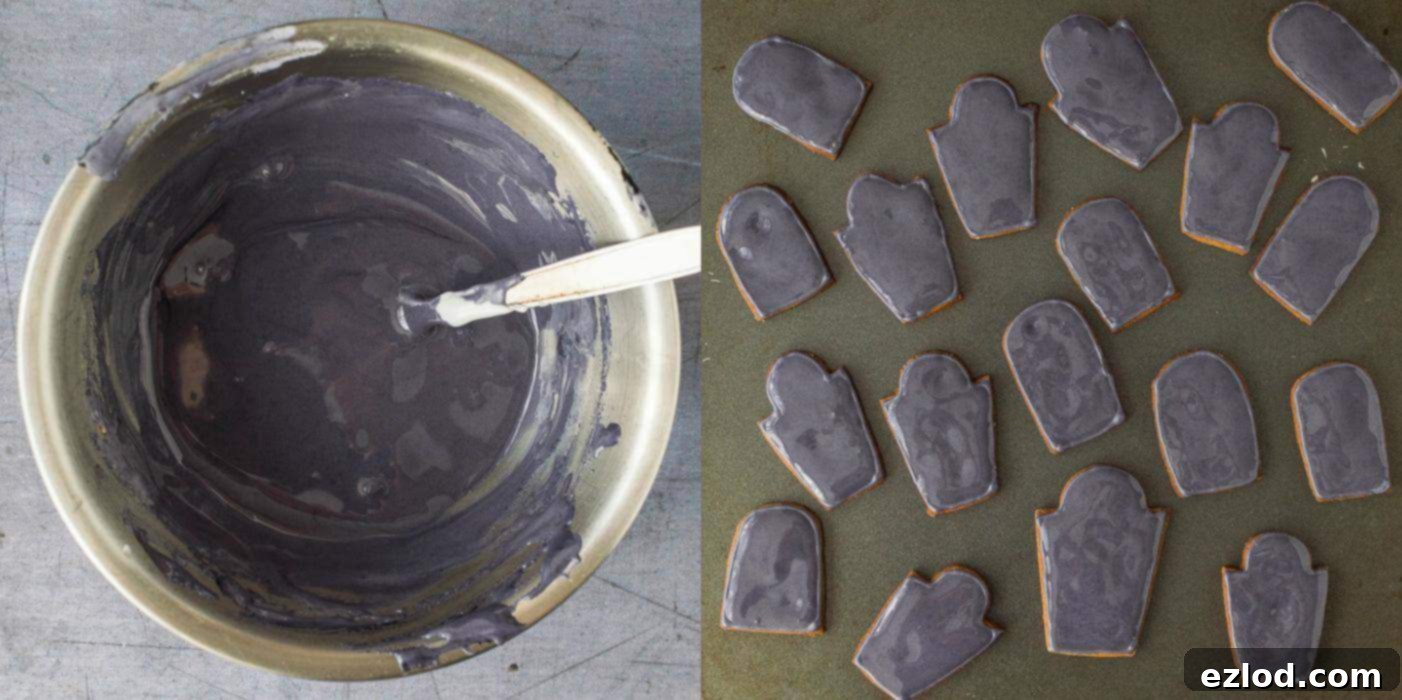
Allow the flooded tombstones to dry completely at room temperature for approximately 4-5 hours, or ideally, overnight. Patience here is key for crisp, well-defined decorations.
Once the tombstones are thoroughly dry, retrieve any leftover white royal icing (if you saved some in the piping bag from making the bones, that’s perfect!). Pipe delicate cobweb designs onto the tops of the tombstones and your choice of eerie lettering (R.I.P., BOO!, etc.) in the middle. If your royal icing has become a little too runny after sitting overnight, simply stir in a small amount of extra sifted icing sugar to thicken it back to piping consistency. For added detail, dip a fine paintbrush into black gel food colouring and carefully paint tiny cracks along the edges of the tombstones, giving them a weathered, ancient look.
Decadent Vegan Chocolate Cupcakes:
To bake the irresistible vegan chocolate cupcakes, preheat your oven to 180°C (350°F / Gas Mark 4) and line a 12-hole muffin tin with festive muffin cases.
In a large bowl, whisk together the unsweetened dairy-free milk (soy milk works wonderfully), cider vinegar, caster sugar, sunflower oil, and vanilla extract until well combined. In a separate, medium-sized bowl, sift together the plain (all-purpose) flour, cocoa powder, baking powder, bicarbonate of soda, salt, and optional instant espresso powder. The espresso powder doesn’t make the cupcakes taste like coffee; rather, it subtly deepens and intensifies the rich chocolate flavour.
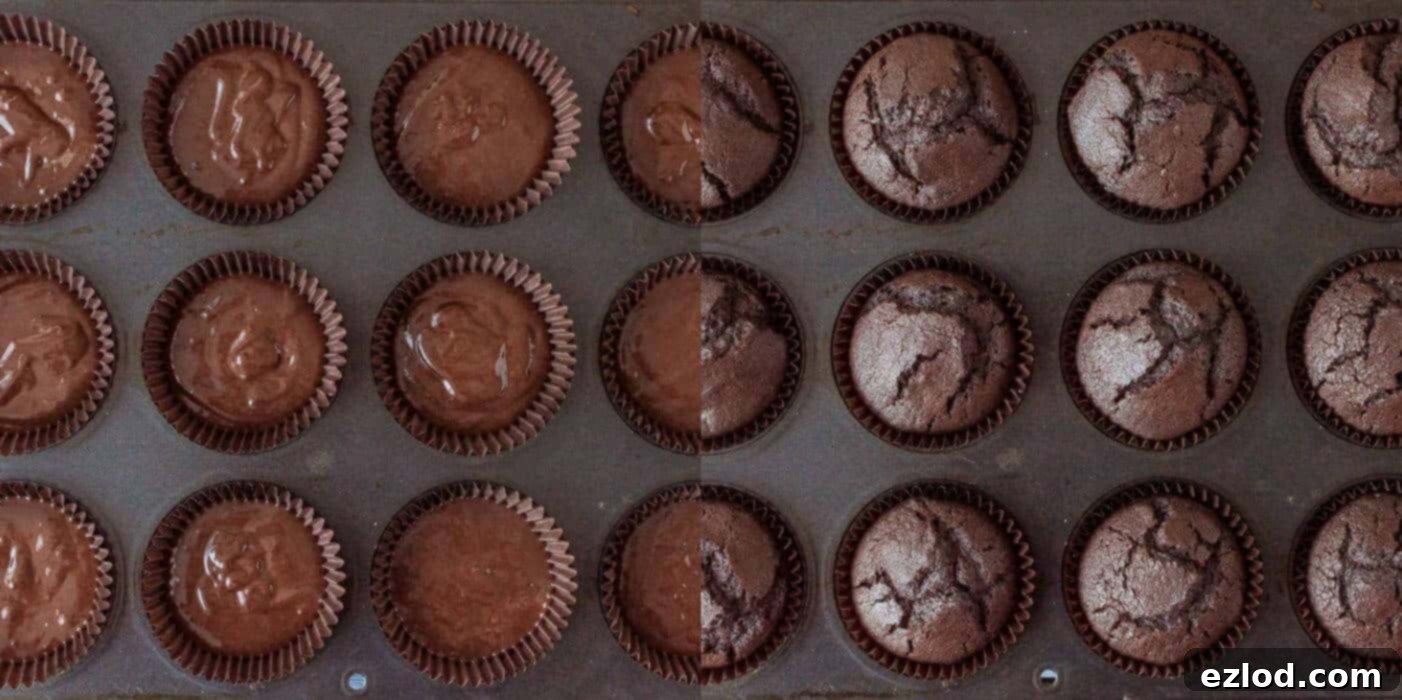
Pour the wet ingredients into the dry ingredients and whisk them together until just combined and smooth. Be careful not to over-mix the batter, as this can result in tough cupcakes. A light hand will ensure your cupcakes are tender and moist.

Divide the luscious batter evenly among the prepared muffin liners, filling each about two-thirds full. Bake for approximately 20 minutes, or until a wooden skewer inserted into the centre of a cupcake comes out clean. This indicates they are perfectly baked. Once done, transfer the cupcakes to a wire rack to cool completely before frosting.
Rich Vegan Chocolate Buttercream:
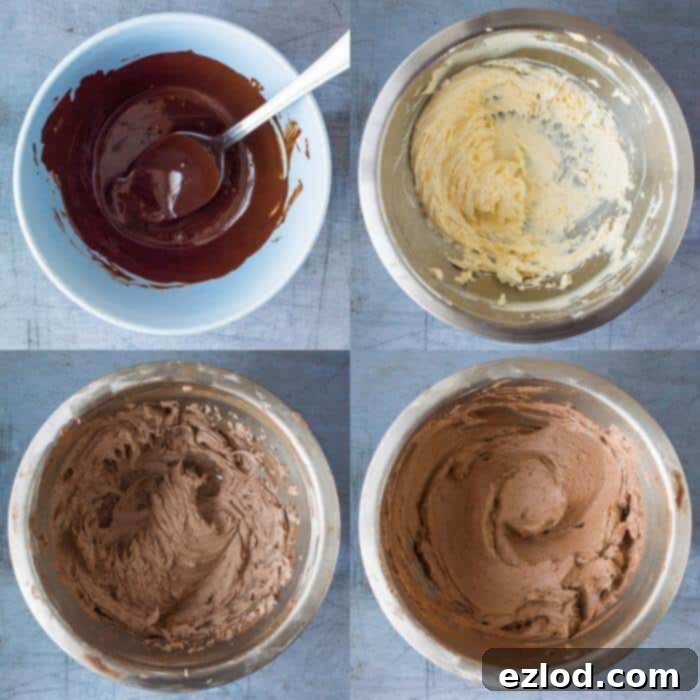
First, melt the chopped dark chocolate. You can do this gently in a heat-proof bowl set over a pan of simmering water (ensure the bowl’s base doesn’t touch the water) or in short bursts in the microwave, stirring thoroughly every 10 seconds, until smooth and melted. Set the melted chocolate aside to cool slightly.
In a large mixing bowl, whisk together the vegetable shortening (such as Trex) and dairy-free margarine with an electric mixer until the mixture is beautifully smooth and creamy. Next, gradually whisk in the sifted cocoa powder, followed by the sifted icing sugar and vanilla extract.
Continue to beat the buttercream for a good few minutes until it transforms into a wonderfully light and fluffy consistency. Finally, slowly beat in the slightly cooled melted chocolate, a little at a time, until it is fully incorporated and the buttercream is rich, smooth, and utterly delicious.
Assembling Your Graveyard Masterpiece:
Now for the fun part – assembling your vegan tombstone cupcakes! Begin by spreading a generous dollop of the creamy chocolate buttercream over the top of each cooled cupcake. There’s no need for perfection here; a rustic, slightly uneven spread actually enhances the “graveyard” effect.
To create the realistic “soil,” coat each frosted cupcake in the crushed chocolate sandwich biscuits. The easiest method is to place the crushed biscuits in a wide, shallow bowl. Hold a cupcake upside down over the bowl, then gently pick up handfuls of the crumbs and press them onto the buttercream, ensuring a thorough and even coating. This will give your cupcakes the perfect dark, earthy finish.
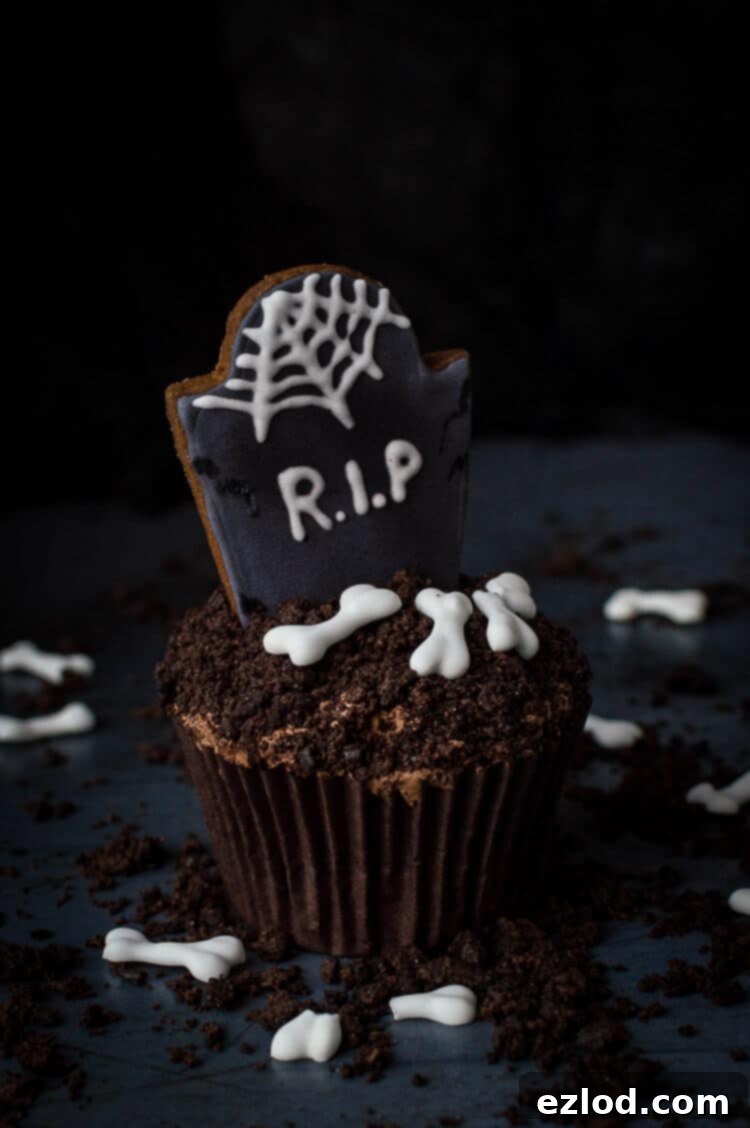
Using a sharp knife, carefully cut a small slit into the top of each cupcake where you envision the tombstone standing. Gently push a gingerbread tombstone biscuit into this slit, ensuring it stands upright and securely. Add a few more crushed biscuits around the base of the tombstone to complete the soil effect. Finally, artfully arrange a few of your dried royal icing bones on top of each cupcake, scattering them around the tombstone to complete your spooky graveyard scene.

Once assembled, these impressive Halloween tombstone cupcakes are ready to impress! Store any leftovers in an airtight container at room temperature to maintain their freshness.
If you tried this recipe, we’d love to see your creations! Tag @domestic_gothess on Instagram and use the hashtag #domesticgothess
*All images and content on Domestic Gothess are copyright protected. If you wish to share this recipe, please use the provided share buttons. Do not screenshot or reproduce the recipe or content in full.*
Tombstone Cupcakes Recipe:

Print
Tombstone Cupcakes For Halloween (Vegan)
Ingredients
Gingerbread Tombstones:
- 100 g (3.5oz) coconut oil
- 80 g (⅓ + ⅛ cup) light brown soft sugar
- 50 g (2 Tbsp) golden syrup (or light molasses)
- 25 g (1 Tbsp) treacle or molasses
- 1 Tbsp water
- 2 tsp ground cinnamon
- 2 tsp ground ginger
- ¼ tsp ground cloves
- ½ tsp bicarbonate of soda (baking soda)
- 250 g (2 cups) plain (all-purpose) flour
Vegan Royal Icing:
- 4 Tbsp aquafaba (the liquid drained from a tin of chickpeas)
- 250 g (2 ½ cups) icing (powdered) sugar sifted
- black gel food colouring
- a couple of teaspoons of lemon juice
Vegan Chocolate Cupcakes:
- 270 ml (1 cup + 2 Tbsp) unsweetened dairy free milk (I use soy)
- 1 tsp cider vinegar
- 200 g (1 cup) caster sugar
- 120 ml (½ cup) sunflower oil
- 1 ½ tsp vanilla extract
- 180 g (1 ½ cups) plain (all-purpose) flour
- 60 g (½ cup) cocoa powder
- ¾ tsp bicarbonate of soda (baking soda)
- ½ tsp baking powder
- ¼ tsp salt
- 1 tsp instant espresso powder (optional)
Vegan Chocolate Buttercream:
- 75 g (2.5 oz) dark chocolate chopped
- 75 g (¼ cup + 1 Tbsp) vegetable shortening (such as Trex)
- 75 g (¼ cup + 1 Tbsp) dairy free margarine (I use Stork (the kind that comes in a stick)
- 25 g (¼ cup) cocoa powder sifted
- 150 g (1 ½ cups) icing (powdered) sugar sifted
- 1 tsp vanilla extract
- 12 oreos/bourbon biscuits/chocolate sandwich biscuits crushed – either in a food processor or with a rolling pin
Instructions
Gingerbread Tombstones:
-
Start by making the gingerbread tombstones. Melt the coconut oil, sugar, golden syrup, treacle and water together in a pan over a low heat. Whisk in the cinnamon, ginger, cloves and bicarbonate of soda then stir in the plain flour to form a dough.
-
Cover the pan and refrigerate for about an hour until firm. Shape the dough into a ball then roll it out thinly on a floured surface.
-
Use a sharp knife to cut out tombstone shapes. They need to fit on top of cupcakes so make sure that you don’t cut them too big; but they also need to be tall enough to push some of the length into the cupcakes – about 7-7.5cm tall by 4cm wide is what I went for.
-
Don’t worry about getting them all the same; it is good to have some different shapes and sizes. You will need 12 tombstones for the cupcakes but it is best to make a few extra so that you can pick the best ones. Re-roll the scraps and cut out more shapes (there is enough dough to make some extra biscuits)
-
Place the tombstones on two baking sheets lined with baking parchment and place them in the freezer for 15 minutes while you preheat the oven to 180C/350F/gas mark 4.
-
Bake the biscuits for about 10 minutes until lightly coloured around the edges. Transfer them to a wire rack and leave to cool completely. Once cool, store in an airtight container.
Vegan Royal Icing:
-
To make the vegan royal icing, whisk the aquafaba with an electric mixer until foamy then add the sifted icing sugar and whisk until thick and glossy. It can take a little longer than egg whites to thicken up but it is possible to over-beat it so be careful.
-
The perfect piping texture is thick and smooth but still very slightly fluid. If it is too runny then you can stir in some more sugar; and if it is too thick then you can add a drop of lemon juice or water.
-
Keep the icing covered at room temperature so that it doesn’t dry out.
-
Place a few spoonfuls of the royal icing in a piping bag fitted with a very small round nozzle (about 1-2mm) (or a disposable piping bag with just the very tip snipped off).
-
Pipe small bone shapes onto a piece of baking parchment – use a little of the icing to stick the corners to a baking tray to make it easier to pipe.
-
You will need about 3 bones per cupcake so I made about 50 of them to be safe (don’t worry, they are very quick to pipe once you get the hang of it). Set them aside to dry at room temperature; mine took about 4 hours to dry out but it will depend on the temperature and humidity where you are.
-
Place a few spoonfuls of the icing in a bowl and stir in a little vegan black gel food colouring to colour it grey. Bear in mind that the colour will deepen as it sits so aim for a couple of shades lighter than you want it to end up.
-
Spoon the coloured icing into a piping bag fitted with a small round nozzle (about 1-2mm as before) and carefully pipe a border around the edges of the tombstones.
-
Colour a couple of spoonfuls of the icing grey as before, but this time stir in a little lemon juice or water so that the icing forms a flooding consistency.
-
Carefully spoon some of the icing inside the piped border of the tombstones. I use a small teaspoon to nudge it towards the edges so that the entire surface inside the border is covered.
-
Set the tombstones aside to dry at room temperature for about 4-5 hours (or overnight).
-
Once the tombstones are dry, spoon some of the leftover white icing into a piping bag fitted with the same small nozzle (I had some left in the bag from making the bones so I just used that). Pipe cobwebs onto the tops of the tombstones and your choice of lettering in the middle.
-
The royal icing may become a little runnier if it has been left overnight; if it is too runny to pipe (mine was fine) then you can stir in a little extra sifted icing sugar to thicken it up again.
-
Use a fine paintbrush dipped in black gel food coluring to paint some little cracks on the edges of the tombstones.
Vegan Chocolate Cupcakes:
-
To make the vegan chocolate cupcakes, preheat the oven to 180C/350F/gas mark 4 and line a 12 hole muffin tin with muffin cases.
-
Whisk together the dairy-free milk, vinegar, sugar, oil and vanilla extract. In a separate bowl, sift together the flour, cocoa powder, baking powder, bicarbonate of soda, salt and instant espresso powder.
-
Whisk the wet and dry ingredients together until smooth but be careful not to over-beat the mixture.
-
Divide the batter between the liners and bake for about 20 minutes until a skewer inserted into one of the cupcakes comes out clean. Transfer to a wire rack to cool.
Vegan Chocolate Buttercream:
-
Melt the chopped dark chocolate, either in a heat-proof bowl over a pan of gently simmering water (don’t let the base of the bowl touch the water), or as I do in short busts in the microwave, stirring every 10 seconds. Set aside.
-
Whisk together the vegetable shortening and dairy free margarine with an electric mixer until smooth, then whisk in the sifted cocoa powder followed by the sifted icing sugar and vanilla extract.
-
Beat the buttercream for a good few minutes until very light and fluffy then beat in the melted chocolate a little at a time.
Assembly:
-
To assemble the tombstone cupcakes, spread a generous dollop of the buttercream on top of each cupcake. There is no need to be neat.
-
Coat each cupcake in crushed chocolate sandwich biscuits to make the soil. the easiest way to do this is to put the crushed biscuits in a wide bowl, hold the cupcake over the bowl, pick up handfuls of the crumbs and gently press them onto the buttercream.
-
Use a sharp knife to cut a slit into each cupcake where you want the tombstone to sit then carefully push a tombstone biscuit into the slit. Add more crushed biscuits around the tombstone and top each cupcake with a few of the dried bones.
-
Store in an airtight container at room temperature.
Notes
