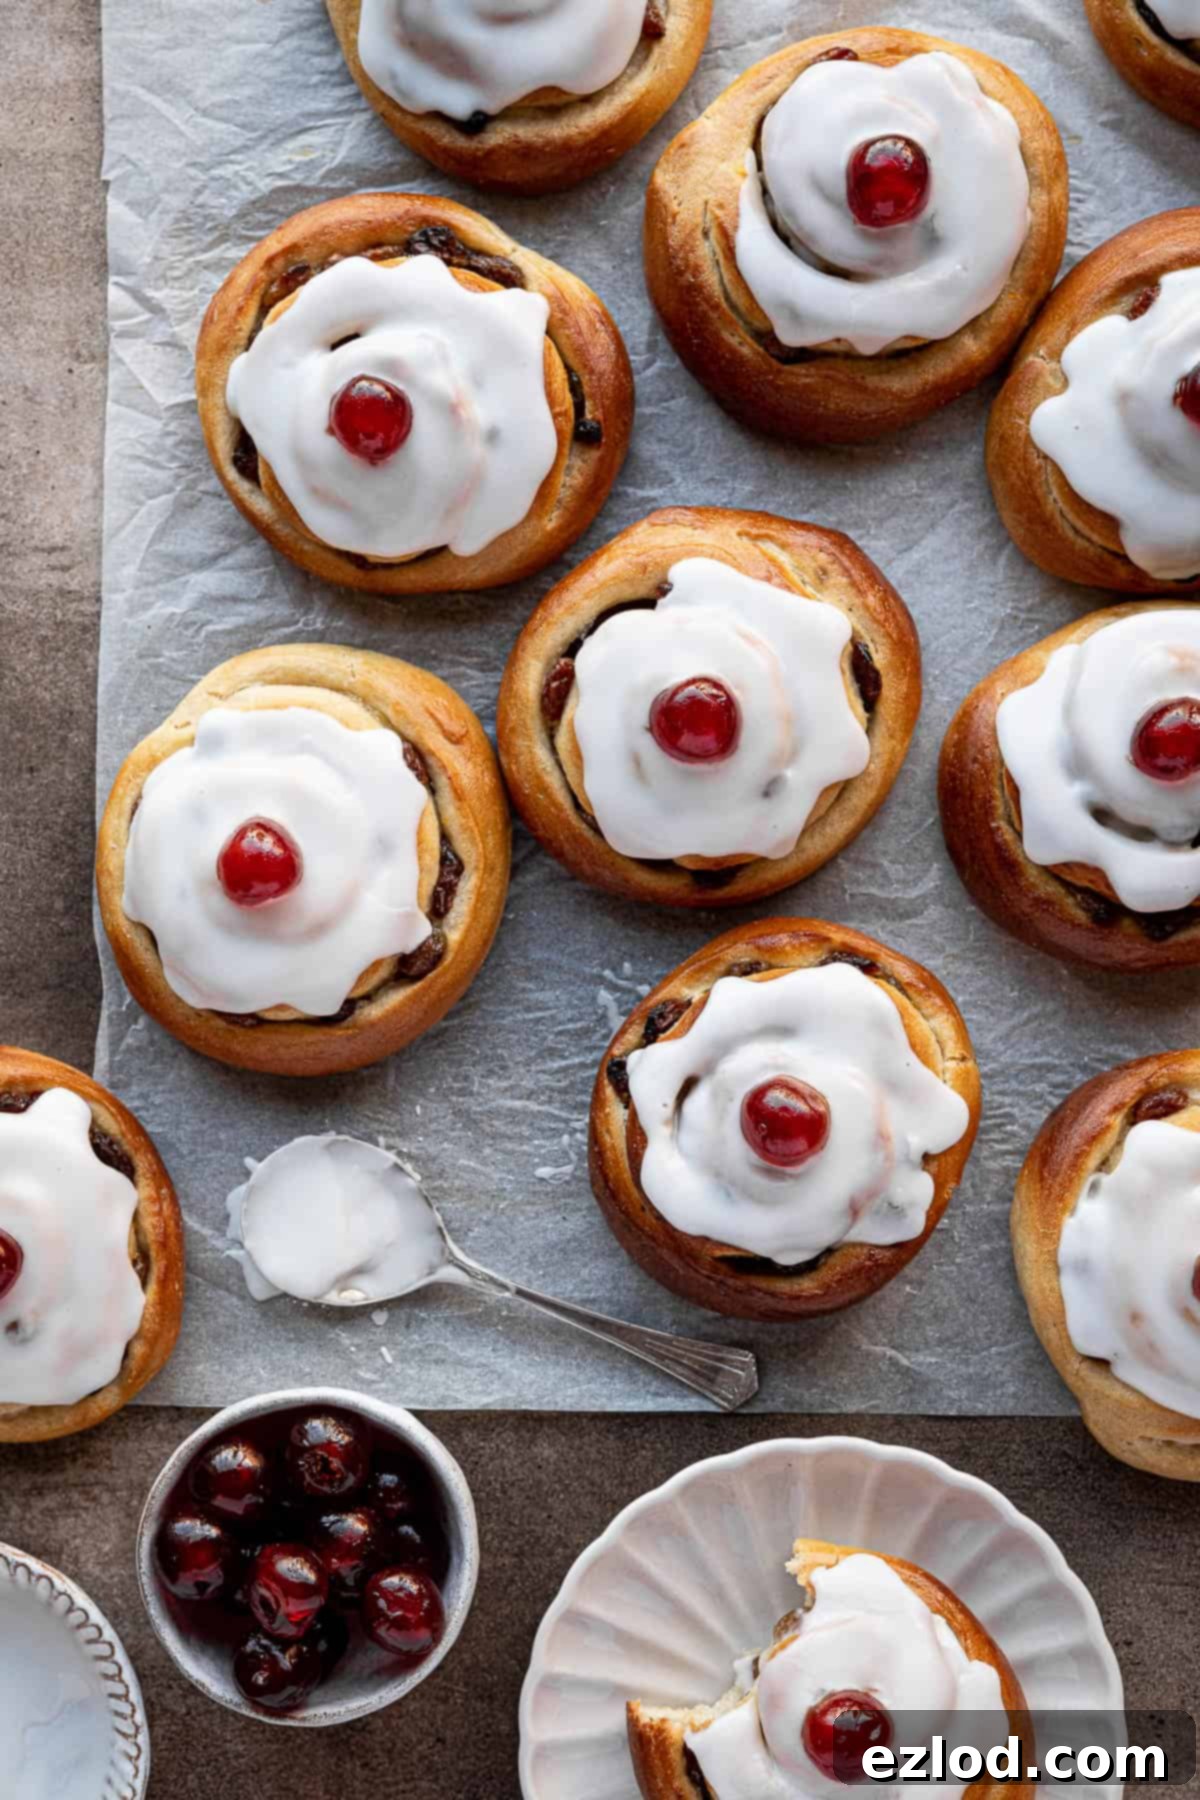
Delicious Vegan Belgian Buns: Soft Lemon & Sultana Glazed Rolls
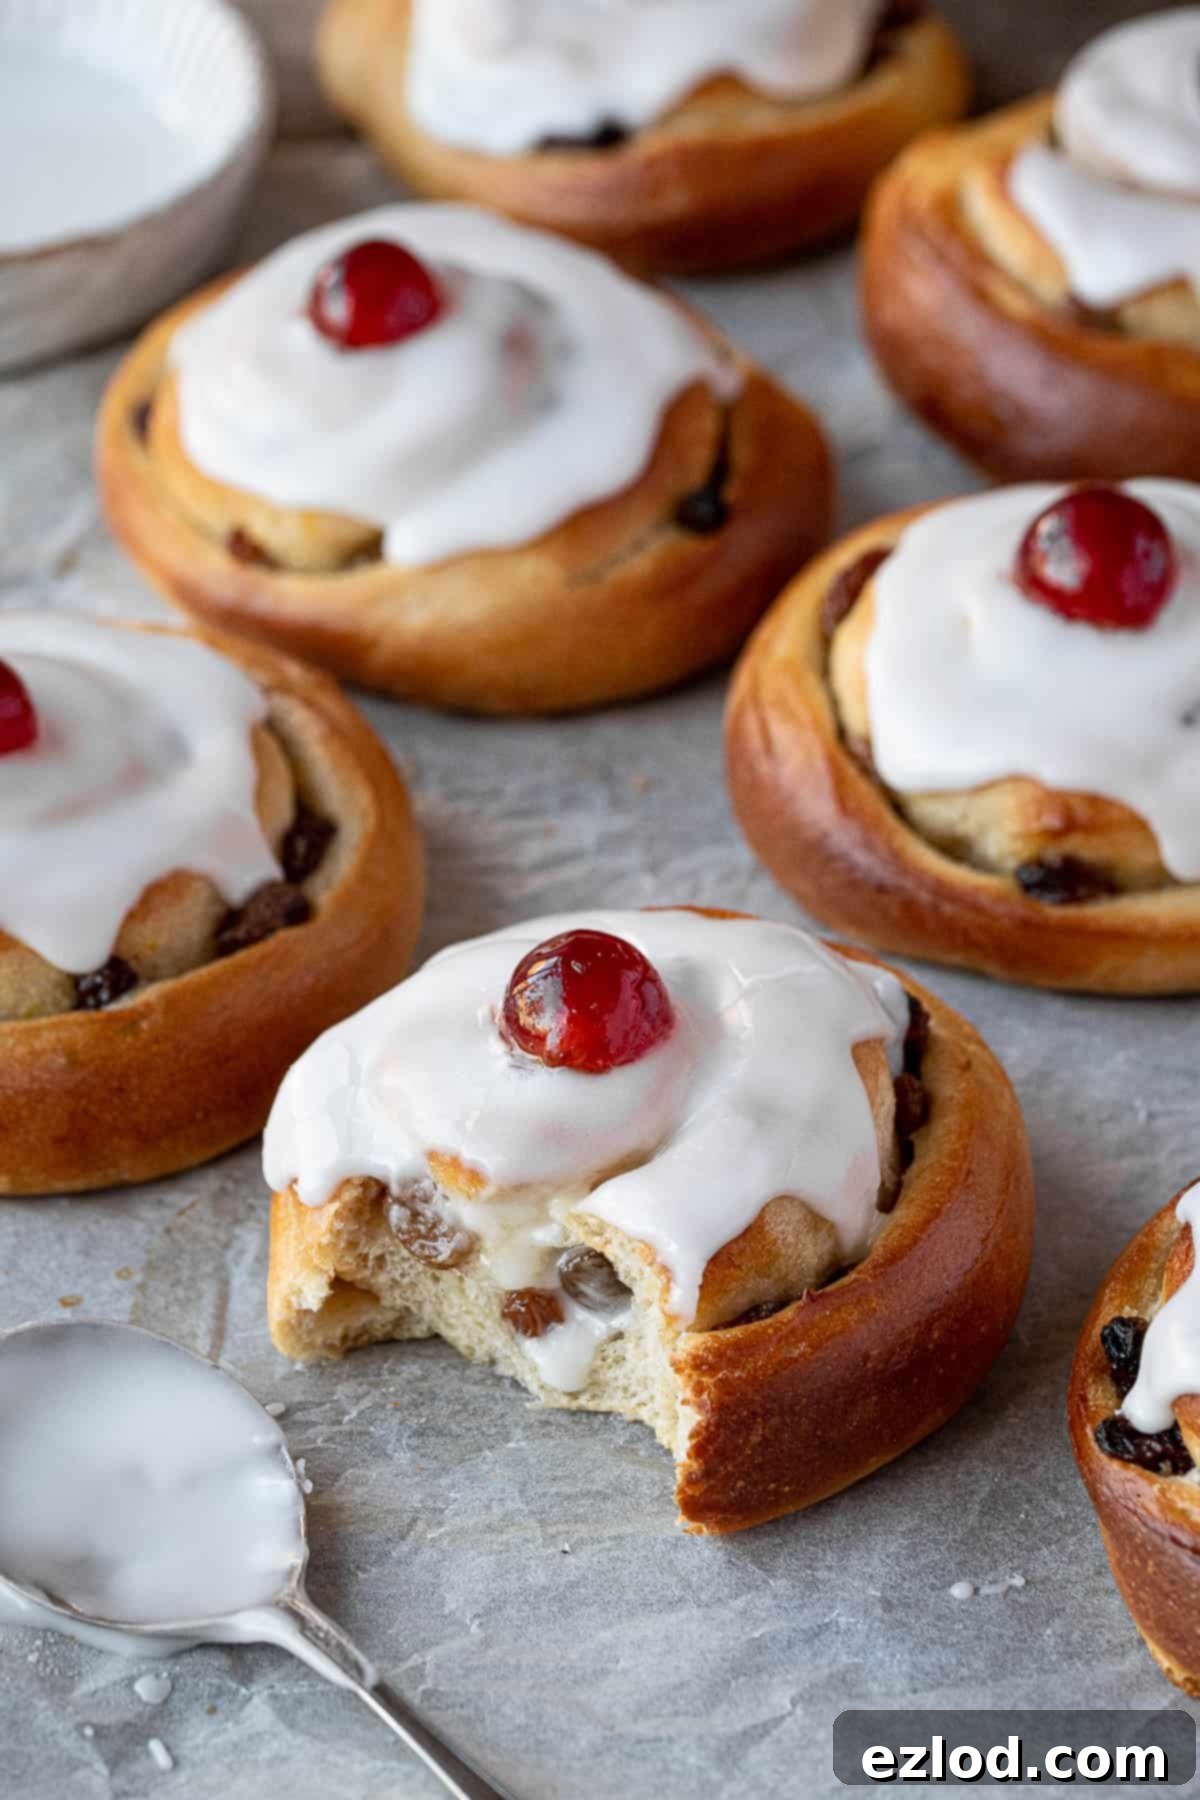
Prepare yourself for an utterly delightful baking adventure! These incredible vegan Belgian buns are a plant-based twist on a beloved British classic, offering a symphony of soft, enriched yeasted dough, tangy homemade vegan lemon curd, and sweet sultanas, all crowned with a zesty lemon glaze and a vibrant glacé cherry. Each bite promises a perfect balance of sweet and tart, with a wonderfully soft and slightly sticky texture that will have you reaching for another.
Forget about store-bought versions; crafting these glazed lemon and sultana buns from scratch is a truly rewarding experience, resulting in a treat far superior in flavour and freshness. Whether you’re a seasoned vegan baker or new to the world of plant-based pastries, this recipe is designed to guide you through creating moreish buns that are perfect for breakfast, a comforting afternoon snack with tea, or a delightful dessert.
What Exactly Are Belgian Buns?
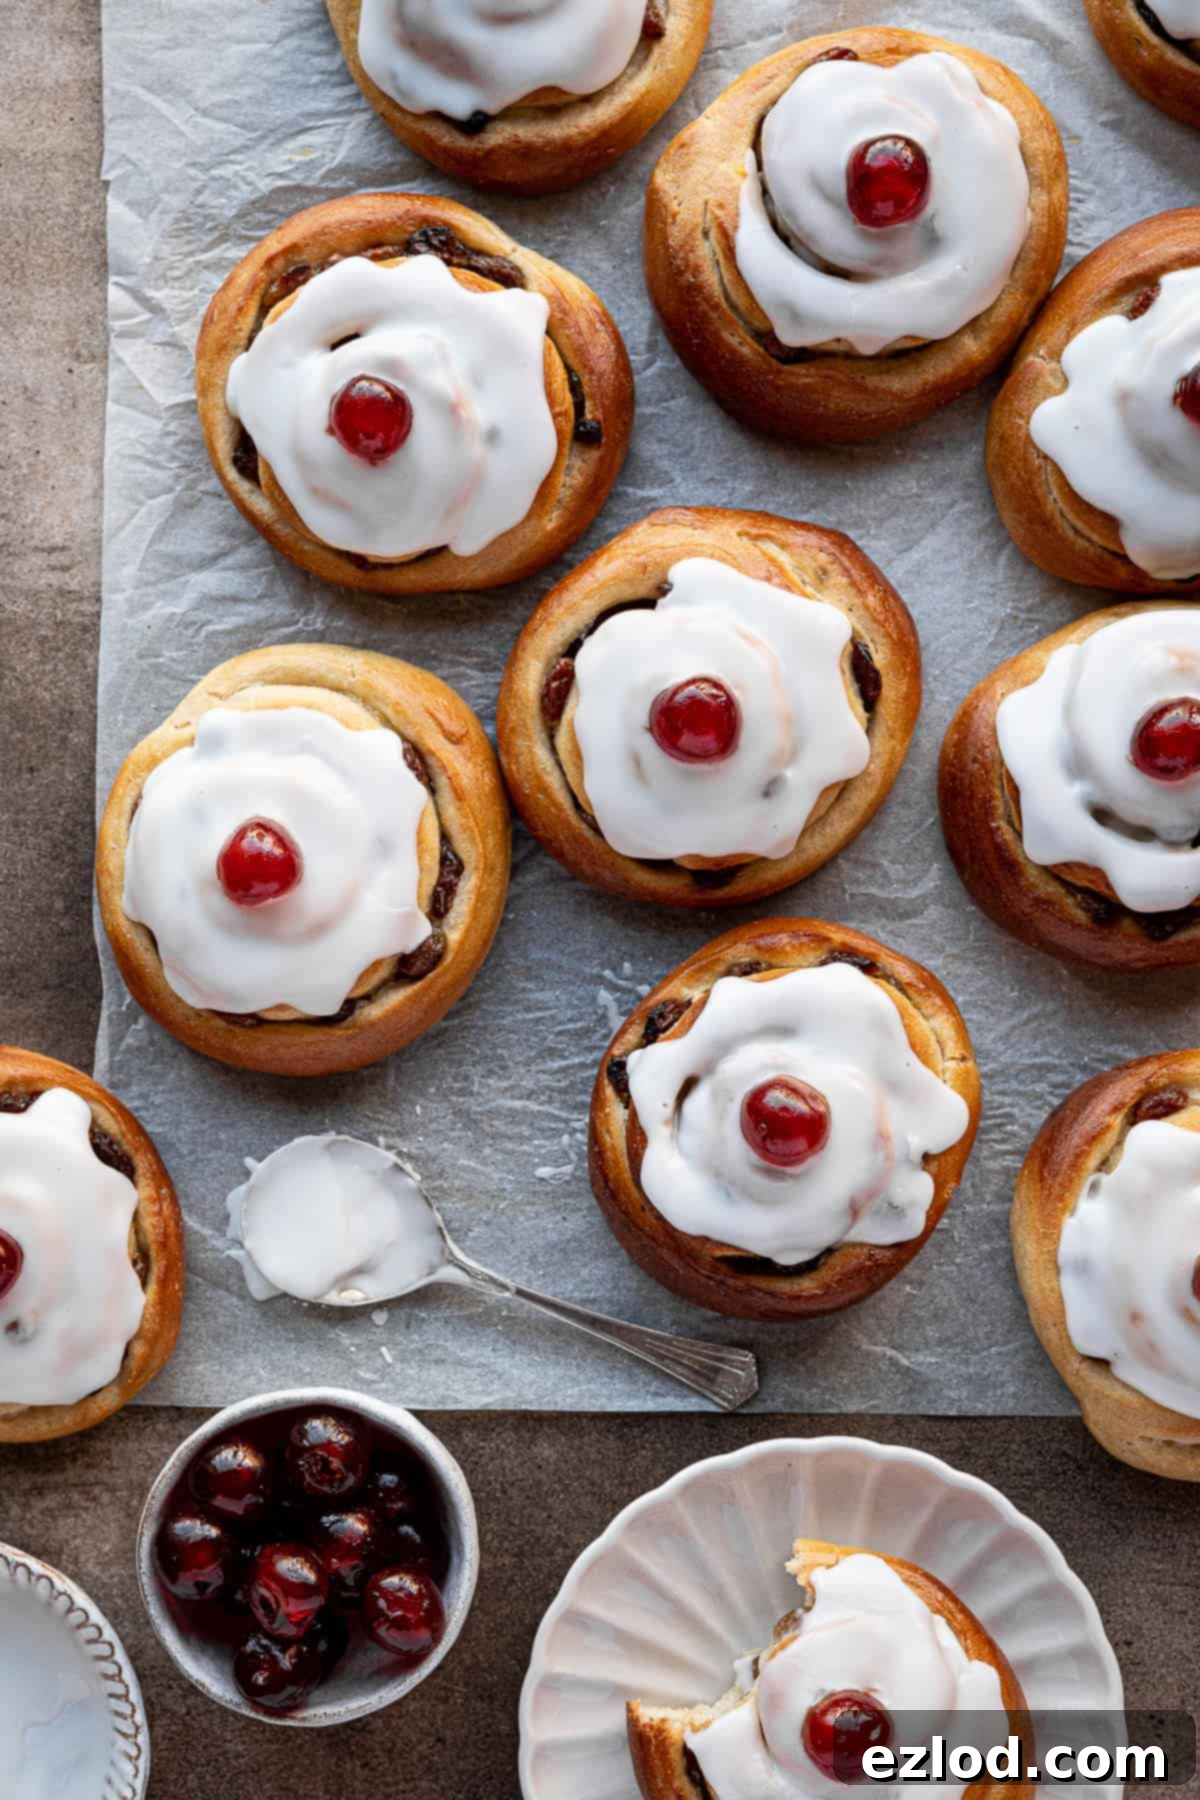
Despite their rather misleading name, Belgian buns are a distinctly British creation, with no actual ties to Belgium. Often likened to a Chelsea bun, these delightful pastries are a staple in many UK bakeries and cafes. Traditionally, they feature a rich, yeasted bread dough, generously studded with sultanas, and finished with a sweet, often lemon-flavoured, icing and a signature glacé cherry right in the centre. The classic version is already a treat, but we believe the addition of a luscious lemon curd filling elevates these buns to an entirely new level of deliciousness, which is precisely what we’ve done for our irresistible vegan rendition.
Our vegan Belgian buns capture all the charm and comfort of the traditional recipe, transforming it into a plant-based marvel that everyone can enjoy. We’ve meticulously crafted the dough to be incredibly soft and fluffy, ensuring it perfectly complements the bright, zesty lemon curd and the juicy sweetness of the sultanas. The combination of textures and flavours makes these buns a truly special bake, proving that vegan pastries can be just as, if not more, decadent and satisfying.
Why You’ll Adore These Vegan Belgian Buns
There are countless reasons why these vegan Belgian buns are destined to become a firm favourite in your baking repertoire. Here are just a few:
- Incredible Flavour Profile: The zesty homemade vegan lemon curd perfectly cuts through the richness of the sweet dough, while the sultanas add bursts of natural sweetness and a pleasant chewiness.
- Delightfully Soft and Sticky: Made with an enriched yeast dough, these buns boast an irresistible softness and a slight stickiness from the glaze that makes them incredibly moreish.
- Visually Appealing: With their beautiful swirls of filling, glistening lemon icing, and vibrant red glacé cherry, these buns are as pleasing to the eye as they are to the palate.
- Perfect for Any Occasion: Whether it’s for a weekend breakfast, an afternoon tea party, a bake sale, or simply a comforting treat, these buns fit the bill beautifully.
- Plant-Based Perfection: A fantastic option for vegans and those with dairy and egg allergies, ensuring everyone can indulge in this classic British delight without compromise.
- Homemade Goodness: There’s nothing quite like the aroma of freshly baked buns filling your home, and the satisfaction of knowing you created such a wonderful treat from scratch.
Essential Ingredients for Your Vegan Belgian Buns
Crafting the perfect vegan Belgian buns starts with the right ingredients. Here’s a closer look at what you’ll need and why each component is important:
For the Dough:
- White Bread Flour: This is crucial for achieving the signature soft, fluffy, and slightly chewy texture of these buns. Bread flour has a higher protein content than all-purpose (plain) flour, which develops more gluten and provides structure. While plain flour can be used in a pinch, the texture won’t be quite as satisfying. Avoid wholemeal flour, as it can result in a denser, heavier bun.
- Instant/Fast Action Yeast: My preferred choice for bread making, instant yeast can be added directly to the dry ingredients without needing prior activation. This saves time and simplifies the process. If you only have active dry yeast, don’t worry – I’ve included specific instructions below on how to activate it before adding it to your dough.
- Caster Sugar: Used in the dough, caster sugar (or superfine sugar) dissolves easily, ensuring even sweetness throughout the bun. Granulated sugar can be used as a substitute if caster sugar isn’t available.
- Salt: A non-negotiable ingredient in any bread recipe, salt is vital for flavour development and also plays a role in controlling yeast activity. Never omit it!
- Lemon Zest: This optional but highly recommended addition infuses the dough with a subtle, fragrant lemon note, adding an extra layer of depth to the overall flavour profile of your buns.
- Lukewarm Unsweetened Non-Dairy Milk: Soy milk is my top recommendation due to its higher protein content, which mimics dairy milk closely in baking. However, any unsweetened non-dairy milk (almond, oat, cashew) will work well. Ensure it’s lukewarm (around 95-105°F or 35-40°C) to activate the yeast without killing it.
- Vegan Butter: While in some baking recipes block vegan butter is essential, for this enriched dough, a good quality tub-style vegan butter (like Flora Original, as mentioned) works perfectly. Just make sure it’s softened to room temperature for easier incorporation, and steer clear of low-fat varieties, which often contain too much water and can compromise the dough’s texture.
For the Filling & Topping:
- Vegan Lemon Curd: The star of the filling! I strongly recommend using my homemade vegan lemon curd recipe. It’s surprisingly quick and easy to make, and its vibrant, tangy flavour is unparalleled. A half batch is usually sufficient, and any leftover curd is certainly not a bad problem to have!
- Sultanas: These sweet, juicy dried grapes are a traditional filling for Belgian buns, providing bursts of flavour and a lovely textural contrast. Raisins can be used as an alternative if preferred.
- Icing (Powdered) Sugar: This fine sugar is mixed with lemon juice to create the smooth, sweet glaze that adorns the baked buns.
- Lemon Juice: Used to make the glaze, fresh lemon juice adds another layer of bright, zesty flavour. If you don’t have enough, a little water or non-dairy milk can also be used, but lemon juice offers the best taste.
- Glacé Cherries: The iconic finishing touch! A glacé cherry half on top of each bun isn’t just for decoration; it’s an essential part of the classic Belgian bun aesthetic and flavour.
Step-by-Step Guide: Crafting Your Vegan Belgian Buns
(For precise measurements and detailed instructions, please refer to the comprehensive recipe card at the bottom of this page.)
Making these vegan Belgian buns is a joyful process, and I’ll walk you through each step to ensure your success. Remember, baking with yeast is a labour of love, and patience is your best ingredient!
1. Prepare the Dough
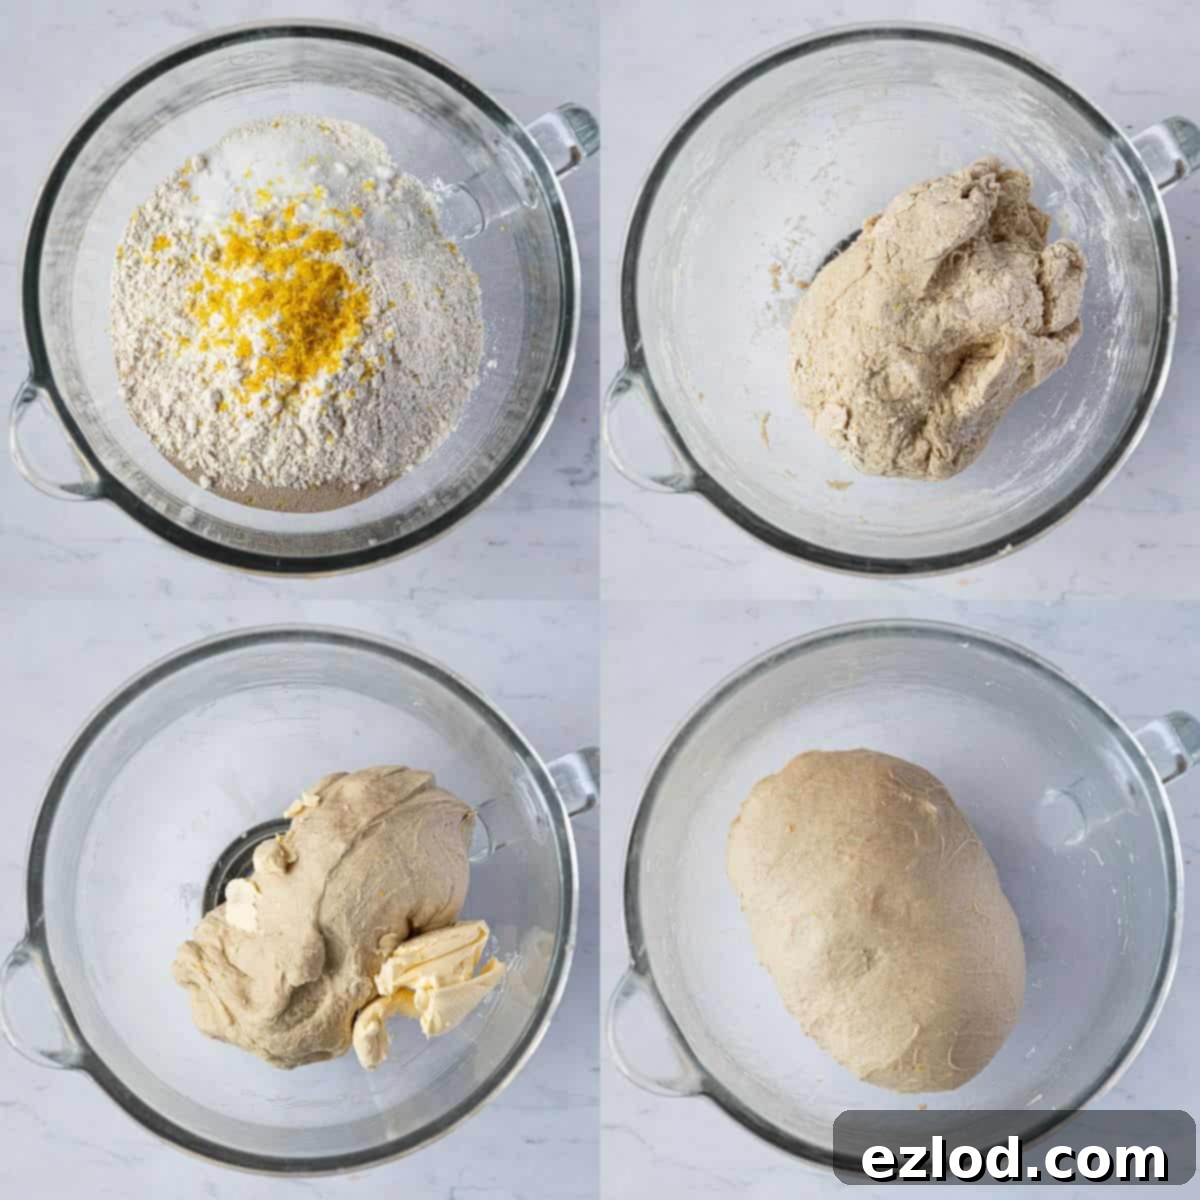
Begin by combining the dry ingredients for your dough. In a large mixing bowl, or the bowl of a stand mixer fitted with a dough hook, add your bread flour, caster sugar, instant yeast, salt, and the fragrant finely grated lemon zest. Give these a good mix until they are well combined. This initial step ensures all the dry components are evenly distributed.
Next, pour in the lukewarm non-dairy milk. Mix everything together until a rough, shaggy dough starts to form. If you’re using a stand mixer, let it work for a few minutes until the dough comes together into a cohesive ball and starts to look smoother. If kneading by hand, keep working it on a lightly floured surface.
Now it’s time to incorporate the softened vegan butter. This step might seem a little messy at first, as the dough can become quite greasy and sticky. Don’t be discouraged! Continue to knead, and I promise, the butter will gradually become fully absorbed into the dough. Keep kneading until the dough transforms into a smooth, elastic, and slightly tacky ball. It should pull away cleanly from the sides of the bowl or your hands when fully kneaded. The butter enriches the dough, giving it that characteristic soft, tender texture.
2. First Rise (Bulk Fermentation)
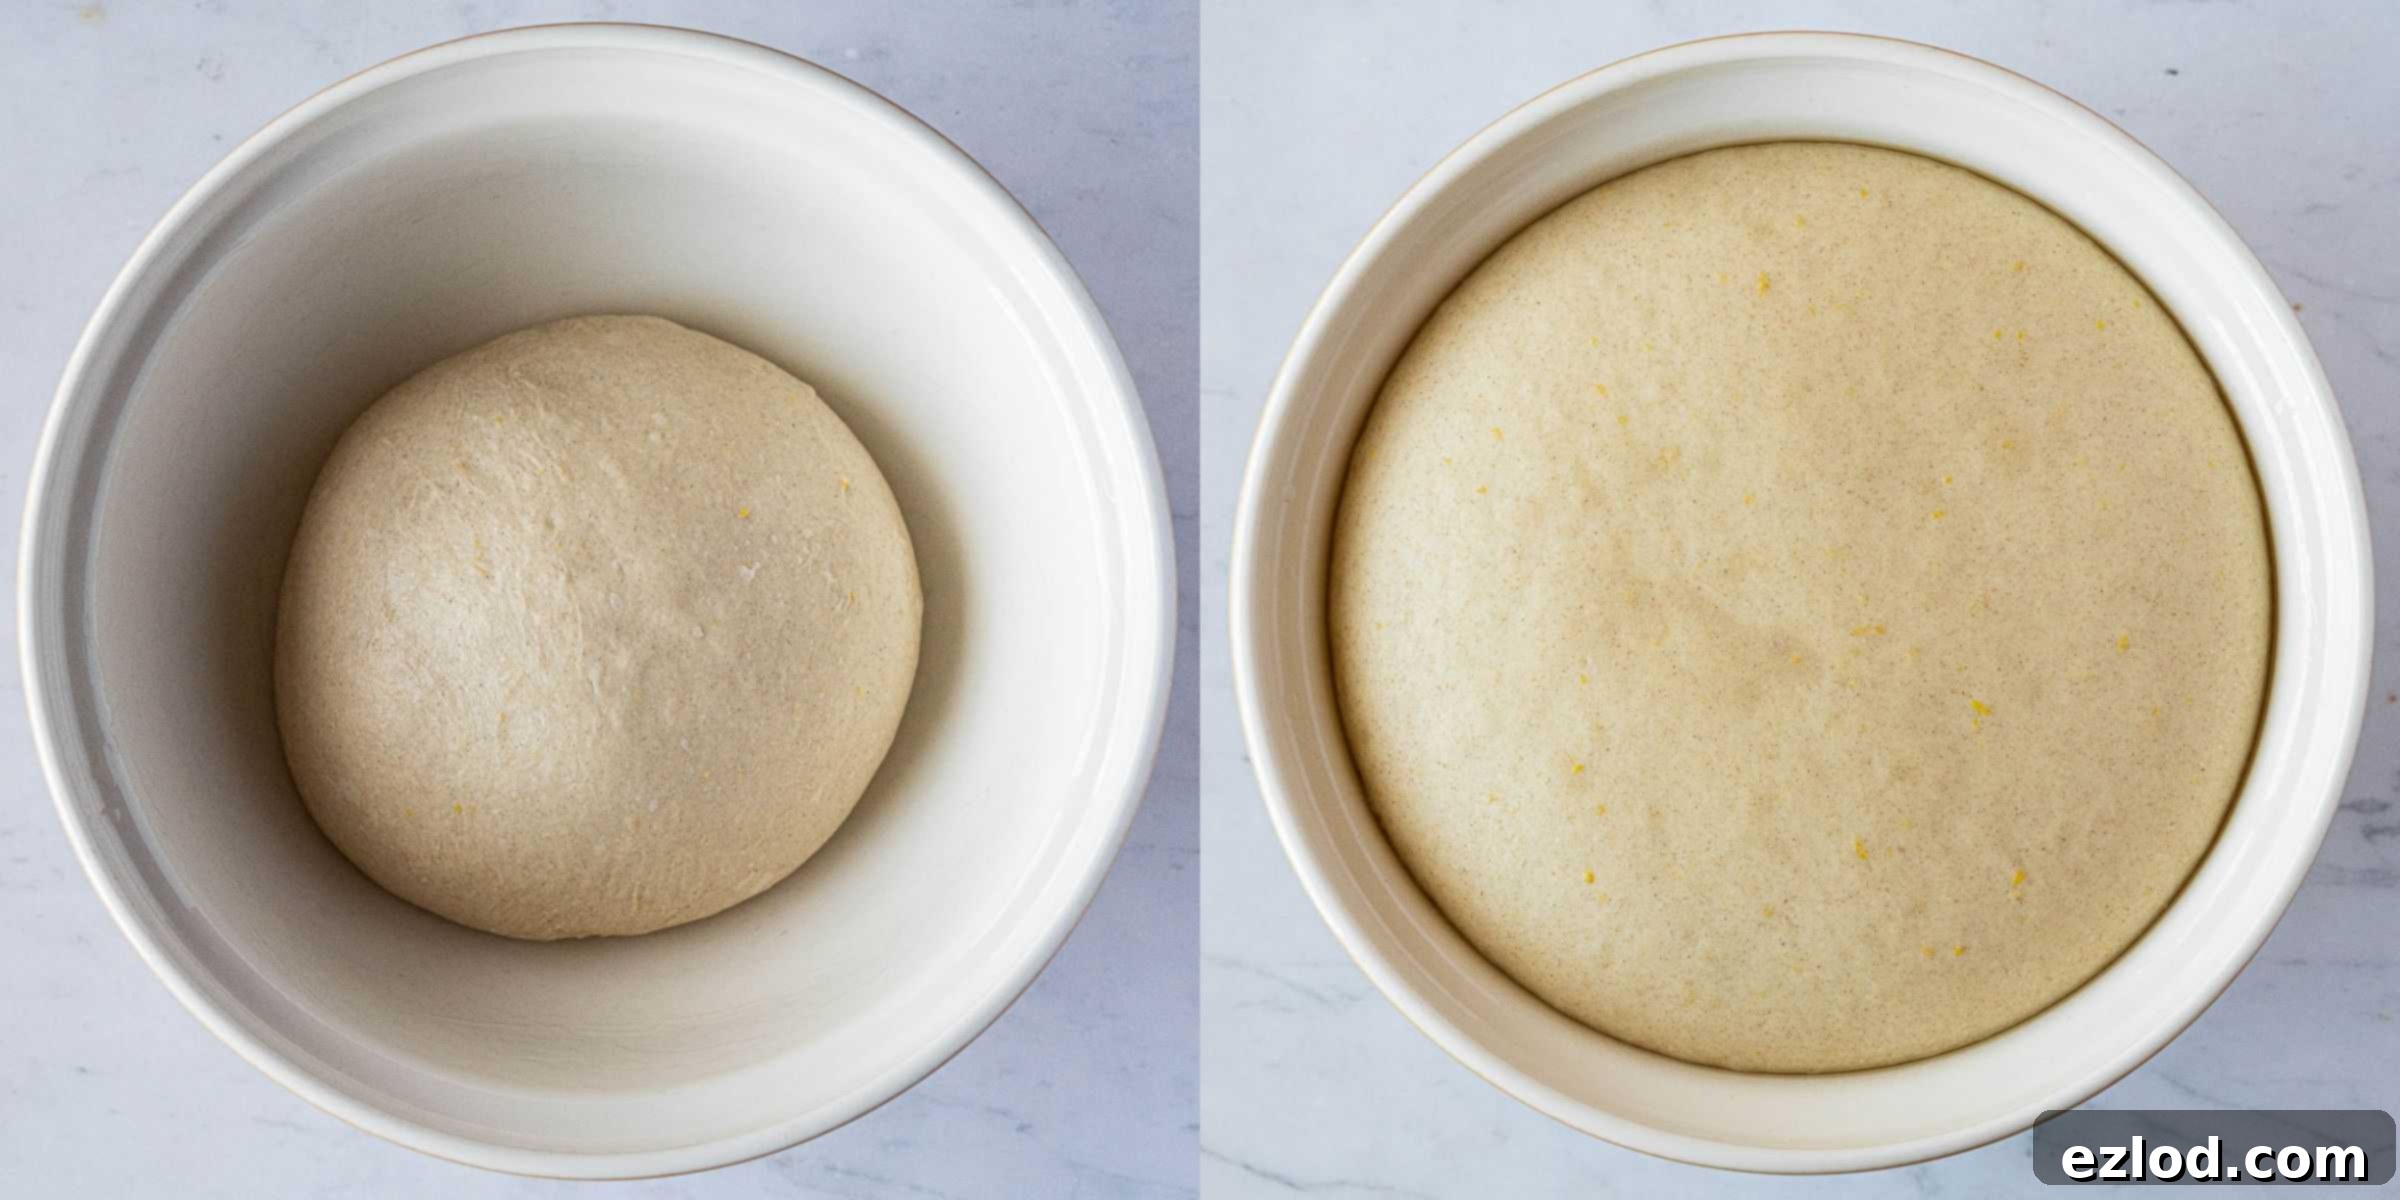
Once your dough is perfectly kneaded, lightly oil a clean bowl. Place the dough inside, turning it once to coat it lightly in the oil. Cover the bowl loosely with cling film or a clean tea towel to prevent a skin from forming. Find a warm spot in your kitchen – this could be a sunny windowsill, near a gentle radiator, or in a warmed-off oven (see “How To Speed Up The Rising Time” below for tips). Allow the dough to rise until it has visibly doubled in size, which typically takes about 1 hour, though this can vary depending on the ambient temperature.
3. Shape the Buns
Once the dough has doubled, gently punch it down to release the trapped air. Turn it out onto a lightly floured surface and give it a brief knead to knock out any large air bubbles. Now, using a rolling pin, roll the dough out into a large rectangle, approximately 30 x 40 cm (12 x 16 inches). Aim for an even thickness across the entire rectangle.
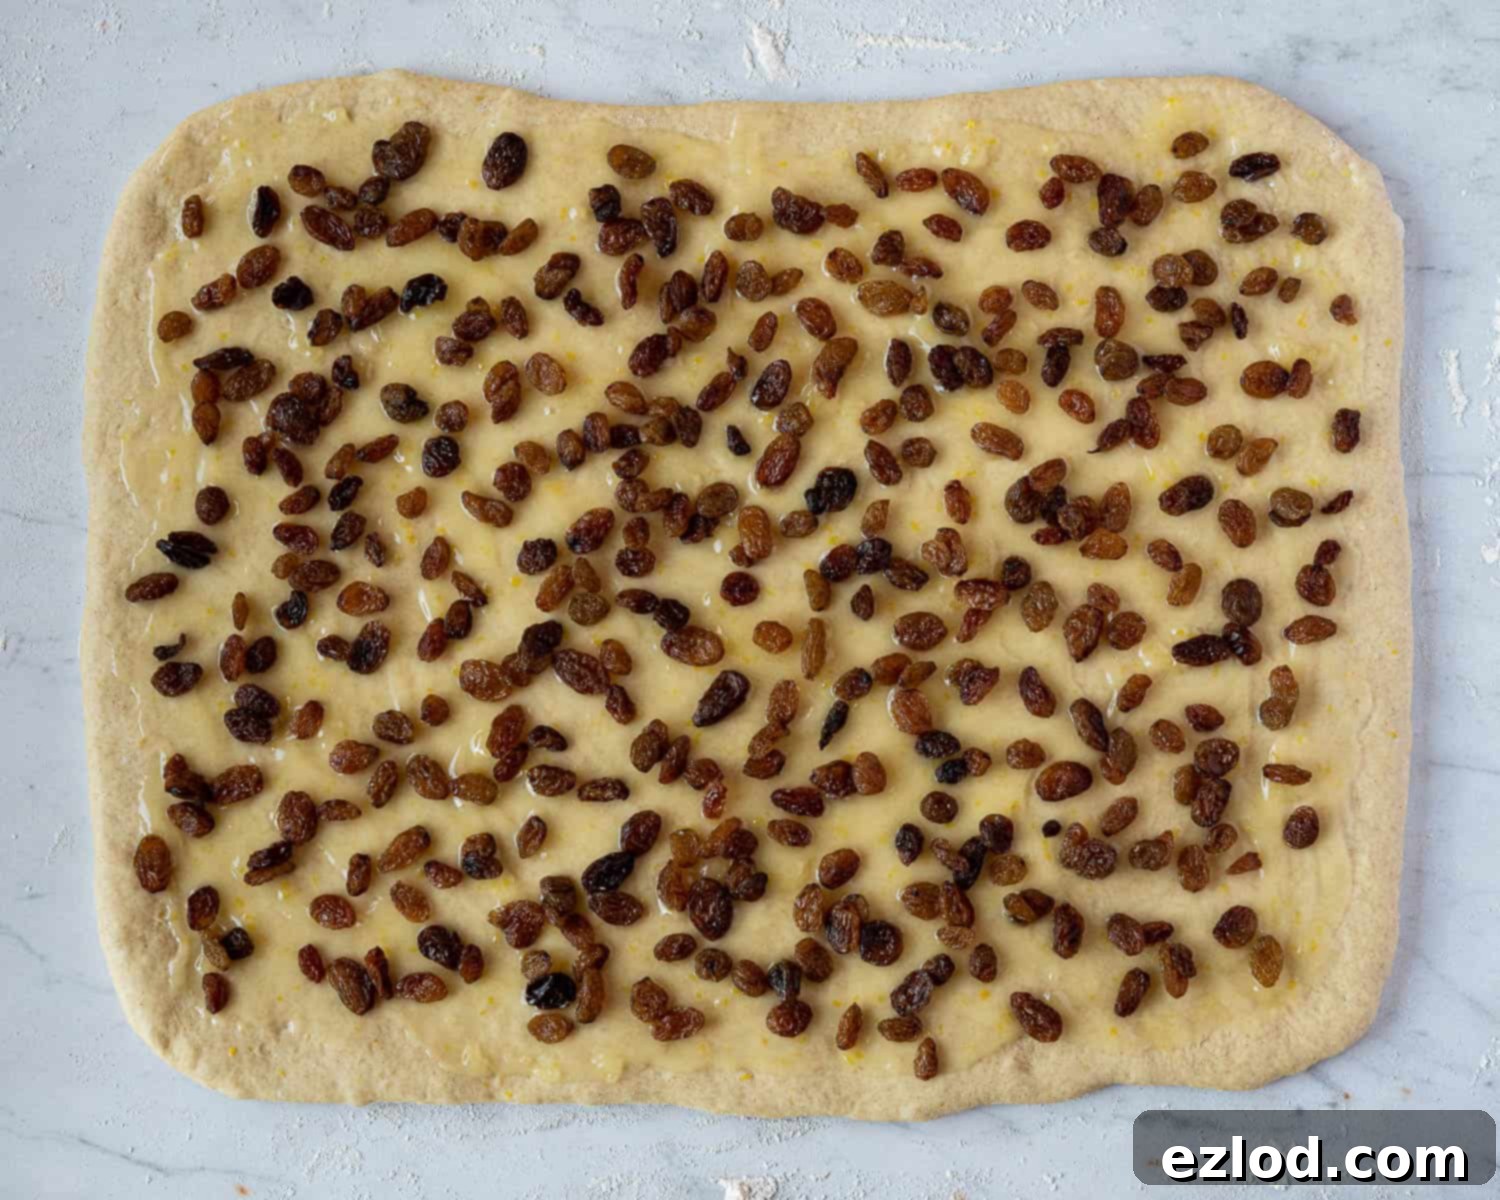
Spread your luscious homemade vegan lemon curd evenly over the rolled-out dough, leaving a small border (about 1cm) free around the edges. This border will help seal the bun later. Once the lemon curd is applied, generously scatter the sultanas over the surface. Ensure they are distributed well so every bun gets a good amount of fruity goodness.
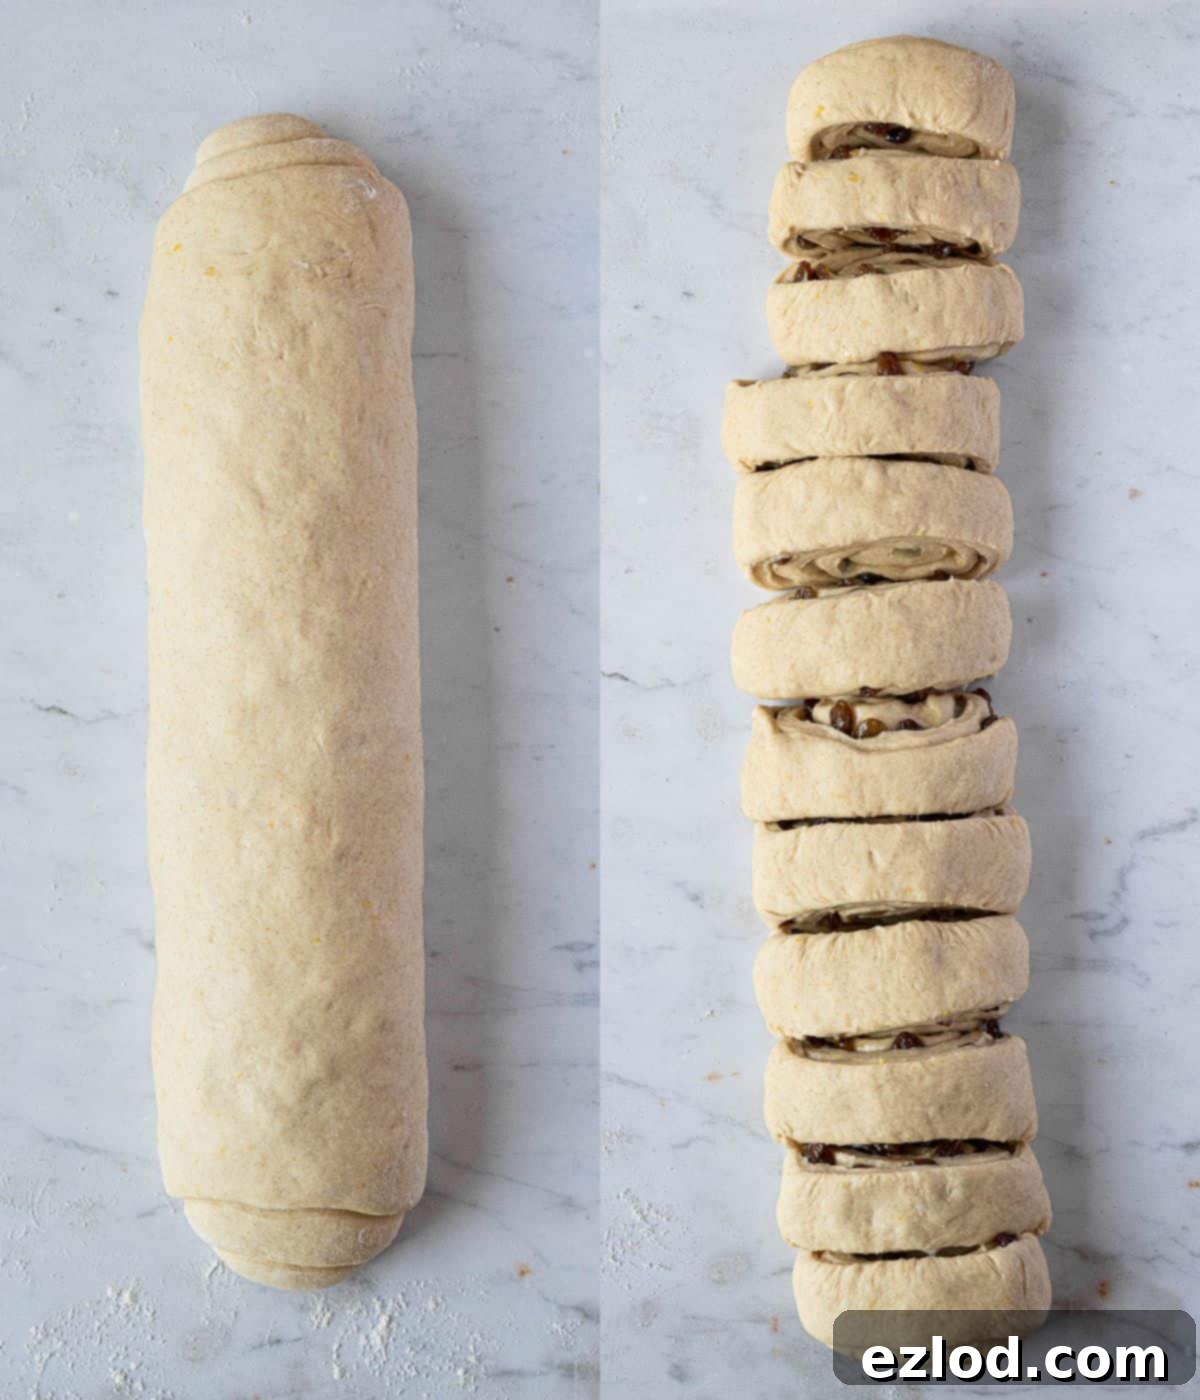
Starting from one of the shorter edges, carefully and tightly roll the dough into a neat sausage shape. Aim for a firm roll to prevent gaps in your finished buns. Once rolled, you can brush the seam with a little water to help seal it. Use a very sharp knife or a piece of unflavoured dental floss to trim off the uneven ends of the roll, then slice the log into 12 equally sized rounds. Each round will form one beautiful Belgian bun.
4. Second Rise (Proofing)
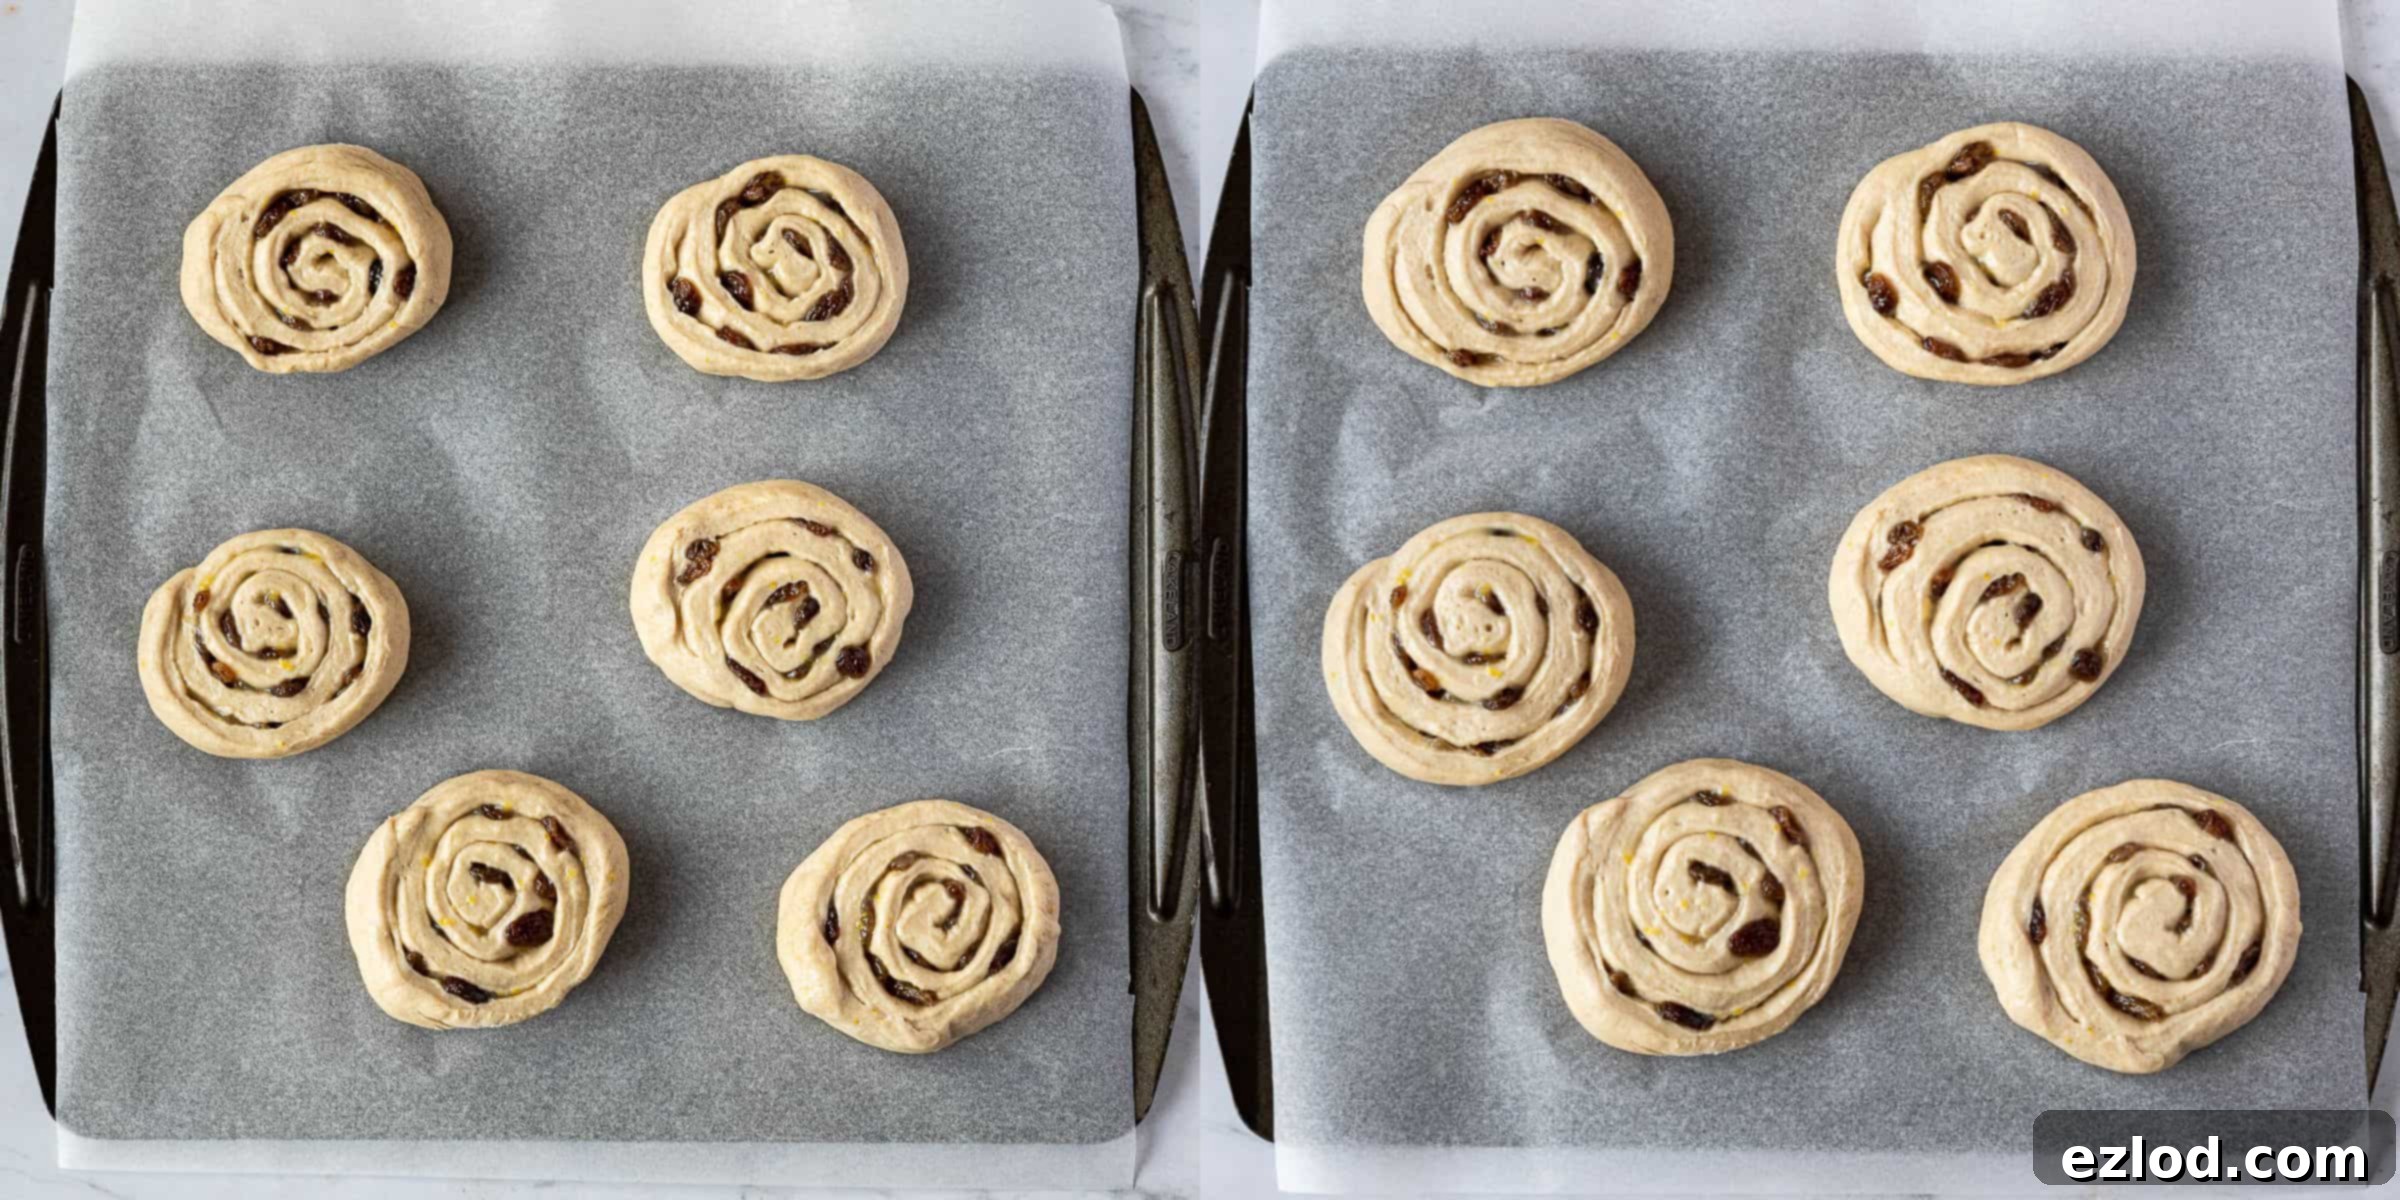
Line two large baking sheets with baking parchment. Arrange the sliced buns on the prepared sheets, ensuring they are spaced well apart to allow for expansion during their final rise and baking. Loosely cover them again and set them aside in a warm place to rise for approximately 45 minutes, or until they have visibly doubled in size and look puffy. A good test for readiness is to gently press a finger into the exposed dough; if it springs back slowly but leaves a slight indentation, they are ready to bake. If it springs back quickly and completely, they need a little more time.
5. Bake to Golden Perfection
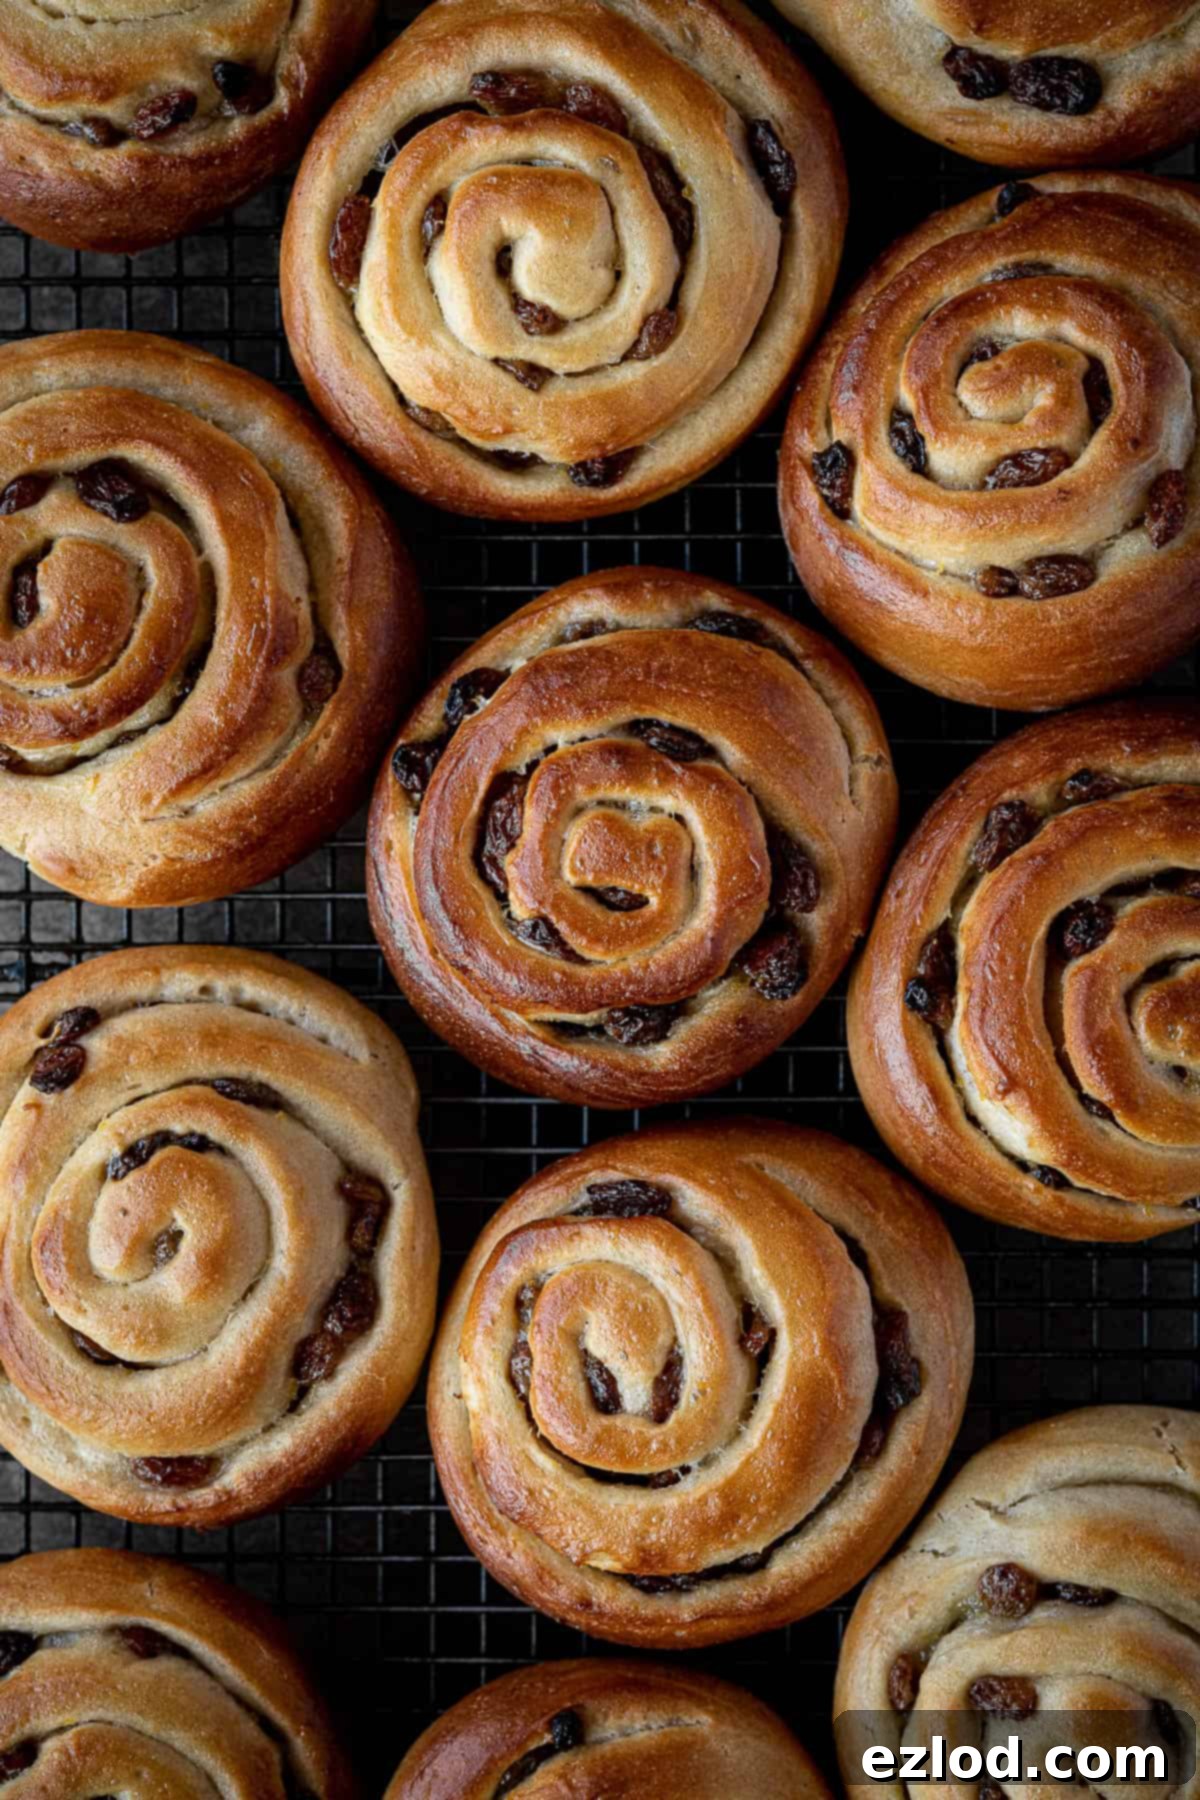
While your buns are enjoying their second rise, preheat your oven to 200°C (180°C fan/400°F/gas mark 6). Just before baking, gently brush the tops of the buns with a little non-dairy milk. This helps them achieve a beautiful golden crust. Bake for 10 minutes, then reduce the oven temperature to 180°C (160°C fan/350°F/gas mark 4) and continue baking for another 10 minutes, or until the buns are a deep golden brown. For absolute certainty of doneness, an internal temperature of 90°C (195°F) with a probe thermometer indicates they are perfectly baked.
Carefully transfer the baked buns to a wire cooling rack immediately to cool completely. Resist the urge to ice them while warm, as the icing will simply melt off.
6. Glaze and Garnish
Once the buns are completely cool, prepare the lemon glaze. Sift the icing (powdered) sugar into a small bowl. Gradually add fresh lemon juice, stirring constantly, until you achieve a thick but pourable or spreadable icing consistency. You want it to be thick enough to coat the buns without running off too quickly.
Using the back of a spoon, generously spread some of the zesty lemon icing over the top of each cooled bun. Finally, place a halved glacé cherry proudly in the centre of each bun. Serve your beautiful vegan Belgian buns as soon as possible to enjoy them at their absolute best!
Expert Tips for Perfect Vegan Belgian Buns
Achieving bakery-quality vegan Belgian buns is easier than you think with these helpful tips:
- Precision is Key – Use a Digital Scale: For all my baking recipes, especially those involving yeast dough, I cannot stress enough the importance of using a digital kitchen scale and metric measurements (grams). Cup measurements are notoriously inaccurate and can lead to inconsistent results. A scale ensures you have the precise ratio of ingredients, which is fundamental for successful baking, and it’s often less messy too!
- Plan Ahead with Lemon Curd: While not strictly necessary, making your vegan lemon curd the day before you plan to bake the buns allows it ample time to cool completely and set properly. This makes it easier to spread and prevents it from becoming too runny in the buns.
- Check Your Yeast: Always ensure your instant or active dry yeast is fresh and hasn’t expired. Out-of-date yeast is a common culprit for doughs that refuse to rise, leading to flat, dense buns. If in doubt, perform a quick yeast activation test before you start.
- Resist Adding Too Much Flour: Yeast doughs, especially enriched ones like this, are meant to be soft and slightly sticky. It’s a common mistake to add extra flour if the dough feels tacky, but doing so will result in dry, dense buns instead of the light, fluffy texture we’re aiming for. Only add a tiny bit more flour if the dough is excessively wet and unmanageable, not just sticky.
- Temperature Matters for Rising: The time it takes for your dough to rise is highly dependent on the ambient temperature. On warmer days, the dough will rise much faster than on cooler ones. If you choose to refrigerate the dough for its first rise (a great option for flavour development), remember that the second rise will take considerably longer at room temperature.
- Overnight Rise for Enhanced Flavor: For an even deeper flavour profile and to break up the workload, consider allowing the dough to complete its first rise slowly in the refrigerator overnight. This cold fermentation process develops more complex flavours and improves the texture of the buns. Just remember to account for the longer rising time for the second proof at room temperature.
- Confirm Doneness with a Thermometer: Oven temperatures can vary significantly, making precise baking times challenging. The most reliable way to know if your buns are perfectly cooked through is to use a probe thermometer. Insert it into the centre of a bun; it should register an internal temperature of 90°C (195°F) when done.
Understanding Yeast: Instant vs. Active Dry
For most of my bread recipes, I predominantly use instant yeast (also known as fast-action yeast). Its main advantage is convenience: you can mix it directly into your dry ingredients without the need to activate it in liquid first. This makes the bread-making process quicker and simpler, and I highly recommend using it if possible.
If you only have active dry yeast, you can absolutely still make these delicious buns, but the process will require a slight modification. You’ll need 10g (3 teaspoons) of active dry yeast. To activate it, gently warm a portion of your non-dairy milk (from the recipe’s total liquid amount, not extra) until it’s lukewarm – think bathwater warm, not hot (around 95-105°F or 35-40°C). Pour the lukewarm milk into a small bowl, sprinkle the active dry yeast over the top, and add a pinch of sugar (this helps “feed” the yeast). Stir gently, then let the mixture sit for 10-20 minutes. You’ll know the yeast is active and healthy when the surface becomes foamy and bubbly. Once activated, proceed with the rest of the recipe as written, incorporating this yeast mixture with your other wet ingredients.
Clever Ways to Speed Up Dough Rising Time
If your kitchen is on the cooler side and you’re eager to get those buns baked, there are a couple of tricks to create a warm, optimal environment for your dough to rise:
- The “Warm Oven” Method: Turn your oven on to its absolute lowest temperature setting for just a few minutes. Then, switch it off completely and open the oven door for about 30 seconds to let out any excessive heat. The interior should feel warm to the touch, like a comfortable summer’s day – crucially, not hot, as too much heat will kill your yeast. Place your covered dough bowl inside the oven and close the door. On particularly chilly days, you might need to briefly re-warm the oven once or twice during the rising process, but often a single warming is sufficient.
- The “Steam Bath” Method: Alternatively, place a bowl or loaf tin filled with boiling water on the bottom rack of your (cold, switched-off) oven. Place your covered dough on the middle rack. Close the oven door. The steam from the hot water will create a warm, humid environment that is perfect for encouraging yeast activity and a good rise.
Kneading by Hand: A Satisfying Workout
While a stand mixer with a dough hook certainly makes quick work of kneading this relatively soft and sticky dough, it is absolutely possible – and incredibly satisfying – to knead it by hand. Just be prepared for a bit of a workout!
When kneading by hand, avoid the temptation to continuously add flour to your work surface. Adding too much flour will make your dough dry, stiff, and ultimately lead to dense buns. Instead, if the dough becomes too sticky to handle, lightly oil your hands and the work surface. This will provide lubrication without altering the dough’s hydration. A bench scraper is an invaluable tool here, helping you to gather and scrape the dough from the surface as you knead, making the process much easier and cleaner.
Storing Your Vegan Belgian Buns
Like most enriched bread products, these vegan Belgian buns are best enjoyed fresh on the day they are baked. The incredible softness and delightful stickiness are truly at their peak right after cooling.
If you happen to have any leftovers, they will keep well in an airtight container at room temperature for one to two days. Before serving on subsequent days, I recommend gently warming them up in the microwave or a low oven for a few minutes. This will help to soften the dough and revive that freshly baked texture.
Freezing Instructions
Yes, these vegan Belgian buns freeze beautifully! For best results, freeze the baked and completely cooled buns before you add the icing and glacé cherry. Simply place them in a freezer-safe bag or airtight container, separated by parchment paper if stacking, and freeze for up to three months. When you’re ready to enjoy them, thaw them at room temperature, then add the fresh lemon icing and cherry halves just before serving. While you can freeze them with the icing on, the texture and appearance of the icing may suffer upon defrosting, so it’s generally best to add it fresh.
Can These Buns Be Made Gluten-Free?
Unfortunately, this particular recipe is not suitable for gluten-free flour substitutes. Baking gluten-free bread, especially an enriched yeast dough like this, is a complex process that requires a completely different formulation of ingredients and techniques. Gluten-free baking is a specialised area that falls outside my current expertise, and attempting to adapt this recipe with gluten-free flour would likely not yield satisfactory results. For delicious gluten-free buns, I strongly recommend seeking out a recipe specifically developed for gluten-free ingredients.
More Delicious Vegan Bun and Roll Recipes to Explore
If you’ve enjoyed making these vegan Belgian buns, you might love exploring some of my other favourite plant-based bun and roll recipes:
- Vegan cinnamon rolls
- Vegan hot cross buns
- Vegan pumpkin cinnamon rolls
- Banana bread cinnamon rolls
- Vegan lemon blueberry rolls
- Chocolate orange hot cross buns
- Gingerbread cinnamon rolls
- Pumpkin bread rolls
- Vegan wholemeal maple cinnamon rolls
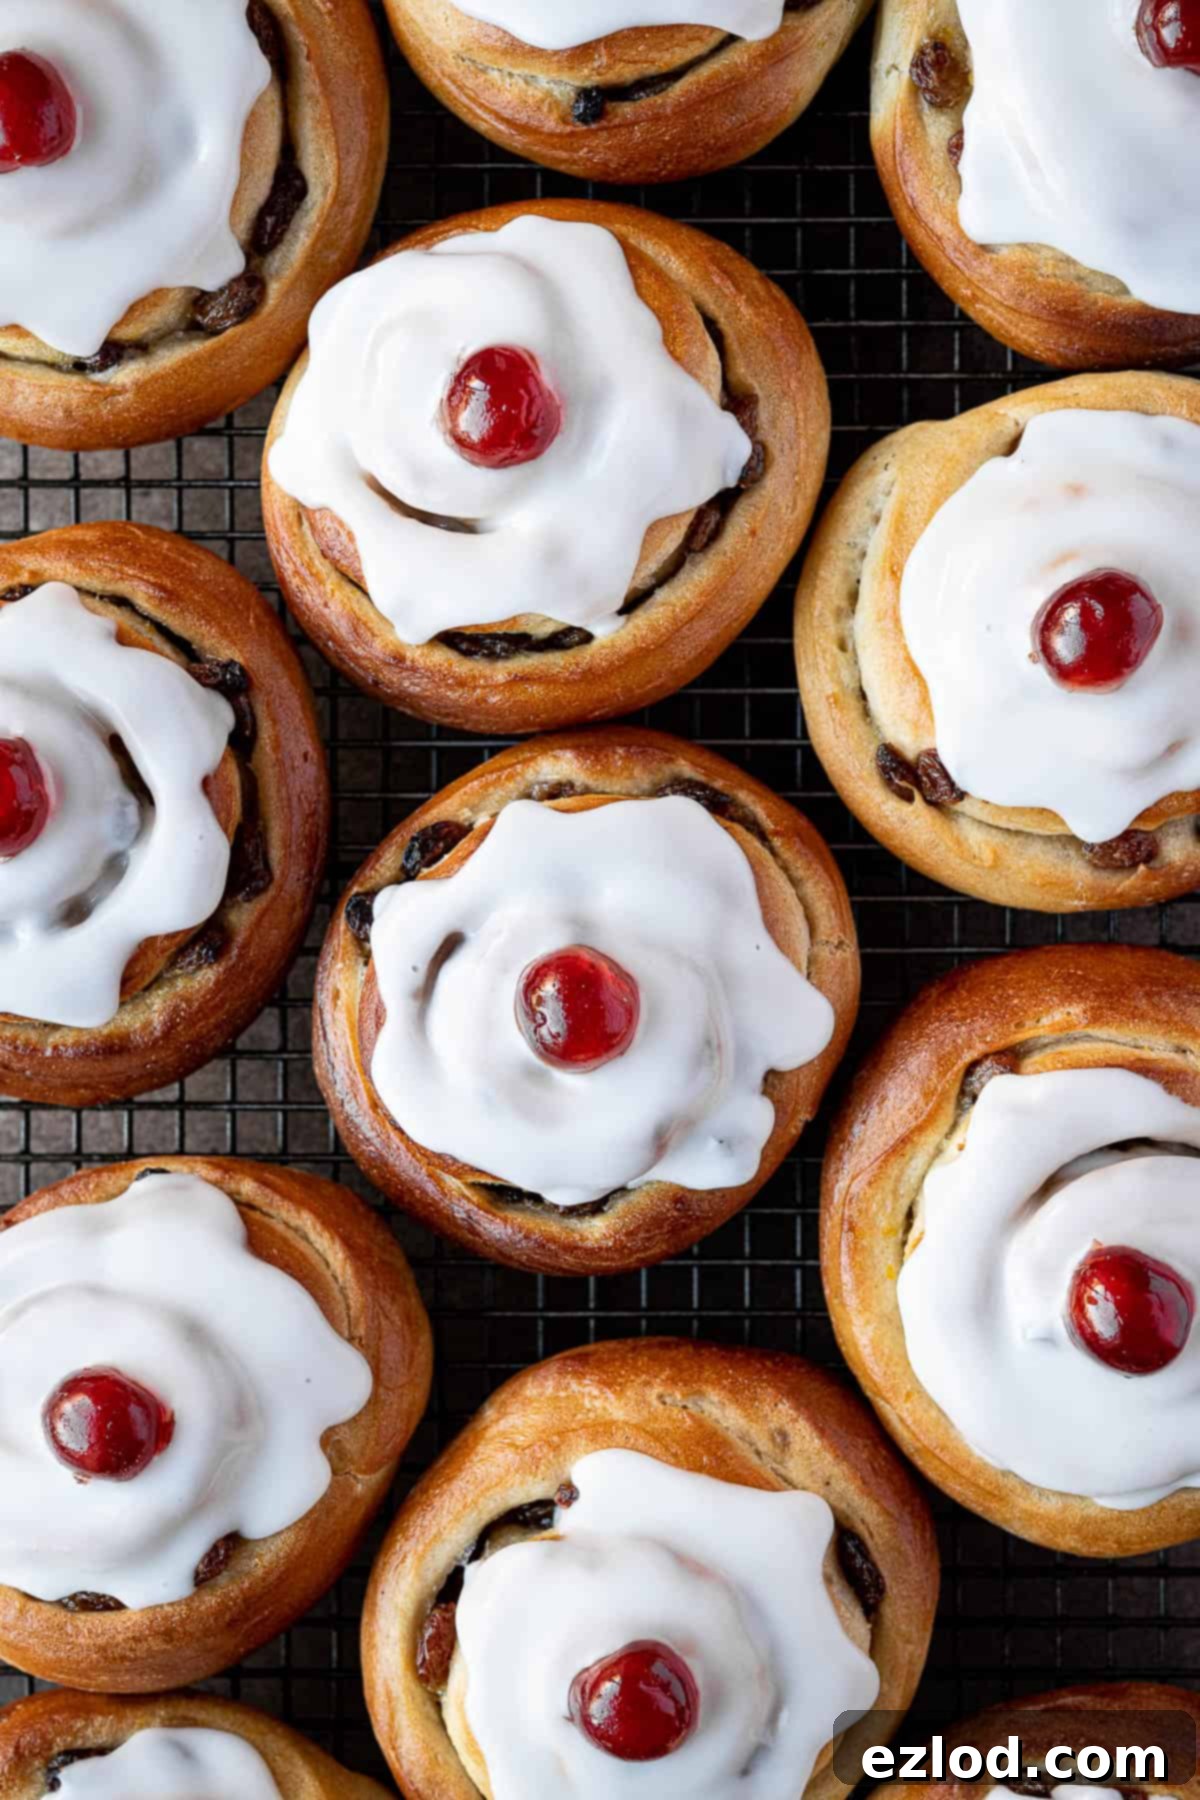
I truly hope you enjoy baking and tasting these delightful Vegan Belgian Buns! If you try this recipe, please let me know how it went by rating it, leaving a comment below, or tagging @domestic_gothess on Instagram with the hashtag #domesticgothess. Your feedback is always appreciated!
All images and content on Domestic Gothess are copyright protected. If you want to share this recipe then please do so by using the share buttons provided. Do not screenshot or post the recipe or content in full, instead include a link to this post for the recipe.

Print
Vegan Belgian Buns
Ingredients
Dough:
- 500 g (4 cups) white bread flour
- 9 g (2 ¾ teaspoons) instant/fast action yeast
- 50 g (¼ cup) caster or granulated sugar
- ½ teaspoon salt
- finely grated zest of 1 large lemon
- 315 ml (1 ¼ cups + 1 Tablespoon) lukewarm unsweetened non-dairy milk (I use soy)
- 80 g (⅓ cup) vegan butter (I use Flora original) softened
- milk for brushing
Filling:
- 125 g (rounded ½ cup) homemade vegan lemon curd
- 150 g (5 oz) sultanas
Icing:
- 200 g (1 ¾ cups) icing (powdered) sugar
- about 2 Tablespoons lemon juice (or water or milk)
- 6 glace cherries halved
Instructions
-
Place the flour, sugar, yeast, salt and lemon zest in a large bowl or the bowl of a stand mixer fitted with a dough hook. Mix to combine.
-
Add the lukewarm milk and mix to form a rough dough. Knead until it forms a smooth ball.
-
Add the softened vegan butter. Continue to knead until the butter is fully incorporated and the dough is smooth and elastic. It may seem greasy and messy at first but keep kneading and I promise you the butter will all mix in and the dough will become smooth.
-
Once the butter is fully incorporated the dough should look smooth and silky and it should pull away from the sides of the bowl cleanly. It should still be soft and slightly sticky but if it seems too wet then you can knead in a little more flour; be careful not to add too much however.
-
Place the dough in a lightly oiled bowl, cover and set aside to rise in a warm spot until doubled in size, about 1 hour.
-
Punch down the risen dough and give it a brief knead to knock out any air bubbles.
-
Roll it out on a lightly floured surface into a rectangle about 30 x 40 cm (12 x 16 in).
-
Spread the lemon curd evenly over the surface, leaving a border of about 1cm around the edges. Scatter over the sultanas.
-
Starting at one of the short edges, roll the dough up fairly tightly into a sausage. Brush the end with a little water to help seal the roll.
-
Use a very sharp knife or a length of floss to trim the ends off the roll to kneaten it, then slice it into 12 rounds.
-
Place them spaced apart on two baking parchment lined baking sheets. Loosely cover and set aside to rise for about 45 minutes, until doubled in size.
-
The buns are ready to bake when they look puffy and if you gently press some of the exposed dough with a finger it springs back slowly most of the way but leaves a small indentation. If it springs back quickly and fills in completely then it isn’t ready yet.
-
While the buns are rising, preheat the oven to 200°C/180°C fan/400°F/gas mark 6.
-
Gently brush the buns with milk then bake for 10 minutes. Turn the oven down to 180°C/160°C fan/350°F/gas mark 4 and bake for another 10 minutes until deep golden. If you have a probe thermometer the internal temperature should reach 90°C/195°F.
-
Transfer the buns to a wire cooling rack and allow to cool completely.
-
To make the icing, sift the icing sugar into a bowl and gradually stir in enough lemon juice to form a thick but spreadable icing.
-
Spread some of the icing over the top of each bun using the back of a spoon. Top with a glace cherry half and serve asap.
Notes
- See post above for tips, details, freezing instructions and step-by-step photos.
- All of my recipes are developed using grams, and as with all of my baking recipes I really do recommend using the metric measurements with a digital scale rather than the cup conversions. Cups are a wildly inaccurate measuring system and you will get far better, more consistent results using a scale, not to mention that it is also easier and less messy than cups!
- Ideally you should make the lemon curd the day before baking the buns to give it time to cool and set but this isn’t strictly necessary.

