The Ultimate Healthier Cheesy Hashbrown Casserole Recipe (AKA Funeral Potatoes)
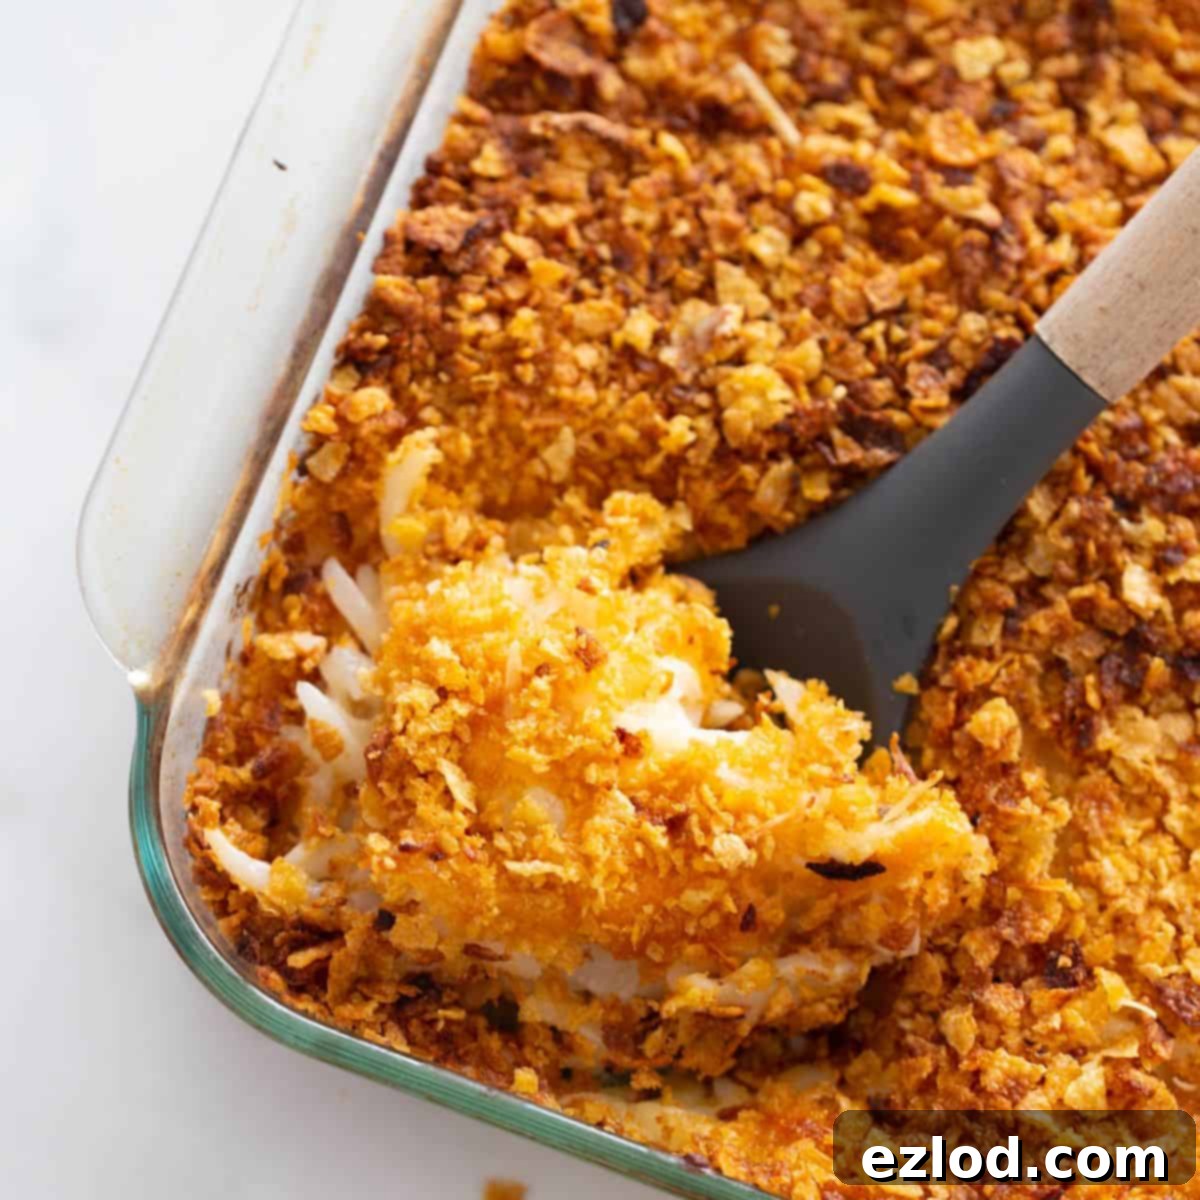
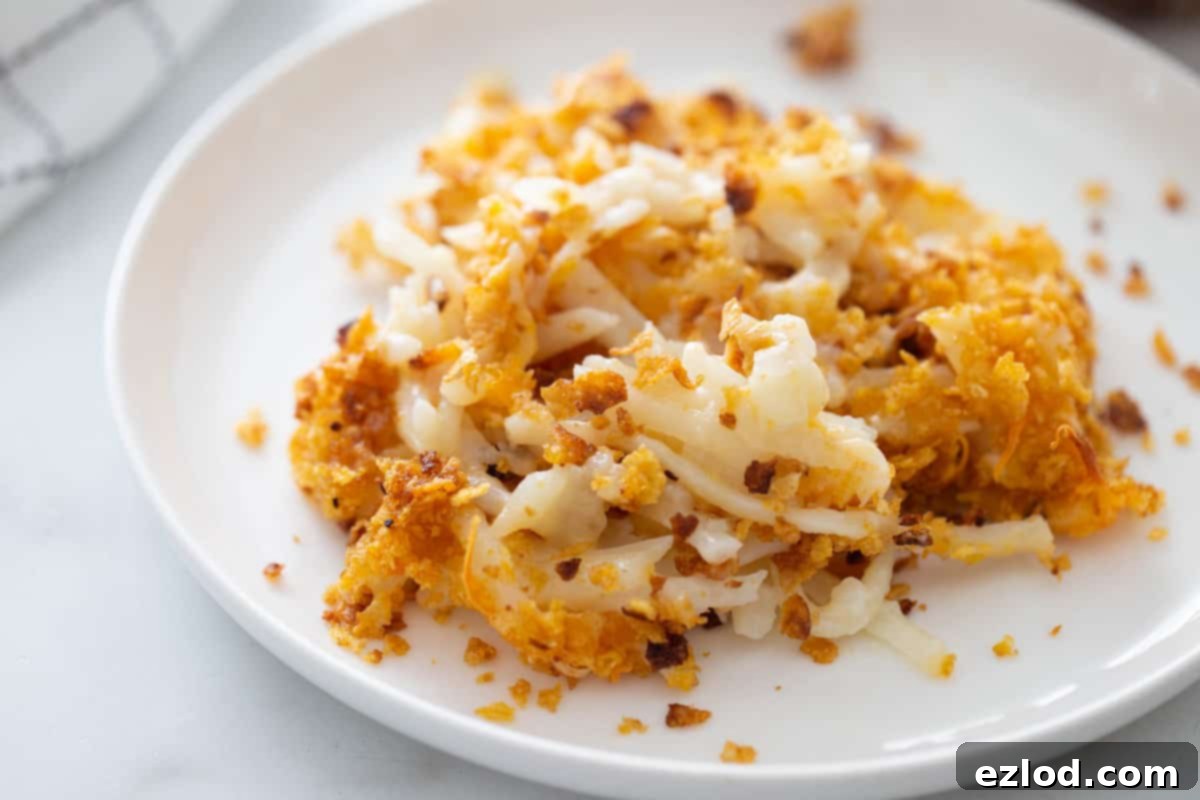
Indulge in the comforting embrace of a classic without the guilt! This cheesy hashbrown casserole recipe offers a remarkably healthier reimagining of the beloved ‘funeral potatoes’ dish. We achieve this by swapping out processed ingredients for wholesome, real foods, including a lighter, homemade cream of chicken soup. The result? An irresistibly creamy, cheesy, and utterly satisfying casserole that’s perfect for any occasion – whether it’s a festive holiday brunch, a cozy weekend breakfast, or a convenient make-ahead side for your weeknight meals.

I’ve always been captivated by the sheer comfort and deliciousness of a classic hashbrown casserole, often affectionately known as “funeral potatoes.” The first time I tasted this iconic side dish at a brunch, I simply couldn’t get enough. However, traditional recipes often come loaded with ingredients like conventional sour cream and canned cream of chicken soup, which are typically high in processed elements and not always ideal for a health-conscious diet. They also frequently call for an excessive amount of butter and copious amounts of cheese.
But I love a culinary challenge! I was confident that with a few thoughtful and simple swaps, I could transform this cheesy hashbrown casserole into a ‘FIX approved’ (or simply healthier) dish that tasted every bit as rich and decadent as the holiday-worthy original. My goal was to create a recipe that embraced wholesome ingredients without sacrificing the incredible flavor and texture that makes this casserole so universally loved.
Craving more wholesome holiday sides? Discover this healthy green bean casserole and these flavorful Air Fryer Brussels Sproutswith hot honey.

Table of Contents
Toggle
Why I Love This Healthier Hashbrown Casserole
- You’ll be amazed at how this healthier version doesn’t compromise on flavor or texture. It delivers all the creamy, dreamy, cheesy deliciousness you crave from classic comfort food, making it an instant favorite for everyone at the table.
- This casserole is a guaranteed hit with any crowd, from picky eaters to gourmet enthusiasts. Its universal appeal makes it a go-to dish for family gatherings, potlucks, and special occasions where a comforting side is a must-have.
- Forget complicated recipes and lengthy prep times. This hashbrown casserole is incredibly simple to assemble, requiring minimal effort for maximum flavor. You’ll be surprised how quickly you can get this dish ready for the oven, leaving you more time to enjoy your day.
- Streamline your holiday preparations or busy mornings by making this casserole in advance. Its make-ahead convenience is a game-changer for holiday dinners, Christmas morning breakfasts, or any event where you want a delicious dish ready to bake.
- Crafted with easily accessible, real food ingredients, this recipe is kind to both your body and your wallet. You don’t need obscure items; most components are pantry staples, making it a budget-friendly option for feeding your family or a large group.
- It’s incredibly versatile! Serve it alongside sweet breakfast treats, savory egg dishes, or even as a hearty side with dinner.
This cheesy hashbrown casserole pairs perfectly as a side for my Cinnamon Roll French Toast Casserole Cups and Bacon and Egg Cups. It’s also fantastic alongside my new Coffee Cake Baked Oatmeal recipe! For dinner, these cheesy potatoes make an excellent accompaniment to my New York Strip Steak or these delectable Jumbo Lump Crab Cakes.
How to Make Cheesy Hashbrown Casserole
For this recipe, the star of our creamy base is a batch of my essential Homemade Cream of Chicken Soup Substitute. This homemade version is a game-changer, eliminating the processed ingredients often found in canned soups while adding a rich, savory depth to your casserole. Tip: Prepare several batches of this creamy soup in advance and freeze them. This way, you’ll always have a healthy base ready for this casserole and countless other delicious dishes.
You will also need these key ingredients:
- Frozen shredded hash browns (about 20-24oz): Opt for a quality brand of frozen shredded hash browns. I recommend checking the ingredient list to ensure it primarily contains potatoes, avoiding brands loaded with excessive oils or artificial additives. Thawing the hash browns before mixing will make them easier to combine with the other ingredients and can aid in more even cooking, though it’s not strictly necessary if you’re pressed for time.
- Onion: A finely diced yellow onion adds a subtle sweetness and aromatic depth to the casserole. Feel free to use any type of onion you have on hand, or even a shallot for a milder flavor.
- Plain Greek yogurt: This is a brilliant healthier swap for traditional sour cream, providing the same creamy tang without the added fats. Don’t worry, the flavor blends seamlessly into the dish, and no one will guess your secret ingredient!
- Shredded sharp cheddar: While traditional recipes often call for excessive amounts of cheese, we’re focusing on quality over quantity here. Using freshly shredded sharp cheddar provides an intense cheesy flavor, so you can use significantly less without sacrificing that craveable taste. For an extra decadent experience, you can certainly add a bit more cheese to your liking.
- Pecorino Romano cheese (or sub more cheddar): My secret weapon for elevating flavors! Just a small amount of Pecorino Romano cheese adds a robust, salty, and umami punch that makes the flavors in this casserole truly pop. It works wonderfully in a blend with cheddar, much like in my famous Instant Pot Mac and Cheese.
- Butter: Whether you use real butter or a dairy-free alternative, it provides richness to the casserole mixture and is essential for creating that irresistible crispy topping.
- Gluten-Free Corn Flakes: The crunchy, buttery topping is a hallmark of this dish. I prefer gluten-free cornflakes to ensure the recipe is accessible to everyone, but regular cornflakes work just as well (and yes, they are often approved for balanced eating plans like 21 Day Fix!). Crush them lightly before mixing with butter.
- Salt: This seasoning is crucial for bringing out the best in your potatoes. A touch of salt enhances all the flavors. Adjust the salt to your preference, especially if your broth or cheese is already salty.
- Garlic powder: This also helps give a savory warmth to the potatoes.
- Black pepper: This is entirely optional. I personally prefer to leave it out, but if you love a subtle peppery kick, feel free to add a dash.
Essential Kitchen Tools:
To make this delightful casserole, you’ll need a few basic kitchen essentials: an 8×8 or 9×13-inch baking dish, a large mixing bowl, a smaller bowl for the topping, a whisk, and a skillet for preparing your homemade cream of chicken soup.
Instructions for a Perfect Hashbrown Casserole
This hearty and comforting breakfast (or side dish) casserole comes together incredibly fast with just a few simple steps:
- Preheat your oven to 350 degrees F (175 degrees C).
- Spray an 8×8 or 9×13-inch baking dish generously with cooking oil spray to prevent sticking. In a large bowl, combine the thawed hash browns, salt (if you’re using it), diced onions, Greek yogurt, 1 cup of the shredded cheddar cheese, and your amazing homemade condensed cream of chicken soup. Mix everything together thoroughly until all ingredients are well incorporated – ensuring every potato shred is coated with that creamy, cheesy goodness. Transfer this mixture evenly into your prepared casserole dish. Then, generously sprinkle the remaining cheddar cheese and the Pecorino Romano cheese over the top, creating a rich, cheesy layer.
- In a smaller, separate bowl, melt the butter. Add the crushed cornflakes to the melted butter and mix well until the cornflakes are evenly coated. Sprinkle this buttery cornflake mixture evenly over the top of the casserole, forming a delicious, crunchy crust.
- Bake for approximately one hour, or until the topping is beautifully golden brown and the potatoes are fork-tender throughout. For an extra crispy, irresistible topping, I often finish by broiling on low for 1-2 minutes just before serving, keeping a close eye to prevent burning. Serve hot and enjoy!
Delicious Casserole Variations
- Switch up the topping: Beyond cornflakes, you can get creative with your topping! Try crushed buttery crackers for a rich flavor, panko breadcrumbs for a lighter crisp, or even crumbled cooked bacon bits for a savory, smoky twist. A mix of different textures can also add an exciting element to the dish.
- Add a protein: Transform this side dish into a complete meal by incorporating your favorite protein. Cooked and crumbled homemade chicken breakfast sausage, lean ground beef, shredded chicken, or even diced ham would be absolutely delicious. Simply cook the protein beforehand and mix it into the hashbrown mixture, or create a flavorful bottom layer in your casserole dish.
- Make it dairy-free: Easily adapt this recipe for dietary needs! This casserole works wonderfully with dairy-free sour cream alternatives, your favorite brand of dairy-free shredded cheese, and dairy-free butter. Use them in the same measurements as the dairy ingredients for a delicious, inclusive dish.
- Add a touch of heat: For those who enjoy a little spice, consider adding a pinch of cayenne pepper to the hashbrown mixture or a dash of hot sauce to the cream of chicken soup. Diced green chilies can also add a mild, earthy warmth.
- Sneak in some veggies: Boost the nutritional value by adding finely diced bell peppers, mushrooms, or even chopped spinach to the hashbrown mixture. Make sure to sauté heartier vegetables lightly before adding them to ensure they cook through.
Meal Prep and Storage Tips
This hashbrown casserole is incredibly versatile and perfect for meal prepping, allowing you to enjoy its deliciousness at your convenience.
To Prep Ahead (Unbaked): This recipe is a perfect prep-ahead holiday side dish or weeknight meal helper. Simply assemble your casserole as described in the instructions, then place it in your casserole dish. Cover it tightly with plastic wrap or aluminum foil, and store it in the refrigerator for up to 2-3 days until you are ready to bake. When ready to bake, you might need to add an extra 5-10 minutes to the cooking time if baking from cold.
To Prep Ahead (Baked): Alternately, you can fully bake your casserole, let it cool completely to room temperature, then cover it tightly and store it in an airtight container in the refrigerator for up to 3-4 days until you are ready to serve or reheat.
To Store Leftovers: If you have any leftovers, you can store them right in the casserole pan if you have room in your refrigerator. Just wrap it tightly with plastic wrap or aluminum foil, or transfer individual portions into airtight containers. It will keep fresh for up to 3-4 days.
To Freeze: This cheesy hashbrown casserole freezes beautifully! You can freeze it in a freezer-safe container for 3-5 months. I personally love portioning it into individual servings using Souper Cubes for quick and easy breakfasts to enjoy with my morning eggs. You can thaw frozen portions in the refrigerator overnight, or reheat them directly from frozen in the microwave or oven.
To Reheat: Reheating this casserole is a breeze. Individual servings heat up really well in the microwave in just a few minutes, stirring halfway through. For larger portions or to reheat the entire casserole, cover it loosely with foil and warm it in the oven at 325°F (160°C) until heated through, typically about 20-30 minutes for a whole casserole.
Healthier Hashbrown Casserole FAQs
While it’s generally recommended to thaw your frozen hash browns before mixing them into the casserole – as it makes them easier to combine with other ingredients and can lead to more even cooking – this step isn’t strictly mandatory. If you’re short on time, you can certainly proceed with frozen hash browns, though you might need to extend the baking time slightly to ensure they are fully tender.
Absolutely! Using fresh potatoes can bring a wonderful, natural flavor. However, it requires a bit more prep work. You’ll need to shred the potatoes first, either with a hand grater or a food processor. After shredding, soak them in cold water for about 30 minutes to remove excess starch, then drain and dry them thoroughly before incorporating them into the recipe. This extra step prevents a gummy texture and ensures crispy results.
While I’ve heard wonderful things about Cracker Barrel’s famous hashbrown casserole, this recipe isn’t intended to be a direct copycat. My focus is on creating a healthier version with real ingredients. If you’re aiming for a taste closer to the Cracker Barrel style, I suggest doubling the amount of cheese and topping it with extra cheddar, rather than using cornflakes, for that specific flavor profile.
The term ‘funeral potatoes’ might sound unusual, but it’s a commonly used name for this type of casserole, particularly in the Midwest United States. The name originates from the dish often being served at large gatherings, including after funerals, due to its comforting nature, ease of transport, and ability to feed a crowd. It’s a true comfort food staple for communal meals.
For those following the 21 Day Fix program, it’s helpful to understand the container counts for this dish. Typically, 1 yellow container of potatoes is ½ cup. However, when considering the caloric density of hashbrowns, 1 yellow container is closer to 1 cup of potatoes. The same applies to cornflakes; 1 cup of cornflakes generally aligns with the calorie count of a traditional yellow container food. This casserole is carefully portioned to fit within these guidelines, offering a delicious yet balanced option.
More Healthy Comfort Food Recipes
If you loved this healthier cheesy hashbrown casserole, be sure to explore more of our wholesome comfort food creations:
- Healthy Chicken Pot Pie
- Spinach Lasagna Roll Ups
- Gluten Free Chicken and Dumplings
- Instant Pot Chicken Curry and Rice
Love this recipe? Please leave a 5-star 🌟🌟🌟🌟🌟 rating & a review in the comments section! We love hearing from you!

Healthier Hash Brown Casserole
Pin Recipe
Ingredients
- 1 recipe Homemade Cream of Chicken Soup Substitute see recipe below
- 6½ cups frozen shredded hash browns (about 20-24oz) thawed is recommended for best results
- ¼ cup yellow onion, diced (about ½ of a small onion)
- ¾ cup plain Greek yogurt
- 1⅓ cups shredded sharp cheddar cheese
- 2 tablespoons Pecorino Romano cheese (or substitute with more cheddar)
- 1 Tablespoon + 1 teaspoon butter (can substitute with vegan butter)
- 1½ cups gluten-free cornflakes, crushed (can substitute with regular cornflakes)
- ¼ teaspoon salt (adjust to taste, especially if sensitive to sodium or if broth/cheese is already salty)
- ¼ teaspoon garlic powder
- 1 dash black pepper (optional – I typically omit it as it’s not a personal favorite)
For the Healthier Cream of Chicken Soup Substitute
- 4 teaspoons gluten-free flour
- 4 teaspoons butter
- ¾ cup milk (dairy or non-dairy)
- ¾ cup chicken broth or stock
- ¼ teaspoon salt
- ¼ teaspoon garlic powder
Instructions
For the Healthier Cream of Chicken Soup Substitute:
-
In a medium skillet, melt the butter over medium heat until fully liquid. Add in the gluten-free flour, then whisk the mixture continuously for one minute to create a roux. This will ensure your soup base is smooth and thick.
-
Increase the heat to medium-high. Slowly and gradually whisk in the milk (dairy or non-dairy) and chicken broth or stock. Continue to whisk constantly while the mixture comes to a gentle boil for 2-3 minutes. It should visibly begin to thicken. If it’s taking longer than a few minutes, you can slightly increase the heat, but keep whisking to prevent lumps. Season the soup with garlic powder and salt to taste.
-
Once the soup has thickened to your desired consistency, remove it from the heat and allow it to cool completely. It will continue to thicken further as it cools. Store the prepared soup in an airtight container in the refrigerator until ready to use.
-
Use this homemade substitute in place of canned condensed cream of chicken soup in this and other recipes. It yields about 1 cup and is also freezer-friendly, making it perfect for meal prepping ahead of time.
For the Hashbrown Casserole:
-
Preheat your oven to 350 degrees F (175 degrees C).
-
Spray an 8×8 or 9×13-inch casserole dish generously with cooking oil spray to prevent sticking. In a large mixing bowl, combine the thawed hash browns, salt (if using), diced onions, Greek yogurt, 1 cup of the shredded sharp cheddar cheese, and your freshly made homemade condensed cream of chicken soup. Mix all ingredients thoroughly until everything is well combined and the hash browns are evenly coated. Transfer this flavorful mixture into your prepared casserole dish. Then, generously sprinkle the remaining cheddar cheese and the Pecorino Romano cheese over the top for a decadent layer.
-
In a smaller bowl, melt the butter. Add the crushed gluten-free cornflakes to the melted butter and stir until they are fully coated. Carefully sprinkle this buttery cornflake topping evenly over the cheese layer on your casserole.
-
Bake the casserole for one hour, or until the topping is a beautiful golden brown and the hash browns are tender when tested with a fork. For an extra crisp texture, I often turn on the broiler to a low setting for 1-2 minutes just before serving, but be sure to watch it closely to prevent burning. Remove from oven and let stand for a few minutes before serving.
Video
Notes
21 Day Fix Container Counts: Per serving, this casserole is approximately 1 YELLOW (for potatoes and cornflakes), 1/2 BLUE (for cheese), 1 TSP (for butter), and a trace RED (from Greek yogurt).
Weight Watchers Points: Each serving of this casserole is approximately 10 Weight Watchers Personal Points.
To Prep Ahead (Unbaked): This recipe is a perfect make-ahead holiday side dish. Simply assemble your casserole mixture and place it in your casserole dish. Cover tightly with plastic wrap or foil, then store in the refrigerator for up to 2-3 days until you are ready to bake it.
To Store Leftovers: You can store any leftover portions directly in the casserole pan if you have refrigerator space. Just wrap tightly with plastic wrap or aluminum foil, or transfer into individual airtight containers. It will stay fresh for up to 3-4 days in the fridge.
To Freeze: This hashbrown casserole freezes exceptionally well in a freezer-safe container for 3-5 months. For ultimate convenience, I like to portion it into individual servings and freeze them in my Souper Cubes, making it a quick and tasty breakfast addition with morning eggs. You can thaw it in the refrigerator overnight or reheat it directly from frozen in the microwave or oven.
To Reheat: This casserole heats up wonderfully. Individual servings can be quickly reheated in the microwave in just a few minutes. For a larger portion or the entire casserole, cover it with foil and warm it in the oven at 325°F (160°C) until thoroughly heated through.
Nutrition
