Meringue Bone Palace Halloween Cake: The Ultimate Spooky & Delicious Chocolate Centerpiece
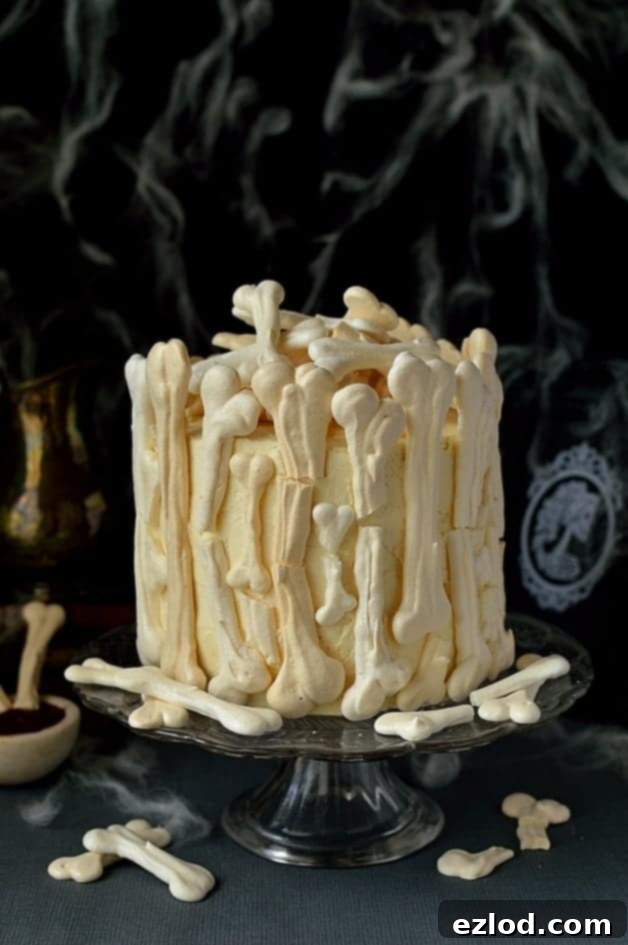
Unleash your gothic creativity this Halloween with our show-stopping Meringue Bone Palace Cake! This hauntingly beautiful dessert features a rich, moist chocolate cake layered with velvety vanilla Swiss meringue buttercream and tart raspberry jam, all spectacularly adorned with delicate meringue bones and a vibrant berry coulis ‘blood.’ It’s the perfect eerie centerpiece to enchant your guests this spooky season.
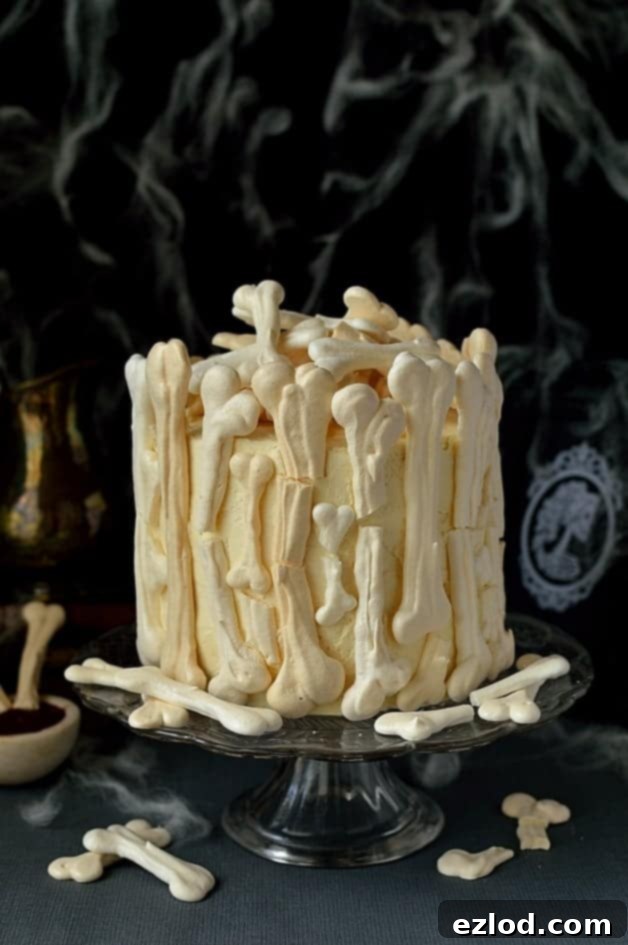
As October rolls in, a unique sense of eerie excitement fills the air, and for those of us who adore baking, it marks the perfect opportunity to let our gothic creativity truly flourish. Halloween isn’t solely about costumes and haunted houses; it’s also about crafting unforgettable, visually stunning treats that are as delicious as they are dramatic. This year, my ambition led me to create something truly spectacular: the Meringue Bone Palace Halloween Cake. It’s far more than just a dessert; it’s an edible masterpiece designed to be the crowning glory of any spooky feast or gathering.
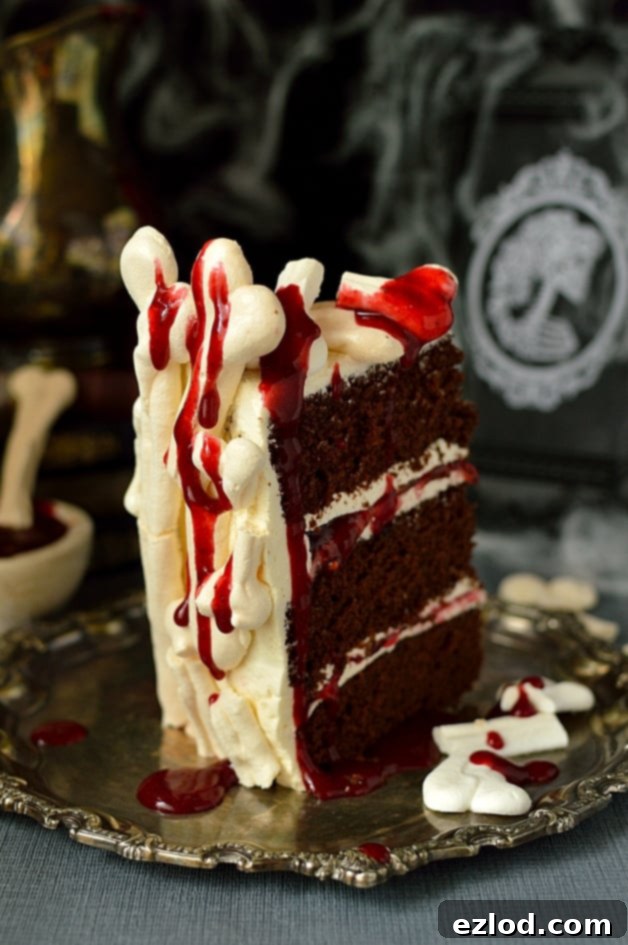
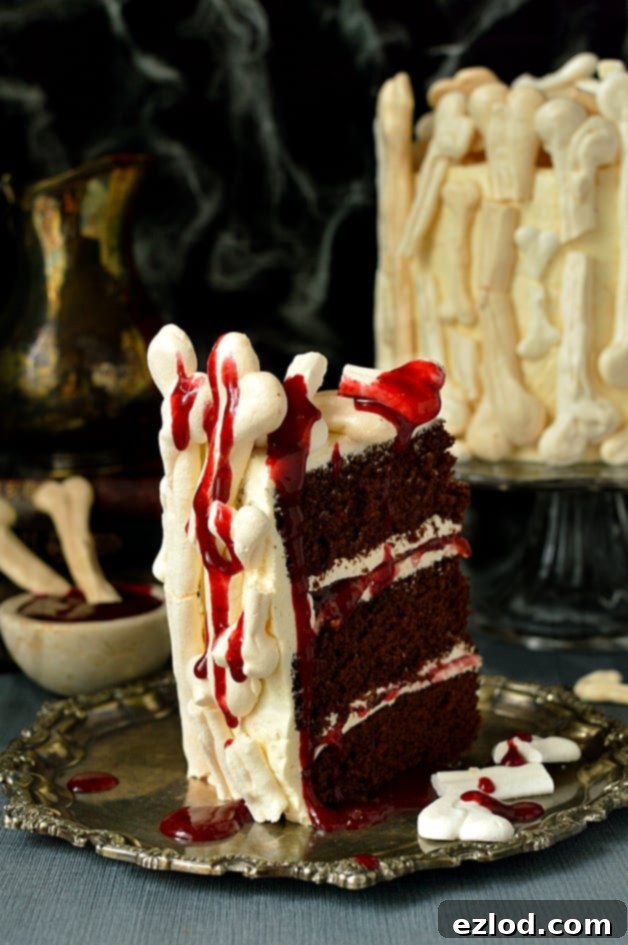
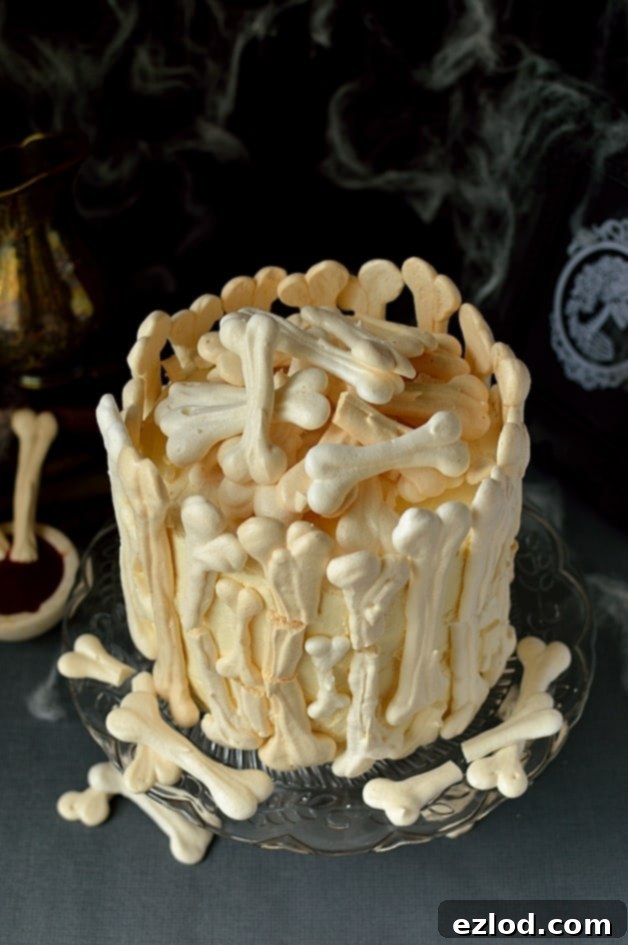
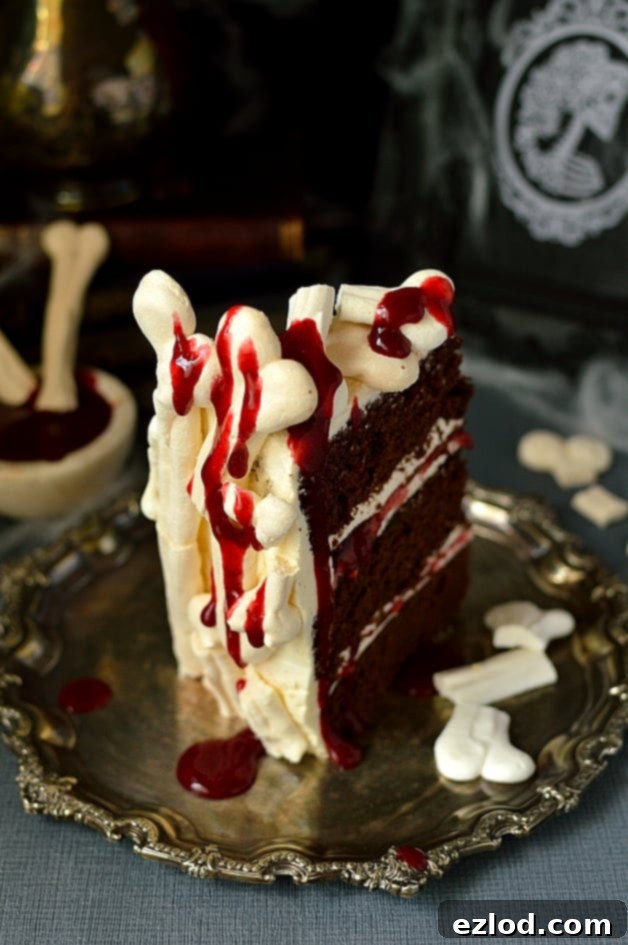
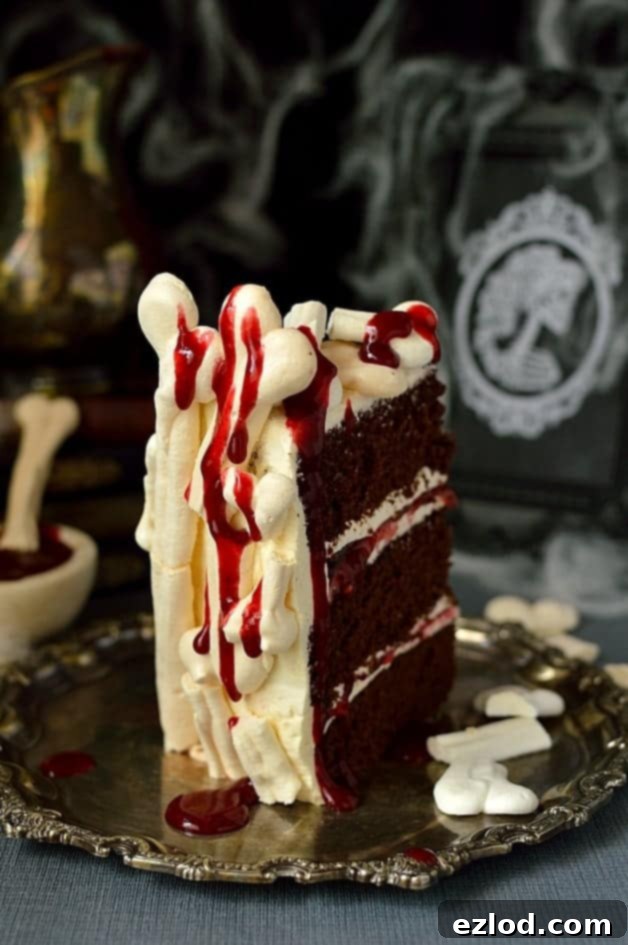
This particular cake has been a labor of love, patiently waiting for the arrival of October to make its grand debut. Deciding on a name was almost as intricate as the baking itself! Should it be a “meringue bone garden,” a “pile,” or perhaps a “graveyard”? In the end, “Meringue Bone Palace” felt most fitting, perfectly capturing the majestic yet macabre aesthetic of this towering creation. At its core, it’s a luscious chocolate cake, generously filled with smooth vanilla Swiss meringue buttercream and tangy raspberry jam. The exterior is dramatically covered in delicate meringue bones, with a vibrant berry coulis served on the side, resembling chilling ‘blood’ for an added spooky effect.
Why This Spooky Cake is Your Ultimate Halloween Party Centerpiece
The Meringue Bone Palace Halloween Cake is not merely a dessert; it’s a statement piece, a conversation starter, and an absolute delight for both the eyes and the palate. Imagine it gracing the center of your Halloween party table – its ghostly white meringue bones contrasting dramatically with the dark, rich chocolate cake. This cake is designed to impress, marrying gothic elegance with playful spookiness. But its appeal extends far beyond its striking appearance.
Every bite offers a symphony of flavors and textures that will captivate your guests. The deep, rich notes of moist chocolate cake are perfectly complemented by the silky, less-sweet vanilla Swiss meringue buttercream, renowned for its luxurious texture and stability. The tartness of the raspberry jam cuts through the richness, adding a burst of fruity brightness and a beautiful ruby red hue. And then, there’s the meringue – light, crisp, and ethereal, providing a delightful, melt-in-your-mouth crunch that contrasts beautifully with the soft cake layers. Finally, the vibrant berry coulis, draped artfully like ‘blood’ across the bones or served alongside, adds another layer of tangy flavor and a visually striking finish. This combination ensures a truly unforgettable dessert experience, making it the perfect showstopper for any spooky celebration.
Crafting the Perfect Moist Chocolate Cake Base
The foundation of any truly great cake is its sponge, and for this Meringue Bone Palace, we’ve opted for an exceptionally moist and tender chocolate cake. The secret to its incredible softness and depth of flavor lies in the intelligent use of dark muscovado (or dark brown soft) sugar and sweetened condensed milk. These ingredients don’t just add unparalleled moisture; they also contribute a deep, nuanced caramel-like flavor that elevates the chocolate to new heights. The recipe is adapted from Dan Lepard’s highly acclaimed book, Short and Sweet, which remains one of my absolute favorite baking resources for its reliable and delicious creations.
Dan Lepard also recommends an optional, yet highly effective, addition: a couple of teaspoons of glycerin to the cake batter. While not strictly necessary for the cake’s success, glycerin acts as a humectant, significantly helping the cakes retain their moisture and stay wonderfully soft for longer periods. If you have it on hand and wish to ensure maximum moistness, I highly encourage you to include it, as it truly makes a noticeable difference in the cake’s texture and shelf life.
For the impressive, towering structure of our Meringue Bone Palace, I typically bake the cake layers in three 15cm (6-inch) round tins. This yields a beautifully tall and dramatic cake, perfect for layering and creating that grand ‘palace’ or ‘graveyard’ effect. However, if you prefer a slightly wider and less tall cake, or if your pan collection dictates, you can certainly use two 20cm (8-inch) round tins instead. Remember that adjusting the tin size will naturally alter the baking time, so always keep a close eye on your cakes and test for doneness with a skewer inserted into the center until it comes out with only a few moist crumbs.
Demystifying the Meringue Bones: Easier Than They Look!
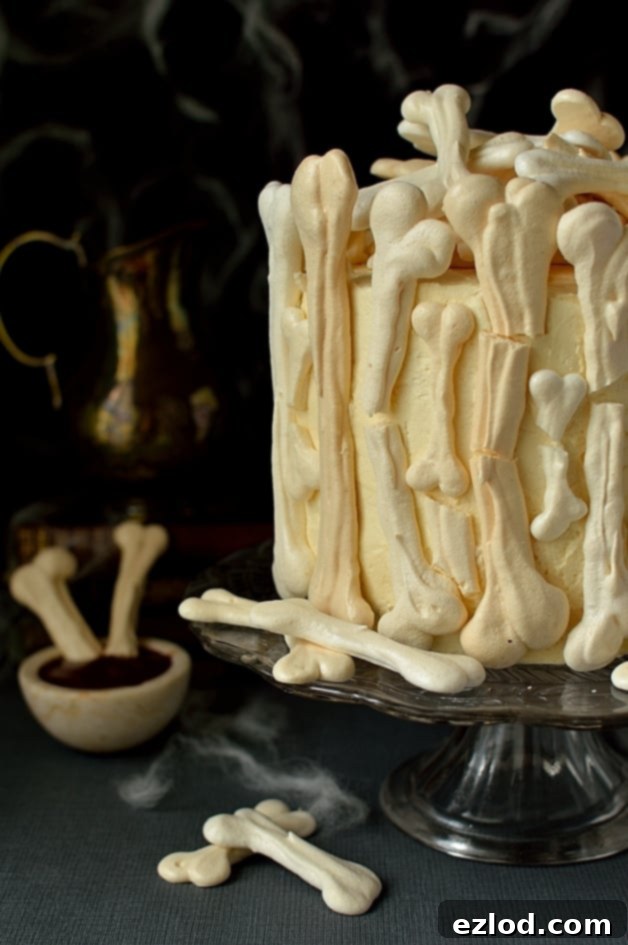
Despite its elaborate and impressive appearance, the Meringue Bone Palace Halloween Cake is surprisingly achievable for home bakers of all skill levels. The meringue bones, which are undeniably the most striking feature and give the cake its unique character, might seem daunting at first glance. However, they are quite straightforward to make with a little patience and practice. One of the best aspects is their make-ahead convenience; you can bake these ghostly decorations up to a week in advance and store them safely in an airtight container until you’re ready to assemble your cake. This foresight significantly reduces the stress on the day of your Halloween gathering, allowing you to focus on the other delicious elements.
Similarly, the rich chocolate cake layers can be baked a day or two before assembly. This staggered approach to preparation makes the entire process much more manageable and enjoyable, preventing any last-minute rushes. However, a crucial tip for serving to ensure the best possible experience: once the cake is fully decorated with its delicate meringue bones, it’s best to serve it straight away. Meringues, by their very nature, are highly susceptible to moisture, and they will begin to soften fairly quickly once exposed to the humid environment of the buttercream and ambient air. While they will certainly hold their shape and structure for a day or two, they will inevitably lose their signature crispness and may become a little sticky. For that perfect, delightful crunchy contrast against the soft cake, immediate serving is key.
Tips for Achieving Perfect Meringue Bones (Even with a Tricky Oven!)
I confess, my own oven has a rather notorious reputation for being uncooperative when it comes to meringues (and many other delicate baked goods, for that matter!). Even at its absolute lowest temperature, it struggles to go below 150°C (300°F), and its heat distribution is, to put it mildly, uneven. This often results in some of my meringue bones emerging with a slightly more golden or browned hue than I might initially have liked. But fear not, fellow bakers!
What might seem like an imperfection can actually be embraced as a unique characteristic. We’ll call them aged bones, and they perfectly fit the macabre and spooky Halloween theme! They look wonderfully ancient, ghoulishly authentic, and add an extra layer of rustic charm to your Meringue Bone Palace. Of course, if you are fortunate enough to possess a perfectly calibrated oven, your bones will likely come out pristine white and ‘fresher’ looking, which is also fantastic. The beauty of this recipe lies in its forgiving nature; the aesthetic works wonderfully either way, so don’t fret if your meringues aren’t flawlessly white. Their unique charm, whether perfectly crisp and white or beautifully ‘aged’ and slightly rustic, will only add to the mystique and personal touch of your haunting Meringue Bone Palace cake.
More Spooktacular Halloween Recipes to Explore:
- Jack-O-Lantern Pumpkin Pies
- Haunted Pavlova
- Mini Bleeding Heart Halloween Cakes
- Chocolate Blackberry Gothic Halloween Cake
- Witches’ Finger Cookies
- Monochrome Cake
- Chocolate Glazed Black Cat Doughnuts
Have you conjured up this hauntingly delicious Meringue Bone Palace Halloween Cake? We’d absolutely love to see your spooky creations! Tag @domestic_gothess on Instagram and use the hashtag #domesticgothess to share your festive bake with our community.
*All images and content on Domestic Gothess are copyright protected. If you want to share this recipe then please do so by using the share buttons provided. Do not screenshot or post the recipe or content in full.*
Meringue Bone Palace Halloween Cake Recipe:

Print
Meringue Bone Palace Halloween Cake
Ingredients
Meringue Bones:
- 3 large egg whites
- pinch cream of tartar
- 165 g (¾ cup + 2tbsp) caster sugar
Berry Coulis ‘Blood’:
- 500 g (17.5 oz) frozen mixed berries
- 130 g (⅔ cup) caster sugar
- 120 ml (½ cup) water
Cakes:
- 30 g (¼ cup) cocoa powder
- 50 ml (3tbsp + 1tsp) cold water
- 100 ml (¼ + ⅛ cup + 1tbsp) boiling water
- 50 g (1.75 oz) dark chocolate finely chopped
- ½ tsp bicarbonate of soda
- 100 g (⅓ cup + scant 2 tbsp) butter softened
- 175 g (1 cup) dark muscovado sugar
- 125 g (4.4oz) sweetened condensed milk
- 2 medium eggs
- 2 tsp glycerin optional
- 200 g (1 + ⅔ cup) plain flour
- 2 tsp baking powder
Buttercream:
- 4 large egg whites
- 225 g (1 cup + 2tbsp) caster sugar
- 250 g (1 cup + 1tbsp) softened butter
- 2 tsp vanilla extract
- pinch salt
- raspberry jam to fill
Instructions
Meringue Bones:
-
Preheat your oven to a low 110C/225F/gas mark ¼. Prepare two baking sheets by lining them with baking parchment.
-
In a large, impeccably clean bowl (any grease can prevent the meringues from setting), combine the egg whites and a pinch of cream of tartar. Whisk on medium speed using an electric mixer until soft peaks begin to form. Gradually, add the caster sugar, a spoonful or two at a time, ensuring each addition is fully incorporated before adding more. Continue whisking until the meringue is beautifully glossy, thick, and forms stiff peaks that hold their shape.
-
Carefully spoon the prepared meringue into a disposable piping bag. Snip off a small corner of the bag to create an opening for piping. To make piping easier and prevent the parchment from sliding, use a tiny dab of meringue to ‘glue’ the baking parchment to the corners of your baking trays.
-
Begin piping your bone shapes onto the prepared baking trays. Start by piping a small round ‘blob’ for one end of the bone, then pipe a straight line downwards to create the shaft, and finish with another matching ‘blob’ for the other end. For a more realistic bone shape, repeat this process in reverse, piping another line over the first, slightly overlapping the meringue along the length to ensure no thin or weak spots. Don’t worry if your first few attempts aren’t perfect; practice makes perfect! Create a variety of bone sizes – some longer, some shorter, to add visual interest to your palace.
-
Bake the meringue bones for approximately 1 hour and 30 minutes, or until they are completely firm to the touch and easily lift off the parchment. Turn off the oven and allow the bones to cool completely inside the oven with the door slightly ajar. This slow cooling prevents cracking. Once cool, transfer them to an airtight container for storage until assembly.
Berry Coulis ‘Blood’:
-
Combine all the frozen mixed berries, caster sugar, and water in a medium-sized, heavy-bottomed saucepan. Bring the mixture to a gentle boil over medium heat, stirring regularly to prevent sticking and ensure the sugar dissolves. Once boiling, reduce the heat to a simmer and cook for about 15 minutes, or until the coulis has thickened to your desired consistency. Remove from heat and let it cool completely. Once cooled, transfer the coulis to a blender (or use a hand blender) and purée until it is completely smooth. To achieve a perfectly silky ‘blood’ texture, pass the purée through a fine-mesh sieve, pushing through as much pulp as possible and discarding any remaining seeds. Pour into a jug, cover, and refrigerate until ready to use.
Cakes:
-
Prepare your baking tins by greasing three 15cm (6-inch) round tins and lining their bases with baking parchment. Preheat your oven to 180C/350F/gas mark 4.
-
In a small bowl, mix the cocoa powder with the cold water to form a smooth paste. Then, stir in the boiling water. Immediately add the finely chopped dark chocolate and bicarbonate of soda to the hot mixture, stirring until the chocolate is fully melted and the mixture is smooth. Set aside to cool slightly.
-
In a separate, large mixing bowl, beat the softened butter, dark muscovado sugar, and sweetened condensed milk together with an electric mixer until the mixture is light, fluffy, and pale. Add the eggs one at a time, beating well after each addition. For best results, add a spoonful of the plain flour with each egg to prevent the mixture from curdling. If using, beat in the glycerin at this stage. In a separate bowl, whisk together the remaining plain flour and baking powder. Add half of this dry mixture to the butter mixture, mixing until just combined. Next, gently fold in the chocolate mixture, followed by the remaining half of the flour mixture, mixing until a smooth batter forms, being careful not to overmix.
-
Divide the cake batter evenly among the three prepared tins. Bake for approximately 25 minutes, or until a skewer inserted into the center of the cakes comes out with only a few moist crumbs attached. Allow the cakes to cool in their tins for about 10 minutes before carefully transferring them to a wire rack to cool completely.
Swiss Meringue Buttercream:
-
In a spotlessly clean, heatproof bowl (ideally the bowl of your stand mixer), combine the egg whites and caster sugar. Place this bowl over a saucepan of gently simmering water, ensuring that the bottom of the bowl does not touch the water. Whisk the mixture gently with a hand whisk (not an electric one at this stage) until all the sugar has completely dissolved. To test, rub a small amount between your fingers – it should feel perfectly smooth, without any graininess. The temperature should reach approximately 60°C (140°F) if you are using a thermometer.
-
Remove the bowl from the heat. Using an electric mixer (either a stand mixer with a whisk attachment or a handheld electric whisk) on high speed, whisk the egg whites until they form a very stiff, glossy meringue. Continue whisking until the mixture is completely cold to the touch – the base of the bowl should feel cool. This process typically takes about 10 minutes, so be patient.
-
Once the meringue is cold and stiff, reduce the mixer speed to low. Begin adding the softened butter, one tablespoon at a time, beating well after each addition to fully incorporate it. Don’t be alarmed if the mixture appears to curdle or become soupy at this stage; this is a normal part of the process. Simply continue whisking, and it will miraculously come back together into a smooth, creamy consistency.
-
Once all the butter has been incorporated and the buttercream is beautifully smooth, silky, and voluminous, whisk in the vanilla extract and a pinch of salt. Your exquisite Swiss meringue buttercream is now ready for assembly!
To Assemble the Meringue Bone Palace Cake:
-
Begin by trimming the tops of your cooled chocolate cake layers to ensure they are perfectly level. Place one cake layer onto your chosen cake stand or serving platter, securing it in place with a small dollop of buttercream. Take about a quarter of your prepared Swiss meringue buttercream and transfer it to a disposable piping bag fitted with a 1.5cm (approximately ½-inch) round nozzle. Spread a thin, even layer of buttercream over the cake layer on the stand. Then, pipe a ring of buttercream around the very edge of this layer. Fill the inner gap of this ring with approximately 3 tablespoons of raspberry jam. Take one of the remaining cake layers, spread a thin layer of buttercream on one side, and carefully place it buttercream-side-down onto the first layer.
-
Repeat the filling process for the second layer. For the final cake layer, spread a thin layer of buttercream on its top side, and then place it upside-down on the stack. This technique ensures a perfectly flat and level top for your cake, providing an ideal canvas for decoration. Now, apply a thin crumb coat of buttercream over the entire cake – sides and top. Refrigerate the cake until this crumb coat is firm, typically for 20-30 minutes. Once chilled, apply a second, more generous layer of buttercream to cover the entire cake. Don’t worry about achieving a perfectly smooth and neat finish at this stage, as it will soon be covered by our spooky meringue bones.
-
Now comes the fun part: arranging your meringue bones! Carefully place the bones around the sides of the cake, gently pressing them into the buttercream so they adhere. Position some bones so they extend slightly above the top edge of the cake, creating a more dynamic ‘palace’ or ‘graveyard’ effect. Vary the sizes of the bones – use some whole ones and gently break others into smaller pieces to add texture and realism to your spooky scene.
-
Once the sides are adorned, create a dramatic pile of smaller bones on top of the cake, again mixing whole and broken pieces for an organic, haunting look. Your Meringue Bone Palace Halloween Cake is now complete! For the best possible experience, serve the cake immediately to ensure the meringue bones remain delightfully crisp. Don’t forget to present it with the berry coulis ‘blood’ on the side, allowing guests to drizzle it themselves for an extra touch of gothic flair.
A Hauntingly Good Halloween Treat!
This Meringue Bone Palace Halloween Cake is truly a triumph of spooky season baking, perfect for those who love to blend culinary artistry with festive fun. It combines rich, deep flavors with a dramatic, unforgettable presentation, making it an essential centerpiece for your holiday celebrations. Whether you’re hosting a grand, ghoulish party or simply want to create a special, memorable treat for your family, this cake promises to be a conversation starter and a truly delicious experience. Embrace the fun of Halloween and let your culinary imagination run wild with this magnificent creation!
I am delighted to share this show-stopping recipe with the vibrant blogging communities of Saucy Saturdays (hosted by The Flavour Bender, Take Two Tapas, La Petit Chef and Mid-Life Croissant), Fiesta Friday (hosted by Hostess At Heart and Fabulous Fare Sisters), The Food Calendar, Foodie FriDIY, Foodie Friends Friday and Friday Features.
