The Ultimate Vegan Angel Cake Recipe: A Nostalgic British Classic Reimagined
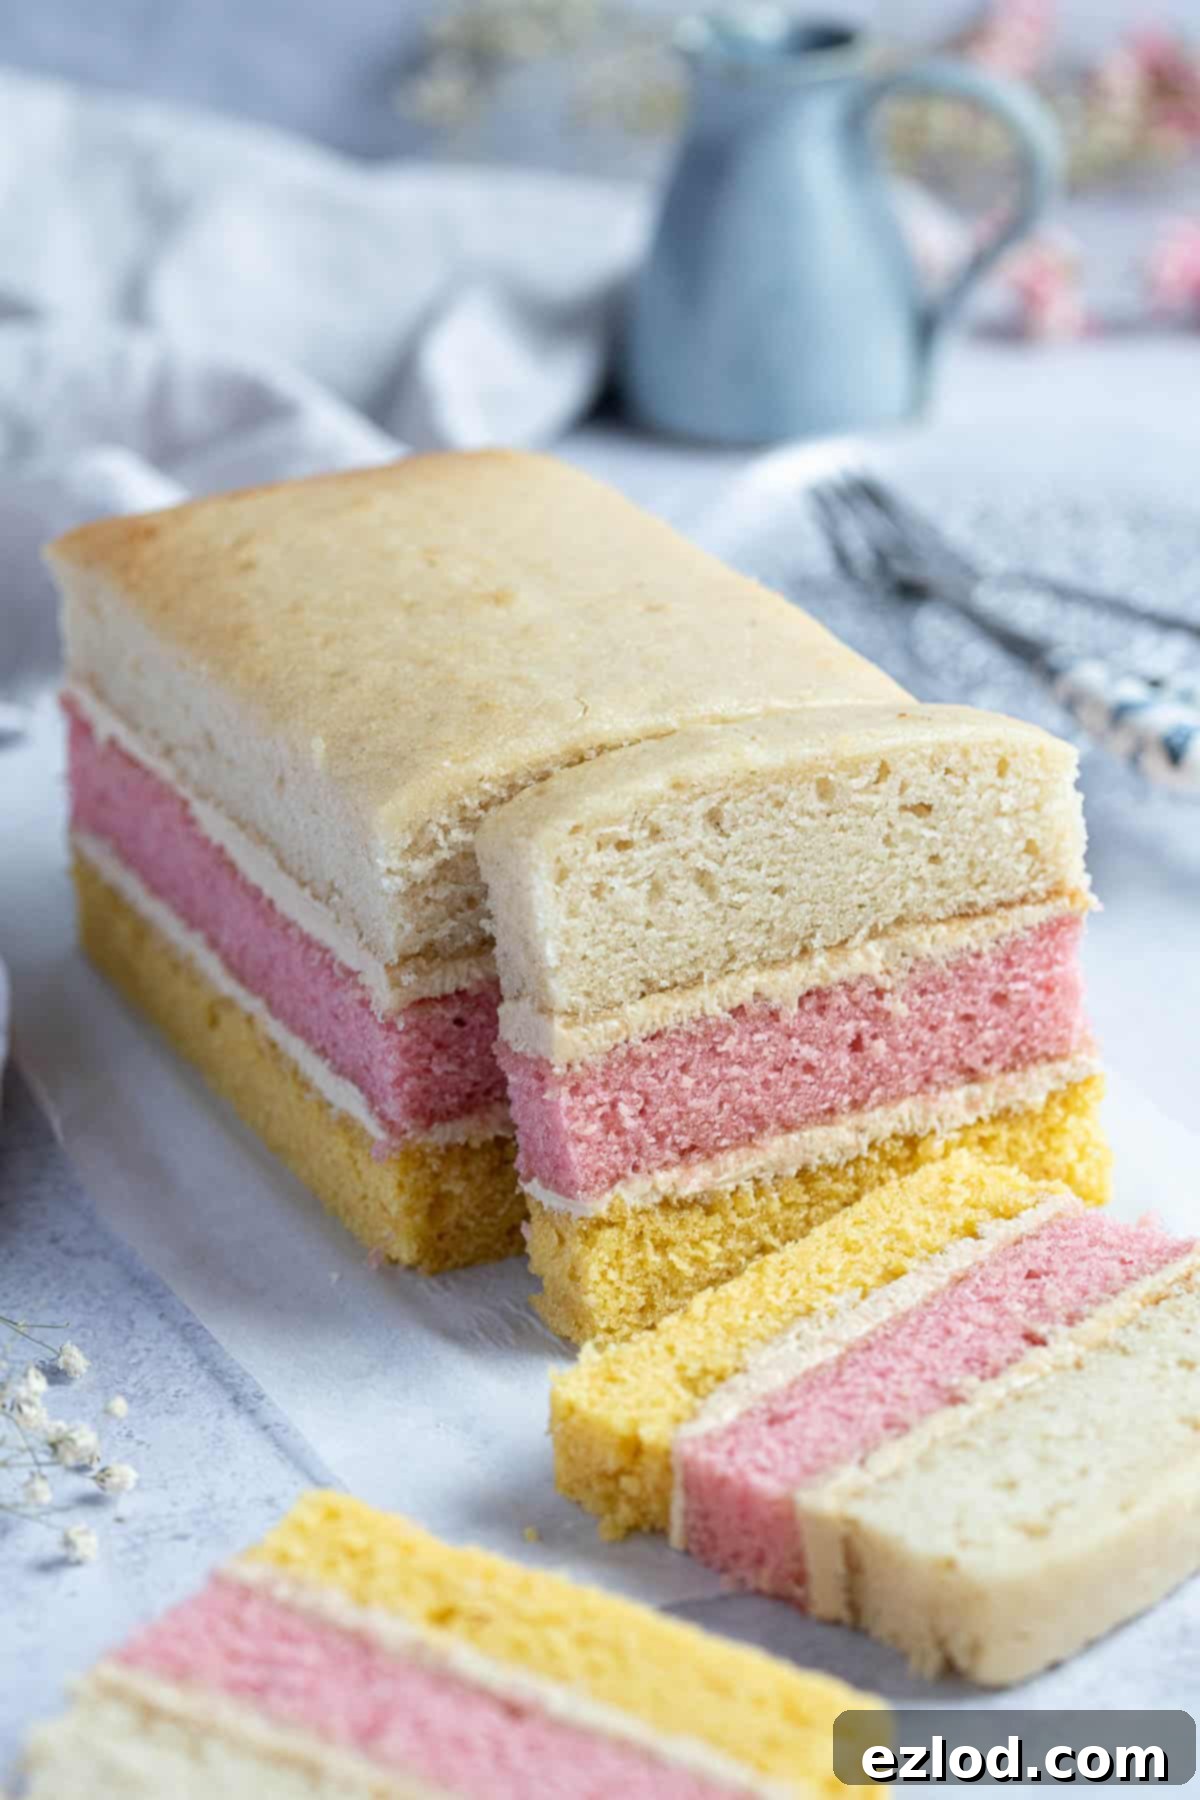
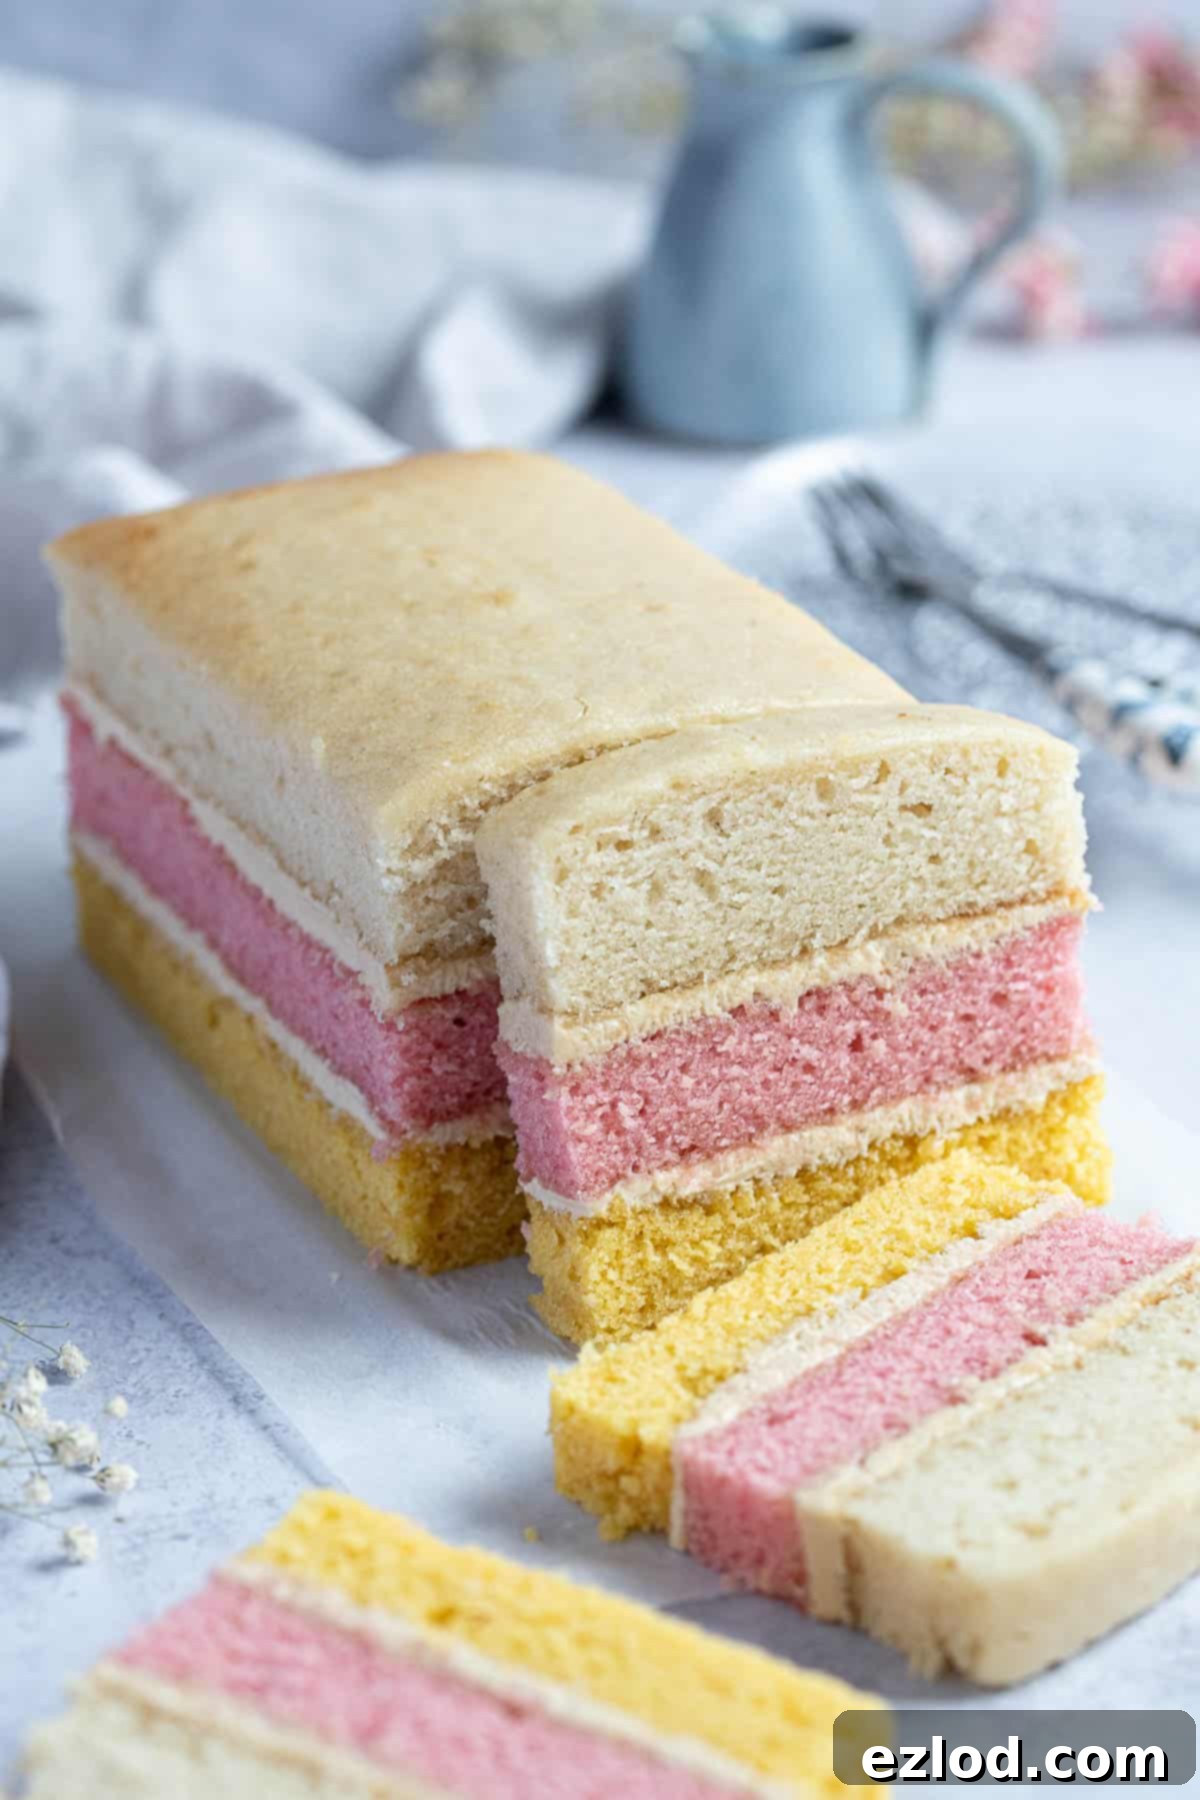
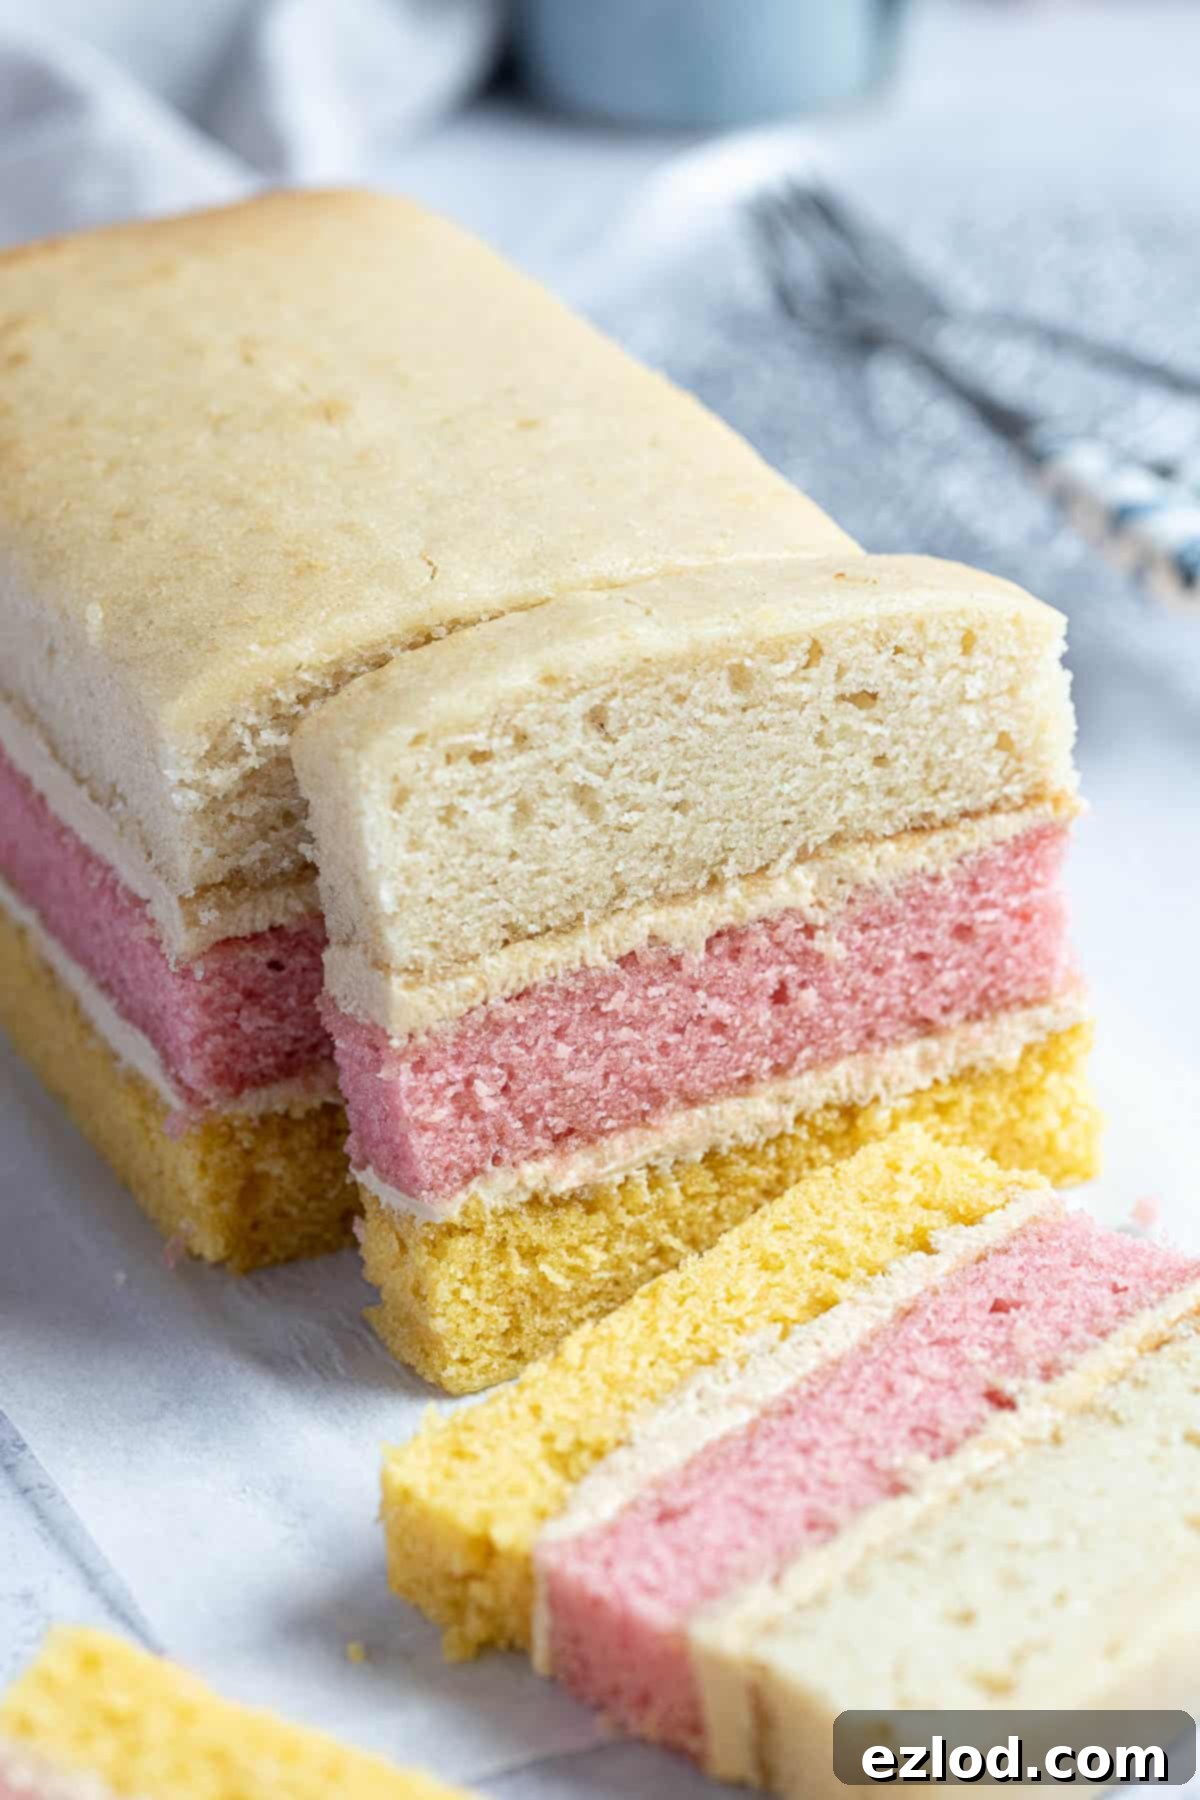
Prepare to rediscover a beloved childhood classic, now made entirely plant-based! This **Vegan Angel Cake** perfectly captures the charm and exquisite taste of the retro British favourite, proving that a dairy-free and egg-free version can be just as, if not more, delightful than the original. Imagine three beautifully distinct layers – soft pink, vibrant yellow, and pristine white vanilla sponge cake – each lovingly sandwiched together with a generous spread of creamy vanilla buttercream. It’s not just a cake; it’s a show-stopping centrepiece, an attractive crowd-pleaser that promises to impress both visually and gastronomically, and surprisingly easy to create in your own kitchen.
This isn’t merely a cake; it’s an experience. Each bite of this vegan angel cake delivers an unparalleled moistness and tenderness, practically melting in your mouth with every delicate forkful. The ethereal softness of the triple-layered vegan sponge, coupled with the rich, smooth vanilla buttercream, creates a simple yet utterly irresistible treat that will have everyone reaching for a second slice. Its vibrant colours and comforting flavour make it an ideal choice for any occasion, from a casual afternoon tea to a festive birthday celebration.
A true staple of British tea time, this cake pairs harmoniously with a steaming cup of tea or a refreshing glass of almond milk. While the recipe itself is straightforward, the key to its flawless presentation lies in the preparation of your baking tin. Unless you’re lucky enough to possess three identical loaf tins, carefully dividing and lining a single traybake tin requires a little patience and precision. Don’t rush this step, as it’s crucial for achieving those perfectly even, distinct cake layers that give angel cake its iconic look.
What Exactly Is British Angel Cake?
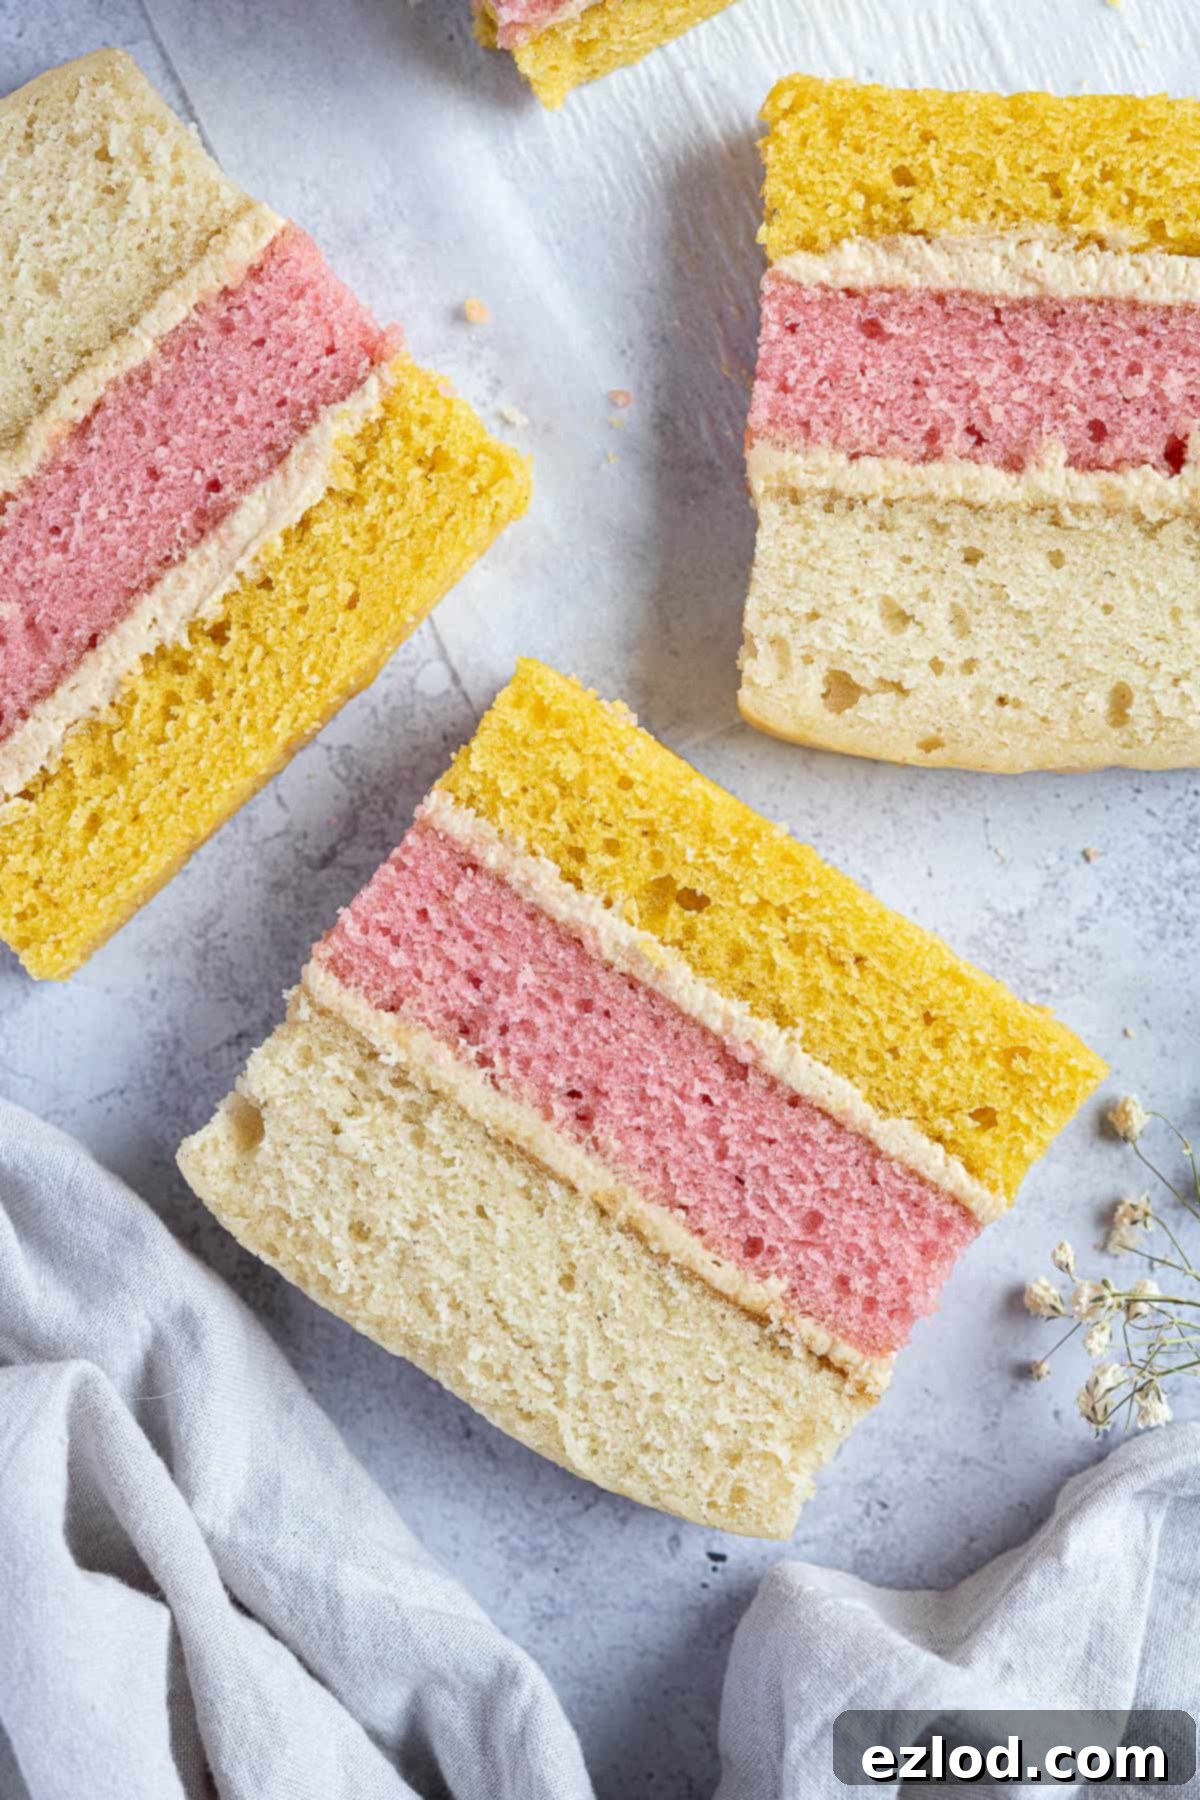
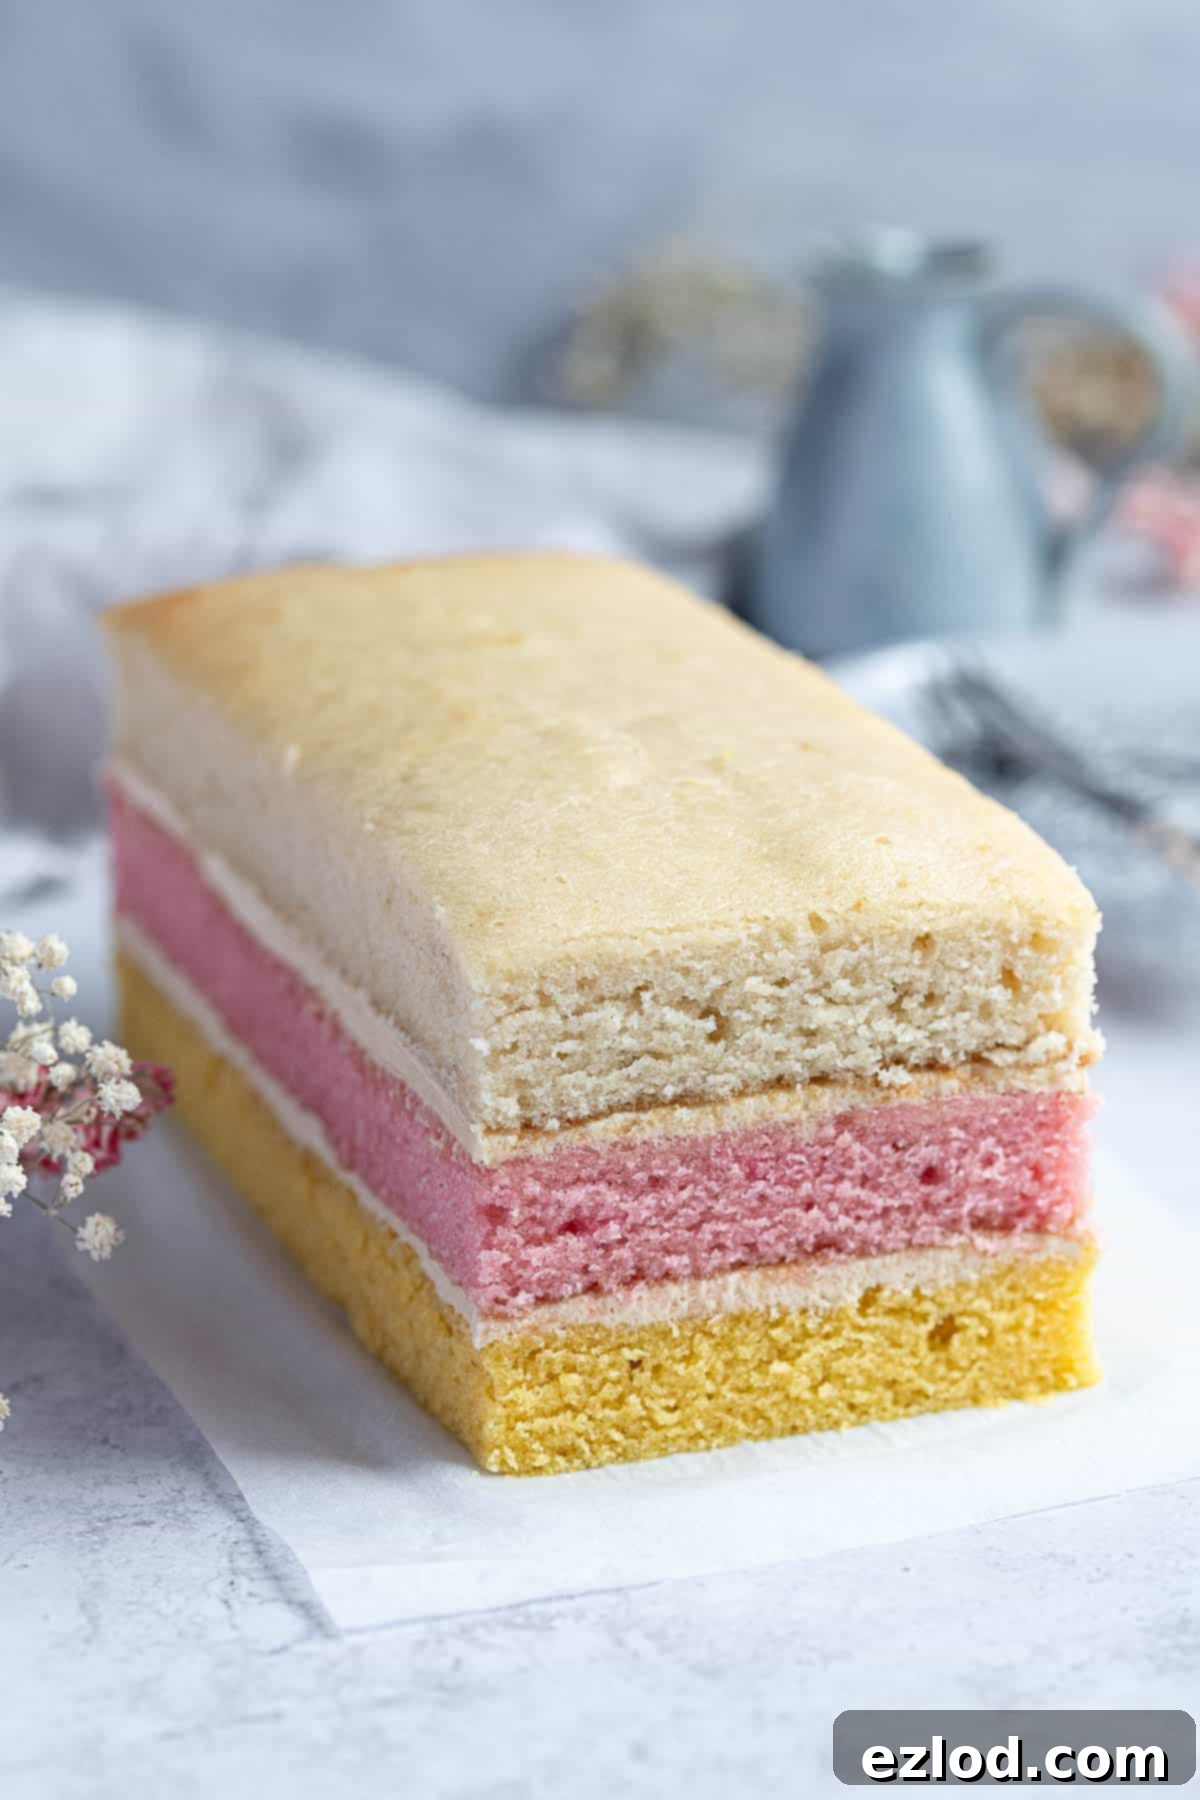
For those unfamiliar with this charming dessert, **British Angel Cake** is a beloved classic in the United Kingdom. It typically features three delicate layers of vanilla-flavoured sponge cake, each tinted a different pastel colour: pink, yellow, and white. These soft, fluffy layers are then lovingly bound together with a thin but luscious spread of vanilla buttercream, creating a visually appealing and delicious cake that has graced countless tea tables for generations. Its vibrant appearance and comforting vanilla flavour make it a timeless favourite.
While readily available in most British supermarkets, the homemade version of this cake truly elevates the experience. The fresh ingredients and personal touch make a world of difference, yielding a cake that is incomparably superior in taste and texture. Our vegan adaptation ensures that everyone can enjoy this nostalgic treat without compromise.
It’s absolutely vital to distinguish the **British Angel Cake** from its American cousin, the Angel *Food* Cake. These two desserts, despite their similar names, are fundamentally different. American Angel Food Cake is a fat-free sponge made predominantly from whisked egg whites, resulting in an incredibly light, airy, and chewy texture, traditionally baked in a specific ring tin. In contrast, the British Angel Cake, as presented in this recipe, is a traditional sponge cake. It relies on fats (vegan butter and oil in our case) and a leavening agent (baking powder and bicarbonate of soda) to achieve its moist, tender crumb, making it a much richer and denser cake than its American counterpart.
Essential Ingredients for Your Vegan Angel Cake:
Creating this delightful vegan angel cake requires a selection of plant-based ingredients that perfectly replicate the texture and flavour of the traditional version. Here’s a detailed look at what you’ll need and why each component is important:
- Plant Milk: The liquid base for our sponge. While any unsweetened plant milk will work, **soy milk is highly recommended**. Its higher protein content contributes to a more stable and well-structured crumb, mimicking the role of dairy milk in traditional baking. Almond or oat milk can also be used, but soy generally yields the best results. Ensure it’s unsweetened to control the overall sweetness of the cake.
- Non-Dairy Yogurt: This is a game-changer in vegan baking! Plant-based yogurt acts as an excellent egg replacer, providing essential moisture and a lovely tender crumb to the cake. It also adds a subtle tang that enhances the flavour profile. Unsweetened soy or coconut yogurt are ideal choices. I’ve had fantastic success with the Coconut Collaborative Natural Coconut Yogurt. While I haven’t extensively tested other substitutes, Oatly creme fraiche is a likely alternative due to its similar consistency and richness, and unsweetened applesauce might also work in a pinch, though results could vary.
- Vegan Butter and Neutral Oil: For the ultimate balance of flavour and moisture, we’re using both! Vegan block butter (like Naturli Vegan Block or Flora Plant block) provides that classic buttery taste and contributes to the cake’s structure, especially for the buttercream. It’s crucial to use a block butter rather than a spreadable tub variety for baking, as spreadable butters often contain more water and less fat, which can negatively impact texture. A neutral-flavoured oil, such as sunflower or rapeseed oil, is added to ensure the cake remains incredibly moist and tender.
- Vinegar: This ingredient plays a crucial chemical role. When combined with bicarbonate of soda (baking soda), it creates a reaction that produces carbon dioxide bubbles, which are essential for giving the cake its light, airy texture and helping it rise beautifully. Apple cider vinegar or white wine vinegar are perfect for this, but lemon juice can also be used as an effective substitute.
- Vanilla, Lemon, and Raspberry Extracts: Traditionally, angel cake layers are all vanilla-flavoured. However, for a delightful twist, this recipe suggests flavouring each layer differently. Vanilla extract for the white layer offers a classic, comforting base. A touch of lemon extract in the yellow layer adds a bright, zesty note, while raspberry extract imbues the pink layer with a delicate fruity aroma. The flavour contributions from these extracts are subtle, creating a harmonious blend rather than overpowering distinct tastes. If you prefer a pure vanilla experience, simply use vanilla extract for all three layers.
- Caster (Superfine) and Icing (Powdered) Sugar: Caster sugar is ideal for the cake batter as its fine granules dissolve quickly, ensuring a smooth, even texture. Granulated sugar can be used if caster sugar isn’t available, but ensure it’s fully dissolved. For the luscious buttercream, icing sugar (powdered sugar) is essential for achieving a smooth, lump-free consistency. I often use golden icing sugar for a slightly richer flavour.
- Plain (All-Purpose) Flour: Standard plain flour is perfect for this recipe. It’s important not to substitute it with wholemeal flour, as the increased fibre content will result in a much denser, heavier cake, losing the delicate crumb that defines angel cake. While I haven’t personally tested a gluten-free version, a good quality gluten-free flour blend designed for baking should work well, though slight adjustments in liquid might be needed.
- Cornflour (Cornstarch): A small addition of cornflour is the secret to an even lighter and more tender cake crumb. It helps to soften the protein structure of the flour. If you don’t have cornflour, you can substitute it with an equal amount of additional plain flour, though the texture might be slightly less delicate. If you happen to have cake flour, you can use 325g of cake flour in place of both the plain flour and cornflour for a beautifully fine crumb.
- Baking Powder and Bicarbonate of Soda (Baking Soda): Using both these leavening agents provides the optimal lift and texture. Baking powder reacts with liquid and heat, while bicarbonate of soda reacts with an acid (our vinegar and yogurt) to produce carbon dioxide. Do not substitute one for the other, as they work in different ways and are crucial for the cake’s rise and overall structure.
- Salt: A pinch of salt is vital in baking. It doesn’t just make the cake taste salty; it enhances and balances all the other flavours, bringing out the sweetness and complexity of the vanilla and fruit extracts.
- Gel Food Colouring: To achieve those iconic vibrant pink and yellow layers, **bake-stable gel food colouring is a must.** Many liquid food colourings found in supermarkets are not heat-stable and will fade or turn brownish during baking, leading to disappointing results. Furthermore, always check that your chosen brand is **vegan-friendly**, as some traditional red colourings (like carmine/cochineal) are derived from insects. I highly recommend Rainbow Dust ProGel colours, which are widely considered vegan and deliver excellent vibrant, stable results (specifically in pink and yellow).
How to Bake Your Perfect Vegan Angel Cake:
(Detailed measurements and step-by-step instructions are provided in the recipe card at the bottom of this page.)
The journey to creating this beautiful cake begins with meticulous tin preparation. You will need a standard 23 x 33 cm / 9 x 13 inch traybake tin. The trick here is to divide this single tin into three perfectly even sections to bake your individual coloured layers simultaneously.
To do this, take a long piece of tin foil and fold it over several times until you have a thick, sturdy strip roughly the same width as your tin and slightly taller than its sides. Repeat this process to create a second identical strip. These two thick foil strips will act as your dividers.
Carefully place these strips crosswise in your traybake tin, ensuring they create three equally sized compartments. Now, take a much longer piece of tin foil (approximately 75 x 23 cm) and use it to line the entire tin, allowing it to drape over the top of your two foil dividers. This long piece of foil will not only line the tin but also secure your dividers firmly in place. Brush this foil lining generously with melted vegan butter, then lay a corresponding long strip of baking parchment (also about 75 x 23 cm) over the top, folding it neatly over the foil dividers. If you have the convenient 2-in-1 foil and parchment product, this is an excellent time to use it!
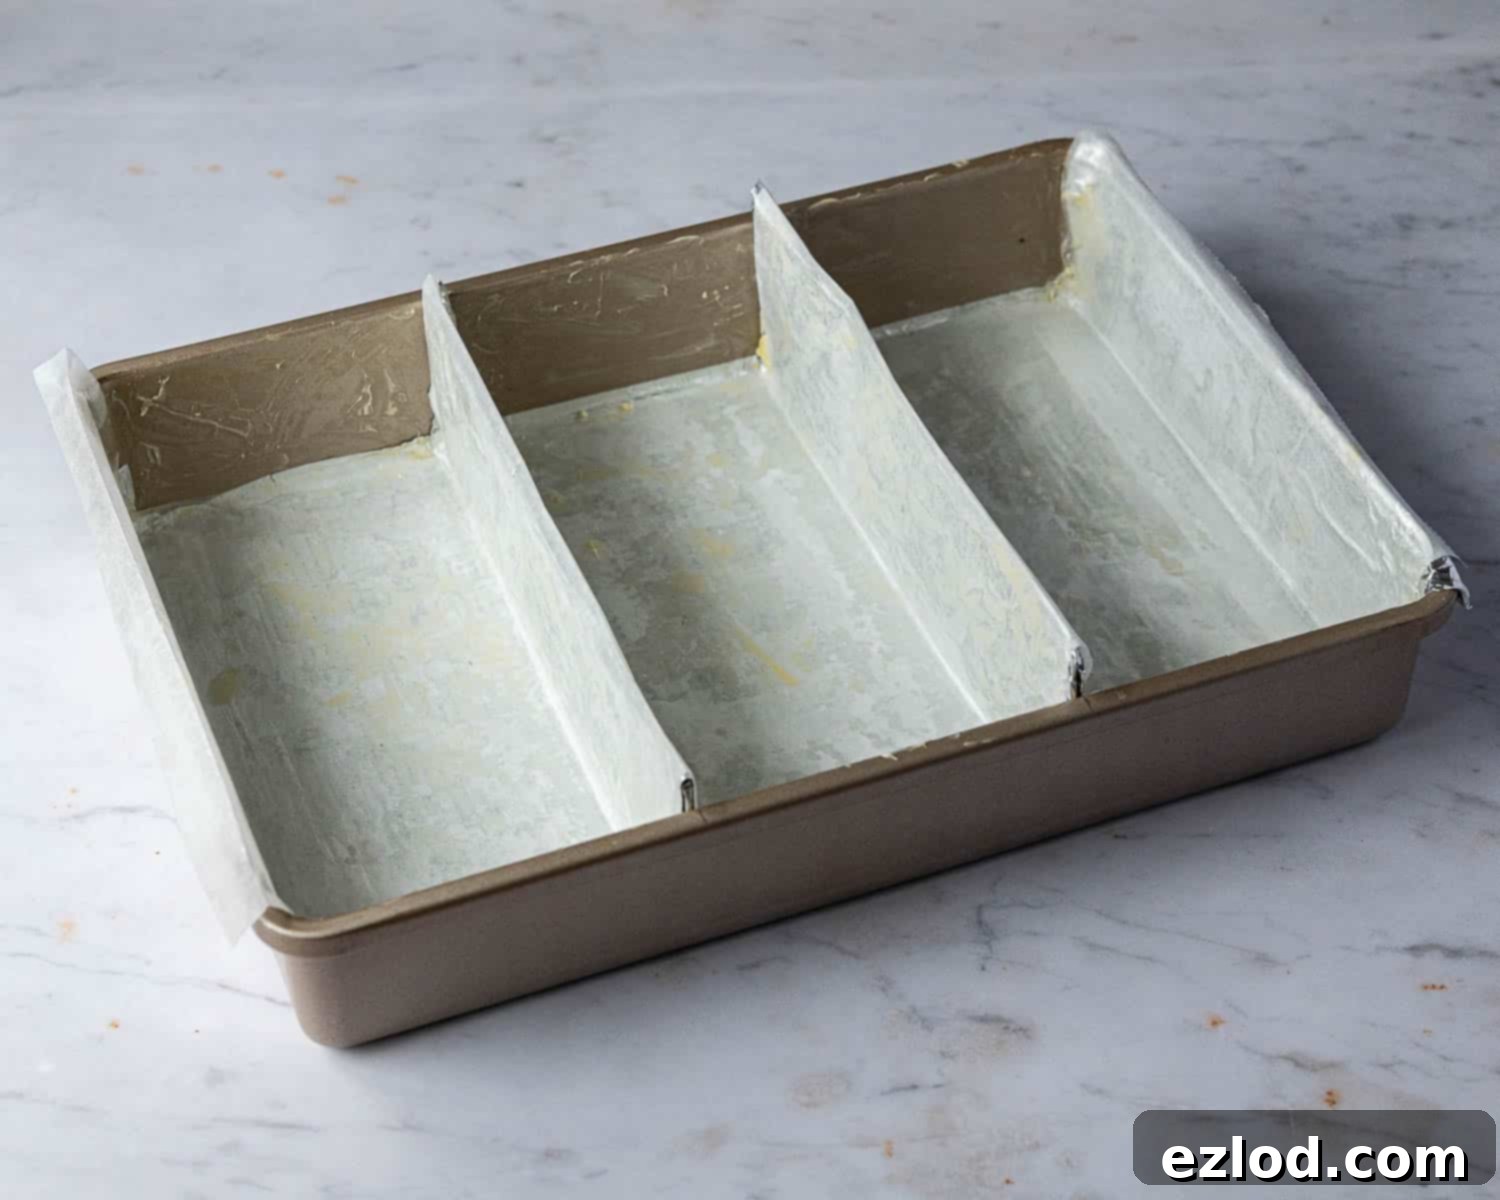
Now, let’s prepare the cake batter. Begin by weighing your empty mixing bowl and noting its precise weight – this small step is crucial for even layering later. Into this bowl, sift all your dry ingredients: the plain flour, cornflour, baking powder, bicarbonate of soda, and salt. Sifting helps to aerate the flour and prevent lumps. Once sifted, whisk in the caster sugar until everything is thoroughly combined.
In a separate large jug, whisk together all the wet ingredients: the plant milk, non-dairy yogurt, melted vegan butter, neutral oil, and vinegar. Ensure this mixture is smooth and well emulsified before proceeding.
Pour the combined wet ingredients into the dry mixture. Using a balloon whisk, gently stir until just combined and no dry lumps of flour remain. Be careful not to overmix, as this can lead to a tough cake.
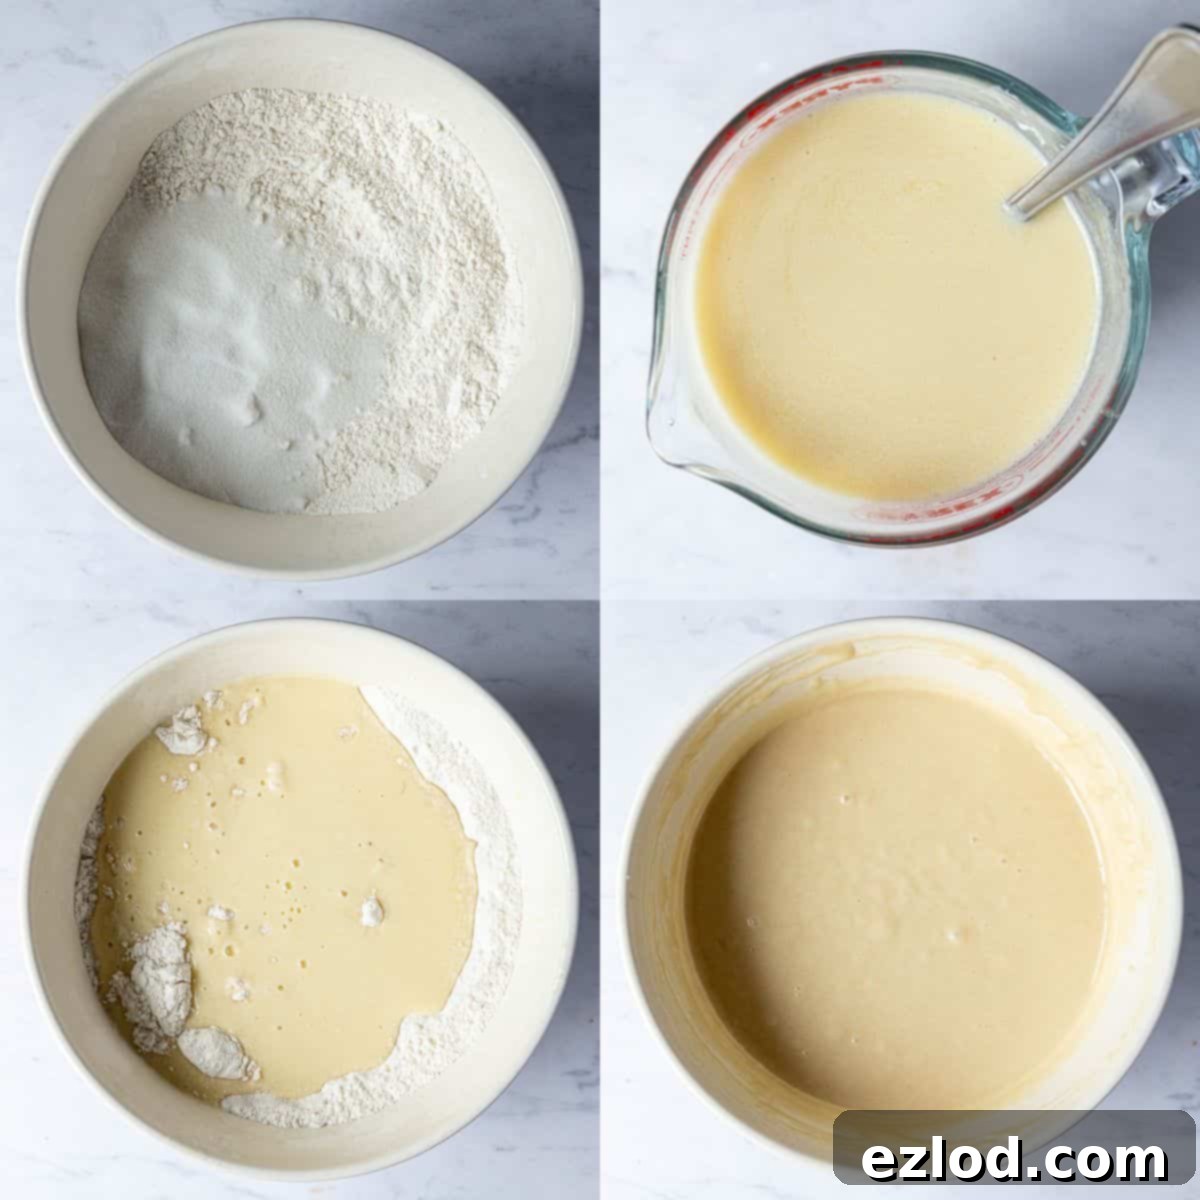
Here’s where your initial bowl weighing comes in handy. Weigh the bowl again, now with the batter inside. Subtract the weight of the empty bowl to find the exact total weight of your cake batter. Divide this number by three to determine the precise amount of batter needed for each coloured layer, ensuring uniformity.
Carefully divide the batter into three separate bowls, weighing out the calculated amount into each. Into one bowl, stir a teaspoon of vanilla extract. In the second, mix a teaspoon of lemon extract (or vanilla) and a single drop of yellow gel food colouring. For the third bowl, stir in a teaspoon of raspberry extract (or vanilla) and a drop of pink gel food colouring. Remember, gel colours are highly concentrated, so a tiny drop is often all you need!
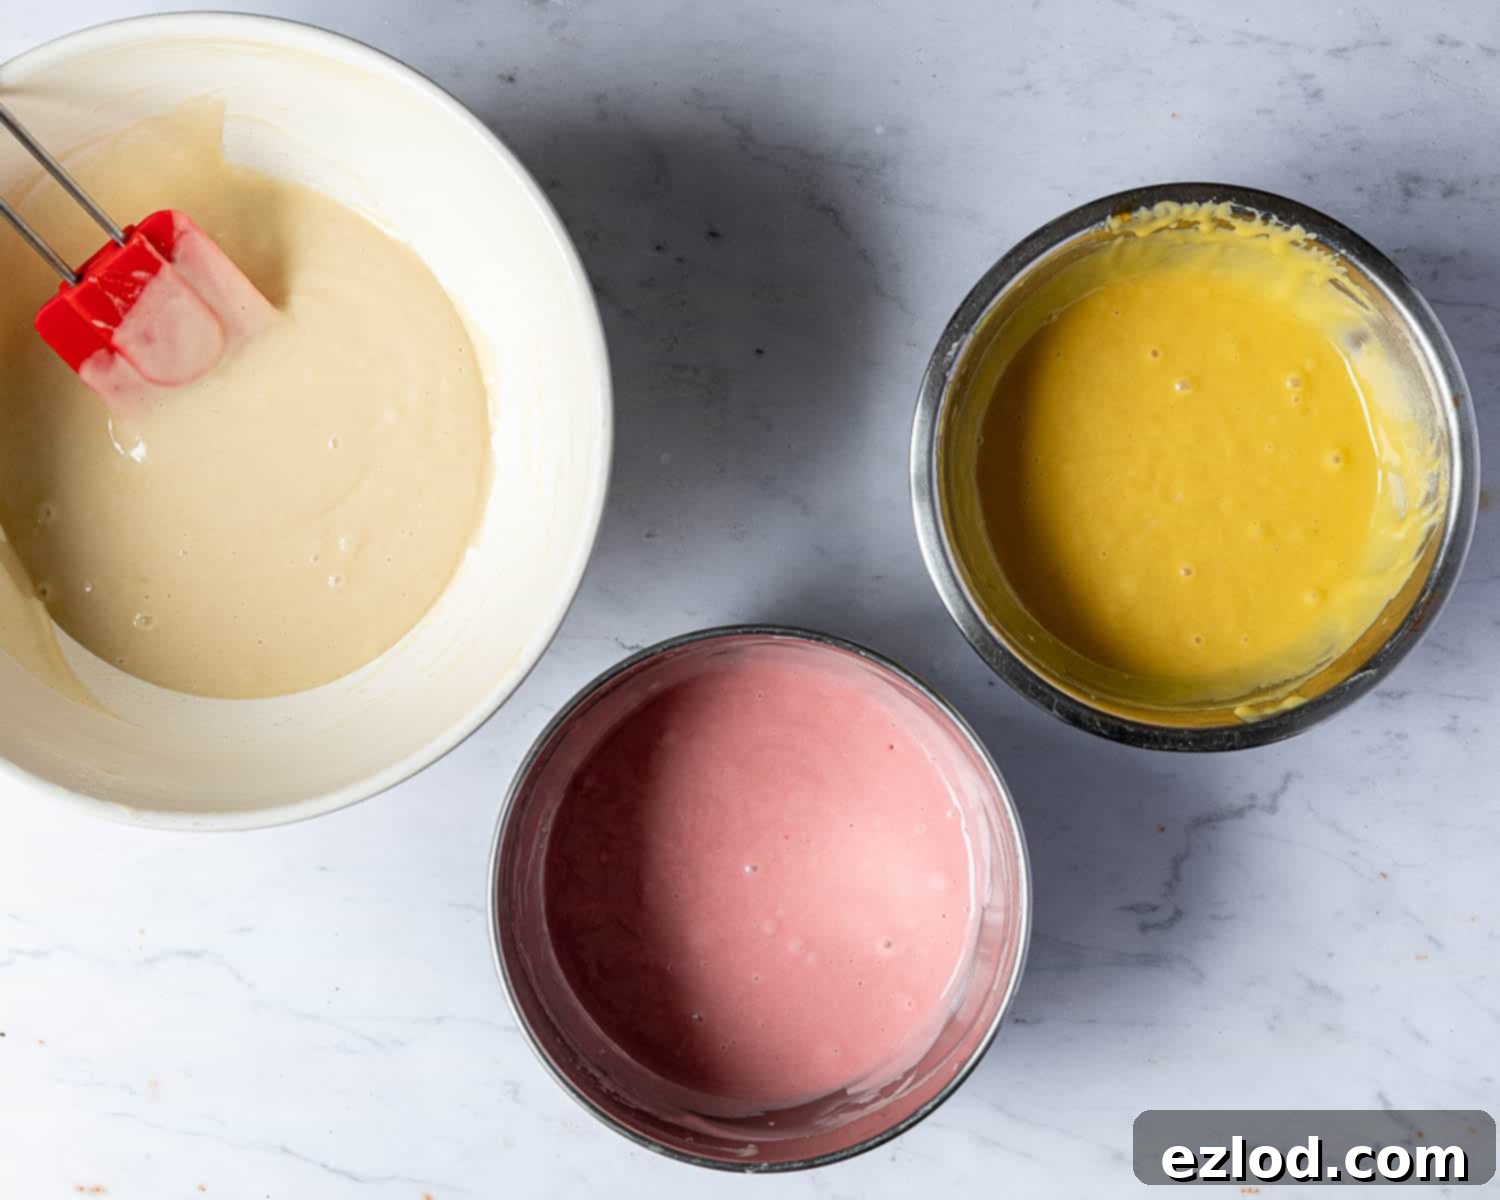
Pour each coloured batter into its corresponding section in your meticulously prepared tin and gently spread it level using a spatula. Bake for approximately 20-25 minutes, or until a wooden skewer inserted into the centre of each cake comes out clean. Once baked, allow the cakes to cool in the tin for about 15 minutes before carefully inverting them onto a wire rack. Let them cool completely to room temperature before assembling.
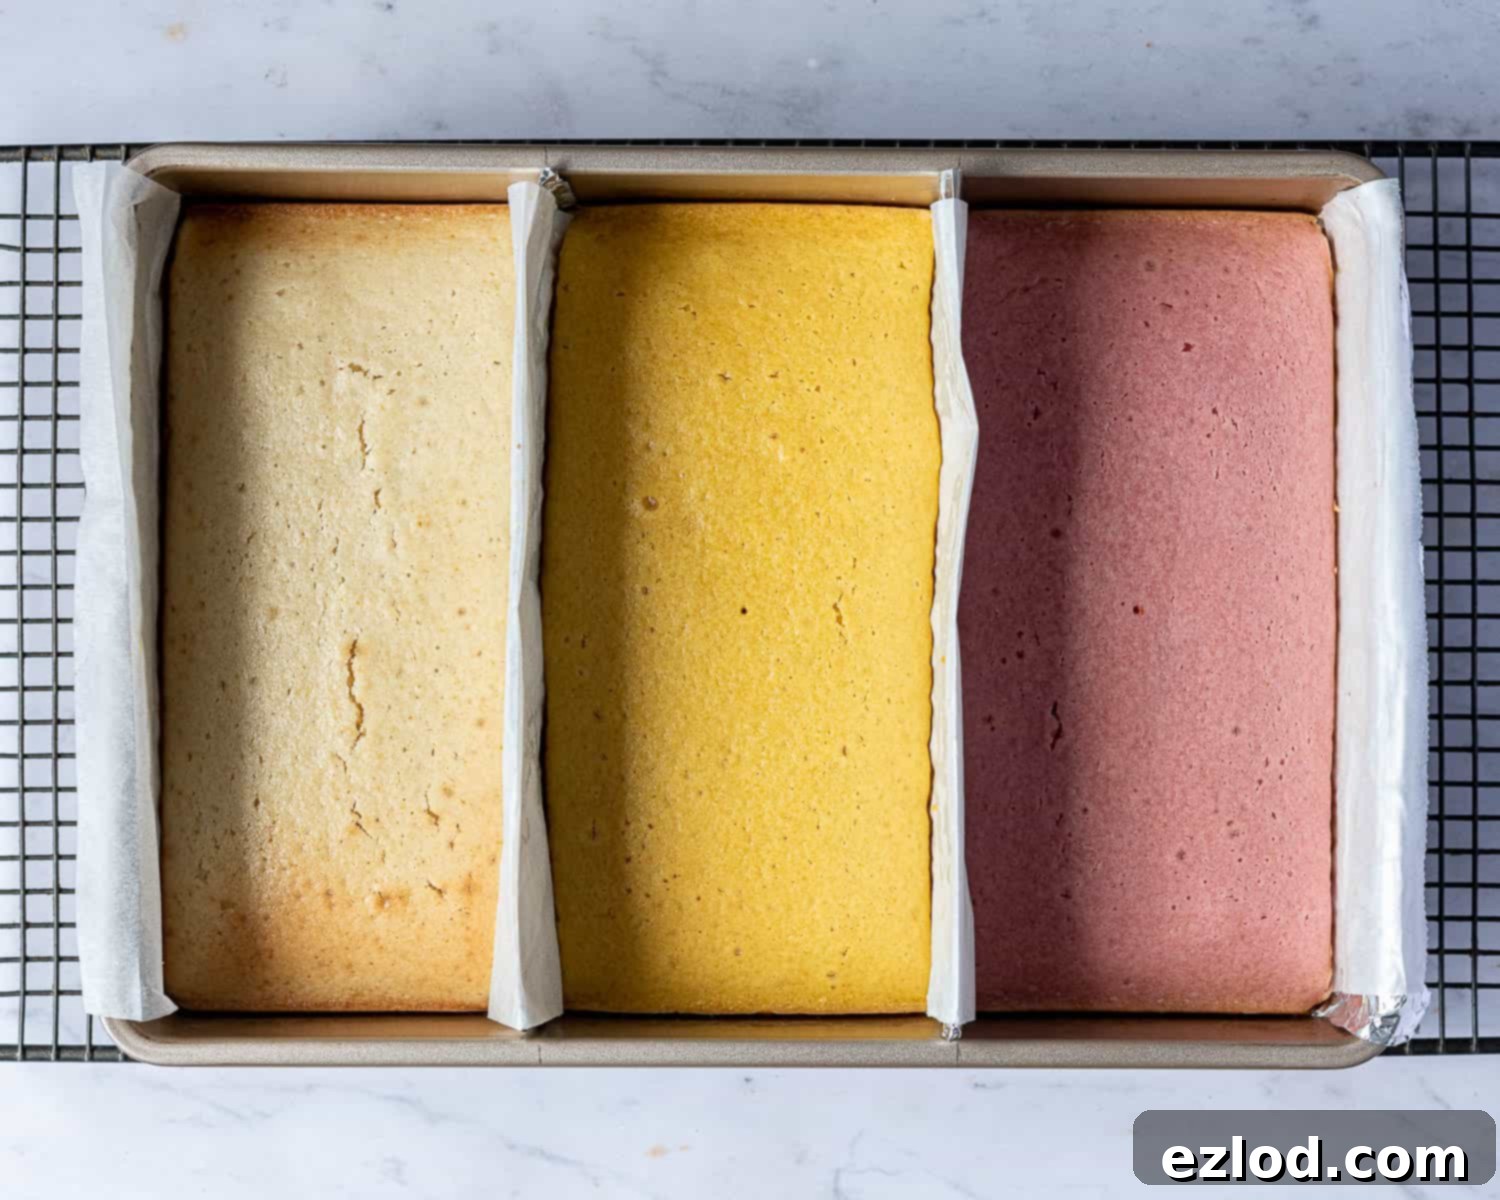
Once the cakes are thoroughly cold, use a serrated knife to gently level the tops of the pink and yellow layers to create flat surfaces (the white layer usually bakes flat enough). Then, carefully trim the sides of all three layers so they are all exactly the same size and shape. This precision ensures a neat, professional-looking assembled cake.
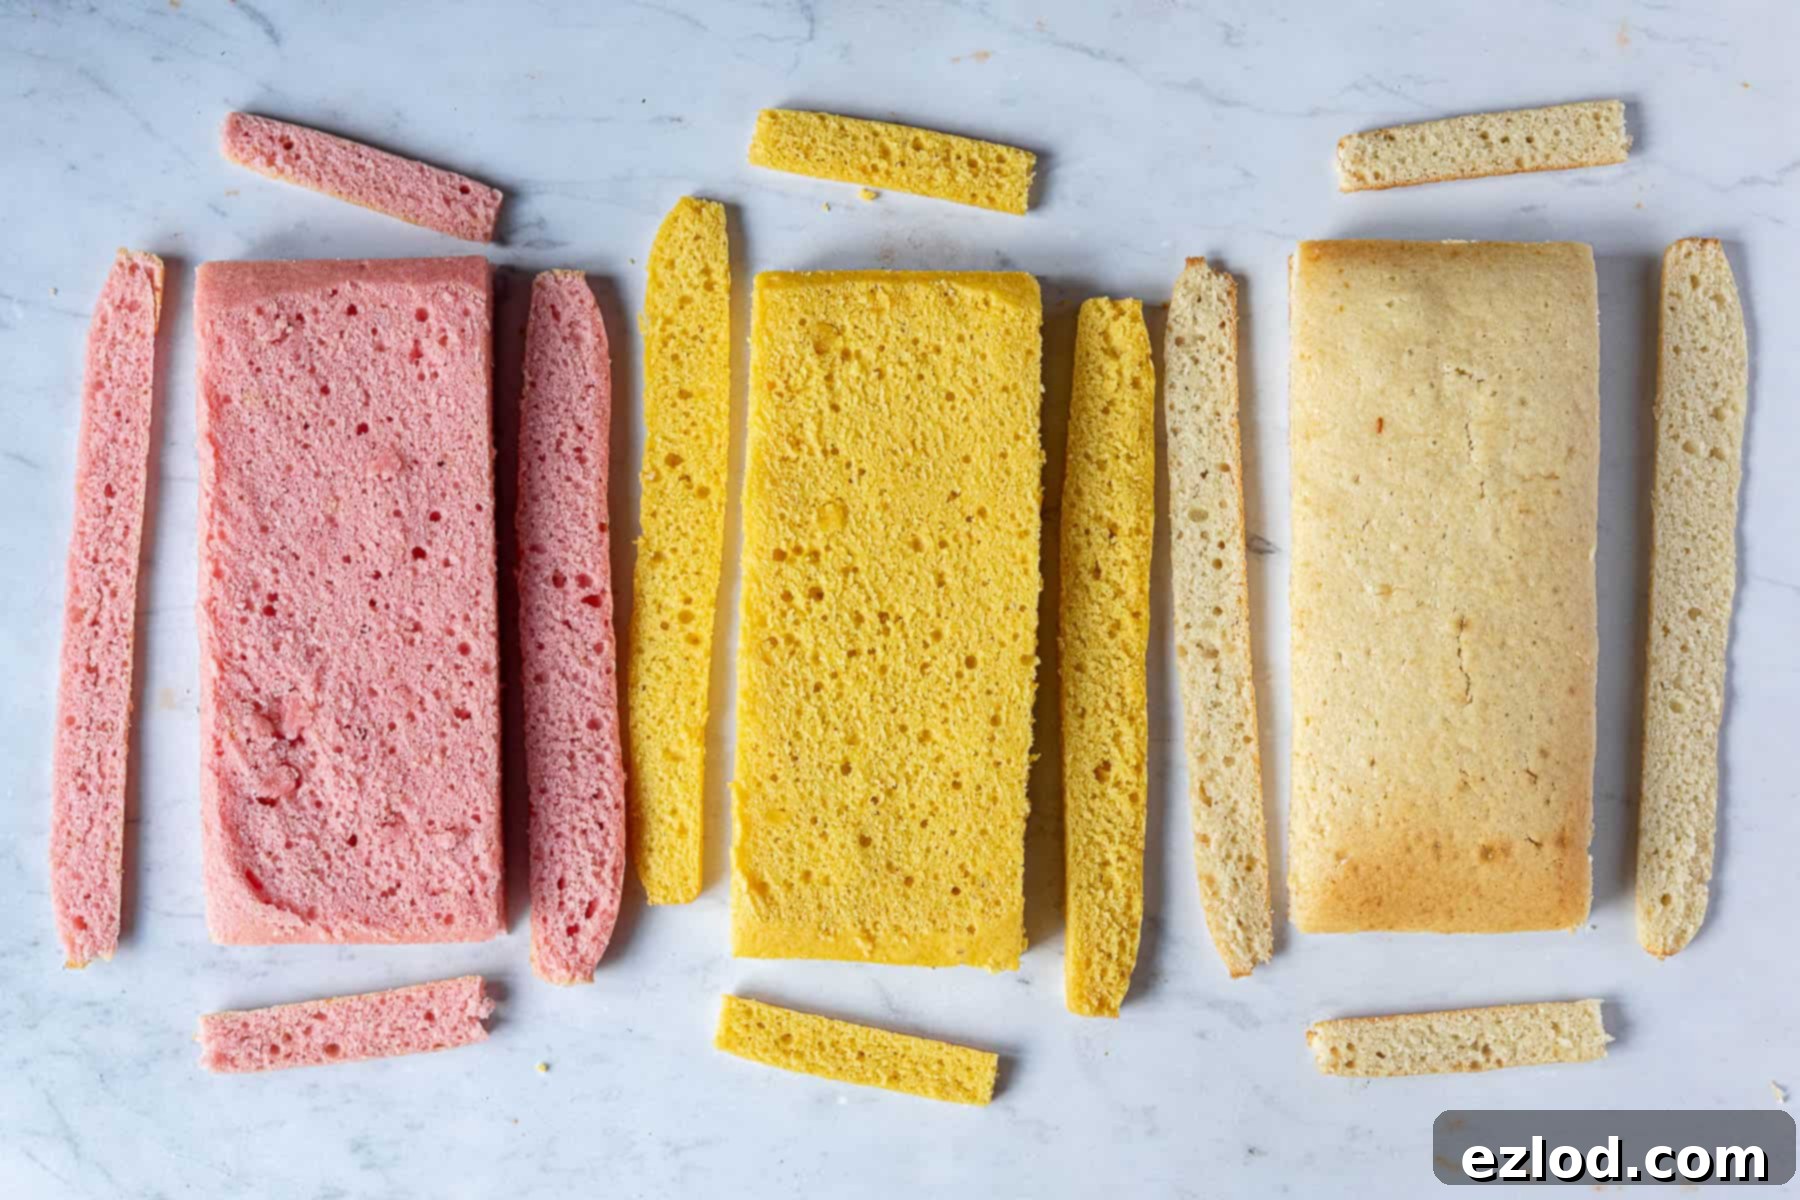
Finally, assemble your masterpiece! Spread half of your freshly prepared vanilla buttercream evenly over the yellow cake layer, then carefully place the pink layer on top. Spread the remaining buttercream over the pink layer, and crown it with the pristine white cake layer. Your exquisite Vegan Angel Cake is now ready to be enjoyed! Slice into its colourful layers and savour the nostalgic flavours.
Top Tips for Vegan Angel Cake Perfection:
- Embrace Metric Measurements: For consistently perfect baking results, always use a digital kitchen scale and metric measurements rather than volumetric cup conversions. Cups can be wildly inaccurate, leading to inconsistent batters and unpredictable outcomes. Using a scale is not only more precise but often quicker and less messy too!
- Precision Tin Lining: Dedicate ample time to accurately lining and dividing your traybake tin into three equal sections. Precision here will save you effort later by minimizing the need for extensive trimming. If you happen to own three separate loaf tins, each approximately 11.5 x 21.5 cm (4.5 x 8.5 inches), you can bake each coloured batter in its own tin. However, it’s crucial to note that the batter should not sit for too long before baking, so only opt for separate tins if you can manage to fill and bake them immediately.
- Weigh Your Batter for Even Layers: To guarantee uniform cake layers, weigh your batter accurately when dividing it. First, weigh your empty mixing bowl and make a note of this. After preparing the batter, weigh the bowl again (with the batter). Subtract the empty bowl’s weight from the total to get the net weight of the batter. Divide this figure by three to get the exact weight for each coloured portion, ensuring perfectly balanced layers.
- Avoid Overmixing: Over-beating the cake batter can activate too much gluten, resulting in a tough, dense cake rather than a light, tender one. Mix the wet and dry ingredients just until no dry streaks or lumps remain. A hand-held balloon whisk is ideal for this, allowing you to incorporate ingredients gently but thoroughly.
- Thorough Initial Mixing: Because overmixing the final batter is detrimental, ensure your wet ingredients and dry ingredients are exceptionally well combined in their respective bowls *before* you bring them together. This way, less mixing is required once they are combined.
- Cool Completely: It is imperative that your cake layers are completely cold before you attempt to trim, level, or assemble them. Warm or even slightly cool cakes are much more fragile and prone to crumbling, tearing, or smudging the buttercream. Patience here is key for a beautifully finished cake.
- Storage: Your Vegan Angel Cake will stay wonderfully fresh and moist when stored in an airtight container at room temperature for up to five days.
Can I Freeze Vegan Angel Cake?:
Absolutely, this **Vegan Angel Cake freezes beautifully**, making it a fantastic make-ahead option!
You have a couple of choices for freezing: you can either freeze individual leftover slices, or if you plan to make the entire cake in advance, it’s best to freeze the individual cake layers *before* adding the buttercream. Each cooled cake layer should be wrapped very well in a double layer of cling film (plastic wrap) and then a layer of aluminium foil to prevent freezer burn. Store them flat in the freezer.
When you’re ready to serve, allow the frozen layers to partially defrost at room temperature. Once they are soft enough to handle but still slightly firm, prepare a fresh batch of vanilla buttercream and assemble your cake as per the instructions. This method ensures maximum freshness and a perfect texture when serving.
More Vegan Versions of Classic British Cakes to Try:
If you loved this vegan take on Angel Cake, be sure to explore more plant-based adaptations of cherished British classics:
- Vegan Battenberg Cake
- Vegan Jam and Coconut Sponge
- Vegan Sticky Toffee Pudding
- Vegan Earl Grey Tea Loaf
- Vegan Parkin
- Vegan Pineapple Upside-Down Cake
- Vegan Simnel Cake
- Vegan Lemon Drizzle Cake
- Vegan Victoria Sponge Cake
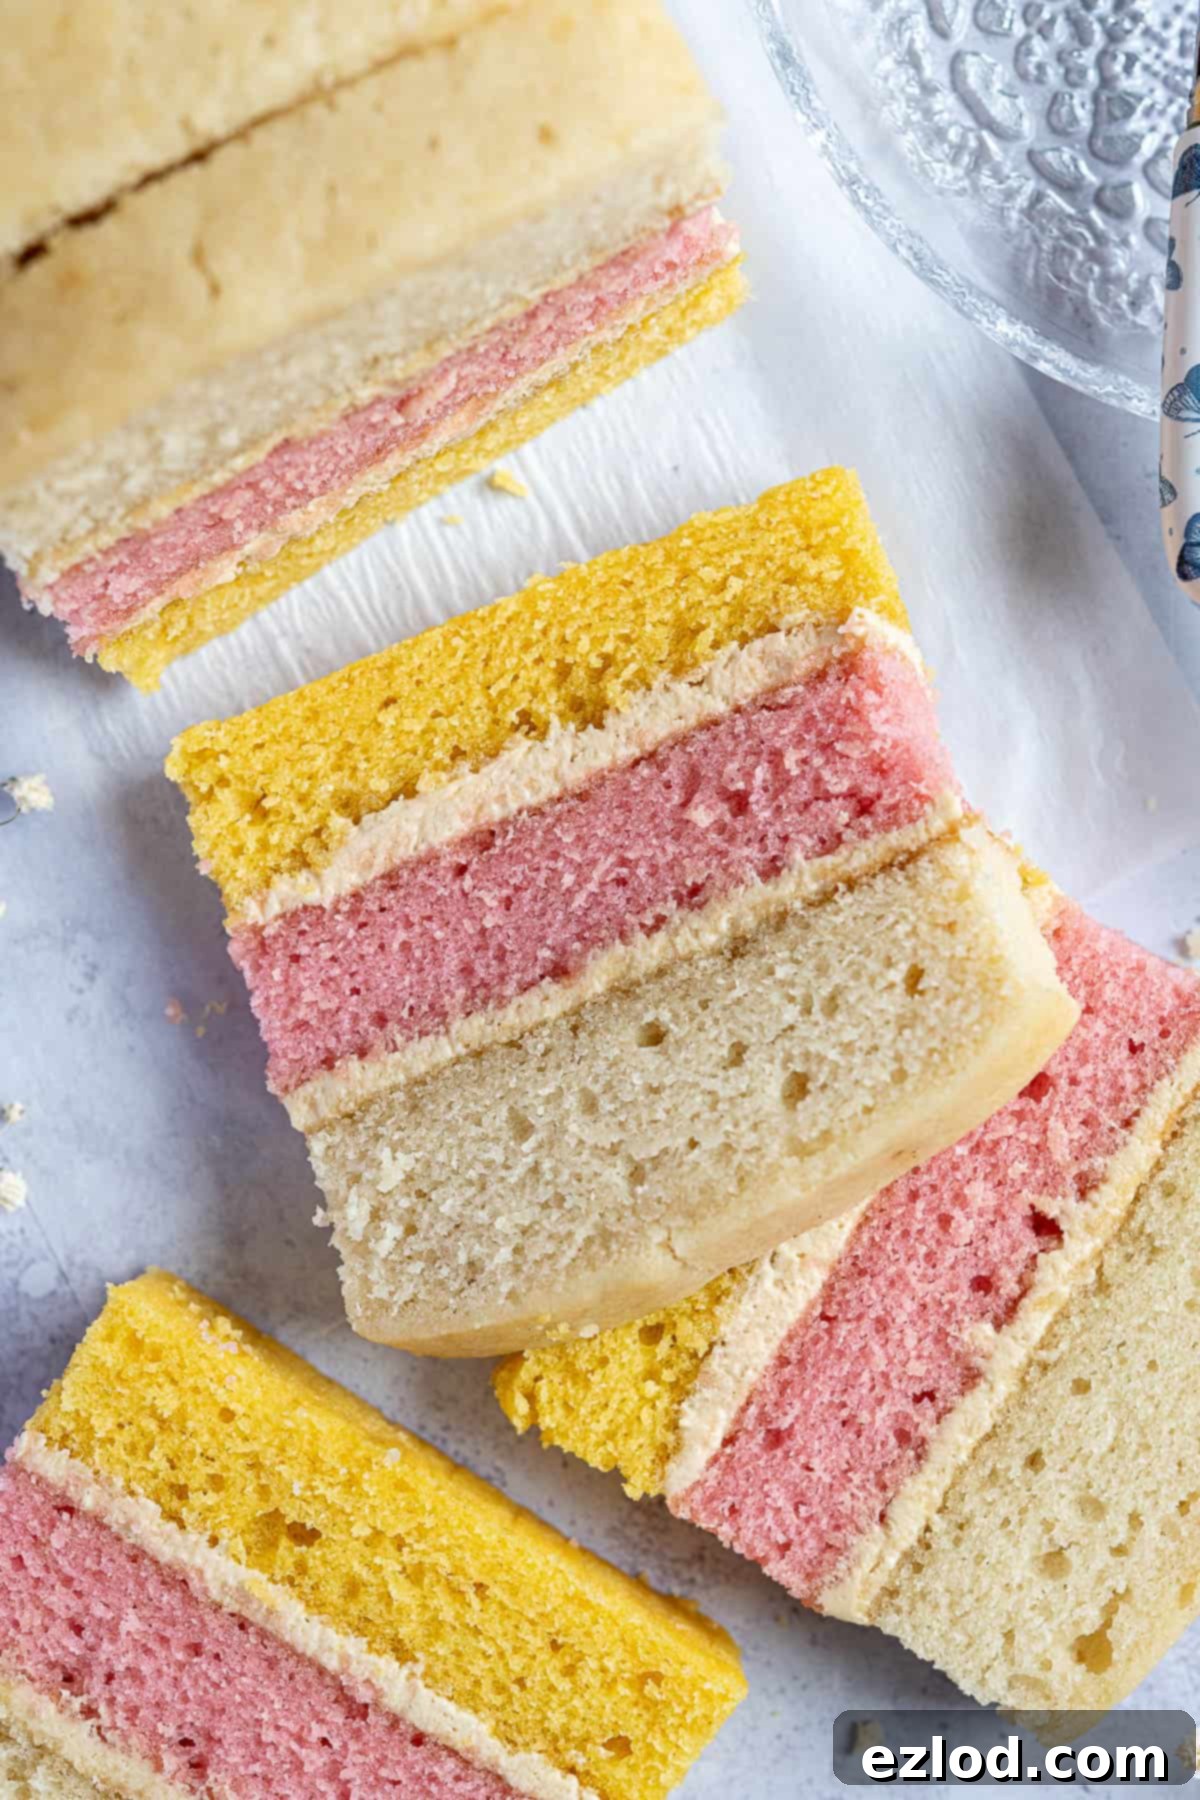
We hope you enjoyed recreating this nostalgic dessert! If you tried this delightful Vegan Angel Cake recipe, we’d love to hear from you. Please rate the recipe, leave a comment below, or tag @domestic_gothess on Instagram and use the hashtag #domesticgothess to share your creations! Your feedback means the world to us.
All images and content on Domestic Gothess are copyright protected. If you wish to share this recipe, please do so by utilizing the provided share buttons. We kindly request that you do not screenshot or post the recipe or content in full. Instead, please include a direct link to this post for the complete recipe details. Thank you for your understanding and support.

Vegan Angel Cake
Ingredients
For the Cake:
- 310 g (2 ½ cups) plain (all-purpose) flour
- 15 g (1 ½ packed Tbsp) cornflour (cornstarch)
- 1 ½ tsp baking powder
- ¼ tsp bicarbonate of soda (baking soda)
- ¼ tsp salt
- 240 g (1 cup + 3 Tbsp) caster (superfine) or granulated sugar
- 240 ml (1 cup) unsweetened non-dairy milk (soy is best)
- 80 g (⅓ cup) unsweetened non-dairy yogurt (I use the Coconut Collaborative)
- 60 ml (¼ cup) neutral oil (I use sunflower)
- 140 g (5 oz) vegan block butter (I use Naturli Vegan Block) melted
- 2 tsp cider or white wine vinegar
- 1 tsp each vanilla, lemon and raspberry extracts (or 3 tsp of vanilla extract)
- pink and yellow gel food colouring (see post above for recommendations)
For the Buttercream:
- 60 g (2 oz) vegan block butter (NOT the spreadable kind. I use Naturli Vegan Block) slightly softened
- 120 g (1 cup) icing (powdered) sugar sifted
- ½ tsp vanilla extract
Instructions
-
Preheat your oven to 180°C/160°C fan/350°F/gas mark 4. Begin by preparing your tin. You will need a 23 x 33 cm / 9 x 13 in traybake tin which needs to be divided into three equal sections.
-
Fold a piece of tin foil over several times to create a thick, sturdy strip. This strip should be the same width as your tin and either the same height or slightly higher. Repeat this process to create a second identical thick strip of tin foil.
-
Place these two foil strips crosswise into the tin, carefully dividing it into three even sections. Next, take a long piece of tin foil (approximately 75 x 23 cm) and use it to line the entire tin, ensuring it goes over the top of the two foil strips to hold them securely in place.
-
Brush the foil lining generously with melted vegan butter. Then, place a long strip of baking parchment (about 75 x 23 cm) over the top, carefully folding it over the tin foil strips. If you have a 2-in-1 foil and parchment product, use that here. Aim to line the tin as neatly and evenly as possible to minimize trimming of the cakes later.
-
To prepare the cake batter, start by weighing the empty bowl you’ll be using for mixing and make a note of its weight.
-
Sift the plain flour, cornflour, baking powder, bicarbonate of soda, and salt into the pre-weighed bowl. Whisk in the caster (superfine) or granulated sugar until all dry ingredients are well combined.
-
In a separate large jug, whisk together the non-dairy milk, non-dairy yogurt, melted vegan butter, neutral oil, and vinegar until smooth.
-
Pour the wet ingredients mixture into the dry ingredients. Using a balloon whisk, stir gently until no dry lumps of flour remain. Be careful not to overmix the batter.
-
Weigh the bowl containing the batter again. Subtract the initial weight of the empty bowl from this new weight to find the total batter weight. Divide this number by three to determine the exact amount of batter for each layer.
-
Divide the batter evenly into three separate bowls, weighing out the calculated amount into each.
-
Into the first bowl, stir in a teaspoon of vanilla extract for the white layer. Into the second, stir a teaspoon of lemon extract (or vanilla) and a single drop of yellow gel food colouring. For the third bowl, mix in a teaspoon of raspberry extract (or vanilla) and a drop of pink gel food colouring. Remember, gel food colouring is very concentrated, so a tiny amount is usually enough!
-
Pour each colour of batter into a separate section of your prepared divided tin and gently spread them level with a spatula.
-
Bake for 20-25 minutes, or until a skewer inserted into the centre of each cake comes out clean. Allow the cakes to cool in the tin for 15 minutes, then carefully turn them out onto a wire rack to cool completely.
-
Once the cakes are thoroughly cold, level the tops of the pink and yellow layers with a serrated knife (the white layer usually bakes flat enough). Then, trim the sides of all three cakes so they are exactly the same size and shape, ensuring a neat assembly.
-
To make the buttercream, in a clean bowl, whisk together the slightly softened vegan block butter, sifted icing (powdered) sugar, and vanilla extract until the mixture is light, fluffy, and smooth.
-
To assemble, spread half of the prepared buttercream evenly over the yellow cake layer. Carefully place the pink layer on top. Spread the remaining buttercream over the pink layer, and finally, top with the white cake layer. Store your beautiful Vegan Angel Cake in an airtight container at room temperature. Enjoy!
Notes
- As with all of my baking recipes, I strongly recommend using metric measurements with a digital scale rather than cup conversions. Cups are a wildly inaccurate measuring system, and you will achieve far better, more consistent results using a scale, not to mention that it is also easier and less messy than cups!
- Take your time when lining your tin to ensure it is exactly divided into thirds. If you happen to have three loaf tins measuring approximately 11.5 x 21.5 cm / 4.5 x 8.5 inches, you can bake each colour in a separate tin instead. (The batter cannot be left to sit before baking, so only do this if you have three loaf tins readily available to go into the oven simultaneously).
- The cake layers must be completely cold before you attempt to trim, level, or assemble them; otherwise, they may crumble.
- Refer to the post above for additional expert tips, detailed explanations, ingredient specifics, and helpful step-by-step photos to guide you through the process.
