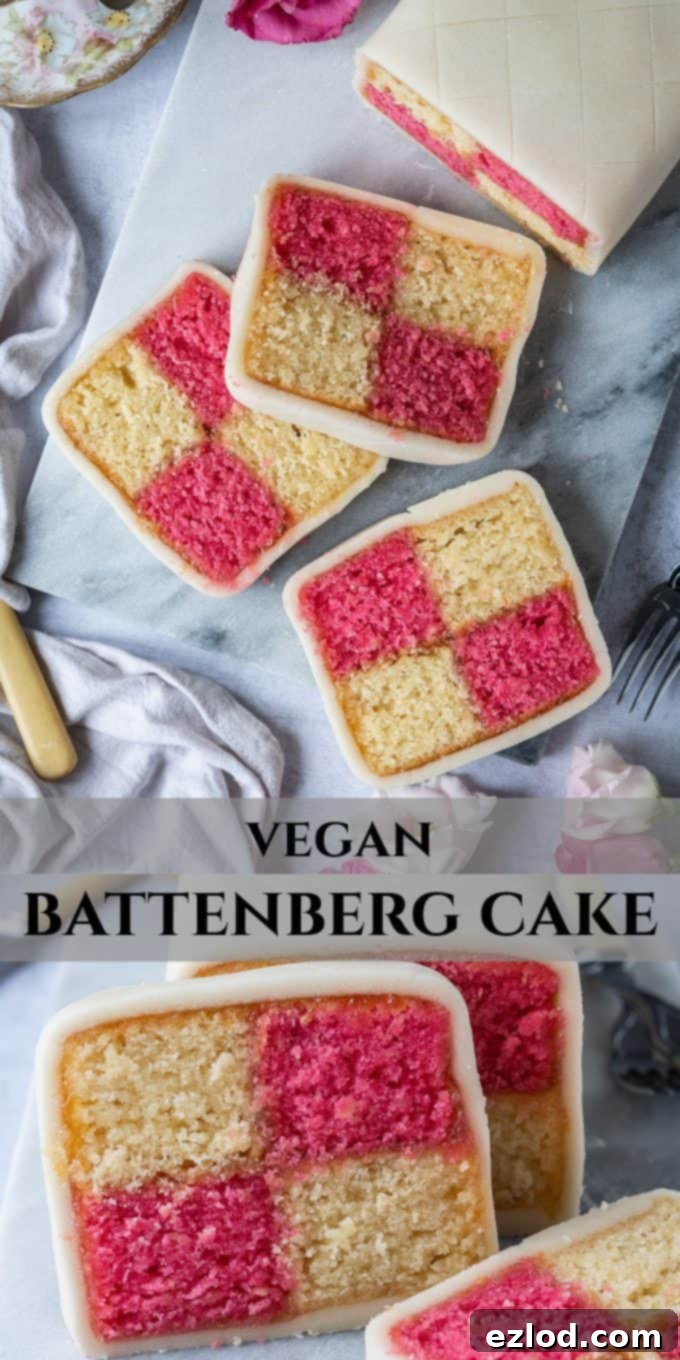
The Ultimate Vegan Battenberg Cake Recipe: A Dairy-Free & Eggless British Classic
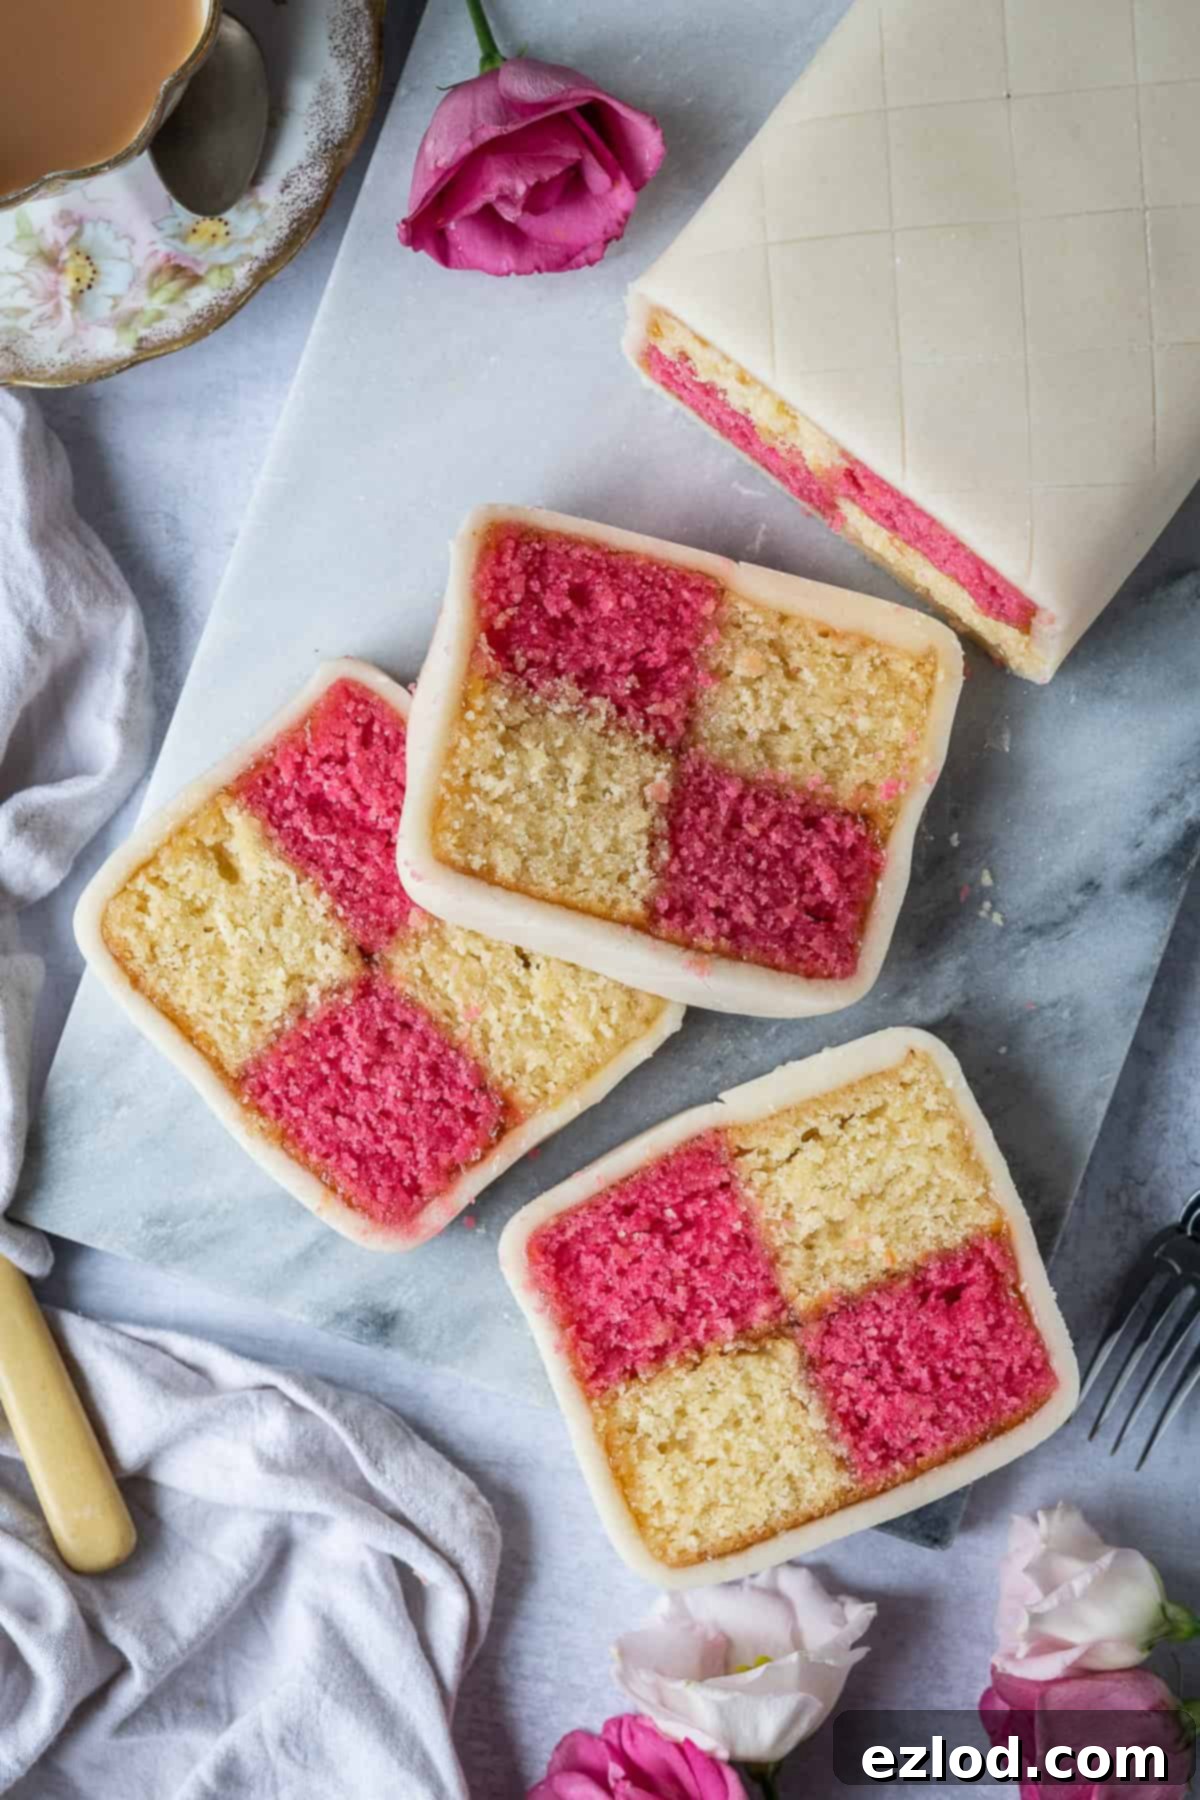
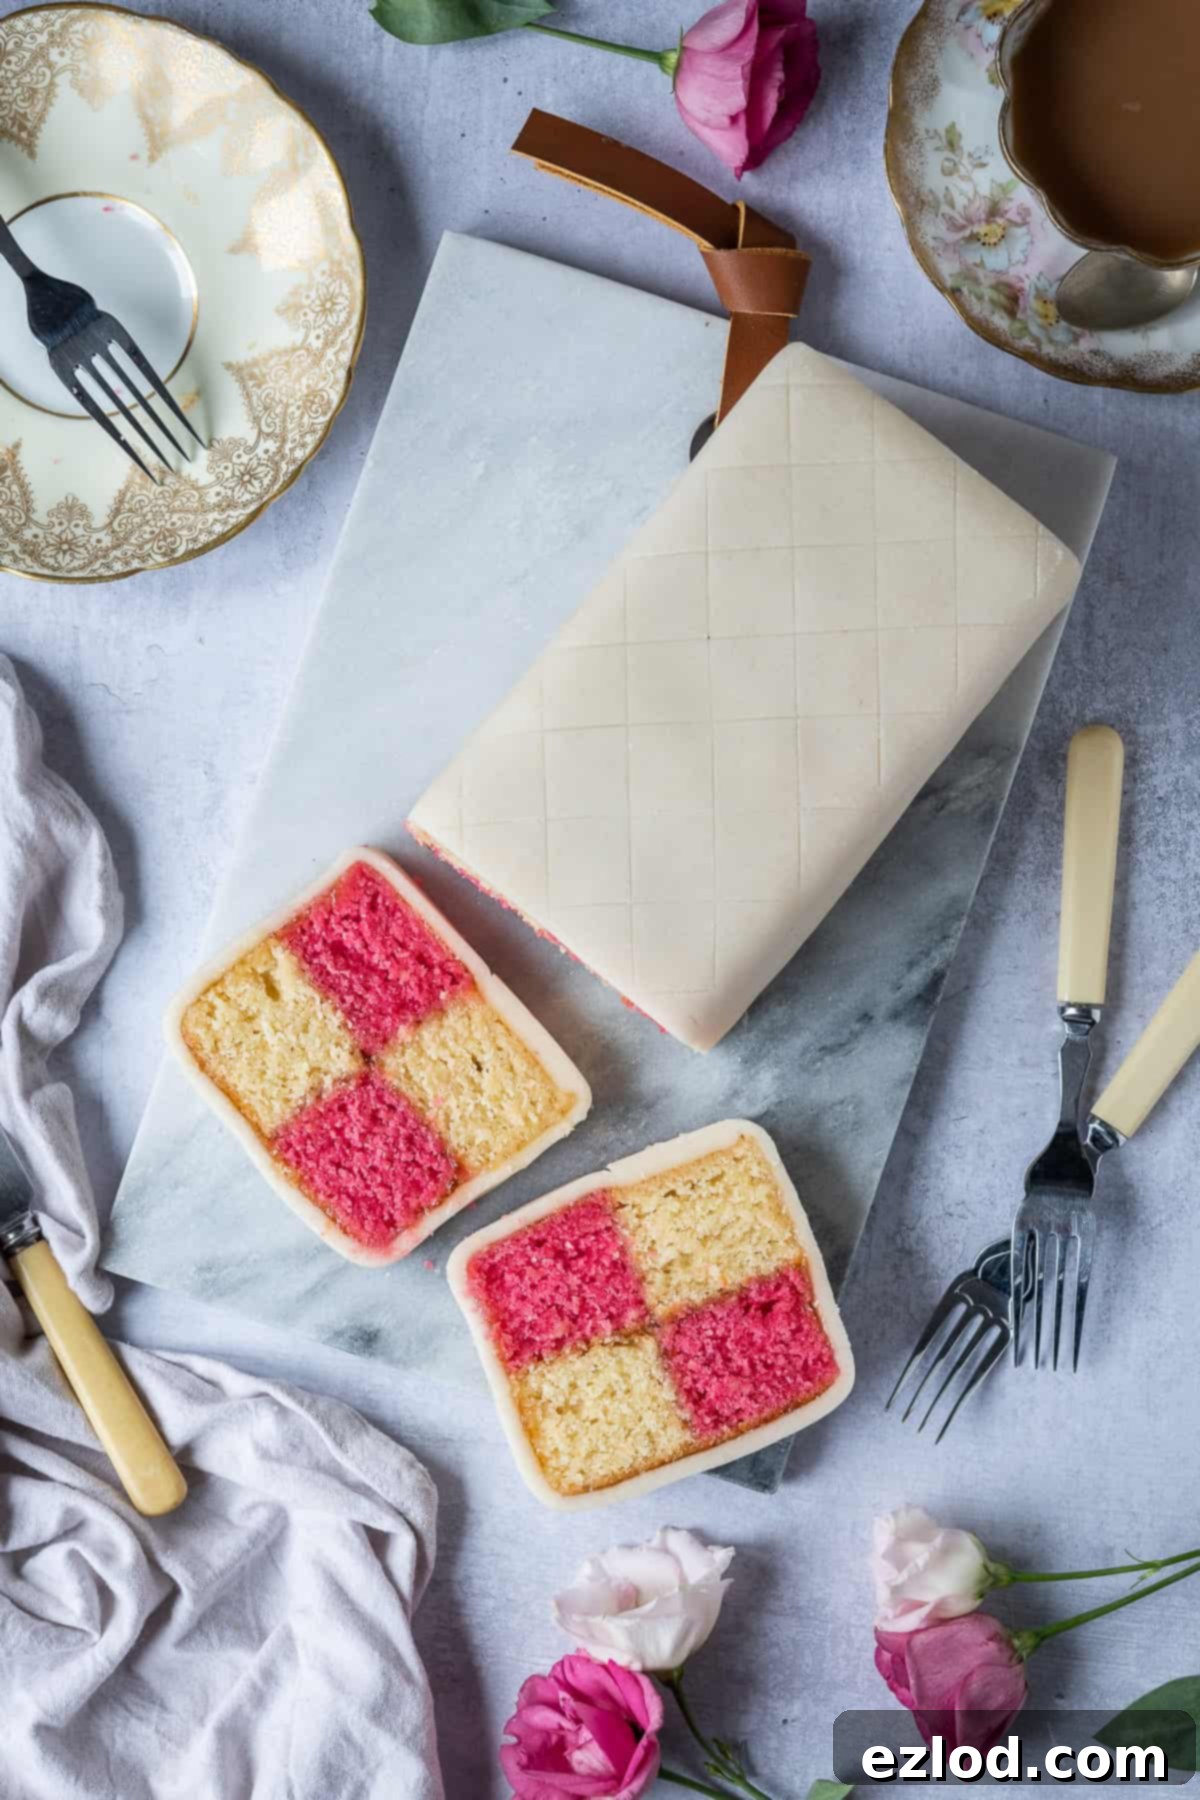
Prepare to be enchanted by this exquisite vegan Battenberg cake, a plant-based rendition of a beloved British classic that truly captures the magic of the original. This recipe is a triumph for almond enthusiasts and anyone seeking a delightful, dairy-free, and eggless dessert. Imagine a light, moist almond sponge cake, meticulously arranged into an iconic chequered pattern of pink and yellow, then lovingly enrobed in a layer of sweet, pliable marzipan. While its intricate appearance might suggest complexity, you’ll be pleasantly surprised at how accessible it is to create in your own kitchen, especially with our detailed step-by-step guidance and accompanying photos.
Why You’ll Adore This Vegan Battenberg Cake
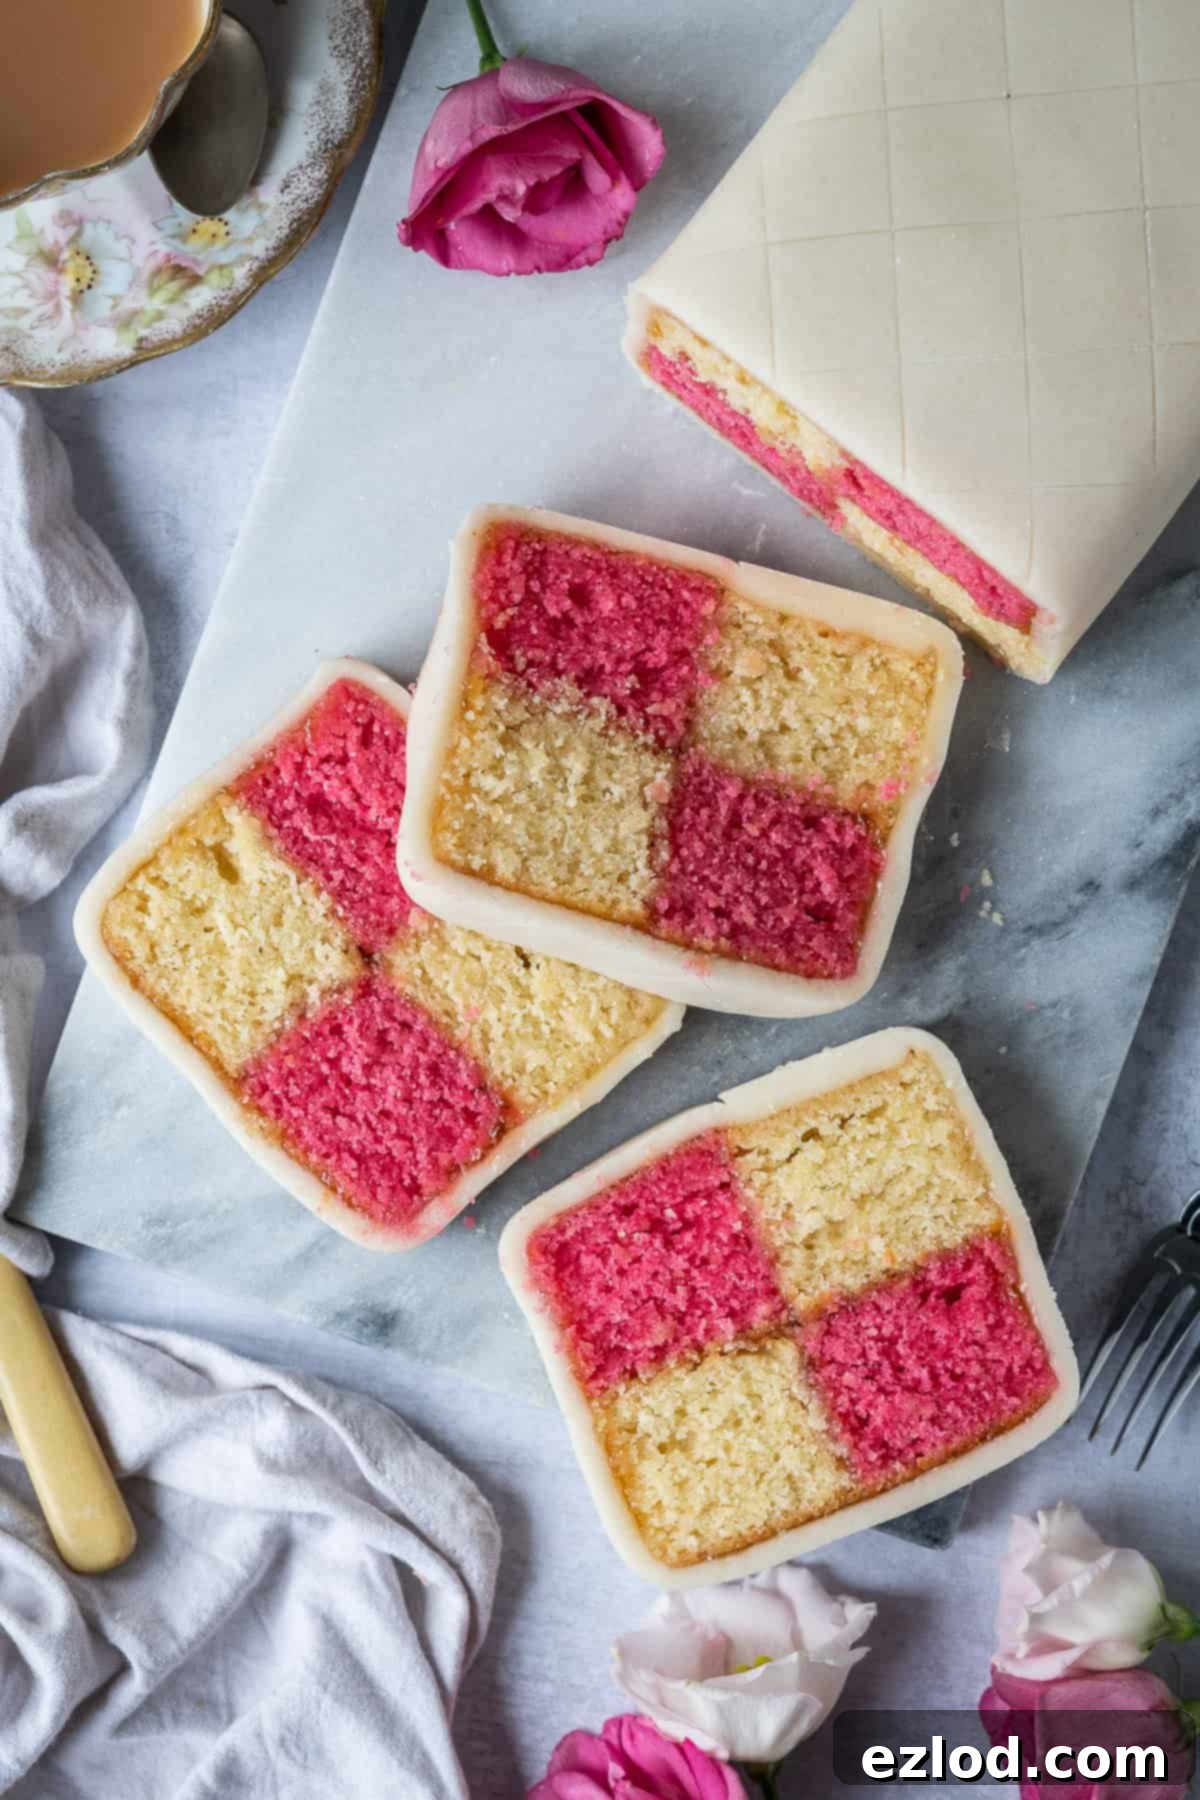
Crafting this vegan Battenberg cake involved a significant amount of testing and refinement, but the effort was undoubtedly worthwhile. The result is a cake that perfectly mirrors the taste and texture I fondly recall from traditional Battenberg cakes before my vegan journey. This plant-based version boasts an incredibly moist and tender crumb, infused with a rich, sweet almond flavor that perfectly complements the generous marzipan coating. It’s not just a cake; it’s an experience, making it the ideal centerpiece for a charming afternoon tea or a special celebration. Despite its sophisticated appearance, don’t let it intimidate you. The process is surprisingly straightforward, requiring no specialized equipment beyond a 20cm / 8-inch square cake tin, some baking parchment, and tin foil. While the assembly does call for a touch of patience and attention to detail to achieve that perfectly straight, even finish, it’s far from difficult and immensely rewarding.
What Exactly is Battenberg Cake? Exploring a British Icon
Battenberg cake, also sometimes spelled Battenburg, stands as a quintessential British confectionery. It’s a visually striking cake characterized by a light, almond-flavored sponge, traditionally dyed pink and yellow, which is then carefully cut and arranged into a distinctive chequered pattern. This vibrant internal structure is then completely wrapped in a smooth, sweet layer of marzipan, giving the cake its signature appearance. Historically, early Battenberg cakes featured a more elaborate nine-square pattern. However, modern versions, likely due to the demands of mass production and a desire for simpler elegance, typically display a four-square checkerboard. The exact origins of this delightful cake are a subject of some debate among culinary historians. The most widely accepted, though not conclusively proven, story suggests that the first Battenberg cake was created in 1884. It was said to commemorate the marriage of Prince Louis of Battenberg to Princess Victoria, who was Queen Victoria’s granddaughter and Prince Philip’s grandmother. While this romantic tale is charming, concrete documentary evidence to fully support this claim remains scarce, adding an air of delicious mystery to this beloved treat.
Mastering Your Vegan Battenberg: A Step-by-Step Guide
Crafting this vegan Battenberg cake is a delightful culinary journey that combines precision with a touch of artistic flair. Follow these detailed steps to achieve a perfectly beautiful and delicious result. For a complete list of ingredients and precise measurements, please refer to the recipe card provided below.
Preparing Your Cake Tin for Success
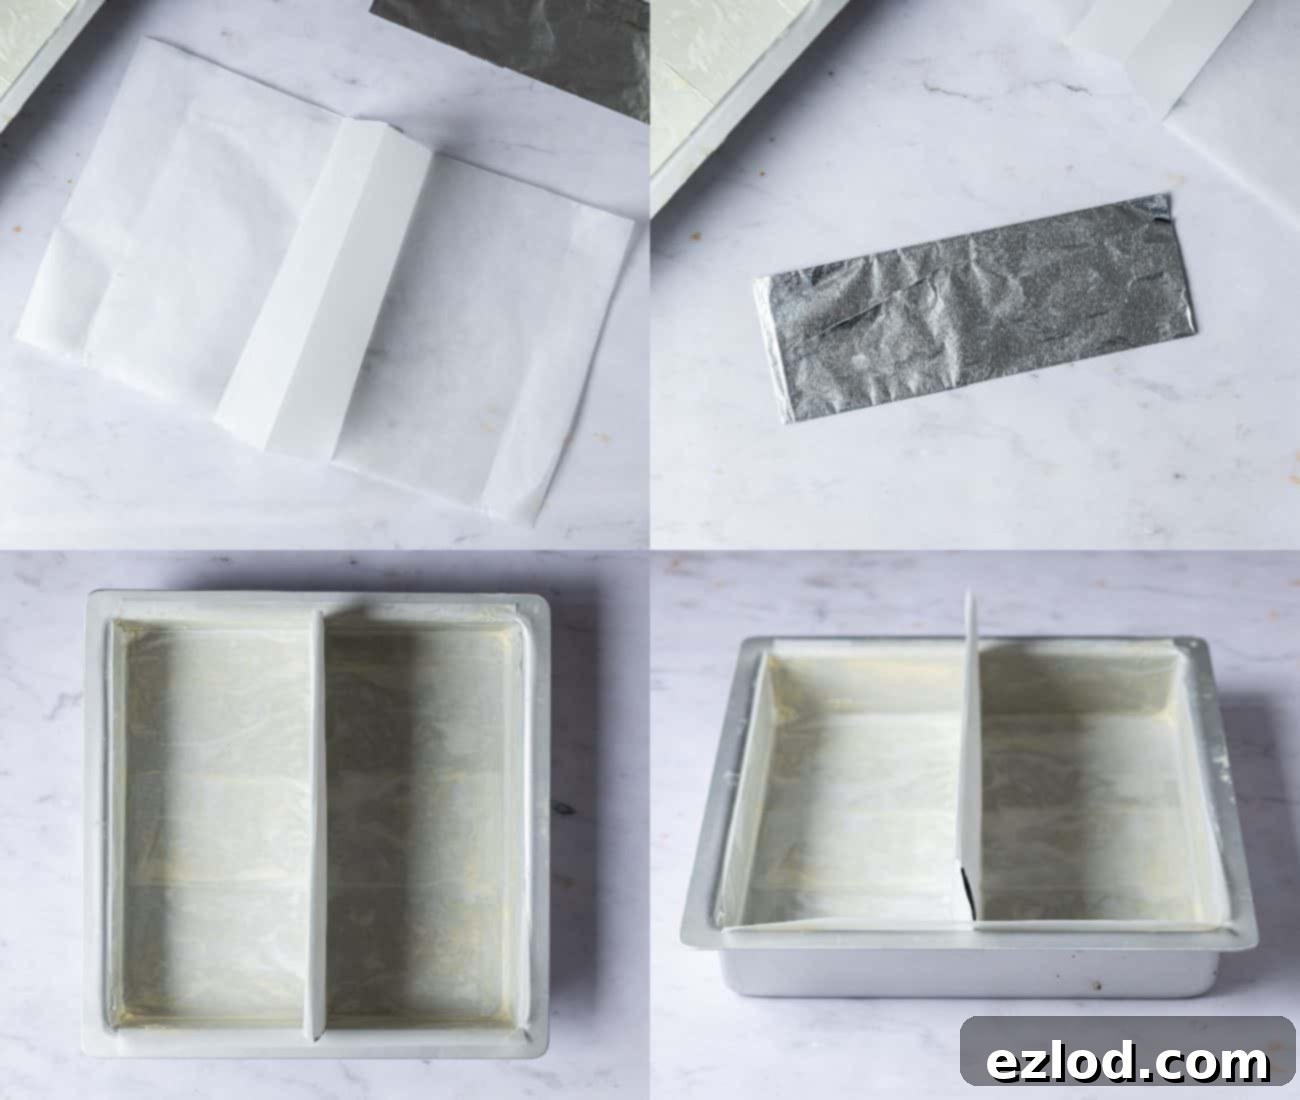
Begin by preheating your oven to 180°C/350°F/gas mark 4. Lightly grease a 20cm / 8-inch square cake tin. To create the essential divider for your two cake batters, cut a piece of baking parchment approximately twice the width of your tin, so about 20x40cm. Fold this parchment sheet in half widthways, then gently push up the center fold to form a pleat that is at least as high as your cake tin. Next, take a piece of tin foil and fold it over several times until it forms a thick, sturdy strip, the same width as your tin and the same height as your parchment pleat. Carefully place this foil strip inside the parchment pleat. Now, use this combined parchment and foil divider to line your cake tin, ensuring the pleat runs precisely down the center, effectively dividing your tin into two equal, smaller compartments. For easier removal of the delicate cakes later, leave a bit of parchment overhanging on either side of the tin. If your cake tin is not non-stick, it’s advisable to also line the remaining two sides with additional strips of baking parchment.
Crafting the Perfect Vegan Almond Sponge Batter
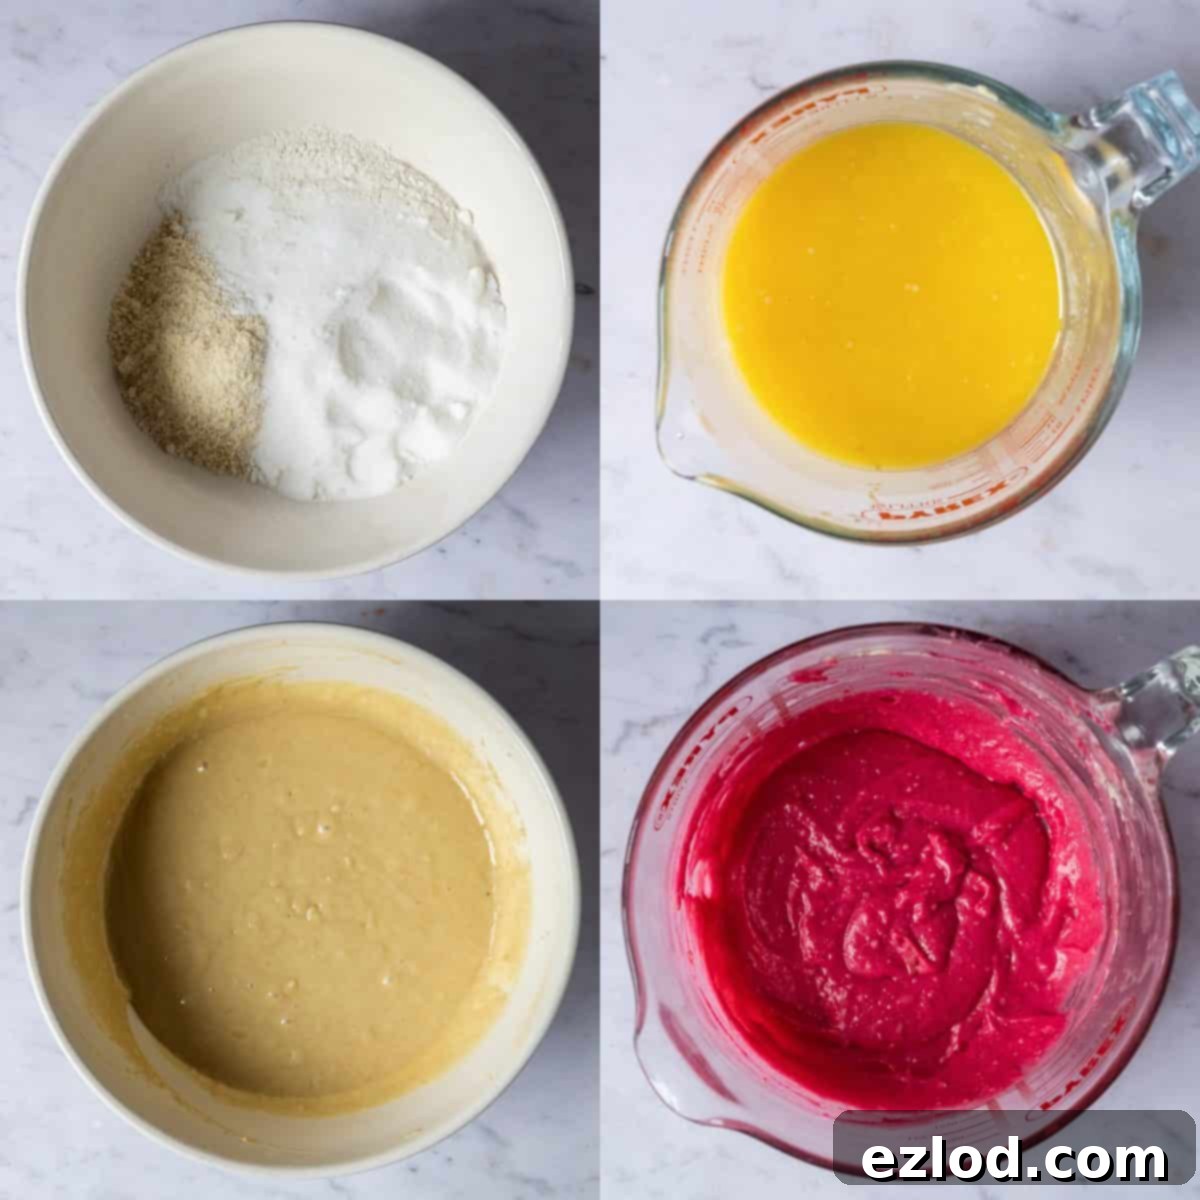
In a large mixing bowl, combine all your dry ingredients: the self-raising flour, caster sugar, ground almonds, baking powder, and salt. Whisk them together thoroughly until they are well combined and lump-free. In a separate jug, whisk together the melted vegan butter or margarine, non-dairy milk (soy milk is highly recommended for its richness and baking properties), vanilla extract, and almond extract. Now, pour the wet ingredient mixture into the bowl with the dry ingredients. Whisk gently, just until everything is combined and no dry lumps remain. Be careful not to over-beat the batter, as this can develop the gluten too much and result in a tough cake. Using a kitchen scale for ultimate accuracy, carefully pour exactly half of the batter into a separate bowl. To this half, add a small amount of pink or red gel food coloring. Stir it in gradually until you achieve your desired shade of pink. Remember, it’s easier to add more color than to take it away, so start with a little and build up (I confess, I was a touch heavy-handed on one occasion, resulting in a slightly too-vibrant pink!).
Baking the Iconic Pink and Yellow Sponges
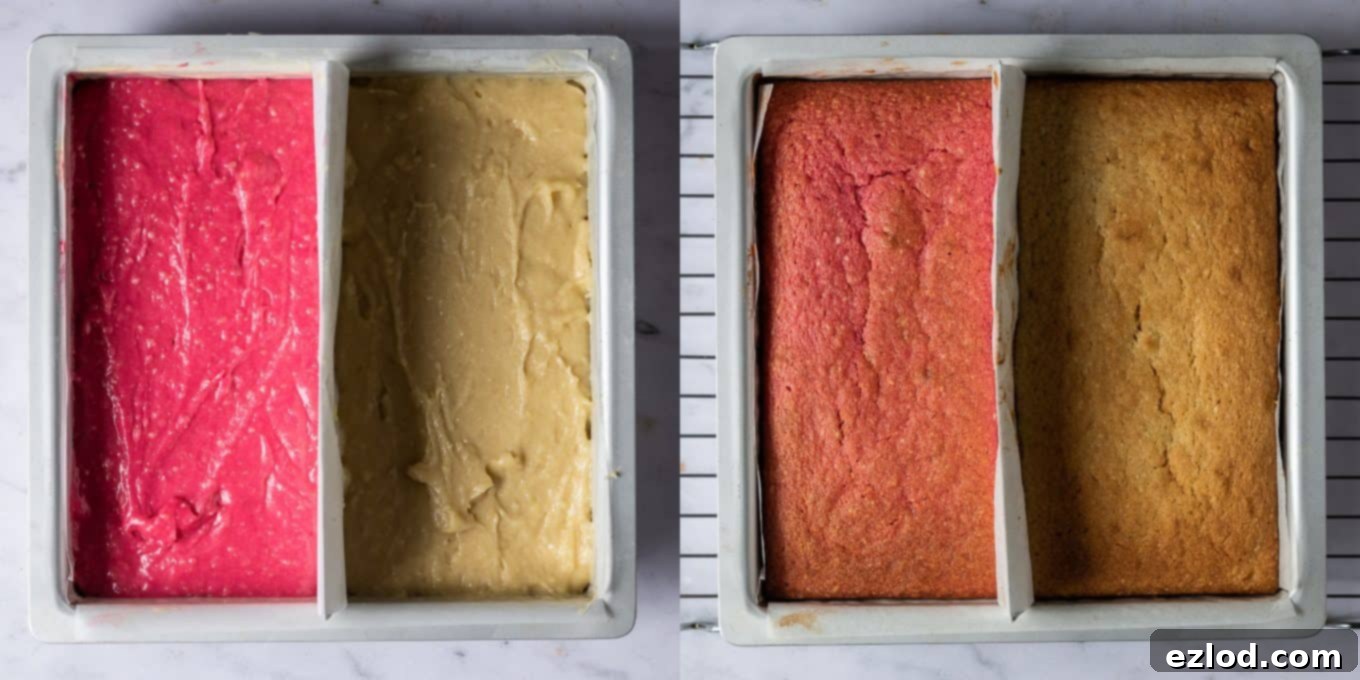
Carefully scrape the colored pink batter into one half of your prepared cake tin, spreading it evenly. Then, scrape the uncolored (yellow) batter into the other half, also spreading it level. Place the tin in the preheated oven and bake for approximately 30-35 minutes, or until a skewer inserted into the center of each cake comes out clean. This indicates they are thoroughly cooked. Once baked, remove the cakes from the oven and allow them to cool in the tin for about 20 minutes. The cakes are quite delicate when warm, so recruit a second person to assist you in carefully lifting them out onto a wire rack using the overhanging parchment sides and the center pleat. This two-person approach greatly reduces the risk of breakage. Once safely on the wire rack, gently peel off the baking parchment and allow the cakes to cool completely to room temperature. This is a crucial step for easy and neat trimming later.
Precision Trimming for a Picture-Perfect Chequered Pattern
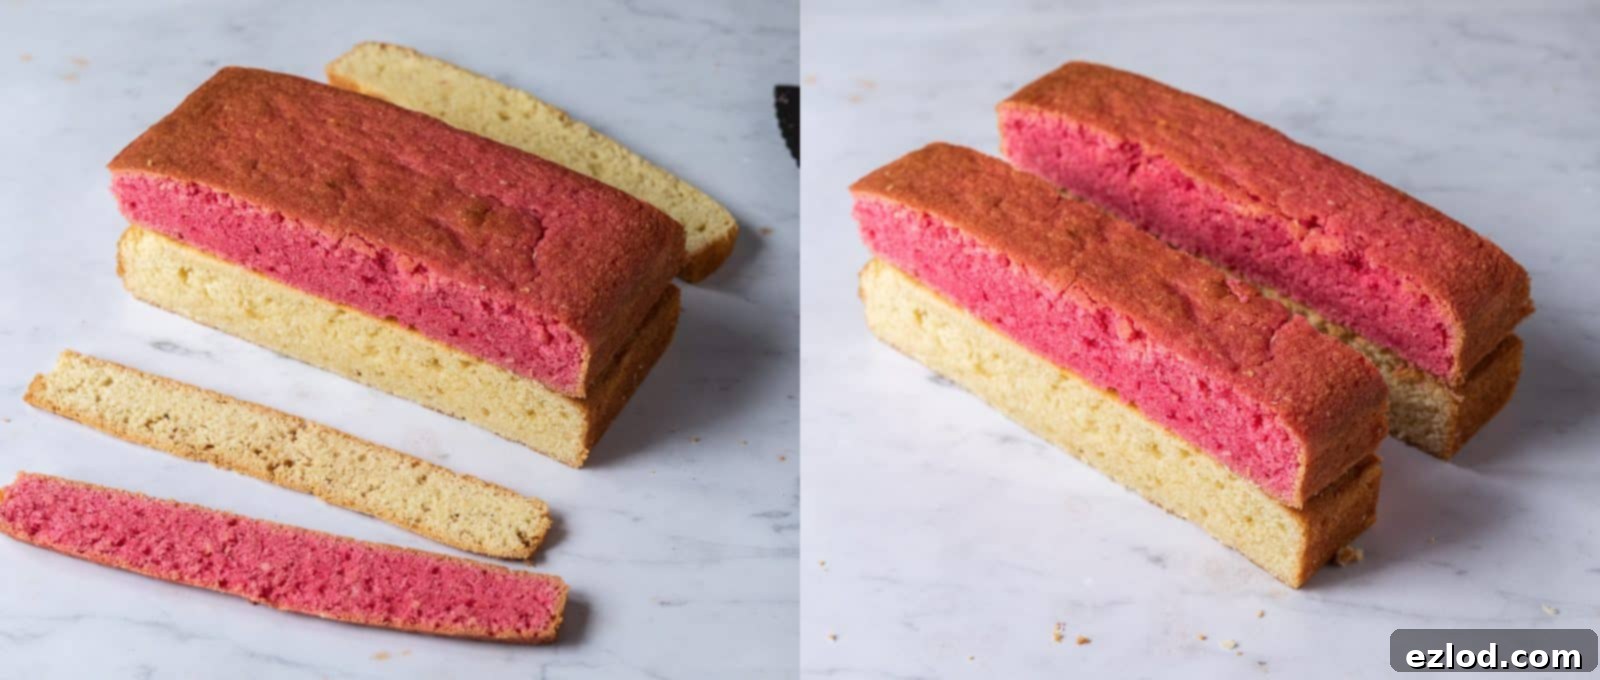
Once your cakes are completely cold, it’s time for the precise trimming that creates the Battenberg’s signature look. If necessary, trim the tops of the cakes to ensure they are perfectly level and of identical height. (If you accurately weighed your batter, they might bake up perfectly flat, requiring no trimming). Place one cake on top of the other and carefully trim the long edges to neaten them. To achieve perfect squares for your chequered pattern, a tape measure or ruler is your best friend. The goal is for the cakes to be exactly twice as wide as they are high. For instance, if your cakes are 4cm high, you should trim them to be 8cm wide. Now, carefully slice both cakes in half lengthways. This will give you two long strips of each color – two pink and two yellow – all of uniform size.
Assembling the Chequered Masterpiece
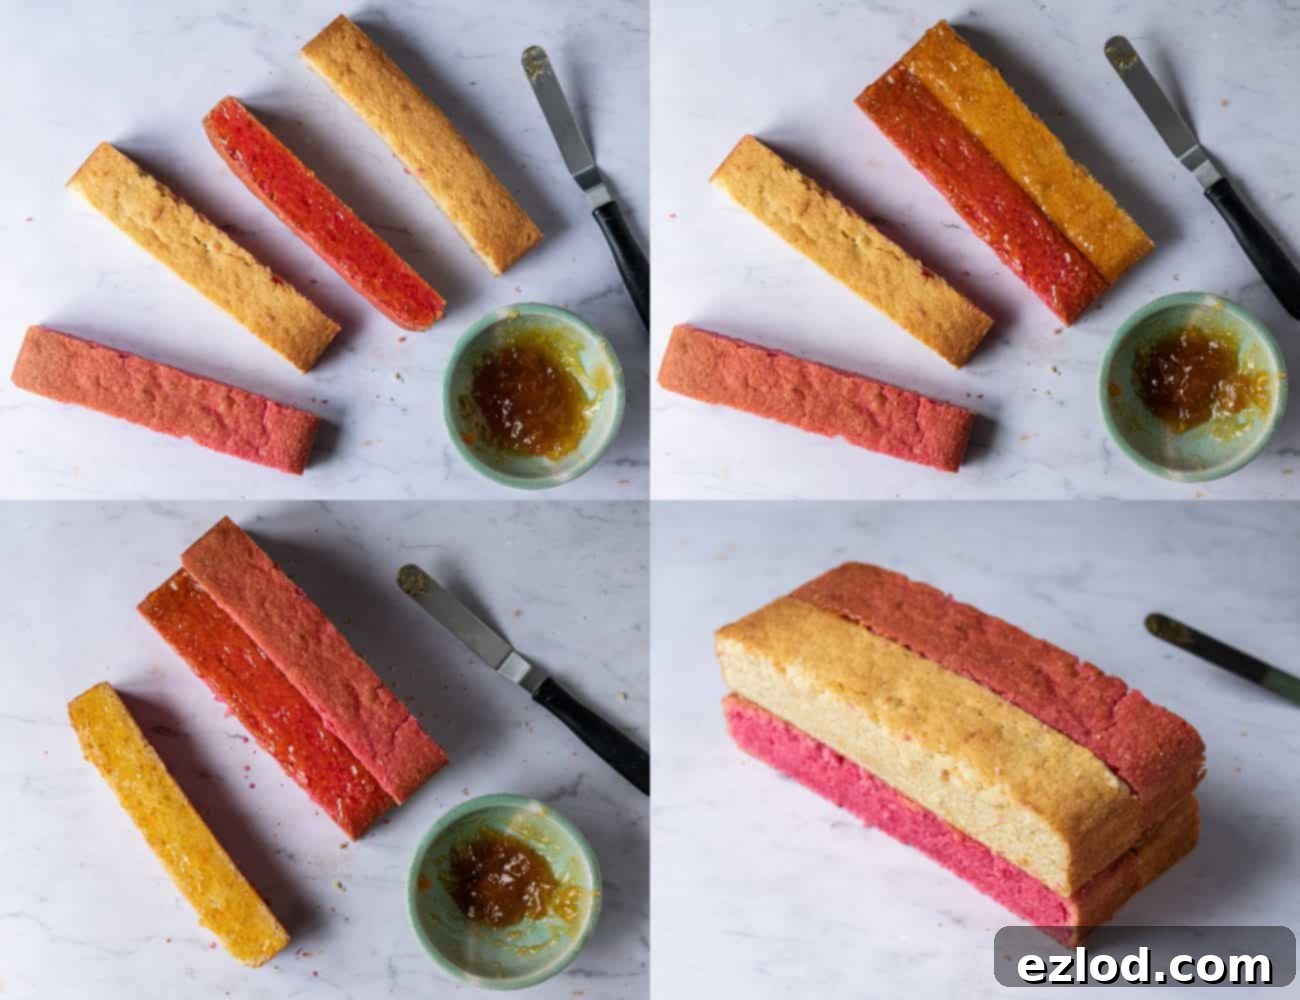
Now for the fun part: assembling the chequered pattern! Take one of the long cake strips and spread a thin, even layer of apricot jam along its long side. Carefully stick a strip of the opposite color to it, pressing gently to secure. For example, if you started with pink, attach a yellow strip. Next, spread another thin layer of apricot jam over the entire top surface of these two joined strips. Place the remaining two strips on top, alternating colors to create the chequered effect (pink above white and white above pink). Spread a final thin layer of jam in between these top two strips to ensure they adhere well. You should now have a sturdy block of cake with alternating pink and yellow squares.
Wrapping Your Battenberg in Sweet Marzipan
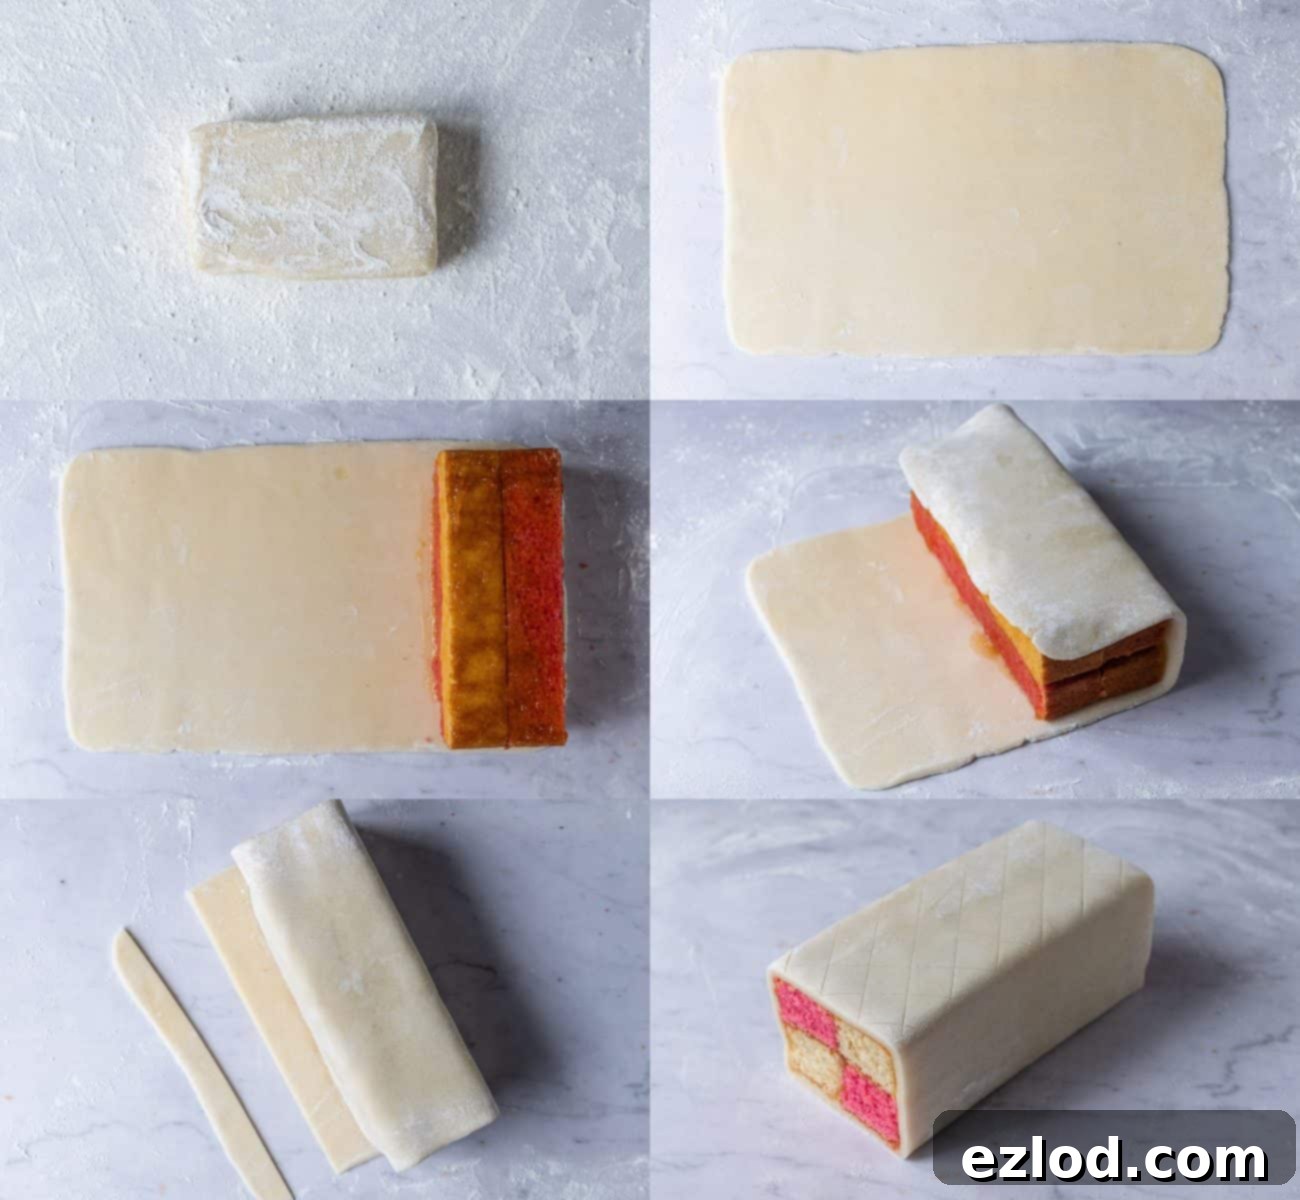
Lightly dust a clean work surface with icing sugar to prevent sticking. Roll out your marzipan into a rectangle approximately 20x38cm (about 8×15 inches). To ensure a neat finish, trim one of the shorter edges of the marzipan. Spread a thin layer of apricot jam over the top of your assembled cake block. Carefully place the cake, jam-side down, against the trimmed short edge of the rolled marzipan. Spread jam over the remaining surfaces of the cake, excluding the short ends. Now, with gentle precision, carefully roll the cake up in the marzipan, ensuring it is fully encased. Trim any excess marzipan so that it overlaps by about halfway across the cake. Lightly brush this overlapping edge with a tiny bit of water and gently press it down to create a secure seal. Finally, flip the cake over so that the seam is on the bottom, creating a smooth, professional finish.
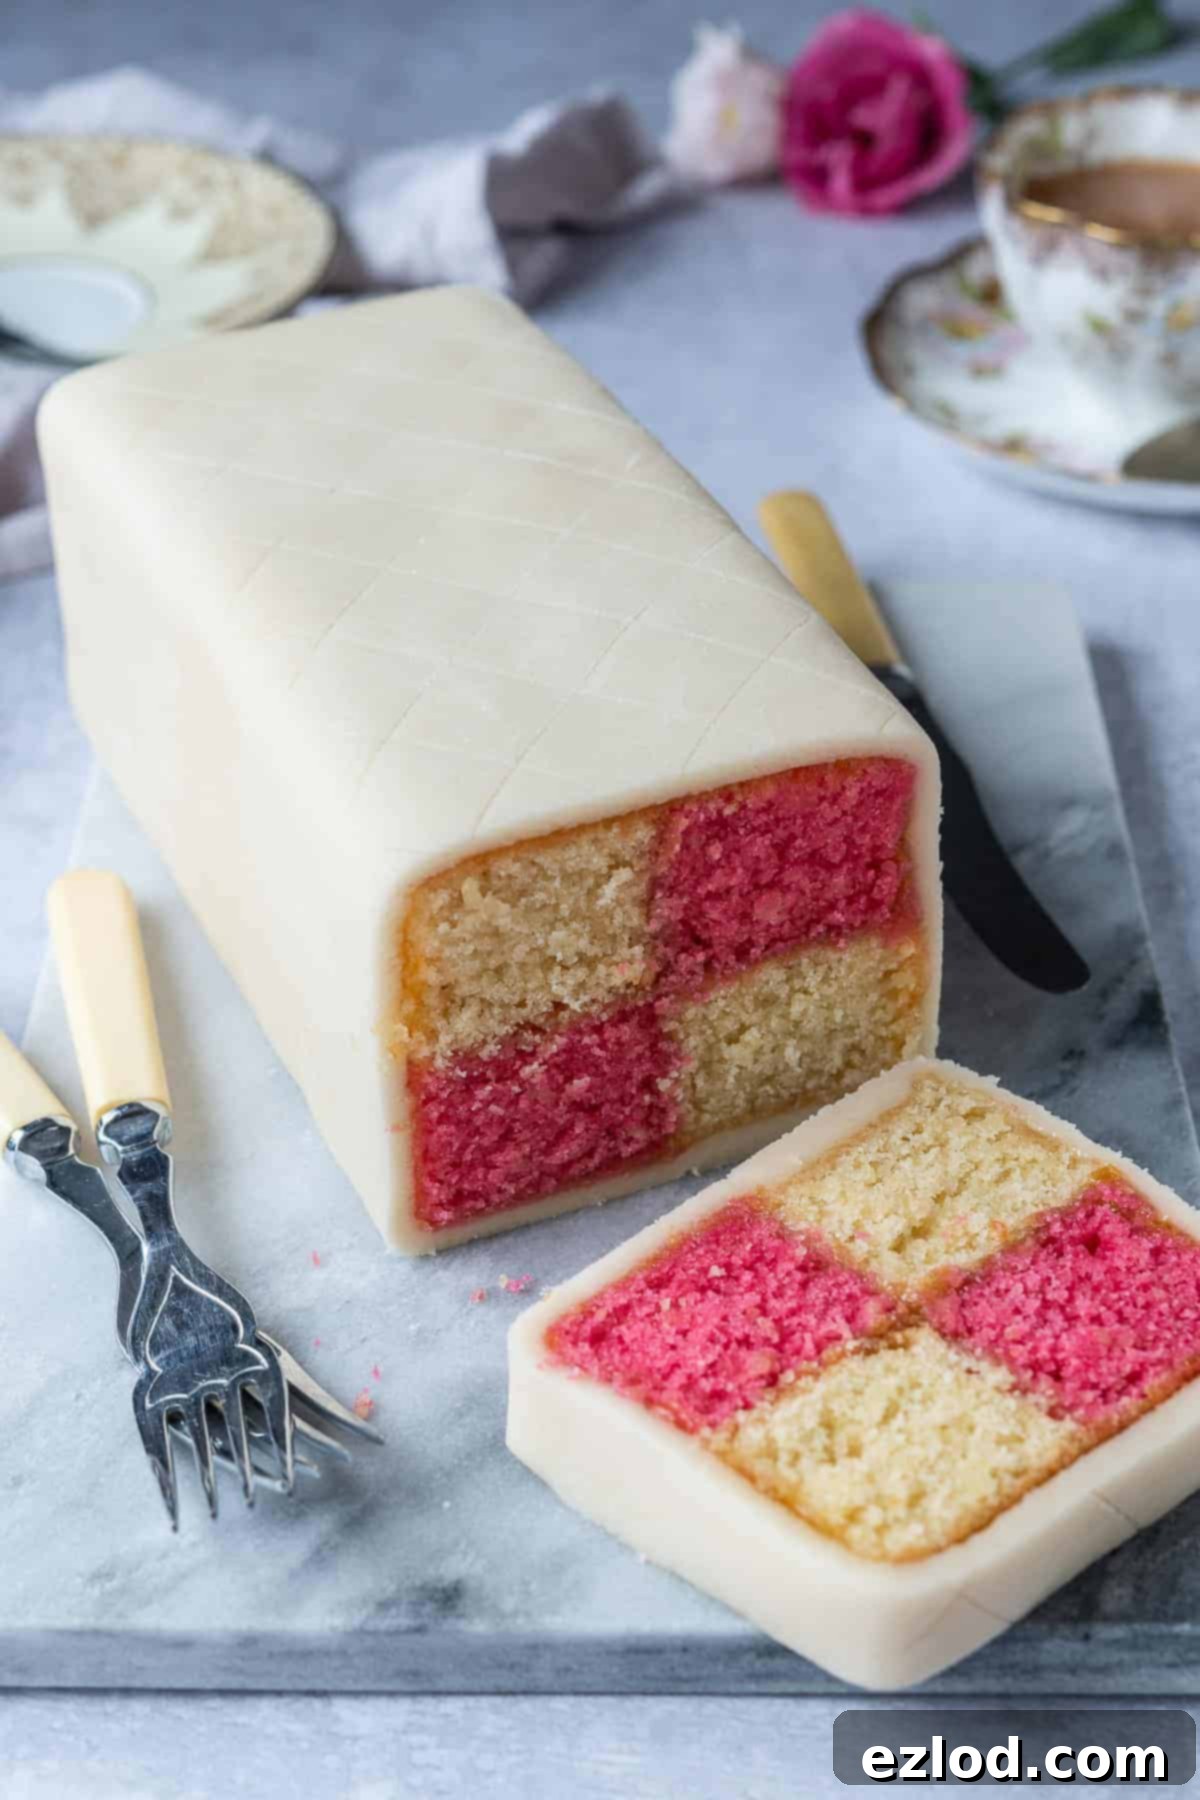
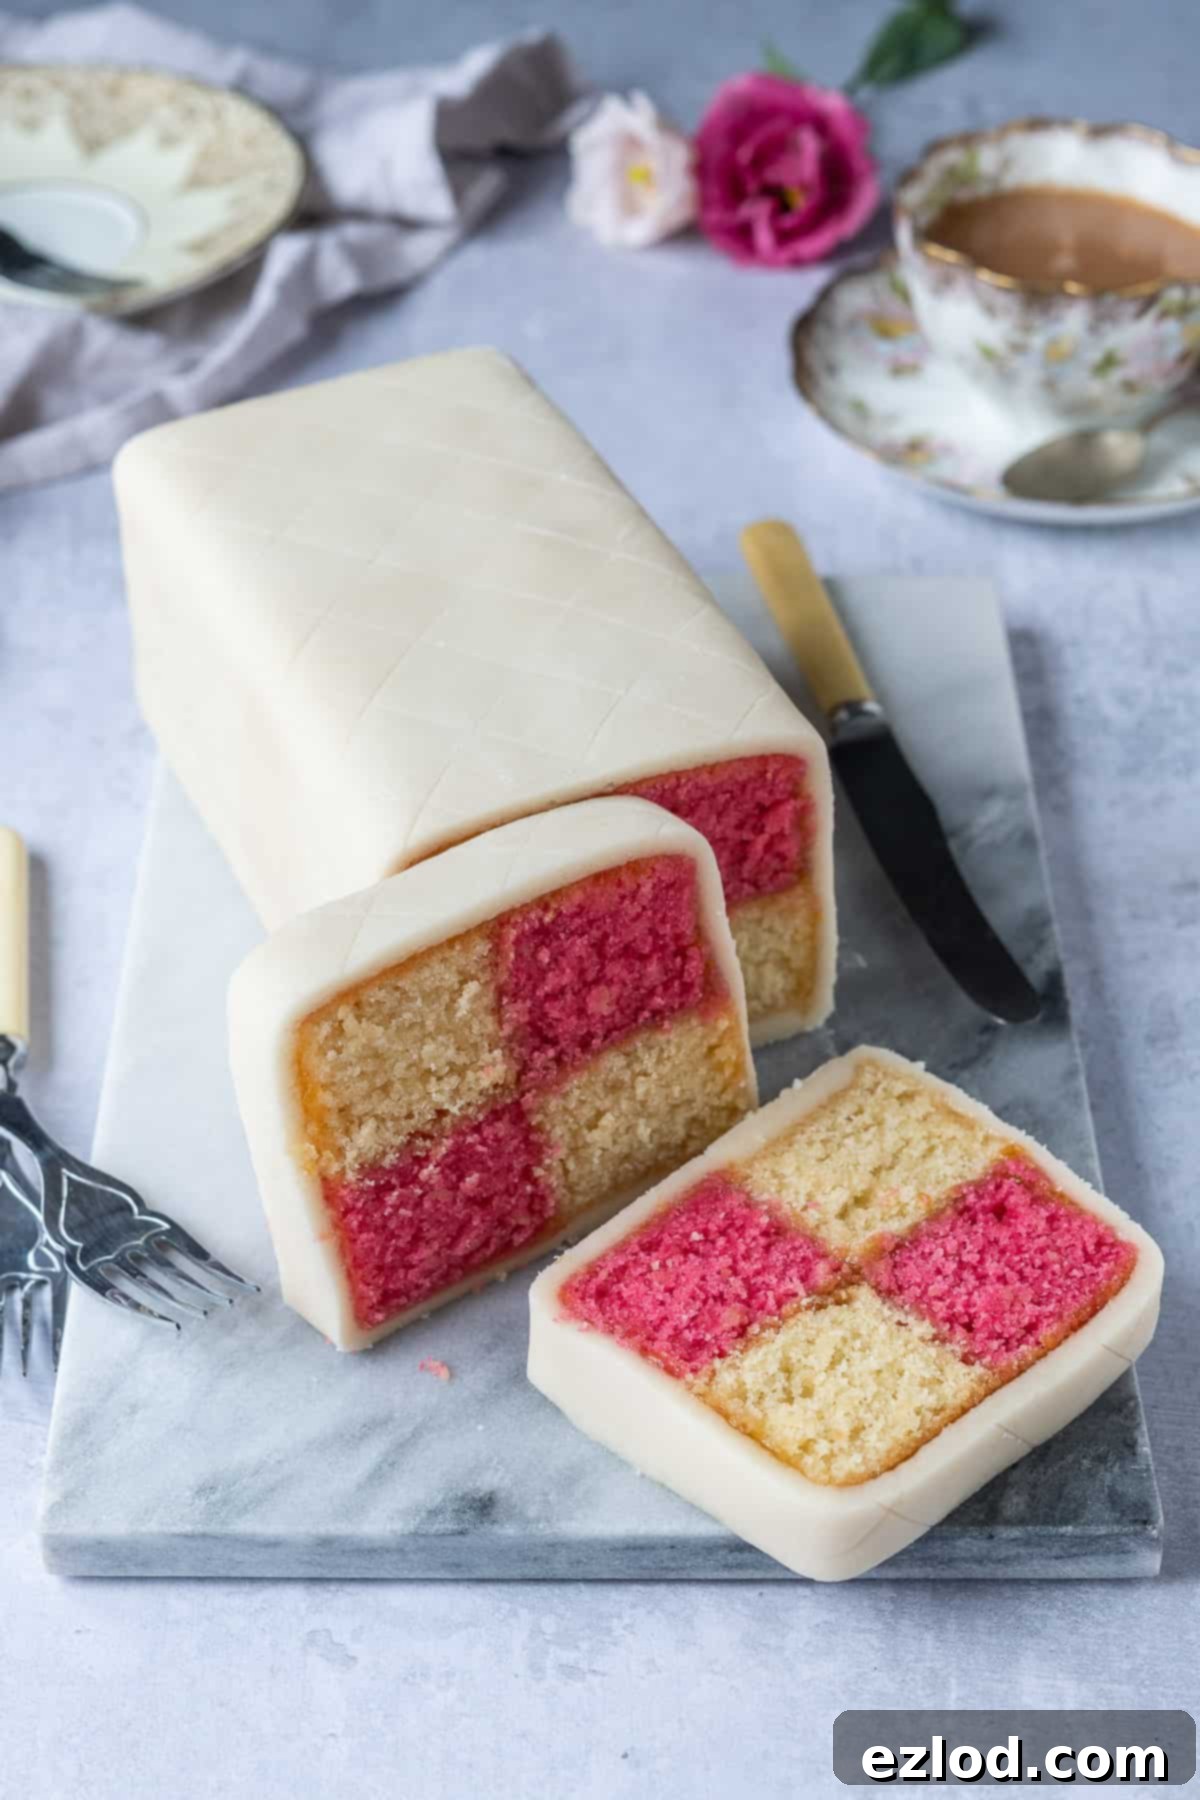
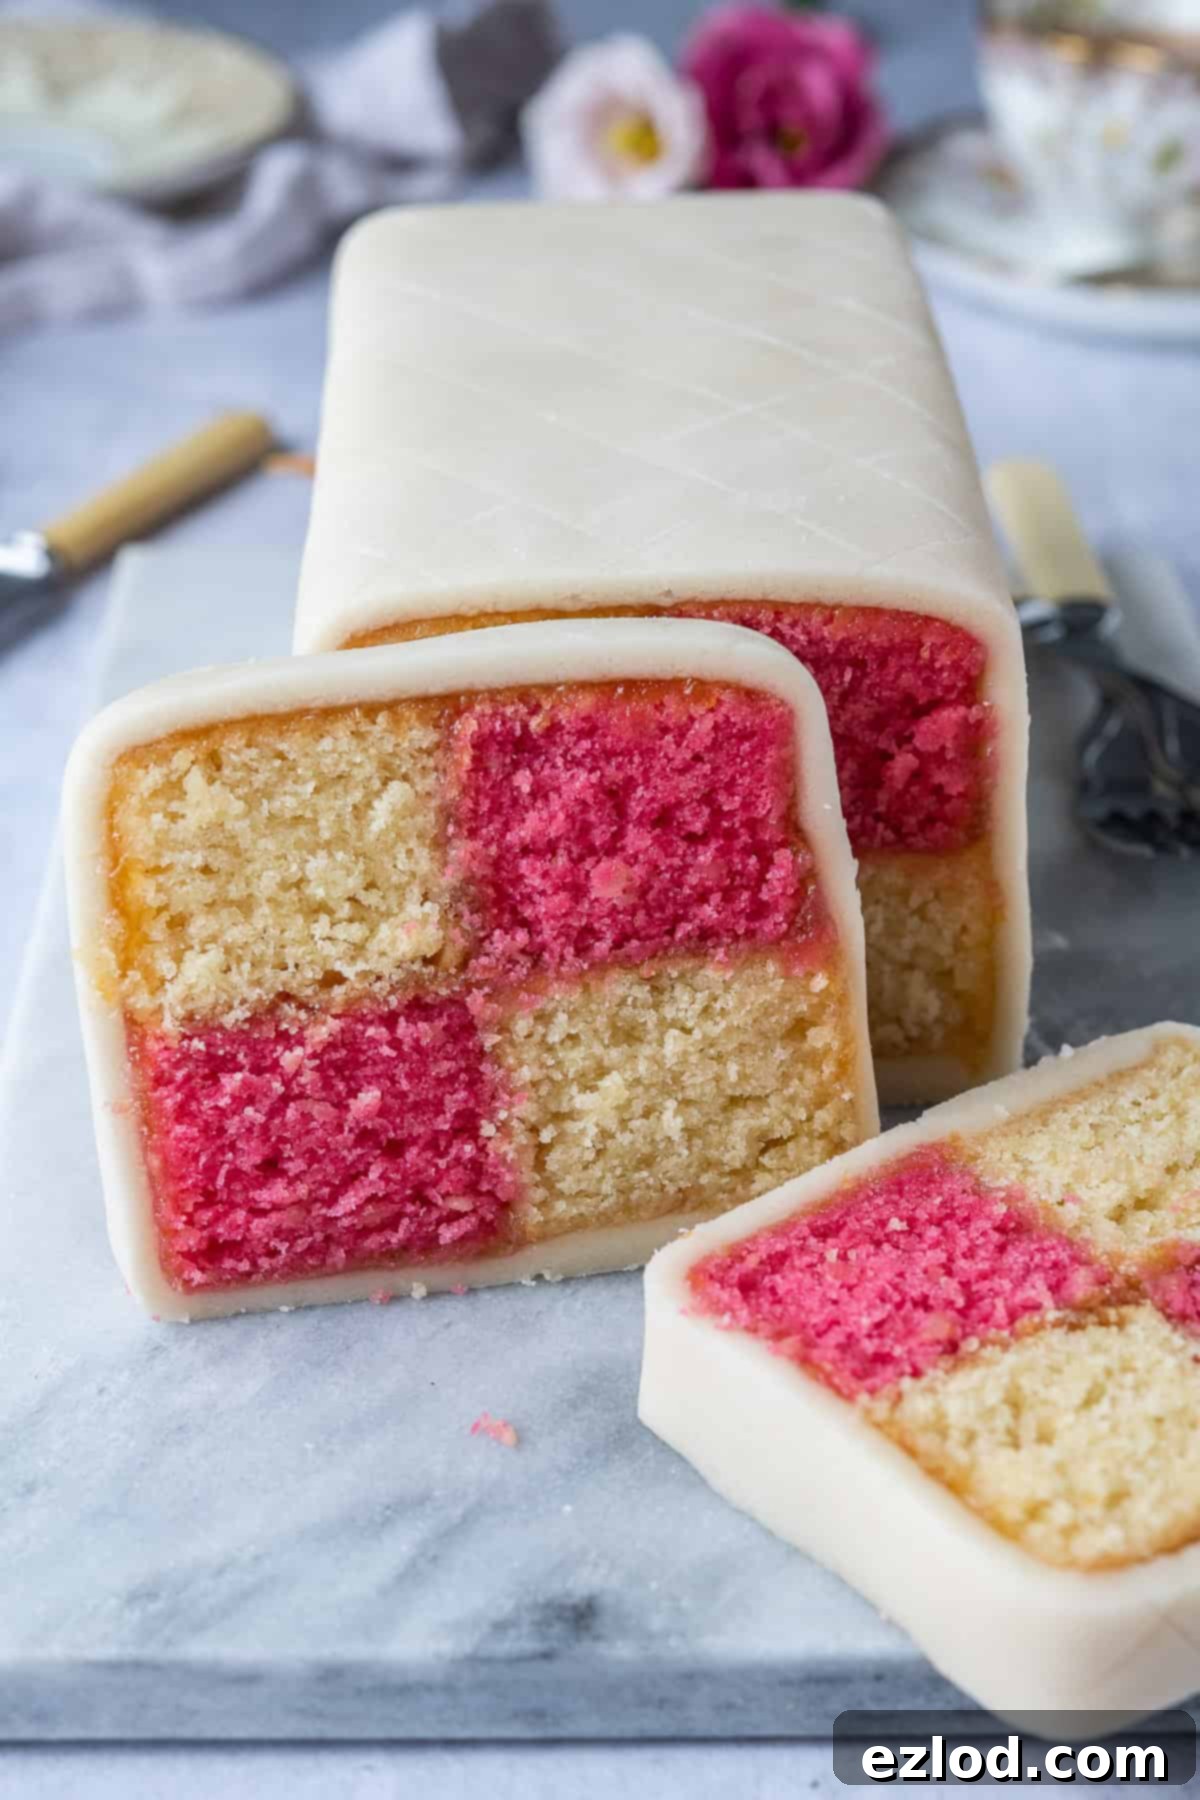
For the grand finale, use a sharp knife to carefully slice a small piece off either end of the cake. This will neaten the edges and, most excitingly, reveal the beautiful chequered pattern within! If you wish to add an extra touch of elegance, you can gently score crisscross lines onto the top of the marzipan with a knife.
Essential Tips for an Impeccable Vegan Battenberg Cake
Achieving the perfect vegan Battenberg cake is all about attention to detail. Here are some essential tips to guide you:
- Precision in Measurement: For the best results in baking, always rely on gram measurements using a digital scale rather than cup conversions. Cup measurements can be less accurate, and precision is key for a consistent crumb and texture in this delicate cake.
- Tin Lining is Crucial: Dedicate sufficient time to meticulously line your cake tin. Ensuring it is perfectly divided in half is paramount for achieving two equally sized cake layers, which in turn leads to a well-proportioned chequered pattern.
- Weigh Your Batter: To guarantee that both your pink and yellow cake layers are identical in size, weigh the batter before dividing it. Note the weight of your empty bowl, then weigh the bowl with the finished batter. Subtract the empty bowl’s weight to find the total batter weight, then divide that number in half to know exactly how much batter to pour into the separate bowl for coloring.
- Cool Completely: Your cakes absolutely must be completely cold before you attempt to cut and assemble them. Warm cakes are incredibly fragile and will be difficult to slice neatly, potentially ruining your pattern. For convenience, you can bake the cakes the day before assembling and store them in an airtight container overnight.
- Mastering the Square: To achieve those iconic, perfect squares, a ruler or tape measure is indispensable. First, ensure both baked cakes are level and exactly the same height. Measure this height (e.g., 4cm). Then, trim the long edges of each cake so they are precisely twice as wide as they are high (e.g., 8cm). Finally, slice each cake lengthwise in half, resulting in four long rectangles (e.g., 4cm wide by 4cm high). This careful trimming ensures symmetry.
- Jam Consistency: If your apricot jam is too thick to spread smoothly, warm it gently in the microwave for a few seconds until it becomes more fluid. Aim for a smooth jam, avoiding large chunks of fruit, as this will create a neater bond between the cake layers and the marzipan. While apricot jam is traditional, feel free to experiment with other smooth jam flavors you enjoy – its primary role here is as an adhesive.
Choosing the Right Vegan Food Colouring
The vibrant pink of a Battenberg cake is essential, but not all food colorings are created equal, especially for baking. It’s crucial to use a bake-stable gel food coloring. Many liquid or standard supermarket food colorings are not heat-resistant and will fade or even turn an undesirable brown during baking, spoiling the visual appeal of your cake. Furthermore, for a truly vegan Battenberg, you must verify that your chosen food coloring is indeed vegan-friendly, as some brands use cochineal (derived from insects) for red hues. I personally recommend and use Rainbow Dust ProGel pink colouring, which is reliably vegan-friendly and bake-stable. It’s widely available from various baking supply stores and online retailers like Amazon.
Storage and Freezing Your Vegan Battenberg
How to Store Vegan Battenberg Cake:
This vegan Battenberg cake is at its absolute best when enjoyed within a day or two of baking. However, it will maintain its deliciousness for 3-4 days if stored properly in an airtight container at room temperature. There’s generally no need to refrigerate it unless your kitchen is exceptionally warm. Be aware that the marzipan might become slightly sticky after a couple of days, especially in humid conditions.
Can I Freeze It?:
Yes, you can absolutely freeze vegan Battenberg cake! To prevent freezer burn, ensure it is wrapped very well in multiple layers of plastic wrap and then foil. It can be frozen for up to one month. When you’re ready to enjoy it, simply allow it to defrost at room temperature for several hours or overnight. A small note on freezing: the marzipan layer may become a little stickier or slightly altered in texture upon defrosting. For this reason, I don’t recommend making and freezing the entire cake in advance specifically for serving at a special event. It’s best to freeze any delicious leftovers you might have for later enjoyment.
Frequently Asked Questions about Vegan Battenberg Cake
Q: What type of non-dairy milk is best for this recipe?
A: While many non-dairy milks can work, unsweetened soy milk is generally recommended for baking cakes like this. Its higher protein and fat content compared to other plant milks (like almond or oat) contributes to a richer texture and helps the cake retain moisture, resulting in a beautifully tender crumb similar to traditional sponge cakes.
Q: Can I use a different type of jam besides apricot?
A: Absolutely! While apricot jam is traditional for its bright color and tartness that complements the almond, you can certainly experiment with other smooth fruit jams. Raspberry, strawberry, or even a thin layer of orange marmalade could be delicious alternatives. The key is to use a smooth jam without large fruit chunks to ensure an even surface for sticking the cake layers and marzipan.
Q: Is it possible to make the marzipan from scratch for this recipe?
A: Yes, you can certainly make your own marzipan if you prefer! Homemade marzipan often has a fresher almond flavor. However, using good quality store-bought marzipan saves a significant amount of time and effort and yields excellent results, making the overall process much more approachable for home bakers.
More Delicious Vegan British Cakes
If you’ve enjoyed this delightful vegan Battenberg cake, be sure to explore more of our scrumptious plant-based twists on British classics:
- Vegan Victoria sponge cake
- Vegan lemon drizzle cake
- Vegan Simnel cake
- Vegan coffee and walnut cake
- Easy vegan ginger cake
- Vegan Christmas cake
If you tried this recipe, we’d love to see your creations! Why not tag @domestic_gothess on Instagram and use the hashtag #domesticgothess to share your delightful bakes?
*All images and content on Domestic Gothess are copyright protected. If you want to share this recipe, please do so by using the share buttons provided. Do not screenshot or post the recipe or content in full.*

Print
Vegan Battenberg Cake
Ingredients
Cake
- 275 g (2 ¼ cups) self-raising flour
- 220 g (1 cup) caster (superfine) sugar
- 80 g (⅔ cup) ground almonds
- 1 ¼ tsp baking powder
- ¼ tsp salt
- 190 g (⅔ cup + 2 Tbsp) vegan block butter/margarine (I use Naturli Vegan Block or Stork block) melted
- 190 ml (⅔ cup + 2 Tbsp) unsweetened non-dairy milk (soy is best) room temperature
- 1 ½ tsp vanilla extract
- ¾ tsp almond extract
- pink or red gel food colouring*
To Assemble
- apricot jam
- 500 g (17 ½ oz) marzipan
- icing sugar for rolling
Instructions
-
Preheat the oven to 180°C/350°F/gas mark 4. Grease a 20cm/ 8in square cake tin.
-
Cut a piece of baking parchment about twice as wide as the tin – 20x40cm. Fold it in half widthways then push up the centre fold to make a pleat at least as high as the tin. Fold a piece of tin foil over several times into a thick piece the same width as the tin and height as the pleat. Place it inside the pleat and then use this to line the tin, making sure that the pleat runs down the centre, dividing the tin into two smaller ones. Leave a bit of parchment overhanging on either side of the tin to make it easier to remove the cakes from the tin later. If your tin isn’t non-stick then you will also need to line the other two sides with strips of baking parchment. (See post above for step-by-step photos).
-
Place the self-raising flour, caster sugar, ground almonds, baking powder and salt in a large bowl and whisk to combine.
-
In a jug, whisk together the melted butter, milk and vanilla and almond extracts.
-
Pour the wet ingredients into the dry and whisk to combine. Do not over-beat the batter.
-
Using a scale for accuracy, pour half of the batter into a separate bowl and stir in a little bit of food colouring until you reach the desired shade, be careful not to add too much.
-
Scrape the coloured batter into one half of the tin, and the uncoloured batter into the other half. Spread them level then bake for 30-35 minutes until a skewer inserted into the centre comes out clean.
-
Leave the cakes to cool in the tin for 20 minutes then carefully lift them out onto a wire rack using the overhanging sides and the centre pleat. It really helps to have a second person to help you do this as the cakes are delicate when warm. Peel off the parchment and leave them on the wire rack to cool completely.
-
Once the cakes are completely cold, trim the tops of them to level if necessary, they should be exactly the same height. (Mine baked up completely flat and I used a scale to divide the mixture in half so no trimming necessary).
-
Place one cake on top of the other and trim the long edges to neaten them. If you want perfect squares then use a tape measure – the cakes should be twice as wide as they are high. Mine were 4cm high so I trimmed them to be 8cm wide.
-
Slice the cakes in half lengthways so you have two long strips of each colour.
-
Spread a thin layer of apricot jam over the long side of one of the strips and stick a strip of the opposite colour to it.
-
Spread a thin layer of jam over the top of both of those strips and stick the remaining strips on top, spreading more jam in between the two, to form a chequered pattern – pink above white and white above pink.
-
Dust a surface with icing sugar and roll out the marzipan into a rectangle about 20x38cm. Trim one of the short edges to neaten it.
-
Spread the top of the cake with jam then place it, jam side down, against the trimmed short edge. Spread jam over the rest of the cake (except the short ends).
-
Carefully roll the cake up in the marzipan so that it is fully encased. Trim the excess so that it overlaps about halfway across the cake. Brush it with a little bit of water and gently press it down to seal. Flip the cake so that the join is on the bottom.
-
Use a sharp knife to slice a piece off either end to neaten the cake and reveal the pattern. If you like you can gently score lines on the top of the cake with a knife to make a crisscross pattern.
Notes
- For the best results make sure that you follow the recipe closely. As always, I highly recommend using the gram measurements (with a digital scale), rather than the cup conversions. Cup measurements are simply not accurate enough for baking and I cannot guarantee the best results if you use them.
- *You need to make sure that you use a bake stable gel food colouring. A lot of the food colourings that you can buy from supermarkets are not bake stable and your lovely pink cake will fade and turn brown as it cooks. I use Rainbow Dust ProGel pink colouring which is vegan friendly. (Available from Amazon and various other places).
- Take time lining your tin to make sure that it is exactly divided in half.
- To make sure that your cakes are exactly the same you should weigh the batter with a scale when you divide it in half. To do this I weigh the bowl before I add any of the ingredients and make a note of this number. Once you have finished making the batter, weigh the bowl again (this time with the batter in it). Take the weight of the full bowl and subtract the weight of the empty one, this gives you the weight of your batter. Divide that number in half and that tells you how much batter to weigh out into a separate bowl.
- The cakes should be completely cold before you cut them otherwise they will be difficult to slice and you might not be able to get them neat. If you like you can bake the cakes the day before assembling and store them in an airtight container overnight.
- To get perfect squares of cake you will need to use a ruler or tape measure. Start by making sure that both of the cakes are level and exactly the same height (if you used a scale to measure them out then they should be!). Measure how high the cakes are, mine were 4cm. Trim the long edges so that the cakes are twice as wide as they are high, so 8cm in my case. Then slice them in half lengthways so that you end up with four long rectangles that are 4cm wide and 4cm high (depending on your initial height measurement).
- If the jam is too thick to spread, warm it up for a few seconds in the microwave until it is runny. Try and avoid spreading any large chunks of fruit onto the cake. Smooth jam would be best.
