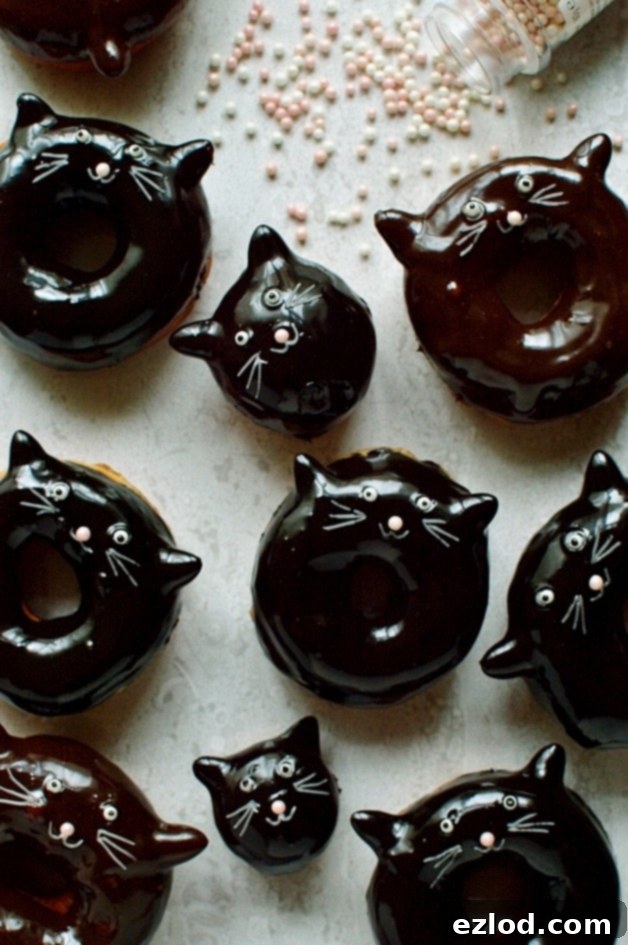
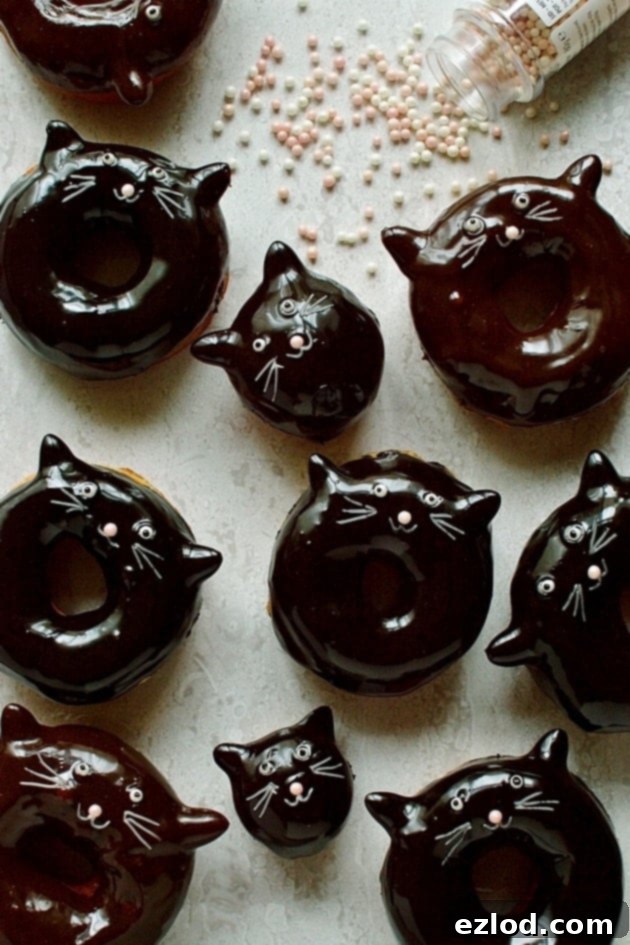
Homemade Chocolate Glazed Black Cat Doughnuts: The Ultimate Guide to Spooky Sweet Treats
Indulge in these delightful chocolate glazed black cat doughnuts – a perfect blend of soft, airy, fried yeasted ring doughnuts coated in a luscious, silky chocolate ganache glaze, adorned with an irresistibly cute cat design. Ideal for Halloween festivities or simply to bring a smile to anyone’s face!
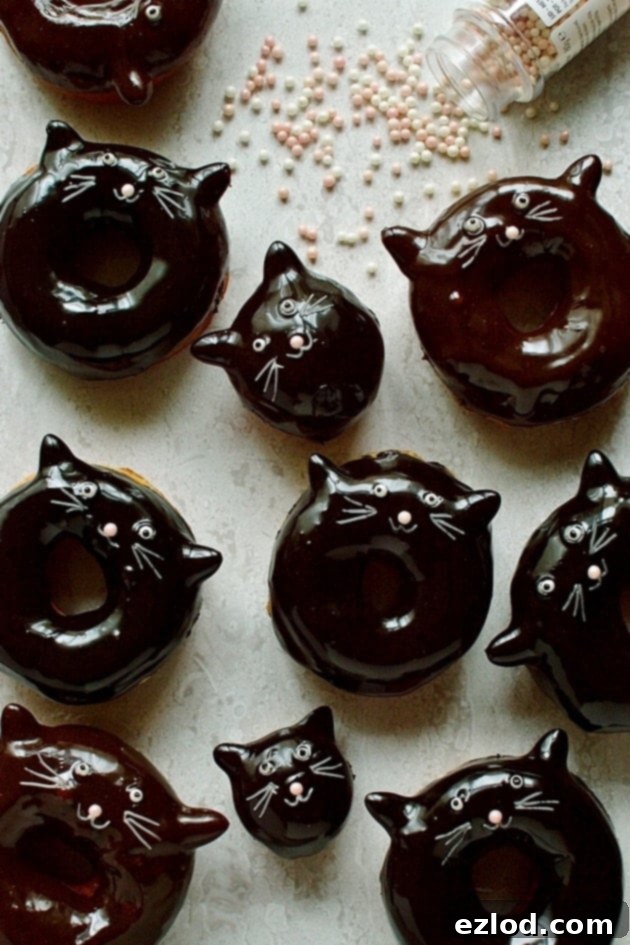
Get ready to charm your guests and satisfy your sweet tooth with these unbelievably cute and incredibly delicious chocolate glazed black cat doughnuts! While I originally crafted these specifically for a Halloween party, their enchanting appeal stretches far beyond a single holiday. Imagine the joy they bring as a whimsical birthday treat, a fun weekend baking project, or a delightful surprise for any cat lover. By simply adjusting the food coloring in the glaze or opting to omit the charming cat design, you can effortlessly transform them into classic, mouth-watering chocolate-glazed ring doughnuts or even brown tabby cat variations. This recipe isn’t just about a festive design; it’s about crafting a truly exceptional homemade doughnut experience that’s both fun to make and unforgettable to eat.
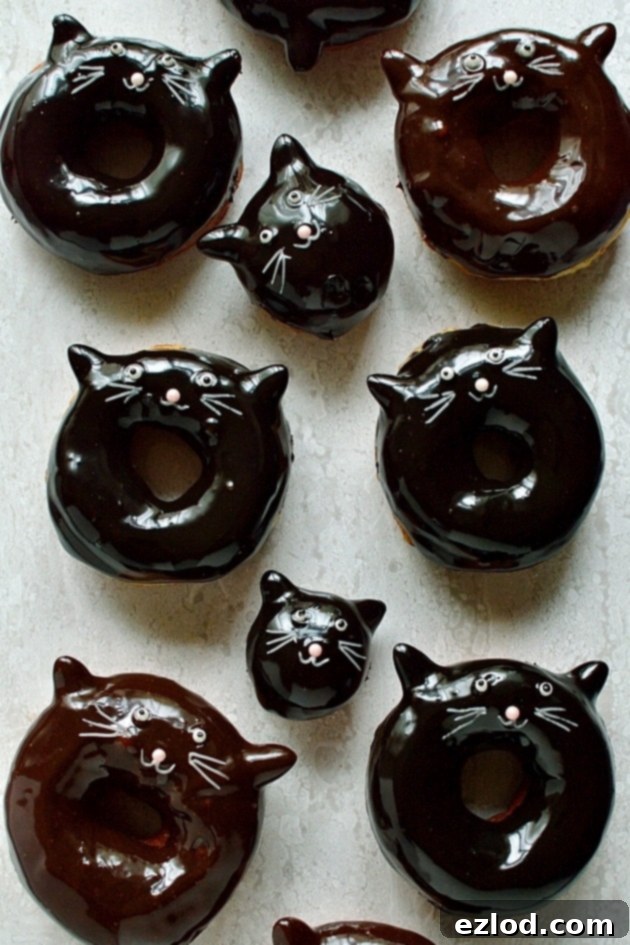
Why Fried Yeasted Doughnuts are the Best (and Easiest!) Choice
In the expansive world of doughnuts, there are many delicious contenders, but for me, nothing quite compares to the sublime texture of a fried yeasted doughnut. These are not your dense, cake-like doughnuts; instead, they offer an unparalleled lightness, airiness, and chewiness that makes every bite an absolute dream. The yeast performs its magic, creating countless tiny air pockets within the dough that expand beautifully during the frying process, resulting in an incredibly soft, cloud-like interior encapsulated by a delicately crisp, golden-brown exterior. It’s this unique combination of textures that makes them truly irresistible.
While the idea of making fried doughnuts at home might initially sound intimidating or complicated, I promise you, the process is far more straightforward than you might anticipate. The journey from simple ingredients to warm, fresh, homemade doughnuts is incredibly rewarding, and the end result is unequivocally superior to anything you’ll purchase from a commercial bakery. There’s a certain alchemy to working with yeast dough, observing its transformation from a humble mixture into something truly spectacular. Don’t let perceived difficulty deter you; this comprehensive guide is designed to walk you through each step with clear instructions, making the entire baking process enjoyable and successful, even if you’re a novice to yeast baking or deep-frying.
Mastering the Dough: Essential Tips for a Fluffy Rise
The very foundation of these incredible black cat doughnuts is a perfectly made yeasted dough. For optimal results, I wholeheartedly recommend using a stand mixer fitted with a dough hook. This particular dough is intentionally quite sticky, a characteristic that is crucial for achieving the final tender and airy texture of the doughnuts. A stand mixer will make the kneading process virtually effortless, ensuring proper gluten development without you having to tirelessly wrestle with a messy, tacky dough for an extended period. It takes all the hard work out of it, allowing you to focus on the fun parts!
However, if you don’t possess a stand mixer, please don’t despair! You can absolutely knead this dough by hand. Just be prepared for a slightly messier and more hands-on experience. Don’t be shy about lightly flouring your hands and your work surface as needed to manage the stickiness. Crucially, try to avoid incorporating too much extra flour directly into the dough itself, as an excessive amount can inadvertently make the finished doughnuts tough and dense. Remember, a sticky dough is generally a happy dough when it comes to yeasted doughnuts, as it often translates to a lighter, more ethereal crumb. Continue kneading until the dough becomes noticeably smooth and elastic, a clear indication that the gluten has properly developed. This typically takes approximately 8-10 minutes of mixing on medium speed in a stand mixer, or a more vigorous 10-15 minutes by hand.
Once your dough is perfectly kneaded, it requires time to rise. Carefully transfer it to a lightly oiled bowl, ensuring it’s covered tightly with clingfilm or a clean, damp tea towel. Set it aside in a warm, draft-free environment until it has visibly doubled in size. This primary rise usually takes around an hour, but the exact time can fluctuate depending on the ambient temperature and humidity in your kitchen. For added convenience and a deeper flavor profile, you also have the option to place the dough in the refrigerator to undergo a slow, overnight rise. If you choose the overnight method, be sure to allow the dough to come up to room temperature for at least 30 minutes before proceeding with the next shaping step. This ensures the dough is pliable, relaxed, and easy to work with, preventing it from springing back and making it a joy to handle.
Shaping and Frying Your Doughnuts to Golden Perfection
After its successful first rise, gently tip the well-rested dough out onto a lightly floured surface. Using a rolling pin, carefully roll it out evenly to a thickness of approximately 1cm (roughly ⅜ inch). Achieving consistent thickness here is key for ensuring that all your doughnuts cook uniformly. Now, use a 7-8cm (about 3-inch) round pastry cutter to cut out your doughnut circles. To create the characteristic ring shape, use a smaller 3-4cm (1-1.5 inch) cutter for the center hole. If you don’t have a cutter specifically for the center, the wide end of a large piping nozzle works wonderfully, or even a clean shot glass can do the trick! Gather all the dough scraps, gently knead them together until smooth, and then re-roll the dough to cut out additional rounds. From this recipe, you should be able to yield around 8 beautiful, perfectly shaped doughnuts. And don’t discard those delightful leftover small bits of dough – I often roll them into mini balls and flatten them slightly to create adorable mini cat doughnuts, which are perfect for smaller bites or for testing your oil temperature!
Once shaped, carefully transfer your delicate doughnuts to a baking sheet generously lined with lightly oiled greaseproof paper, making sure they are well-spaced to allow for expansion. Loosely cover them again with oiled clingfilm and set them aside to rise for a second time, for approximately 40 minutes, or until they look visibly puffy, light, and almost marshmallow-like. This crucial second rise, known as proofing, is absolutely essential for developing that desirable airy, melt-in-your-mouth texture in your final fried black cat doughnuts.
Now, for the exhilarating moment of frying! Heat your deep fat fryer or a large, heavy-bottomed pot with about 2-3 inches of neutral vegetable oil (such as canola, sunflower, or peanut oil) to a precise temperature between 170°C (338°F) and 180°C (356°F). Maintaining the correct oil temperature is paramount for perfect doughnuts: if the oil is too low, your doughnuts will absorb excessive oil, becoming greasy and heavy; if it’s too high, they’ll brown too quickly on the outside while remaining raw and doughy in the center. A reliable kitchen thermometer is truly your best friend here. To gently transfer the delicate, risen doughnuts into the hot oil without deflating them, a clever trick is to cut the parchment paper around each doughnut so it sits on its own small square. Carefully lower the doughnut, still on its parchment, into the hot oil. The paper will naturally release itself from the doughnut within seconds, and you can easily fish it out with a pair of tongs. Fry the doughnuts a couple at a time, avoiding overcrowding the pan, which can drop the oil temperature too drastically. Fry them for about two minutes per side until they achieve a beautiful, even golden-brown hue. To ensure they are thoroughly cooked through, it’s always a good idea to use a probe thermometer to check the internal temperature, aiming for 100°C (212°F).
Once your doughnuts are perfectly golden and cooked, use a slotted spoon or spider tool to carefully lift them out of the hot oil. Transfer them immediately to a plate or wire rack generously lined with several layers of kitchen paper or paper towels to thoroughly drain any excess oil. This step is vital for preventing a greasy finish and ensures your black cat doughnuts remain wonderfully light.
Crafting the Silky Chocolate Ganache Glaze for Your Black Cat Doughnuts
The luscious chocolate glaze that adorns these black cat doughnuts is a simple yet wonderfully decadent ganache, elevated with a touch of sifted powdered sugar for extra sweetness and an exceptionally smooth, pourable finish. For a rich, intensely chocolatey flavor, I typically opt for all dark chocolate, ideally around 70% cocoa solids. However, if you’re preparing these delightful black cat doughnuts for a younger audience or simply prefer a milder, sweeter taste, a harmonious blend of half dark and half milk chocolate works beautifully, creating a slightly sweeter, creamier glaze that appeals to a broader palate. The key to an outstanding glaze, much like the doughnuts themselves, is to use good quality chocolate; its flavor truly shines through in the final product.
For an elevated, sophisticated twist that’s perfect for adult gatherings, consider transforming your classic chocolate glaze into a delightful mocha ganache. Simply stir in a couple of teaspoons of high-quality instant espresso powder into the cream as it heats up. The robust coffee notes will beautifully enhance and deepen the chocolate flavor, creating a wonderfully complex and utterly delicious mocha glaze that’s both familiar and intriguing.
To prepare this silky glaze, ensure your chopped chocolate is placed in a heatproof bowl that is wide enough to comfortably dip your doughnuts later. Next, gently heat the double (heavy) cream in a small saucepan until it just begins to simmer or comes to a gentle boil around the edges. Immediately pour the hot cream over the chopped chocolate in the bowl. Let it sit undisturbed for a precious couple of minutes – this critical waiting period allows the hot cream to melt the chocolate evenly and thoroughly. After two minutes, gently begin to stir the mixture with a whisk or spatula, starting from the center and slowly working outwards, until the chocolate is completely melted, and the mixture is smooth, glossy, and beautifully emulsified. Finally, stir in the sifted icing (powdered) sugar until it is fully incorporated and there are no lumps. If, at any point, the glaze appears too thick for easy dipping, you can gradually thin it out by adding a very small amount of warm cream, a tablespoon at a time, until it reaches your desired pourable consistency.
To achieve that striking, mysterious black cat effect, I highly recommend coloring the ganache glaze with black extra gel food coloring. It is absolutely crucial to use a high-quality gel coloring, preferably one specifically labeled “extra” or “super” black. Avoid liquid food colorings, as they can thin out your delicate ganache and require a large, often unmanageable, amount to achieve a truly deep black shade, potentially altering the texture and taste of your beautiful glaze. Gel coloring, especially the highly concentrated variety, provides intense color with just a tiny amount, ensuring your glaze remains perfectly rich and thick. Add it incrementally, a tiny bit at a time, stirring thoroughly after each addition, until you reach your desired deep, mysterious black hue. Remember, a little goes a very long way with these concentrated gels!
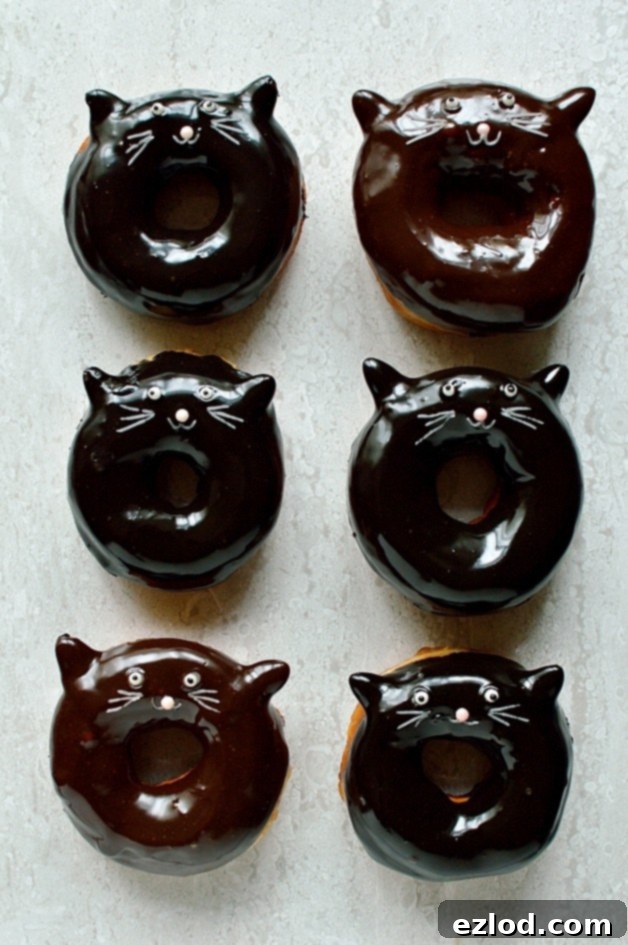
Bringing Your Black Cats to Life: An Easy Decoration Guide
Now for arguably the most enchanting part: decorating your adorable black cat doughnuts! Before you begin glazing, take each cooled doughnut and carefully make two small, shallow slits on the top, positioned where the ears will naturally sit. Next, take a whole raw almond and dip its rounded end into a small amount of melted dark chocolate (about 25g, melted). Gently insert the chocolate-dipped end of the almond into one of the prepared slits. Repeat this process for the second ear, positioning it symmetrically. The melted chocolate serves as an excellent edible “glue,” effectively securing the almond ears in place. Set the doughnuts aside briefly to allow the melted chocolate to firm up and harden completely. This crucial step ensures that the ears remain perfectly upright and secure as you proceed with the glazing and facial detailing.
Once the almond ears are firmly set, it’s time to apply the luxurious black glaze. Dip the top surface of each doughnut into your prepared black ganache glaze, allowing any excess to beautifully drip off back into the bowl. Then, carefully transfer the glazed doughnut to a wire rack, allowing the glaze to set and firm up. If, during this process, your glaze begins to cool and thicken too much, don’t worry – it’s an easy fix! A quick 10-15 second blast in the microwave (followed by a thorough stir) will quickly restore it to the perfect dipping consistency, ensuring a smooth and even coat on every doughnut.
After the glaze has set slightly – it should be a little tacky to the touch but no longer wet – you can enthusiastically begin adding the charming facial features. For the cat’s nose, gently press a single pink edible sugar pearl into the center of the doughnut, just below the almond ears. For the eyes, position two white edible sugar pearls just above the nose, creating bright, curious eyes. If you find yourself without sugar pearls, don’t fret; you can easily pipe these features using pink and white writing icing for a similar effect. Using white writing icing (the convenient kind typically sold in small tubes at supermarkets), carefully pipe on the cat’s adorable mouth and delicate whiskers. For the final, crucial touch, pipe a tiny, precise dot of black writing icing onto the center of each white eye pearl to create lifelike pupils. Repeat this delightful process for all your chocolate glazed black cat doughnuts, watching their unique personalities magically emerge with each careful detail.
These beautiful and incredibly delicious black cat doughnuts are unequivocally best enjoyed on the very day they are made, when they are at their absolute freshest, softest, and most flavorful. Any leftover doughnuts can be stored in an airtight container at room temperature for up to two days, though I doubt they’ll last that long! As for any leftover ganache glaze, please, do not let it go to waste – it’s far too versatile! You can easily freeze it for future use as a rich, decadent cake filling once it thickens, or chill it thoroughly in the fridge until it becomes firm. Once solid, you can roll the chilled ganache into small, uniform balls and dust them with cocoa powder or powdered sugar to create exquisite homemade truffles. It truly is a gift that keeps on giving, allowing you to enjoy that glorious chocolate flavor in multiple ways!
More Spooky & Delicious Halloween Recipes from Domestic Gothess:
- Witches’ Finger Cookies: Creepy, buttery, and surprisingly delicious shortbread cookies that are perfect for a spooky treat.
- Haunted Pavlova: An eerie yet elegant meringue dessert, perfect for a sophisticated Halloween gathering, featuring dramatic cracked meringue.
- Mini Bleeding Heart Halloween Cakes: Individual cakes with a dramatic, spooky twist – perfect for portion control and maximum impact.
- Chocolate Blackberry Gothic Halloween Cake: Dark, rich, and perfectly haunting, this cake combines deep chocolate with tart blackberries for a truly elegant dessert.
- Meringue Bone Palace Halloween Cake: A showstopping cake adorned with intricately crafted edible meringue bones, sure to impress any ghoulish guest.
- Jack-O-Lantern Pumpkin Pies: Classic, comforting pumpkin pies given a festive, carved face twist, making them perfect for your Halloween dessert table.
- Monochrome Cake: A stylish and deceptively simple cake, perfect for a subtle, chic Halloween theme or any occasion demanding understated elegance.
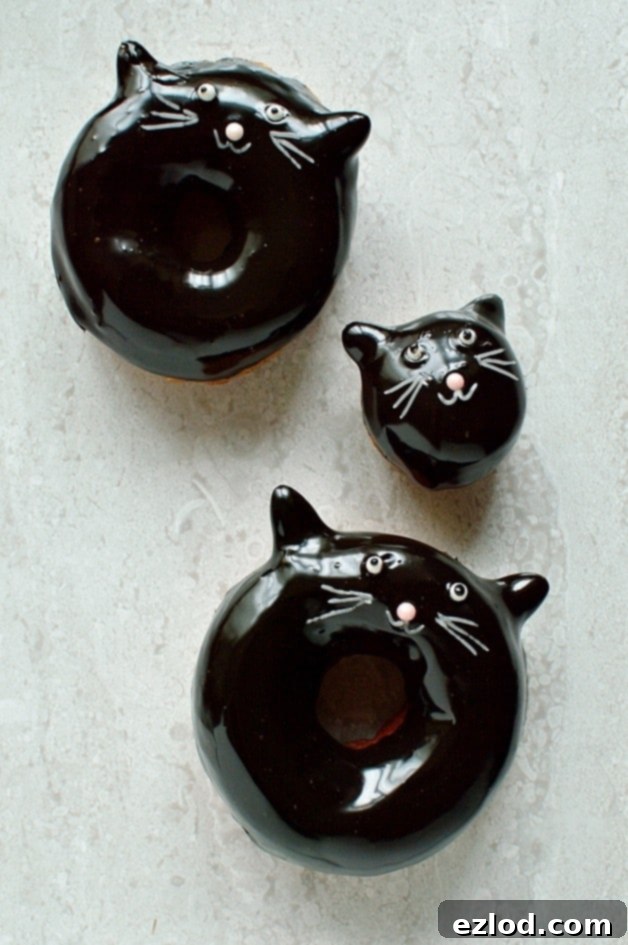
If you tried this delightful recipe and created your own batch of chocolate glazed black cat doughnuts, we’d absolutely love to see your amazing creations! Why not tag @domestic_gothess on Instagram and hashtag it #domesticgothess to share your culinary masterpieces with our community?
*Please note: All images and content presented on Domestic Gothess are copyright protected. If you wish to share this recipe, we kindly request that you do so by utilizing the convenient share buttons provided. We respectfully ask that you do not screenshot or post the recipe or content in its entirety on other platforms. Your understanding and cooperation are greatly appreciated.*
Chocolate Glazed Black Cat Doughnuts Recipe:

Chocolate Glazed Black Cat Doughnuts
Ingredients
Doughnuts:
- 250 g strong white bread flour 2 cups + 2tbsp
- 7 g fast action yeast 2 tsp
- 5 g salt ½ tsp
- 30 g caster sugar 2 tbsp
- 25 g softened unsalted butter 2 tbsp
- 1 large egg
- 120 ml warm full fat milk ½ cup
- vegetable oil for frying
Chocolate Glaze:
- 200 g dark chocolate (0r 100g dark and 100g milk chocolate) 7oz, chopped
- 200 ml double (heavy) cream ¾ cup + 2tbsp, plus a little extra if needed
- 50 g icing (powdered) sugar ½ cup, sifted
- black extra gel food colouring optional
To Decorate:
- 25 g dark chocolate 1oz, melted
- whole raw almonds
- pink and white sugar pearls
- black and white writing icing
Instructions
-
To make the dough, place all of the ingredients (apart from the vegetable oil) into the bowl of a stand mixer fitted with a dough hook. Mix on a low speed until it comes together into a dough then turn up the speed and continue to mix until it is smooth and elastic and comes away from the sides of the bowl cleanly. You can knead the dough by hand if you prefer but it is very sticky.
-
Place in a bowl, cover with clingfilm and set aside until doubled in size, about 1 hour. You can also place the dough in the fridge to rise overnight, allow to come up to room temperature for half an hour before proceeding with the next step.
-
Tip the dough out onto a lightly floured surface and roll it out to about 1cm thick. Use a 7-8cm round pastry cutter to cut out circles of dough, then use a 3-4cm one to cut a hole out of the centre of each (I used the wide end of a large piping nozzle as I didn’t have a cutter small enough). Knead together the scraps until smooth then re-roll the dough and cut out more rounds; you should be able to get about 8 doughnuts. I rolled the leftover scraps into a couple of small balls and flattened them slightly to make a couple of mini cats. You can also make fewer ring doughnuts and keep the holes to make more mini cat doughnuts.
-
Place the doughnuts well spaced apart on a baking sheet lined with lightly oiled greaseproof paper; cover loosely with oiled clingfilm and set aside to rise for about 40 minutes until puffy.
-
Heat a deep fat fryer or large pan of oil to between 170C (338F) and 180C (356F). Cut the paper around each doughnut so that each one is sitting on it’s own square of paper. Lift the doughnut on it’s parchment into the oil; the paper will come away from the doughnut and you can fish it out with tongs. I find this the easiest way to transfer the doughnuts into the fryer as they are quite soft and sticky.
-
Fry the doughnuts a couple at a time for a couple of minutes per side until golden, they should reach 100C (212F) inside, I use a probe thermometer to check each one is done.
-
Use a slotted spoon to lift the doughnuts out onto a plate lined with kitchen paper to drain.
-
Cut a couple of small slits in the top of each doughnut for the ears to fit in. Dip the rounded end of an almond into the melted chocolate and stick it into one of the slits; repeat to make the rest of the ears. Set aside until the chocolate has hardened.
-
To make the glaze, place the chocolate in a bowl that is wide enough to dip the doughnuts in. Heat the cream until just boiling then pour it over the chocolate; leave for a couple of minutes then stir until melted and smooth. Stir in the icing sugar. Add food colouring a little at a time (if using), until the glaze reaches the desired shade, a little goes a long way with the black extra so just add a bit at a time. If the glaze is a bit too thick for dipping, you can thin it with a little bit more warm cream.
-
Dip the tops of each doughnut into the glaze, letting the excess run off before placing them on a wire rack. If the glaze cools too much and becomes too thick, you can give it a short blast in the microwave to re-melt it.
-
Once the glaze has set a little, use a pink pearl to make the cat’s nose, and two white pearls for the eyes. Pipe on the mouth and whiskers with the white writing icing, and pipe a tiny dot of black writing icing on each eye to make a pupil. Repeat with the remaining doughnuts.
-
Store in an airtight container, best eaten on the day they are made.
