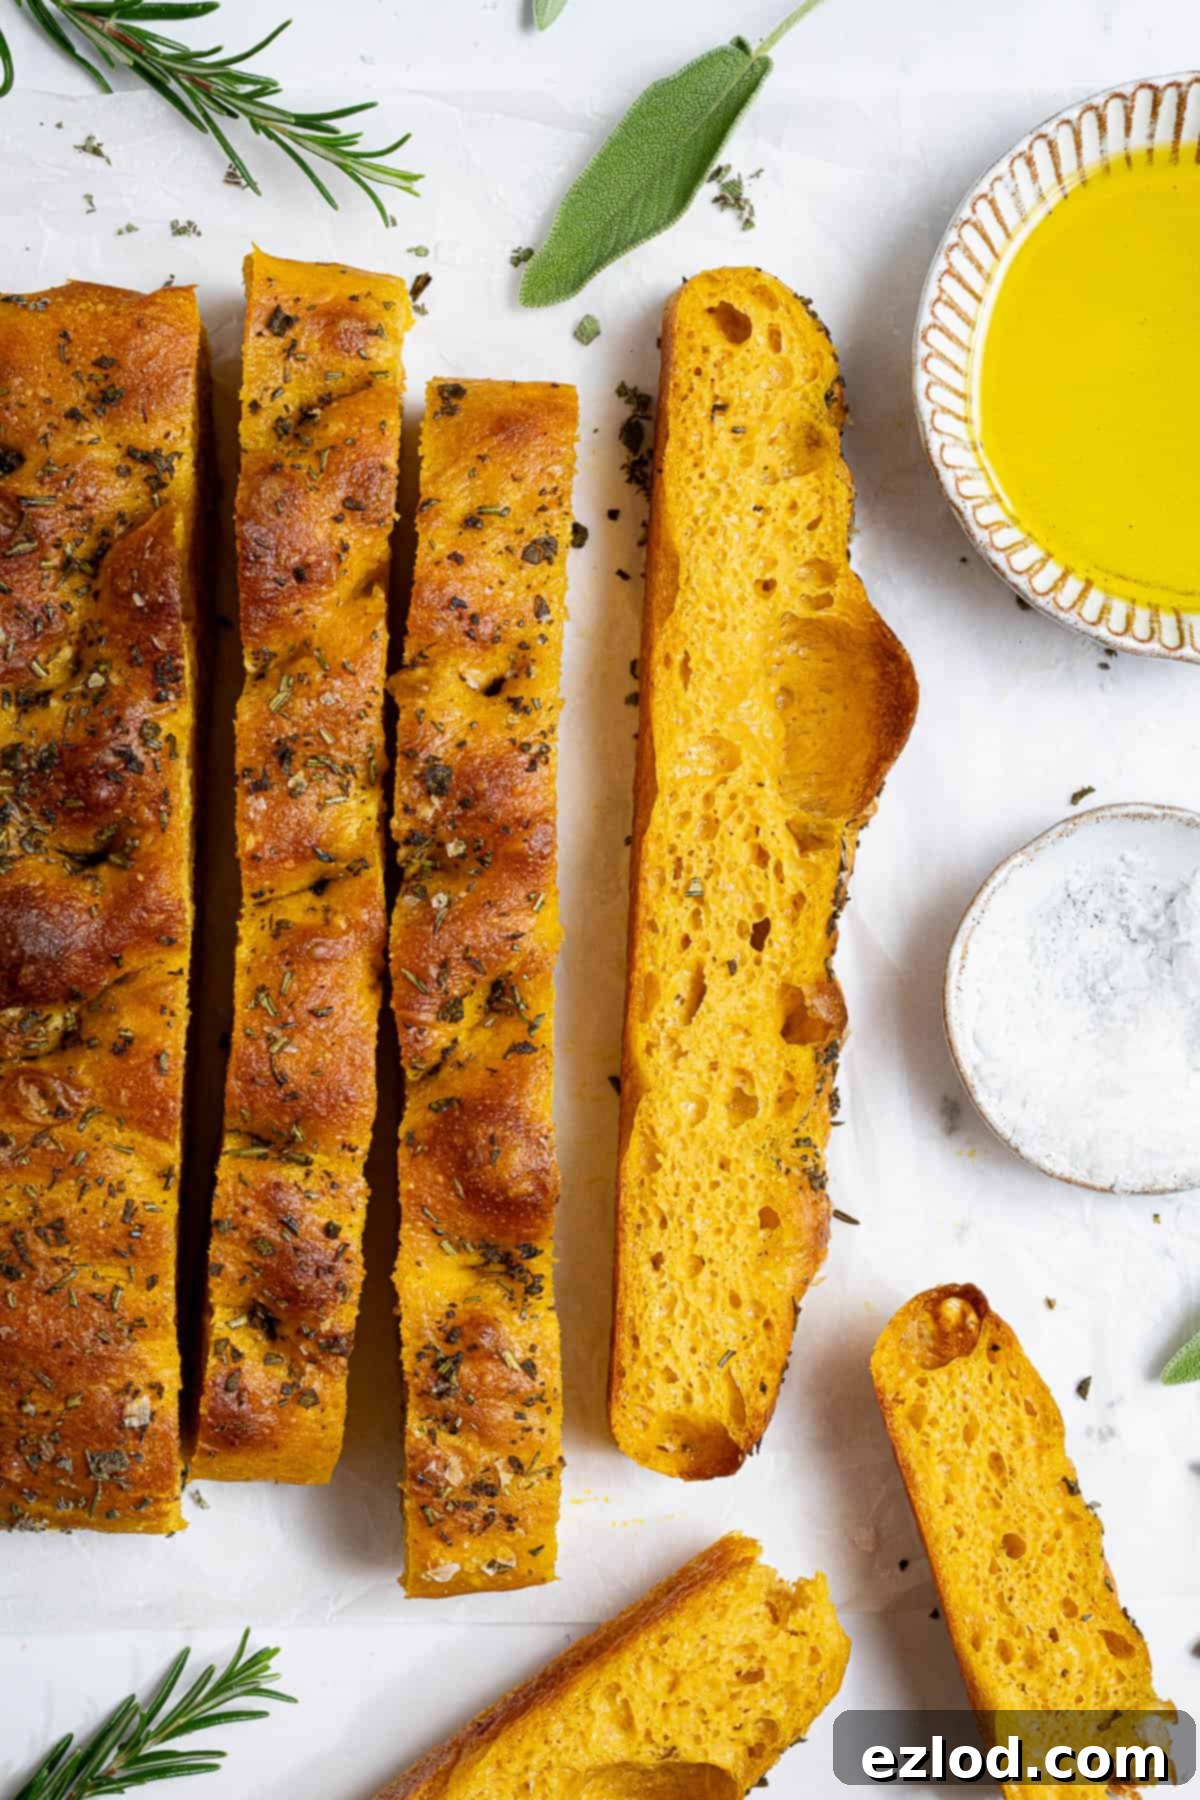
Irresistible No-Knead Pumpkin Focaccia: A Soft, Chewy & Herby Vegan Delight
Prepare to be amazed by this truly incredible pumpkin focaccia bread! Achieving a perfect balance of soft, chewy texture with a delightful bubbly crumb and a hint of fresh herbs, this recipe is surprisingly simple. The secret lies in the efficient “stretch and fold” method, eliminating the need for extensive kneading and drastically reducing hands-on time. It’s an ideal baking project for both novice and experienced bakers looking for a rewarding, low-effort bread.
This vibrant pumpkin focaccia is more than just a side dish; it’s a culinary experience. Its rich flavor and appealing texture make it an exquisite accompaniment to hearty Autumn soups and robust stews. However, don’t be surprised if you find yourself enjoying slices of this delightful bread on its own, perhaps dipped in a good quality olive oil, savoring every single bite.
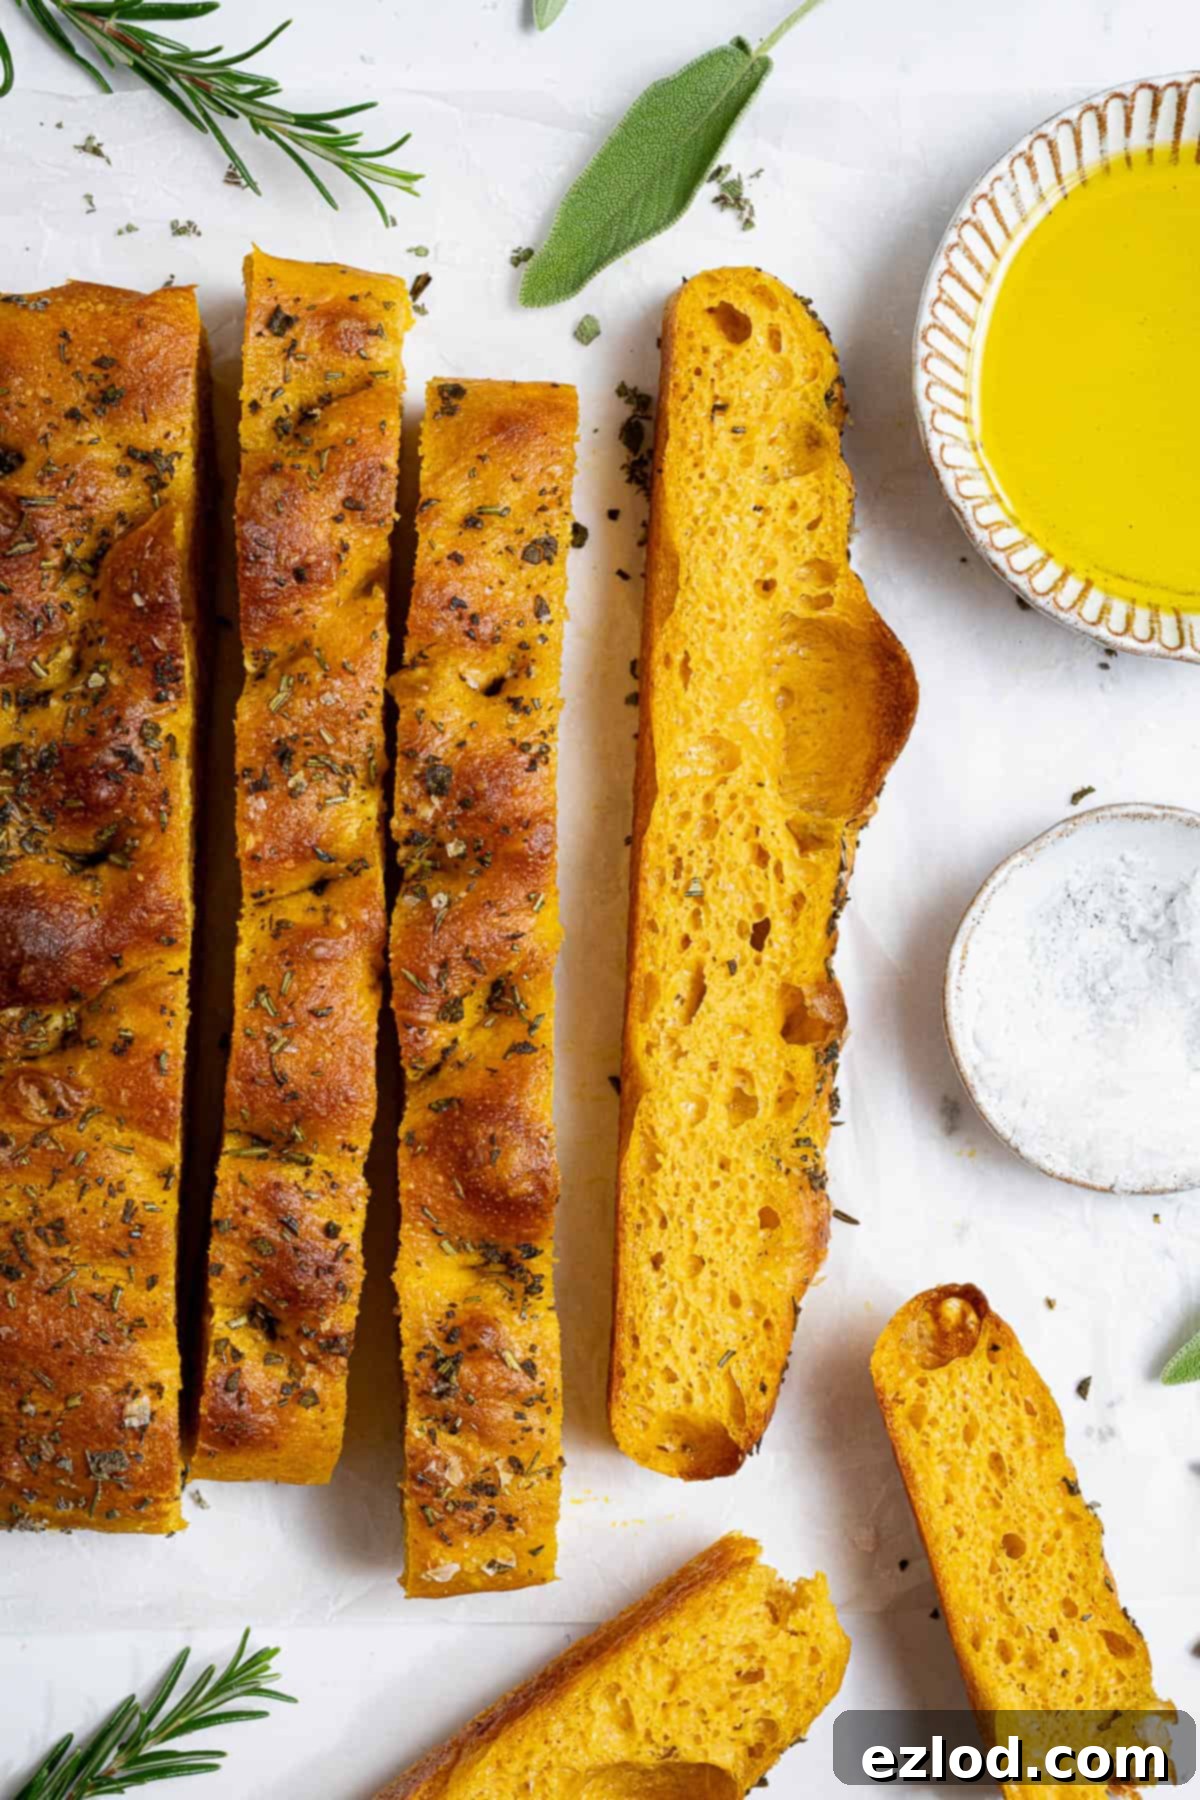
Focaccia holds a special place in my heart as one of my all-time favorite breads to bake. Its appeal stems from a harmonious combination of relatively low effort and incredibly high reward. It’s an exceptionally versatile bread, offering a blank canvas for various toppings and flavors, yet it shines brightly even in its simplest form. This particular pumpkin focaccia recipe, however, has become my latest obsession, taking the classic Italian bread to a new level of autumnal delight.
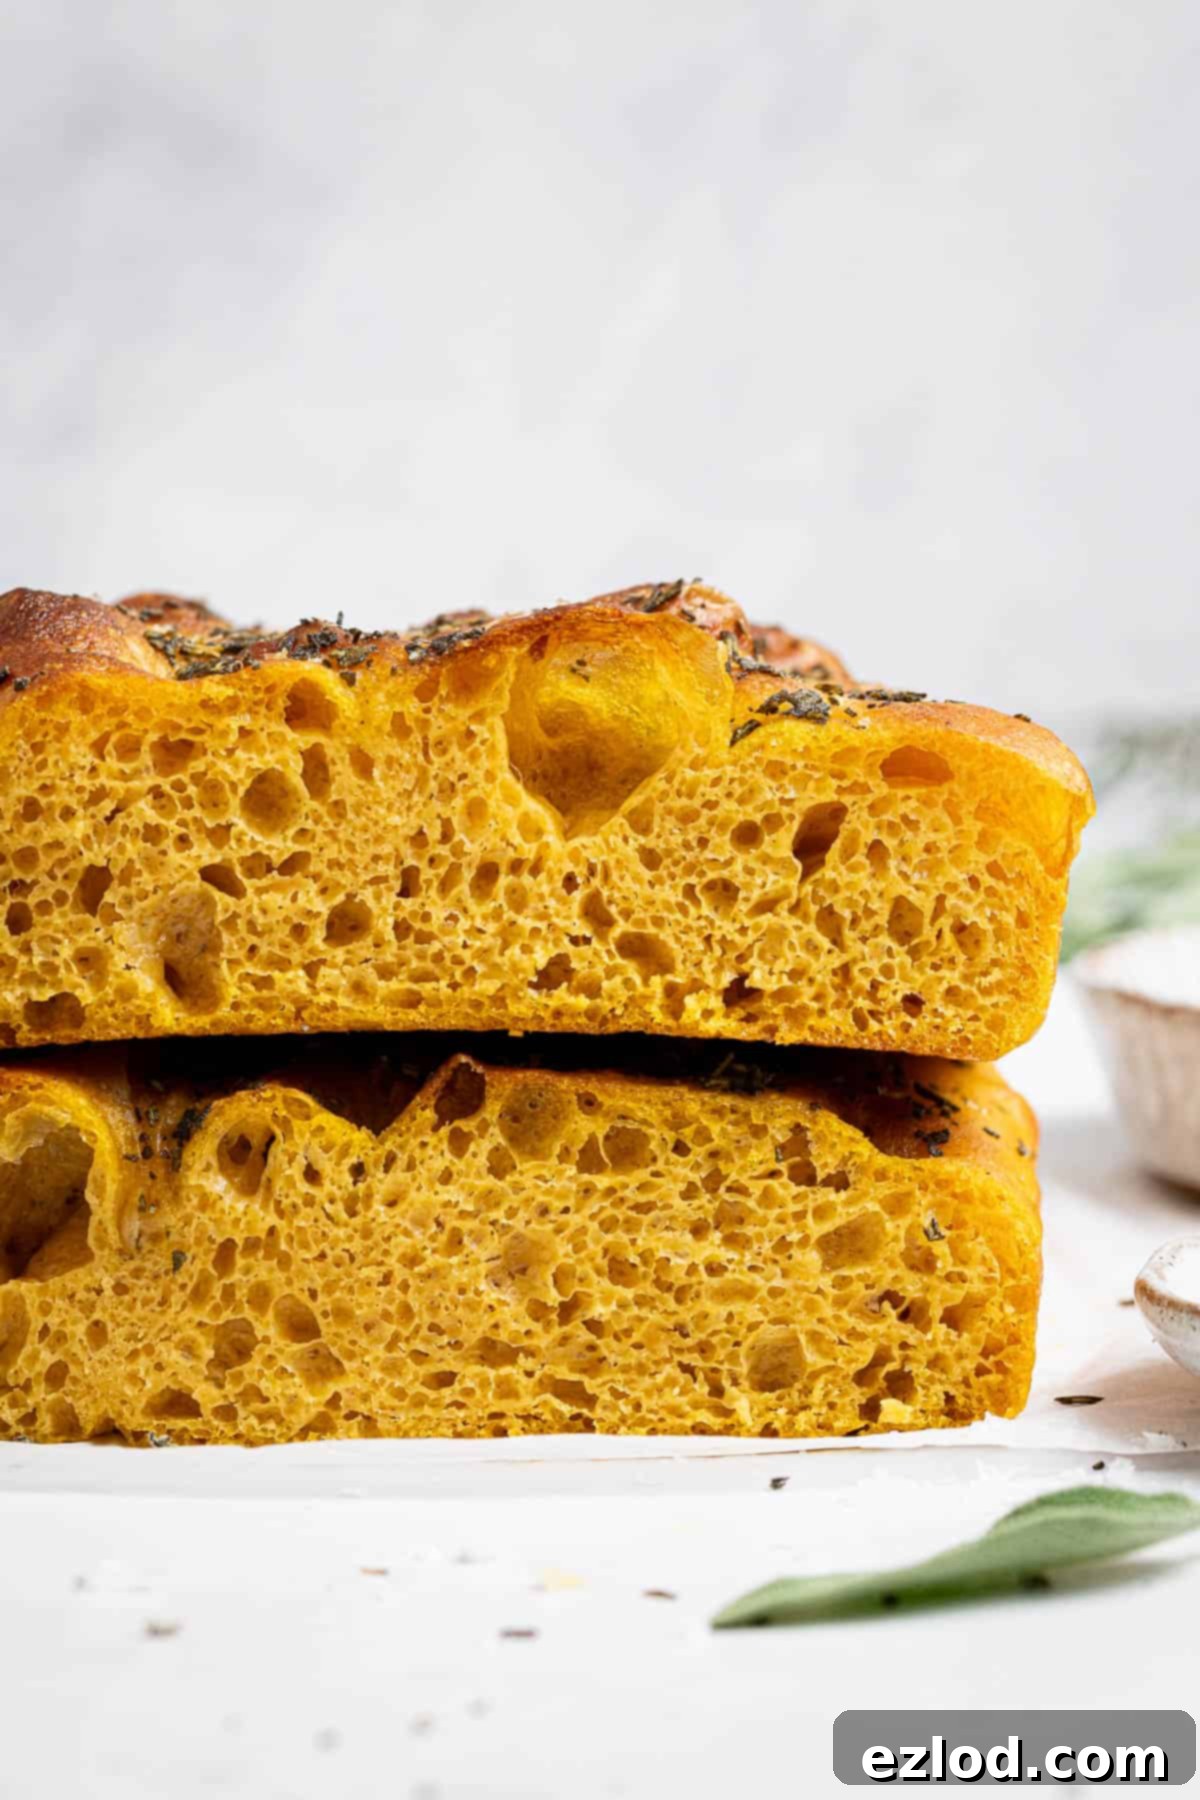
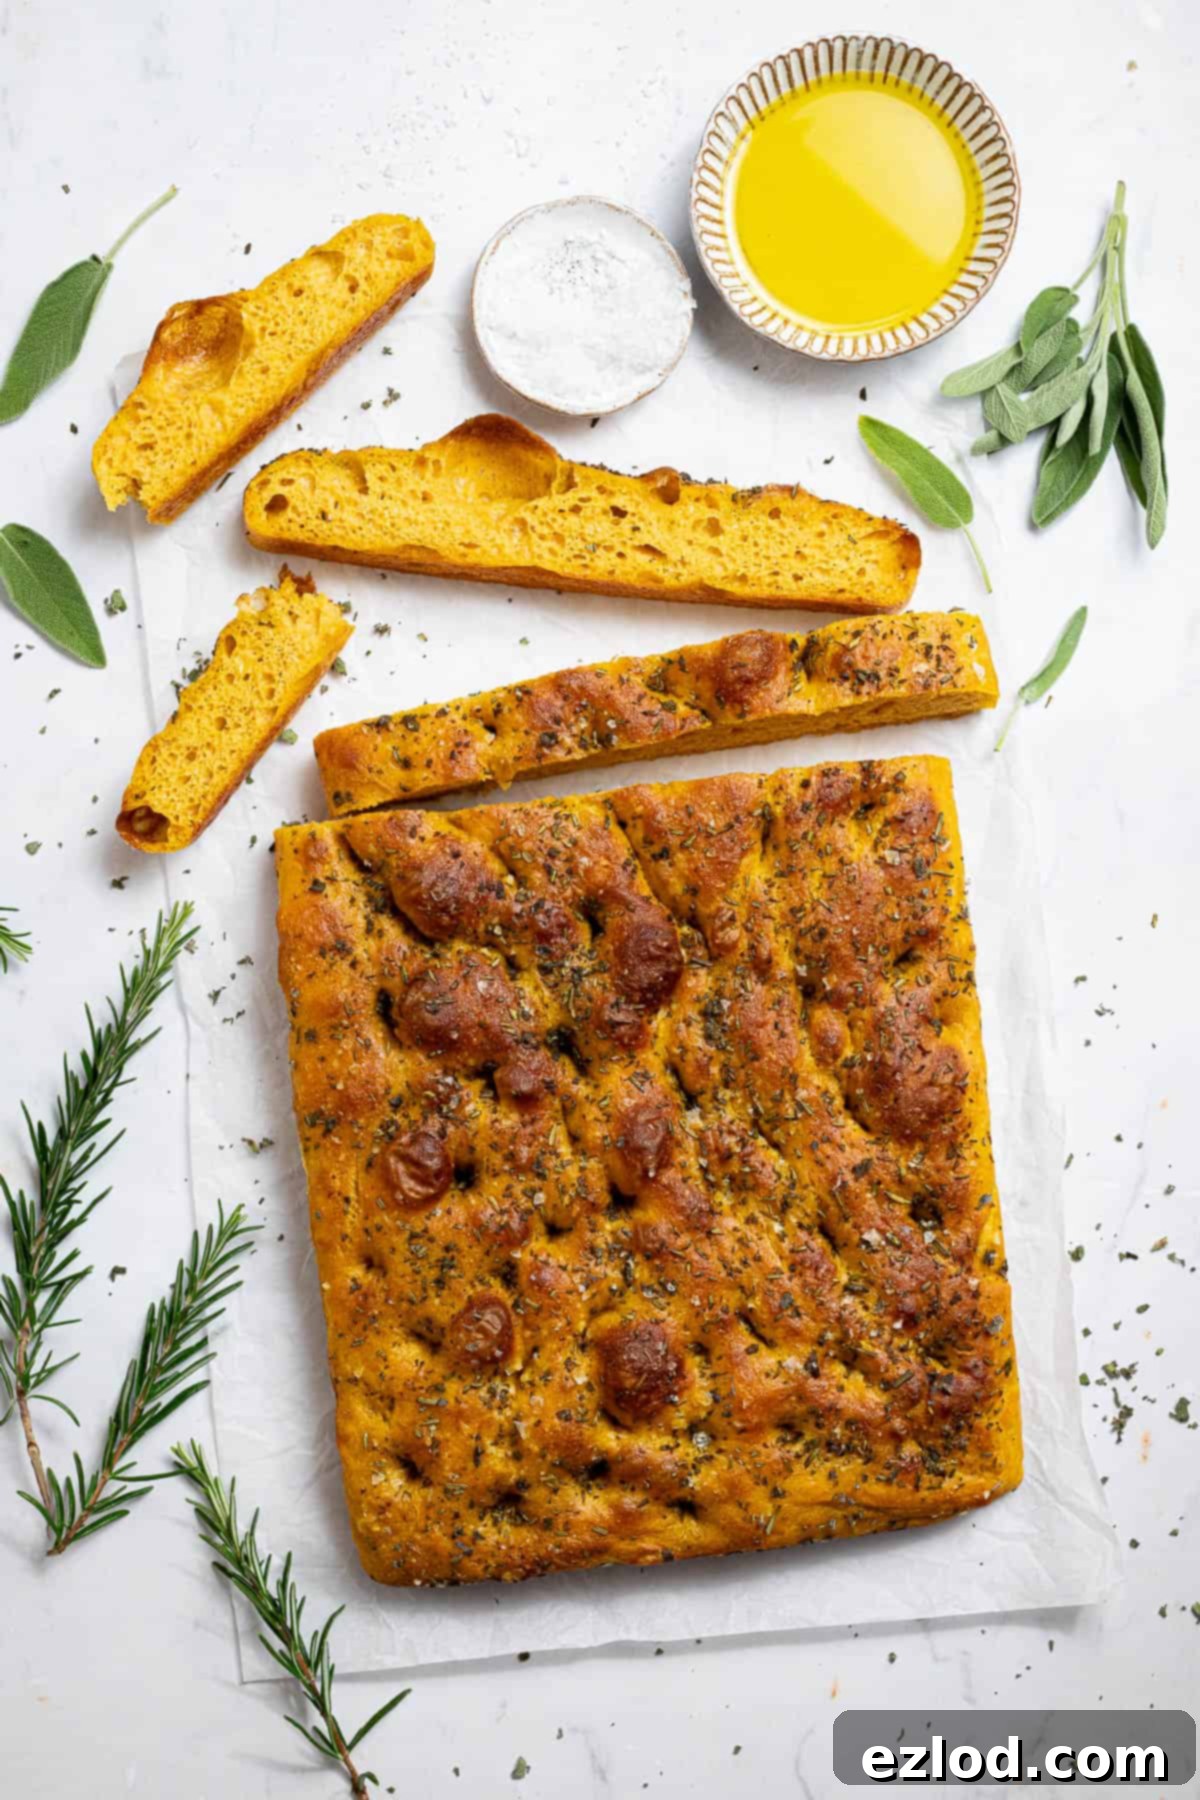
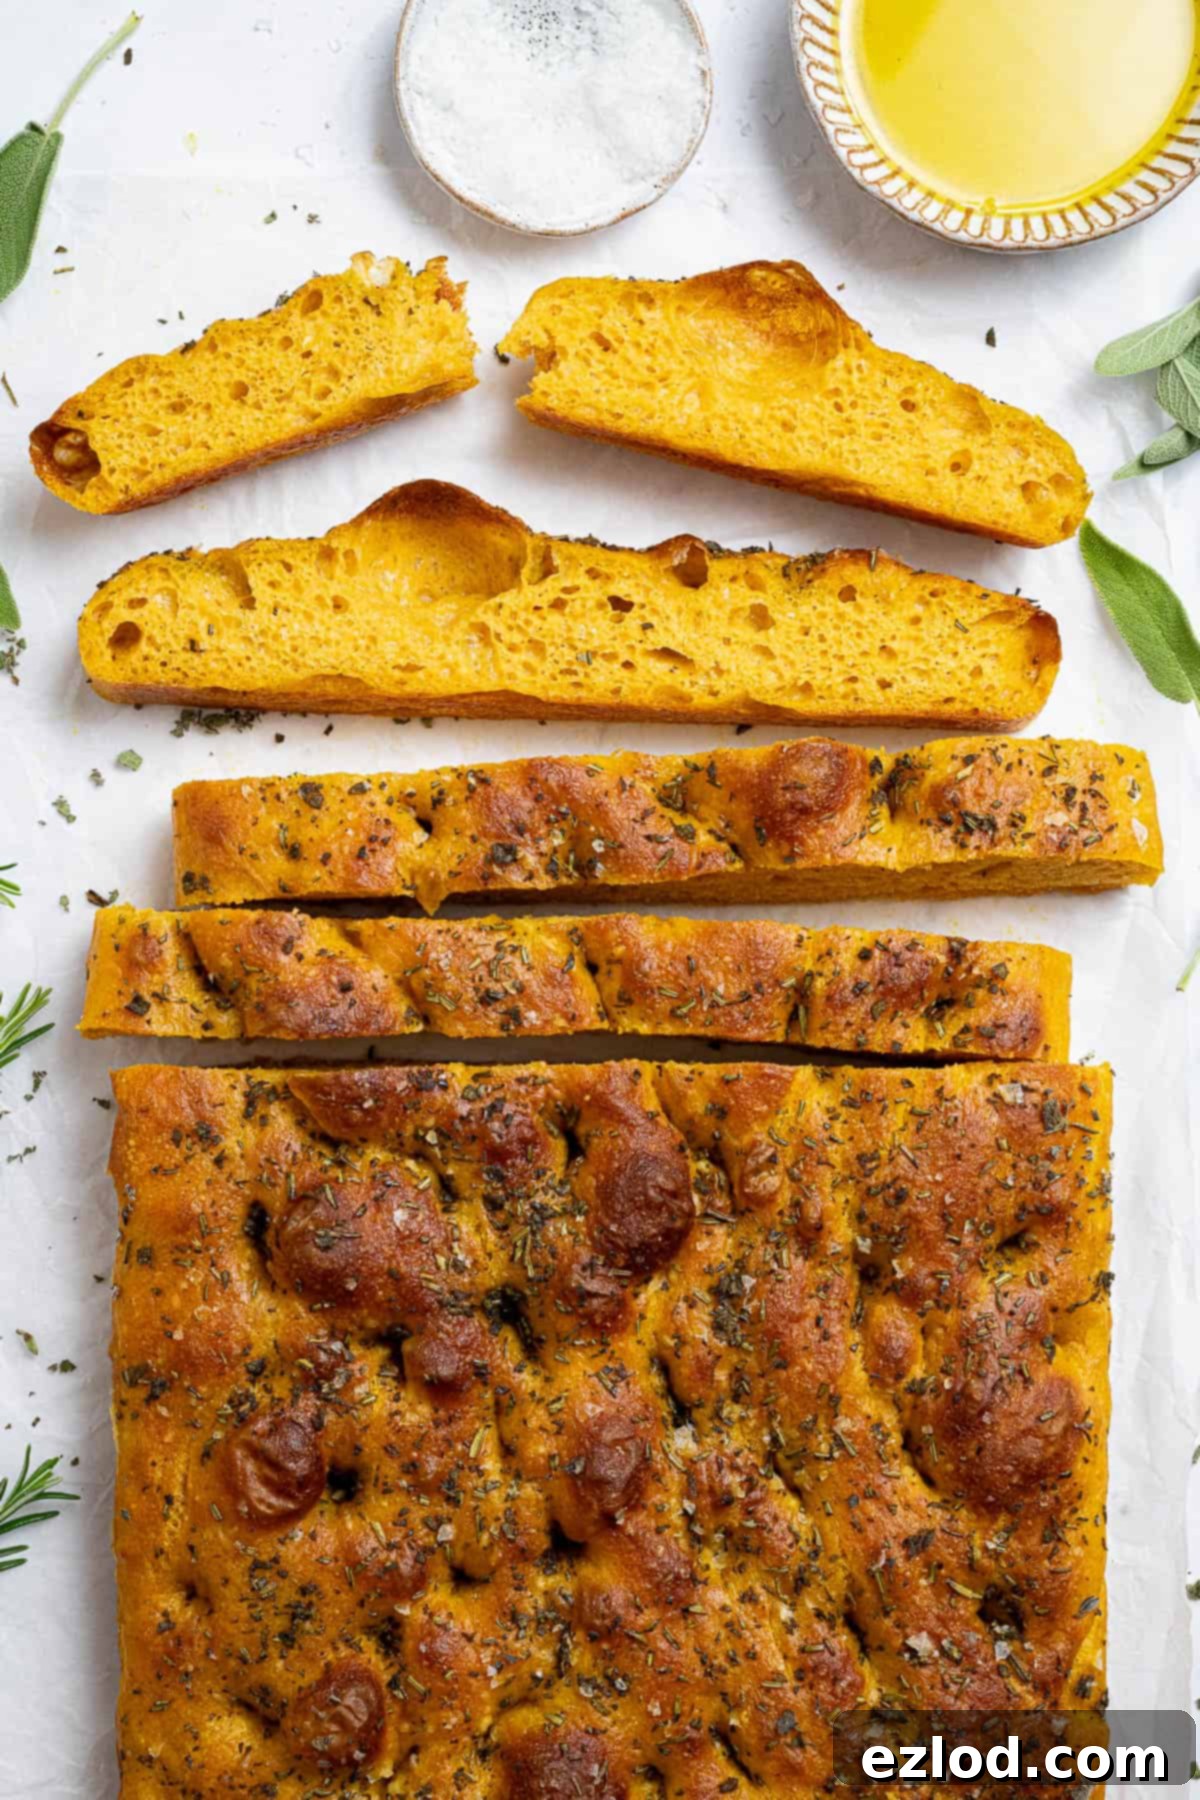
What sets this pumpkin focaccia apart is its remarkable texture: an exquisitely soft, airy, and bubbly interior that contrasts beautifully with a crisp, almost fried-bread-like exterior. Flavor-wise, it’s not overwhelmingly “pumpkin-y” in a sweet sense. Instead, the pumpkin puree lends a subtle, earthy sweetness and a delicate depth of flavor, enhancing the overall profile without dominating. Beyond taste, the pumpkin puree plays a crucial role in ensuring a perfectly tender crumb and imparts a gorgeous, natural bright orange hue to the bread, making it as appealing to the eye as it is to the palate.
Crafting this focaccia utilizes the innovative stretch and fold technique, a method I highly recommend. It simplifies the bread-making process significantly, as it completely bypasses the traditional, often strenuous, kneading of the dough, making it accessible and enjoyable for everyone.
Understanding the Stretch and Fold Technique for Perfect Focaccia
The stretch and fold method is a revolutionary technique in bread making, particularly beneficial for high-hydration doughs like focaccia. Its primary purpose is to develop gluten and strengthen the dough structure without the intensive physical effort of traditional kneading. Given that focaccia dough is intentionally very wet and sticky, attempting to knead it would be challenging, messy, and often frustrating. The beauty of the stretch and fold method lies in its simplicity and cleanliness, as the entire process is performed directly within the mixing bowl.
Here’s how this brilliant technique works: Initially, the dough ingredients are gently stirred together until just combined. There’s no vigorous kneading at this stage. Once mixed, the bowl is covered, and the dough is allowed to rest for a brief 15 minutes. This short rest period, known as autolyse, allows the flour to fully hydrate and the gluten proteins to begin developing naturally. Following this rest, you perform the first set of stretch and folds. To do this, simply wet your hands (this prevents the sticky dough from adhering to your fingers), then gently grasp a portion of the dough from one side of the bowl. Lift it upward, stretching it until it resists, then fold it over itself towards the center of the bowl. Rotate the bowl slightly and repeat this action, performing approximately 8-12 stretches and folds until you’ve worked your way around the entire perimeter of the dough.
After the first set, cover the bowl again and let the dough rest for another 15 minutes. This resting period is crucial; it allows the gluten strands to relax and strengthen further. You will then repeat the stretching and folding process. This cycle of stretching, folding, and resting is repeated for a total of 5 times. As you progress through each set, you’ll notice a remarkable transformation in the dough. It will gradually become noticeably stronger, more elastic, and increasingly resistant to stretching, indicating excellent gluten development. This entire process, while requiring several intervals, involves only a few minutes of active hands-on time per set and generates minimal mess, making it an incredibly efficient and satisfying way to achieve a beautifully structured bread.
Essential Ingredient Details for Perfect Pumpkin Focaccia
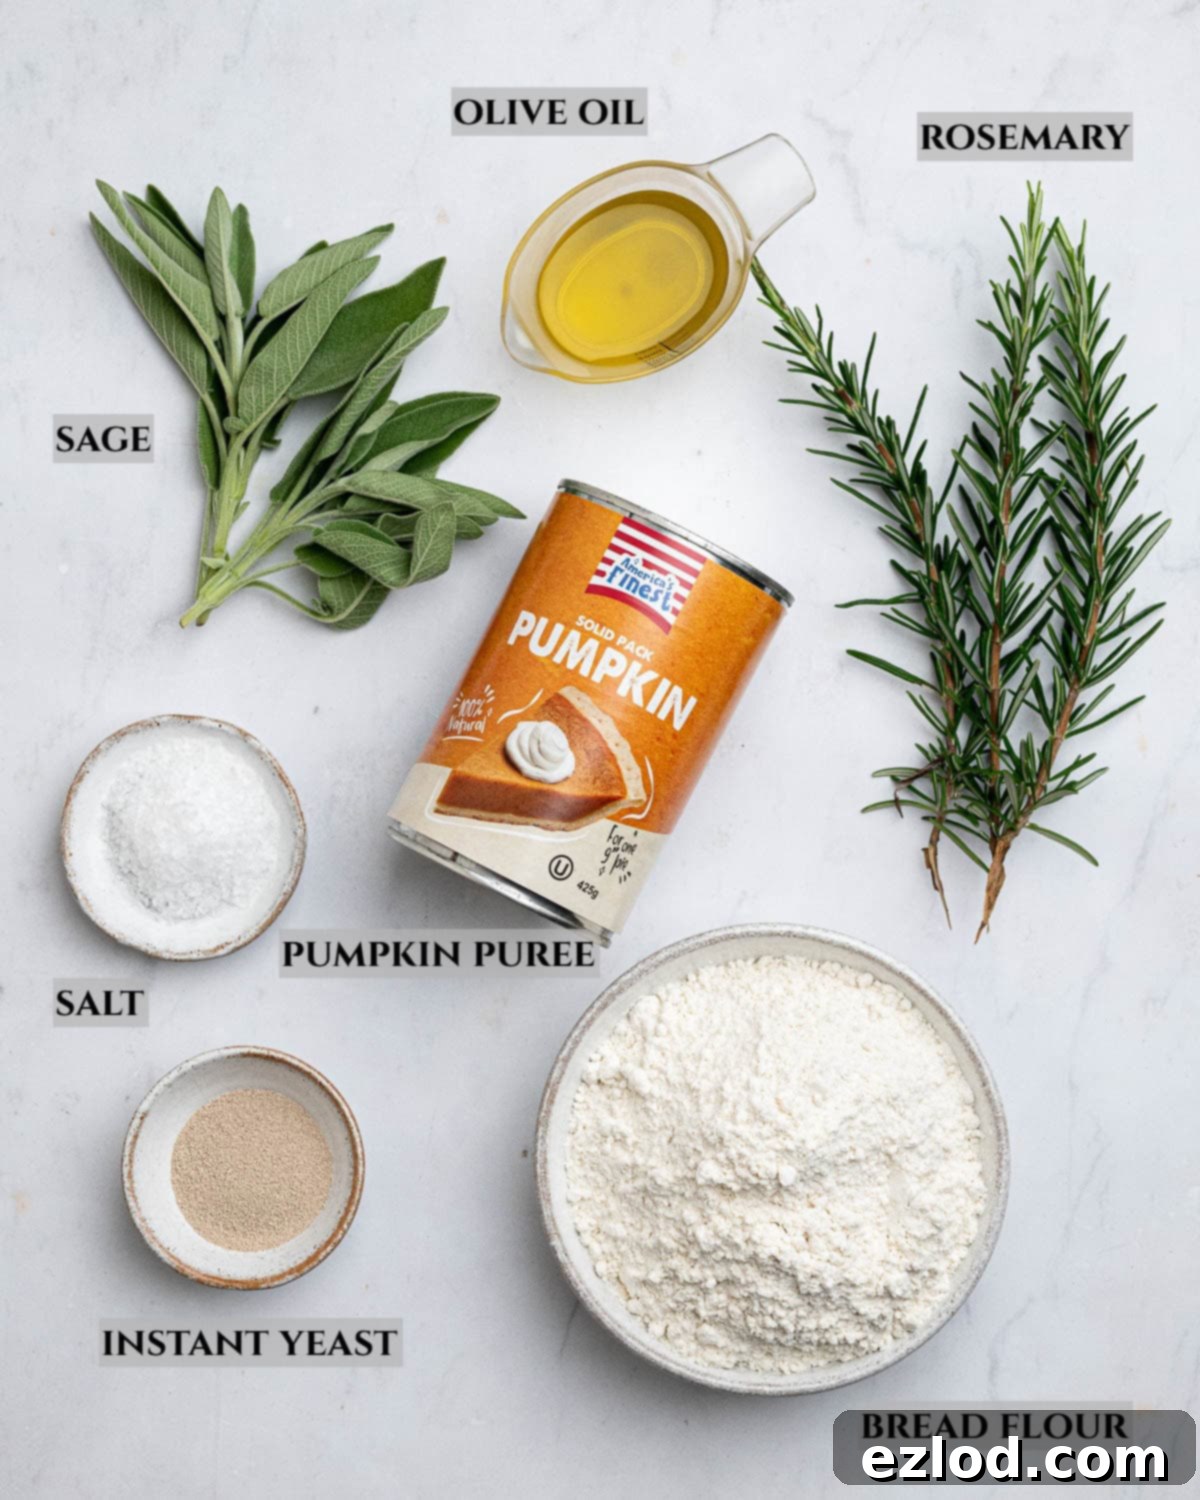
Using the right ingredients is key to achieving the perfect soft, chewy, and bubbly texture of this pumpkin focaccia. Pay close attention to these details for the best results:
Tinned Pumpkin Puree: This is a non-negotiable ingredient. It is vital to use pure pumpkin puree, not pumpkin pie filling. Pumpkin pie filling contains added sugars and spices that will alter the flavor and texture of your savory focaccia. If you’re in the UK, look for it in larger supermarkets or specialty stores, or purchase it online. Alternatively, for the freshest flavor and texture, you can easily make your own pumpkin puree by roasting a small pumpkin or butternut squash until tender, then pureeing it until smooth. Ensure it’s completely cooled before incorporating it into the dough.
Bread Flour: The type of flour you choose is critical for the focaccia’s characteristic chewiness and open crumb structure. You must use white bread flour, often labeled as “strong white bread flour” in the UK. This type of flour has a higher protein content (typically 12-14%) compared to plain or all-purpose flour. The higher protein is essential for developing strong gluten networks, which are responsible for the dough’s elasticity and ability to trap gas, creating those desirable large air pockets. Using plain/all-purpose flour, with its lower protein content, will result in a denser, less airy focaccia. Do not use gluten-free flour, as this recipe relies entirely on gluten development, and wholemeal flour will also produce a different, heavier texture.
Yeast: For convenience and consistent results, I always recommend using instant yeast (also known as fast-action or easy-bake yeast) when baking bread. Instant yeast can be added directly to the dry ingredients without prior activation, saving time and effort. If, however, active dry yeast is your only option, refer to the FAQ section below for specific instructions on how to properly activate it before proceeding with the recipe. Proper yeast activity is crucial for the dough’s rise.
Olive Oil: The quality of your olive oil significantly impacts the flavor of your focaccia. Invest in a good quality extra virgin olive oil, as it contributes a fruity, peppery depth to both the dough and the final drizzle. It not only adds flavor but also contributes to the tender crumb and helps create that crispy, almost fried exterior when baked. Don’t skimp on this ingredient; it makes a noticeable difference.
Salt: Salt is an indispensable component in bread making. Beyond mere seasoning, it plays several critical roles: enhancing the overall flavor of the bread, regulating yeast activity (slowing it down slightly for better flavor development), and contributing to the crust’s color and crispness. I use fine sea salt or standard table salt within the dough for even distribution. Just before baking, a generous sprinkle of flaky sea salt on top provides a delightful textural contrast and a burst of savory flavor. While the extra sprinkle of flaky salt is optional, the salt incorporated into the dough is not and should never be omitted.
Herbs: The choice of herbs can elevate your focaccia. Pumpkin pairs exceptionally well with robust, aromatic herbs like rosemary and sage, which is why I’ve chosen them for this recipe. Their earthy, slightly pungent notes beautifully complement the subtle sweetness of the pumpkin. Other excellent choices include fresh thyme or oregano, which also offer wonderful flavor profiles. Fresh herbs are always preferred for their vibrant aroma and taste, but if fresh options aren’t available, dried herbs can certainly be used instead. Just remember that dried herbs are more concentrated, so use about half the amount of fresh herbs.
Step-by-Step Guide: How To Make Amazing Pumpkin Focaccia
(For precise measurements and detailed instructions, please refer to the comprehensive recipe card located at the very bottom of this page.)
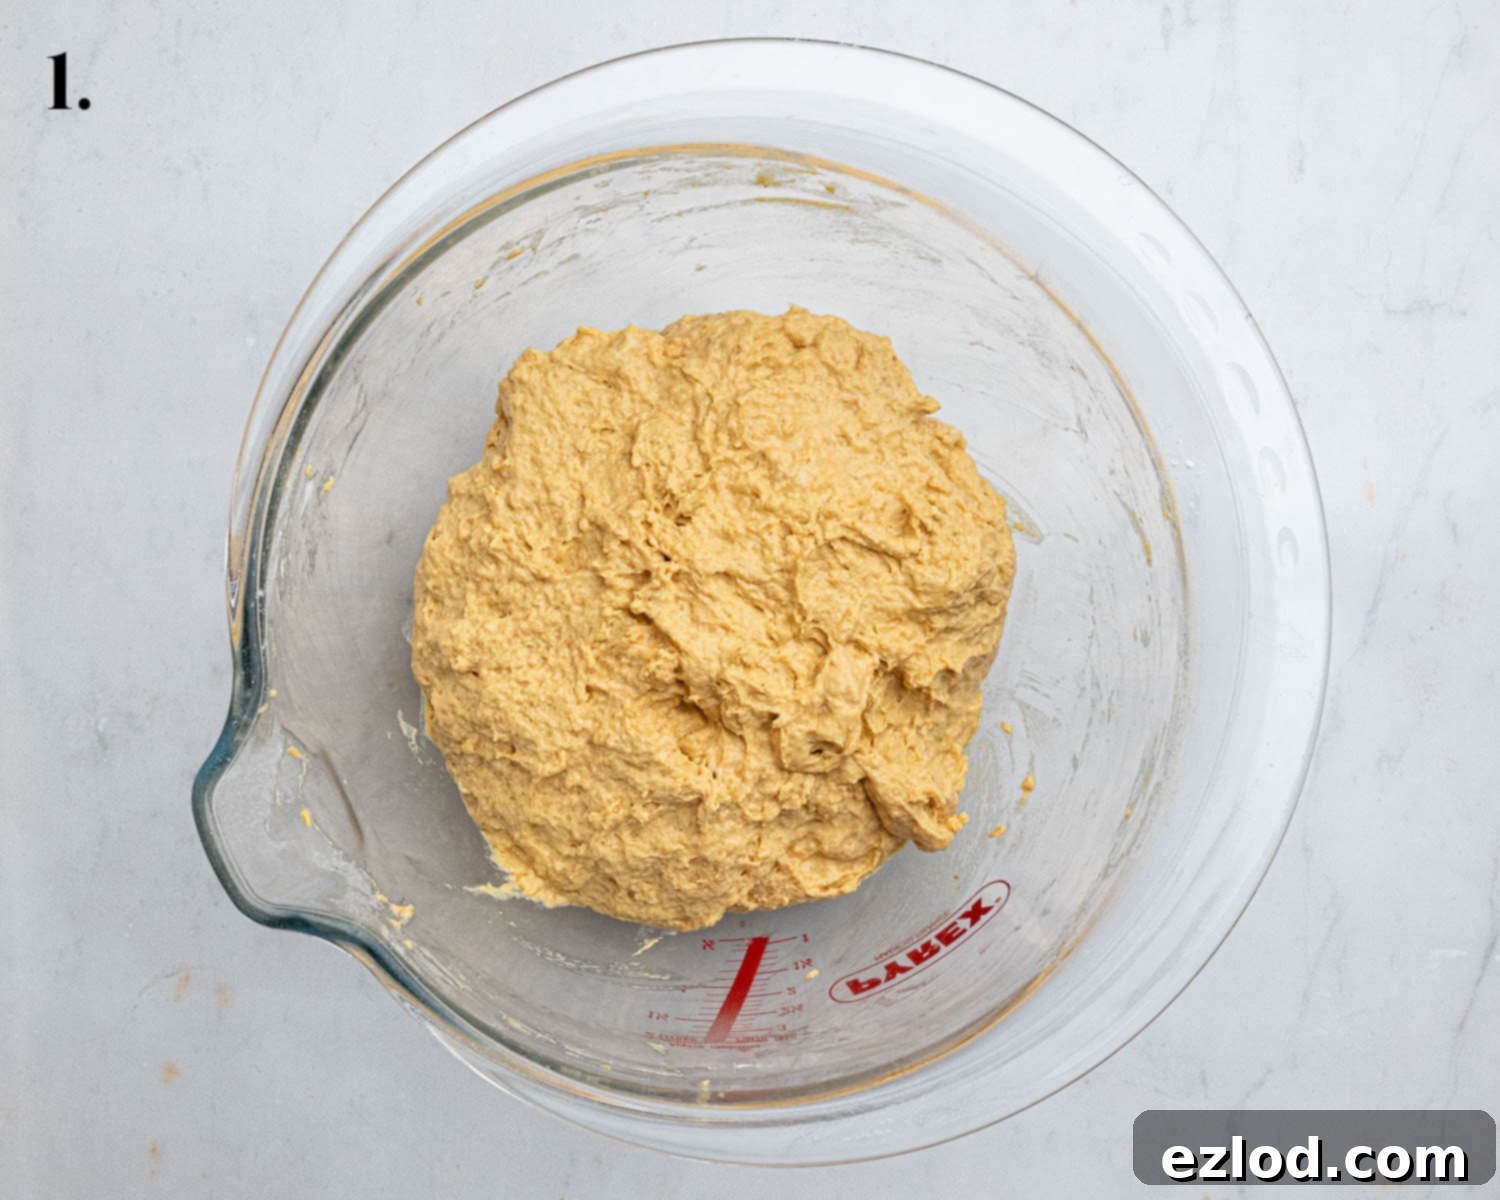
- Step 1: In a large mixing bowl, combine the pumpkin puree, lukewarm water, and extra virgin olive oil. Stir these liquid ingredients together until they are well integrated. Then, add the instant yeast, fine table salt, and white bread flour. Mix everything thoroughly with a sturdy spoon or a dough whisk until a sticky, shaggy dough forms. Ensure there are no dry pockets of flour remaining. Once combined, cover the bowl with plastic wrap or a damp kitchen towel and let it rest at room temperature for 15 minutes. This initial rest allows the flour to hydrate and begins the gluten development.
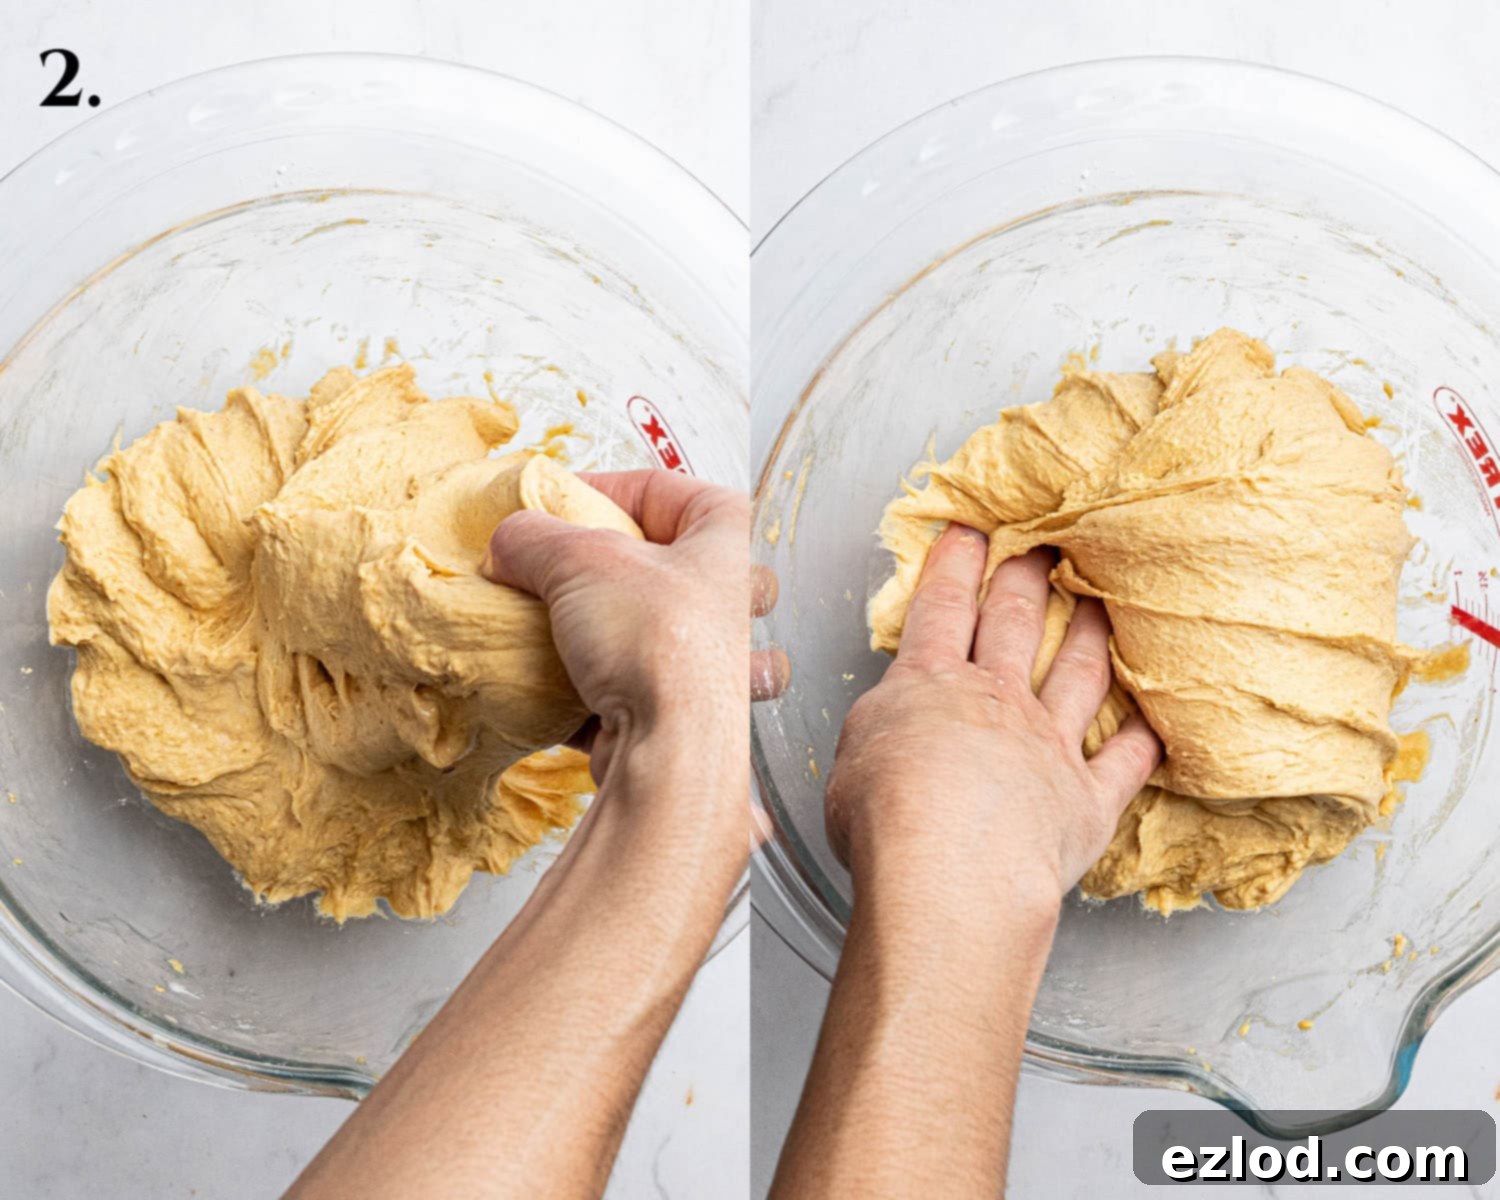
- Step 2: It’s time for the first set of stretch and folds! Lightly wet your hands to prevent the dough from sticking. Gently slide your hand under a portion of the dough on one side of the bowl. Lift it upwards, stretching it as far as it will go without tearing. Then, fold the stretched dough over itself towards the opposite side of the bowl, pressing it gently back into the main mass. Rotate the bowl approximately a quarter turn and repeat this stretching and folding action. Continue this process, turning the bowl each time, until you have completed about 8-12 stretch and folds. You’ll notice the dough starting to gain some structure. Once done, cover the bowl again and let the dough rest for another 15 minutes.
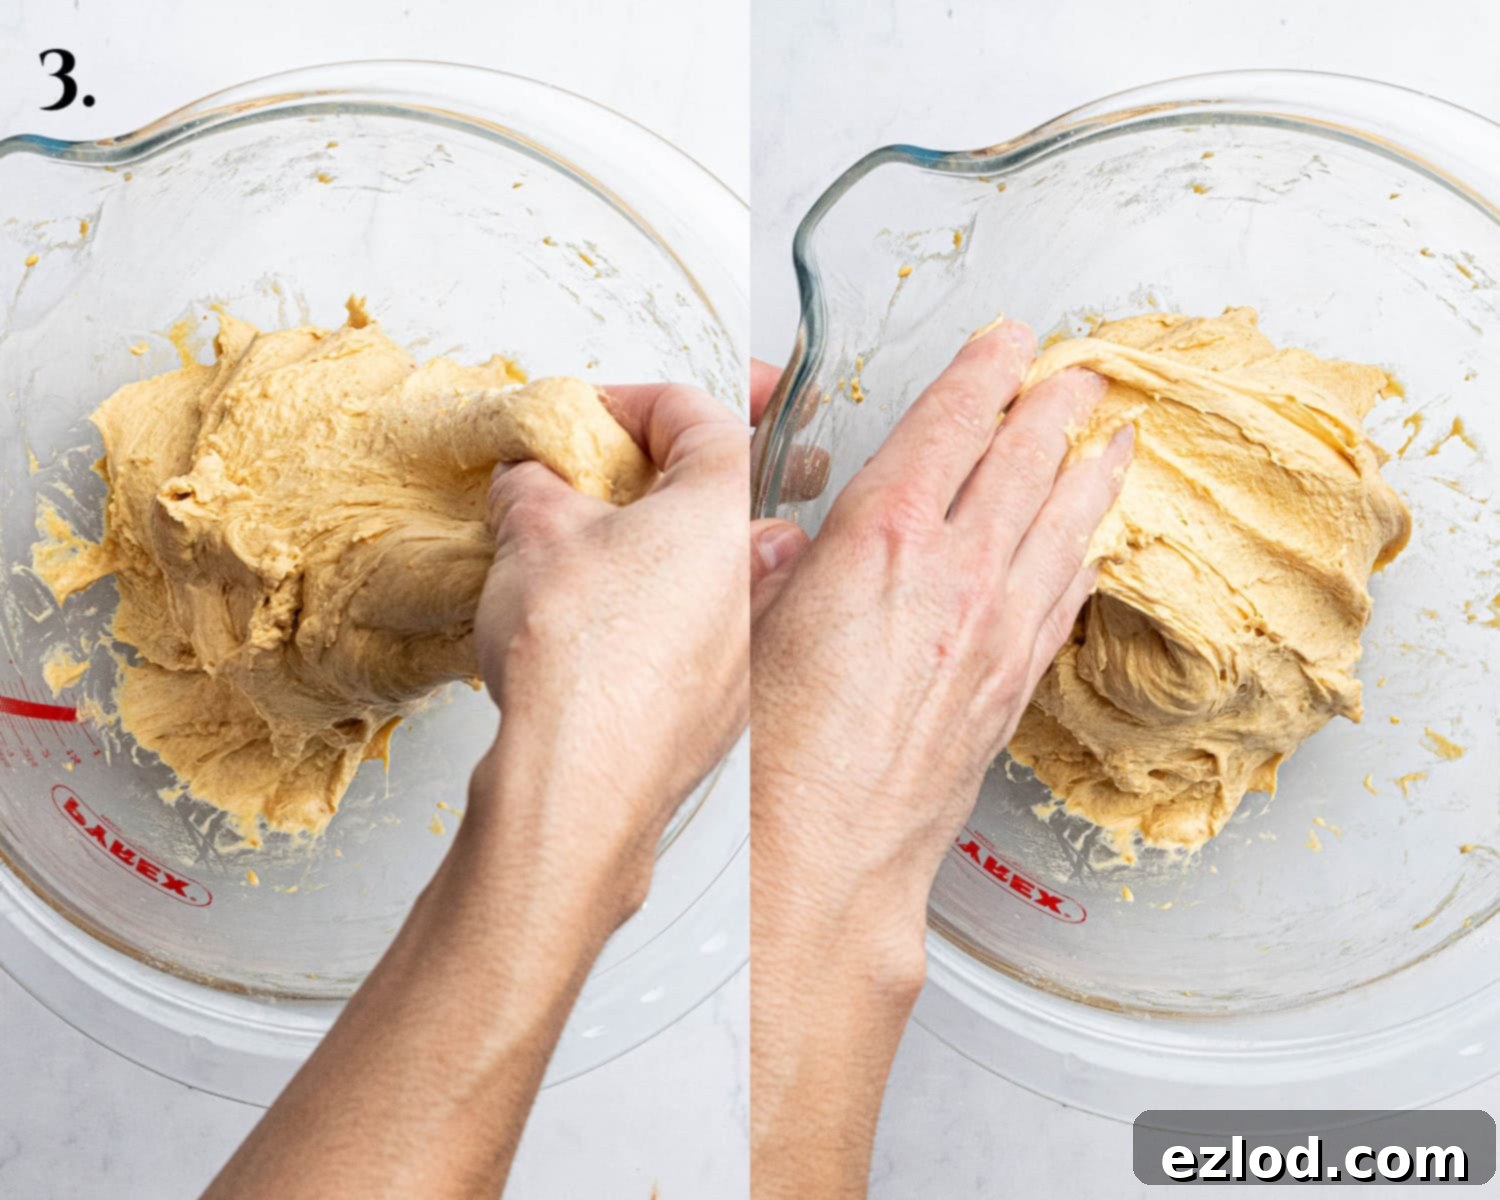
- Step 3: You will now repeat the entire stretching and folding process four more times. This means you will perform a total of five rounds of stretch and folds. After each set of 8-12 stretches and folds, remember to cover the bowl and allow the dough to rest for 15 minutes. With each successive round, you’ll observe the dough becoming progressively smoother, more elastic, and significantly stronger, showing clear signs of developing gluten. By the fifth round, the dough should feel much more cohesive and resistant.
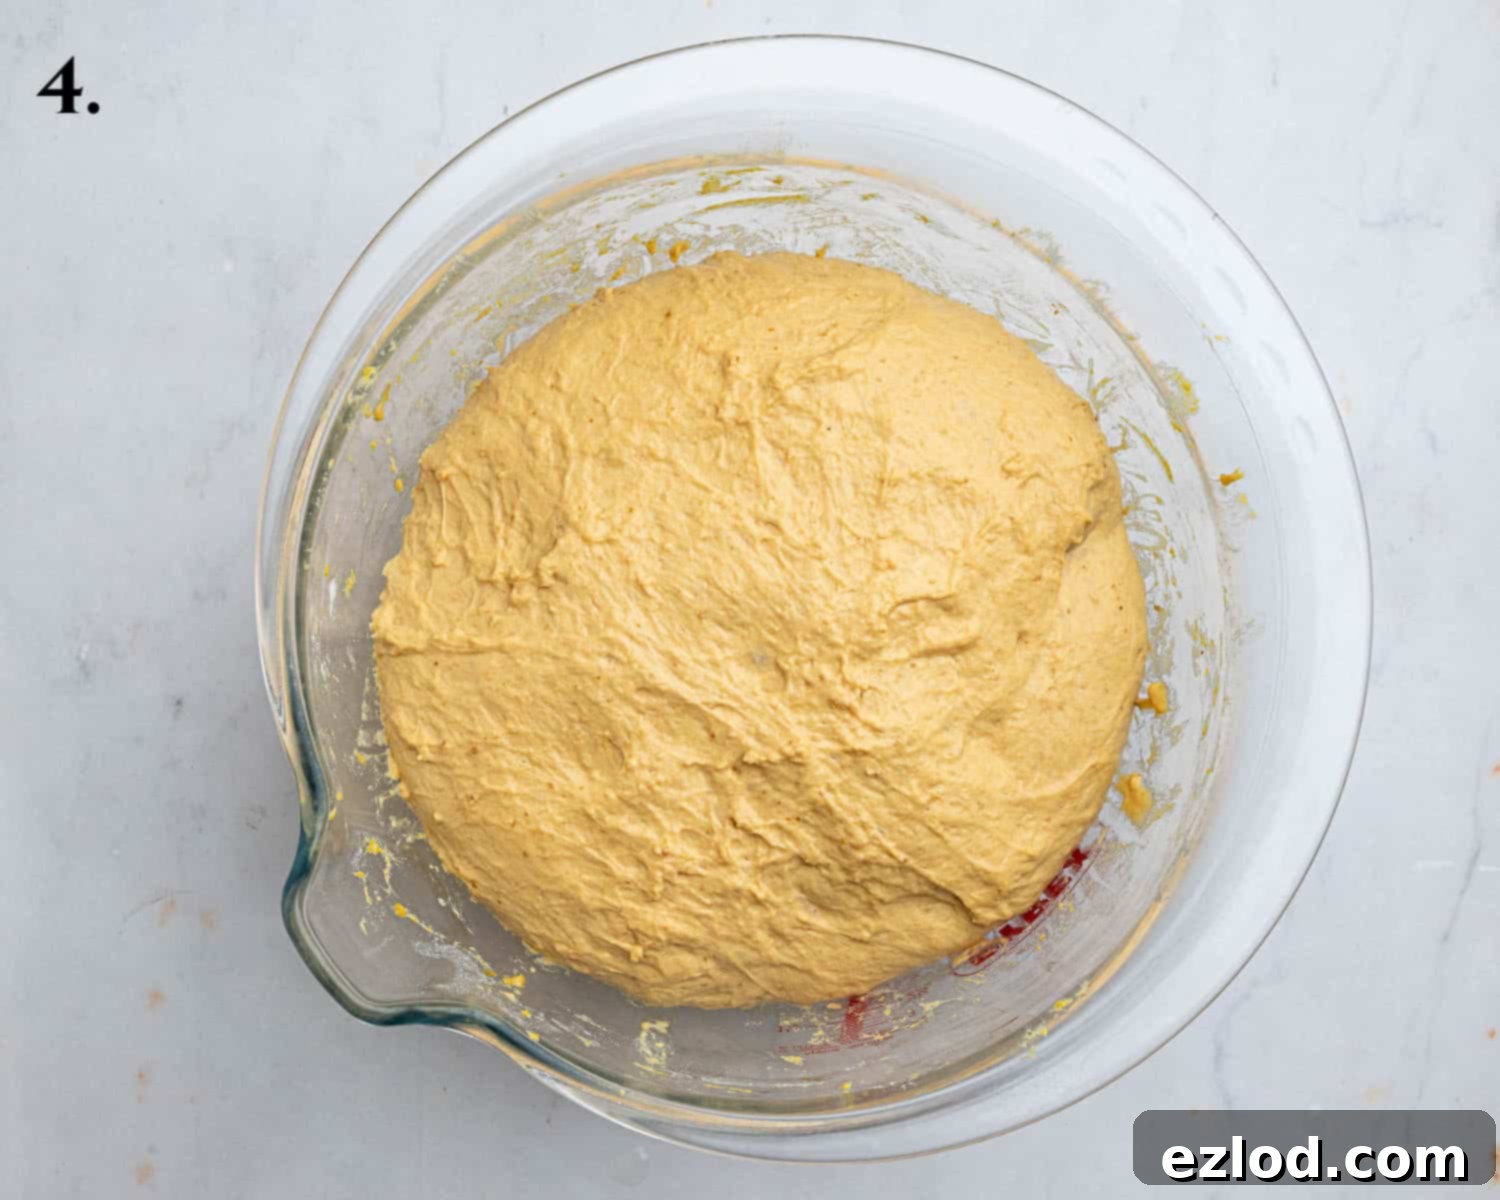
- Step 4: Once all five rounds of stretch and folds are completed, recover the bowl. This time, allow the dough to undergo its bulk fermentation, or first rise, until it has visibly doubled in size and appears very puffy and aerated. The duration of this rise will depend on your room temperature; it typically takes about 1 hour in a warm kitchen, but could extend to 1.5 to 2 hours if the environment is cooler. Look for clear signs of significant volume increase and bubbling.
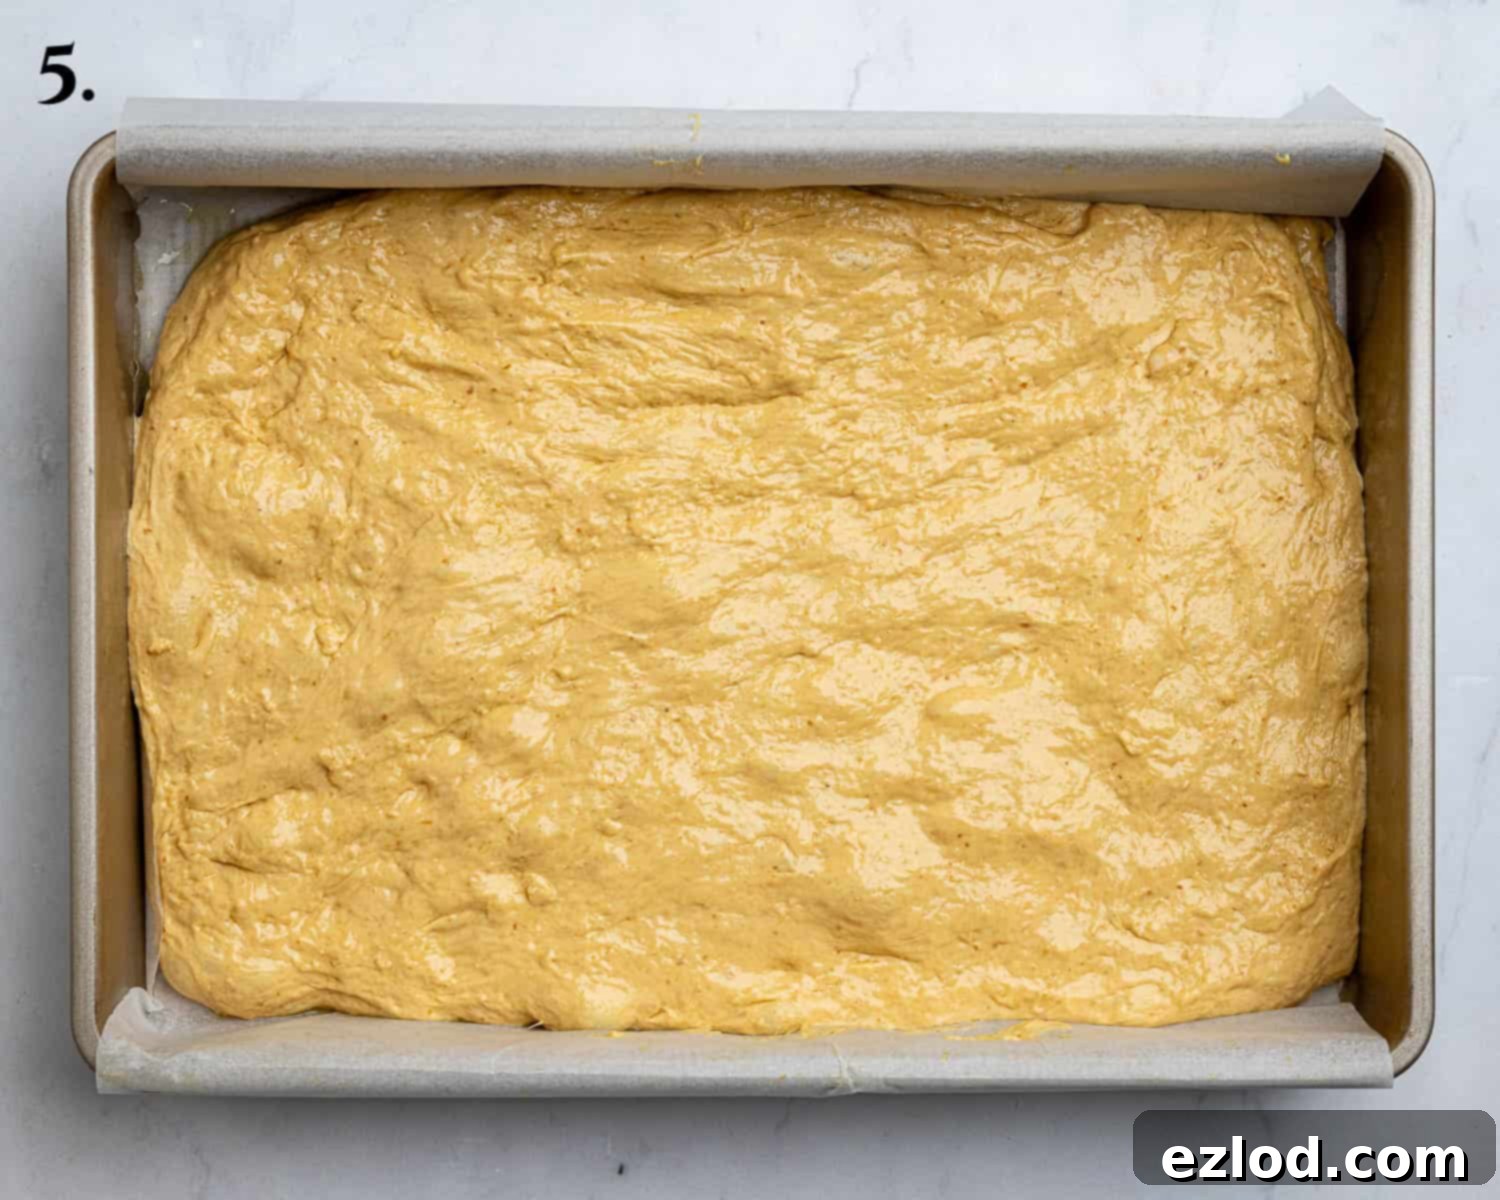
- Step 5: Prepare your baking tray: line a 23 x 33 cm (9 x 13 inch) baking pan with parchment paper, leaving an overhang on the sides for easy removal. Drizzle the bottom of the parchment paper generously with 1-2 tablespoons of extra virgin olive oil, ensuring it coats the surface. Carefully scrape the risen, airy dough out of the bowl and into the prepared baking tray. Lightly oil your hands, then gently stretch the dough outwards to almost fill the tray. It’s perfectly fine if it doesn’t quite reach all the corners; avoid forcing it, as this can de-gas the dough.
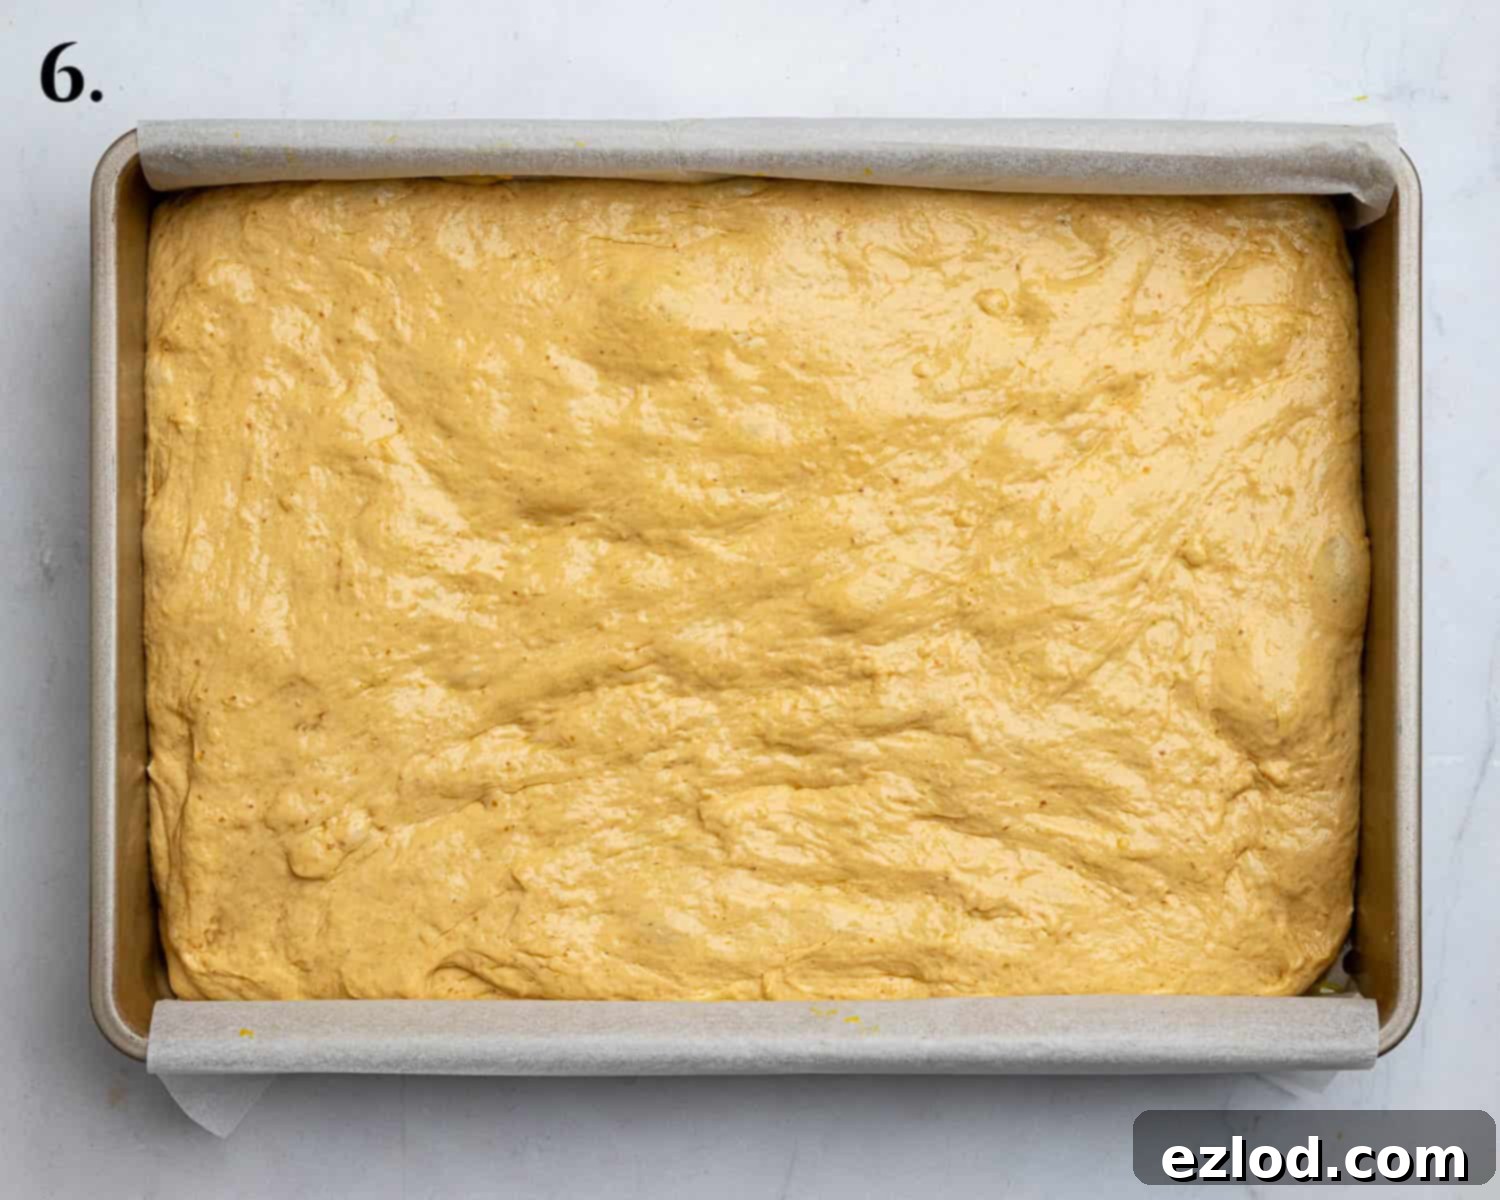
- Step 6: Once the dough is gently spread in the pan, cover it loosely with plastic wrap or a clean kitchen towel. Allow it to undergo its final proof, or second rise, until it has significantly spread, filled out the pan more, and appears remarkably bubbly and jiggly. Gently shaking the pan should reveal a noticeable jiggle, indicating a light and airy structure. This typically takes about 1 hour at a comfortable room temperature. While the dough is doing its second rise, preheat your oven to 230℃/210℃ fan/450℉/gas mark 8, ensuring it’s very hot for a crispy crust.
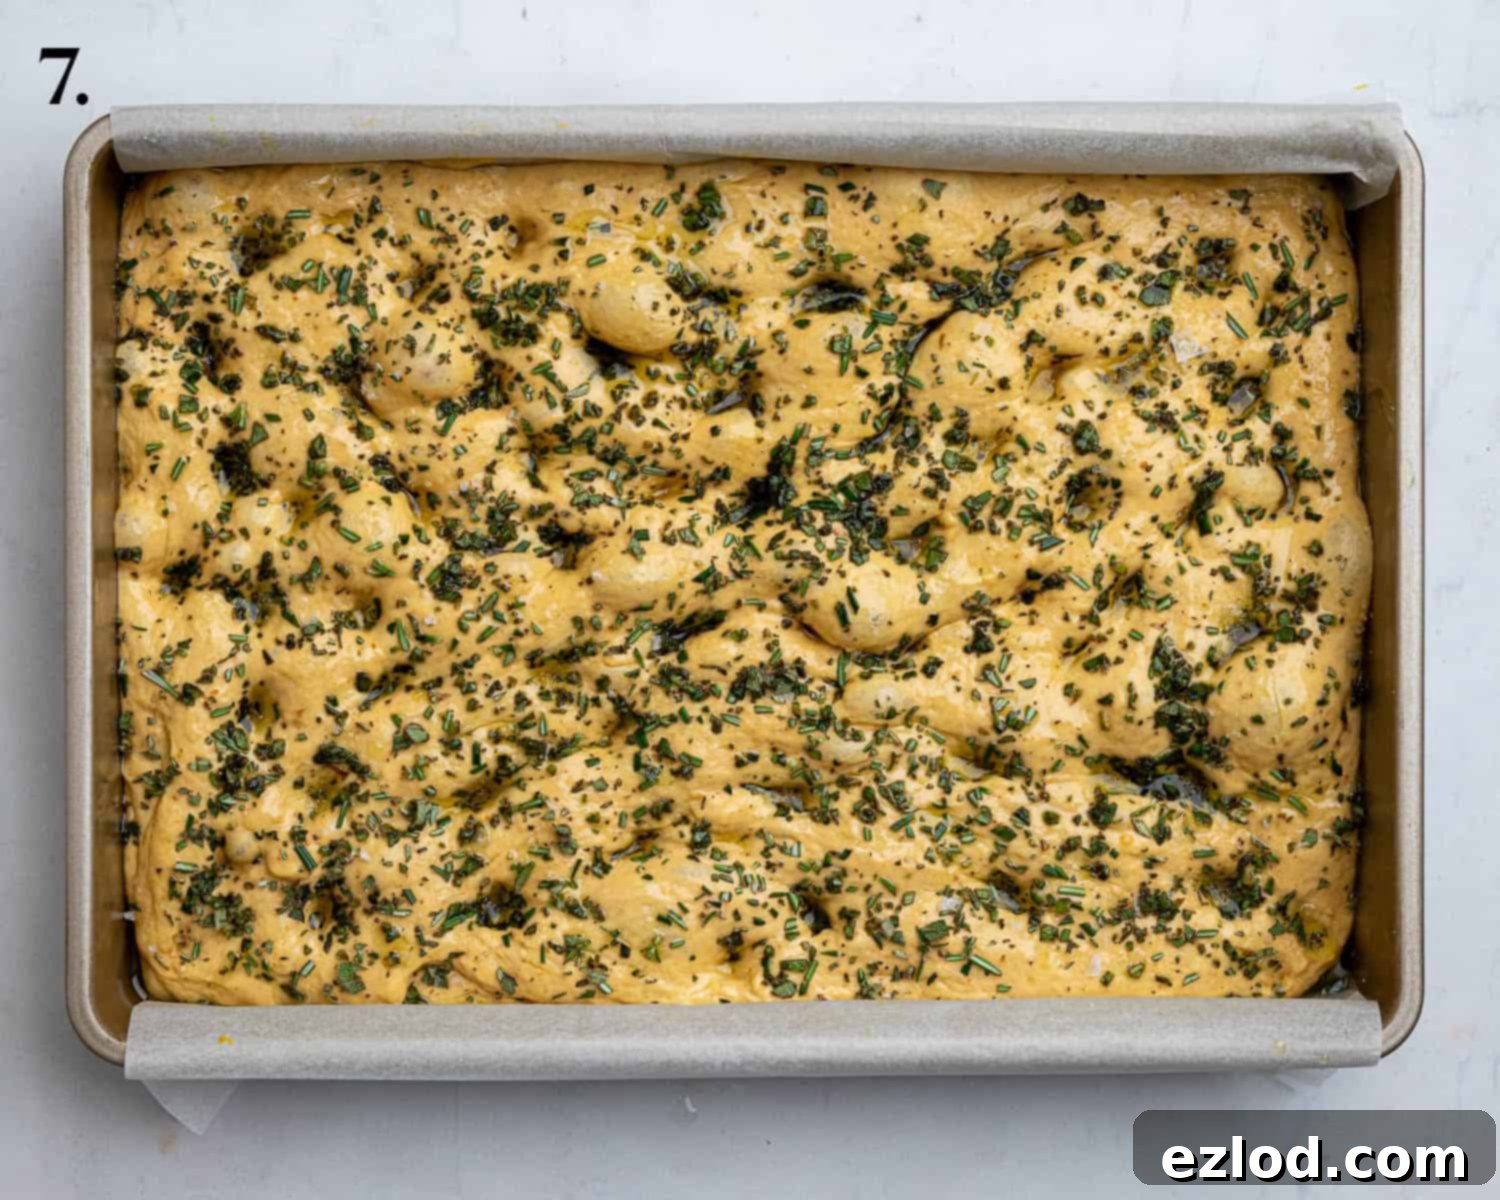
- Step 7: When the dough is fully risen and bubbly, gently scatter the finely chopped fresh herbs (sage and rosemary) evenly over the surface. Now, it’s time to create those signature focaccia dimples! Oil your hands really well to prevent sticking. Using your fingertips, gently but firmly press into the dough at regular intervals (about 3-4 cm apart), ensuring your fingers reach all the way down to the bottom of the pan. This creates the characteristic dimples that will hold the delicious olive oil and flaky salt. Be thorough but avoid deflating the dough too much. Drizzle the dough generously with another 1-2 tablespoons of extra virgin olive oil, allowing it to pool enticingly within the dimples. Finally, sprinkle a good pinch of flaky sea salt evenly over the top for flavor and texture.
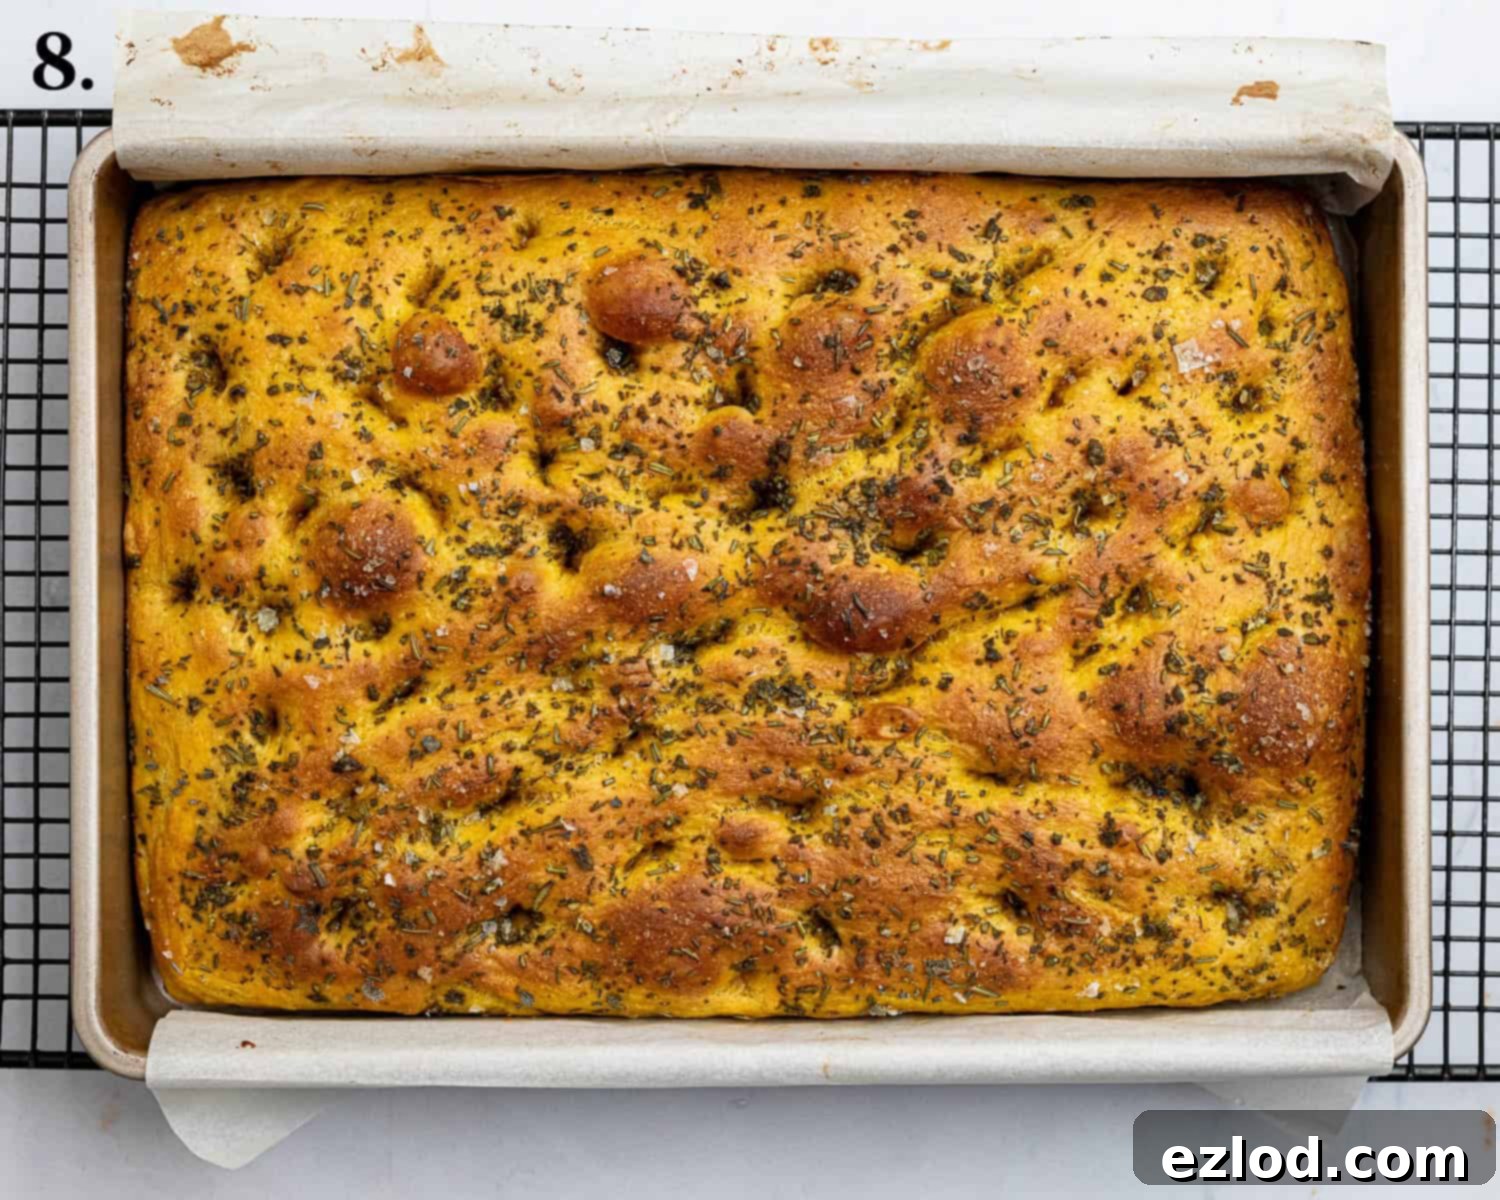
- Step 8: Transfer the prepared focaccia into your preheated oven. Bake for approximately 20-25 minutes. Keep an eye on it – you’re looking for a beautifully golden-brown crust and a wonderfully crisp exterior. The top should feel firm to the touch, and the bottom should also be golden. Once baked to perfection, carefully remove the focaccia from the oven. Allow it to cool in the pan for just a couple of minutes to set, then, using the parchment paper overhangs, carefully transfer it to a wire rack to cool completely. This prevents the bottom from becoming soggy, ensuring a crisp crust all around. Slice and enjoy!
Top Tips for Baking the Best Pumpkin Focaccia
Achieving bakery-quality focaccia at home is entirely possible with a few key considerations and tips:
- For the absolute best results, it is imperative to follow the recipe closely, especially regarding measurements. As with all baking, I strongly advocate for using a digital kitchen scale and the gram measurements provided, rather than relying on volumetric cup conversions. Cup measurements can be notoriously inaccurate due to varying packing densities of ingredients, and I cannot guarantee the desired outcome if they are used. Precision in baking is paramount.
- Embrace the wetness of the dough! Focaccia dough should naturally be quite wet and sticky. This high hydration level, when combined with the intense heat of a hot oven, is precisely what creates that characteristic chewy interior and the wonderfully open, holey structure. Resist the urge to add more flour than specified, as this will lead to a dense, tough focaccia instead of the light and airy texture you’re aiming for.
- Always double-check the expiration date on your yeast. Old or inactive yeast is a common culprit for bread that fails to rise adequately. Fresh, active yeast is essential for a light and bubbly focaccia. If in doubt, bloom a small amount in warm water with a pinch of sugar to test its vitality before adding it to your main dough.
- When performing the stretch and folds, always remember to wet your hands beforehand. This simple step is a game-changer; it creates a non-stick surface, preventing the very sticky dough from clinging to your fingers and making the process much easier and less messy.
- Be mindful of your kitchen’s temperature, as it directly impacts the dough’s rising time. On warmer days, yeast activity will be significantly higher, causing the dough to rise much faster. Conversely, in colder conditions, the rising process will slow down considerably. Don’t rely solely on the suggested timings; instead, observe the dough for visual cues like doubling in size and bubbling, rather than strictly adhering to a clock.
- Don’t hesitate to get creative with your toppings to suit your personal taste preferences. While a simple scattering of chopped herbs is classic and delicious, the possibilities are endless! Consider adding sweet and savory caramelised onions, delicate thin slices of roasted pumpkin, briny olives, juicy cherry tomatoes, thinly sliced garlic cloves for an aromatic kick, crunchy pumpkin seeds, or even a sprinkle of your favorite vegan cheese for an extra layer of flavor.
- If you’re craving a pumpkin spice flavored focaccia, a word of caution: adding ground spices directly into the dough can sometimes inhibit yeast activity and affect the rise. Instead, I recommend a different approach for a warm, spiced flavor. Melt about 3 tablespoons of vegan butter, then stir in a couple of teaspoons of your favorite pumpkin spice blend. Drizzle this fragrant spiced butter over the dimpled dough just before baking, in place of the olive oil. This will infuse your focaccia with beautiful autumnal flavors without compromising its rise.
Frequently Asked Questions About Pumpkin Focaccia
Unfortunately, focaccia, like most fresh breads, tends to go stale relatively quickly. For the best flavor and texture, I highly recommend enjoying it on the day it is baked. While it will still be edible for the next day or two, its quality will diminish. To refresh day-old focaccia, simply warm it through in a low oven (around 150°C/300°F) for 5-10 minutes before serving. This will help restore some of its crispness and aroma.
Yes, focaccia freezes exceptionally well! To preserve its freshness and texture, make sure the baked loaf has cooled completely to room temperature before freezing. It’s best to freeze it on the day it’s baked. You can freeze it whole or slice it into individual portions for convenience. Wrap it tightly in plastic wrap, then place it in a sealed freezer bag or an airtight container. It will keep well in the freezer for up to 1-2 months. When ready to enjoy, thaw at room temperature and then warm in a low oven to revive its texture.
I typically use instant yeast (also known as easy bake yeast) in my recipes because it’s convenient and doesn’t require prior activation – you can simply add it directly to the flour. If possible, I recommend sourcing instant yeast for this recipe. However, if active dry yeast is all you have, you can certainly still use it, but the method will differ slightly. You will need 10g (3 teaspoons) of active dry yeast. In a separate bowl, stir the active dry yeast into the lukewarm water (from the recipe ingredients). Let this mixture sit for 10-20 minutes, or until it becomes visibly foamy and bubbly on the surface. This indicates that the yeast is active. Once bloomed, add this activated yeast mixture along with the remaining ingredients, and then proceed with the rest of the recipe as written, starting from step 1.
Unfortunately, this specific recipe is not suitable for gluten-free flour. The structure and texture of this focaccia rely heavily on the development of gluten from bread flour. Adapting a traditional gluten-containing bread recipe to be gluten-free is a complex process that usually requires a complete reformulation of ingredients and techniques. Gluten-free baking is a specialized area, and it’s best to use a recipe that has been specifically developed and tested to be gluten-free rather than attempting to modify this one. I am not an expert in gluten-free baking, so I cannot provide advice on successful substitutions.
This delectable pumpkin focaccia is incredibly versatile and can be enjoyed in numerous ways. It serves as the perfect companion to almost any kind of soup, from creamy tomato to hearty lentil, or as a flavorful dipper for various dips like hummus, baba ghanoush, or a simple balsamic-infused olive oil. For a more substantial meal, slice the focaccia in half widthways to create a fantastic base for gourmet sandwiches or paninis, filling it with your favorite roasted vegetables, vegan meats, and spreads. It’s also wonderful as part of a grazing board, served alongside olives, sun-dried tomatoes, and vegan cheeses.
Explore More Delicious Vegan Bread Recipes
If you’ve enjoyed making and tasting this delightful pumpkin focaccia, you might be keen to explore more exciting vegan bread recipes. Bread making, especially with simple methods like stretch and fold, is a rewarding culinary journey. Here are some other fantastic vegan bread options to inspire your next baking adventure, each offering unique flavors and textures:
- No-Knead Olive Bread (vegan)
- Sun Dried Tomato Breadsticks (Vegan)
- Vegan Pesto Bread
- Sea Salt & Rosemary Focaccia
- Vegan Garlic Pull Apart Bread
Stay in touch with me through social media @ Instagram, Pinterest and Facebook, and subscribe via email to get all our latest recipes!
All images and content on Domestic Gothess are copyright protected. If you want to share this recipe then please do so by using the share buttons provided. Do not screenshot or post the recipe or content in full, instead include a link to this post for the recipe.

Pumpkin Focaccia (vegan)
Ingredients
For the Dough:
- 240 g (1 cup) tinned pumpkin puree (ensure it’s pure, not pie filling)
- 285 g (1 cup + 3 Tablespoons) lukewarm water (around 35-40°C / 95-105°F)
- 2 Tablespoons good quality extra virgin olive oil
- 8 g (2 ½ teaspoons) fast action/instant yeast
- 10 g (1 ½ teaspoons) fine sea salt or table salt
- 500 g (4 ¼ cups) strong white bread flour (high protein content is key)
For the Topping:
- extra virgin olive oil for drizzling (approx. 1-2 Tablespoons)
- 1 Tablespoon finely chopped fresh sage
- 1 Tablespoon finely chopped fresh rosemary
- flaky sea salt (to taste, for sprinkling)
Instructions
-
In a large mixing bowl, combine the pumpkin puree, lukewarm water, and 2 Tablespoons of olive oil. Stir well. Add the instant yeast, fine salt, and bread flour. Mix until all ingredients are thoroughly combined and no dry flour remains, forming a shaggy, sticky dough. Cover the bowl with plastic wrap or a damp kitchen towel and let it rest at room temperature for 15 minutes.240 g (1 cup) tinned pumpkin puree, 285 g (1 cup + 3 Tablespoons) lukewarm water, 2 Tablespoons extra virgin olive oil, 8 g (2 ½ teaspoons) fast action/instant yeast, 10 g (1 ½ teaspoons) fine table salt, 500 g (4 ¼ cups) white bread flour
-
Perform the first set of stretch and folds: wet your hands to prevent sticking. Gently pick up a side of the dough, stretch it upwards, and fold it over the top towards the center of the bowl. Repeat this 8-12 times, rotating the bowl as you go. Cover and let the dough rest for another 15 minutes.
-
Repeat the stretch and fold process (as described in Step 2) 4 more times, allowing the dough to rest for 15 minutes, covered, in between each set. You will complete a total of 5 rounds of stretch and folds.
-
After completing all 5 rounds, cover the bowl again and let the dough rise at warm room temperature until it has doubled in size and is very puffy. This usually takes around 1 hour, but can take up to 1.5 – 2 hours in a cooler environment.
-
Line a 23 x 33 cm (9 x 13 inch) baking pan with baking parchment, leaving an overhang on the sides. Drizzle the base of the parchment with 1-2 Tablespoons of extra virgin olive oil (you can skip the parchment if you have a very good non-stick pan).
-
Gently scrape the risen dough into the prepared pan. Lightly oil your hands, then carefully stretch the dough out to almost fill the tray. Avoid forcing it if it doesn’t reach the corners perfectly.
-
Cover the pan loosely and let the dough rise for its second proof until it has spread further, is very bubbly, and jiggles noticeably when the pan is gently shaken. This should take around 1 hour at warm room temperature.
-
While the dough is on its second rise, preheat your oven to 230℃/210℃ fan/450℉/gas mark 8.
-
Once the dough is fully risen, scatter the chopped fresh sage and rosemary evenly over the surface. Oil your hands well. Gently but firmly press your fingertips into the dough at regular intervals (about 3-4 cm apart), ensuring they reach the bottom of the pan to create dimples. Be thorough without deflating the dough too much.1 Tablespoon finely chopped fresh sage, 1 Tablespoon finely chopped fresh rosemary
-
Drizzle the dough with an additional 1-2 Tablespoons of extra virgin olive oil, allowing it to pool in the dimples. Sprinkle generously with flaky sea salt.extra virgin olive oil for drizzling, flaky sea salt
-
Bake in the preheated oven for 20-25 minutes, or until the focaccia is beautifully golden brown, crisp on the edges, and cooked through.
-
Remove the focaccia from the oven. Let it cool in the pan for just a couple of minutes to stabilize, then carefully transfer it to a wire rack to cool completely. Cooling on a rack is crucial to prevent the bottom from becoming soggy. Slice, serve, and enjoy your homemade pumpkin focaccia!
Notes
- For additional helpful tips, ingredient insights, and step-by-step photos to guide you, please refer to the detailed sections in the blog post above the recipe card.
- For optimal baking results and consistent texture, always follow the recipe closely and use the gram measurements with a digital kitchen scale. Volumetric cup measurements are less precise for baking and may lead to inconsistent outcomes.
- Remember to wet your hands lightly before performing each set of stretch and folds. This simple trick will prevent the sticky dough from adhering to your fingers, making the process much cleaner and easier to manage.
- The rising time of your dough is influenced by ambient temperature. On warmer days, it will rise more quickly, while colder temperatures will extend the rising period. Always judge the rise by visual cues (e.g., doubled in size, bubbly) rather than strict adherence to a clock.
- This recipe yields one large loaf of focaccia, perfect for sharing or enjoying over a couple of days. You can easily halve the recipe for a smaller batch.
If you tried this delicious vegan pumpkin focaccia recipe, I would love to hear how it turned out for you! Please take a moment to rate it, leave a comment below, or share your creation on social media. Don’t forget to tag @domestic_gothess on Instagram and use the hashtag #domesticgothess so I can see your wonderful baking! Your feedback is always appreciated.
