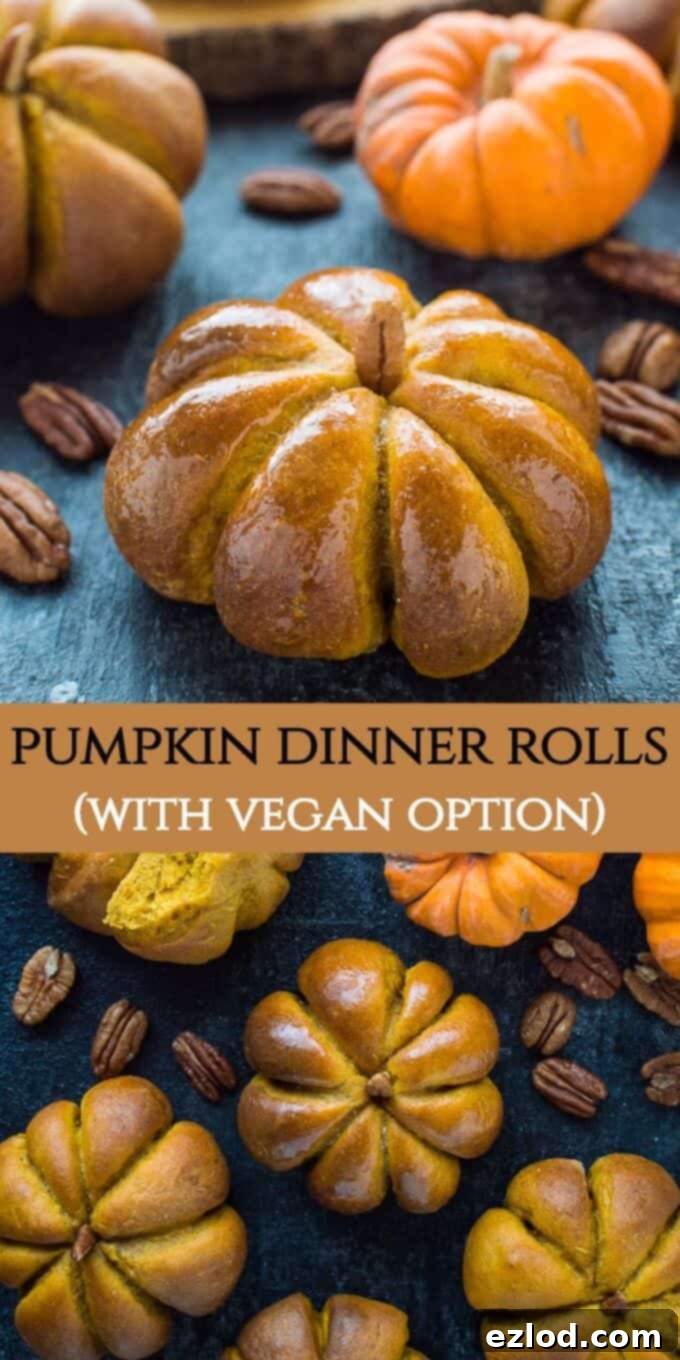
Delightful Homemade Pumpkin Bread Rolls: Your Essential Autumn Baking Guide
Pumpkin bread rolls – these cute little pumpkin flavoured dinner rolls are easier to make than you might think and are the perfect centrepiece for an Autumn celebration!
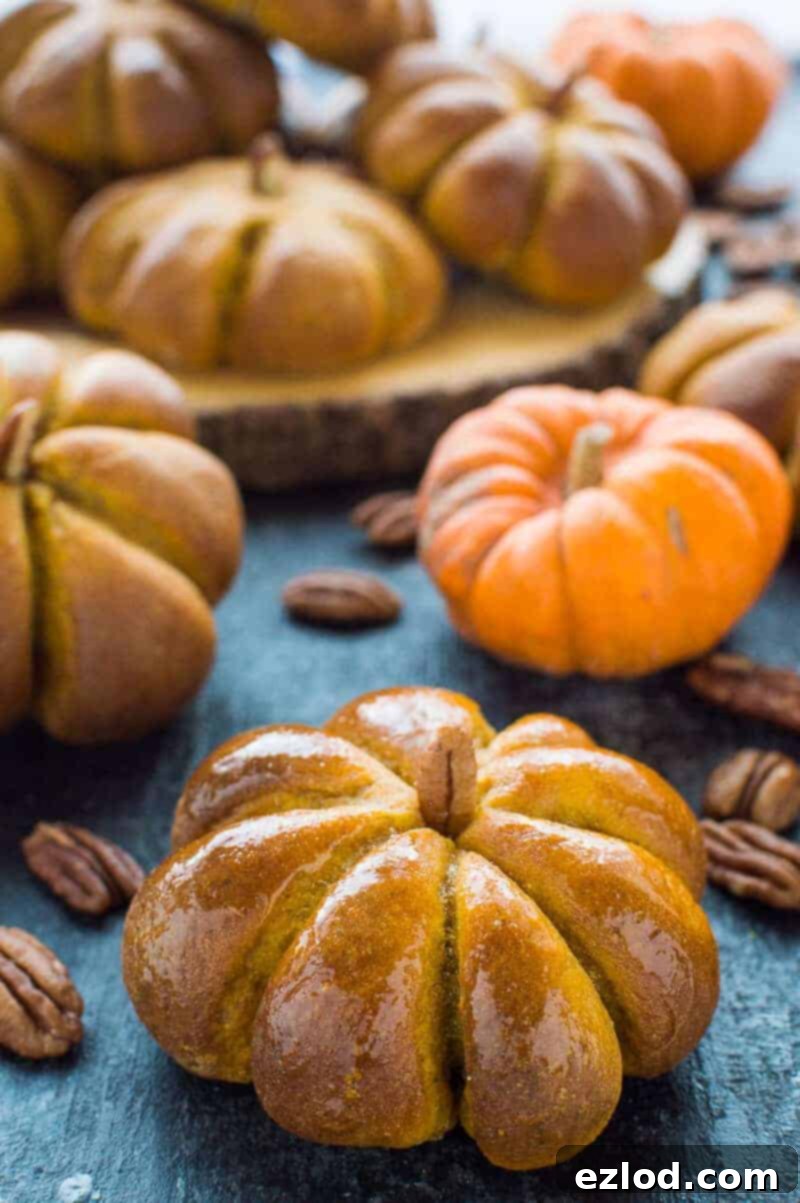
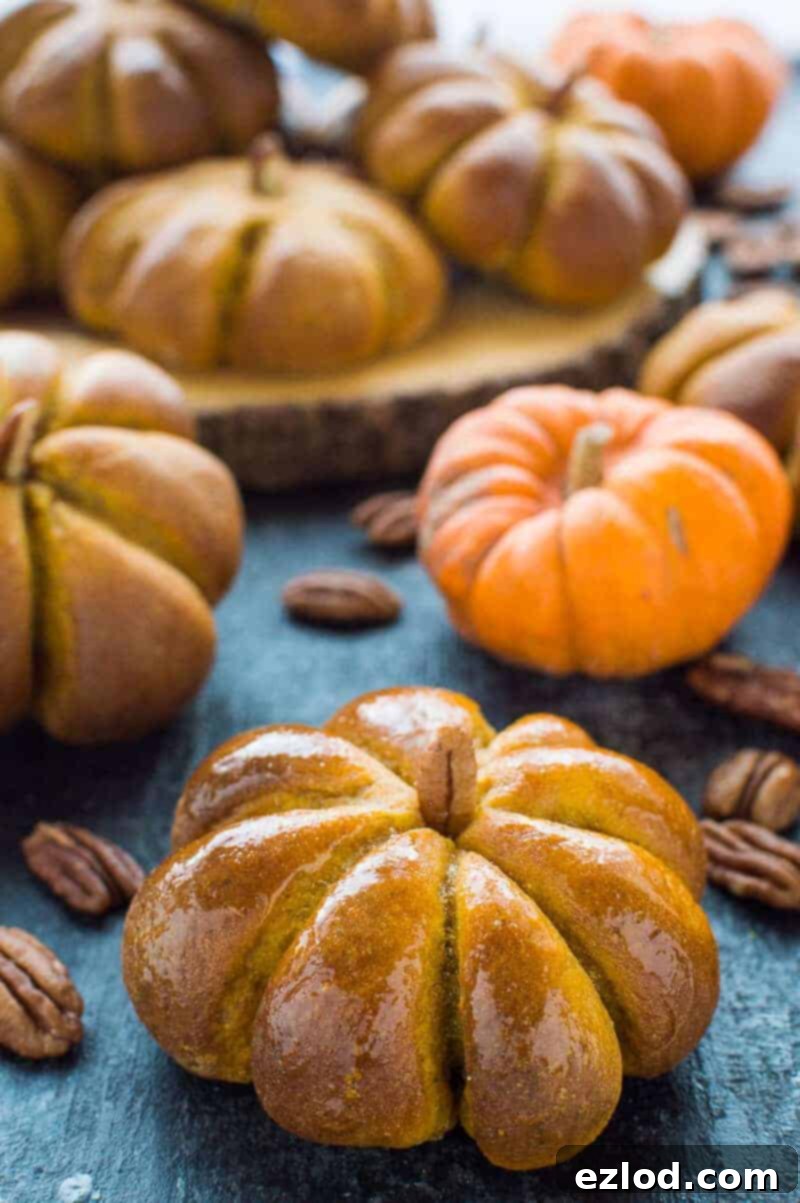
As the leaves begin to change and the air turns crisp, there’s nothing quite like the comforting aroma of freshly baked bread filling your home. These adorable pumpkin bread rolls are not just a treat for the taste buds, but also a feast for the eyes, making them an ideal addition to any autumnal gathering, from cozy family dinners to festive holiday celebrations like Halloween or Thanksgiving. Lightly infused with the warm flavors of pumpkin and a blend of aromatic spices, they offer a subtle sweetness that pairs beautifully with almost any meal, both savory and sweet.
Crafting these homemade pumpkin dinner rolls is a truly enjoyable process, and the result is a batch of soft, fluffy buns that boast a delightful hint of autumn in every bite. Whether you’re an experienced baker or just starting out, this recipe for spiced pumpkin bread rolls is designed to be approachable and incredibly rewarding. The subtle pumpkin flavor ensures they complement a wide range of dishes without overpowering them, making them remarkably versatile. Imagine them as a charming centerpiece on your holiday table or a comforting accompaniment to a hearty soup – they truly elevate any meal.
Creative Ways to Shape Your Pumpkin Bread Rolls
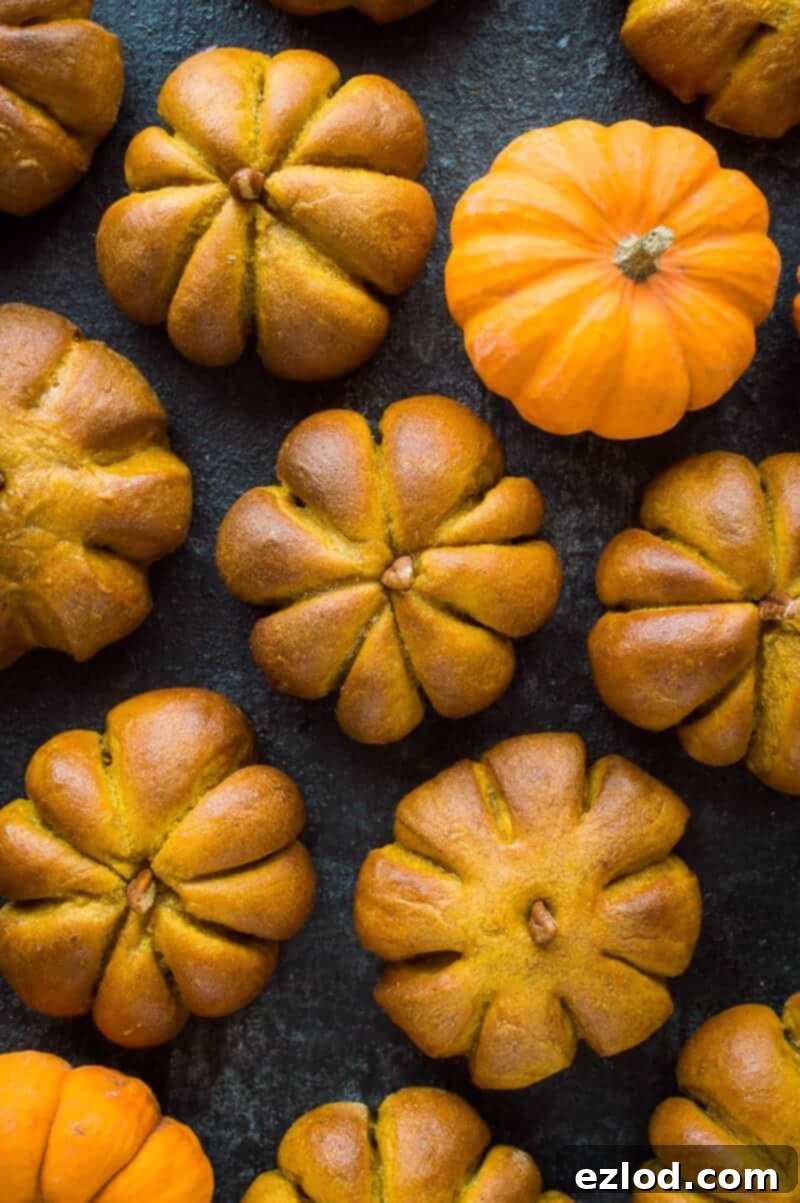
One of the most exciting aspects of making these pumpkin bread rolls is the opportunity to shape them into charming mini pumpkins. There are two primary methods for achieving this festive look, and each offers its own unique benefits. While the shaping process adds a touch of whimsy and makes them perfect for autumn entertaining, rest assured that even if you choose to bake them as plain rolls, their delicious flavor will still shine through!
Method 1: The Quick and Easy Scissor Technique
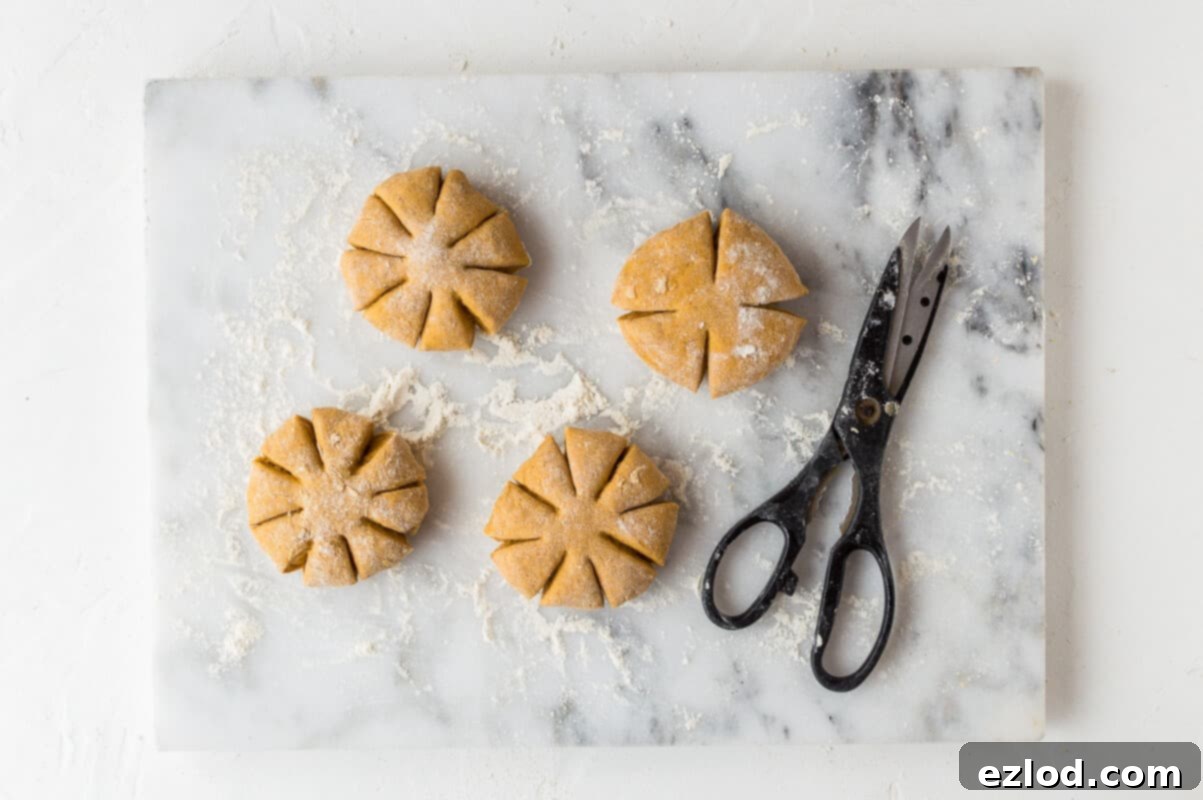
The first shaping method involves using a pair of clean kitchen scissors or a sharp knife to create the pumpkin segments. This technique is wonderfully quick and straightforward, making it perfect if you’re short on time or prefer a less intricate approach. To use this method, you’ll simply make eight evenly spaced cuts around the circumference of the ball of dough, cutting about halfway into the dough but ensuring the center remains uncut. This creates the illusion of pumpkin segments, and the rolls will naturally expand beautifully during baking to enhance this effect, yielding a lovely, rustic pumpkin shape.
The main advantage here is speed and ease, allowing you to rapidly transform a simple ball of dough into a pumpkin-like bun with just a few snips. This method is excellent for kids to help with too, under supervision. However, it’s worth noting that while effective and charming, these rolls might not possess the deeply defined ridges of real pumpkins as much as those made with the string method.
Method 2: The Detailed String Method for Realistic Pumpkins
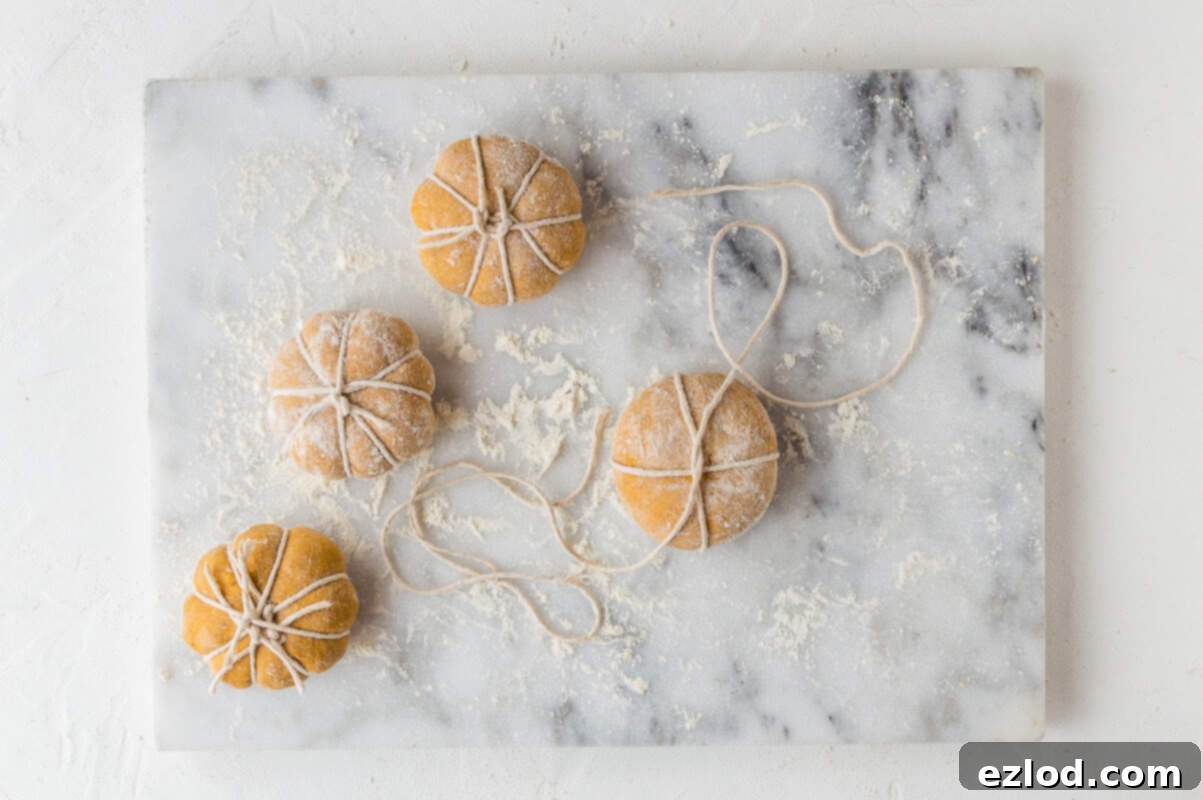
For those who desire a truly authentic and visually stunning pumpkin appearance, the string method is the way to go. This technique involves carefully wrapping a long piece of food-safe cotton kitchen string around each ball of dough to divide it into eight even sections. The rolls are then baked with the string still attached. As the dough rises during both proofing and in the oven, it expands around the string, forming distinct, realistic pumpkin shapes with beautiful, deep grooves that mimic natural pumpkin ribs.
The clear advantage of this method is the stunning visual result – your pumpkin rolls will look exactly like miniature pumpkins, ready to impress. The downside is that it requires a bit more patience and is slightly more fiddly and time-consuming than the scissor method. You need to ensure the string is tied securely but not too tightly, allowing for the dough’s expansion. However, the impressive final presentation often makes the extra effort absolutely worthwhile, especially for special holiday meals like Thanksgiving dinner rolls or a Halloween party centerpiece.
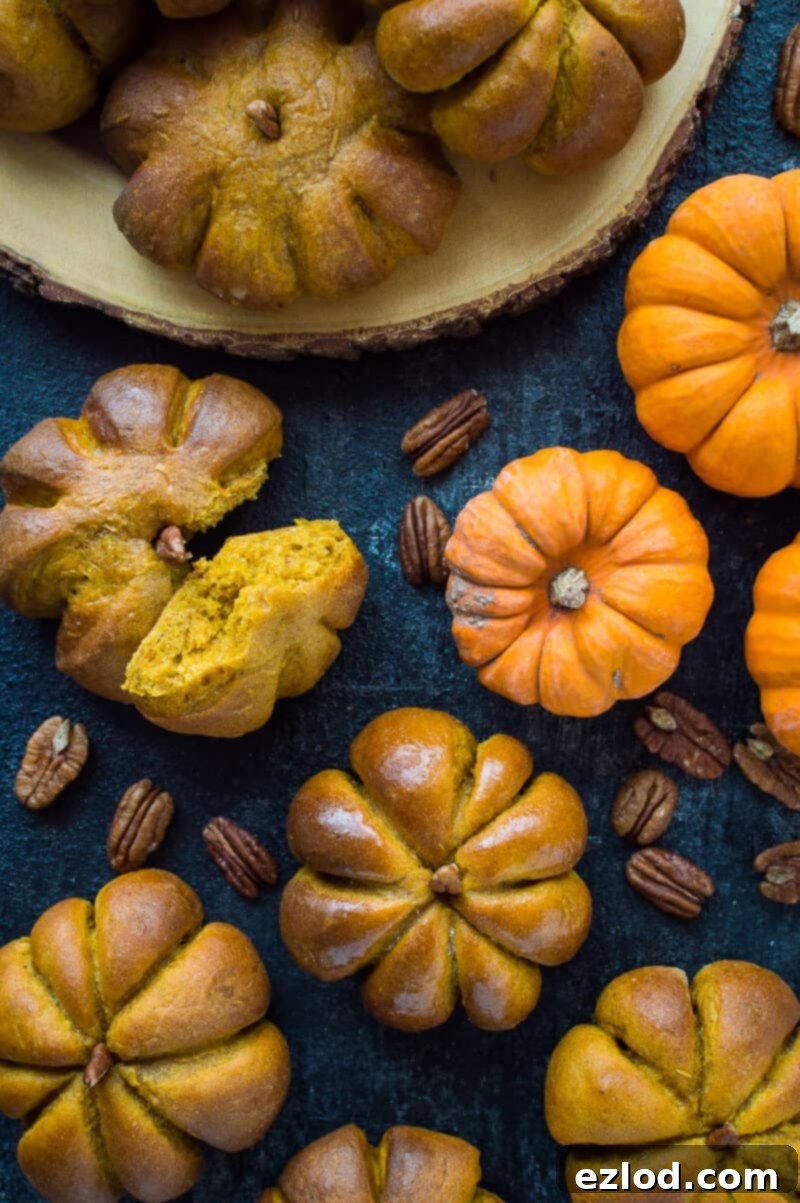
No matter which shaping method you decide to use, your homemade pumpkin bread rolls are guaranteed to look amazing! To complete the pumpkin illusion, don’t forget the final, charming touch: adding a small slice of pecan, strategically placed on top of each roll, to resemble a tiny stem. This simple detail elevates the aesthetic and brings the whole adorable concept to life, making them truly unforgettable.
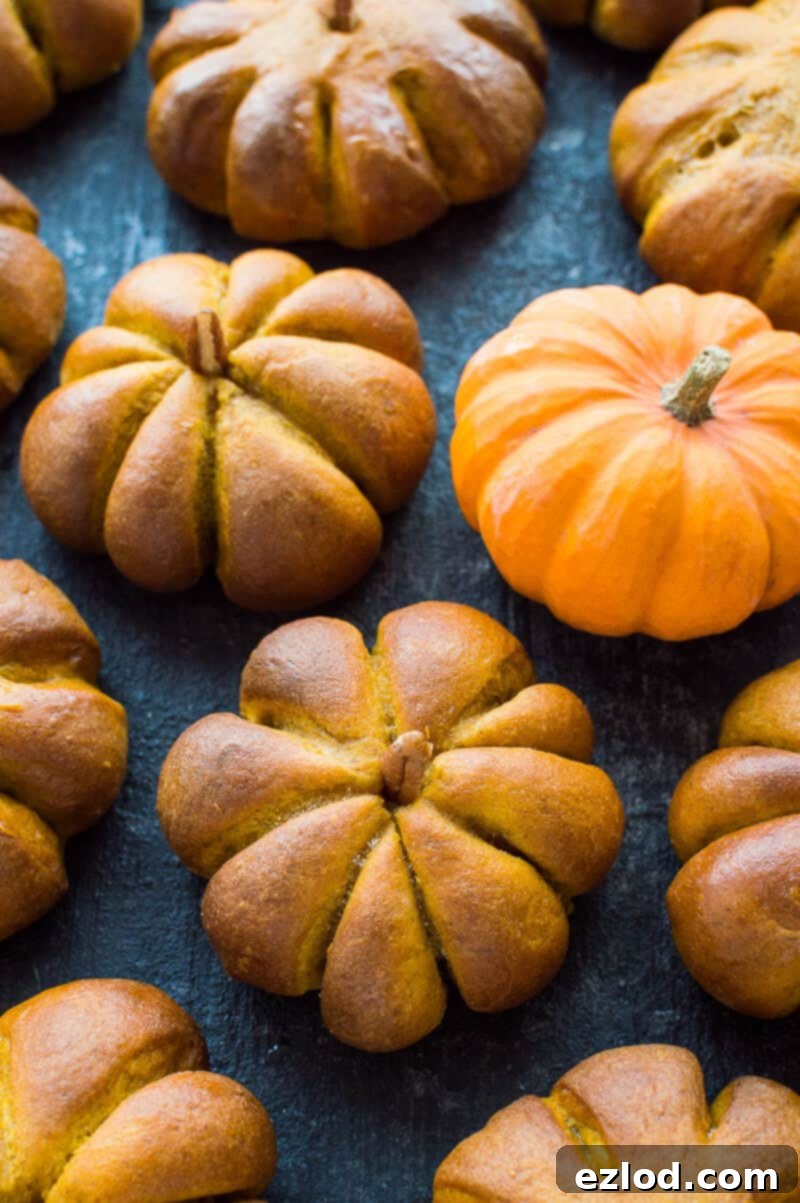
Perfect Pairings and Serving Suggestions for Your Pumpkin Bread Rolls
These versatile pumpkin bread rolls are much more than just a simple side dish; they can be the star of various meals throughout the entire autumn season. In the US, they are an absolute must-have for any Thanksgiving celebration, providing a festive, flavorful, and visually appealing alternative to traditional dinner rolls. Their unique pull-apart shape and soft, slightly sweet texture make them utterly ideal for dipping into rich, savory soups and hearty stews, soaking up every last drop of delicious broth and adding a comforting element to your meal.
But their appeal isn’t limited to dinner or holiday feasts. Because they work wonderfully with both savory and sweet accompaniments, these easy pumpkin bread rolls are also fantastic for breakfast or brunch. Imagine them served warm, slathered with a generous dollop of homemade cinnamon maple butter, a rich honey butter, or even a simple cream cheese spread – a truly indulgent and comforting start to your day. They also make a delightful accompaniment to a charcuterie board or cheese platter, adding a touch of seasonal sweetness that contrasts beautifully with sharp cheeses and cured meats. For a Halloween treat, serve them alongside a spooky chili or a creamy pumpkin soup.
Beyond the major holidays, these rolls are perfect for any casual autumnal occasion. Pack them in a picnic basket for a crisp fall outing, serve them alongside a Sunday roast, or simply enjoy them warm with your favorite jam or spread for an afternoon snack. Their beautiful presentation and comforting, spiced pumpkin flavor make them a welcome and memorable addition to any table, proving that homemade bread truly makes a difference.
Crafting Your Own Pumpkin Bread Rolls: A Step-by-Step Guide
Making homemade bread might seem intimidating at first glance, but with this detailed recipe for pumpkin bread rolls, you’ll find the process straightforward and incredibly satisfying. The key to success lies in understanding the ingredients and following the steps carefully. For precise measurements and the best possible results, I always recommend using a digital kitchen scale for gram measurements, as cup conversions can be less accurate in baking and may affect the final texture and consistency of your dough. Let’s dive into the process and bake some deliciousness!
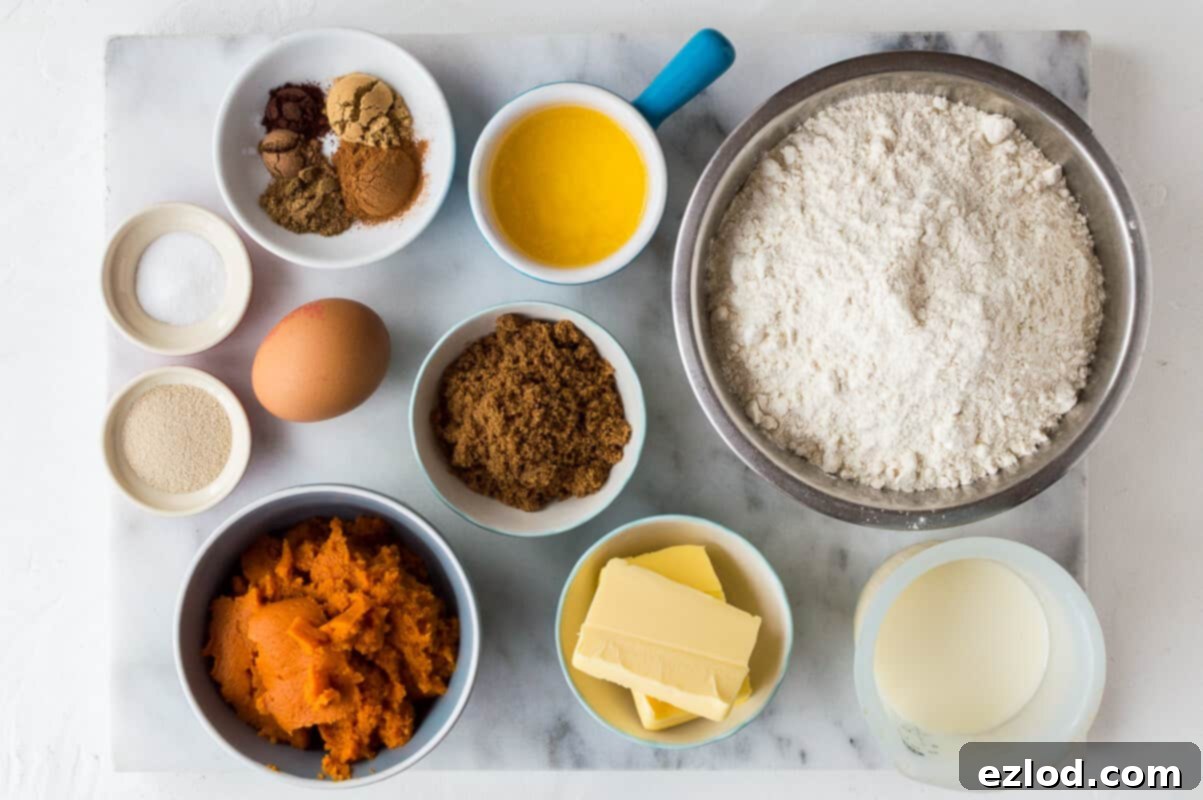
The Dough: Foundation of Flavor and Texture
Begin by activating your yeast. In the bowl of your electric stand mixer, combine the fast-action or instant yeast with a small portion (½ tsp) of the light brown sugar and about a third of the milk. Whisk these ingredients gently until the yeast fully dissolves. This mixture then needs 5-10 minutes to rest in a warm place and become visibly foamy, which is a clear indication that your yeast is active and potent, ready to work its magic and give your rolls that desirable light and airy texture.
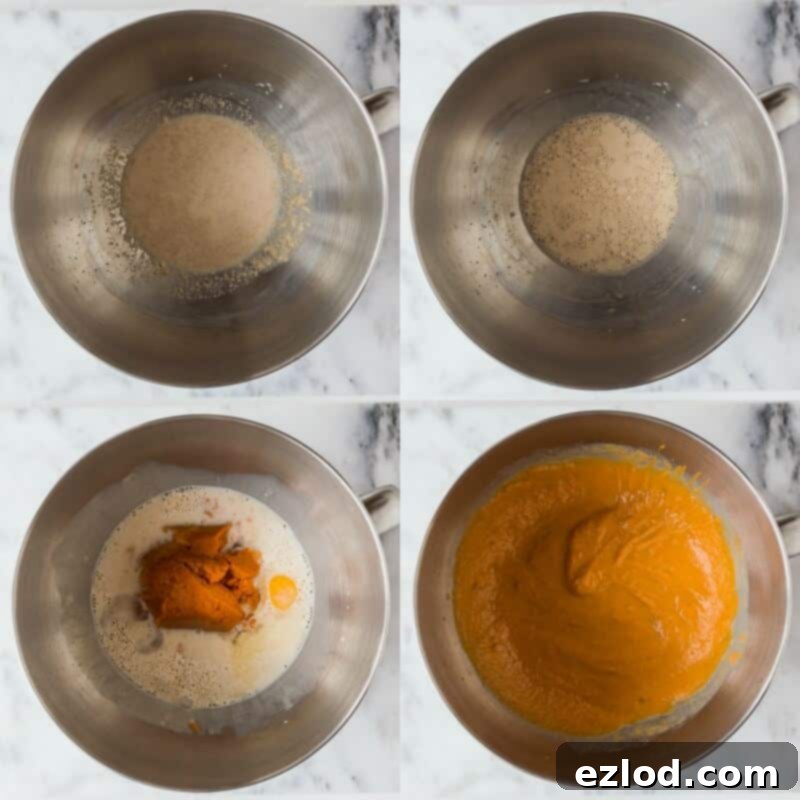
Once your yeast mixture is bubbling nicely, whisk in the remaining milk, the rest of the brown sugar, the star ingredient – pumpkin puree – and the large egg (or flax egg if you’re preparing the vegan version of these delicious pumpkin bread rolls). These wet ingredients combine to form the rich, flavorful base of your dough, contributing to its moisture and overall taste.
Next, add the dry ingredients to the wet mixture: all-purpose flour, salt, and your carefully selected autumn spices including ground cinnamon, ground ginger, ground coriander, ground cloves, and ground nutmeg. Stir everything together with a sturdy spoon or a dough hook on a low setting to form a rough, shaggy dough. At this initial stage, it won’t look particularly smooth or cohesive, but that’s perfectly normal and expected.
Now comes the crucial step of kneading. Attach the dough hook to your stand mixer and mix on a medium speed for a couple of minutes until the ingredients are just combined. Then, gradually incorporate the softened butter, adding it one tablespoon at a time. It’s absolutely crucial to mix well after each addition, allowing the butter to be fully absorbed into the dough before adding more. This slow and steady incorporation ensures a rich, tender crumb and helps develop a smooth dough.
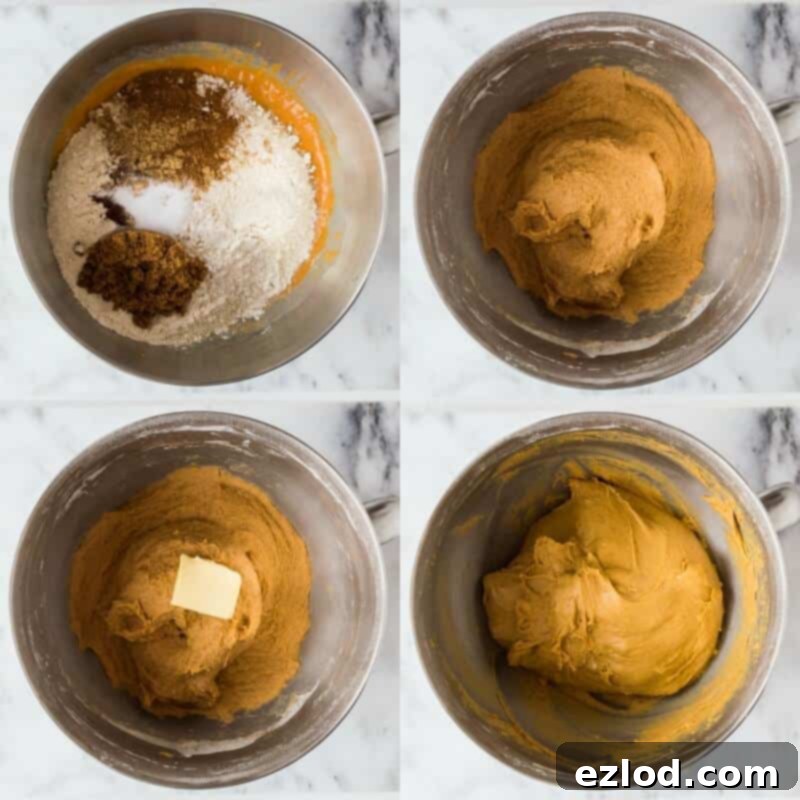
Increase the mixer speed to high and continue to knead for another 5 to 10 minutes. During this time, the dough will transform dramatically, becoming smooth, elastic, and pulling away cleanly from the sides of the bowl. It should still feel quite soft and slightly sticky to the touch, which is desirable for a tender roll, but it shouldn’t be wet or unmanageable. If you find it too sticky, you can add a tiny bit more flour (half a tablespoon at a time) as needed until the desired consistency is achieved. Proper kneading is vital for developing the gluten structure that gives bread its characteristic chewiness, strength, and impressive rise.
The First Rise: Patience is Key to Fluffy Rolls
Transfer the beautifully kneaded dough to a large, lightly oiled bowl. Turn the dough once or twice to ensure it’s coated in oil, which prevents it from drying out and sticking. Then, cover the bowl loosely with plastic wrap or a clean kitchen towel. Place it in a warm, draft-free spot to rise. This first rise, often referred to as bulk fermentation, is crucial for flavor development and will typically take approximately 1-2 hours, or until the dough has noticeably doubled in size. The warmer the environment, the faster it will rise, so choose your spot wisely – a warm oven (turned off!) or a sunny windowsill can work wonders.
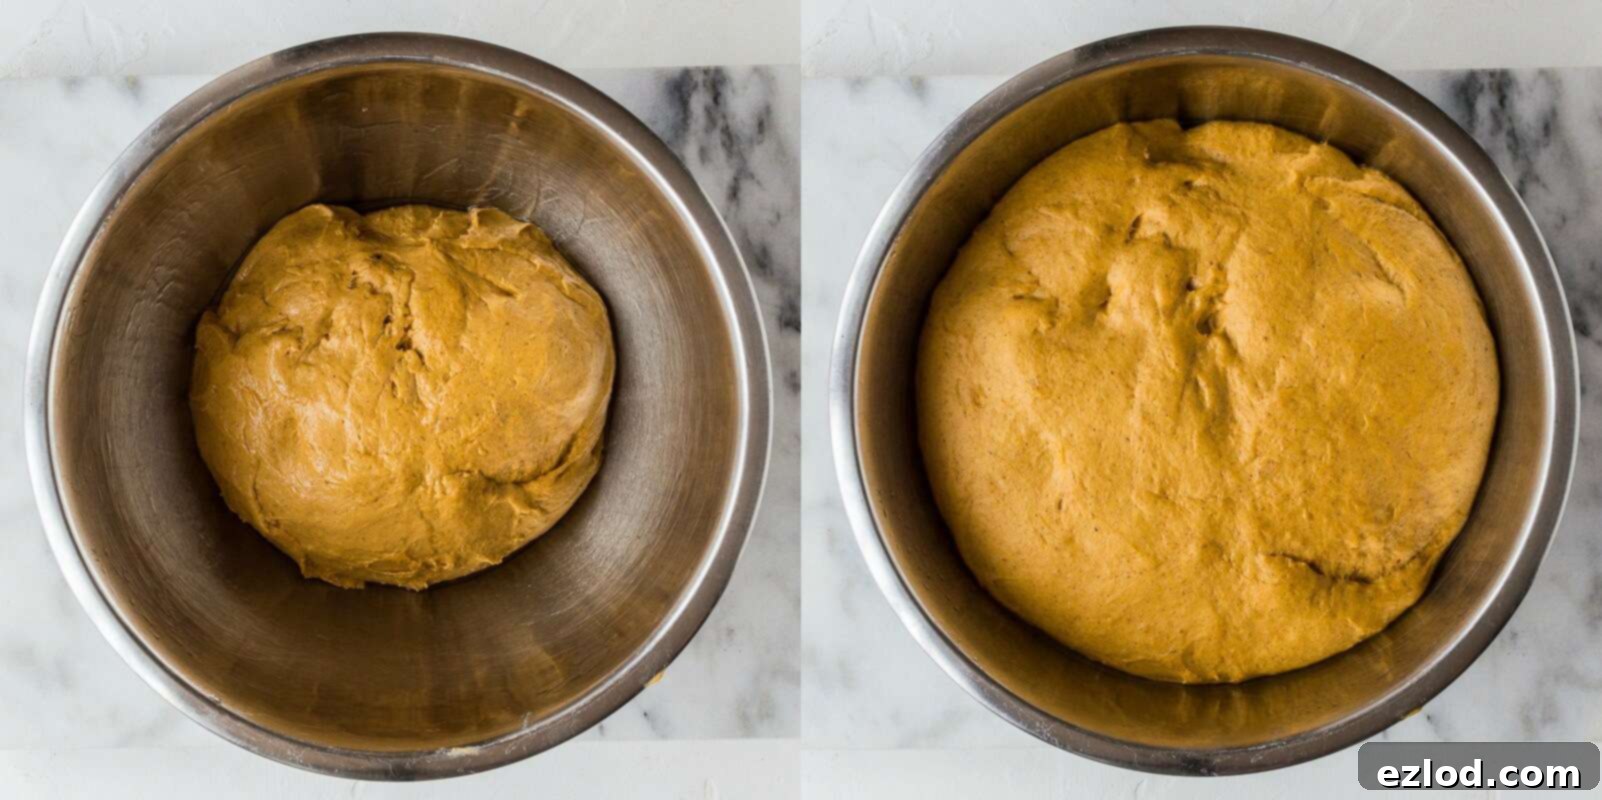
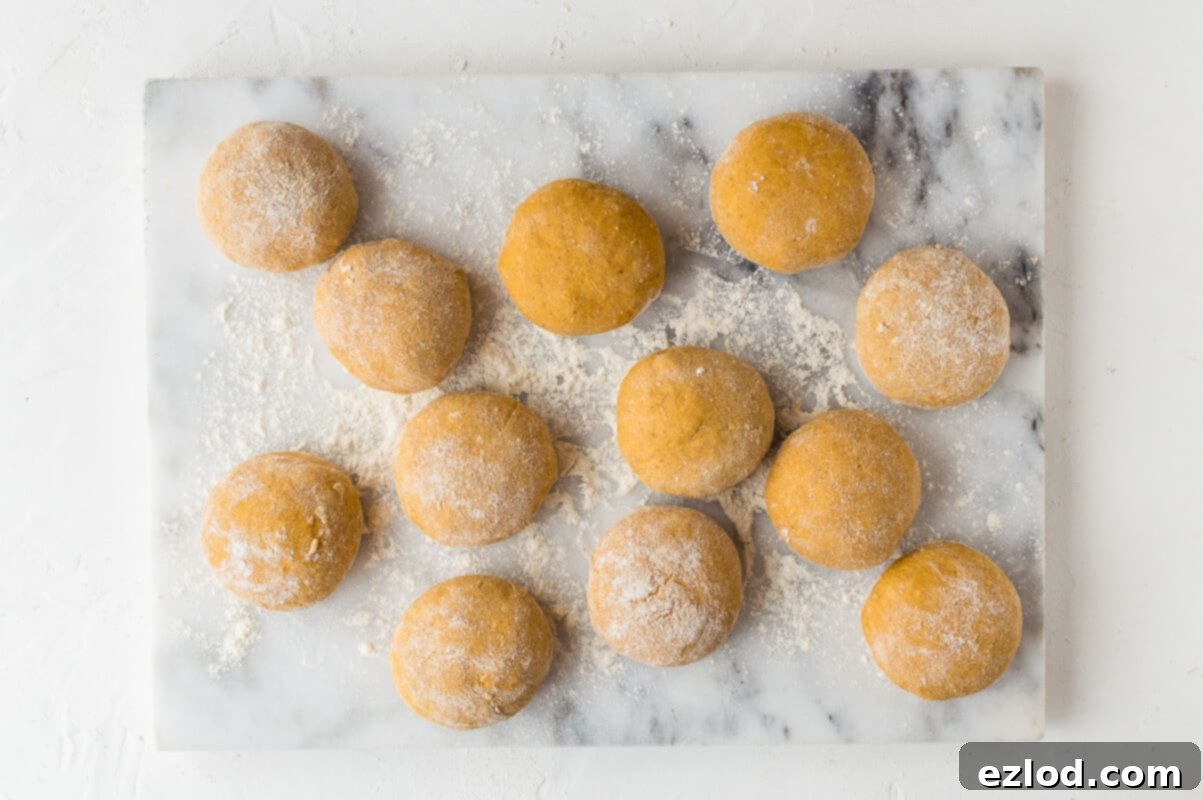
Once doubled in size, gently “knock back” the risen dough by deflating it with your fist. This important step redistributes the yeast, evens out the temperature within the dough, and helps create a finer, more consistent crumb structure in the finished rolls. Turn the dough out onto a lightly floured surface and divide it into 12-15 even pieces (the original recipe made 12, but you can adjust based on desired roll size). Aim for consistency in size for uniform baking and presentation. Shape each piece into a smooth, tight ball. Finally, line two baking sheets with baking parchment, preparing them for the shaped rolls and preventing sticking.
Shaping Your Festive Pumpkin Rolls
Using Scissors for Defined Lobes
For the scissor method, lightly oil your kitchen scissors (or a sharp, non-serrated knife) to prevent sticking to the dough. Hold one dough ball firmly and make 8 equally spaced cuts around the circumference of the ball. Cut about halfway into the dough, but crucially, ensure the very center remains uncut. This will create the distinct, appealing lobes of your pumpkin roll. Repeat this process for all your dough balls until they all resemble mini pumpkins.
Using String for Realistic Ribs
If you opt for the string method, you’ll need several pieces of food-safe cotton string, each about 12-15 inches long. Take one piece of string and find its halfway point. Place this halfway point over the top of a dough ball. Then, carefully flip the entire ball over. Bring the two ends of the string together underneath and cross them, creating a cross shape on the bottom of the ball. Flip it back over to the original side, and continue this process, crossing the strings again, until the ball is visibly divided into 8 relatively equal sections. Gently tie the string at the top of the dough ball, ensuring it’s secure enough to hold the shape but not pulled too tight, as the dough will expand considerably during rising and baking. Trim any excess string. This method truly gives the rolls an authentic, deeply ribbed pumpkin appearance.
Second Rise and Baking Your Golden Rolls
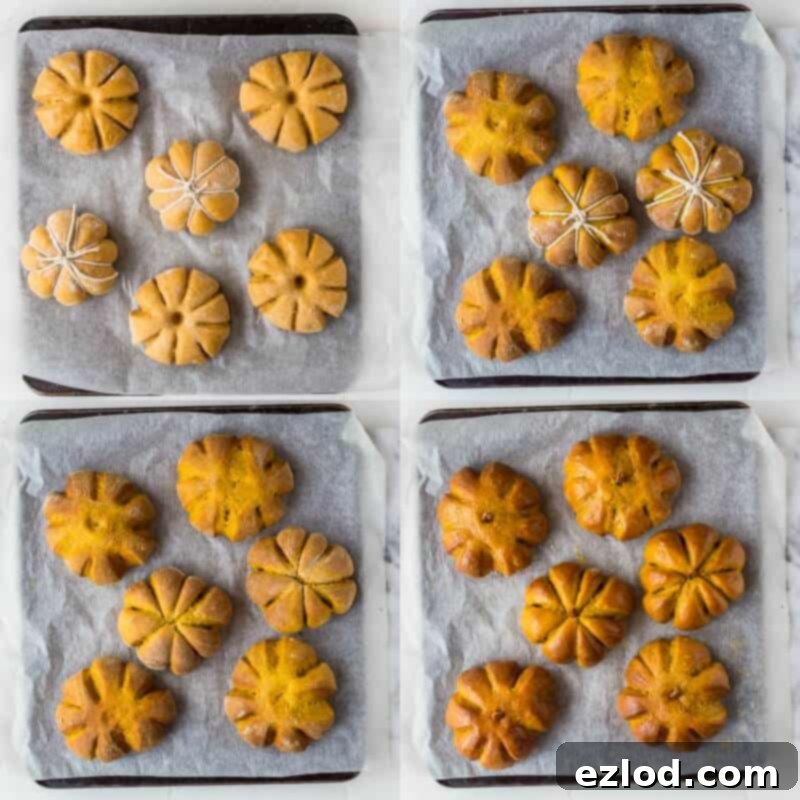
Arrange your beautifully shaped buns on the prepared baking trays, ensuring they are well spaced apart to allow for ample expansion during their final rise and baking. Loosely cover them with oiled cling film or a clean, damp kitchen towel to prevent them from drying out, and set them aside for their second rise, also known as proofing. This critical stage will take about 45 minutes, or until the buns look visibly puffy and spring back slowly when gently pressed with a finger. This indicates they are properly proofed and ready for baking, having developed their final light texture.
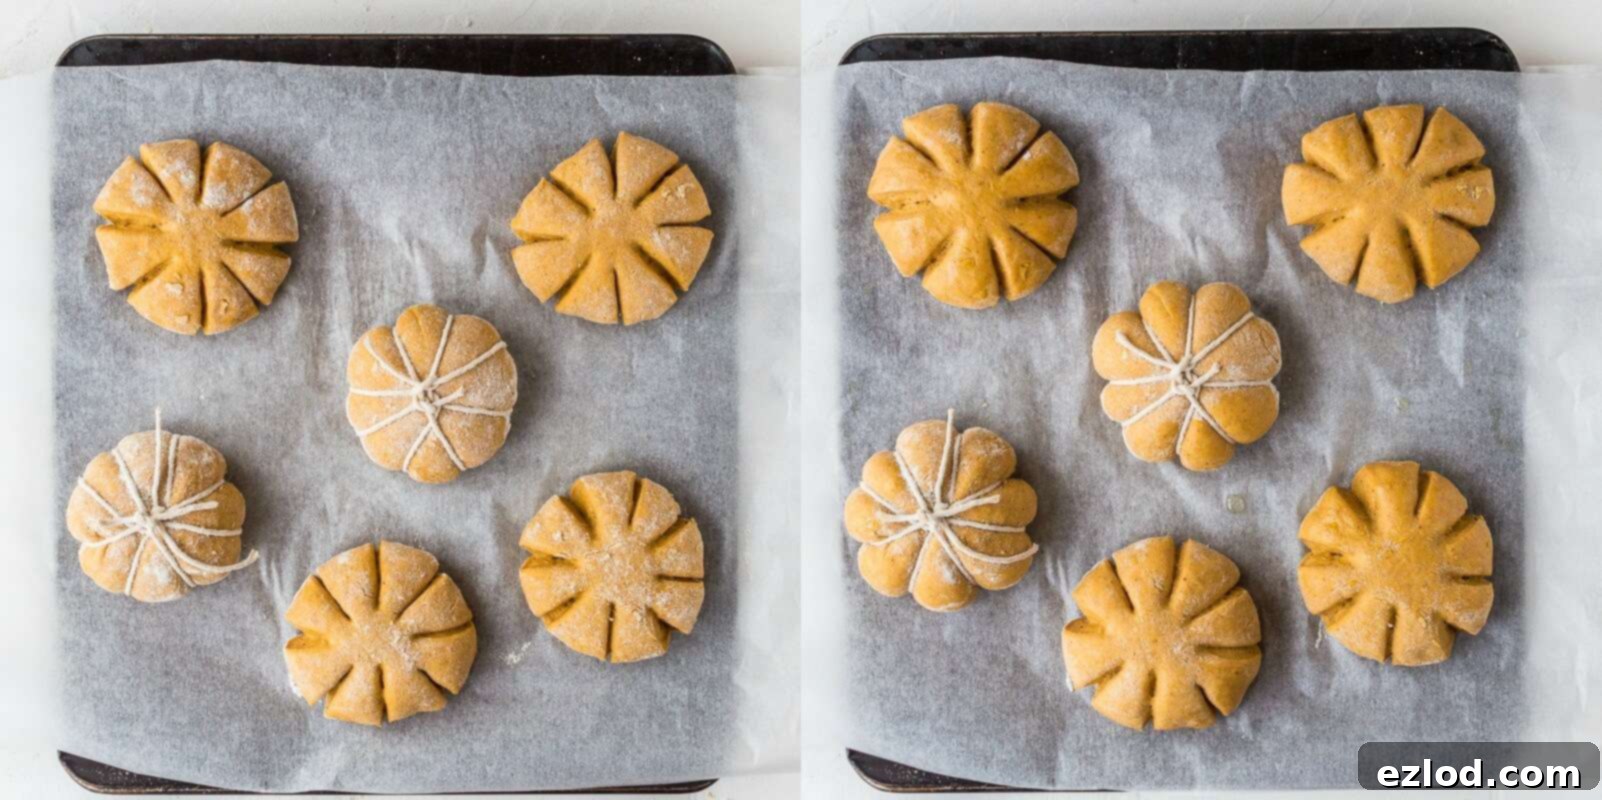
While the rolls are completing their second rise, preheat your oven to 180°C (350°F / Gas Mark 4). If you used the scissor shaping method, now is the time to use the oiled end of a wooden spoon or a dowel to create a deep indentation in the center of each bun. This further enhances the pumpkin look and creates a spot for your pecan “stem.” Carefully transfer the trays to the preheated oven and bake the rolls for approximately 20 minutes, or until they are beautifully golden brown on top and sound hollow when gently tapped on the bottom. This hollowness indicates they are cooked through.
Finishing Touches: The Perfect Pumpkin Presentation
Once baked to golden perfection, remove the rolls from the oven. If you used the string method, allow the rolls to cool for just a couple of minutes, then very carefully remove the strings while the rolls are still warm but cool enough to handle. Gently brushing off any string residue. Brush the warm buns generously with melted butter (dairy or vegan); this adds a lovely sheen, enhances the flavor, and keeps them soft. Finally, for that perfect pumpkin stem effect, gently push a sliced pecan (ideally sliced lengthways to mimic a natural stem) into the center of each roll. Your delightful homemade pumpkin bread rolls are best enjoyed on the day they are made, straight from the oven! Any leftovers can be stored in an airtight container at room temperature for a day or two, though they are rarely around for long as they are simply irresistible!
Helpful Tips for Perfect Pumpkin Bread Rolls Every Time
Make Them Vegan: Simple Swaps for Everyone to Enjoy
Creating these delightful pumpkin bread rolls in a vegan-friendly version is incredibly straightforward, ensuring everyone can partake in the autumnal goodness. Simply swap the dairy milk for an unsweetened dairy-free alternative – soy milk is often recommended for its protein content, which can mimic dairy milk in baking, but almond or oat milk will also work beautifully. Replace the traditional butter with a high-quality vegan butter or margarine block, which is designed for baking. For the egg, a flax egg (prepared by mixing 1 tablespoon of ground flaxseed meal with 3 tablespoons of water, then letting it sit for 5 minutes until it forms a gel-like consistency) serves as an excellent, natural binder. These simple, accessible substitutions ensure that your vegan pumpkin rolls are just as fluffy, flavorful, and festive as the original recipe.
Understanding Pumpkin Puree: Not All Cans Are Created Equal!
It’s absolutely crucial to use plain pumpkin puree for this recipe, NOT pumpkin pie filling. Pumpkin pie filling is already spiced, sweetened, and often contains other additives, which would significantly alter the delicate flavor profile and sweetness level of your bread rolls. Always check the label carefully to ensure you’re grabbing the right product from the shelf!
For those readers in the UK, finding tinned pumpkin puree can sometimes be a bit of a treasure hunt. Many larger supermarkets, such as Sainsbury’s, often stock it in their American or international food aisles, especially around autumn. Online retailers like Amazon are also a reliable source if you’re struggling to locate it locally. If you still can’t find it, don’t worry – making your own pumpkin puree at home is surprisingly simple and guarantees freshness and pure pumpkin flavor.
To make homemade pumpkin puree, choose a small baking pumpkin (like a sugar pumpkin), a kabocha squash, or even a butternut squash. Halve it, scoop out the seeds and stringy bits, and then roast it in the oven (cut-side down with a little water in the pan) until the flesh is completely tender. Once cool enough to handle, scoop out the soft flesh and mash it thoroughly with a fork or, for a super smooth consistency, puree it in a food processor until silky. Avoid boiling or steaming the pumpkin for puree, as this method can introduce too much moisture, resulting in a wetter puree that could make your dough too sticky and difficult to work with. Roasting concentrates the pumpkin’s natural sugars and flavors, ensuring the right consistency for baking.
Baking Precision: Why Grams Matter in Dough Making
As emphasized in the recipe card, for the most consistent and best results in baking, especially when working with yeast doughs like these pumpkin bread rolls, using gram measurements with a digital kitchen scale is highly recommended over volumetric cup conversions. Cup measurements can vary significantly depending on how ingredients are scooped and packed, leading to inconsistent dough hydration and potentially affecting the final texture, rise, and overall quality of your rolls. A digital scale ensures pinpoint accuracy, which is paramount for successful and repeatable baking, helping you achieve perfect, fluffy rolls every time.
If you tried this recipe why not tag @domestic_gothess on Instagram and hashtag it #domesticgothess
*All images and content on Domestic Gothess are copyright protected. If you want to share this recipe then please do so by using the share buttons provided. Do not screenshot or post the recipe or content in full.*

Pumpkin Bread Rolls
Course
Breakfast, Side Dish
Cuisine
American, Baking
Keyword
bread rolls, pumpkin, dinner rolls, baking, autumn, holiday, vegan, easy
Prep Time
40 minutes
Cook Time
20 minutes
Rising time
2 hours
15 minutes
Total Time
1 hour
Calories
238
kcal
Author
Domestic Gothess
Ingredients
- 10 g (3 tsp) fast action/instant yeast
- 160 ml (⅔ cup) milk (either dairy or unsweetened non-dairy is fine)
- 50 g (¼ cup) light brown soft sugar
- 240 g (1 cup) pumpkin puree (not pumpkin pie filling)
- 1 large egg (or 1 flax egg)
- 510 g (4 ¼ cups) Plain flour (all-purpose)
- 1 ¼ tsp salt
- 1 tsp ground cinnamon
- 1 tsp ground ginger
- ½ tsp ground coriander
- ¼ tsp ground cloves
- ¼ tsp ground nutmeg
- 80 g (⅓ cup) butter (or vegan block butter)
- 2 Tbsp melted butter for brushing (or melted vegan butter)
- sliced pecans for stalks (sliced lengthways)
Instructions
-
In the bowl of an electric stand mixer whisk together the yeast, ½ tsp of the brown sugar and ⅓ of the milk until the yeast has dissolved. Let rest for 5 – 10 minutes until foamy.
-
Whisk in the rest of the milk, the sugar, pumpkin puree and egg (or flax egg).
-
Add the flour, salt and spices and stir to form a rough dough. Mix on a medium speed for a couple of minutes then gradually add the butter a tablespoon at a time, mixing well after each addition.
-
Turn the mixer up to high and continue to mix for about 5 to 10 minutes until the dough is smooth and elastic and pulls away from the sides of the bowl cleanly. It should still be quite soft and sticky but should not be wet, if it is then you can add in a little more flour as needed.
-
Transfer the dough to a large, lightly oiled bowl; cover and set aside to rise in a warm place until doubled in size, about 1-2 hours.
-
Knock back the risen dough and divide it into 12-15 even pieces (I made 12). Shape each one into a ball on a lightly floured surface. Line two baking sheets with baking parchment.
-
To shape the buns using scissors, oil your scissors (or a sharp knife) and make 8 cuts equally spaced around the ball of dough, leaving the centre uncut.
-
To shape the buns using string, take a long piece of string and find the halfway point. Place the half way point on top of the ball of dough and flip the whole thing over. Pull the two pieces of string together and cross them over to create a cross on the bottom of the ball. Flip it over again and do the same thing until the ball is divided into 8 equal pieces. Tie the string at the top and cut off any excess. Make sure that you don’t pull the string too tight as the dough will expand a lot as it rises and in the oven.
-
Place the shaped buns well spaced apart on the prepared trays. Cover loosely with oiled clingfilm and set aside to rise until puffy and the dough springs back slowly if you press it with a finger, about 45 minutes.
-
Meanwhile, preheat the oven to 180°C/350°F/gas mark 4. If you are using the scissors shaping method then use the oiled end of a wooden spoon to make a deep hole in the centre of each bun. Bake the buns for about 20 minutes until golden and they sound hollow when tapped on the bottom.
-
Remove the buns from the oven and allow to cool for a couple of minutes then very carefully remove the string (if you used that shaping method). Brush the buns generously with melted butter and push a sliced pecan into the centre of each to make the stalk. Best served on the day they are made; store in an airtight container.
Notes
More Delicious Pumpkin Recipes to Explore
If you’ve enjoyed baking these delightful pumpkin bread rolls, you might be inspired to explore more autumnal delights featuring the star ingredient! Pumpkin is incredibly versatile and can be incorporated into a wide array of sweet and savory dishes, making it a fall favorite. Here are some other fantastic pumpkin recipes from Domestic Gothess to tantalize your taste buds and keep the autumn baking spirit alive:
- Crumble Topped Pumpkin Spice Cake: A comforting and richly spiced cake, perfect for dessert or an afternoon treat, featuring a delicious crunchy crumble topping that adds texture and flavor.
- Double Pumpkin Goats Cheese Pizza: An unexpectedly delicious savory option that creatively combines the inherent sweetness of pumpkin with tangy goat’s cheese, all atop a crispy pizza base for a unique meal.
- Chocolate Ginger Pumpkin Bread Wreath: A beautiful and flavorful festive bread, intricately shaped into a wreath, ideal for sharing during the holiday season and sure to impress guests.
- Vegan Pumpkin Chocolate Chip Cookies: A delightful plant-based cookie option that is wonderfully soft, perfectly chewy, and packed with all the beloved flavors of fall, without any dairy or egg.
- Halloween Jack-O-Lantern Pumpkin Pies: Cute and individually sized pumpkin pies, making them perfect for Halloween gatherings, complete with fun, carved tops that resemble classic jack-o’-lanterns.
- Pumpkin Layer Cake with Mascarpone Cream and Sugared Pecans: An elegant and truly impressive dessert, featuring moist and flavorful pumpkin cake layers generously frosted with a luxurious mascarpone cream and adorned with sweet sugared pecans.
