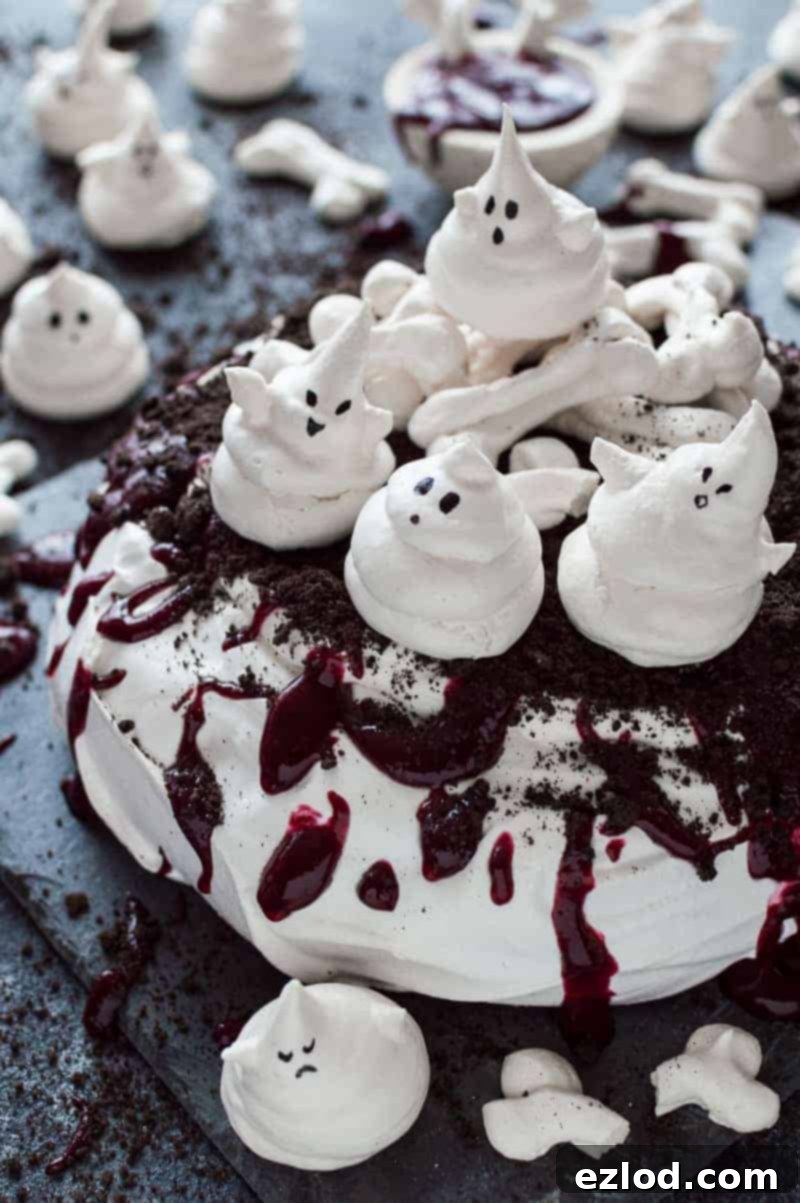
Unleash the Spooky Sweetness: Your Guide to Creating a Haunted Halloween Pavlova Masterpiece
As the crisp autumn air settles in and anticipation builds for all things spooky, it’s the perfect time to delve into some festive Halloween baking. Forget your average pumpkin pie; this year, prepare to mesmerize your guests with a truly show-stopping dessert: the Halloween Haunted Pavlova. Dubbed “The Haunting Of Anna Pavlova” by my clever cousin Maddy, this dessert isn’t just a treat for the taste buds – it’s an edible work of art that promises to be the centerpiece of any Halloween celebration.
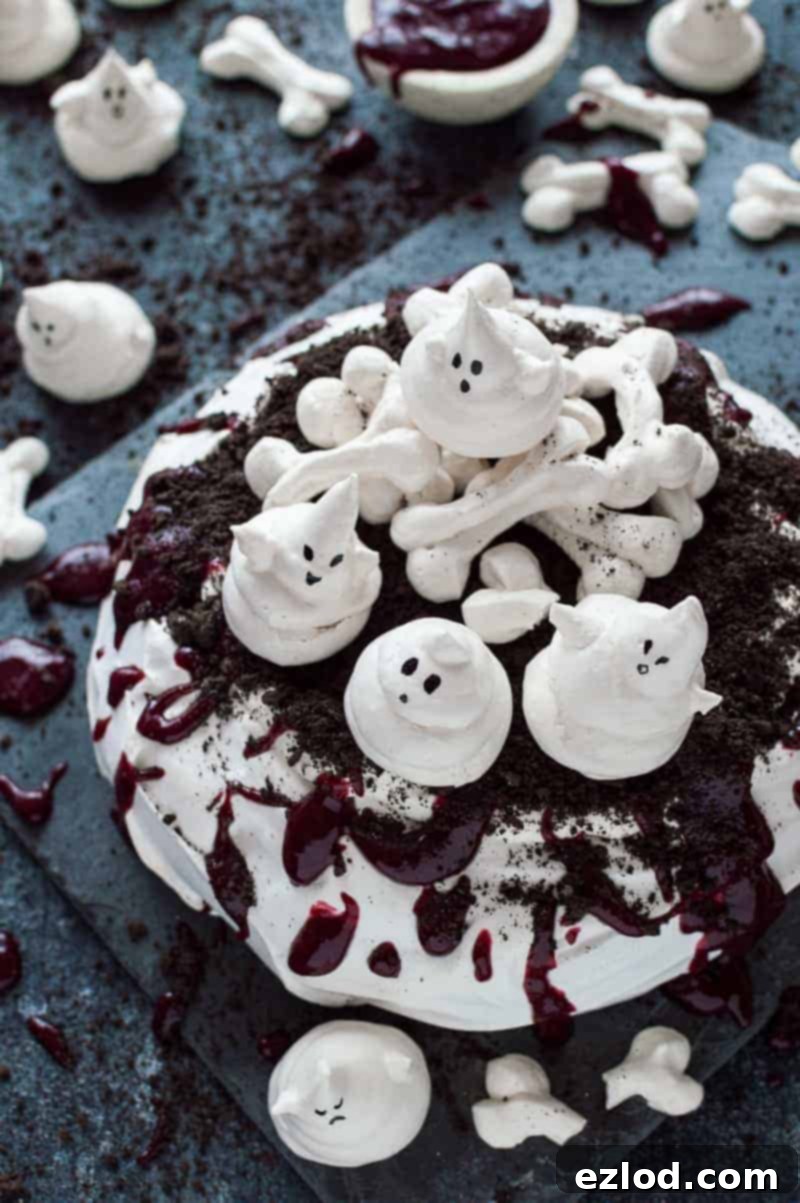
This haunted pavlova takes the classic, elegant meringue dessert and gives it a delightfully ghoulish twist. Imagine a perfectly crisp yet marshmallowy meringue base, generously topped with fluffy whipped cream, then transformed into a spooky scene. We’re talking about chilling berry coulis ‘blood’, crumbled Oreo ‘soil’, and an array of ghostly meringue figures and eerie bones. The best part? While it looks incredibly intricate and impressive, it’s surprisingly easy to assemble, making it an accessible project for bakers of all skill levels.
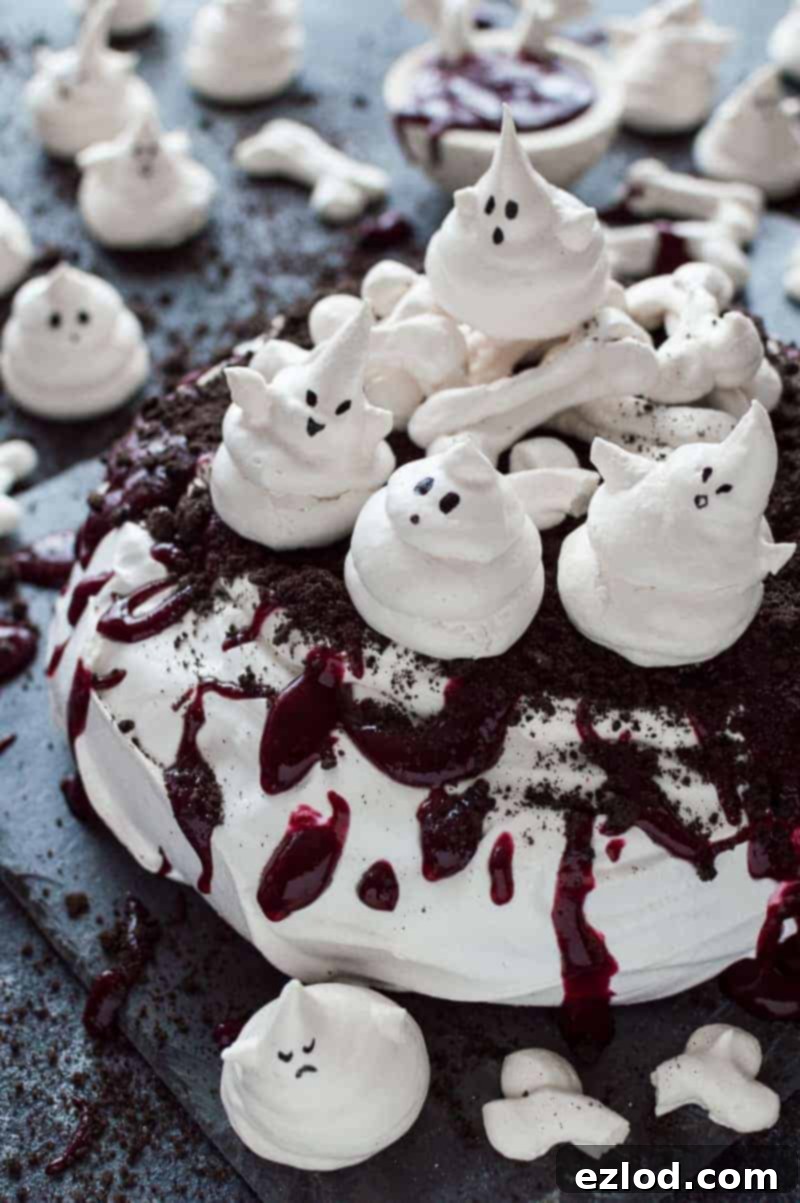
What Makes a Haunted Pavlova So Special?
At its heart, this Halloween pavlova embraces the best qualities of a traditional pavlova: a delicate, crisp shell that shatters beautifully, giving way to a soft, chewy, marshmallow-like interior. This ethereal base provides the perfect canvas for our macabre decorations. The contrast in textures and flavors – the sweet, light meringue, the rich cream, the tart berries, and the crunchy cookie – creates a symphony of sensory delights. But it’s the spooky embellishments that truly elevate it from a simple dessert to an unforgettable Halloween experience.
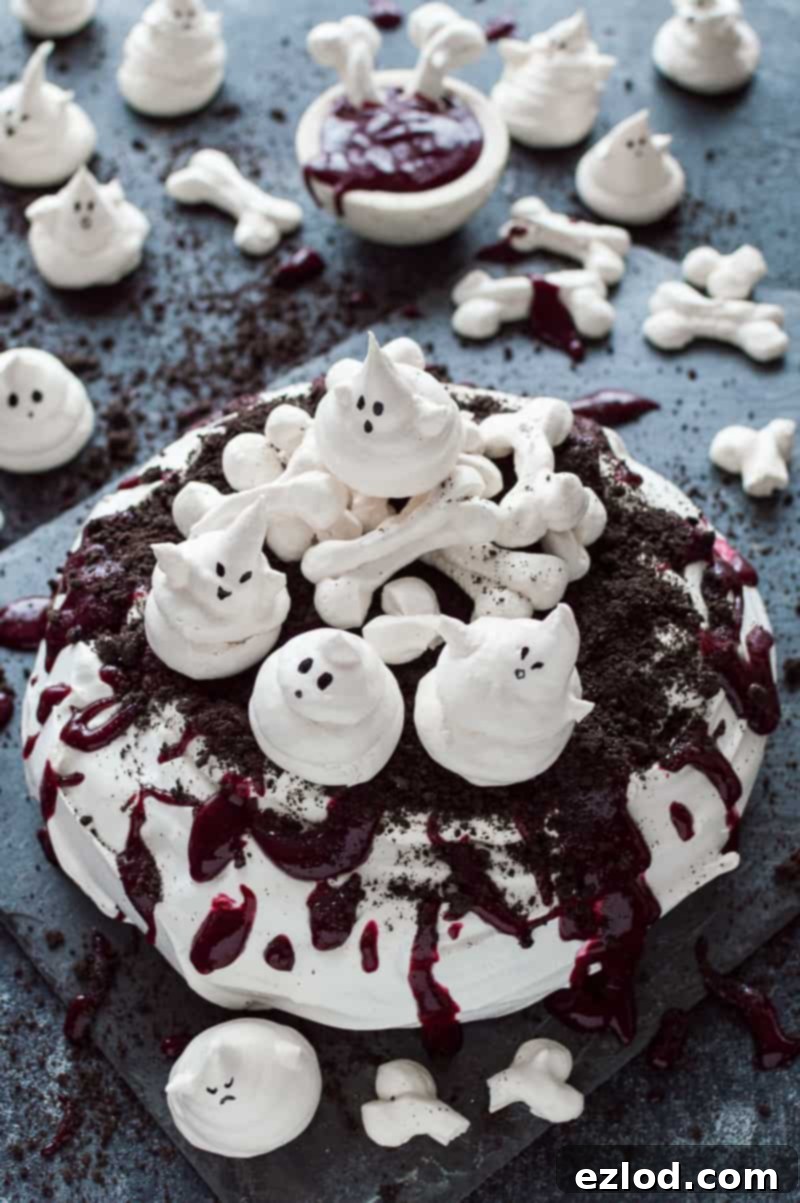
Crafting Your Spooky Elements
The Eerie Meringue Ghosts and Bones
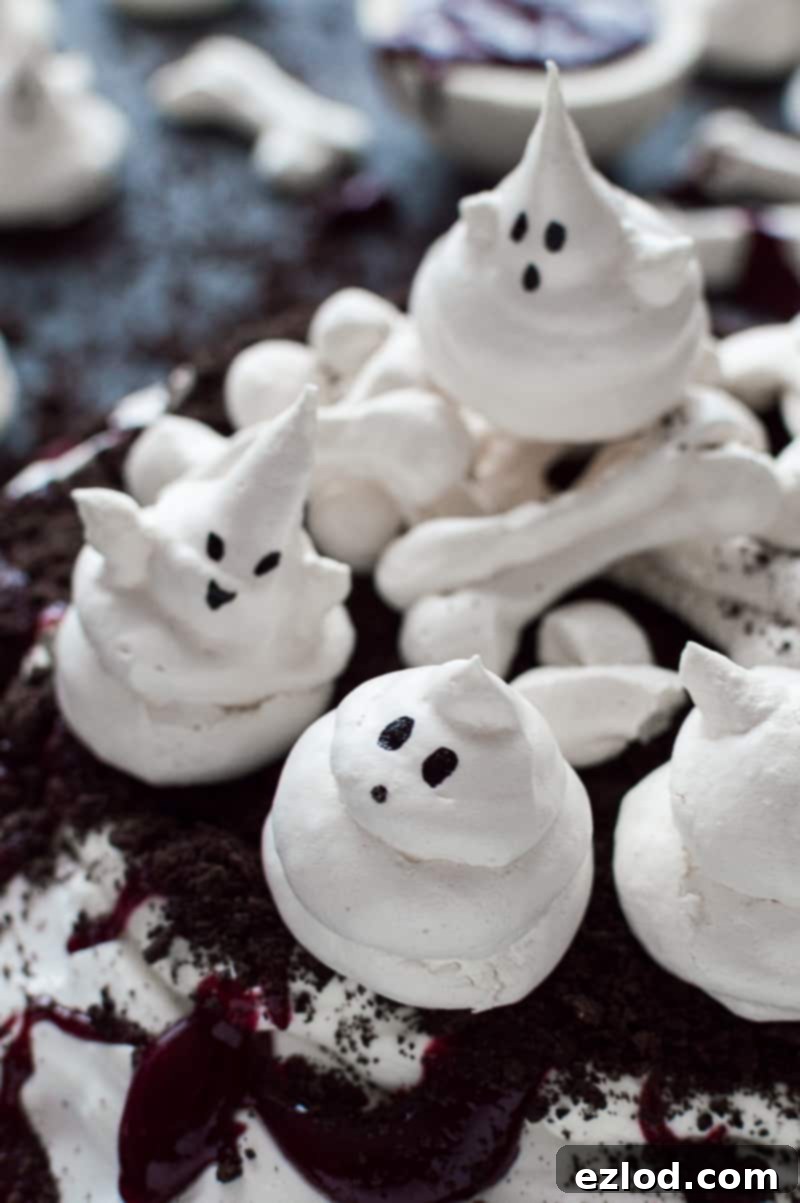
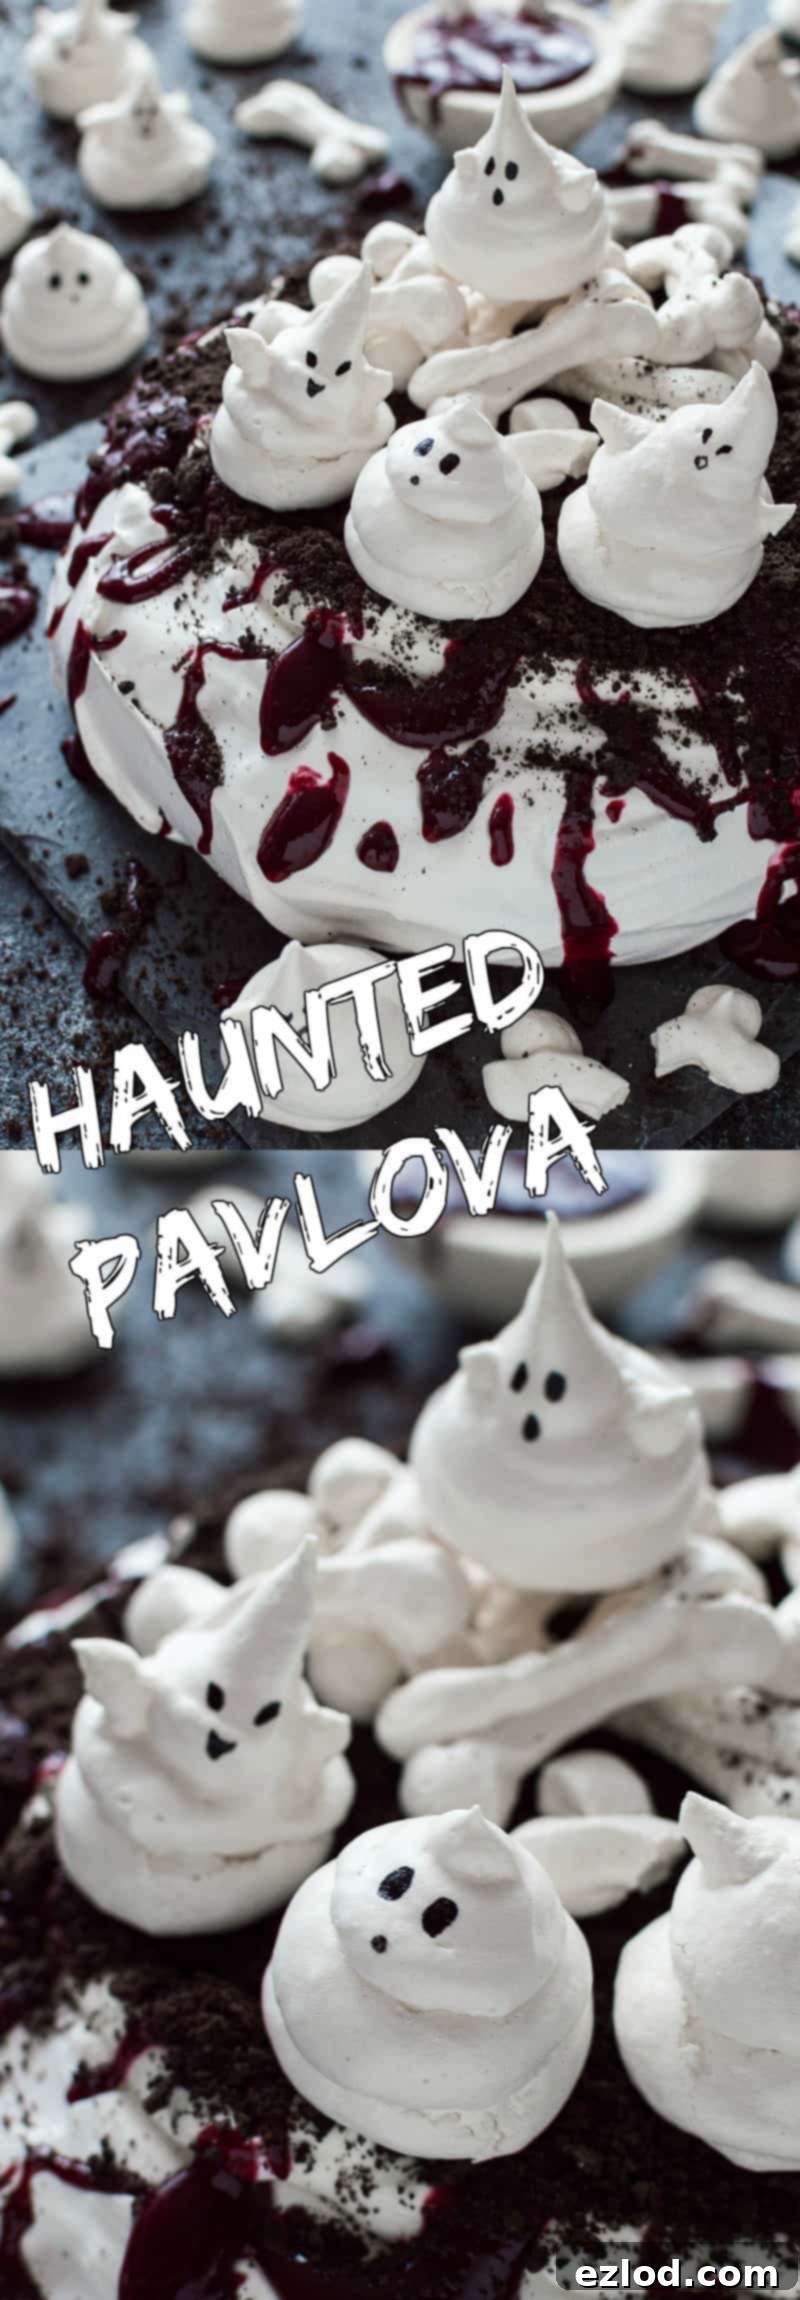
The meringue ghosts and bones are arguably the stars of this haunted dessert. And surprisingly, they are incredibly straightforward to create. For the ghosts, simply pipe blobs of meringue onto a baking sheet, making them wider at the bottom and tapering off towards a point at the top. Want to add a touch of personality? Use a toothpick to gently pull out small ‘arms’ from the meringue, giving your ghosts expressive poses. For the bones, envision simplified cartoon bone shapes; pipe a central shaft and then add rounded blobs at each end. Don’t worry about perfection; slightly crooked or imperfect shapes can add to their charmingly creepy aesthetic.
Once baked to a crisp, ethereal finish, these meringue figures become the perfect blank canvases. A fine, food-only paintbrush dipped in black gel food coloring allows you to add expressive faces to your ghosts – wide-eyed stares, mischievous grins, or even mournful frowns. I found myself giving each ghost a unique personality, which made eating them almost feel a little remorseful… but delicious remorse, nonetheless!
The Gory Berry Coulis ‘Blood’
No haunted scene is complete without a splash of ‘blood’. Our berry coulis serves this purpose perfectly, providing a vibrant, tart counterpoint to the sweetness of the meringue and cream. Made from mixed berries, sugar, and water, this coulis is cooked down until thickened and then puréed and sieved for a smooth, luscious texture. The deep red hue mimics freshly spilled blood, creating a truly gruesome (in the best way possible!) effect as it drips artfully down the sides of the pavlova. You can adjust its thickness by adding a tiny bit of water if needed, ensuring it flows just right for maximum dramatic impact.
The Crumbling Oreo ‘Soil’
To ground our spooky scene, we need some ‘earth’. Crushed Oreo cookies are ideal for creating this dark, rich ‘soil’ effect. Their intense chocolate flavor complements the berries and meringue beautifully, while their crumbly texture adds a delightful crunch. Simply blitz them in a food processor until finely ground, or for a more rustic approach, place them in a freezer bag and bash them with a rolling pin. This easy step adds depth and an authentic graveyard feel to your haunted pavlova.
Assembling Your Masterpiece: Tips for Success
The beauty of this Halloween Haunted Pavlova lies not only in its appearance but also in its flexible preparation. All the components – the pavlova base, meringue ghosts and bones, and the berry coulis – can be made in advance. Bake your pavlova shell and meringue decorations, allow them to cool completely, and store them in airtight containers. The berry coulis can be prepared and kept in the fridge, ready to deploy. Even the Oreo ‘soil’ can be crushed ahead of time. This forethought means that when it’s time to serve, all you need to do is whip up some fresh cream and artfully arrange your spooky toppings, a process that takes mere minutes.
For best results, assemble the pavlova just before serving. Transfer your cooled pavlova base to your chosen serving platter. Then, generously dollop and spread the freshly whipped cream into the center of the meringue shell. Next, drizzle the berry coulis over the cream, letting some of it spill down the meringue sides for that chilling ‘bleeding’ effect. Scatter the dark, crumbly Oreo ‘soil’ over and around the cream. Finally, arrange your adorable yet eerie meringue ghosts and bones on top, creating a playful, haunted tableau. Serving it immediately ensures the meringue stays crisp and the cream perfectly fresh.
More Spooktacular Halloween Recipes:
- Witches’ finger cookies
- Chocolate glazed black cat doughnuts
- Mini bleeding heart Halloween cakes
- Chocolate blackberry gothic Halloween cake
- Meringue bone palace Halloween cake
- Jack-O-Lantern pumpkin pies
- Monochrome cake
If you tried this recipe, we’d love to see your creations! Why not tag @domestic_gothess on Instagram and hashtag it #domesticgothess?
*All images and content on Domestic Gothess are copyright protected. If you want to share this recipe then please do so by using the share buttons provided. Do not screenshot or post the recipe or content in full.*
Halloween Haunted Pavlova Recipe:
Print
Halloween Haunted Pavlova
Ingredients
Meringue Ghosts and Bones:
- 2 large egg whites
- pinch cream of tartar
- 110 g (½ cup) caster (superfine) sugar
- black gel food colouring
Pavlova:
- 3 large egg whites
- ⅛ tsp cream of tartar
- 175 g (¾ cup + 1 Tbsp) caster (superfine) sugar
- 1 tsp cornflour (cornstarch)
- ½ tsp vanilla extract
Berry Coulis Blood:
- 450 g (1 lb) mixed frozen berries
- 100 g (½ cup) granulated sugar
- 100 ml (scant ½ cup) water
To Finish:
- 200 ml (½ + ⅓ cup) whipping cream
- 1 heaped Tbsp icing (powdered) sugar sifted
- ½ tsp vanilla bean paste/extract
- 5 chocolate stuffed Oreo cookies or Bourbon biscuits
Instructions
Meringue Ghosts and Bones:
-
Preheat the oven to 100C/210F/gas mark ¼ and line two baking sheets with baking parchment.
-
Place the egg whites and cream of tartar in a large, spotlessly clean bowl and whisk on medium speed until soft peaks form. Gradually whisk in the sugar a couple of spoonfuls at a time until it is all incorporated; continue to whisk until the meringue is glossy and forms stiff peaks.
-
Spoon the meringue into a disposable piping bag and snip off the corner. Use a little of the meringue to stick the baking parchment to the tray so that it is easier to pipe.
-
Pipe bone shapes on one of the baking trays – start by piping a blob then work your way down to make the length, then finish with another blob on the opposite side. Repeat in reverse to make a crisscross, overlapping your meringue down the length of the bone to ensure there are no thin spots. It may take a few attempts to get the technique right.
-
Pipe ghosts on the other tray – start with a fat blob and tail off towards the top. Use a toothpick with a blob of meringue on the end to form arms.
-
Bake for about 1 hour until firm and the meringues lift away from the parchment cleanly. Remove from the oven and allow to cool.
-
Once cool, use a fine, food-only paintbrush to paint faces on the ghosts then store in an airtight container.
Pavlova:
-
Turn the oven up to 150C/325F/gas mark 3. Line a baking sheet with baking parchment.
-
Place the egg whites and cream of tartar in a large, spotlessly clean bowl and whisk on medium speed until soft peaks form. Gradually whisk in the sugar a couple of spoonfuls at a time until it is all incorporated; continue to whisk until the meringue is glossy and forms stiff peaks.
-
Sift over the cornflour and drizzle over the vanilla extract; fold through carefully until well combined.
-
Dollop about ⅔rds of the meringue onto the baking sheet and spread it out into an approx 20cm/8in circle. Use the rest of the meringue to build up the sides so that it is sort of bowl shaped.
-
Place the meringue in the oven and immediately turn the heat down to 100C/210F/gas mark ¼. Bake for 1 hour 20 minutes then turn off the oven and leave the pavlova in there until it has cooled completely (to help prevent it from cracking). Once cool, store in an airtight container.
Berry Coulis:
-
Place all the mixed berry coulis ingredients into a medium sized heavy bottomed saucepan and bring to the boil over a gentle heat, stirring regularly. Reduce to a simmer and cook for about 15 minutes, or until thickened. Allow to cool, then transfer the coulis to a blender or use a hand blender to purée until completely smooth, pass the puree through a sieve, pushing through as much pulp as possible and discarding any seeds. Transfer to a jug, cover and keep refrigerated.
Assembly:
-
When you are ready to serve the pavlova, carefully transfer it to a serving platter. Place the Oreos in a food processor and blitz until finely ground (or place in a freezer bag and bash with a rolling pin).
-
Whisk the cream with the icing sugar and vanilla bean paste until soft peaks form. Top the middle of the pavlova with the whipped cream.
-
Drizzle over some of the coulis, letting it drip down the sides gorily; if it is too thick then you can thin it with a little water. Serve the rest on the side in a jug for people to pour over.
-
Scatter over the crushed Oreos then top with a pile of meringue bones and your favourite ghosts. Serve straight away and keep any leftovers refrigerated.
Beyond the Recipe: Tips for Pavlova Perfection
Achieving a perfect pavlova can sometimes feel daunting, but with a few key tips, you’ll master it in no time. Firstly, ensure your mixing bowl and whisk are absolutely spotless and free of any grease. Even a tiny speck of fat can prevent your egg whites from whipping up properly. Using fresh, room-temperature egg whites also aids in achieving maximum volume. When adding sugar, do so gradually, a spoonful at a time, allowing it to dissolve fully before adding more. This prevents your meringue from weeping and ensures a stable, glossy structure.
The low and slow baking process is crucial for pavlova. This method dries out the meringue slowly, creating that wonderfully crisp outer shell while maintaining a soft, chewy interior. Resist the urge to open the oven door during baking, as sudden temperature changes can cause cracking. Most importantly, after baking, turn off the oven and leave the pavlova inside to cool completely. This gradual cooling prevents thermal shock and minimizes cracking, resulting in a beautifully intact meringue shell ready for your spooky decorations. Don’t worry if it does crack a little – it simply adds to the ‘haunted’ charm!
Make-Ahead Magic for Your Halloween Party
Hosting a Halloween party can be hectic, but this haunted pavlova makes dessert prep a breeze thanks to its make-ahead friendly components. The meringue pavlova base, once baked and cooled, can be stored in an airtight container at room temperature for up to two days. The meringue ghosts and bones can also be made several days in advance and kept in an airtight container, preserving their crispness. The vibrant berry coulis can be prepared up to three days beforehand and stored in a covered jug in the refrigerator, allowing its flavors to meld beautifully. You can even crush your Oreo cookies for the ‘soil’ and store them in an airtight bag or container. This pre-preparation leaves you with minimal last-minute tasks, letting you enjoy the festivities and awe your guests with your stunning, spooky dessert with ease.
Serving Suggestions & Customization
This Halloween Haunted Pavlova is a feast for the eyes as much as it is for the palate, making it an ideal centerpiece for your Halloween spread. Serve it on a dark-colored platter to enhance the dramatic effect of the ‘blood’ and ‘soil’. Consider garnishing with a few fresh berries or a sprig of mint for a subtle contrast, though the dessert is striking enough on its own. For an extra touch of creepiness, you could place a small, edible spider or a few gummy worms amongst the ‘soil’.
Don’t be afraid to get creative with your meringue ghosts; try different sizes, or use a finer piping nozzle for more delicate bone structures. If you can’t find black gel food coloring, a tiny bit of melted dark chocolate can also be used for the ghost faces. For the berry coulis, feel free to experiment with other red fruits like raspberries or cherries, or even add a hint of spice like a tiny pinch of cinnamon for an autumn twist. This recipe is wonderfully adaptable, allowing you to personalize your haunted creation and make it uniquely yours.
Whether you’re hosting a grand Halloween bash or simply want to bring some festive fun to your family dinner, the Halloween Haunted Pavlova is guaranteed to be a hit. Its impressive appearance belies its simplicity, delivering both spooky charm and delightful flavors. So, gather your ingredients, unleash your inner ghoul, and get ready to bake a dessert that will haunt your guests’ memories (in the best possible way!) long after the last bite.
Happy Halloween baking!
