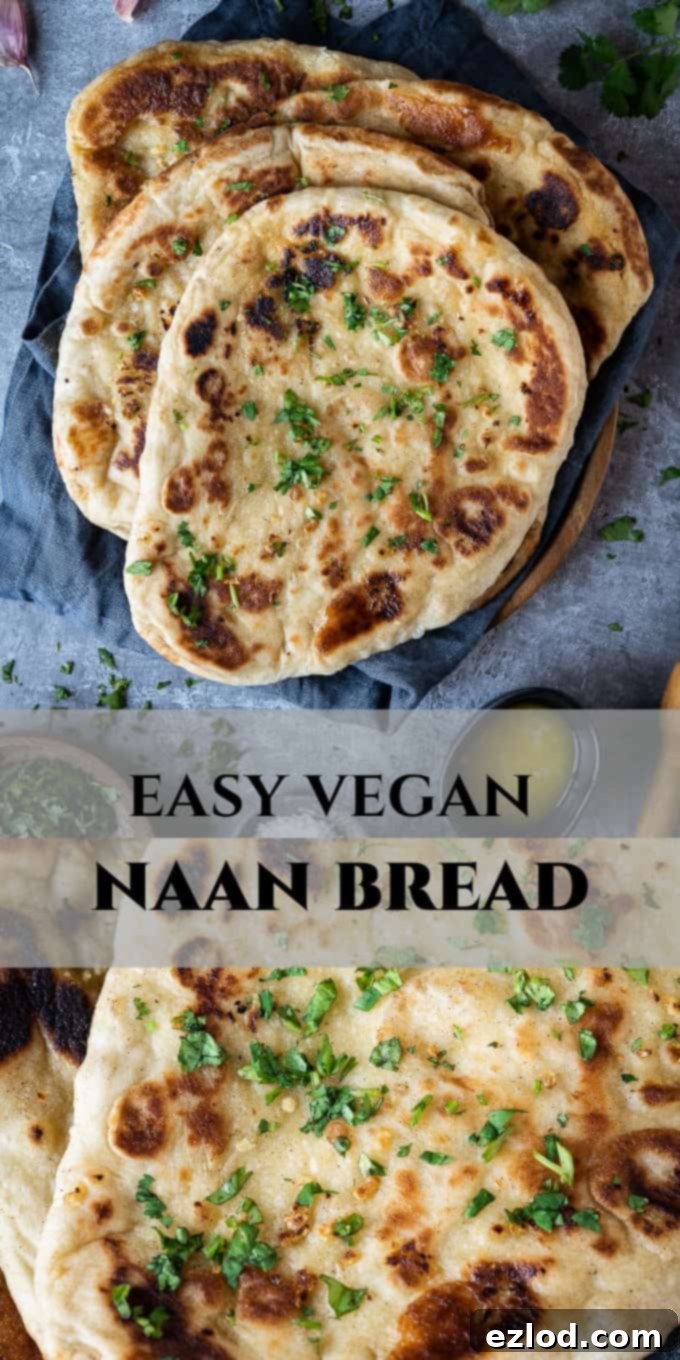
Delicious Homemade Vegan Naan Bread: Soft, Fluffy, and Perfectly Plant-Based Garlic Naan

There’s nothing quite like a warm, pillowy piece of naan bread to complete an Indian-inspired meal. Its soft, chewy texture and slightly tangy flavor make it the ultimate companion for scooping up rich curries, mopping up spicy soups, or even serving as a quick and customizable pizza base. While traditional naan recipes often rely on dairy products like yogurt and ghee for their signature richness and tenderness, this incredibly easy vegan naan bread recipe delivers the same restaurant-quality taste and texture without any animal products. Get ready to bake the most delicious, fluffy, and perfectly soft garlic naan you’ll ever make at home!
The Irresistible Appeal of Vegan Naan
Naan bread, a staple of South Asian cuisine, is a leavened flatbread typically made with an enriched dough. This enrichment, often achieved through ingredients like yogurt, milk, and ghee or butter, is what gives traditional naan its characteristic softness, elasticity, and depth of flavor. However, this also means that most naan found in restaurants or supermarkets is not suitable for a vegan diet.
But here’s the exciting news: creating a truly authentic and delicious vegan naan at home is surprisingly simple! By making smart substitutions for dairy ingredients, you can achieve a naan that is just as soft, fluffy, and flavorful as its traditional counterpart. We’ll swap dairy yogurt for a plant-based alternative and ghee/butter for oil, ensuring your homemade naan is entirely plant-based without compromising on taste or texture. This recipe proves that you don’t need dairy to enjoy truly amazing, restaurant-style naan.
From Tandoor to Skillet: Home Cooking Naan
Traditionally, naan is cooked in a tandoor oven—a cylindrical clay oven heated to an incredibly high temperature, often reaching around 480°C (900°F). The dough is slapped onto the hot walls of the tandoor, where it quickly puffs up and cooks through, developing those distinctive charred spots and a wonderfully chewy texture. Replicating a tandoor in a home kitchen is, for most of us, impractical.
However, a well-heated cast iron skillet on your stovetop provides an excellent alternative, mimicking the intense direct heat needed to cook naan quickly and achieve that perfect rise and char. If you don’t have a cast iron skillet, a heavy-bottomed frying pan will also work, though a cast iron skillet is truly ideal for its superior heat retention and distribution. The key is to get your cooking surface very hot before adding the dough, ensuring a rapid cook that creates those beautiful air pockets and a tender interior.
Essential Ingredients for Your Vegan Naan Bread
Crafting the perfect vegan naan starts with selecting the right ingredients. Each component plays a vital role in achieving that soft, fluffy texture and rich flavor. Here’s a closer look at what you’ll need:
- Plain Flour (All-Purpose Flour): For this recipe, plain (all-purpose) flour is preferred to achieve a wonderfully soft and tender naan. Its moderate protein content allows for good gluten development without making the bread too chewy. If you desire a slightly chewier texture, you can use bread flour, or even a 50/50 blend of plain and bread flour. Just be mindful that bread flour will absorb a bit more liquid, so you might need to adjust the water slightly.
- Instant Yeast (Fast-Action or Easy Yeast): I consistently use instant yeast in my baking because it’s incredibly convenient – it doesn’t require activation before being mixed with the dry ingredients. If your recipe calls for active dry yeast instead, you’ll need to “proof” it first. To do this, combine the active dry yeast with the specified warm water (make sure it’s lukewarm, not hot, as excessive heat will kill the yeast) and a pinch of the sugar. Let it sit for about 10-20 minutes until a foamy layer forms on top. This foam indicates the yeast is alive and active. Once proofed, proceed with the recipe as written, incorporating the foamy mixture with your wet ingredients.
- Unsweetened Non-Dairy Yogurt: This is a crucial ingredient for vegan naan, as it replaces traditional dairy yogurt, contributing to the dough’s softness, tenderness, and a slight tangy flavor. Any unsweetened, plain variety will work well. I often use a soy or coconut yogurt blend for its creamy texture. The consistency of plant-based yogurts can vary; some are thicker, some are runnier. Be prepared to make slight adjustments to your dough by adding a touch more flour if the yogurt makes it too wet, or a tiny bit more water if it feels too dry. The goal is a very soft, sticky dough.
- Oil (Olive Oil, Sunflower Oil, Vegetable Oil, etc.): A small amount of fat is essential for a tender and moist naan. It enriches the dough, preventing it from drying out and enhancing its overall texture. Olive oil is a great choice for its flavor, but any neutral-flavored oil like sunflower, vegetable, or canola oil will work. You can even use melted coconut oil or melted vegan butter for an extra touch of richness.
- Sugar: Don’t skip the sugar! While it adds a hint of sweetness, its primary role is to feed the yeast, helping it activate and rise efficiently. A little sugar goes a long way in ensuring a beautifully risen, light naan.
- Salt: Just like sugar, salt is non-negotiable in bread making. It enhances the flavor of the flour, balances the sweetness from the sugar, and controls the yeast’s activity. Bread made without salt is notoriously bland, so ensure you include the recommended amount.
- Warm Water: The temperature of your water is critical for yeast activation. It should be lukewarm – ideally between 40-45°C (105-115°F). You should be able to comfortably keep your hand in it for at least 30 seconds. Water that is too hot will kill the yeast, preventing the dough from rising, while water that is too cold will inhibit its activity. You can also use lukewarm unsweetened plant milk for an even richer dough, though water works perfectly fine.

Step-by-Step Guide: How to Make Vegan Naan Bread
Making vegan naan at home is a rewarding process. Follow these detailed steps to achieve perfect, fluffy flatbreads every time:
-
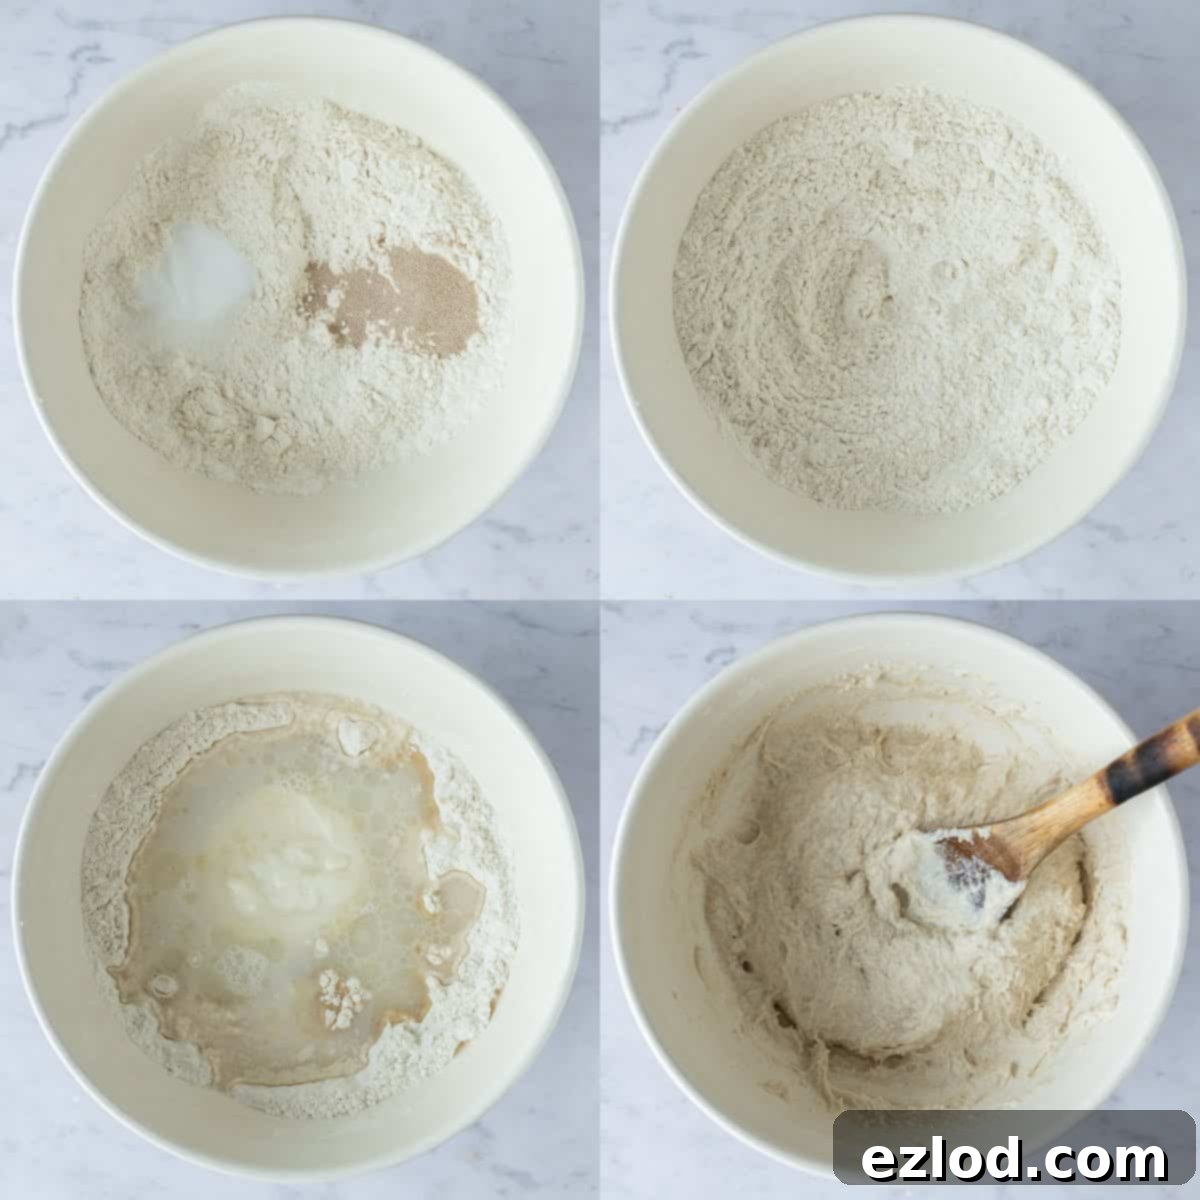
Combine Dry Ingredients: Begin by placing your plain flour in a large mixing bowl. If using a stand mixer, attach the dough hook. Add the sugar and salt to one side of the bowl, and the instant yeast to the other side. It’s important to keep the yeast and salt separate initially, as direct contact can inhibit the yeast’s activity. Give these dry ingredients a good stir to ensure they are well combined before proceeding.
-
Form the Dough: Pour in the unsweetened non-dairy yogurt, oil, and warm water. Stir everything together using a spoon or your hand until a rough, shaggy dough forms. This dough should be quite soft and sticky. If it appears overly wet or soupy, gradually add a small amount of extra flour until it reaches a sticky but manageable consistency. Conversely, if the dough feels too dry and crumbly, add a few drops more warm water or yogurt. A good indicator of sufficient moisture is that the dough will be sticky to the touch, but not runny.

-
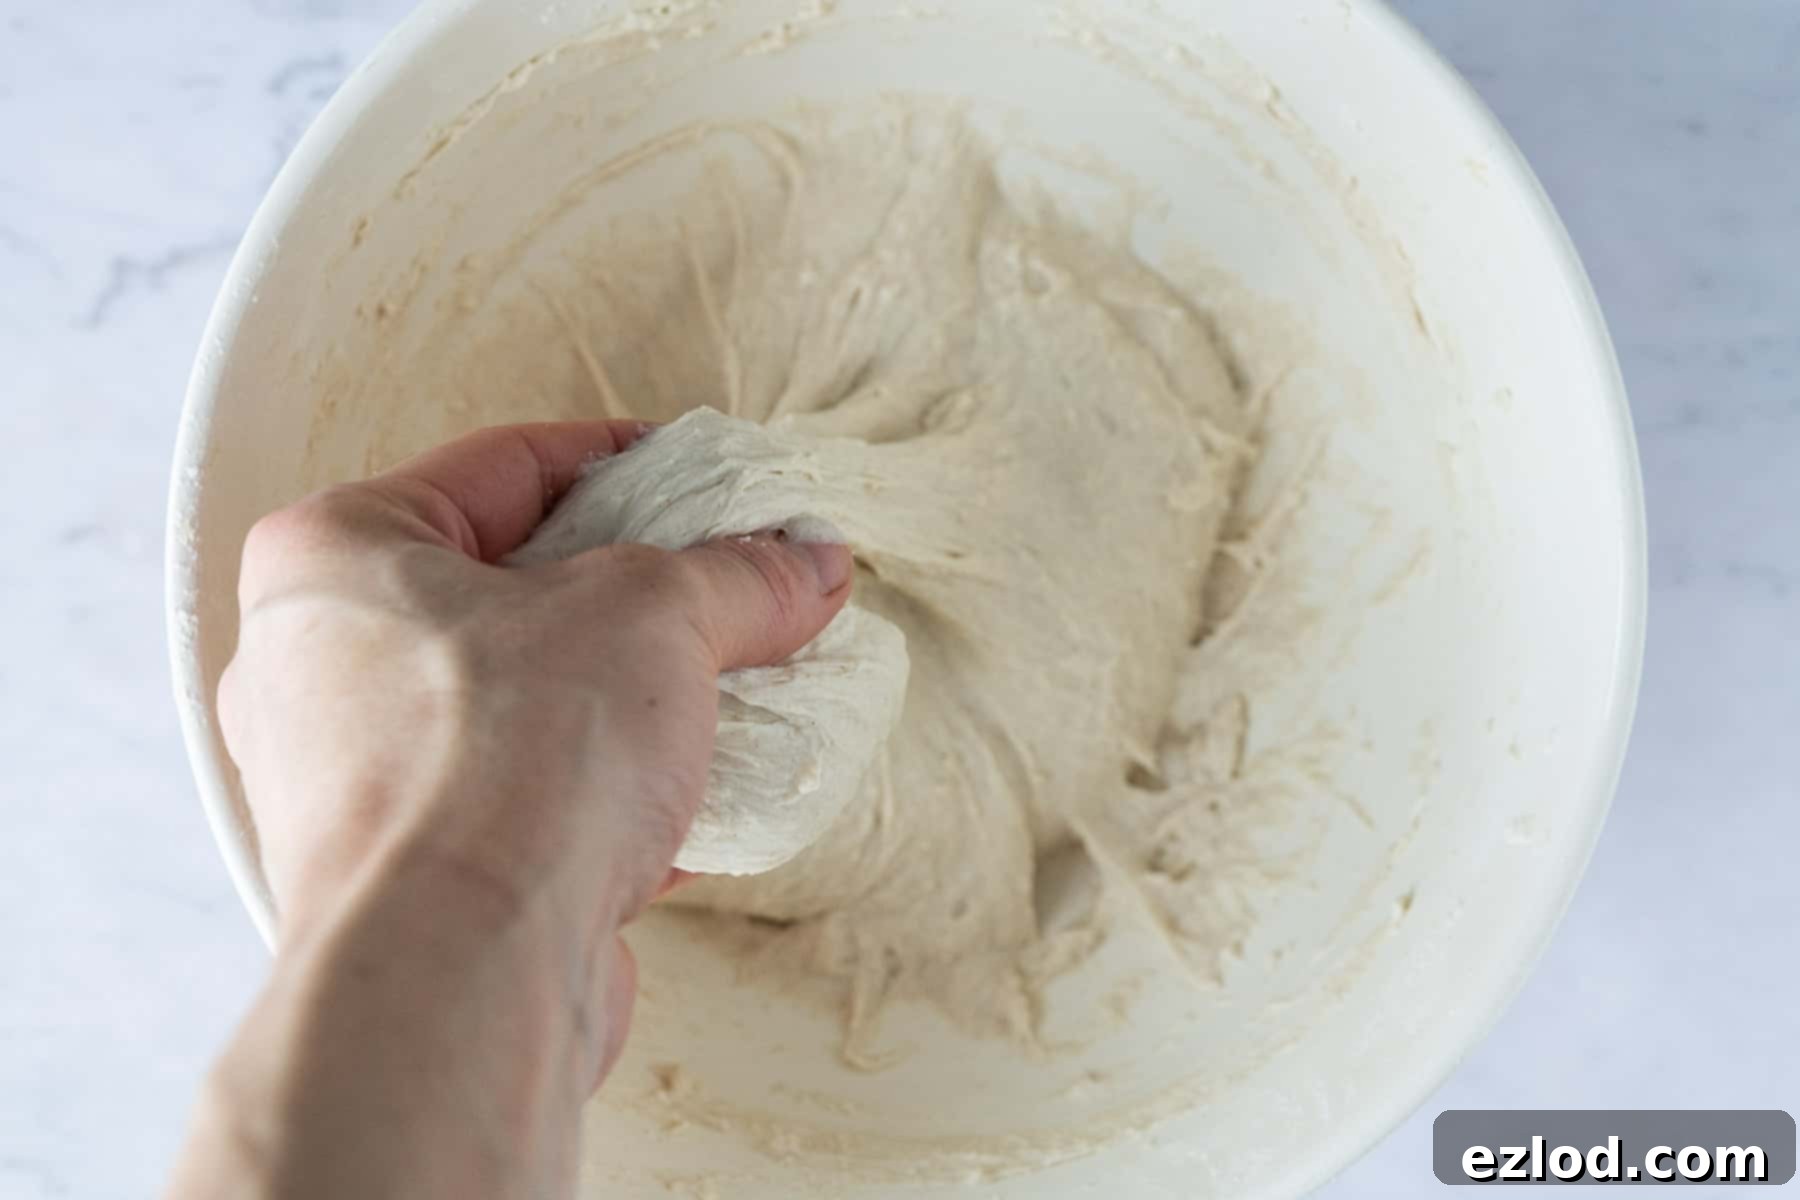
Knead the Dough: Turn the dough out onto a lightly floured surface or continue kneading in the stand mixer. Knead for approximately 5 minutes. During this time, the dough will start to become smoother and more elastic, though it will remain sticky. If kneading by hand, you can keep it in the bowl and use a “pull and fold” method, bringing the edges of the dough to the center repeatedly. Don’t be afraid to get a little messy – the stickiness is a sign of a well-hydrated dough, which is crucial for soft naan.

-
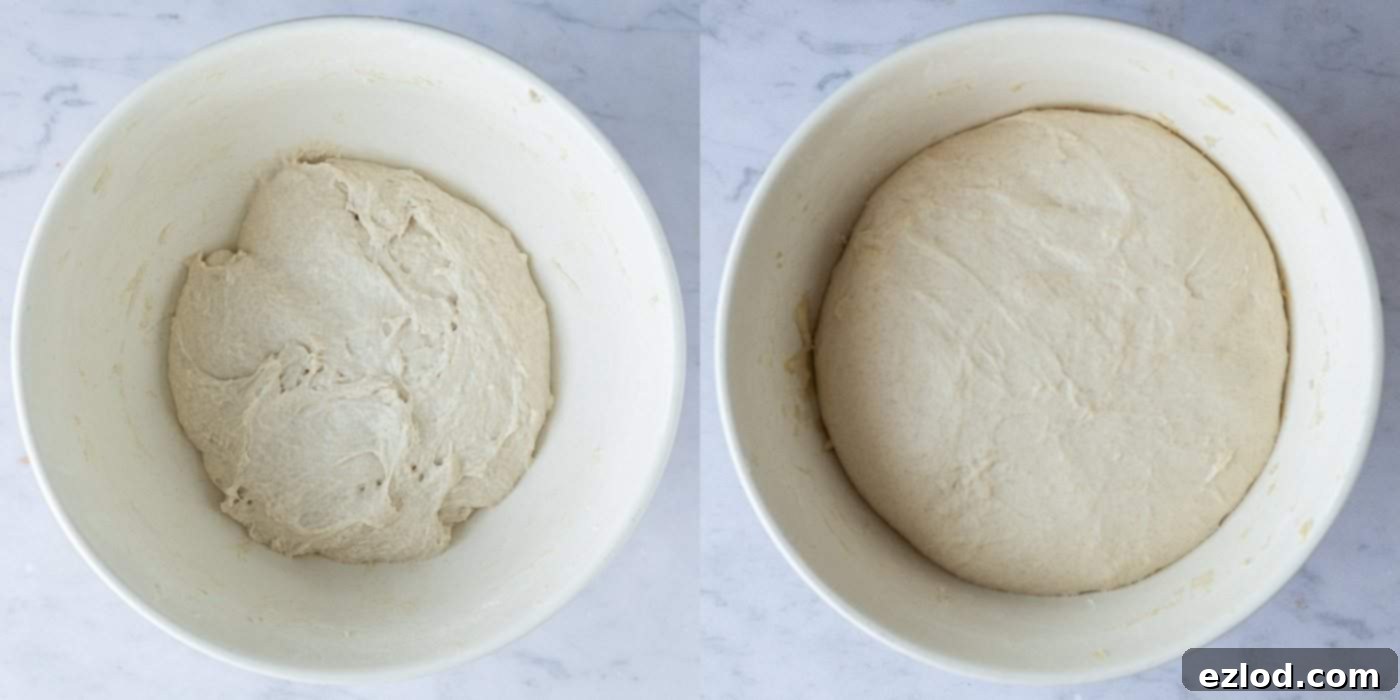
First Rise (Bulk Fermentation): Place the kneaded dough back into the bowl, cover it tightly with plastic wrap or a damp tea towel, and set it aside in a warm place to rise. This process will take about 90 minutes, or until the dough has visibly doubled in size. For a slower, more flavorful rise, you can also place the covered bowl in the refrigerator for 8-24 hours. If using the fridge method, ensure the dough has still doubled in size before you move on to shaping the naan. A good rise is essential for a light and airy texture.

-
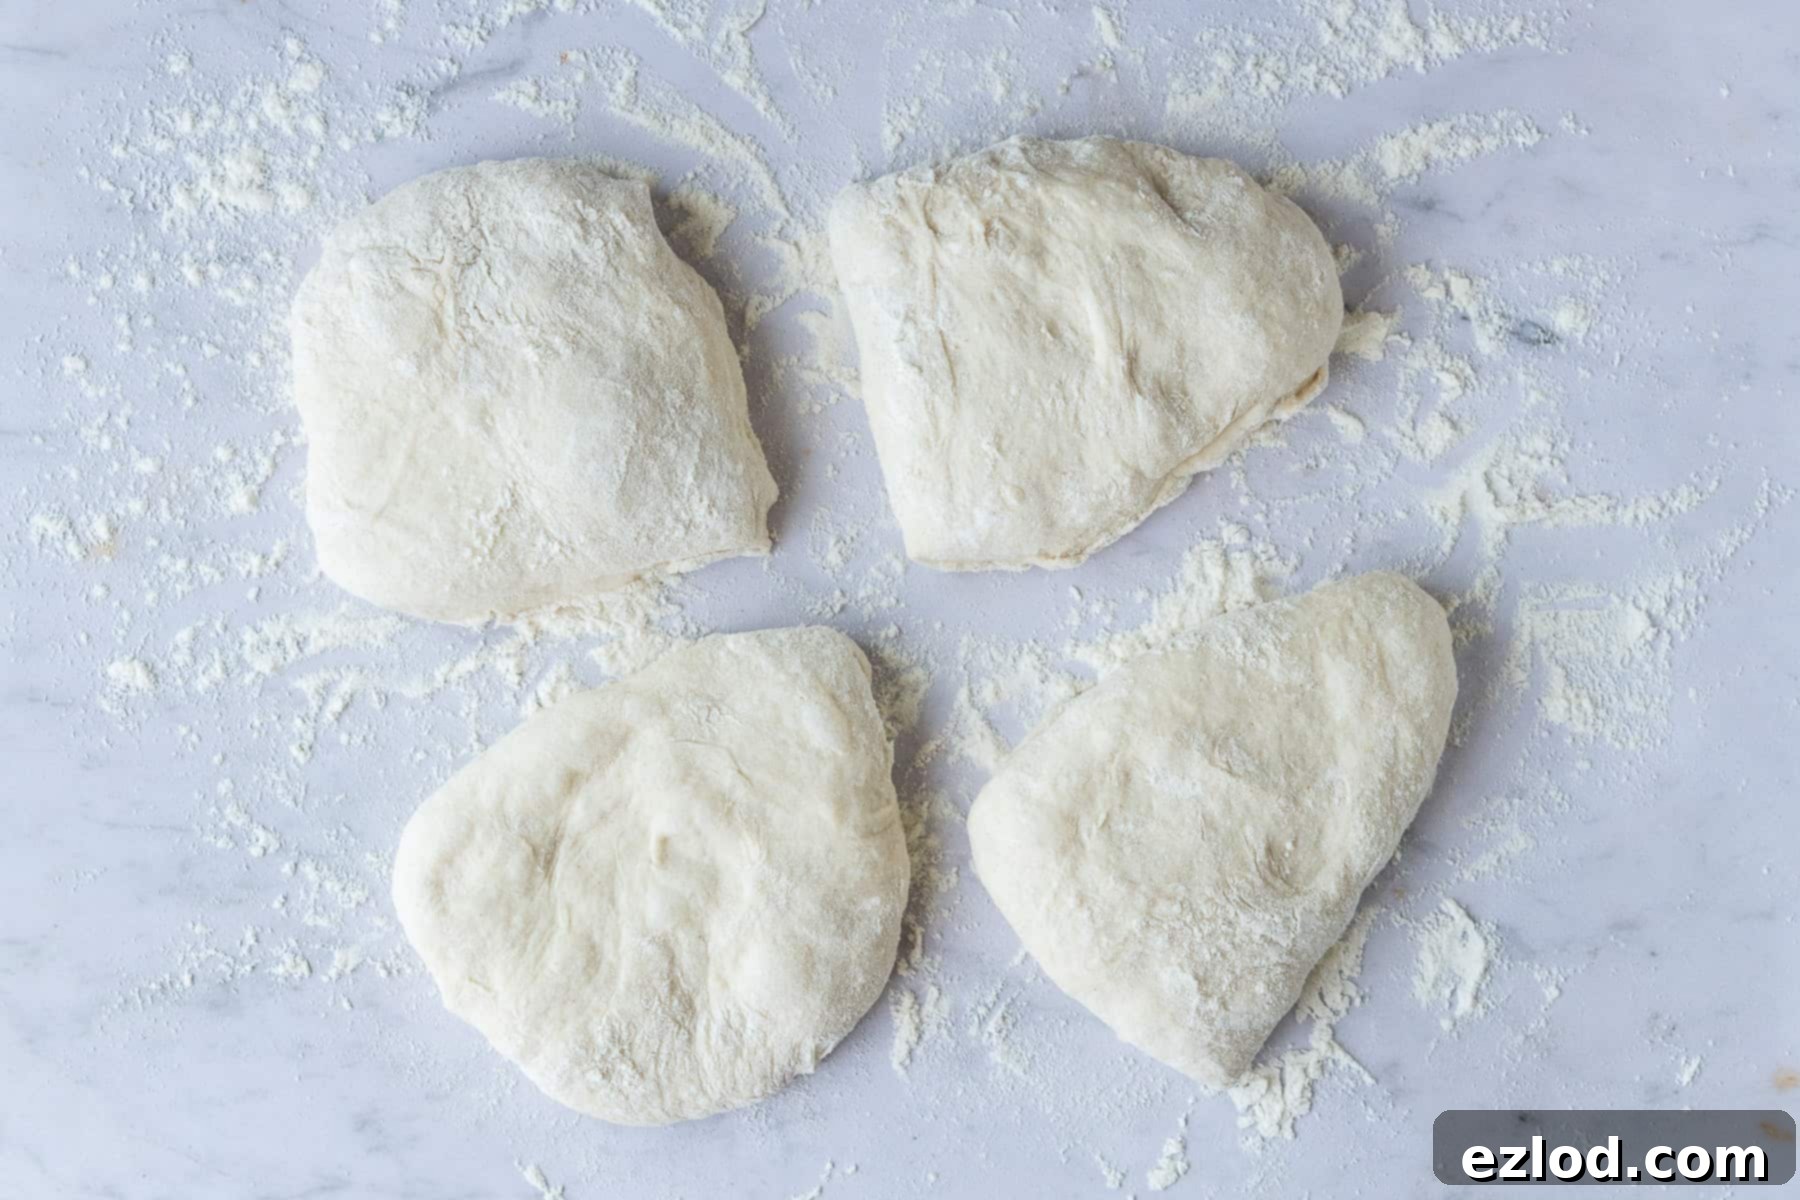
Divide and Rest: Once risen, gently turn the dough out onto a surface lightly dusted with flour. Dust your hands and the dough with more flour as needed to prevent sticking. Divide the dough into 4 to 8 equal pieces, depending on your desired naan size (smaller pieces are easier to handle for beginners). Loosely cover the dough portions and let them rest for another 20 minutes. This resting period allows the gluten to relax, making the dough much easier to roll out.

-
Prepare Garlic Butter: While the dough rests, prepare your delicious garlic butter. In a small bowl, combine melted vegan butter or margarine with freshly crushed garlic. This will be brushed on the naan as it cooks for incredible flavor.
-
Heat the Skillet: Place a cast iron skillet or heavy-bottomed frying pan over medium-high heat. Allow it to heat up thoroughly until it’s very hot – you should see faint wisps of smoke or feel significant heat when hovering your hand over it. A hot pan is key to getting those lovely bubbles and char on your naan.
-
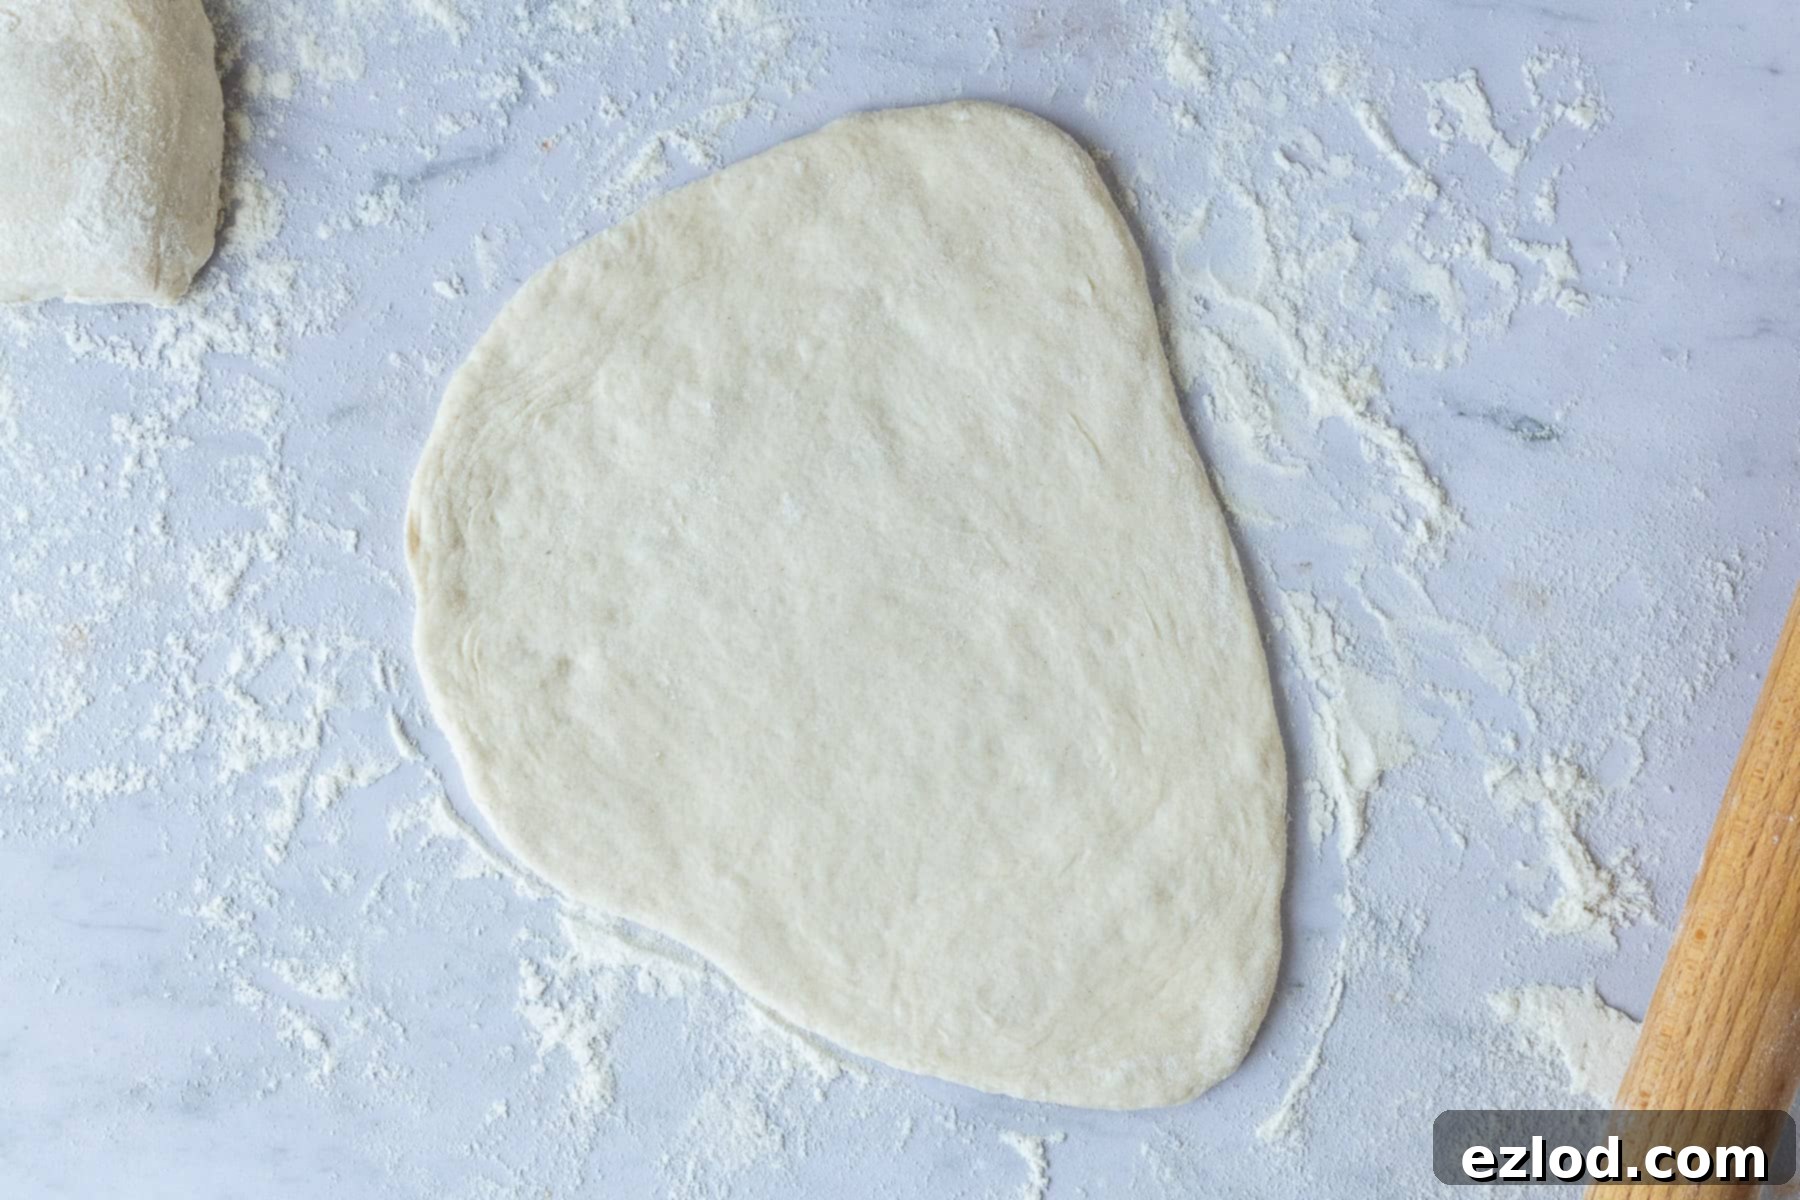
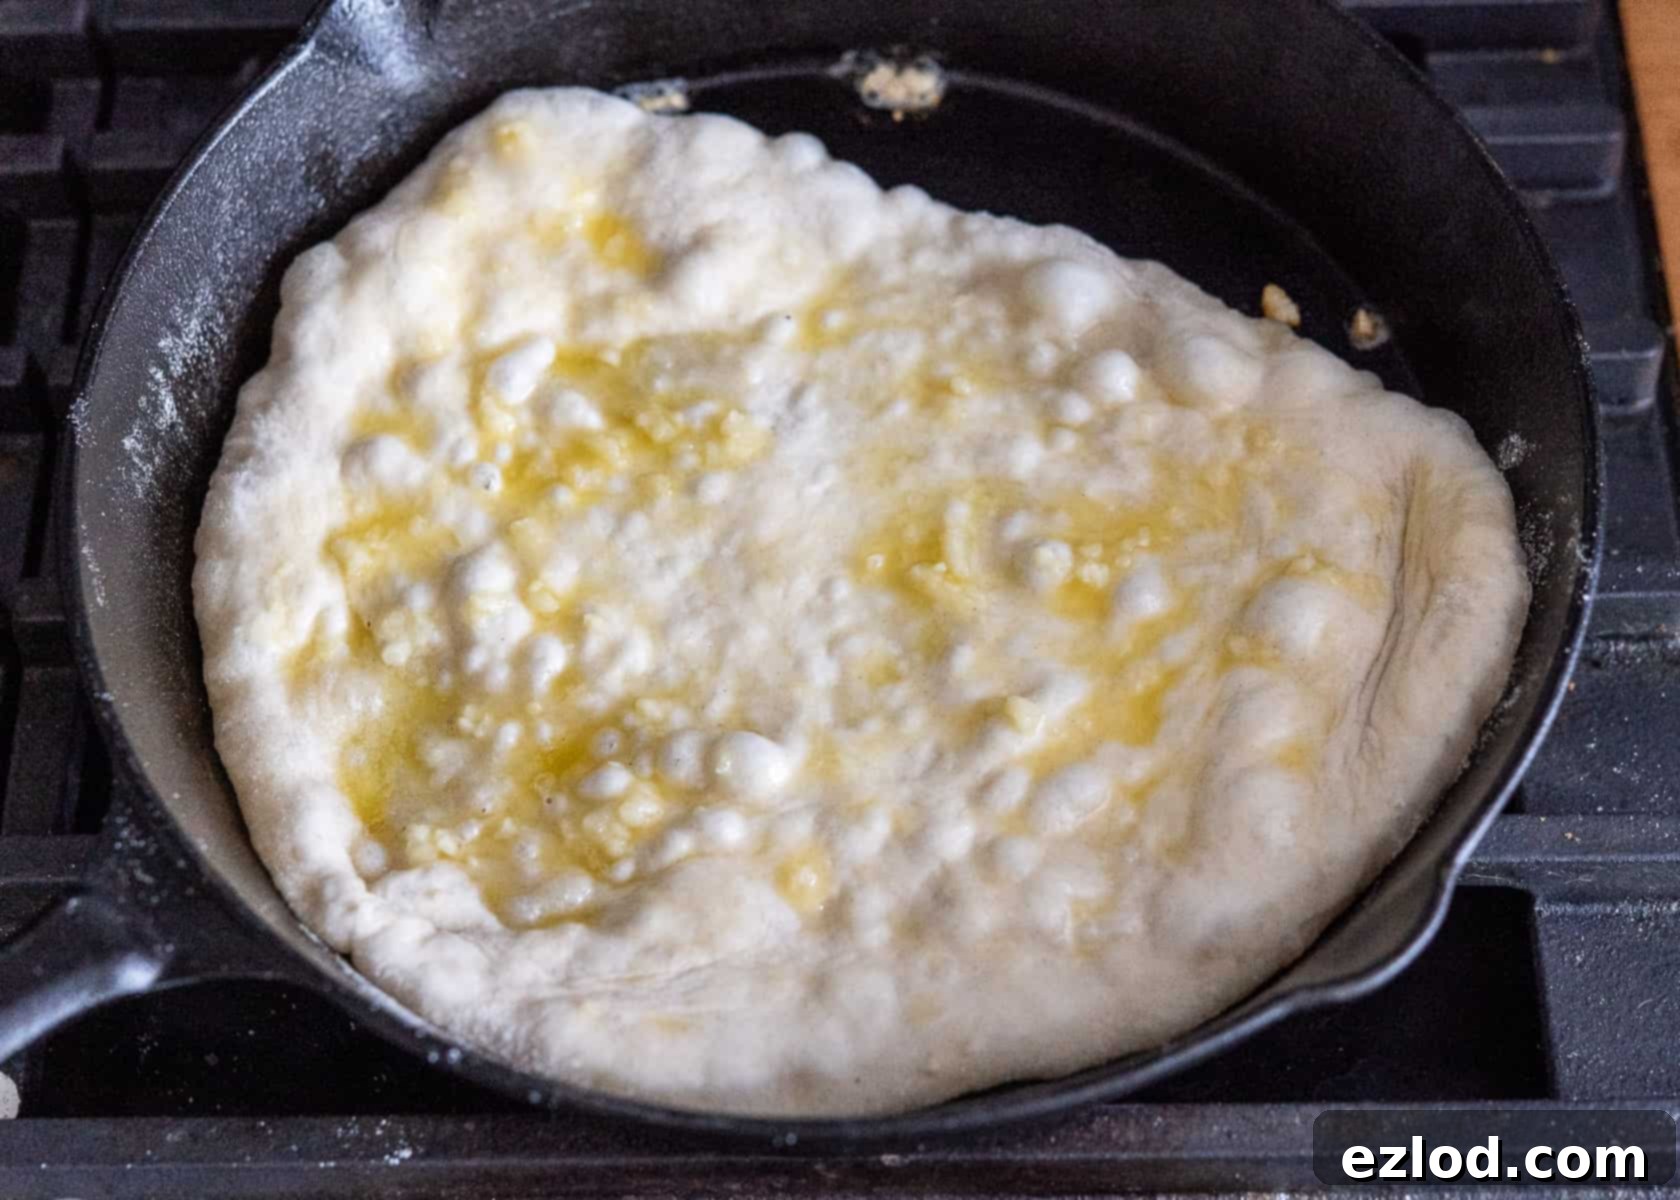
Shape and Cook: Take one piece of rested dough. On a lightly floured surface, stretch or roll it out into a rough triangle or oval shape, about ¼ inch thick. Dust with flour as needed to prevent sticking. Brush the hot skillet with a tiny bit of oil, then carefully transfer the shaped dough to the pan. Brush the top of the dough with some of your prepared garlic butter. Cook for about 1-2 minutes, or until you see large bubbles forming on the surface and the underside is lightly golden with charred spots.


-
Flip and Finish: Flip the naan over and cook for another 30 seconds to 1 minute, until the second side is also nicely browned and cooked through. Transfer the cooked naan to a plate and immediately brush it generously with more garlic butter. This infuses it with maximum flavor and keeps it soft.
-
Repeat: Continue this process with the remaining dough balls, brushing the skillet with a little more oil as needed between each naan. You can keep the cooked naan warm in a low oven (around 100°C/200°F) while you cook the rest, though they are always best fresh.
Expert Tips for Perfect Vegan Naan
-
Accurate Measurements Are Key: For the best and most consistent results in baking, especially with yeast doughs, I highly recommend using a digital kitchen scale for gram measurements rather than cup conversions. Cup measurements can vary significantly depending on how the flour is scooped, leading to inconsistent dough hydration. Precise gram measurements ensure your dough has the perfect texture every time.
-
Embrace the Stickiness: This dough is designed to be very soft and quite sticky. It’s crucial not to add too much extra flour during kneading or shaping, as this will result in a dry, tough naan. A sticky dough is a well-hydrated dough, which translates to a wonderfully soft and tender finished product. If the dough feels overly wet and soupy, a small addition of flour is fine. Conversely, if it’s too stiff, a little extra warm water or yogurt will help.
-
Batch Size Flexibility: This recipe typically yields four large naan breads, which are perfect for a substantial meal. However, if you have a smaller skillet or prefer more manageable portions, you can easily divide the dough into six or even eight smaller pieces. Smaller naans are also often easier to flip and cook evenly.
-
Fresh is Best: Vegan naan is undeniably at its peak when served fresh and warm, right off the skillet. While it’s best to enjoy it immediately, you can certainly make the dough in advance. Prepare the dough up to the first rise stage, then place the covered bowl in the refrigerator for 8-24 hours. The slow, cold rise will enhance the flavor. Just ensure it has doubled in size before you proceed with dividing and shaping.
-
Freezing for Later: If you find yourself with leftover cooked naan (unlikely, but possible!), they freeze beautifully. Allow them to cool completely, then stack them with parchment paper in between, and store them in an airtight container or a well-wrapped freezer bag. For the best quality, freeze them as soon as they’ve cooled to preserve their softness. To serve, simply reheat them in a low oven (around 160°C/325°F) for about 10 minutes until warmed through and pliable again.

Creative Ways to Flavour Your Naan
While classic garlic naan is a timeless favorite, don’t hesitate to experiment with different flavor profiles to suit your meal or mood:
-
Garlic Naan: As detailed in the recipe, this is a crowd-pleaser! Brush your naan with a generous amount of garlic-infused melted vegan butter or margarine. For an extra punch of garlic, brush some on when it first hits the hot skillet and again immediately after it’s cooked.
-
Butter Naan: For a simple yet rich flavour, omit the garlic and simply brush the hot naan with melted vegan butter or margarine. This highlights the bread’s natural sweetness and texture.
-
Nigella Seed Naan: When you place the naan in the hot skillet, brush it with melted butter or oil and then sprinkle generously with nigella seeds (also known as kalonji). The seeds add a subtle oniony, peppery flavour and a beautiful visual appeal.
-
Coriander Naan: For a burst of freshness, once the naan is cooked and brushed with melted vegan butter, sprinkle a liberal amount of freshly chopped coriander (cilantro) over the top. The vibrant green leaves add color and a refreshing herbaceous note.
-
Za’atar Naan: For a Middle Eastern twist, brush the naan with olive oil or melted vegan butter and sprinkle it with za’atar before or after cooking. This aromatic spice blend typically contains dried thyme, oregano, marjoram, sumac, and sesame seeds.
Perfect Pairings: What to Serve with Vegan Naan Bread
Vegan naan is incredibly versatile and pairs wonderfully with a wide array of dishes. Here are some fantastic suggestions to inspire your next meal:
Hearty Curries:
The soft, absorbent texture of naan makes it ideal for soaking up flavorful curry sauces. It’s truly the perfect vehicle for a satisfying Indian meal.
- Chickpea, sweet potato and spinach curry
- Red lentil dhal with roasted cauliflower and butternut squash
- Chana Masala
Comforting Soups:
Use your fluffy naan to dip into warming soups, adding substance and a delicious counterpoint to liquid meals. It’s far more satisfying than plain bread!
- Spiced carrot and pumpkin soup
- Quick black-eyed bean soup
- Vegan sausage casserole with lentils and farro
- Spiced red lentil and root vegetable soup
Flavorful Dips:
Naan also serves as an excellent dipper for various spreads and dips, making for a fantastic appetizer or snack.
- Roasted red pepper and chilli hummus
- Hummus bowl with crispy North African chickpeas
Explore More Vegan Bread Recipes
If you’ve enjoyed making this vegan naan, you might love exploring other delicious plant-based bread recipes. Expand your baking repertoire with these fantastic options:
- Vegan brioche
- Vegan Hokkaido milk bread
- Easy vegan cornbread
- Pumpkin bread rolls

If you tried this incredible vegan naan bread recipe, we’d love to see it! Share your creations on Instagram and tag @domestic_gothess, using the hashtag #domesticgothess. Your culinary adventures inspire us!
*All images and content on Domestic Gothess are copyright protected. If you want to share this recipe, please do so by using the provided share buttons. Do not screenshot or post the recipe or content in full.*

Print
Vegan Naan Bread
Ingredients
Naan Bread:
- 350 g (3 cups minus 2 Tbsp) plain (all-purpose) flour, plus extra as needed
- 2 tsp sugar
- 1 tsp salt
- 4 g (1 ½ tsp) instant/fast action yeast*
- 120 g (½ cup) unsweetened non-dairy yogurt
- 2 ½ Tbsp oil (sunflower/vegetable/canola/olive etc)
- 160 ml (⅔ cup) warm water (plus extra if needed)
Garlic Butter:
- 45 g (3 Tbsp) vegan butter/margarine melted
- 3 cloves garlic peeled and crushed
- chopped fresh coriander (cilantro) to serve
Instructions
-
Place the flour in a large mixing bowl or in the bowl of a stand mixer fitted with the dough hook. Add the sugar and salt to one side of the bowl and the yeast to the other. Stir to combine.
-
Add the yogurt, oil and warm water and stir to form a rough dough. It should be very soft and sticky but if it feels soupy you can add a bit more flour until it is sticky but not runny. If it feels too dry add a drop more water. If it’s not sticking to your hands then it is too dry!
-
Knead for about 5 minutes, it will still be sticky but should become smoother. I knead it by hand in the bowl by pulling the dough upwards then folding it. Be prepared to get a bit messy!
-
Cover the bowl and set aside to rise in a warm place for about 90 minutes until doubled in size. You can also place the bowl in the fridge to rise for 8-24 hours.
-
Turn the risen dough out onto a flour dusted surface and dust with more flour as needed to prevent it from sticking. Divide it into 4-8 even pieces, depending on how large you want your naan to be. Loosely cover and leave to rest for 20 minutes.
-
Meanwhile make the garlic butter by mixing the melted butter and crushed garlic together in a bowl.
-
Place a cast iron skillet or heavy bottomed frying pan over a medium-high heat.
-
Take one of the pieces of dough and stretch or roll it out into a rough triangle shape, dusting with flour as needed to prevent it from sticking.
-
Brush the skillet with a little oil and carefully transfer the triangle to the hot skillet. Brush the dough with some of the garlic butter and cook until it becomes bubbly.
-
Flip the naan over and cook until browned, about 30 seconds – 1 minute. Transfer to a plate and brush with more of the garlic butter.
-
Repeat with the rest of the dough balls, brushing the skillet with a little more oil as needed.
-
The cooked naan breads can be kept warm in a low oven if needed. They are best eaten freshly cooked but will keep in an airtight container for two days.
Notes
- For the best results make sure that you follow the recipe closely. As always, I highly recommend using the gram measurements (with a digital scale), rather than the cup conversions. Cup measurements are simply not accurate enough for baking and I cannot guarantee the best results if you use them.
- *If you’ve only got active dry yeast then you will need to ‘activate’ it first. To do this, mix it with the warm water (lukewarm, NOT hot or it will kill the yeast) and the sugar and set it aside for 10-20 minutes or so until it goes foamy or puffy. Then continue with the recipe as written.
- The recipe will make four large naan breads, or six or eight smaller ones. Unless you have a very large skillet/frying pan I suggest making six or eight rather than four.
- This vegan naan bread is best eaten freshly cooked so I don’t suggest making it in advance. You can however make the dough in advance and let it rise in the fridge for 8-24 hours. It should be doubled in size before you shape the naan.
- The cooked naan bread can be frozen in an airtight container or well wrapped. Ideally they should be frozen as soon as they have cooled to keep them as soft as possible. Refresh them in a low oven for 10 minutes to serve.
