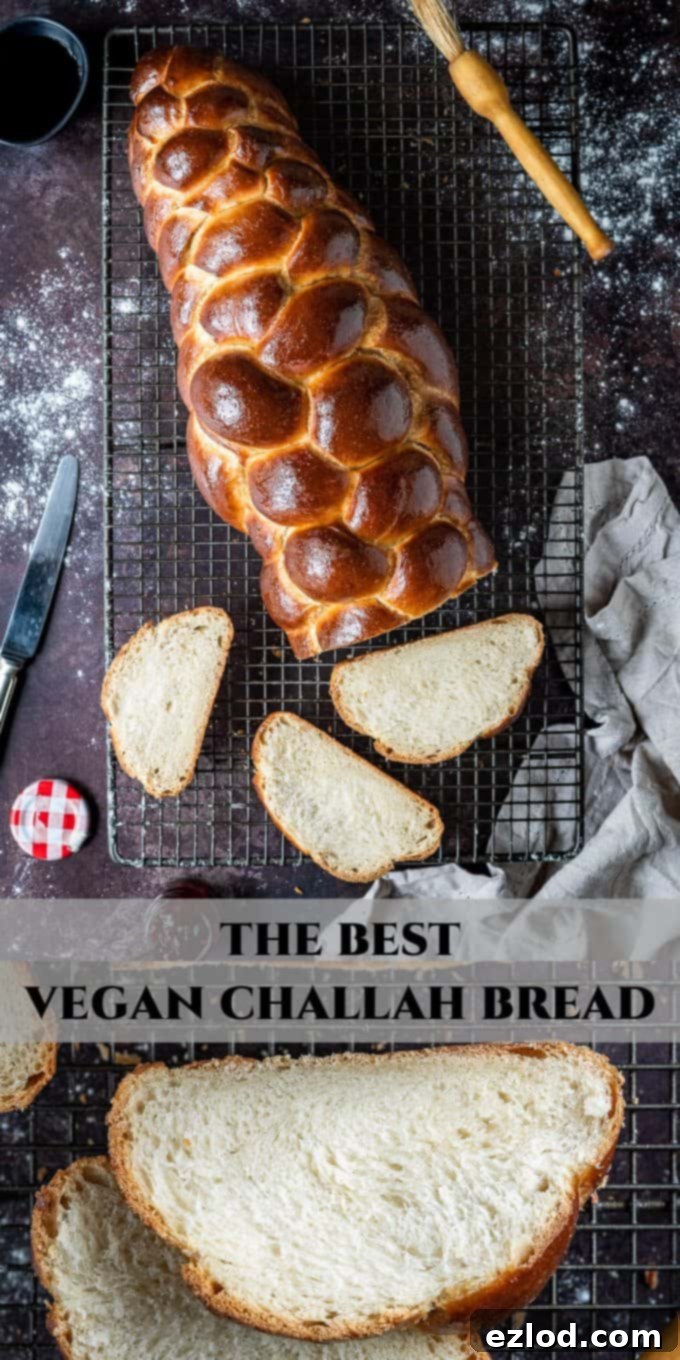
The Ultimate Guide to Homemade Vegan Challah Bread: Soft, Fluffy & Egg-Free
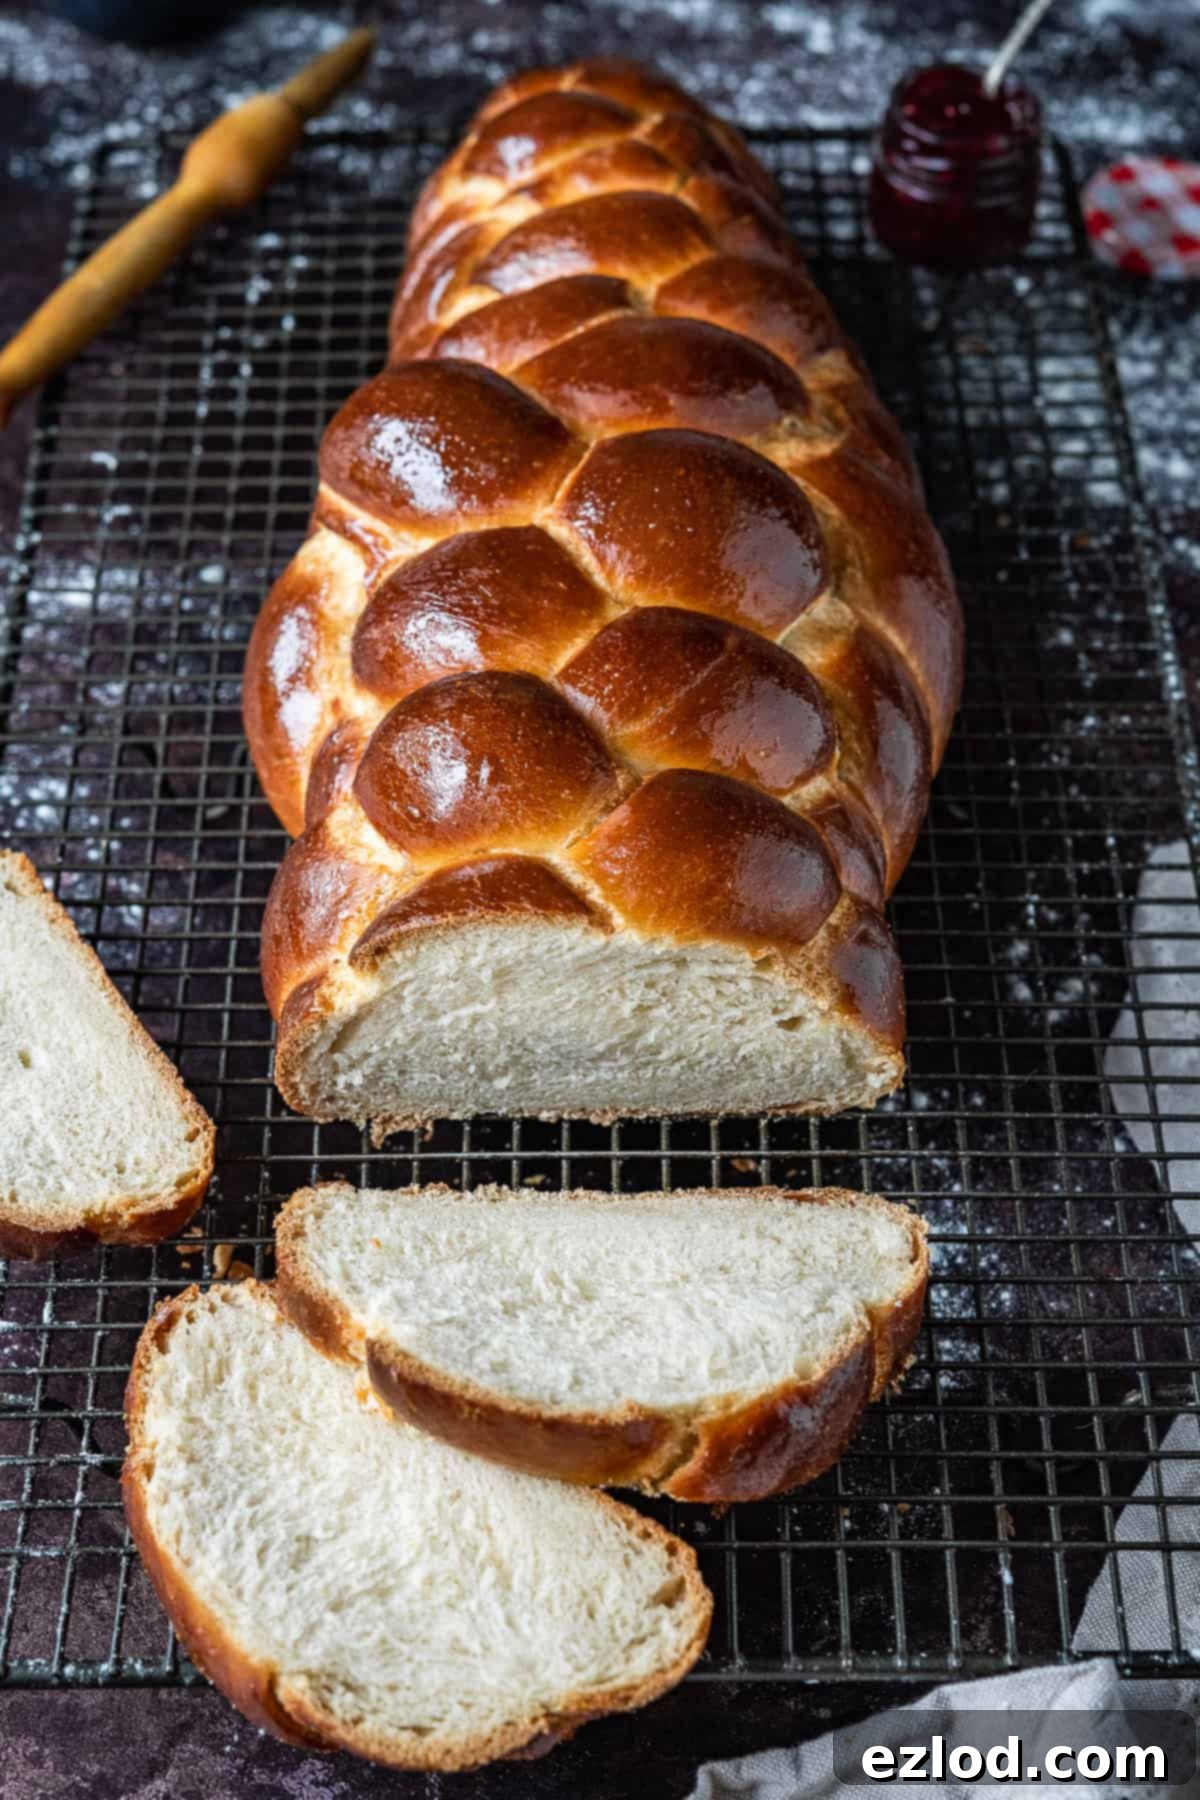
This incredible vegan challah bread is a game-changer for plant-based baking. Made without eggs, this water challah still achieves that signature softness, delightful fluffiness, and rich flavor that challah is famous for. It’s surprisingly easy to make, and you can get creative with your shaping or follow our detailed, step-by-step instructions to craft a stunning six-strand braid that will impress everyone.
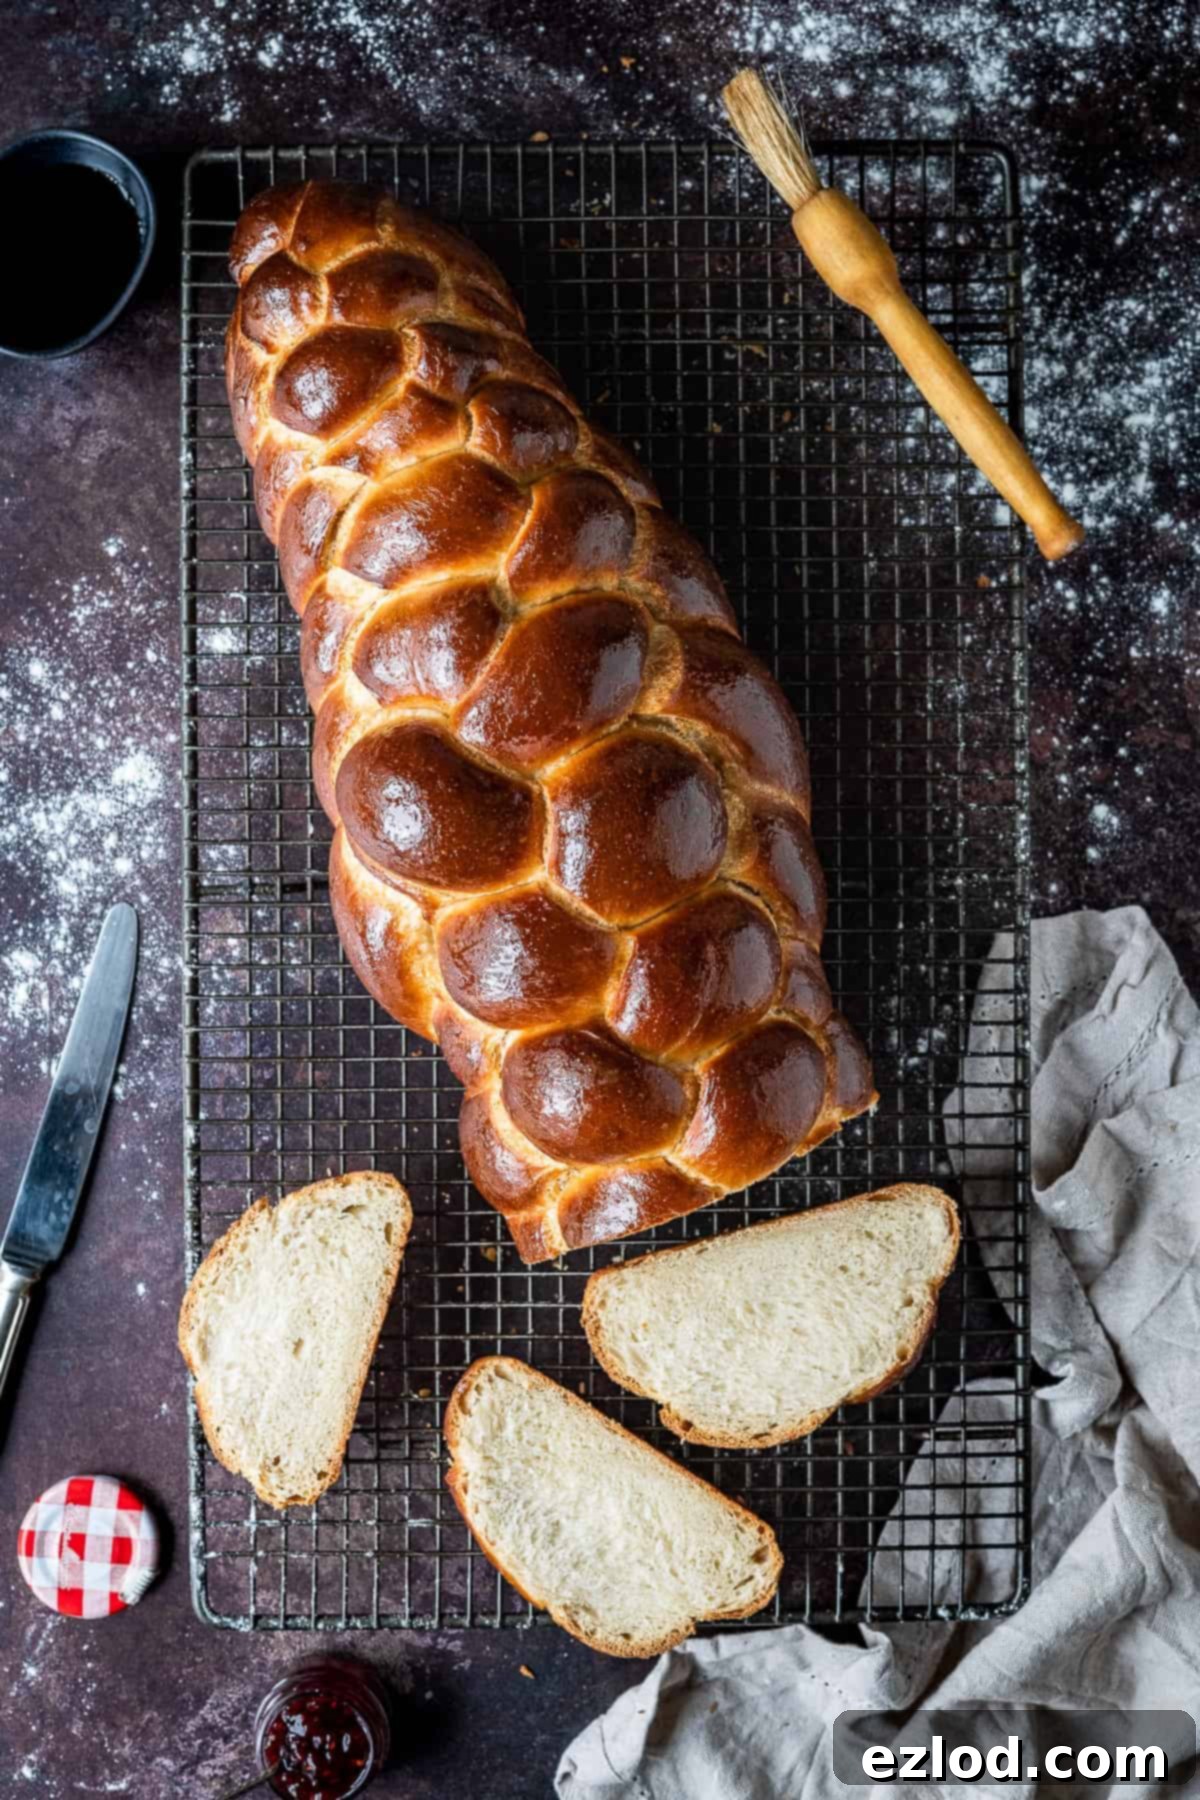
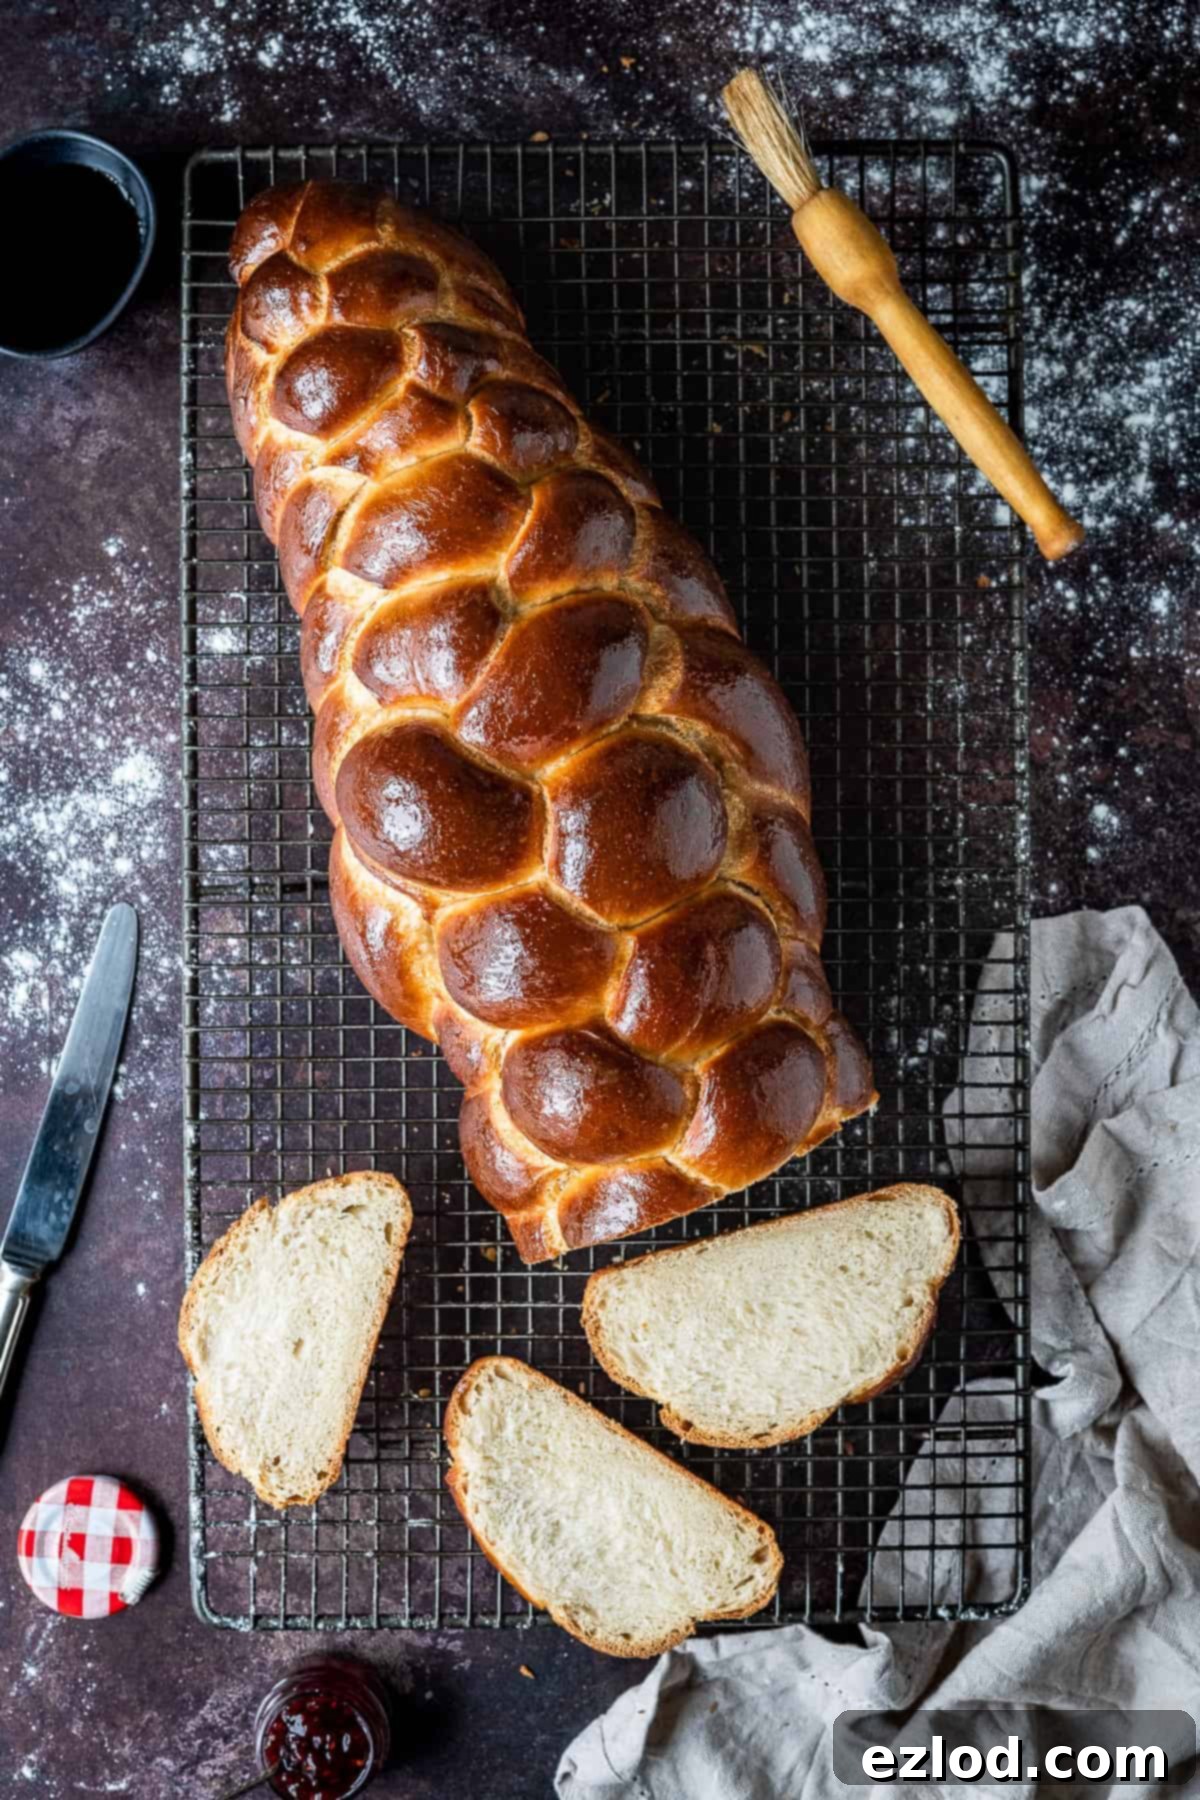
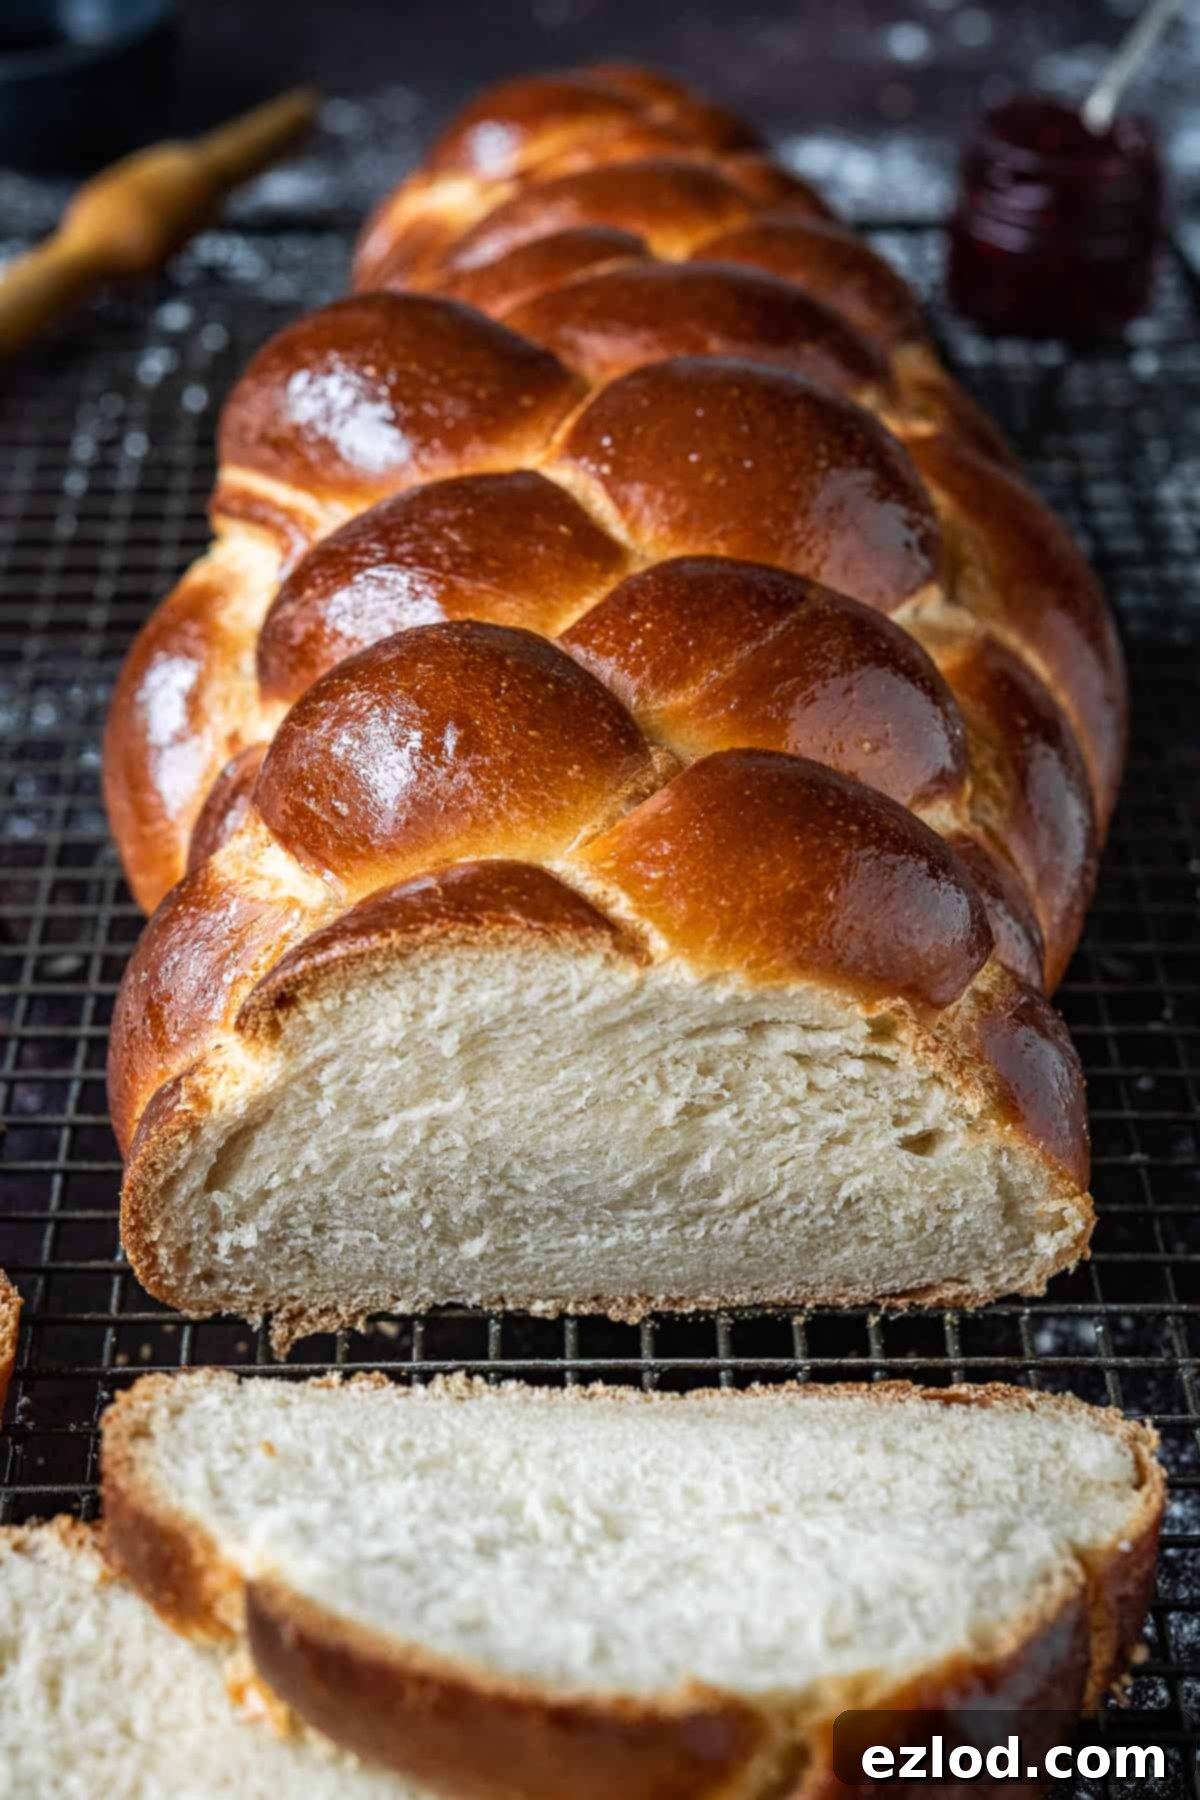
There’s something truly magical about freshly baked bread, and this vegan challah takes that magic to a whole new level. Imagine a perfectly soft, subtly sweet white bread, artfully shaped into an impressive six-strand braid. This isn’t just any bread; it’s a culinary masterpiece that happens to be entirely plant-based.
This bread is so exceptionally good, with its rich, tender crumb and delicate sweetness, that it stands perfectly on its own as a delightful snack or breakfast item. However, its versatility shines when paired with other dishes. Serve it as an elegant side for any meal, dip it into a hearty soup, or enjoy it toasted with your favorite plant-based butter and a dollop of sweet jam. It’s a bread that truly elevates any dining experience.
While its intricate braided appearance might suggest a complicated baking process, rest assured, making this vegan challah is actually quite straightforward. It does require patience, primarily due to rising times, and is often best completed over two days. But don’t let that deter you; most of this time is hands-off, allowing the dough to develop its exquisite flavor and texture. The effort invested is undeniably worth every single bite!
Understanding Challah Bread: Traditional Roots and Vegan Adaptations
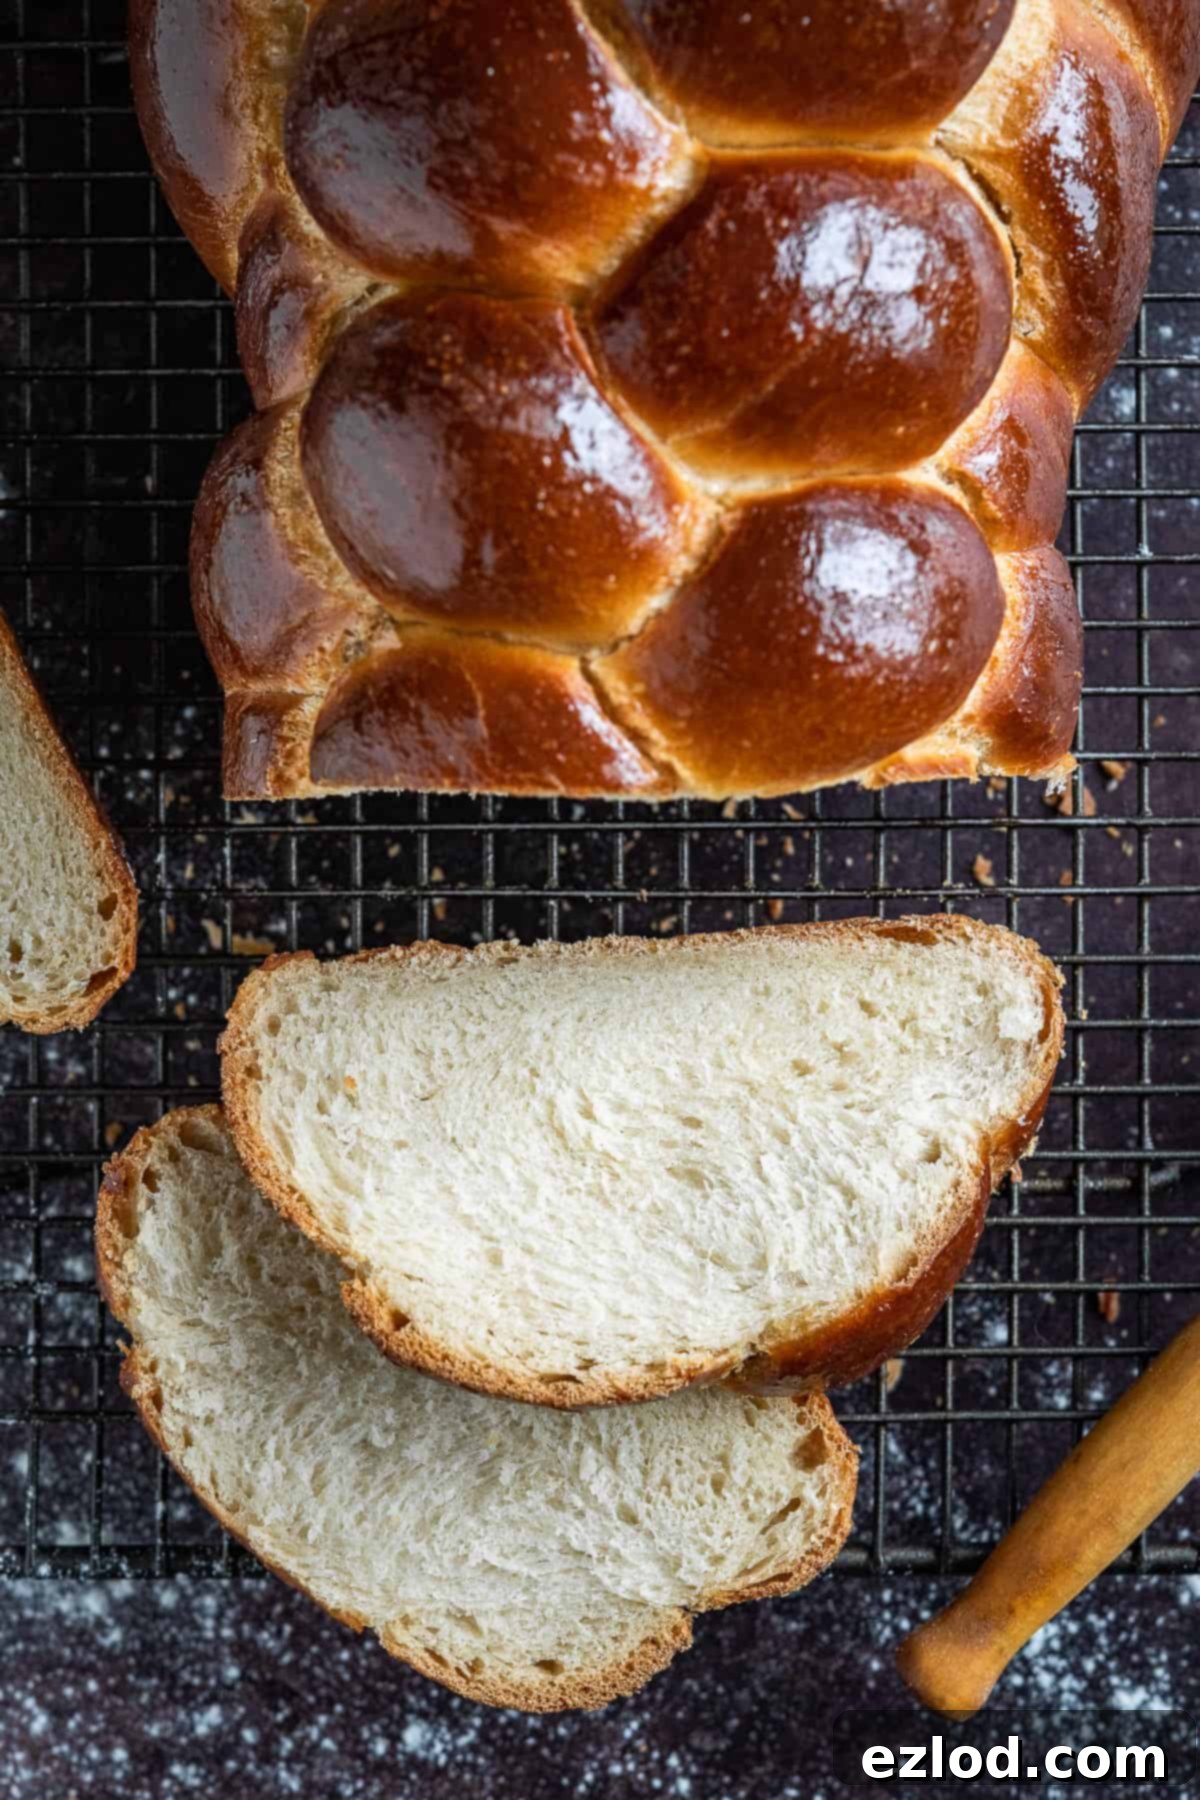
Challah is a traditional Jewish braided bread, deeply rooted in history and custom. It is typically baked for the Sabbath (Shabbat) and Jewish holidays, symbolizing blessings and continuity. Traditionally, challah is an enriched bread, meaning it contains eggs and oil, giving it a distinct golden hue, rich flavor, and incredibly tender texture. It’s almost always shaped into a beautiful braid, adding to its celebratory appeal.
While the egg-enriched challah is widely known, particularly in the United States, there’s another traditional variety called “water challah.” As its name suggests, water challah is made without eggs, relying on water and oil for its moisture and richness. This makes it naturally vegan-friendly in terms of ingredients, as challah, by tradition, does not contain dairy products anyway. It’s worth noting that even water challah is often glazed with egg wash for a shiny finish, so for a truly vegan version, we’ll use an alternative glaze.
Water challah is especially popular in Israel, offering a slightly lighter yet still wonderfully soft and flavorful alternative to its egg-heavy counterpart. Our vegan eggless challah recipe embraces the water challah tradition, meaning there’s no need to fuss with complicated egg replacers in the dough. The result is a beautifully soft, fluffy, incredibly flavorful, and perfectly sweet bread that adheres to plant-based principles without compromising on taste or texture.
As the author, I want to clarify that I am not Jewish and do not claim to be an expert on the intricate cultural and religious aspects of challah. My goal with this recipe is to share a delicious, accessible vegan version that honors the spirit of this wonderful bread. From personal experience, this recipe has become a beloved staple in my household; we simply can’t get enough of it, and I sincerely hope it becomes a favorite in yours too!
Step-by-Step Guide: Crafting Your Vegan Challah Bread
(For precise ingredient measurements and full, detailed instructions, please refer to the comprehensive recipe card located below.)
Baking this vegan challah bread can be a flexible process. If you’re an early bird, you can certainly complete the entire baking process in a single day. However, for a more relaxed and manageable experience, I highly recommend spreading the preparation over two days. This approach allows for a longer, slower rise, which often results in a more developed flavor and superior texture.
Preparing the Dough: The Foundation of Flavor and Texture
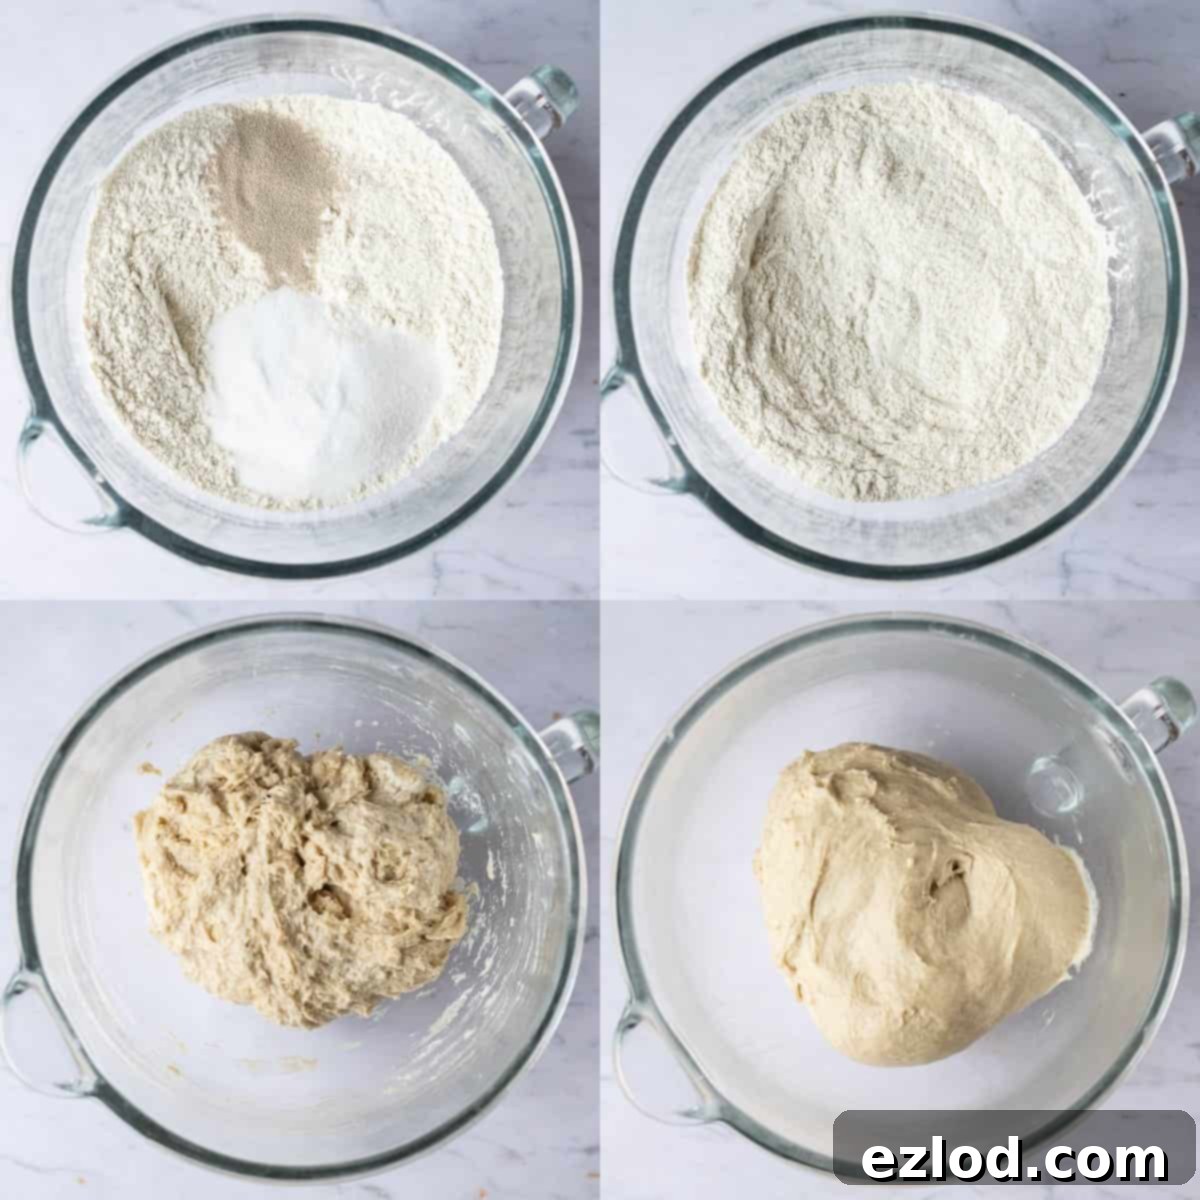
To begin, measure your white bread flour or plain (all-purpose) flour into a large mixing bowl. If you’re using a stand mixer, transfer the flour to its bowl and fit it with a dough hook attachment. Carefully add the yeast to one side of the bowl, and the sugar and salt to the opposite side. This separation is crucial at first, as direct contact between yeast and salt can inhibit the yeast’s activity. Once all ingredients are in the bowl, give them a gentle mix to combine evenly.
Next, pour in the oil and most of the warm water. Using a sturdy spoon or your stand mixer, begin to stir the mixture until a rough, shaggy dough starts to form. Gradually add the remaining water, a little at a time, until all the flour is incorporated and the dough comes together cohesively. The exact amount of water can vary slightly depending on your flour and humidity, so adjust as needed.
Now comes the kneading process, vital for developing the gluten structure that gives challah its signature chew and fluffiness. If kneading by hand, transfer the dough to a clean, unfloured surface and knead for approximately 10 minutes. If using a stand mixer, knead for about 5 minutes on medium speed.
While my stand mixer is a trusty companion for many bread recipes, I genuinely prefer kneading challah dough by hand. There’s an intuitive satisfaction in feeling the dough transform under your hands, allowing you to gauge its texture and elasticity perfectly. This hands-on approach helps ensure you achieve the ideal consistency for a truly exceptional challah.
After sufficient kneading, the dough should feel silky smooth and wonderfully supple. It should also pull away cleanly from your worktop or the sides of the mixing bowl, leaving minimal residue. When touched, it should be slightly tacky, but not sticky to the point of clinging to your fingers. If you find the dough too sticky, gradually knead in a spoonful of additional flour at a time until it reaches the desired smooth, elastic, and slightly tacky texture. Patience here pays off!
The All-Important First Rise
Once your dough is perfectly kneaded, transfer it to a large bowl that has been lightly oiled to prevent sticking. Cover the bowl securely (a reusable shower cap works wonders for this, creating a perfect seal!). At this stage, you have a critical decision regarding your timeline:
- Same-Day Baking: If you plan to bake your challah on the same day, allow the dough to rise in a warm, draft-free place. It should double in size, which typically takes about 2 to 2 ½ hours.
- Overnight Rise (Recommended): For a deeper flavor and more relaxed schedule, let the dough rise at room temperature for 1 hour first. This initial period allows the yeast to activate robustly. After this hour, transfer the covered bowl to your refrigerator to complete its slow rise overnight. This extended cold fermentation enhances the bread’s flavor profile significantly.
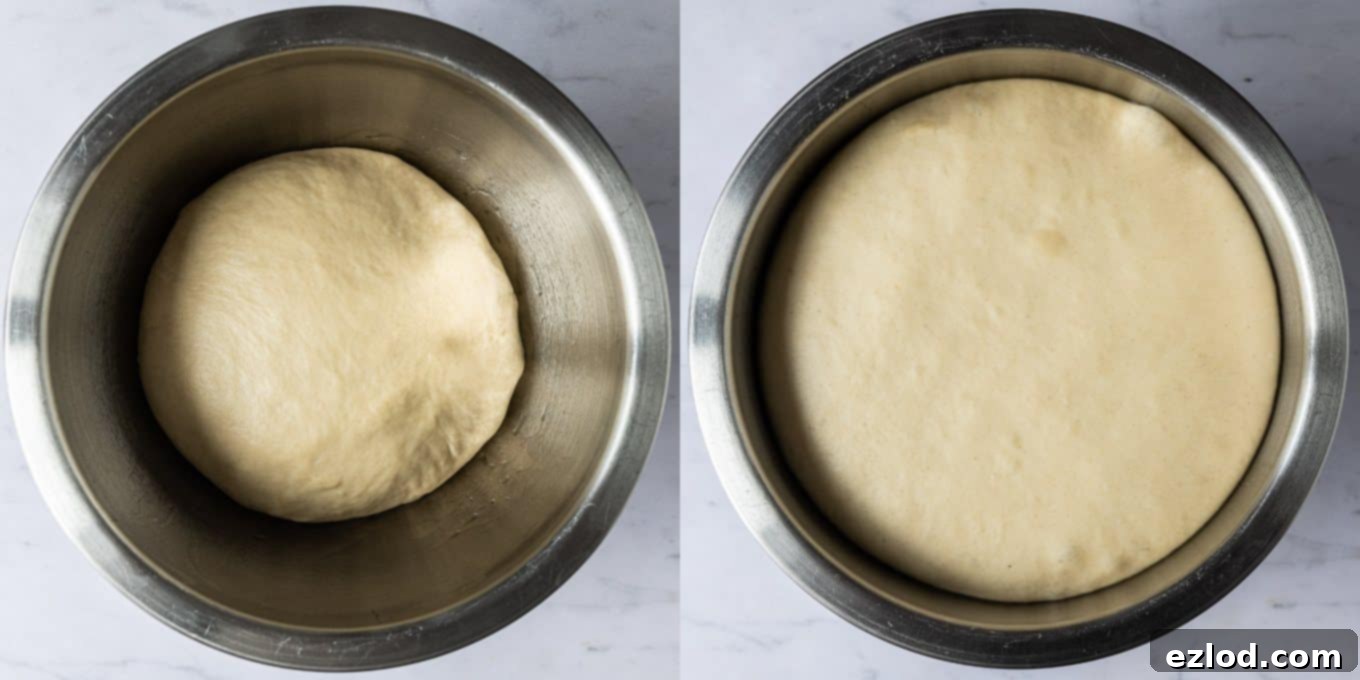
The following morning, or once your dough has visibly doubled in size (if using the same-day method), gently punch it down. This action expels the accumulated gases, allowing for even shaping and a finer crumb in the final loaf.
The Art of Shaping Challah: Creating Beautiful Braids
Shaping challah is one of its most distinctive and enjoyable aspects. There’s a vast array of ways to braid challah, from simple three or four-strand designs to more elaborate five, six, seven, eight, or even nine-strand patterns. Beyond braids, challah can also be shaped into round loaves for specific holidays, or smaller individual rolls, offering endless creative possibilities.
If you’re curious to explore different designs, YouTube is an excellent resource, brimming with tutorials for various challah shapes. Feel free to browse and find a design that appeals to you! Alternatively, you can follow my detailed instructions below for how to create a classic and beautiful six-strand challah braid.
This recipe is designed to yield either one impressively large challah loaf or two smaller, more manageable ones. The choice is yours, depending on your serving needs and preferences.
Crafting the Strands for Your Braid
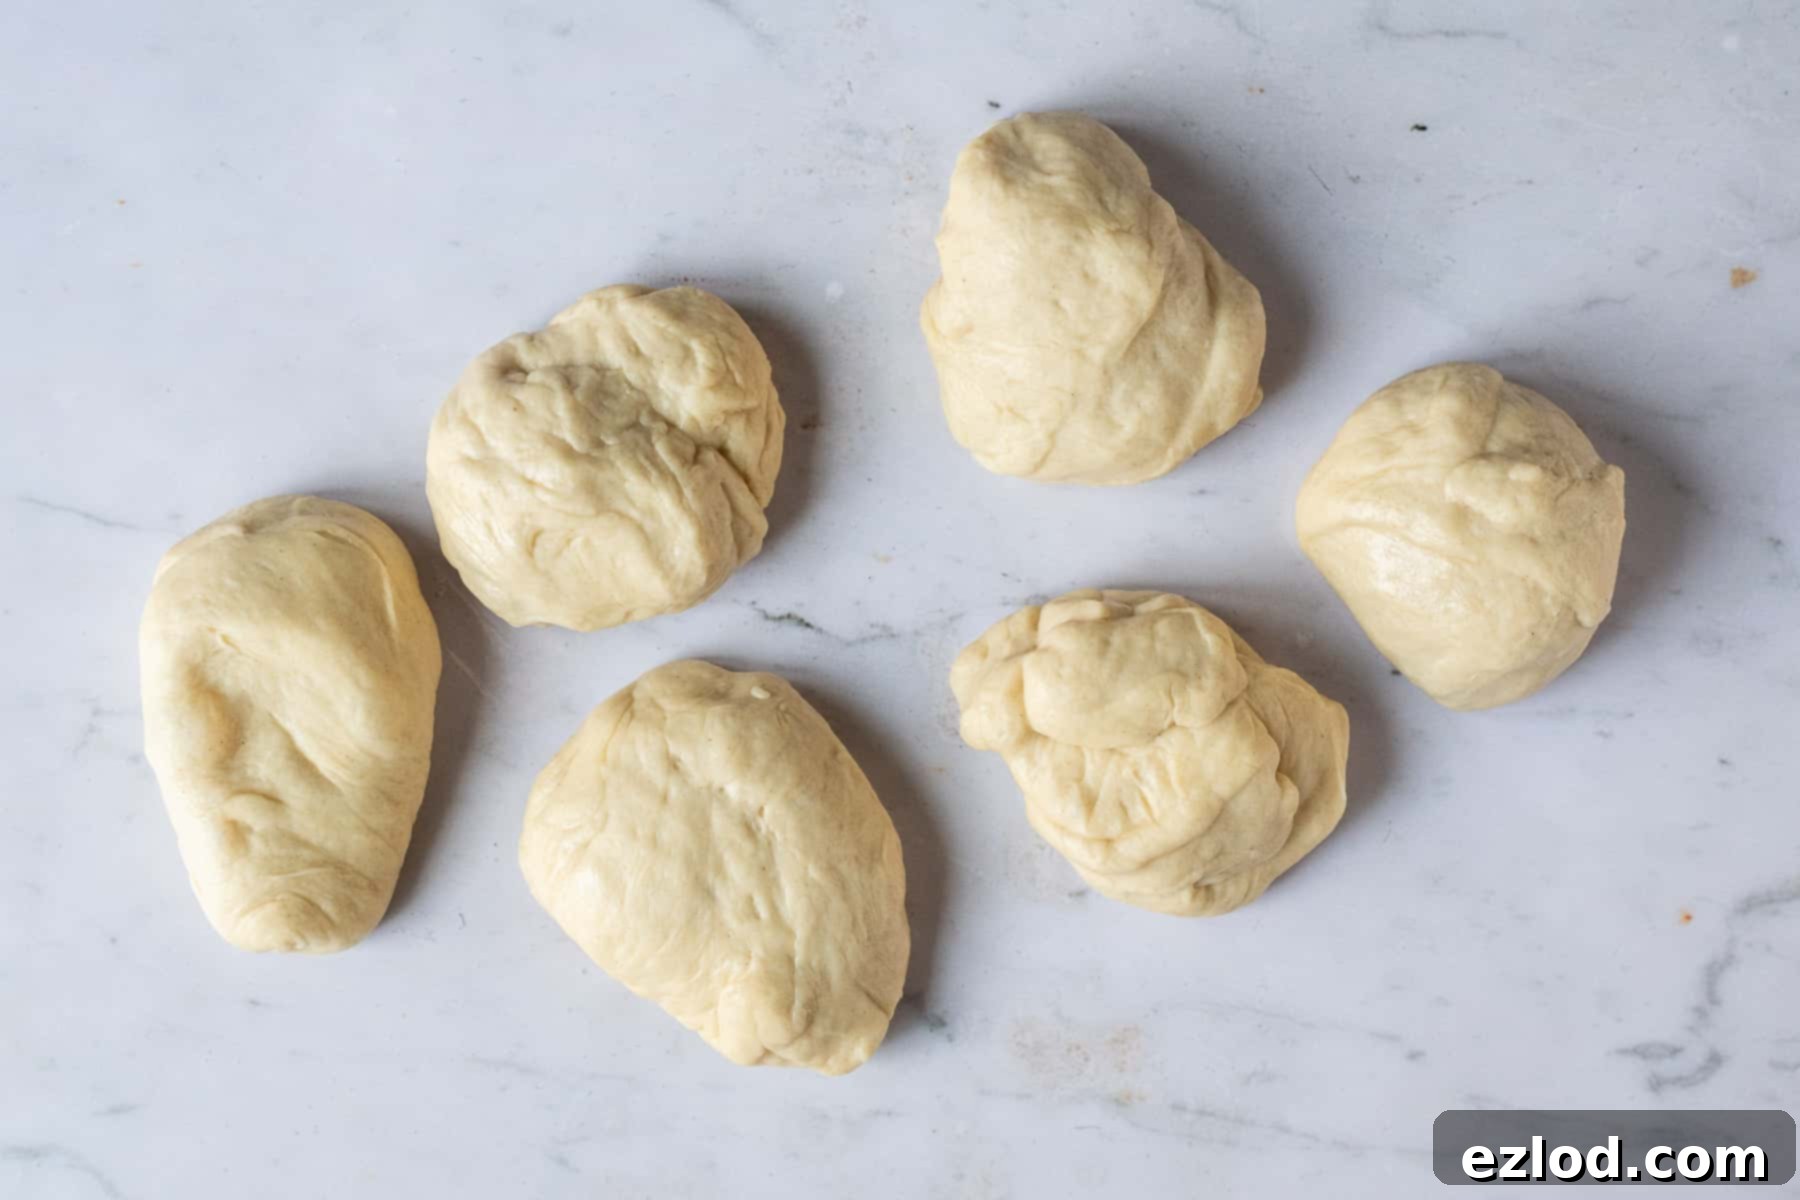
First, divide your prepared dough into six perfectly even pieces. Achieving uniform pieces is crucial for an even braid, so I highly recommend using a kitchen scale to ensure each portion is of the exact same weight. If you opt to make two smaller loaves, first divide the entire dough in half, then divide each half into six equal pieces.
Take one of your dough portions and, on a very lightly oiled (or unfloured, depending on stickiness) worksurface, roll it out into a thin, roughly square shape. Don’t worry about absolute precision here; a general square is fine. If you notice the dough sticking at any point, a minimal amount of oil on your worksurface and rolling pin will prevent this.
Starting from whichever side of your dough square is shortest, tightly roll the dough up into a neat sausage shape. Once you have your sausage, use your hands to gently roll it back and forth, starting from the middle and gradually working your way outwards towards the ends. This action will elongate the dough into a long, thin strand.
As you roll, apply slightly more pressure with your hands towards the ends of the strand to taper them, making them pointy. The goal is a strand that is thicker in the middle and gracefully tapers to delicate points at each end. This tapering creates a more elegant braid.
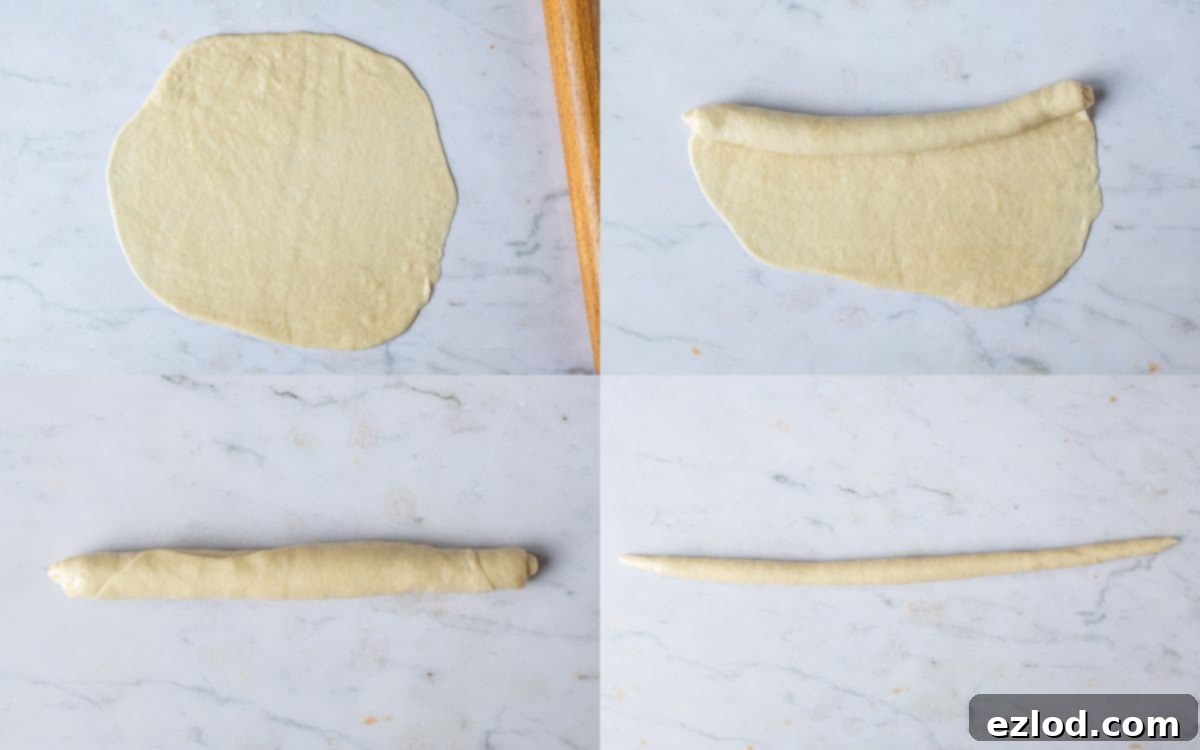
Repeat this entire process with the remaining five portions of dough, ensuring that all six strands are as uniform in length and thickness as possible. Consistency here will lead to a more beautiful and even final loaf.
Mastering the Six-Strand Braid
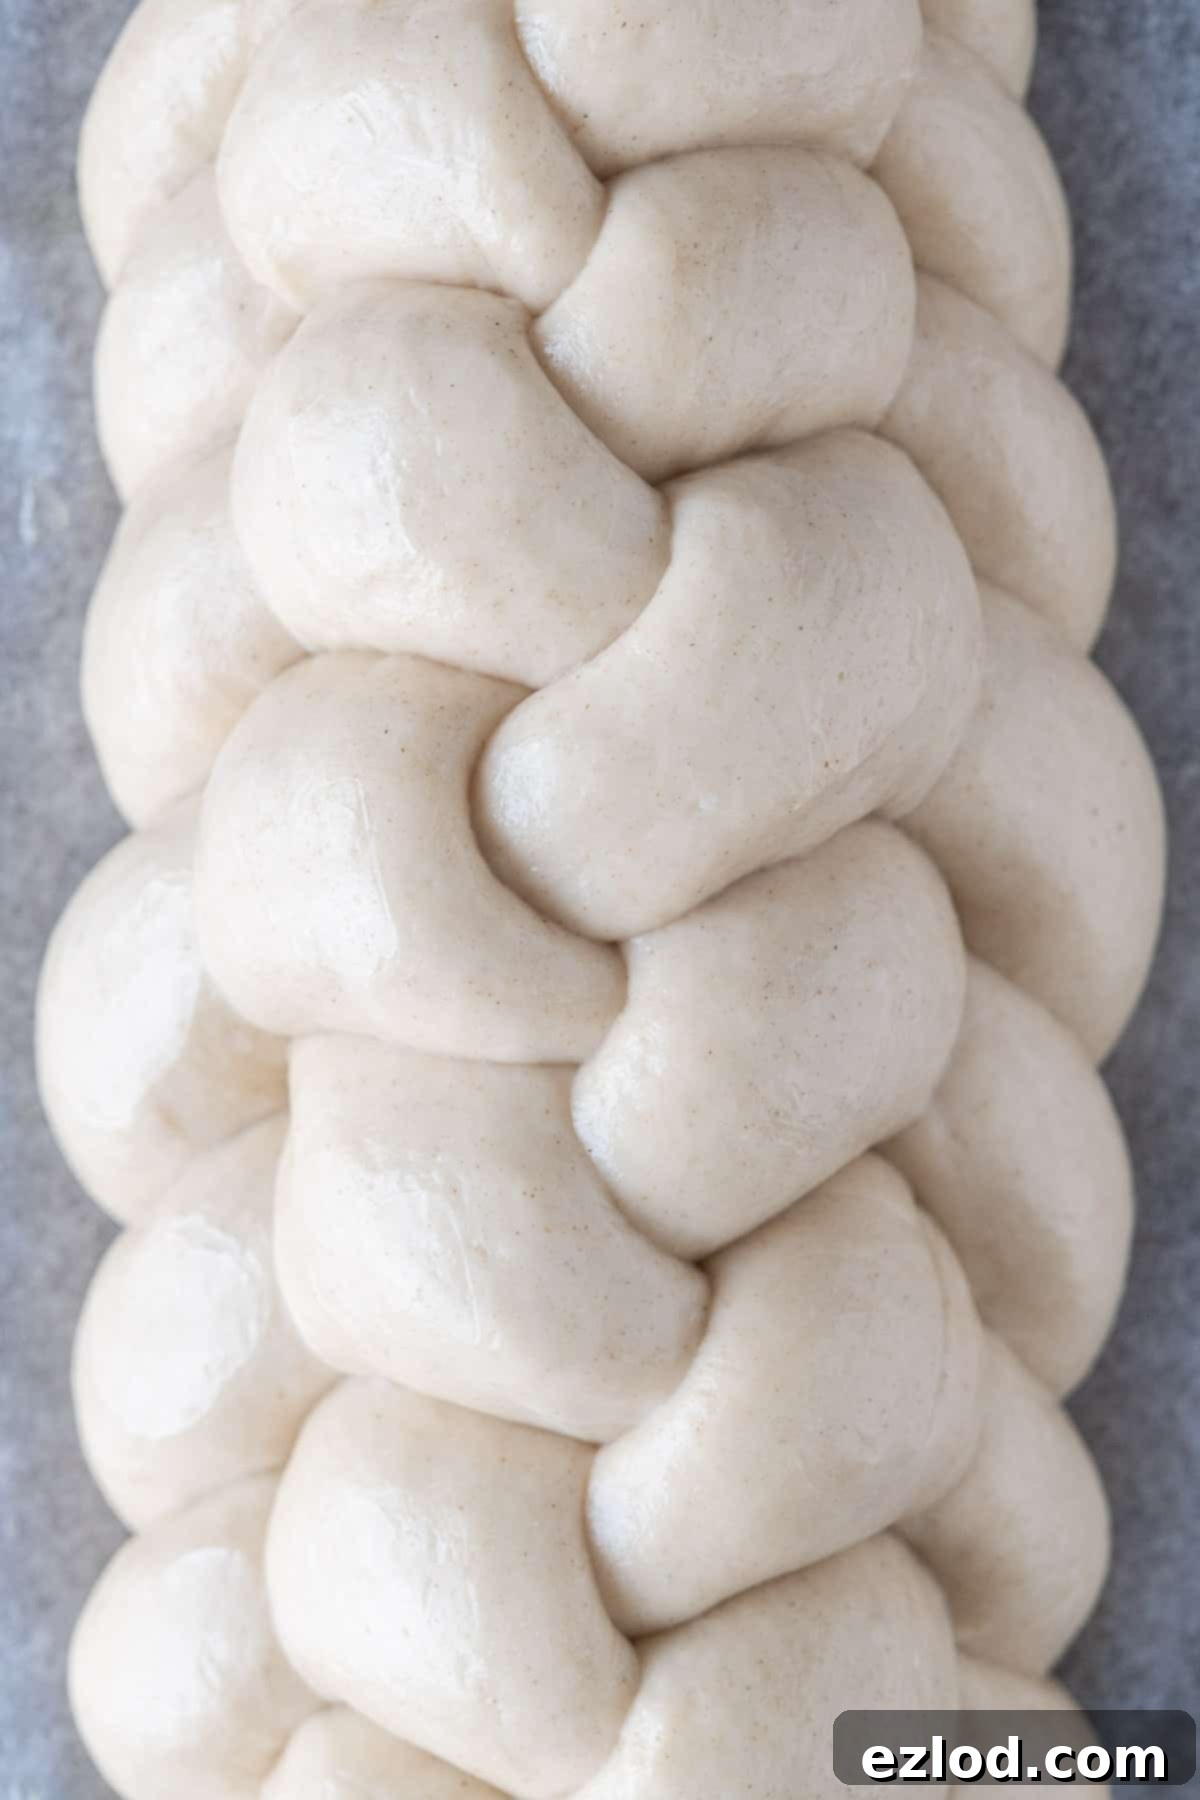
On a lightly floured surface, arrange your six prepared dough strands parallel to each other. At one end, gather the tips of all six strands together and firmly pinch them to join them securely. This creates the anchor point for your braid.
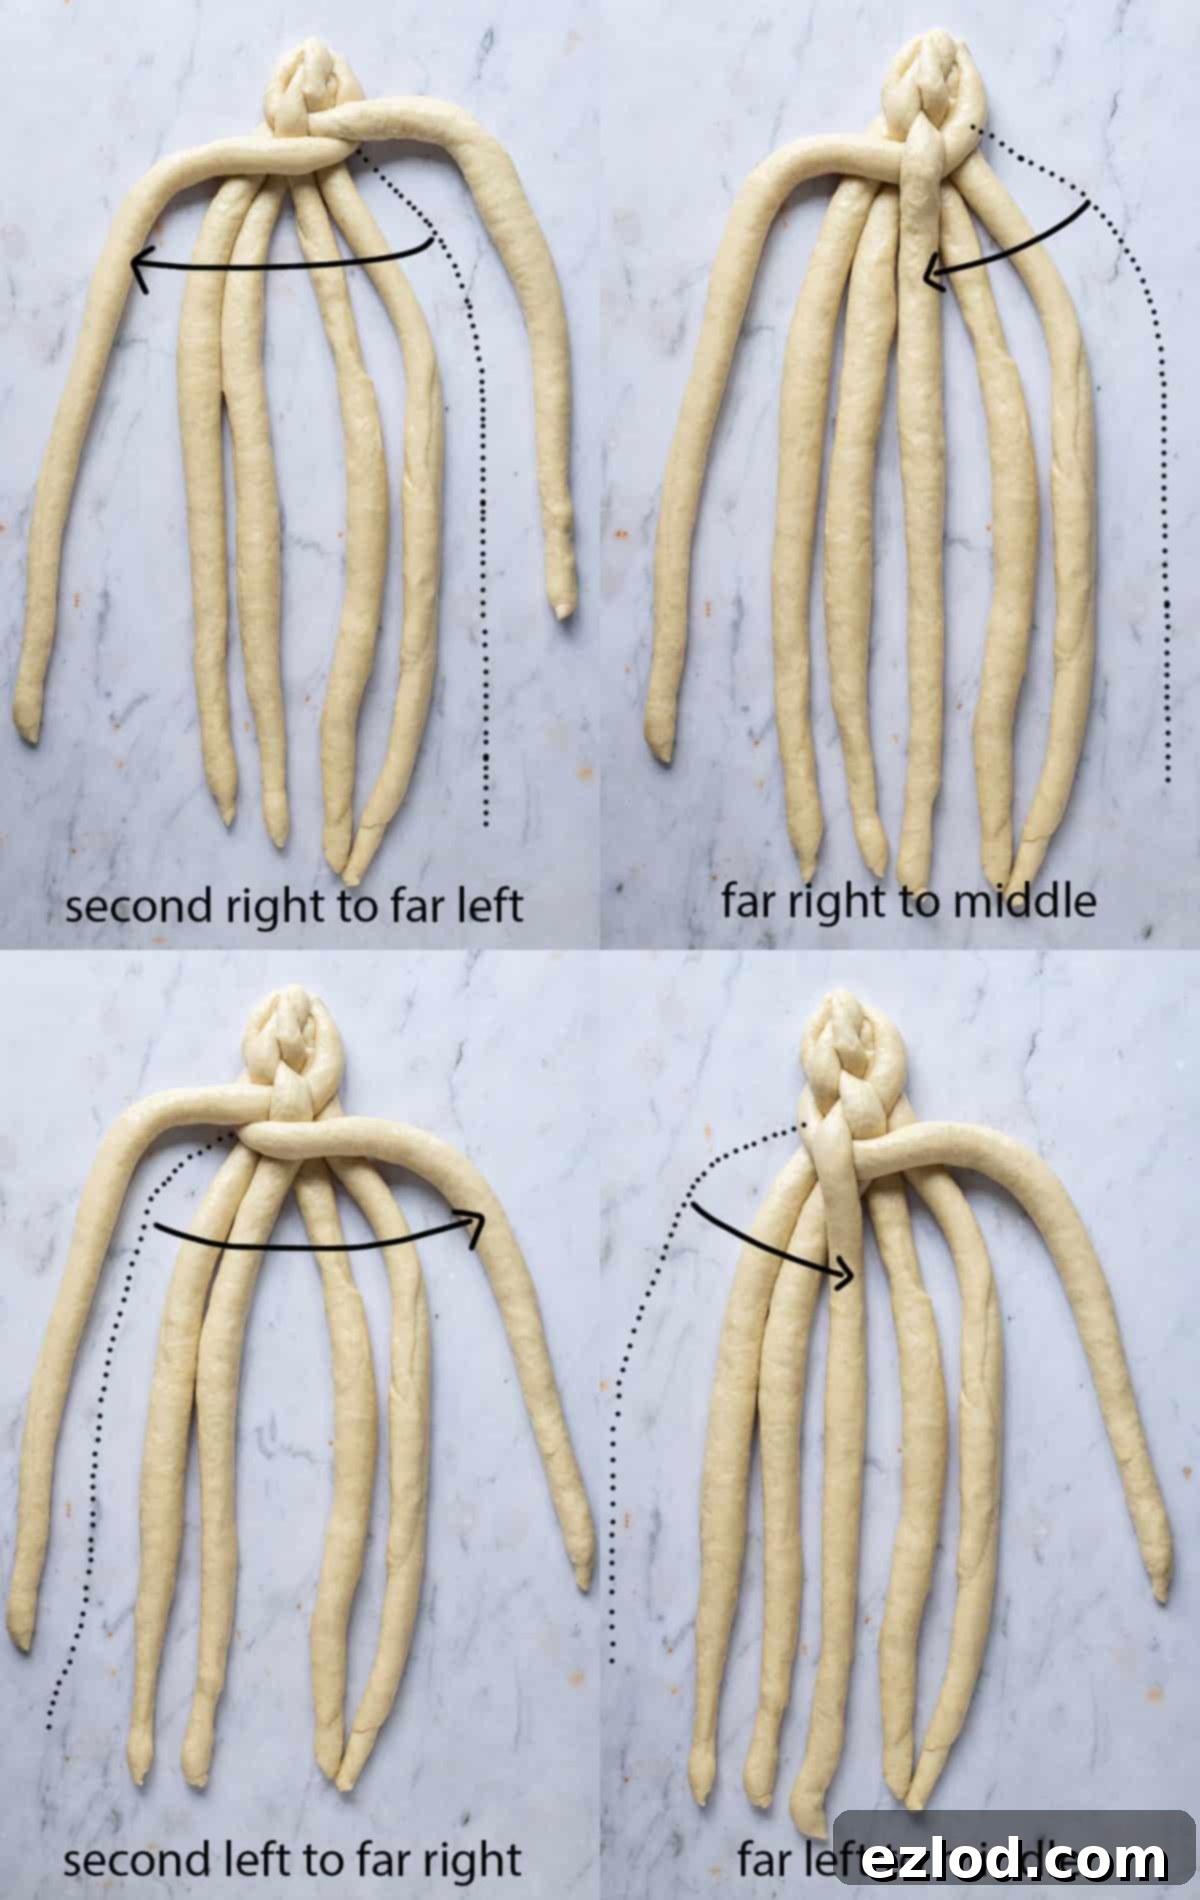
To weave a stunning six-strand braid, you’ll follow a simple sequence of four repeating moves. It might seem complex at first glance, but with a little practice, it becomes quite intuitive:
- Move 1: Take the second strand from the right and cross it over, moving it all the way to the far left position.
- Move 2: Now, take the new far right strand and move it over two strands, placing it in the middle. (If needed, gently spread the strands apart to create room for this movement. The “middle” here refers to the center of the remaining four strands, excluding the one you just moved to the far left.)
- Move 3: Take the second strand from the left and cross it over, moving it all the way to the far right position.
- Move 4: Finally, take the new far left strand and move it over two strands, placing it in the middle position.
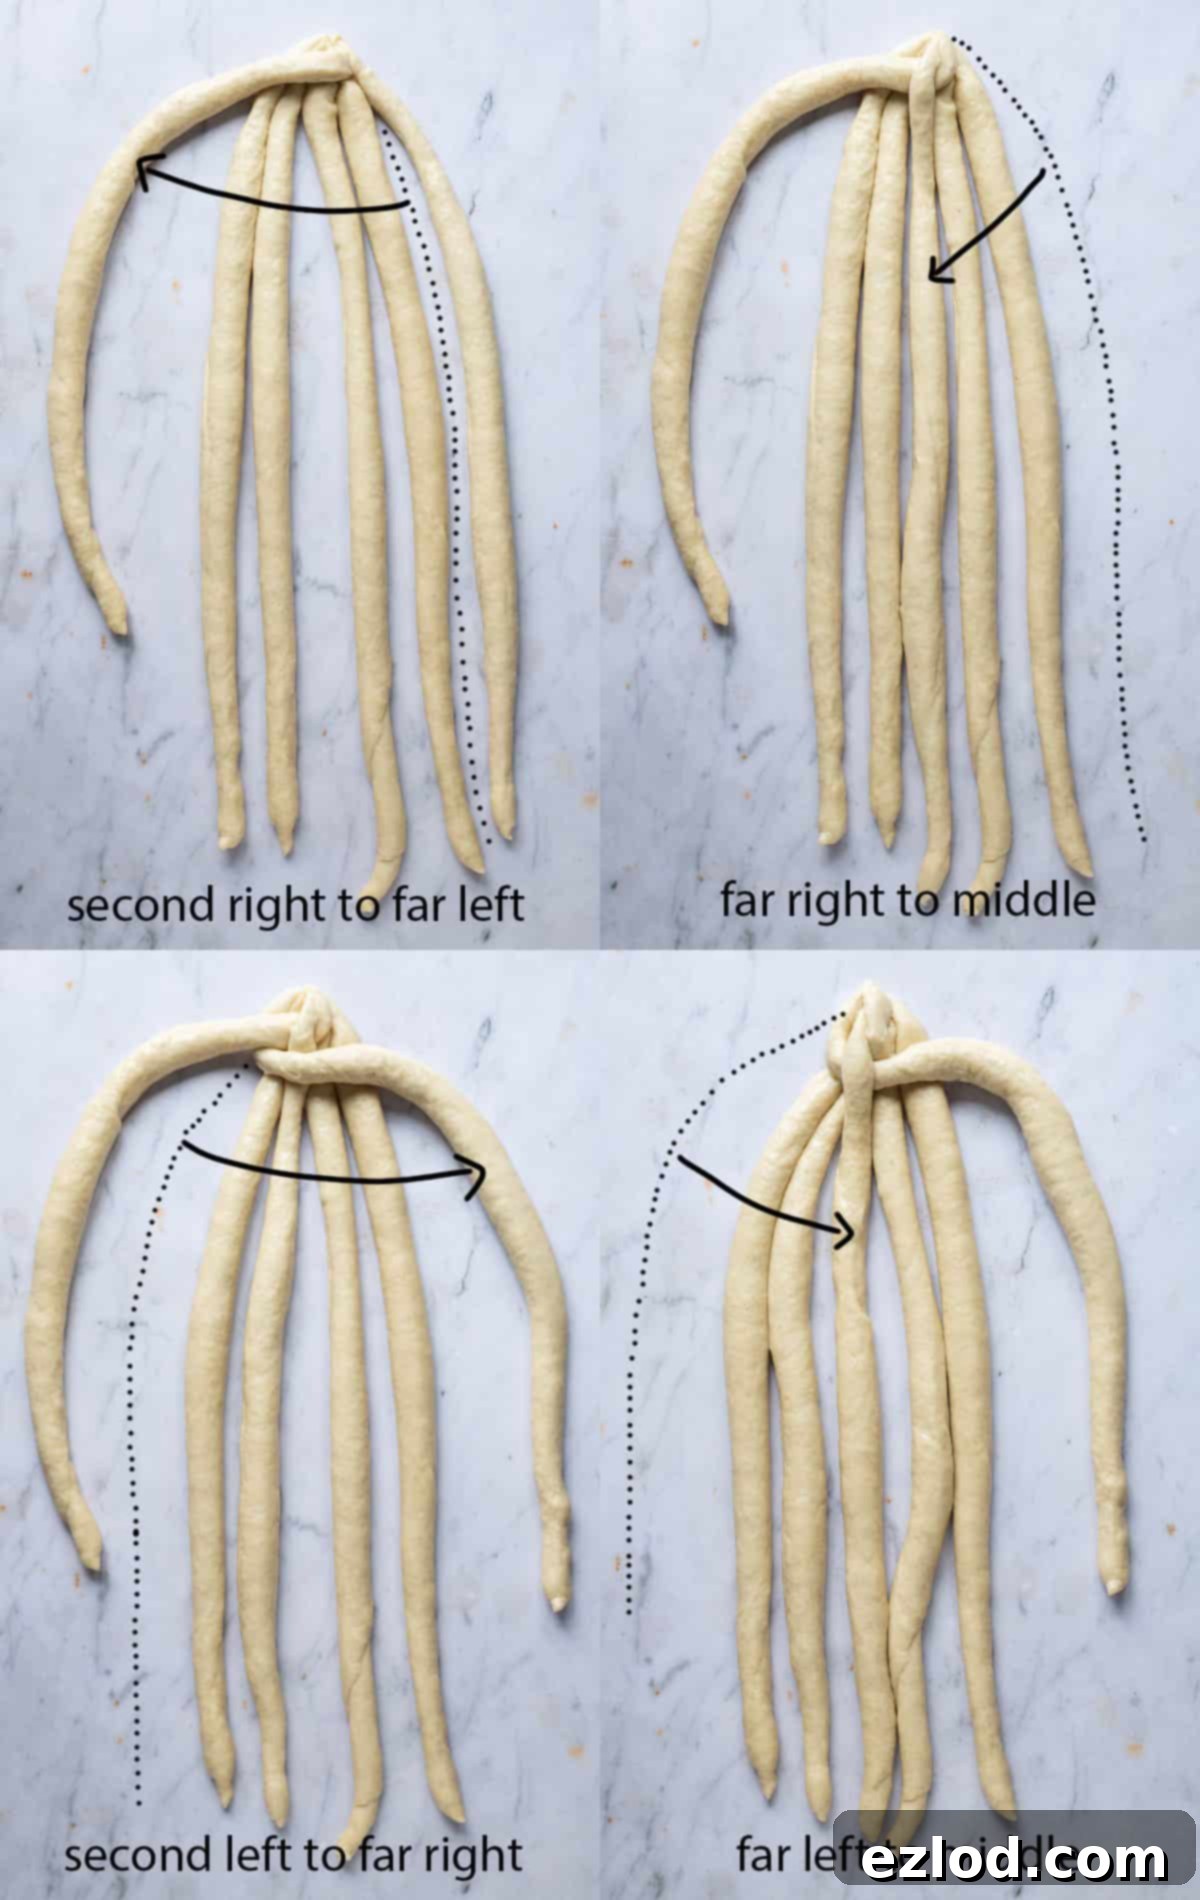
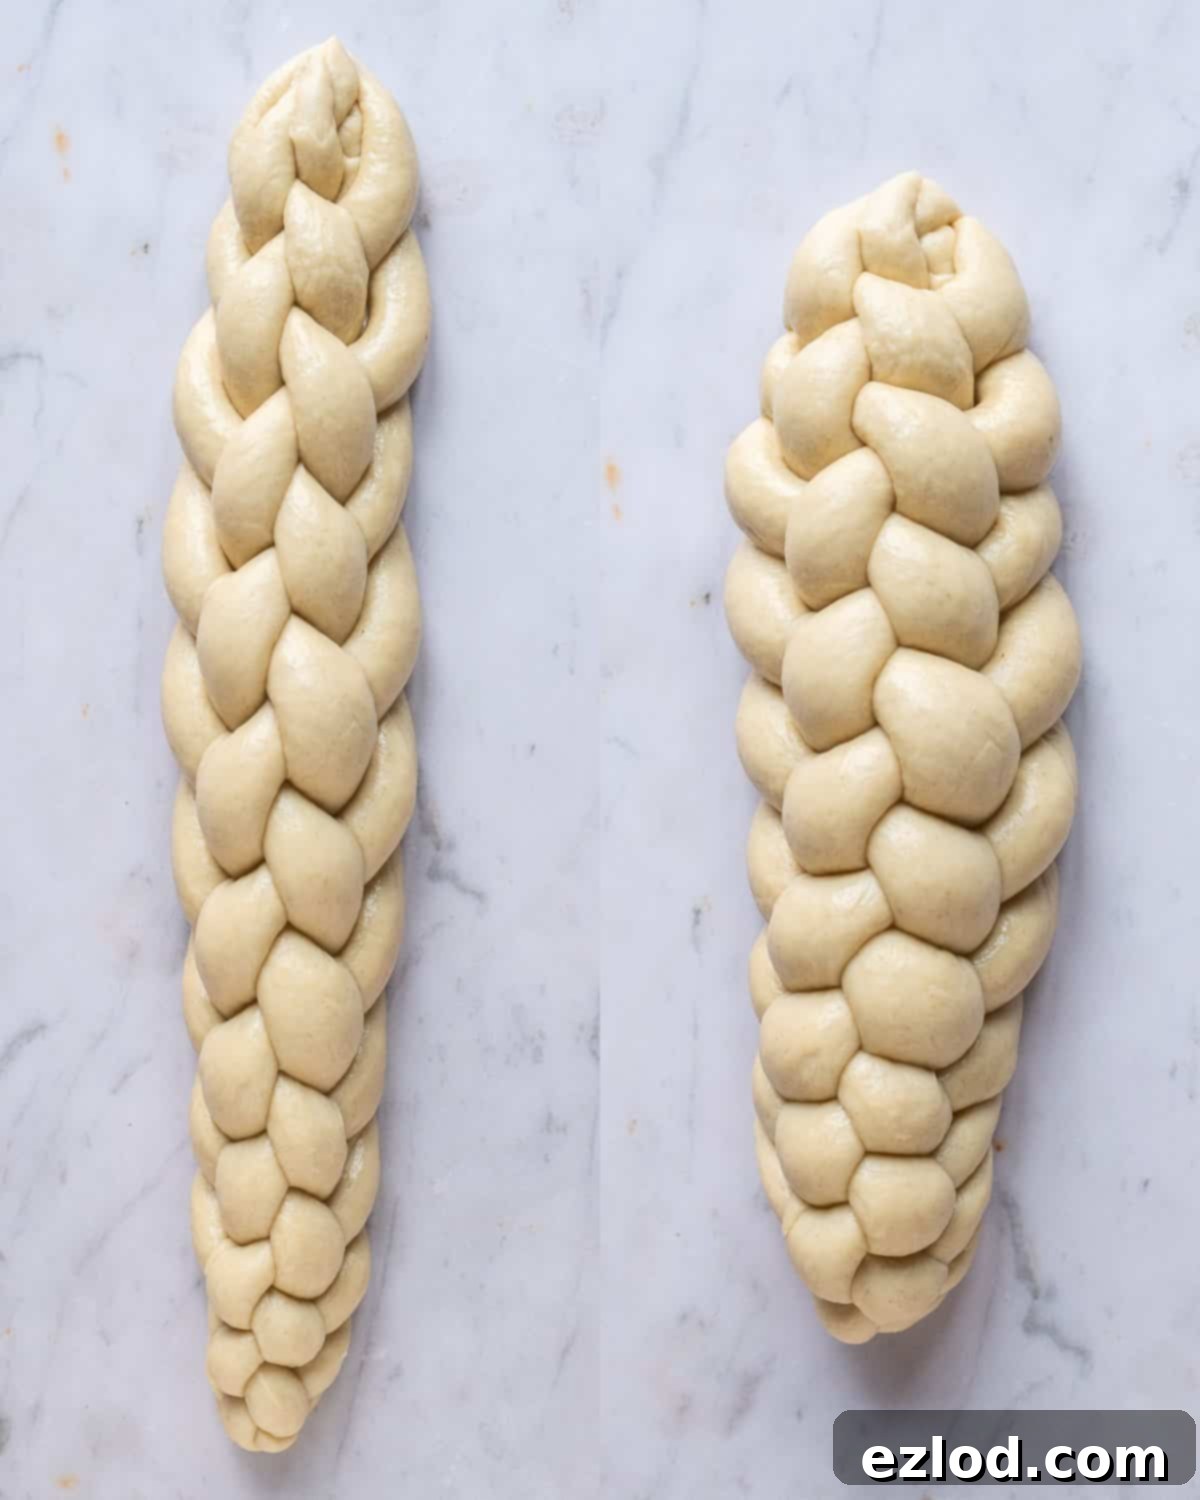
Continue to repeat these four moves systematically: second right to far left, far right to middle, second left to far right, far left to middle. Keep going until you have braided the entire length of the loaf. Once complete, firmly pinch the ends of the strands together to seal the braid and tuck any small, stray bits of dough neatly underneath for a clean finish.
If your braided loaf appears a bit too long and slender for your preference, you can gently use your hands to lift and compact it slightly. This will help to shorten it and give it a more pleasing, fatter shape.
The Second Rise (Proofing) and Baking
Carefully transfer your beautifully braided loaf (or loaves, if making two smaller ones) onto a baking sheet lined with baking parchment. Loosely cover the loaf(ves) to prevent drying and set them aside in a warm, draft-free place for their crucial second rise, also known as proofing. This rise can take anywhere from 1 to 3 ½ hours, depending largely on the ambient temperature of your room.
The bread is ready for the oven when it has visibly almost doubled in size and feels light and airy. A good test is to gently poke the dough with a floured finger: if it springs back slowly most of the way but leaves a slight indentation, it’s perfectly proofed. If it springs back quickly and completely, it needs a little more time. If it collapses, it’s over-proofed, but still bake it – it will still be delicious, just a bit denser.
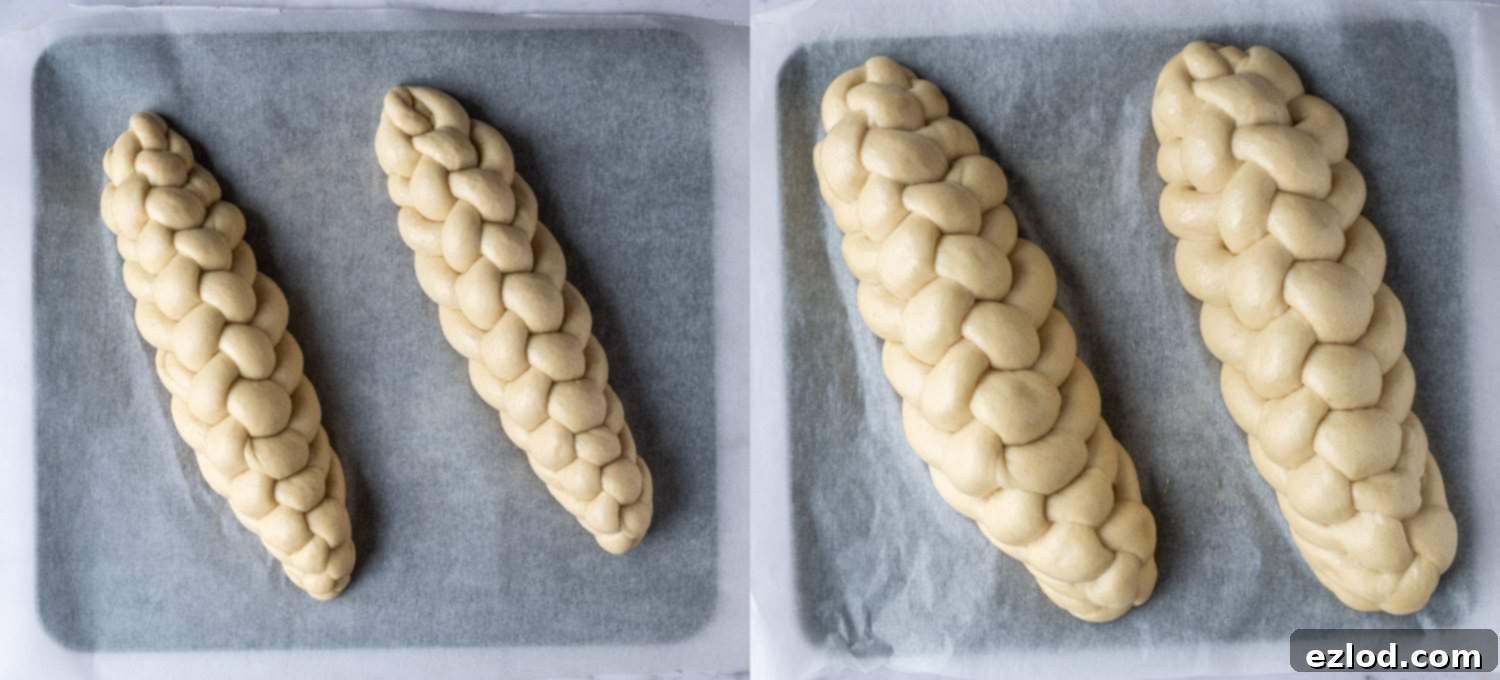
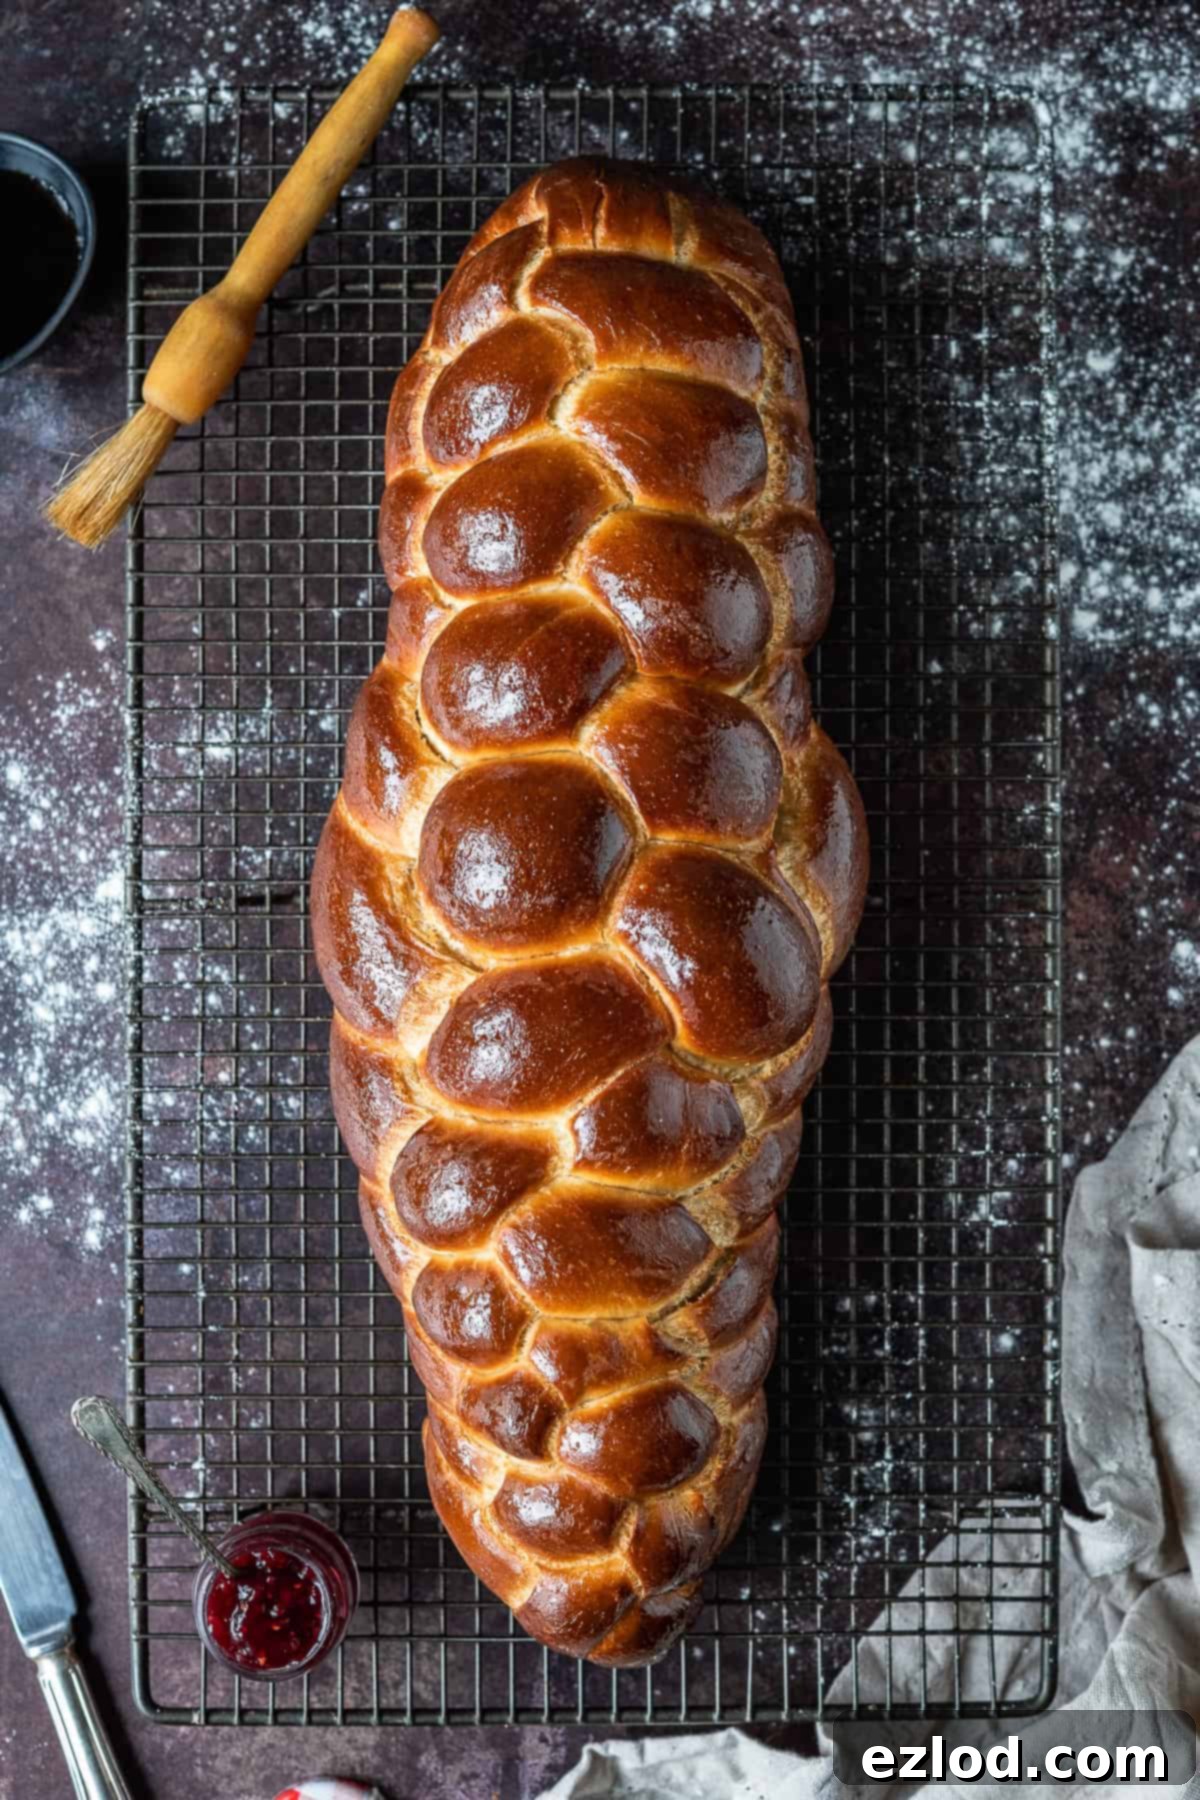
Once your challah is perfectly proofed and ready to bake, gently brush the entire surface with your prepared maple glaze. Bake the challah for 20 minutes. After this initial bake, remove it from the oven, brush it with more glaze (this is also the ideal moment to sprinkle sesame or poppy seeds if desired for an authentic touch), and return it to the oven. Continue baking for another 15 minutes for a large loaf, or 10 minutes for two smaller ones. The bread should be beautifully golden brown and sound hollow when tapped on the bottom.
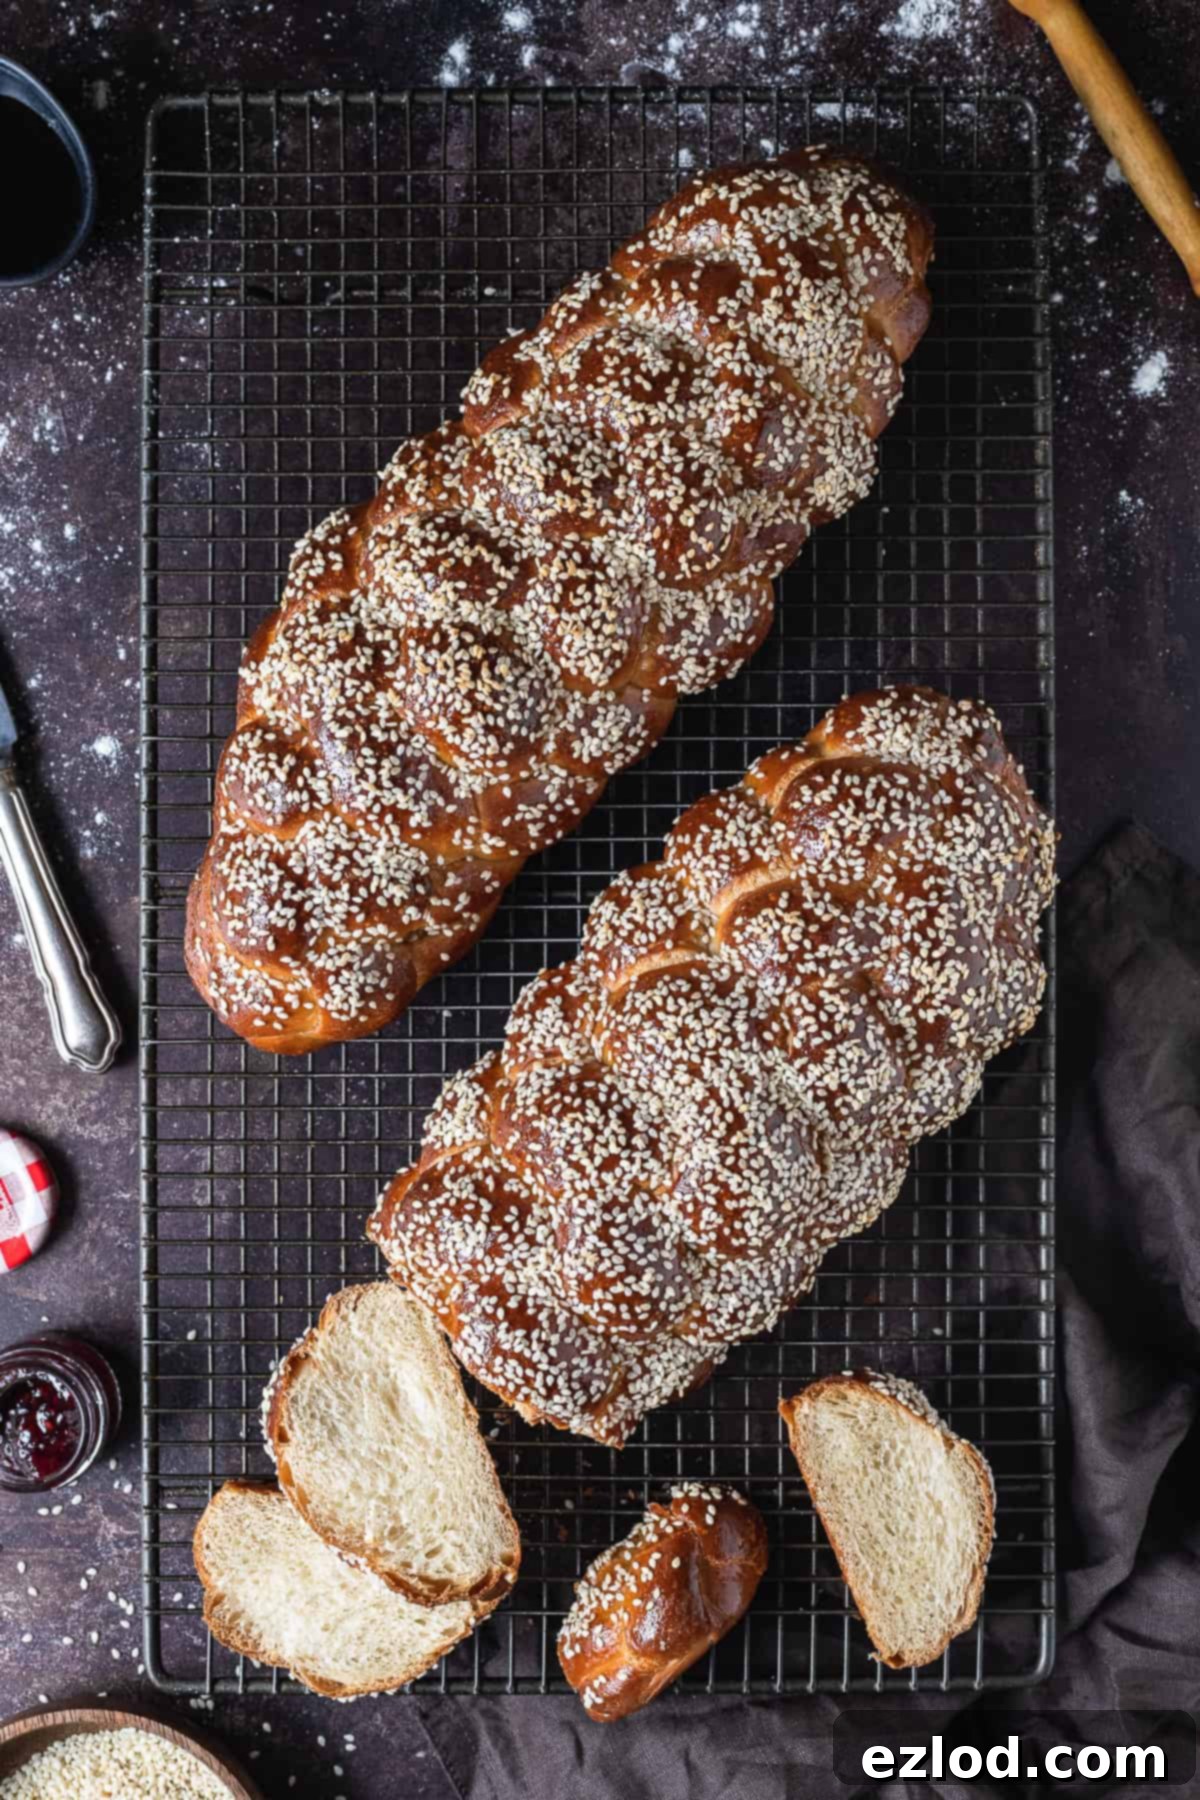
Understanding Challah’s Rising Pace
Due to the dough being enriched with oil and sugar, challah tends to be a slower riser compared to leaner breads. For the best possible texture and flavor, it’s crucial not to rush this process. Baking the bread before it has fully risen will result in a denser loaf rather than the desired soft, airy crumb.
The first rise can take anywhere from 1 ½ to 3 hours, depending on the warmth of your environment. The second rise, or proofing, will typically require 1 to 3 ½ hours, influenced by whether you refrigerated the dough and the current room temperature. This extended timeline is why starting early in the morning is essential if you plan to bake it all in one day.
My preferred method involves making the dough over two days, allowing for an overnight first rise in the refrigerator. I’ve found that letting the dough sit at room temperature for about an hour before refrigerating it yields the best results, as it gives the yeast a head start.
Accurately judging when challah is ready to bake is somewhat of an art, developed with practice. It’s ready when it has visibly almost doubled in size and, when gently poked with a floured finger, it springs back slowly most of the way but leaves a small, persistent indentation. If it springs back quickly and completely, it still needs more time. A slightly under-proofed loaf will still be delicious but might be a bit denser and less fluffy than a perfectly proofed one. Don’t worry, with each bake, you’ll become more adept at recognizing the perfect proofing stage.
Tips to Accelerate Rising Time
If your kitchen is on the cooler side and you’d like to gently speed up the dough’s rising process, here’s a simple trick:
Preheat your oven to its absolute lowest temperature setting. Once it reaches that minimal warmth, switch it off completely. Open the oven door for about 30 seconds to allow some of the intense heat to escape. Test the warmth by holding your hand inside for a few seconds; it should feel comfortably warm, not unpleasantly hot.
Place your covered dough bowl inside the warmed, turned-off oven and close the door. On particularly cold days, you might need to re-warm the oven briefly after a while, but usually, a single warming is sufficient to create the ideal environment for a quicker, yet still controlled, rise.
Essential Tips for Perfect Vegan Challah
To ensure you achieve the most outstanding results with your vegan challah, we’ve compiled some crucial tips:
- Precision in Measuring: For optimal baking results, always follow the recipe closely. I cannot emphasize enough the importance of using gram measurements with a digital kitchen scale, rather than volumetric cup conversions. Cup measurements are inherently less accurate for baking, and relying on them can significantly impact the final texture and consistency of your challah.
- Adjusting Sugar Levels: If you prefer a more savory challah rather than a sweet one, you can reduce the amount of caster sugar in the dough. However, ensure you retain at least one or two tablespoons of sugar; this is essential to “feed” the yeast and ensure it activates properly. Be aware that with less sugar, the dough might rise slightly quicker, so keep a closer eye on it during proofing.
- Choosing the Right Oil: For the oil component, I typically use either olive oil or sunflower oil, both of which work beautifully in this recipe. Vegetable or canola oil are also excellent, neutral-flavored alternatives. I generally advise against using coconut oil, as it is solid at room temperature. Its solidification within the dough can potentially lead to a denser, less airy bread texture.
- Flour Type Matters: This recipe works well with both white bread flour and plain (all-purpose) flour. Bread flour, with its higher protein content, will yield a slightly chewier challah, offering a more robust structure. Plain flour will result in a softer, more tender crumb. Both are delicious, so choose based on your preference or even use a combination of the two for a balanced texture.
- Loaf Size Flexibility: The recipe is designed to produce one large, impressive challah loaf or, if you prefer, two smaller, equally delightful ones. This flexibility allows you to bake according to your needs, whether for a large gathering or to have an extra loaf for freezing.
- The Perfect Glaze: I glaze my challah with a simple mixture of maple syrup and water (or non-dairy milk). This glaze imparts a stunning, shiny finish, especially if applied twice: once before the initial bake and again after the first 20 minutes in the oven. This double glazing intensifies the golden hue and gloss.
- Glaze Alternatives: Be aware that the maple glaze can become a little sticky if left at room temperature for several hours. If you prefer a non-sticky finish, you can brush the bread with just non-dairy milk or aquafaba (the liquid from a can of chickpeas) instead. While these alternatives won’t provide the same glossy shine, they will still contribute to a beautiful golden crust.
- Ensuring Doneness with a Thermometer: The most reliable way to confirm that your loaf of bread is perfectly cooked through in the middle is to use a probe thermometer. Oven temperatures can vary significantly, making a one-size-fits-all baking time challenging. Insert the thermometer into the center of the loaf; it should register an internal temperature of 94°C (201°F) for a thoroughly baked challah.
Understanding Yeast Types
For consistent and efficient baking, I always opt for fast-action yeast, also commonly known as instant or easy-bake yeast. The beauty of this type of yeast is that it doesn’t require prior activation; you can simply add it directly to your flour mixture, saving a step in the process.
If active dried yeast is what you have on hand, don’t worry, you can still use it! The method is slightly different: you’ll need to activate it first. Mix the active dried yeast with a portion of the warm water specified in the recipe and a small pinch of the sugar. Let this mixture sit for 10-20 minutes until it becomes foamy and bubbly, indicating the yeast is active and ready. Once activated, proceed with the rest of the recipe as written, incorporating this bubbly mixture where the water is added.
Freezing Vegan Challah for Future Enjoyment
Absolutely! This vegan challah freezes exceptionally well, allowing you to enjoy its deliciousness long after baking. You can freeze it either as a whole loaf or conveniently sliced. To preserve its peak freshness, ideally, freeze it on the same day it’s baked, once it has cooled completely. Place the challah in a freezer-safe ziplock bag or wrap it tightly in cling film and then foil, and it will keep beautifully for up to three months.
For quick enjoyment, you can toast individual slices straight from the freezer. If you’ve frozen an entire loaf, allow it to defrost at room temperature first. To restore its glorious texture and warmth, refresh it in a low oven (around 150°C/300°F) for 5-10 minutes. This gentle reheating will bring back its fresh-baked aroma and softness.
As a personal preference, I often bake the recipe as two smaller loaves rather than one large one. This way, we can enjoy one loaf immediately and conveniently freeze the second for a delightful treat on another day.
Proper Storage for Optimal Freshness
Like most homemade bread, this vegan challah is at its absolute best when enjoyed on the day it’s baked. However, its deliciousness certainly extends beyond that. It remains wonderfully good the next day, and for 2-3 days following, it makes fantastic toast or the base for an indulgent French toast.
To keep your challah fresh, store it in an airtight container or a dedicated bread bin at room temperature. Avoid refrigerating bread, as the cool, damp environment of a fridge can actually cause it to go stale much faster than if left at room temperature.
More Delectable Vegan Bread Recipes to Explore
If you’ve loved baking this vegan challah, you might enjoy exploring these other delightful plant-based bread recipes:
Vegan Hokkaido milk bread
Gingerbread cinnamon rolls
Vegan hot cross buns
Vegan brioche
Banana bread cinnamon rolls
Pumpkin bread rolls
Vegan lemon blueberry rolls
Maple pecan bread wreath
Vegan wholemeal maple cinnamon rolls
We love seeing your baking creations! If you tried this recipe, don’t forget to tag @domestic_gothess on Instagram and use the hashtag #domesticgothess to share your beautiful vegan challah.
*All images and content on Domestic Gothess are copyright protected. If you want to share this recipe, please do so by using the share buttons provided. Do not screenshot or post the recipe or content in full.*

Print Recipe
Vegan Challah Bread
Ingredients
- 485 g (4 cups) white bread flour or plain (all-purpose) flour plus extra as needed for kneading
- 10 g (2 ½ tsp) fast action/instant yeast*
- 75 g (¼ cup + 2 Tbsp) caster (superfine) sugar**
- 1 ½ tsp salt
- 90 ml (6 Tbsp) oil (olive, sunflower, vegetable or canola)
- 260 ml (1 cup + 1 Tbsp + 1 tsp) warm water
For the Glaze:
- 1 Tbsp maple syrup
- 1 Tbsp water or non-dairy milk
Instructions
-
For best results, aim to start your challah preparation the day before you intend to bake, or at least very early in the morning if completing in one day.
-
Place the specified amount of flour into a large mixing bowl, or the bowl of a stand mixer fitted with a dough hook. Add the yeast to one side of the bowl, and the sugar and salt to the other, then mix thoroughly to combine all dry ingredients.
-
Pour in the oil and most of the warm water. Stir the mixture until a shaggy, rough dough forms, gradually adding the remaining water as needed to fully hydrate the flour and bring the dough together.
-
Knead the dough for approximately 10 minutes by hand on an unfloured surface, or for about 5 minutes using a stand mixer until smooth and elastic.
-
After kneading, the dough should be silky, pliable, and should pull away cleanly from your work surface or the bowl. It should feel slightly tacky to the touch, but not sticky. If too sticky, knead in extra flour, one spoonful at a time, until the desired texture is achieved.
-
Transfer the dough to a large, lightly oiled bowl and cover it (a shower cap works well). You now have two options: for same-day baking, let the dough rise in a warm place until it has doubled in size, which typically takes 2 to 2 ½ hours.
-
If baking the following day, allow the dough to rise at room temperature for 1 hour, then place the covered bowl in the refrigerator to finish rising overnight.
-
The next morning, or once the dough has doubled in size, gently punch it down to release the air. Now, it’s time to shape your challah. You can either explore online tutorials for different braid designs or follow our detailed instructions (and accompanying photos above) to create a beautiful six-strand challah. Remember, this recipe makes either one large loaf or two smaller ones.
-
To make a six-strand challah, divide the dough into six equal pieces. For precision, use a kitchen scale to ensure each piece has the exact same weight. If you’re opting for two smaller loaves, first divide the entire dough in half, then divide each of those halves into six pieces.
-
Take one piece of dough and roll it out into a thin, roughly square shape on a lightly oiled work surface. Exact squareness isn’t necessary.
-
Starting from the shortest side, tightly roll the dough into a sausage. Then, roll the sausage with your hands, starting from the middle and working outwards, to form a long, thin strand. Increase pressure at the ends to taper them, making the strand thicker in the middle and pointy at the ends.
-
Repeat this shaping process with the remaining five dough portions, ensuring all strands are approximately the same length and taper.
-
On a lightly floured surface, arrange the six strands parallel to each other. Gather and tightly pinch the tips of the strands at one end to join them securely.
-
To create a six-strand braid, follow these four repeating moves: First, take the second strand from the right and move it over to the far left. Then, take the far right strand and move it over two strands to the middle (gently spread strands apart if needed). The ‘middle’ here refers to the center of the remaining four strands, excluding the one you just moved far left.
-
Next, take the second strand from the left and move it over to the far right. Then, take the far left strand and move it over two strands to the middle.
-
Repeat these four moves – second right to far left, far right to middle, second left to far right, far left to middle – until the entire loaf is braided. Pinch the end strands together tightly and tuck any loose ends underneath.
-
If the braided loaf appears too long and thin, gently use your hands to lift and compact it slightly to achieve a shorter, plumper shape.
-
Place the shaped loaf onto a baking sheet lined with baking parchment. If making two loaves, repeat the shaping steps for the second one.
-
Loosely cover the loaf(ves) and let them rise in a warm spot until visibly almost doubled in size, which can take 1 to 3 ½ hours, depending on room temperature. To check for readiness, gently poke the dough with a floured finger: if it slowly springs back most of the way but leaves a small indentation, it’s ready. If it springs back quickly, it needs more time.
-
While the challah is rising, prepare the glaze by mixing the maple syrup with water or non-dairy milk in a small bowl. Set aside. Preheat your oven to 180°C/350°F/gas mark 4.
-
Once the challah is perfectly proofed, gently brush its entire surface with some of the glaze. Bake for 20 minutes. After this time, remove the loaf, brush with more glaze (and sprinkle with sesame or poppy seeds if desired), then return to the oven for another 15 minutes for a large loaf, or 10 minutes for two smaller ones.
-
To ensure your bread is fully cooked, use a probe thermometer inserted into the middle of the loaf. It should reach an internal temperature of 94°C/201°F.
-
Carefully slide the baked challah onto a wire rack and allow it to cool completely before slicing and serving.
Notes
- For the best results, it is crucial to follow the recipe directions meticulously. As always in baking, I strongly recommend using gram measurements with a digital scale for accuracy, rather than less precise cup conversions.
- *If you only have active dried yeast, you will need to activate it first. Mix it with a small portion of the warm water and a pinch of sugar from the recipe ingredients. Let it sit for 10-20 minutes until it becomes bubbly, then proceed with the recipe as written.
- **You can adjust the amount of caster sugar if you prefer a less sweet, more savory challah. Just ensure you keep at least one to two tablespoons to activate the yeast. Note that the dough may rise quicker with less sugar, so monitor it closely.
- The maple syrup glaze, while beautiful and shiny, can become slightly sticky if the bread is left at room temperature for several hours. If you prefer a non-sticky finish, you can brush the bread with just non-dairy milk or aquafaba for a nice color without the shine.
