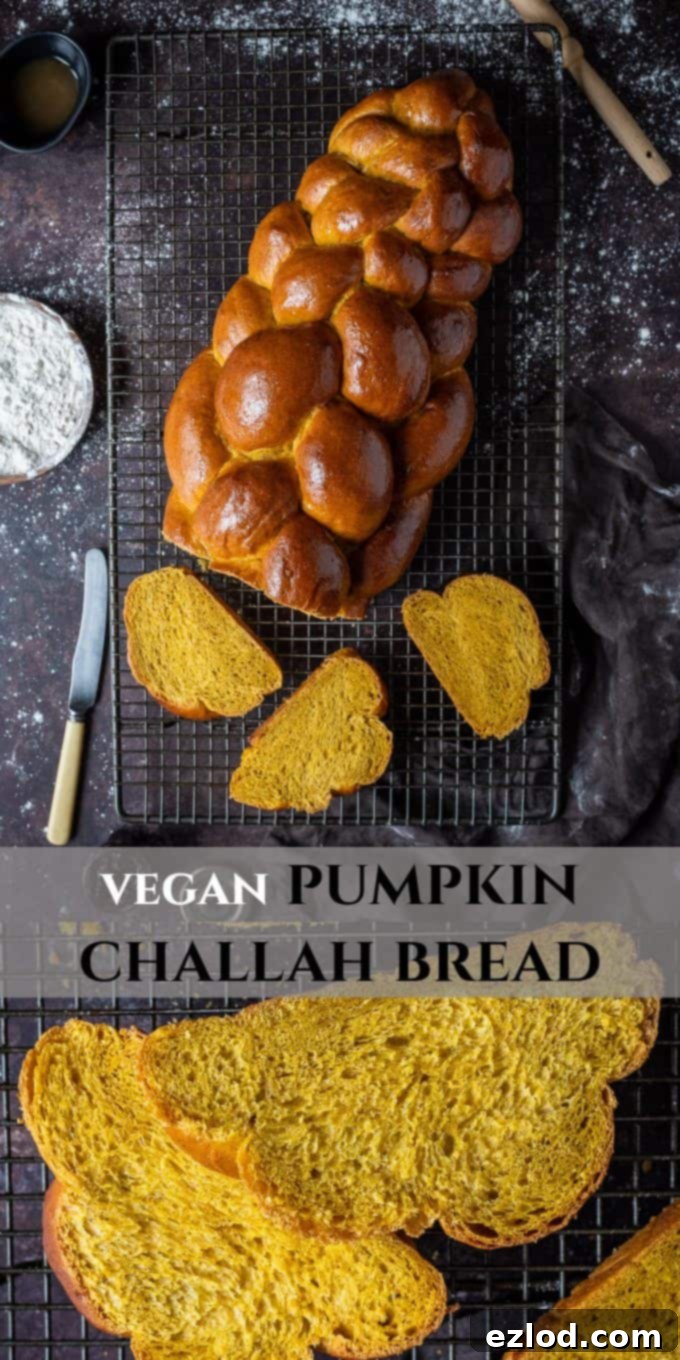
Delicious Vegan Pumpkin Challah Bread: A Spiced Eggless & Dairy-Free Delight
Experience the warmth and comfort of homemade challah with this exquisite vegan pumpkin version. Crafted with aromatic pumpkin puree and a delicate blend of spices, this eggless challah bread boasts a stunning color, incredible flavor, and a wonderfully soft, fluffy texture. This comprehensive guide includes easy-to-follow, step-by-step instructions to create a show-stopping six-strand braid.
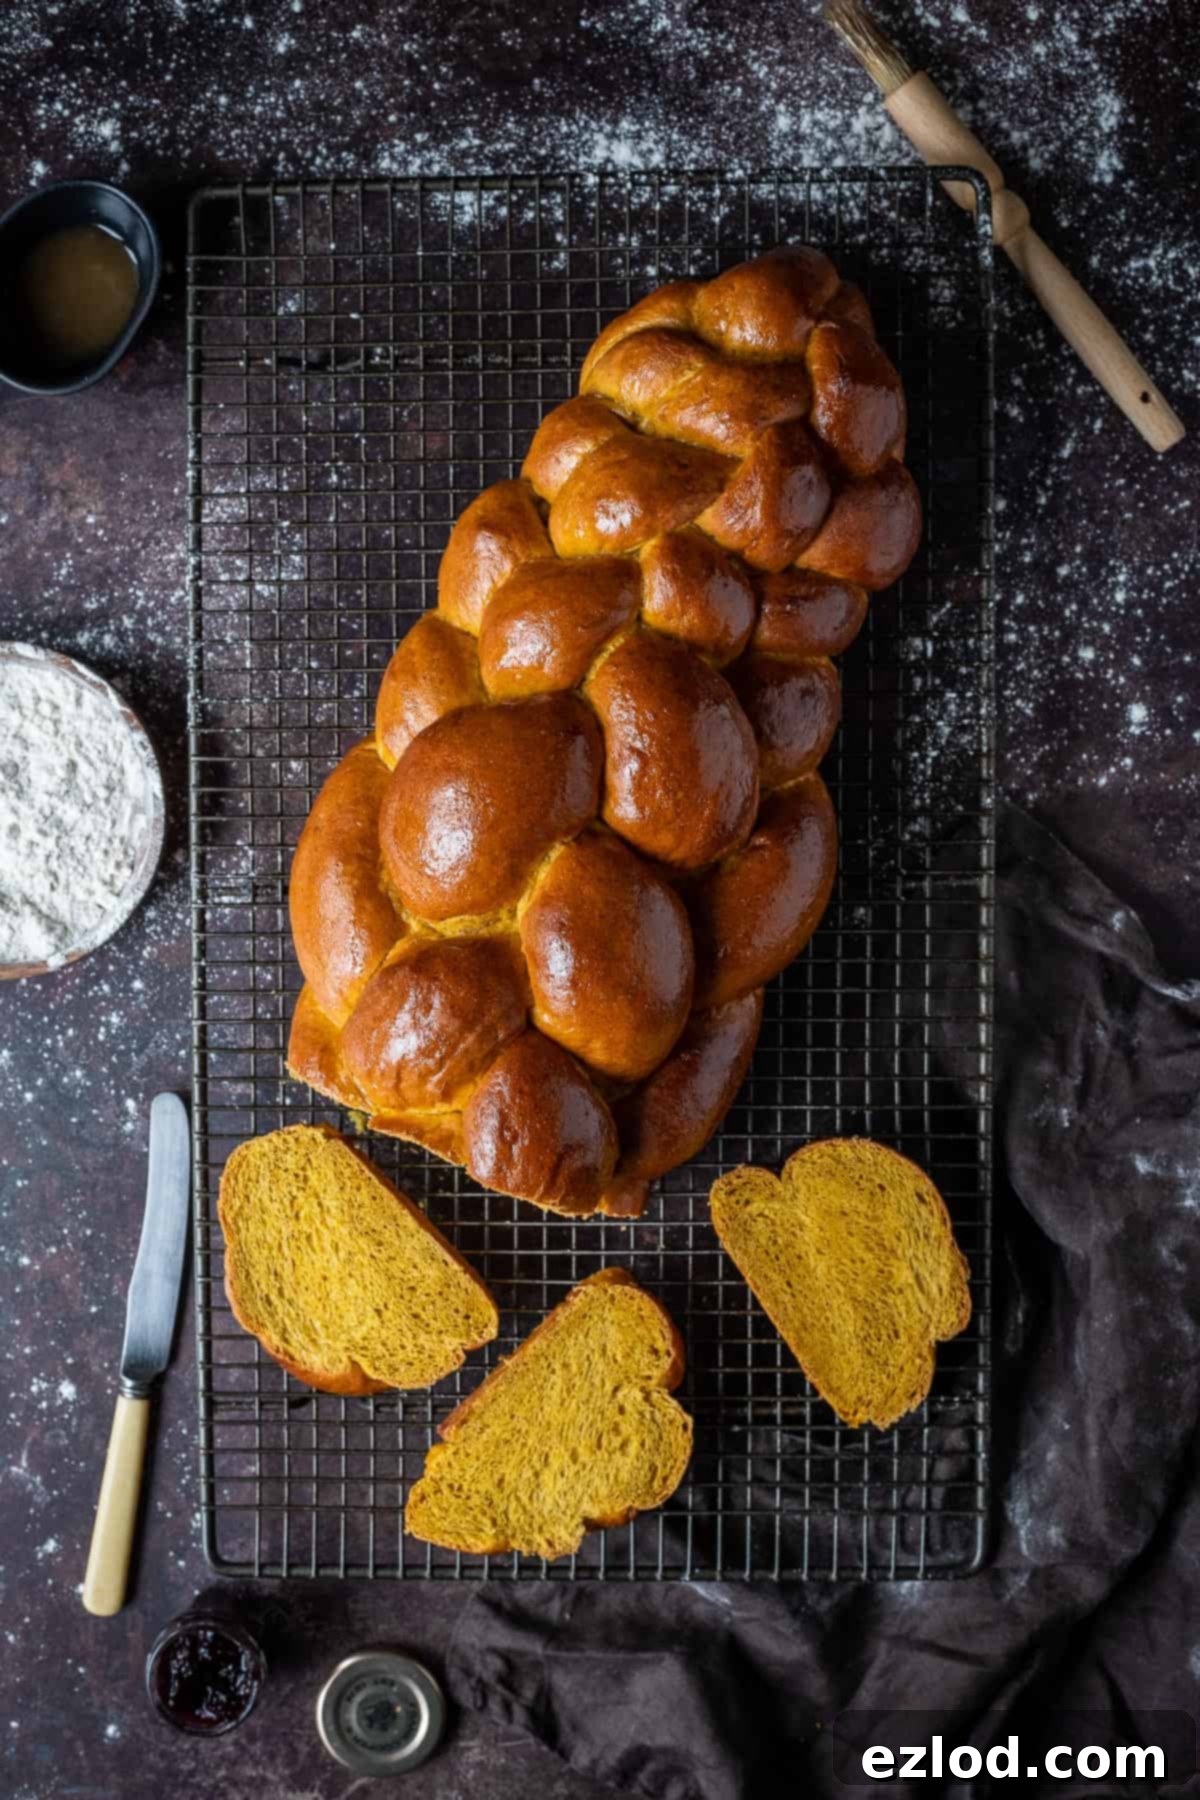
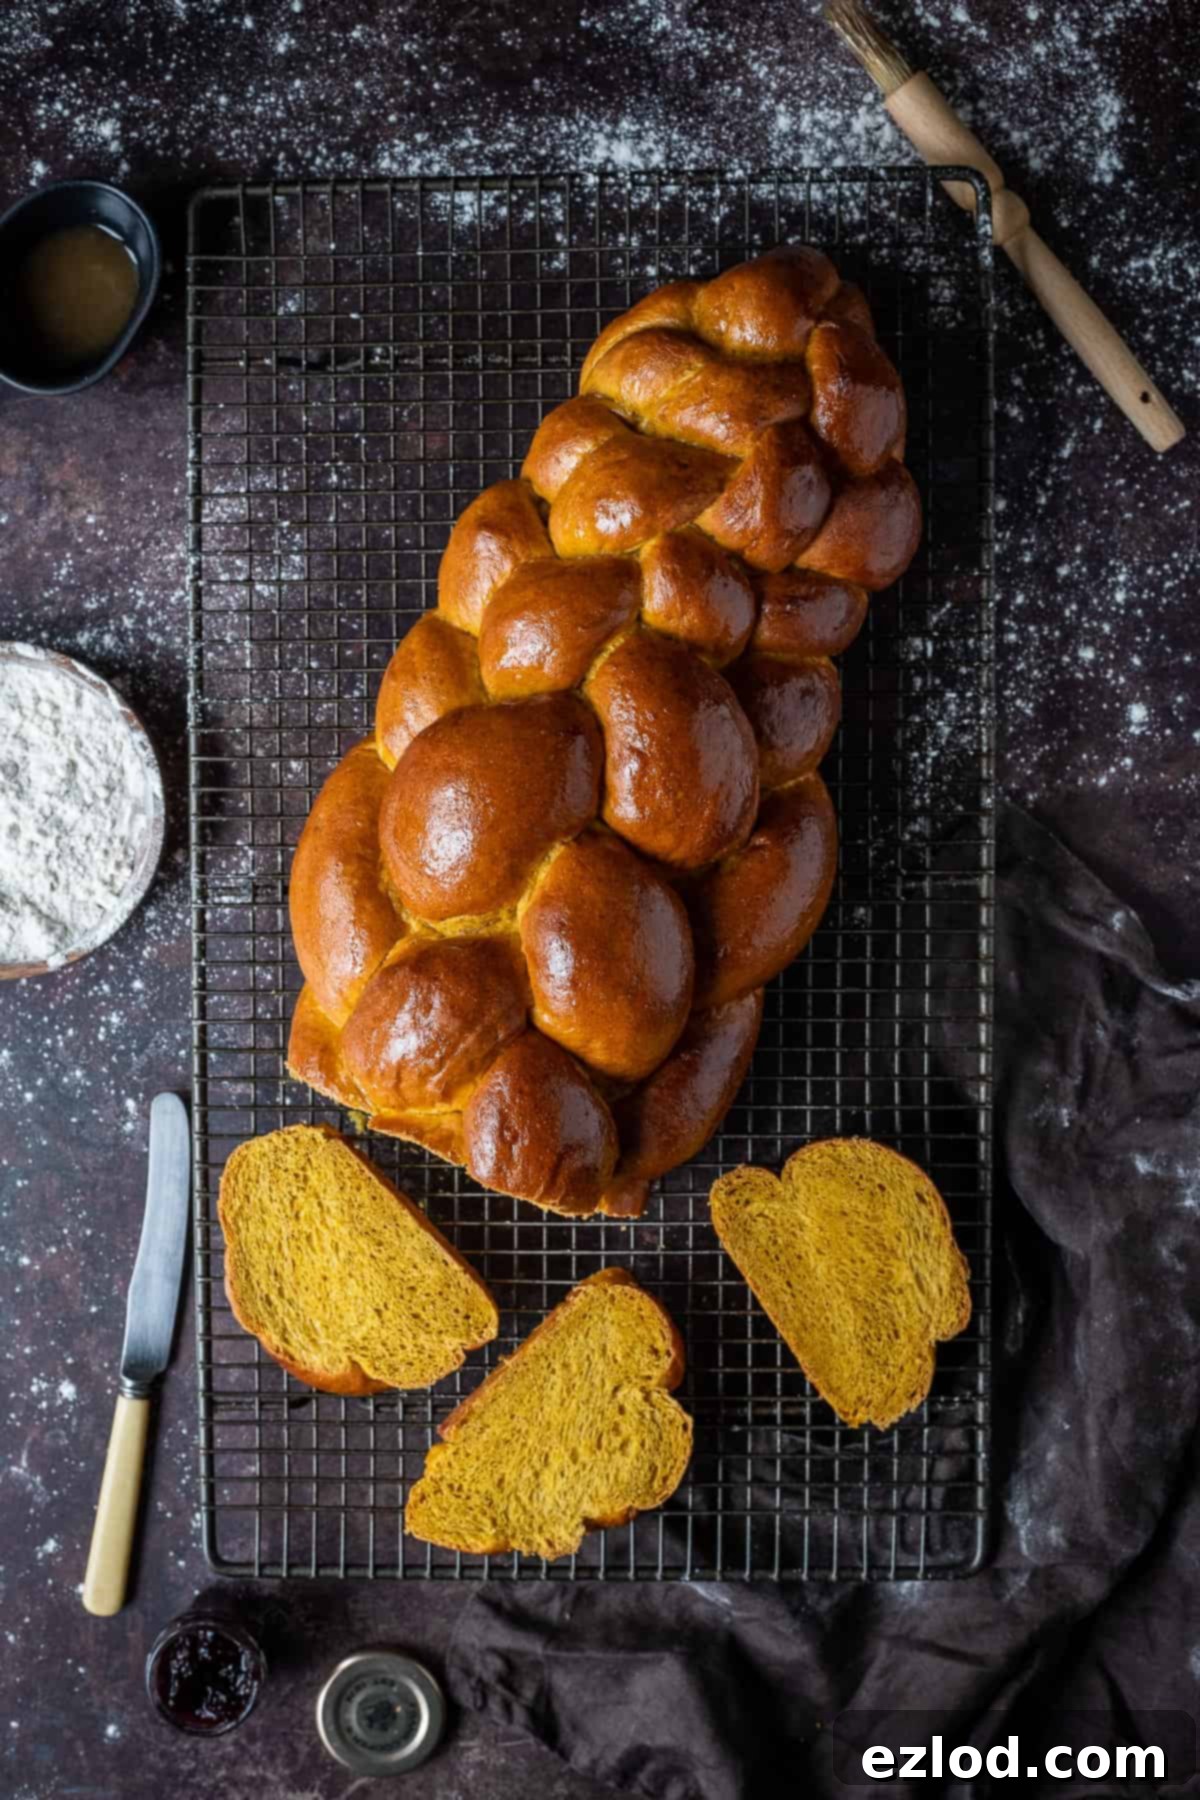
Prepare to fall in love with this vegan pumpkin challah bread! It’s an absolute triumph of plant-based baking, delivering a perfectly soft, fluffy, and utterly delicious loaf that will become a staple in your kitchen. Not only does it look incredibly impressive with its beautiful golden hue and intricate braid, but the aroma that fills your home as it bakes is simply intoxicating. This recipe takes my beloved basic vegan challah bread and elevates it with the addition of pumpkin puree and warming spices, resulting in a truly spectacular loaf perfect for any occasion.
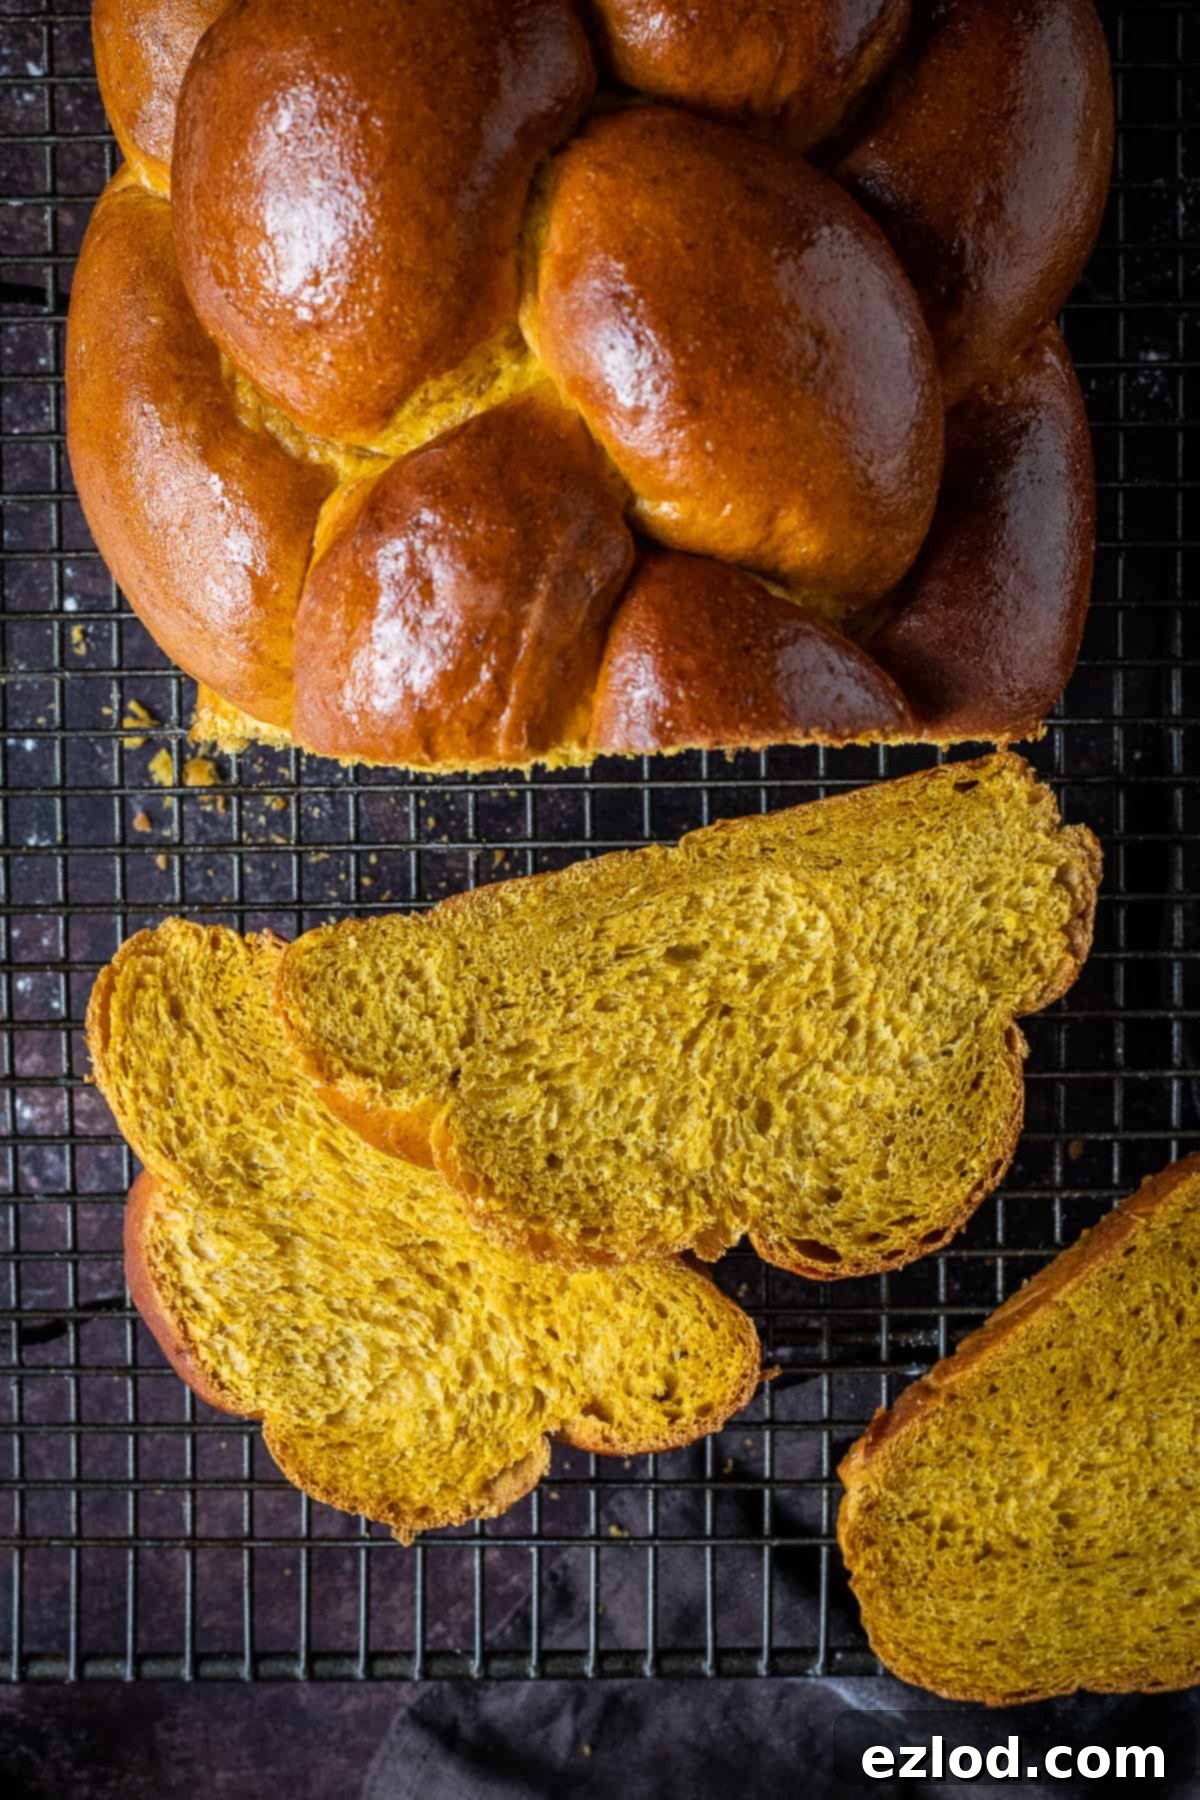
The infusion of real pumpkin puree and a carefully balanced pumpkin spice blend creates a uniquely fragrant bread. While rich in flavor, it’s not overly sweet, making it incredibly versatile. Enjoy it alongside your favorite savory meals, or toast slices and slather them with jam for an unforgettable breakfast. Trust me, it makes the most amazing toast!
Despite its impressive appearance, don’t be intimidated by the idea of making challah. This recipe is surprisingly straightforward and very approachable for bakers of all skill levels. While it does require some time for rising, most of this is hands-off, allowing you to go about your day while the dough works its magic. The effort you put in will be undeniably worth it for the incredible results.
What Is Challah Bread? A Vegan Perspective
Challah is a traditional Jewish braided bread, deeply rooted in history and culture. It is customarily baked to celebrate the Sabbath (Shabbat) and various Jewish holidays, serving as a symbol of blessings and joy. Traditionally, challah is an enriched bread, made with eggs and oil, giving it a rich texture and golden color. It is most often recognized by its distinctive, often elaborate, braided shape.
While the egg-enriched version is perhaps the most widely known, particularly in the United States, it’s important to note that “water challah” is also a traditional form of this bread. Water challah, as its name suggests, is made without eggs. This makes it naturally amenable to a vegan adaptation, as traditional challah generally does not contain dairy products. However, even water challah is often glazed with egg wash before baking, a step that needs a vegan alternative for a fully plant-based loaf.
This particular recipe for vegan pumpkin challah is a fantastic example of a water challah. By omitting eggs entirely, there’s no need to fuss with complicated egg replacers in the dough itself. The result is a beautifully soft, fluffy, and flavorful bread with a subtle sweetness, making it a wonderful addition to any meal. The pumpkin puree not only adds a lovely autumn flavor but also helps to achieve a rich, golden crumb without the use of eggs.
As the author, I wish to acknowledge that I am not Jewish, and my exploration of challah is from a culinary perspective rather than a religious or cultural one. However, I have developed this recipe with respect for the tradition and a passion for creating delicious, inclusive baked goods. I truly believe (and hope!) that this recipe captures the essence of what makes challah so beloved. In my home, it has certainly become a regular bake, eagerly devoured by everyone who tries it.
Crafting Your Vegan Pumpkin Challah Bread: A Step-by-Step Guide
(For a detailed list of ingredients and full instructions, please refer to the recipe card located below this article.)
One of the beauties of this vegan pumpkin challah recipe is its flexibility. You can choose to bake it all in a single day if you start early in the morning, or you can opt for a more relaxed two-day process, allowing for an overnight rise in the refrigerator which can also enhance the bread’s flavor profile.
Preparing the Dough
Begin by combining your dry ingredients. In a large mixing bowl, or the bowl of a stand mixer fitted with a dough hook attachment, measure out your white bread flour or plain all-purpose flour. Create a small well on one side for the fast-action yeast, and on the opposite side, add the pumpkin spice blend and salt. This separation is key to prevent the salt from directly inhibiting the yeast before mixing. Give it a quick stir to ensure everything is evenly distributed.
Next, introduce the wet ingredients. Add the pumpkin puree, maple syrup, and oil to the dry mixture. Pour in about half of the specified water quantity and start to stir everything together, either with a sturdy spoon or by engaging your stand mixer on a low speed. Gradually add the remaining water, only as needed, until a shaggy, cohesive dough begins to form. You might not need all the water, or you might need a tiny bit more – dough consistency can vary slightly depending on humidity and the flour used.
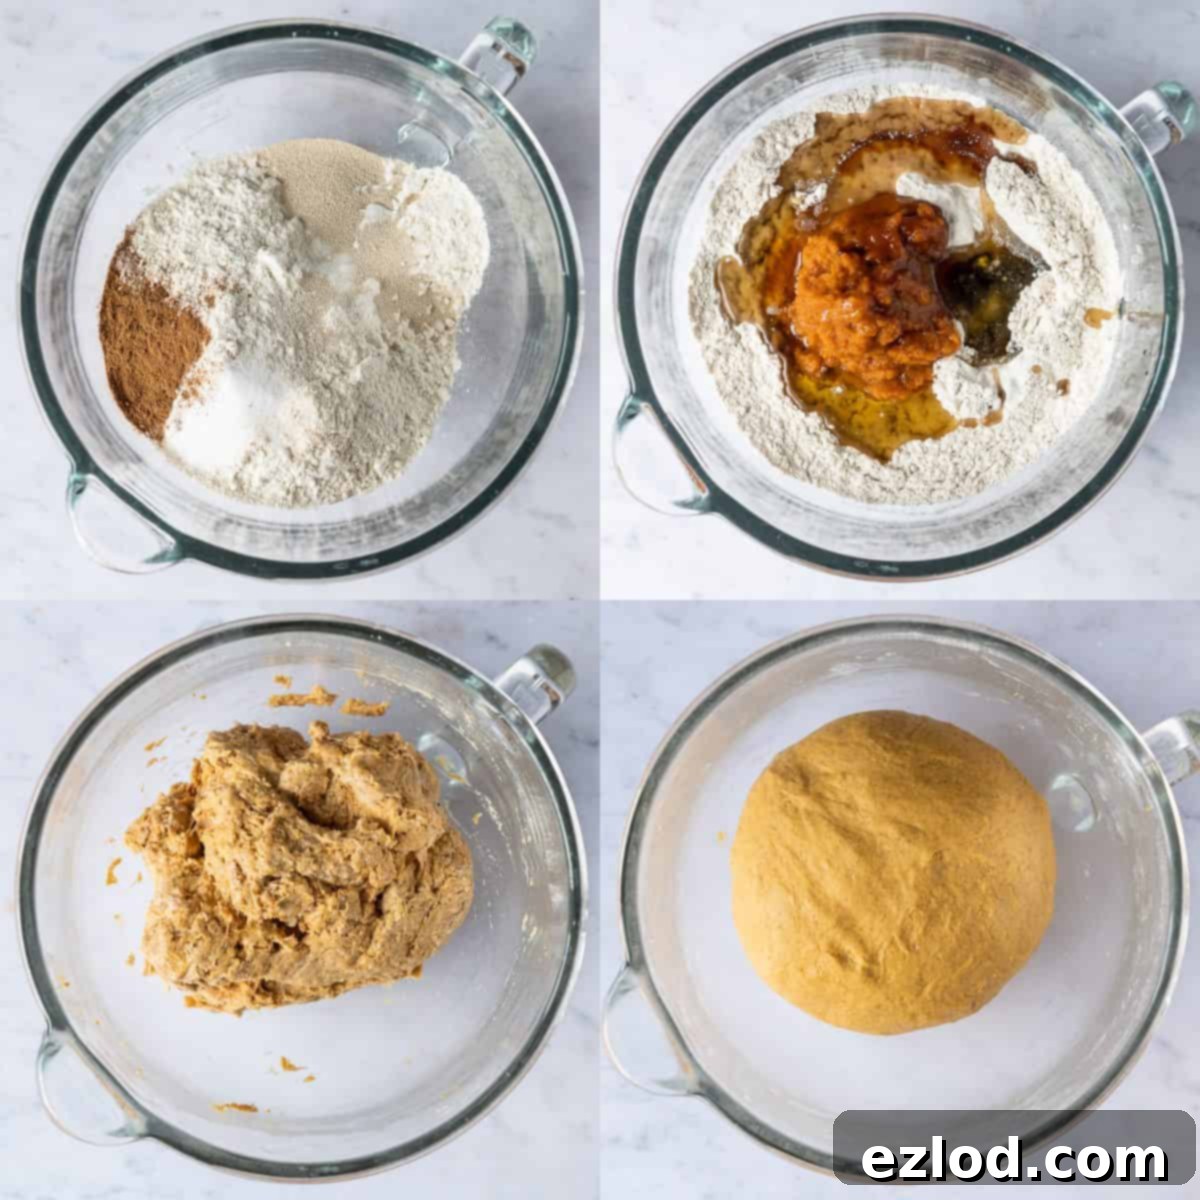
Now comes the kneading process. If you’re kneading by hand, transfer the dough to a clean, unfloured surface. Knead for approximately 10 minutes. For those using a stand mixer, let it knead for about 5 minutes. While a stand mixer is often my go-to for bread dough, I find kneading challah by hand offers a more tactile experience, allowing me to truly feel when the dough reaches its ideal texture. This personal touch ensures the best results for that signature challah softness.
After sufficient kneading, the dough should transform into a silky smooth, supple, and elastic ball. It should pull away cleanly from your worktop or the sides of the mixer bowl. When touched, it should feel slightly tacky but not sticky. If you find your dough is excessively sticky, incorporate more flour, one spoonful at a time, until you achieve the perfect, manageable consistency.
The First Rise (Bulk Fermentation)
Lightly oil a large bowl and place your kneaded dough inside. Cover the bowl securely – a shower cap works wonderfully for this, creating a snug, humid environment. At this stage, you have two options for the first rise:
- Same-Day Baking: Allow the dough to rise in a warm spot in your kitchen until it has visibly doubled in size. This typically takes between 1.5 to 2.5 hours, depending on the ambient temperature.
- Overnight Rise (Enhanced Flavor): For a deeper flavor development and a more convenient baking schedule, let the dough sit at room temperature for about 30 minutes, then transfer the covered bowl to the refrigerator to continue rising slowly overnight. The colder temperature retards the yeast activity, leading to a longer, more complex fermentation.
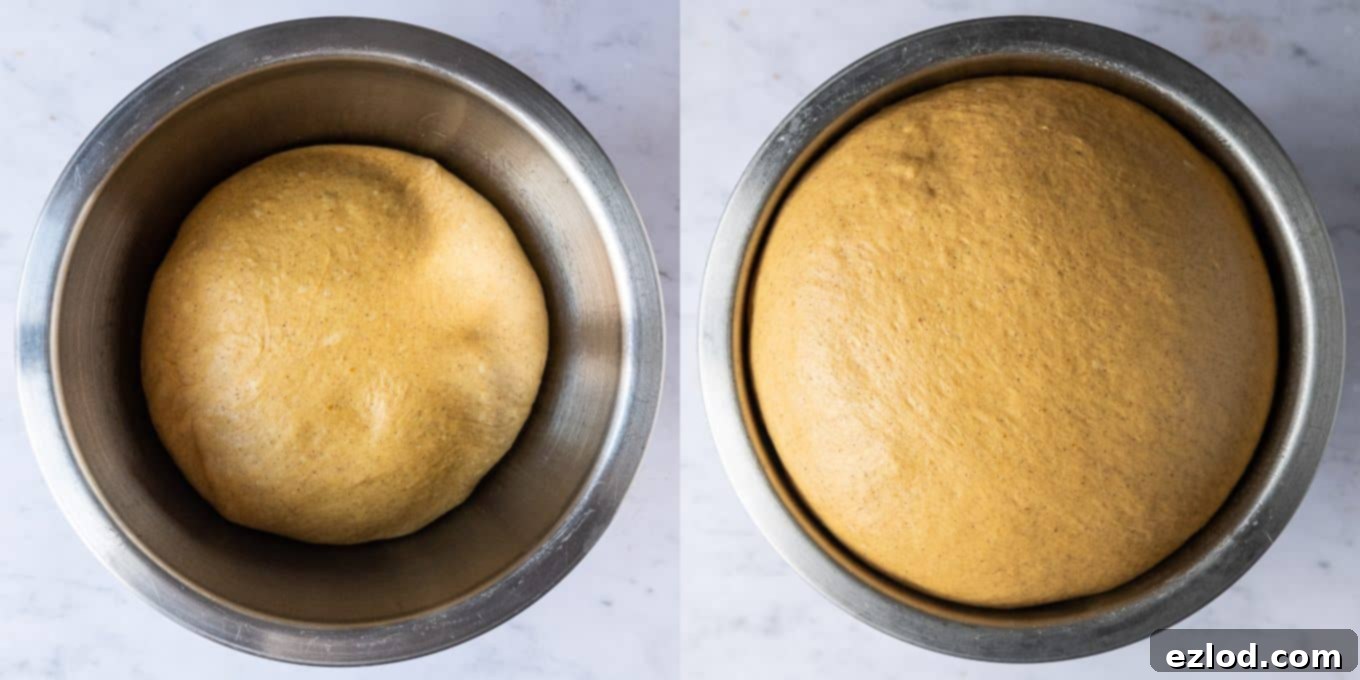
Once the dough has doubled in size (either after the warm rise or the following morning after the cold rise), gently “punch it down” to release the accumulated gases. This deflates the dough and prepares it for shaping.
Mastering the Challah Braid: A Six-Strand Design
One of the most captivating aspects of challah is its beautiful braided form. There’s an incredible variety of challah shapes, from simple three-strand braids to intricate seven, eight, or even nine-strand designs, as well as various round loaves and individual rolls. If you’re keen to explore different styles, YouTube is a fantastic resource with countless tutorials. However, for a truly impressive yet achievable result, I highly recommend following my instructions below for a classic and elegant six-strand challah braid.
This recipe is designed to yield one generously sized challah loaf, or you can divide the dough to create two smaller, equally charming loaves. The choice is yours!
To begin shaping your six-strand challah, first divide the dough into six equal pieces. Precision is key here for a uniform braid, so I strongly advise using a kitchen scale to ensure each piece weighs exactly the same. If you plan on making two smaller loaves, start by dividing the entire dough in half, and then proceed to divide each half into six equal portions.
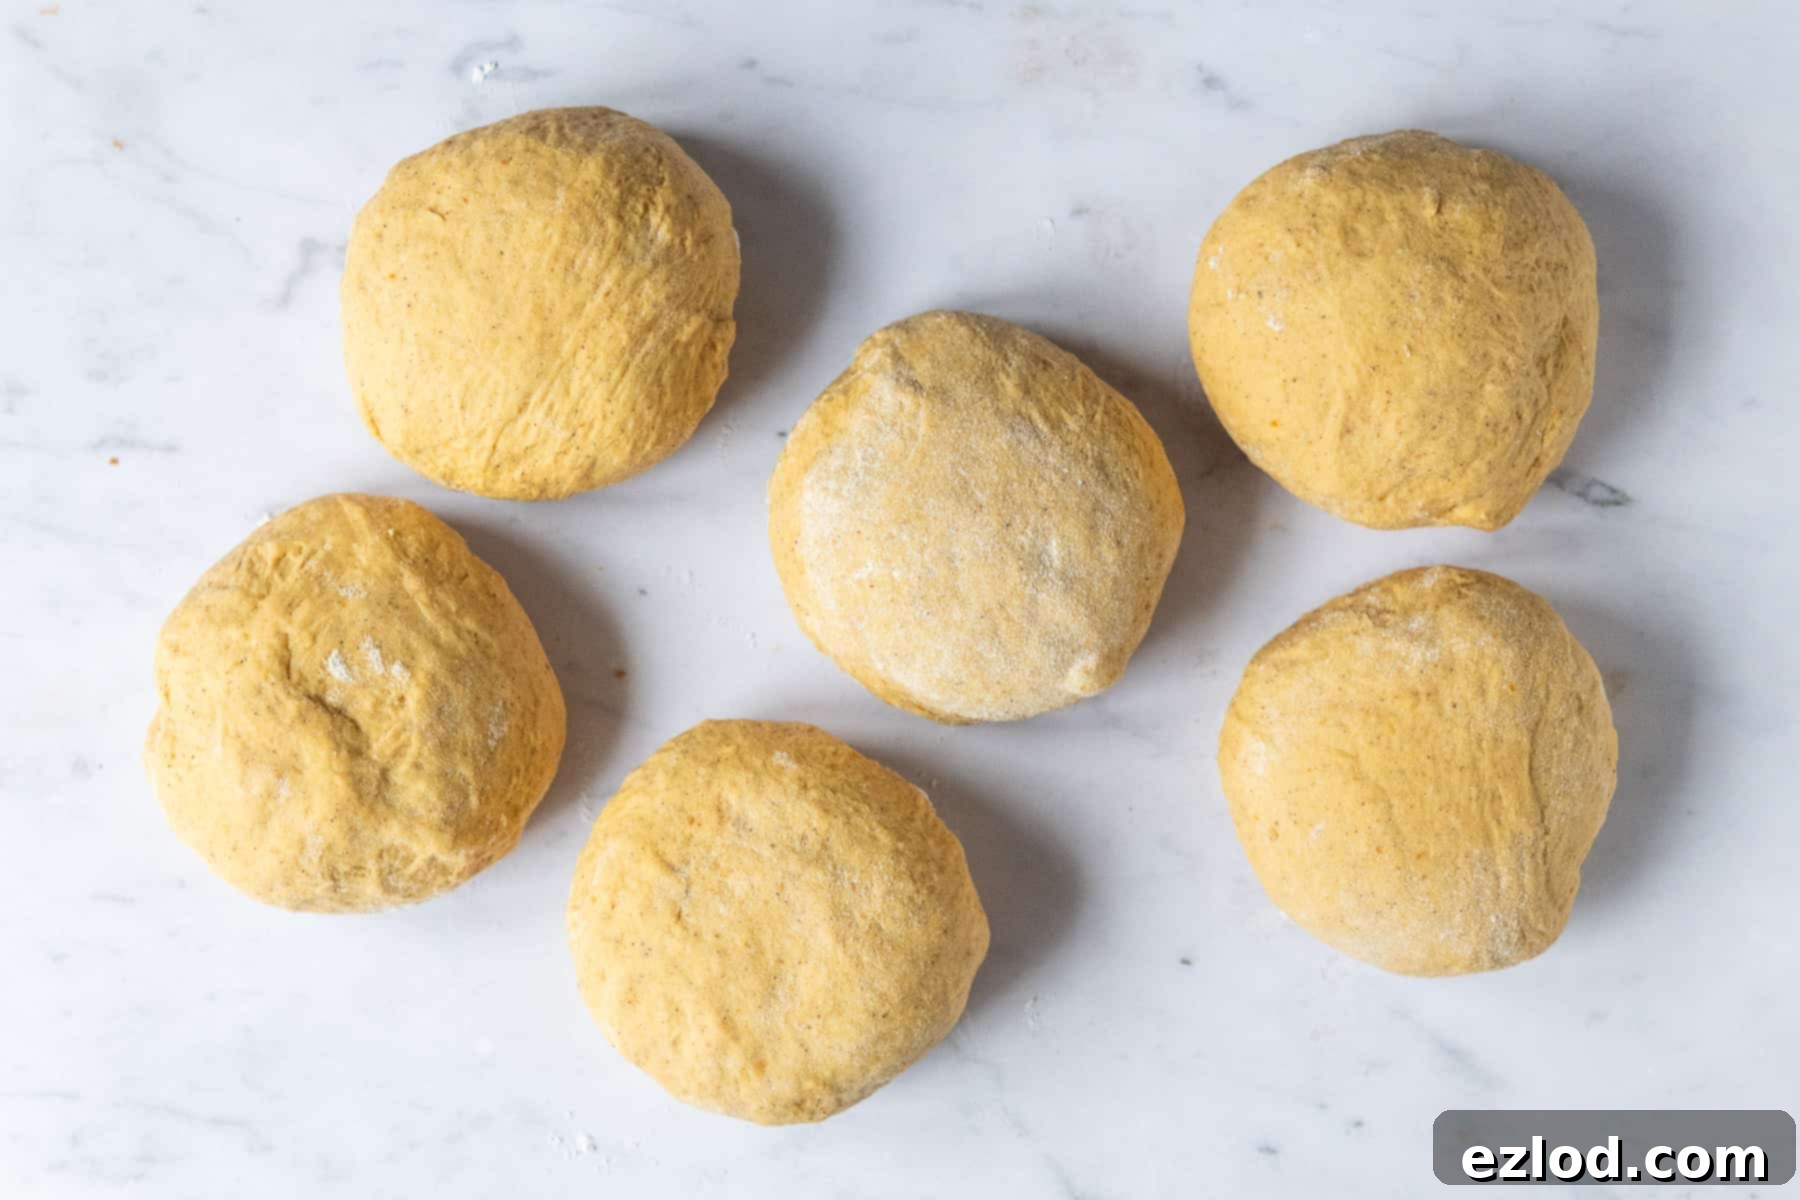
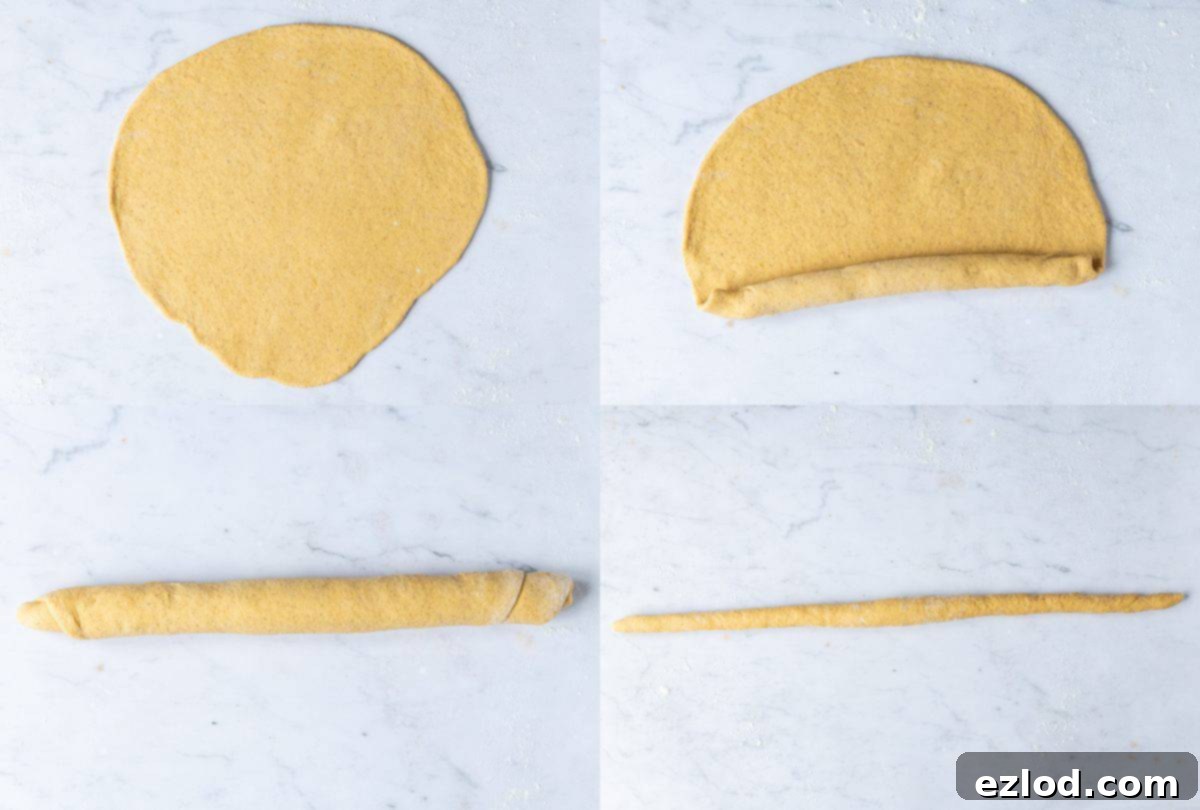
Take one of your dough portions and, on a lightly oiled or unfloured surface, roll it out into a relatively thin square or rectangle. Don’t worry about perfect geometric precision. If you find the dough is sticking, a very light application of oil on your work surface and rolling pin will help tremendously.
Starting from the shortest side of the rolled-out dough, tightly roll it up into a sausage shape. Once you have a tight sausage, use your hands to gently roll it back and forth, starting from the middle and working your way outwards. This action will lengthen the dough into a long, thin strand. Apply slightly more pressure at the ends to taper them, aiming for pointy ends and a slightly thicker middle section in each strand.
Repeat this process with the remaining five portions of dough, ensuring that all six strands are roughly the same length. Consistency in strand length is crucial for a symmetrical and beautiful braid.
Now, arrange your six perfectly shaped strands parallel to each other on a lightly floured surface. At one end, gather the tips of all six strands together and firmly pinch them to create a secure starting point for your braid.
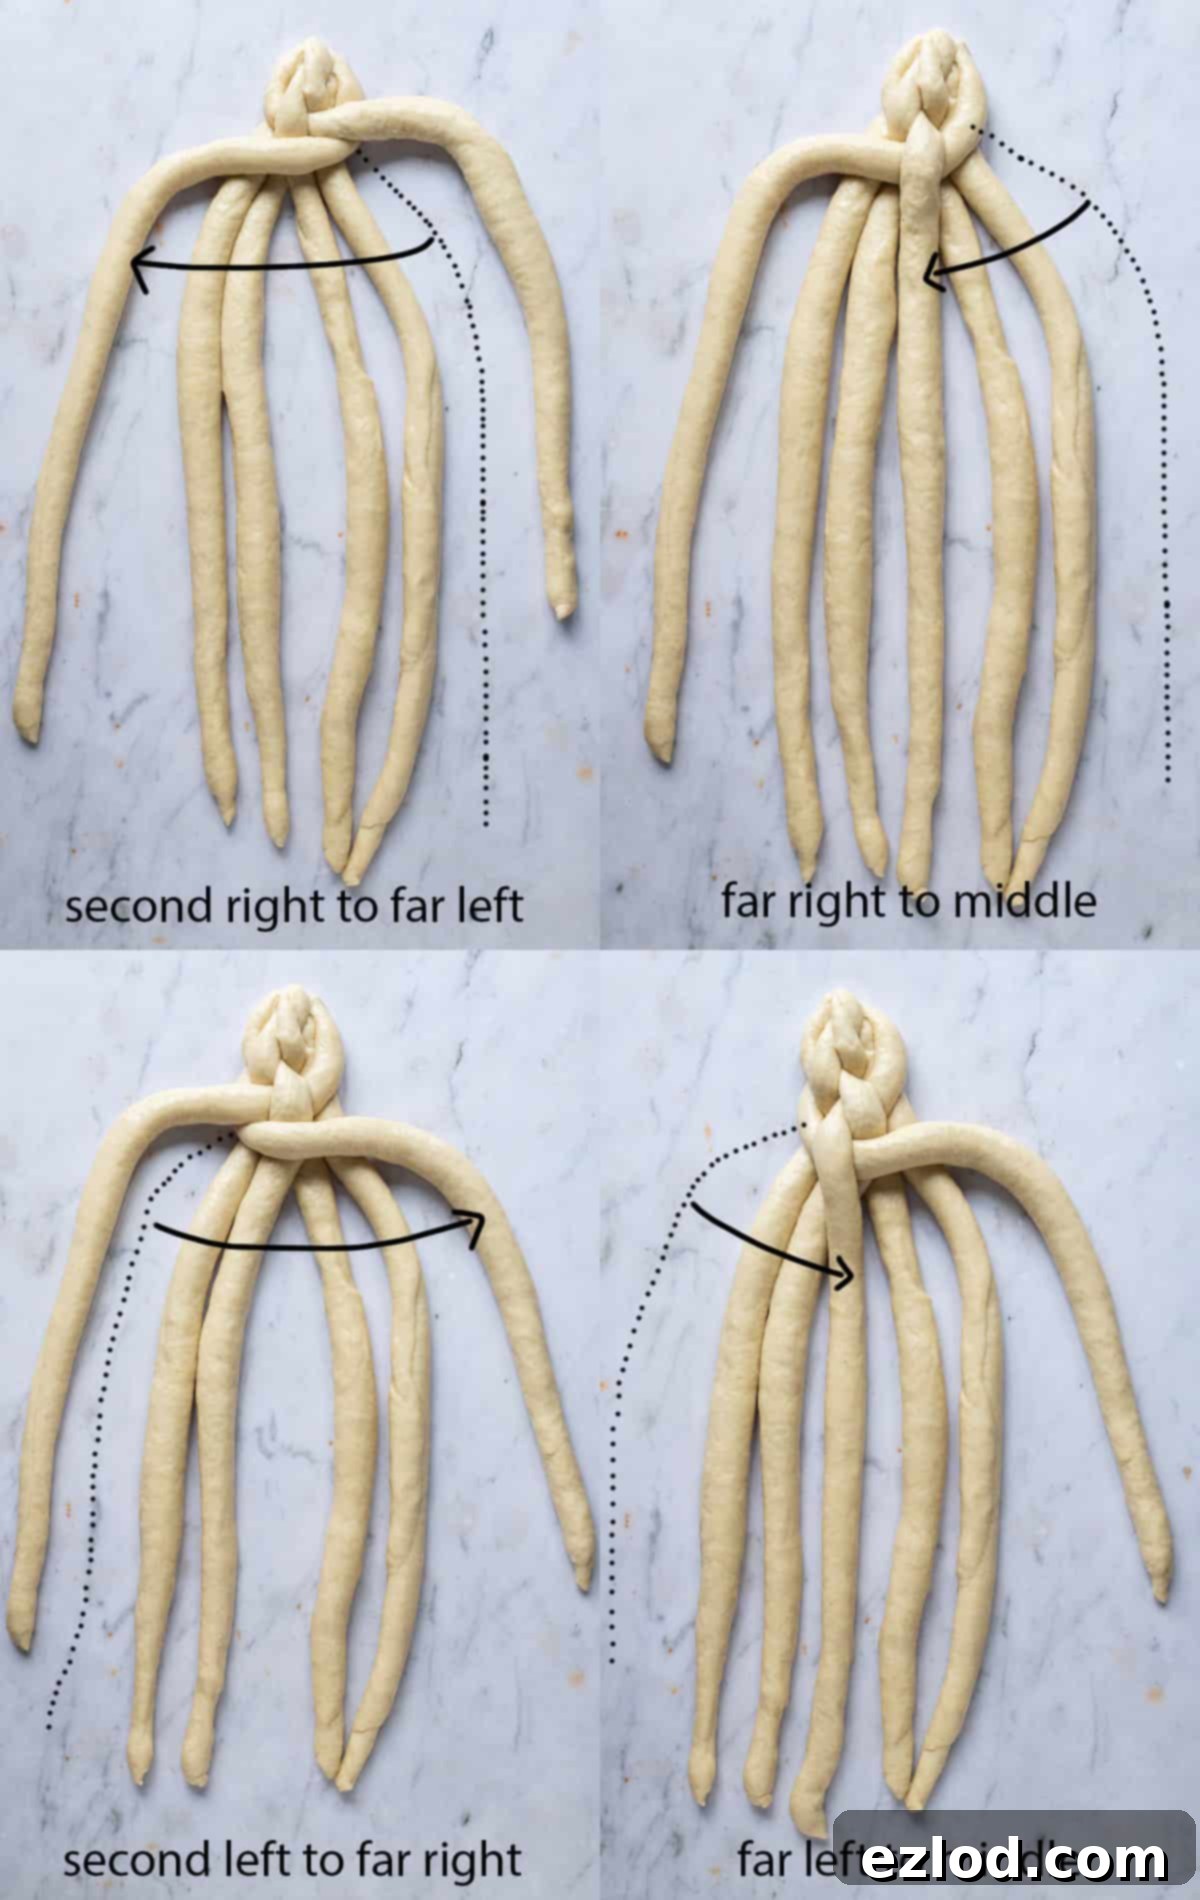
The six-strand braid, while looking complex, relies on just four repeating moves. Let’s break it down:
- Take the second strand from the right and move it all the way over to the far left position.
- Next, take the strand that is now on the far right and move it over two strands towards the middle. (You might need to gently spread the strands apart slightly to create space for this move. Remember, “the middle” refers to the center of the four strands, excluding the one you just moved to the far left).
- Then, take the second strand from the left and move it over to the far right.
- Finally, take the strand that is now on the far left and move it over two strands towards the middle.
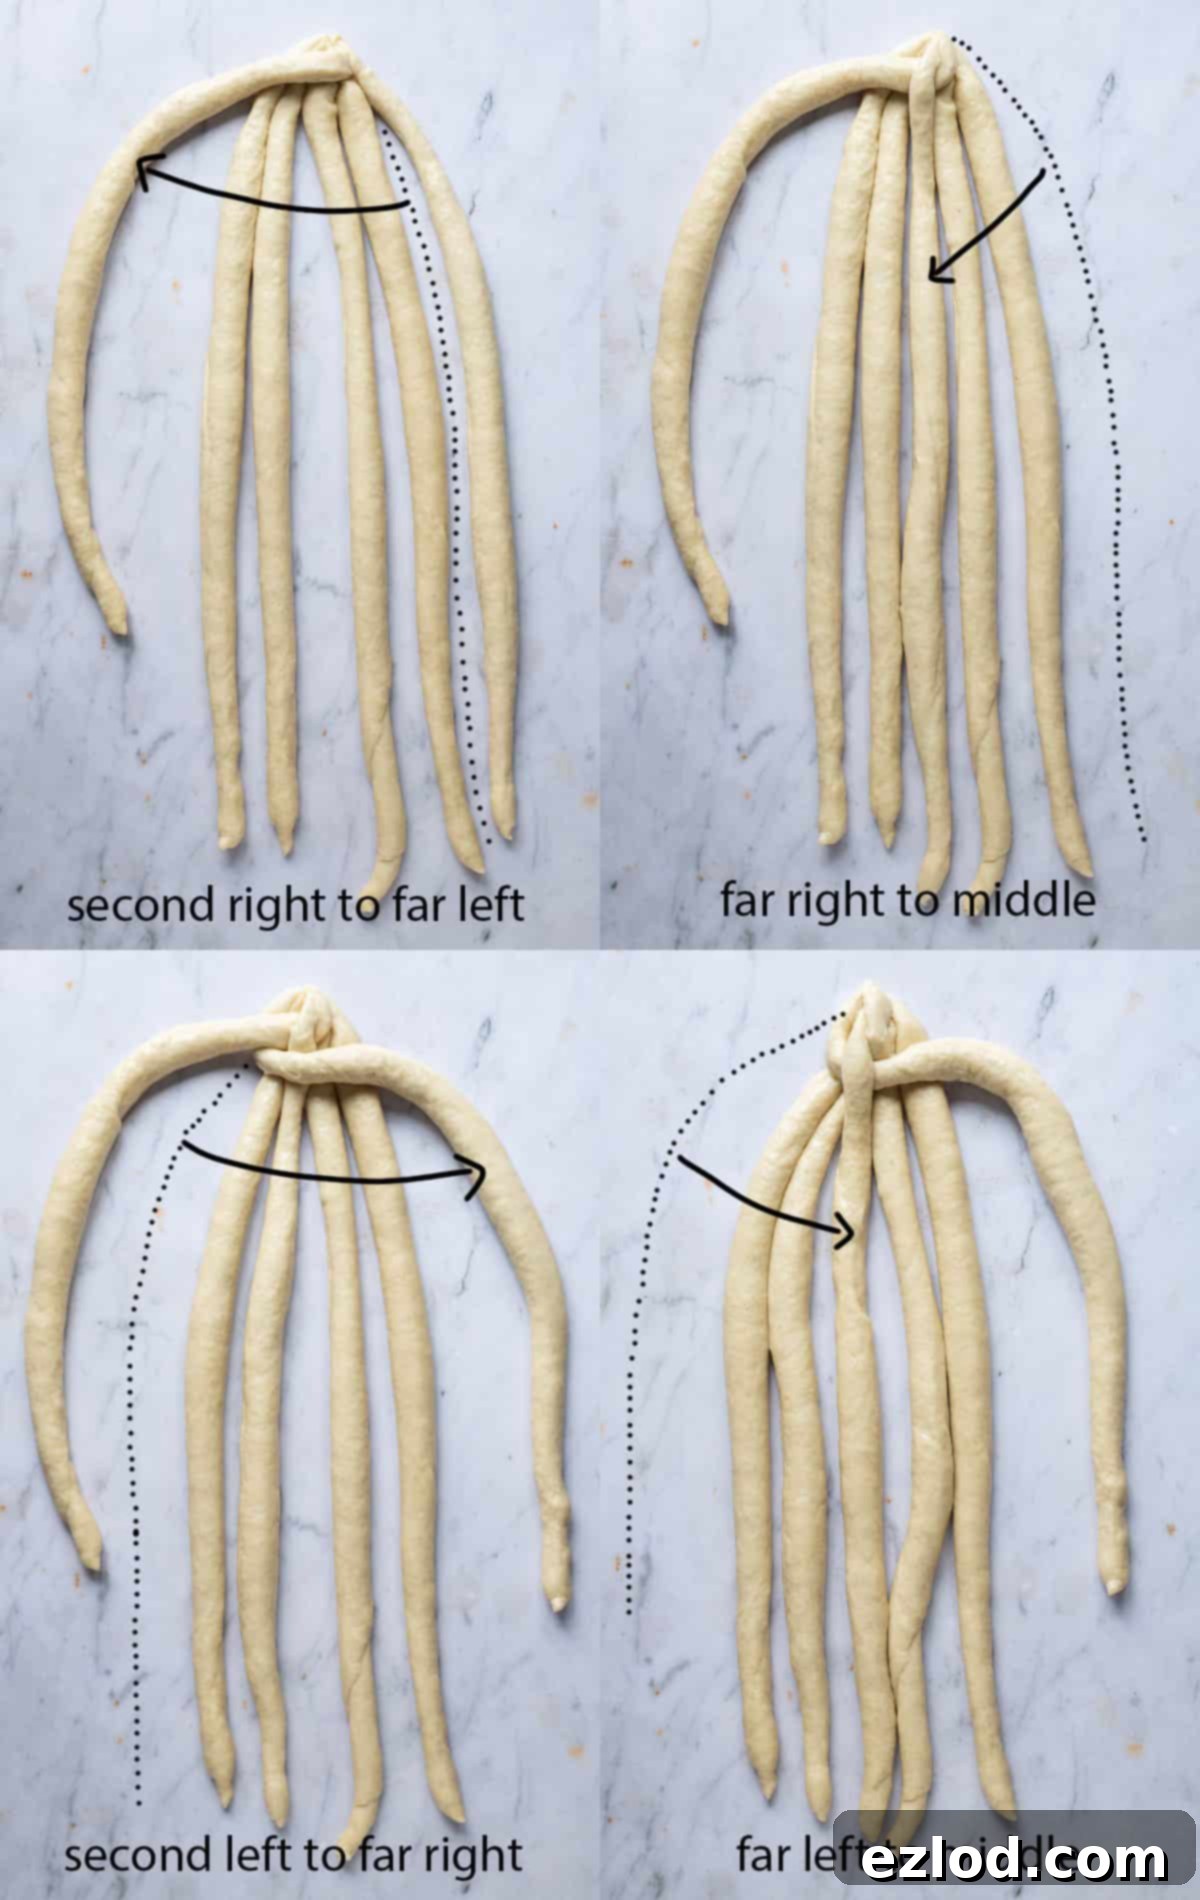
Continue repeating these four moves in sequence: second right to far left, far right to middle, second left to far right, far left to middle. Keep going until you have braided the entire length of the loaf. Once you reach the end, firmly pinch the remaining tips together and tuck any loose or stray bits of dough neatly underneath the loaf to create a clean finish.
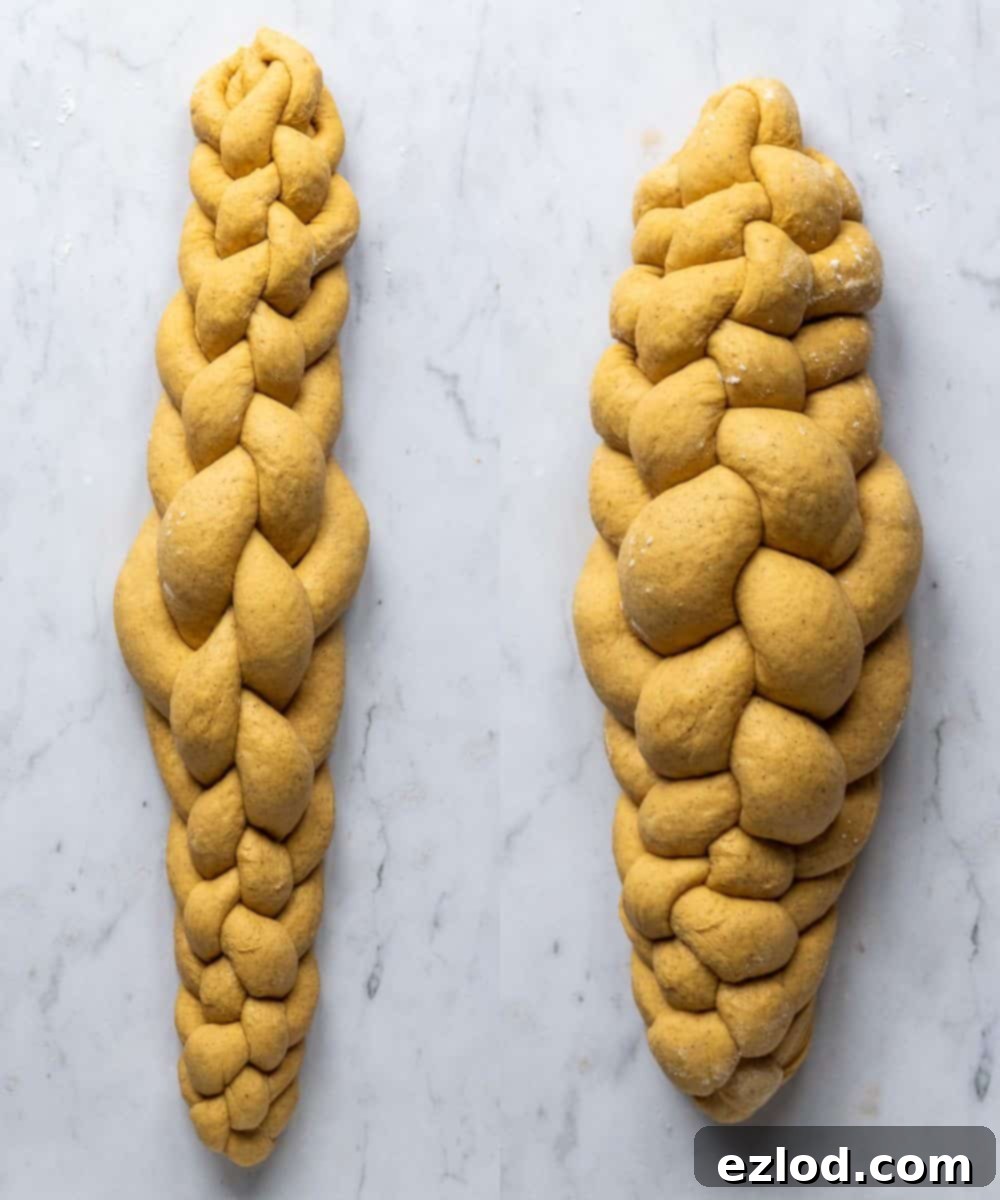
If your braided loaf appears too long and thin for your preference, you can gently use your hands to lift and compact it slightly. This will shorten and fatten the loaf, giving it a more robust and appealing shape.
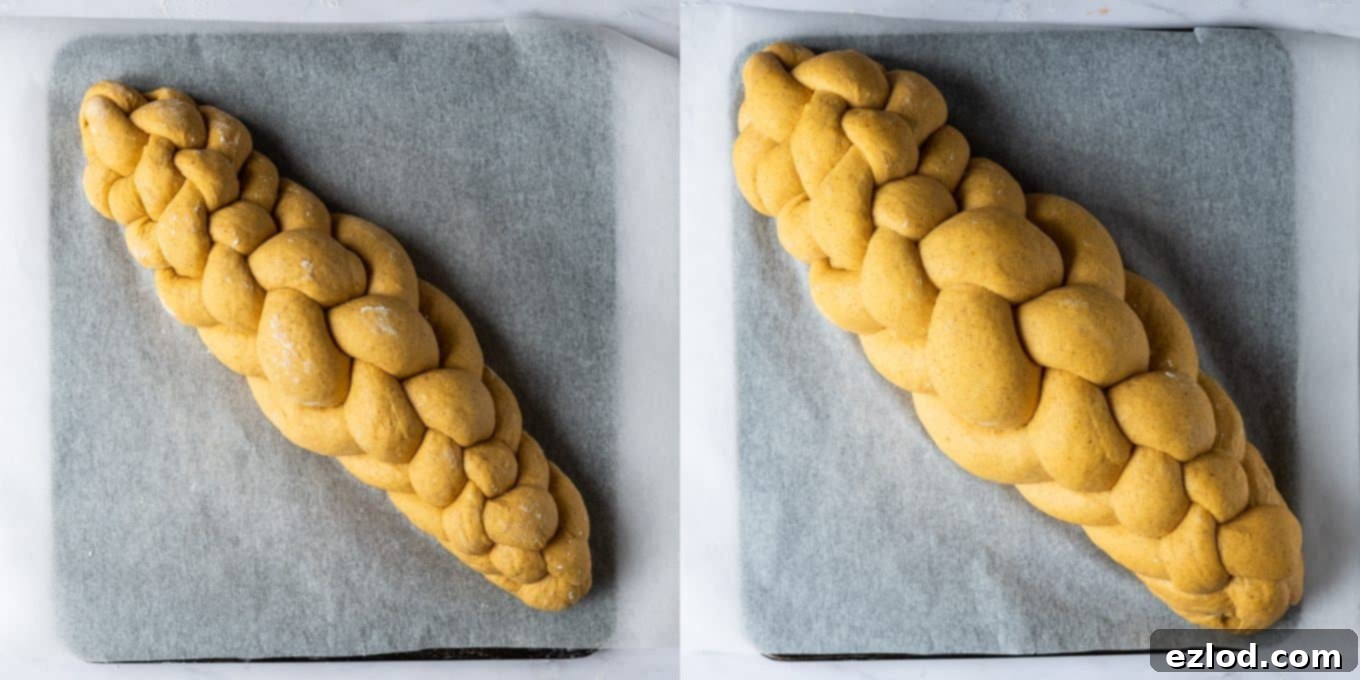
Carefully transfer your beautifully braided loaf (or loaves, if making two) onto a baking sheet that has been lined with baking parchment. This prevents sticking and ensures easy transfer after baking.
The Second Rise (Proofing)
Loosely cover the challah loaf(ves) on the baking sheet. Place them in a warm, draft-free spot to undergo their second rise, also known as proofing. Allow them to rise until they have nearly doubled in size. This can take anywhere from 1 to 3.5 hours, with the exact time largely dependent on the warmth of your environment.
To determine if your challah is adequately proofed and ready for the oven, perform a gentle “poke test.” Lightly press the dough with a floured finger. If it springs back slowly most of the way but leaves a slight indentation, it’s perfectly proofed. If it springs back quickly and completely fills the indentation, it needs more time to rise. Conversely, if the indentation remains without springing back at all, the dough may be over-proofed, which can lead to a less airy texture.
Baking and Glazing Your Challah
Once your challah is perfectly proofed, it’s time for the final touches before baking. Gently brush the entire surface of the loaf with the prepared maple glaze. This glaze will give your challah a beautiful golden sheen and a touch of sweetness.
Bake the challah for an initial 20 minutes. After this time, carefully remove it from the oven and brush it with a second layer of the maple glaze. This double glazing technique significantly enhances the shine and flavor. If you wish to add sesame or poppy seeds for extra texture and visual appeal, now is the ideal moment to sprinkle them on. Return the challah to the oven for another 15 minutes if you are baking one large loaf, or 10 minutes if you are baking two smaller loaves. The goal is a deep golden brown crust and a fully cooked interior.
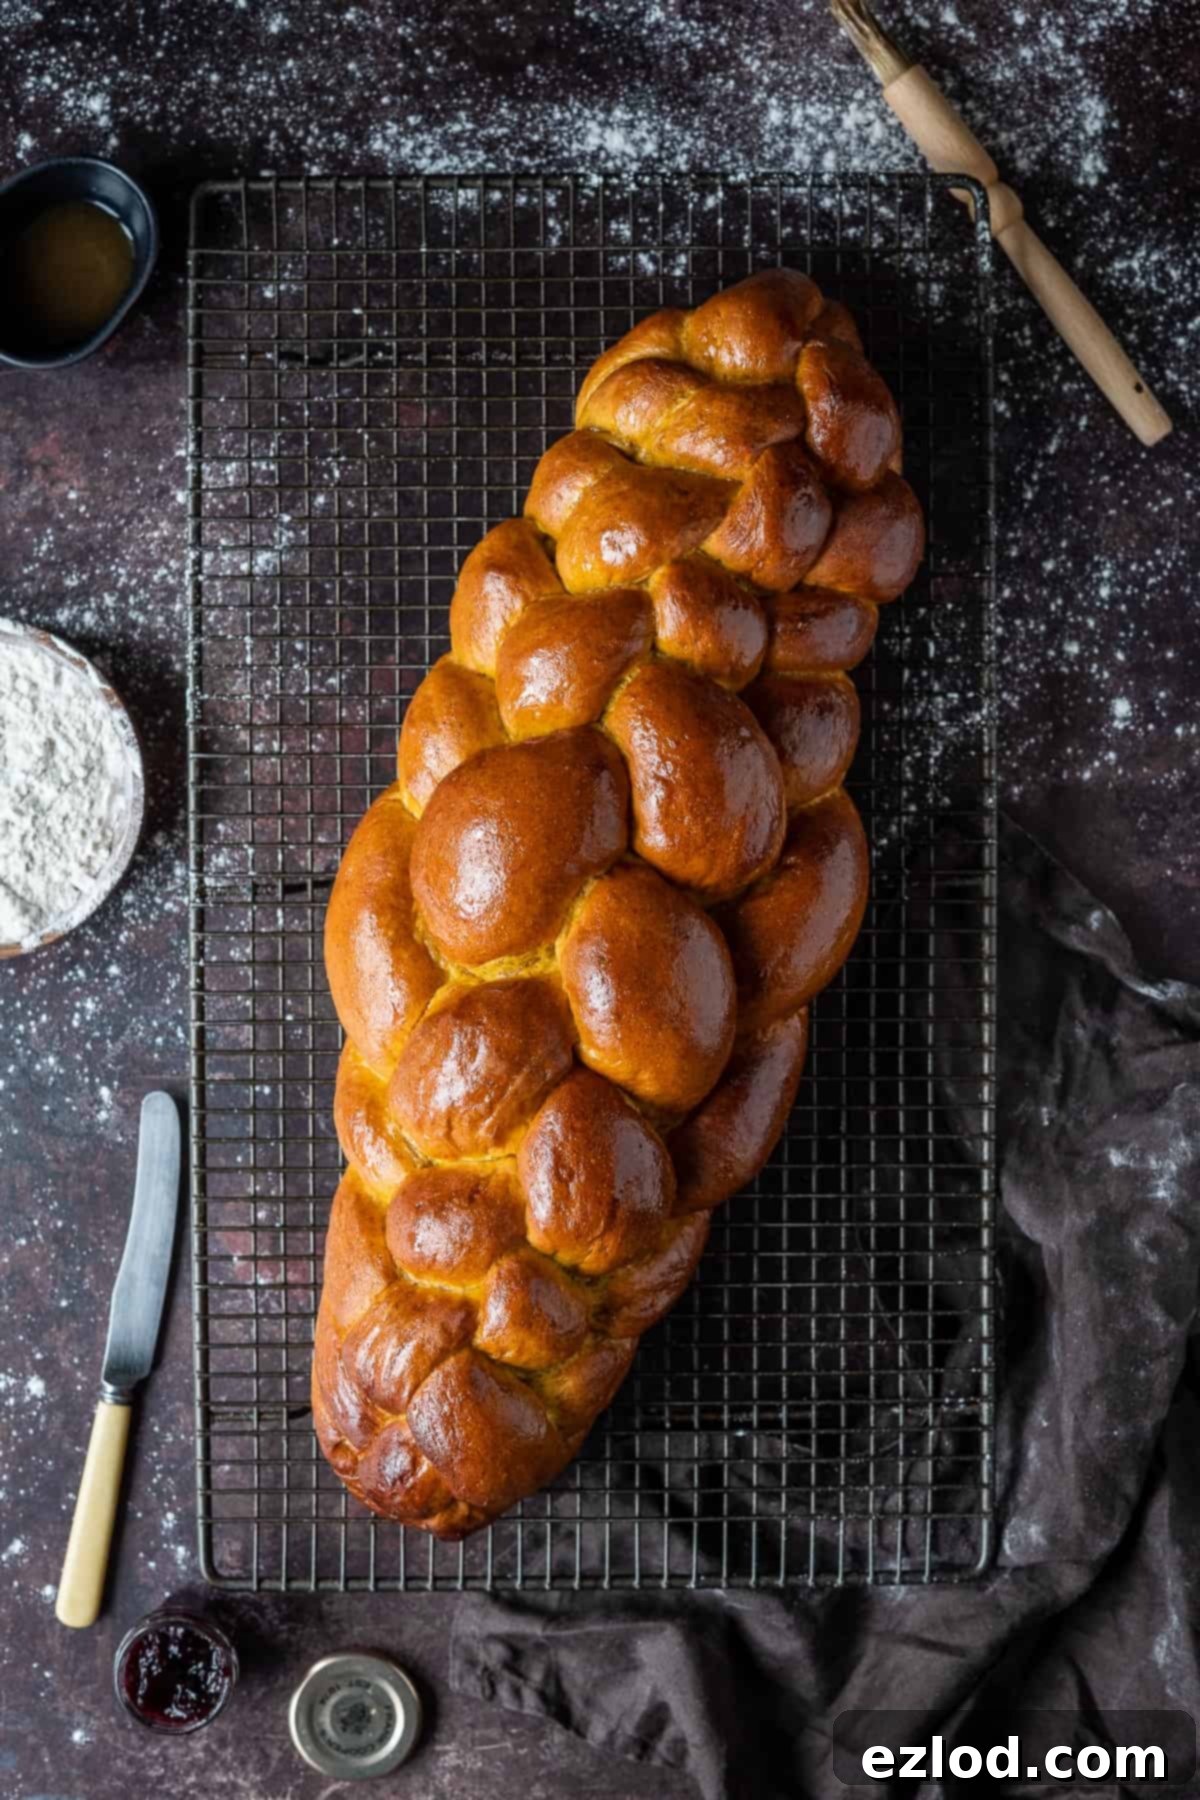
Top Tips for the Perfect Vegan Pumpkin Challah
- Precision is Key: For the most consistent and best results, I cannot stress enough the importance of using gram measurements with a digital kitchen scale rather than cup conversions. Cup measurements, especially for flour, can be inaccurate and lead to vastly different outcomes in baking.
- Choosing Your Oil: For this recipe, olive or sunflower oil typically work best, imparting a neutral or subtly pleasant flavor. Vegetable or canola oil are also excellent choices. I recommend avoiding coconut oil as it is solid at room temperature, which could potentially result in a denser texture in the finished bread.
- Flour Power: You have a choice between white bread flour or plain (all-purpose) flour. Bread flour, with its higher protein content, will give your vegan challah a slightly chewier, more structured texture. Plain flour will result in a softer crumb. Both are delicious, so feel free to use your preference or even a combination of the two.
- Pumpkin Puree Perfection: If you’re using canned pumpkin puree, always double-check the label to ensure it’s 100% pumpkin. Avoid pumpkin pie filling, which contains added sugars and spices that will alter the recipe’s balance.
- One or Two Loaves: The recipe quantities are designed to make one generous large challah, or you can easily divide the dough into two smaller loaves. This is entirely up to your preference for serving or freezing.
- Temperature Matters: Be aware that the rising time of your dough will be influenced by the ambient temperature. In warmer conditions, the dough will rise more quickly than in colder environments. Adjust your rising times accordingly, always relying on visual cues and the “poke test.”
- Overnight Rise for Flavor: As mentioned in the instructions, allowing the dough to have its first rise overnight in the refrigerator is a fantastic option. This slow fermentation not only makes the baking process more manageable by spreading out the workload but also contributes to a more complex, deeper flavor in the finished bread.
- The Perfect Glaze: My preferred glaze is a simple mixture of maple syrup and a splash of water or non-dairy milk. Applying this glaze twice – once before baking and again after 20 minutes in the oven – ensures a beautiful, lustrous shine. Be aware that this maple glaze can become slightly sticky at room temperature after several hours. If stickiness is a concern, you can opt to brush the bread with just non-dairy milk or aquafaba for a less shiny but equally delicious crust.
- Internal Doneness: The most reliable way to confirm if a loaf of bread is fully cooked in the center is to use a probe thermometer. Oven temperatures can vary significantly, making a universal baking time difficult. Your vegan pumpkin challah is perfectly baked when the internal temperature reaches 94°C (201°F). If you don’t have a thermometer, tap the bottom of the loaf – it should sound hollow.
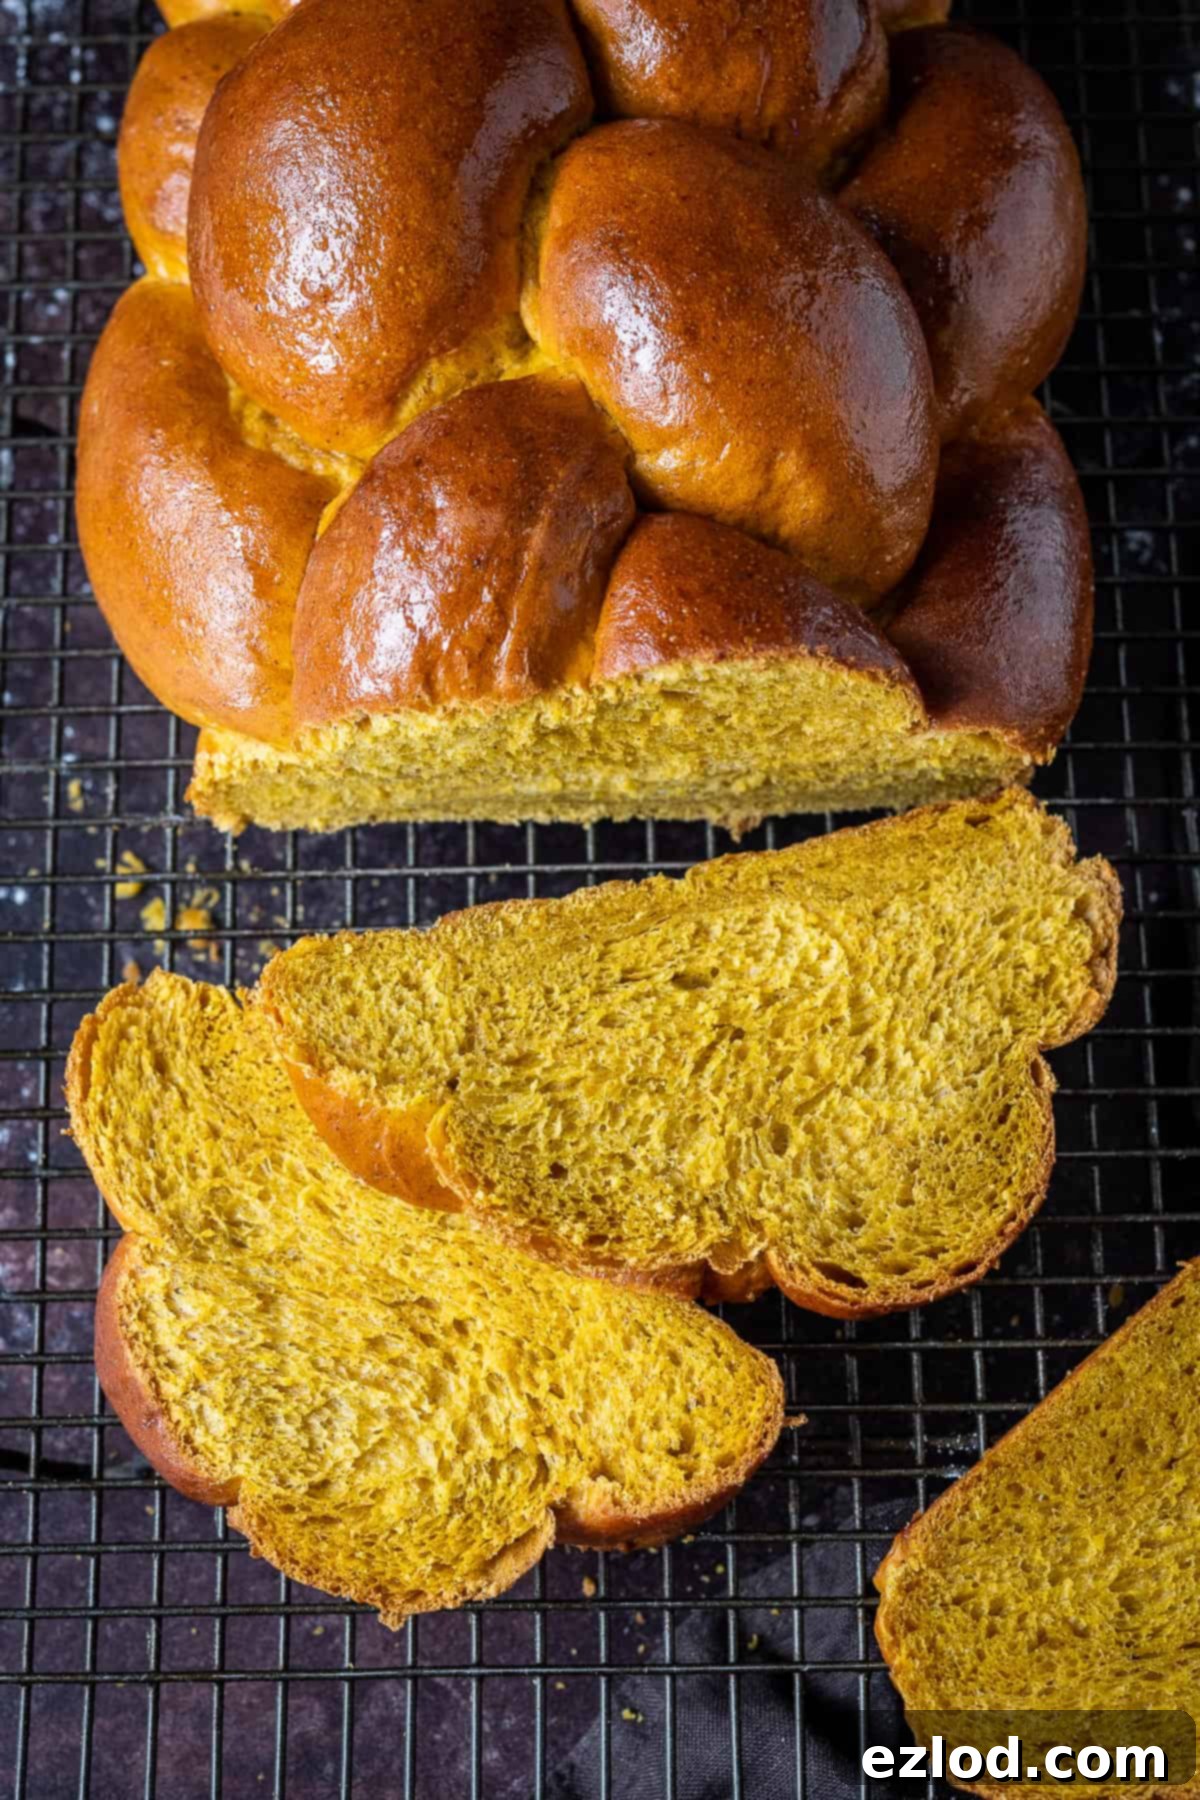
Understanding Yeast: Fast-Action vs. Active Dried
I consistently use fast-action yeast (also known as instant or easy yeast) in my recipes. The great advantage of this type of yeast is that it doesn’t require prior activation. You can simply add it directly into your dry flour mixture, saving a step and some time.
If your pantry only contains active dried yeast, fear not! You can absolutely still use it, but you’ll need to activate it first. To do this, mix the active dried yeast with a small portion of the warm water specified in the recipe and a dash of the maple syrup. Let this mixture sit for 10-20 minutes until you see a frothy, bubbly layer forming on the surface. This indicates the yeast is active and ready to work. Once activated, proceed with the rest of the recipe as written, incorporating this bubbly mixture where the water and yeast are usually added.
Homemade Pumpkin Puree: Simple & Fresh
While I often use canned pumpkin puree (which can sometimes be tricky to find outside of specific “American sections” in larger supermarkets), making your own fresh pumpkin puree is incredibly easy and yields fantastic results. It ensures pure pumpkin flavor without any additives.
To make your own, you’ll need an eating pumpkin (steer clear of the large carving pumpkins, which tend to be watery and stringy) or a butternut squash. Halve the pumpkin/squash, scoop out the seeds and stringy bits, and then roast it until the flesh is fork-tender. This typically means roasting at around 200°C (400°F/Gas Mark 6). The exact roasting time will vary significantly based on the size and density of your squash, so simply cook until the flesh can be easily pierced with a fork. Once tender, scoop out the soft flesh and puree it in a food processor or blender until completely smooth. Avoid boiling the pumpkin, as this can introduce too much moisture, resulting in a watery puree that isn’t ideal for baking bread.
Crafting Your Own Pumpkin Pie Spice Blend
For those outside of the US, a pre-made pumpkin pie spice blend might not be a common pantry item. While “mixed spice” is often available in the UK, it has a different flavor profile than authentic pumpkin spice. The good news is that it’s wonderfully simple to create your own blend at home using common spices, ensuring that true autumnal flavor.
To make your own pumpkin pie spice, simply combine the following: 3 tablespoons ground cinnamon, 2 teaspoons ground ginger, 2 teaspoons ground nutmeg, 1 teaspoon ground cloves, and 1 teaspoon ground allspice. You can easily halve this recipe if you only need a smaller amount for a single baking project. Store any leftover homemade pumpkin pie spice in an airtight container, and it will keep its potency for ages, ready to enhance all your fall and festive baking endeavors.
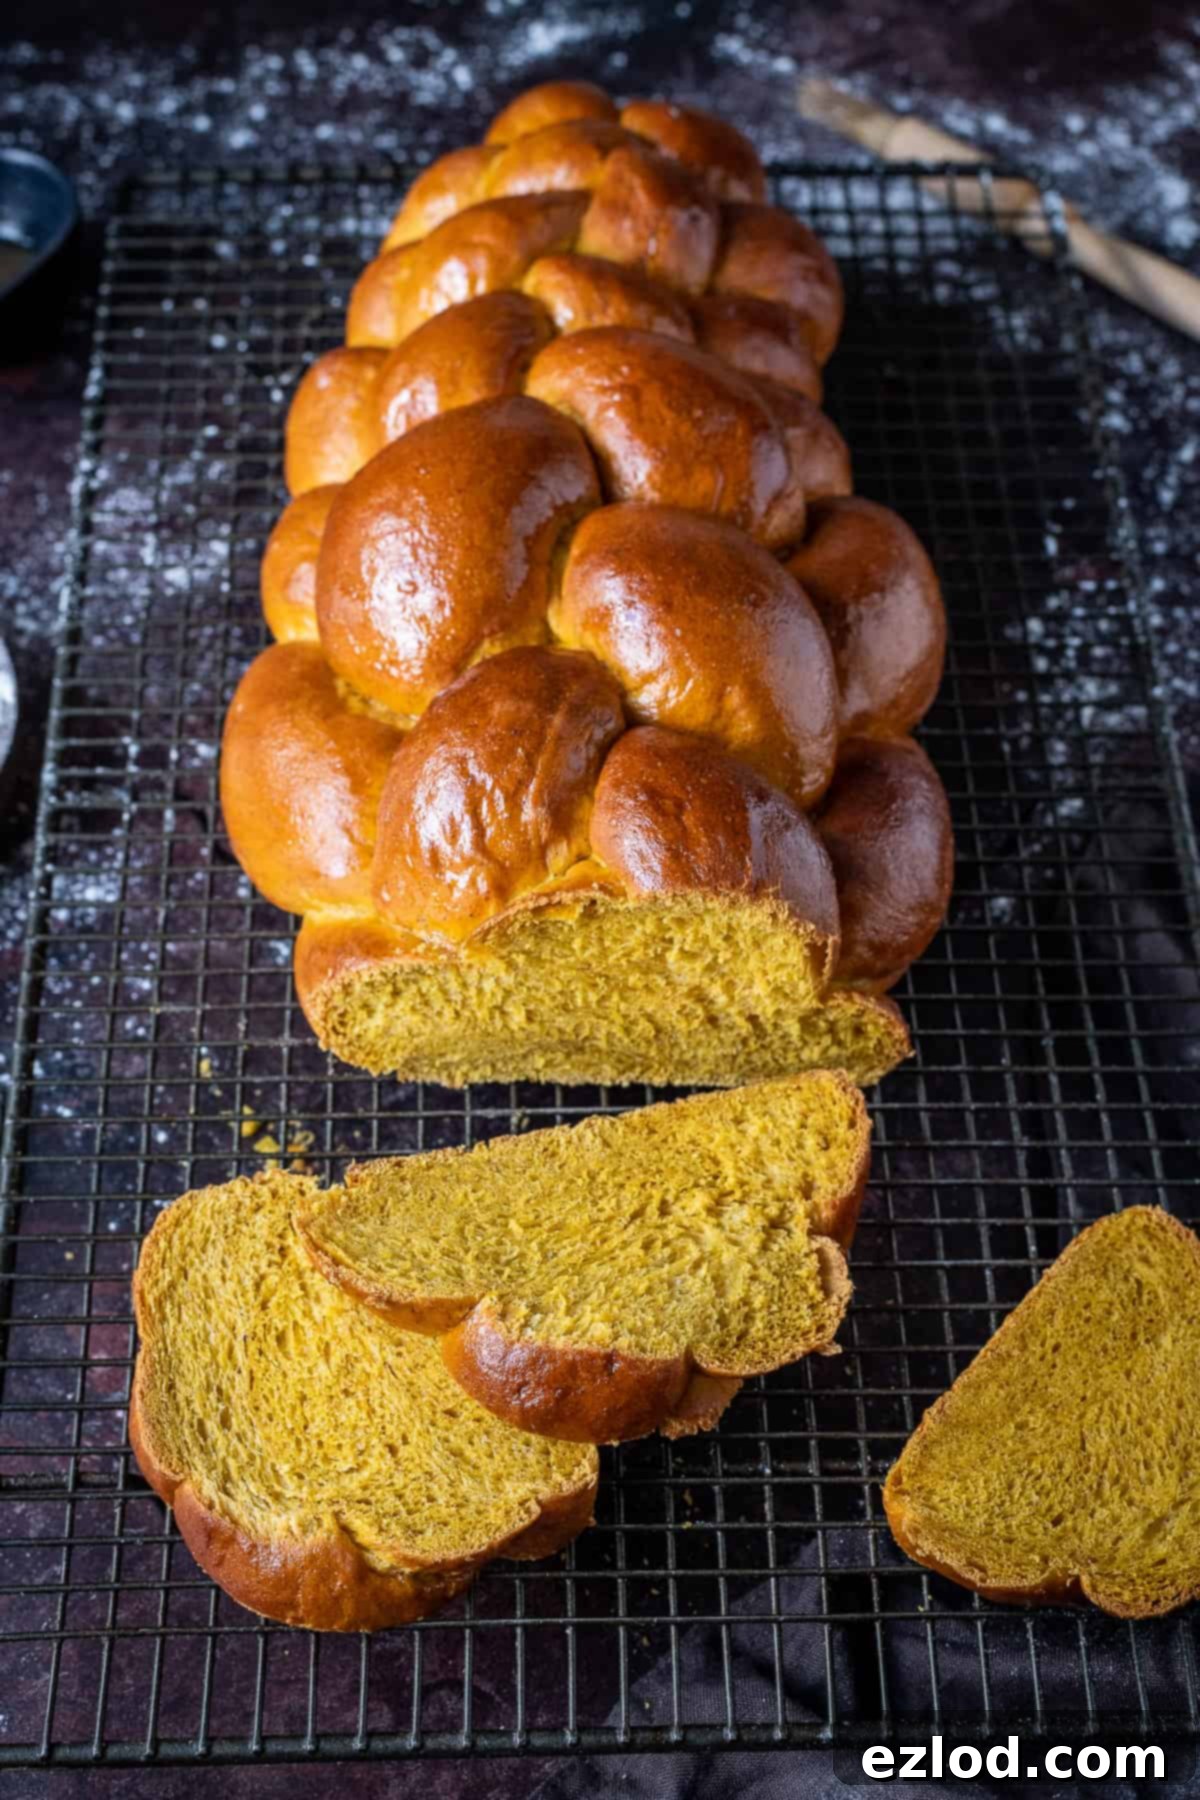
Storage Solutions for Your Vegan Pumpkin Challah
As with most freshly baked homemade bread, this vegan pumpkin challah is at its absolute peak of deliciousness on the day it’s baked. However, it remains wonderfully good the following day, and for 2-3 days after, any leftover slices transform into fantastic toast or French toast.
To maintain its freshness, store the challah in an airtight container or a dedicated bread bin at room temperature. It’s crucial not to store bread in the refrigerator, as the cold environment actually accelerates the staling process, making your beautiful challah dry out faster.
Can You Freeze Vegan Pumpkin Challah Bread? Absolutely!
Yes, this vegan pumpkin challah freezes exceptionally well, allowing you to enjoy homemade goodness whenever a craving strikes. You can freeze it either as a whole loaf or conveniently sliced. For optimal freshness, it’s best to freeze the challah on the same day it’s baked, ensuring it has cooled completely first. Place it securely in a freezer-safe ziplock bag, pressing out as much air as possible, and freeze for up to three months.
When you’re ready to enjoy, you can toast individual slices directly from the freezer. If you’ve frozen an entire loaf, allow it to defrost at room temperature for several hours. Once thawed, you can refresh it in a low oven (around 150°C/300°F) for 5-10 minutes. This will restore its soft crumb and slightly crisp crust, bringing it back to its former glory. I often opt to bake this recipe as two smaller loaves; one to enjoy immediately and the other to freeze for a future treat!
More Irresistible Vegan Bread Recipes
If you’ve enjoyed baking this vegan pumpkin challah, you might be interested in exploring other delicious plant-based bread recipes from my collection:
- Vegan white sandwich bread
- Vegan naan bread
- Vegan challah bread (the original, un-pumpkin version!)
- Vegan Hokkaido milk bread
- Vegan beer pretzels
- Sea salt and rosemary focaccia
- Easy vegan flatbreads
- Vegan cornbread
- Vegan brioche
- Pumpkin bread rolls
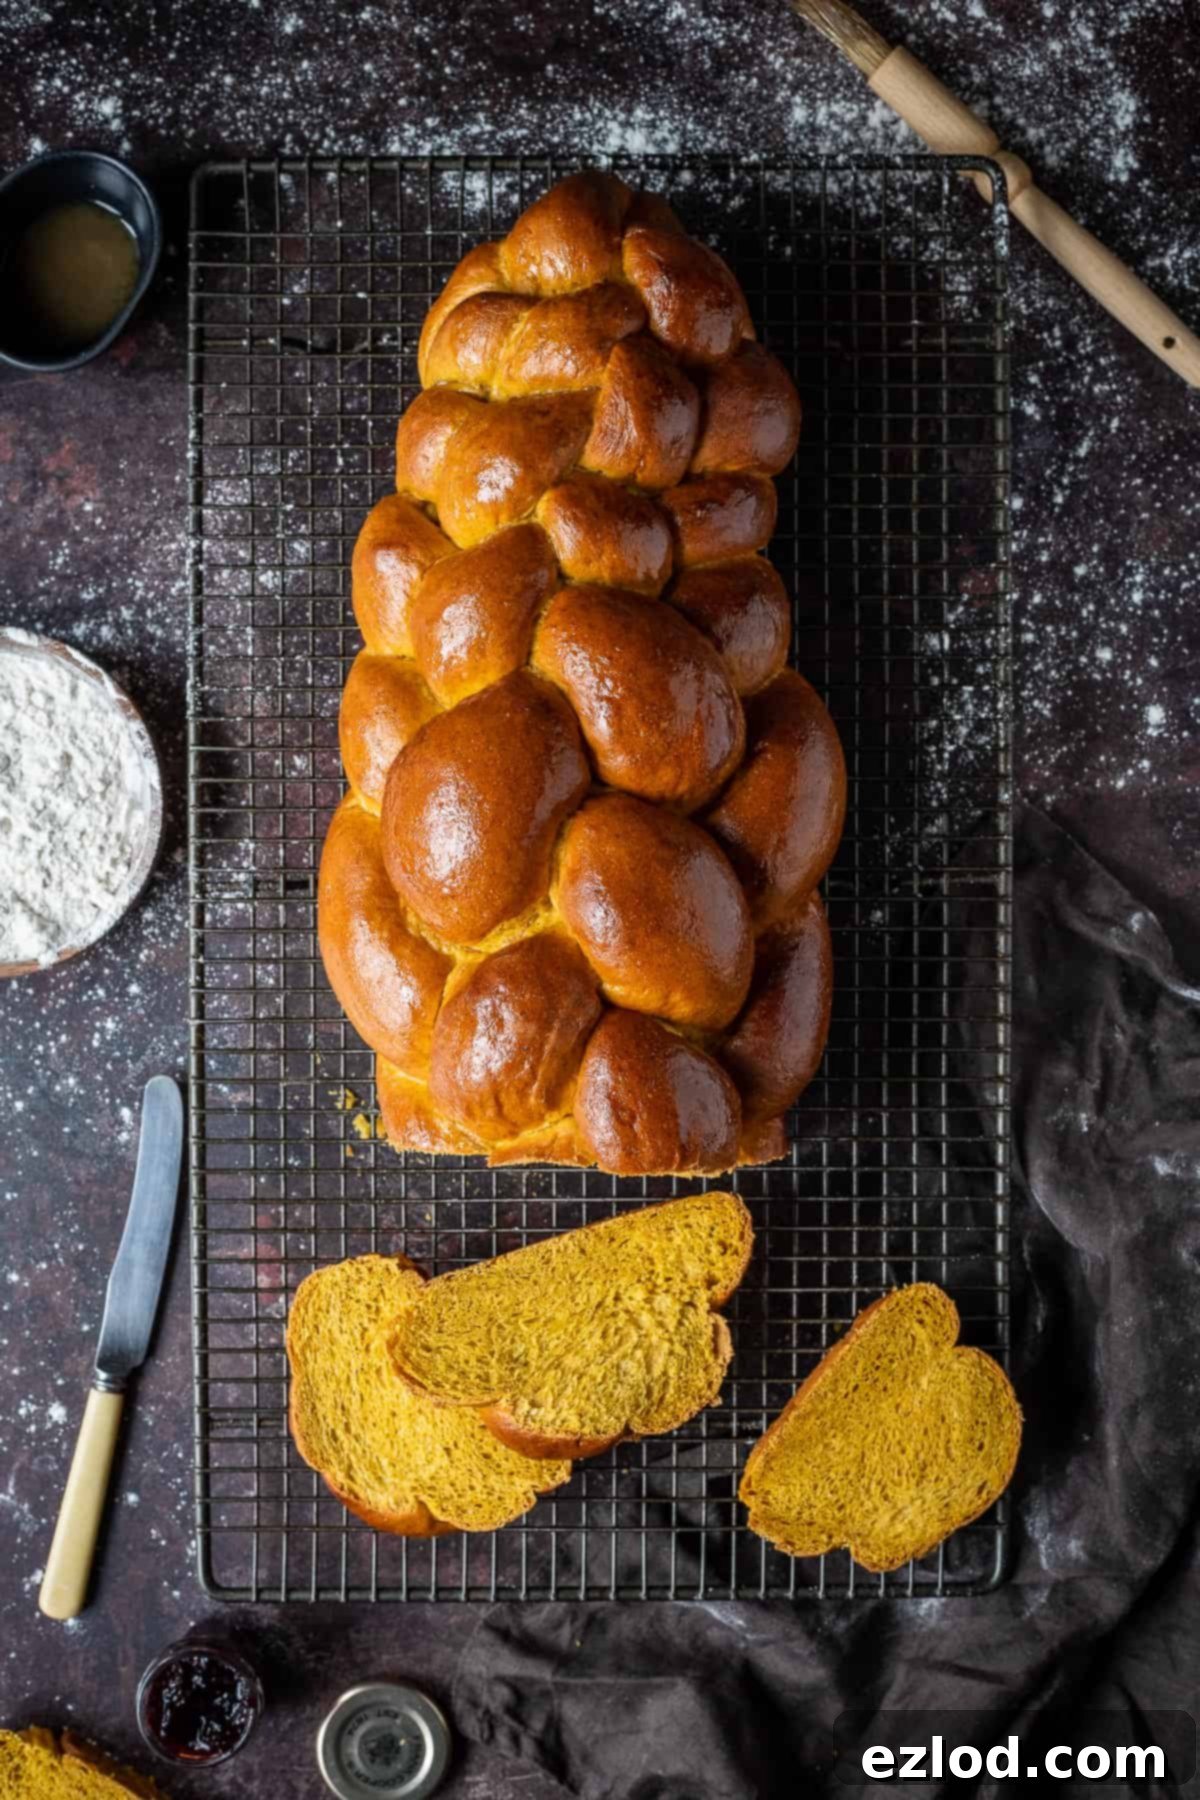
If you tried this incredible vegan pumpkin challah recipe, I would love to hear how it turned out! Please feel free to rate it, leave a comment below, or tag @domestic_gothess on Instagram and use the hashtag #domesticgothess. Your feedback is always appreciated!
*All images and content on Domestic Gothess are copyright protected. If you want to share this recipe then please do so by using the share buttons provided. Do not screenshot or post the recipe or content in full.*

Vegan Pumpkin Challah Bread
Ingredients
- 485 g (4 cups) white bread flour or plain (all-purpose) flour (plus extra as needed)
- 10 g (2 ½ tsp) fast action/instant yeast*
- 1 ½ tsp salt
- 2 ½ tsp pumpkin spice (see post above for details to make your own)
- 60 ml (¼ cup) maple syrup
- 240 g (1 cup) pumpkin puree** (see post above for details to make your own)
- 80 ml (⅓ cup) oil (olive, sunflower, vegetable or canola)
- 120 ml (½ cup) water
Glaze:
- 1 Tbsp non-dairy milk
- 1 Tbsp maple syrup
Instructions
-
Start fairly early in the morning if you want to make this bread all in one day, or you can make it over the course of two days.
-
Place the flour in a large bowl, or in the bowl of a stand mixer fitted with a dough hook. Add the yeast to one side and the pumpkin spice and salt to the other. Mix to combine.
-
Add the pumpkin puree, maple syrup, oil and half of the water and stir to form a rough dough, adding the rest of the water as needed to bring it together.
-
Knead the dough for about 10 minutes by hand on an unfloured surface, or for about 5 minutes in a stand mixer.
-
After a bit of kneading the dough should become silky smooth and supple and should pull away from the worktop or sides of the bowl cleanly. It should be slightly tacky to the touch but not sticky. If it is too sticky then knead in more flour, a spoonful at a time until it reaches the desired texture.
-
Place the dough in a large lightly oiled bowl and cover (I use a shower cap). At this point you have two choices; if you are baking the bread in the same day, let the dough rise in a warm place until doubled in size, about 1 ½ – 2 ½ hours.
-
If you are baking the bread the following day, let the dough rise at room temperature for ½ an hour then place the bowl in the fridge to finish rising overnight.
-
The following morning, or once the dough has doubled in size, punch it down. Now it is time to shape your challah; you can either find a tutorial for a shape you like, or follow my instructions (and step-by-step photos above) to make a six strand challah. You can make one large loaf or two smaller ones.
-
To make a six strand challah, divide the dough into six even pieces. You want them to be as even as possible, I use a scale to make sure they are all the same weight. If you are making two smaller loaves rather than one big one, divide the dough in half first, then each half into six.
-
Roll one of the pieces of dough out into a thin square, it doesn’t need to be exactly square shaped. If the dough is sticking you can lightly oil the worksurface and rolling pin.
-
Starting at whichever side is shortest, roll the dough up tightly into a sausage. Roll over the sausage with your hands, starting from the middle and working outwards, to form a long, thin strand. Increase the pressure from your hands at the ends to taper them. You want the ends to be pointy and the strand to be thicker in the middle.
-
Repeat with the rest of the portions of dough, making sure that all of the strands are the same length.
-
On a lightly floured surface, arrange the six strands parallel to each other. At one end, gather the tips of the strands together and pinch them tightly so they stick together.
-
To make a six strand braid you just have to follow four repeating moves. First, take the second from the right strand and move it over to the far left. Then, take the far right strand and move it over two strands to the middle (spread the strands apart if needed to make room). (The middle is in the centre of the four strands, not including the strand you just moved to the far left.)
-
Then, take the second from the left strand and move it over to the far right, then move the far left strand over two to the middle.
-
Repeat these four moves – second right to far left, far right to middle, second left to far right, far left to middle. Carry on going until you have braided the whole loaf then pinch the end together and tuck any stray bits underneath.
-
If the loaf is too long and thin, you can use your hands to lift and compact it a bit to make it shorter and fatter.
-
Place the loaf on a baking sheet lined with baking parchment and repeat the steps above if you are making two loaves.
-
Loosely cover the loaf(ves) and set aside in a warm place to rise until they are about doubled in size, 1 – 3 ½ hours depending on how warm it is. The bread is ready to bake when when it has visibly almost doubled in size and if you gently poke it with a finger it springs back slowly most of the way but leaves a small indentation. If it springs back quickly and fills in completely then it isn’t ready yet.
-
While the challah are rising make the glaze – mix together the maple syrup and milk in a small bowl and set aside. Preheat the oven to 200°C/180°C fan/400°F/gas mark 6.
-
When the challah is ready to bake, gently brush it all over with some of the glaze. Bake for 20 minutes then brush with more glaze (if you want to sprinkle it with sesame or poppy seeds do it now). Turn the oven down to 180°C/160°C fan/350°F/gas mark 4 and return the challah to the oven for 15 minutes for a large loaf, or 10 minutes for two smaller ones.
-
The best way to tell when a loaf of bread is cooked through is to use a probe thermometer, it should reach 94°C/201°F when poked into the middle of the loaf. If you don’t have a probe thermometer then the challah should sound hollow when tapped on the bottom.
-
Slide the baked challah onto a wire rack and leave to cool before slicing.
Notes
- For the best results make sure that you follow the recipe closely. As always, I highly recommend using the gram measurements (with a digital scale), rather than the cup conversions. Cup measurements are simply not accurate enough for baking and I cannot guarantee the best results if you use them.
- *If you only have active dried yeast then you can still use it, but you will need to mix it with some of the warm water and a dash of the maple syrup first. Let it sit for 10-20 minutes until it has become bubbly then proceed with the rest of the recipe as written.
- **If you are using tinned/canned pumpkin puree, make sure that it is 100% pumpkin, NOT pumpkin pie filling.
- The glaze does become a bit sticky after a few hours at room temperature so if you prefer you can brush the bread with milk or aquafaba instead; it won’t be shiny in this case however.
