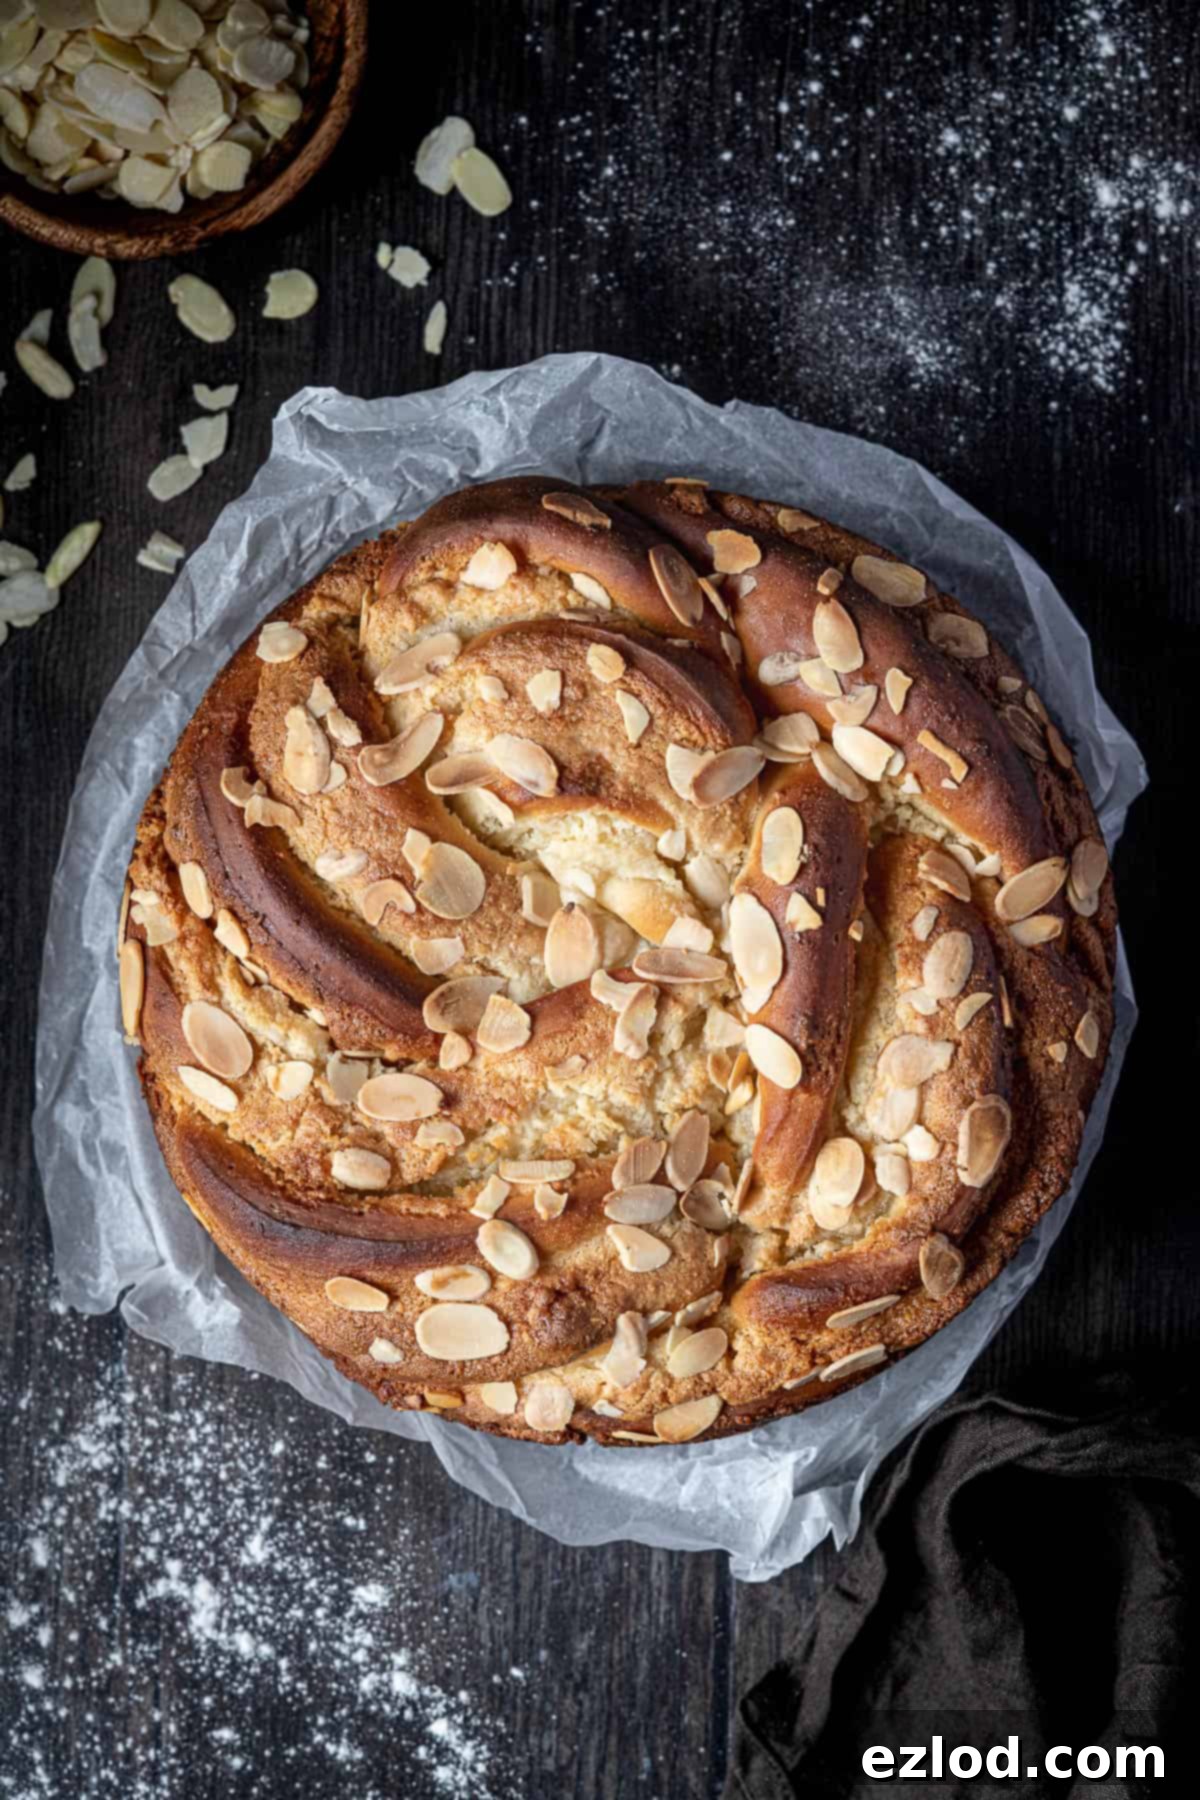
Heavenly Vegan Almond Bread Twist: A Soft, Vanilla-Scented Marzipan Delight
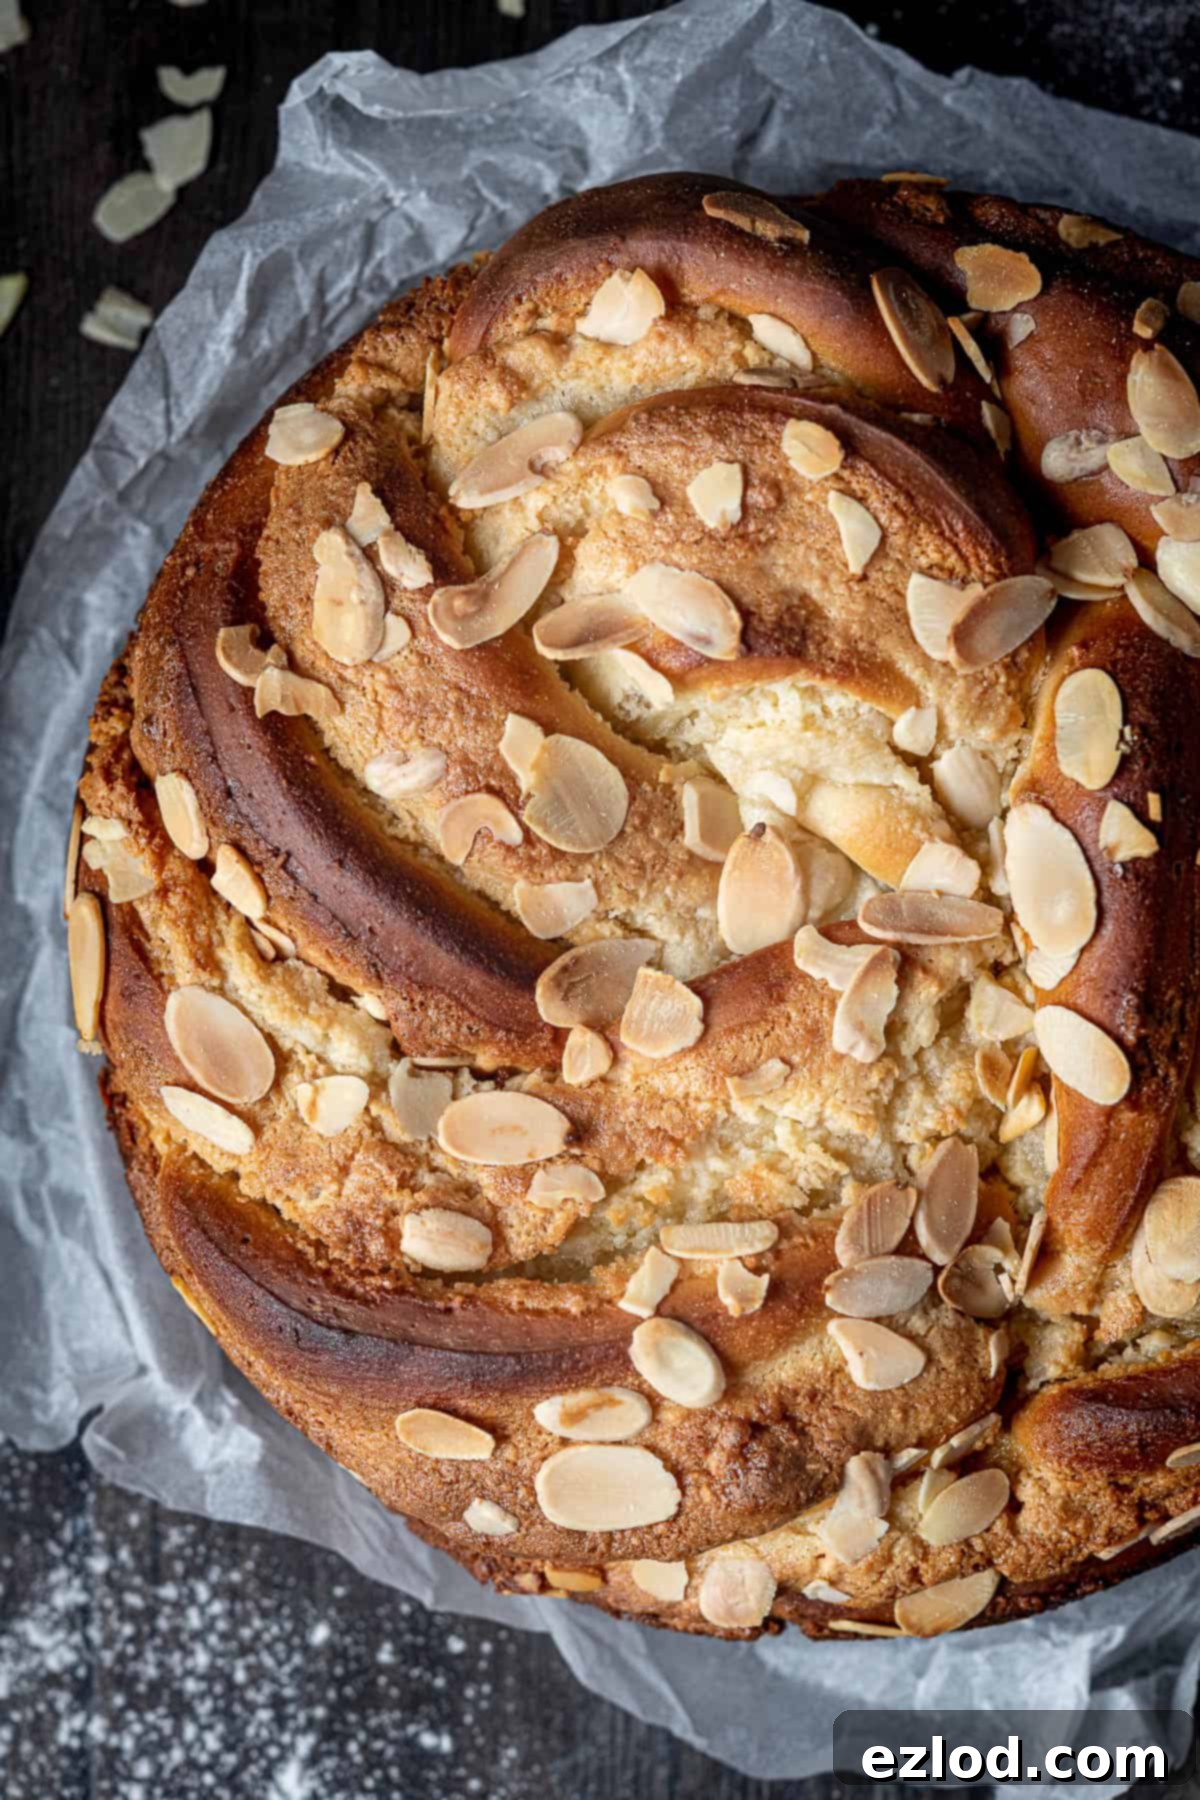
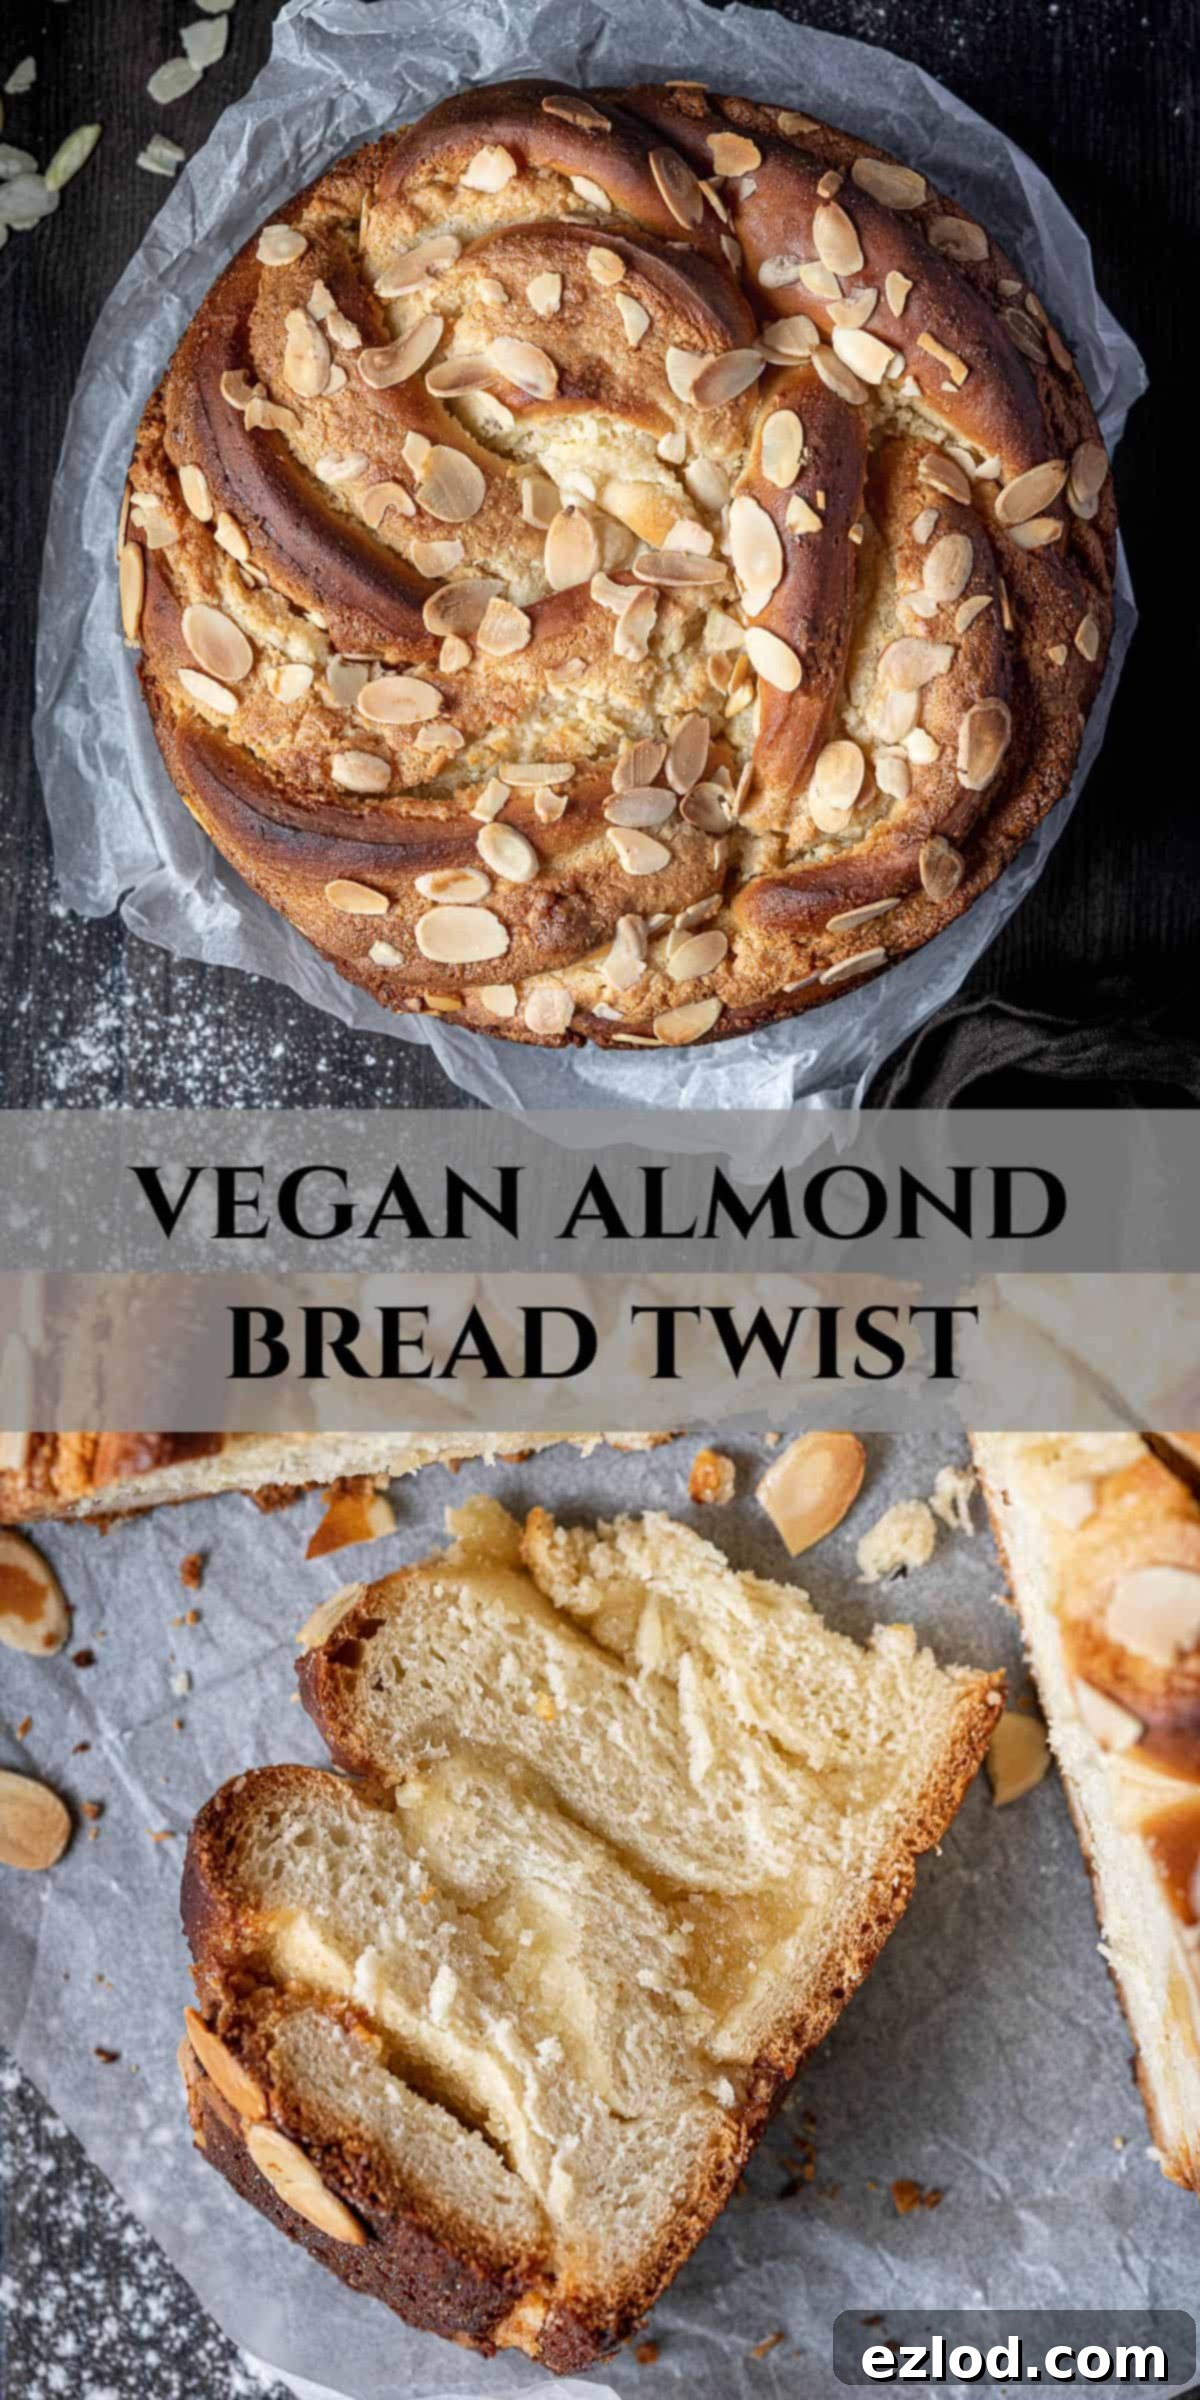
Indulge in this truly amazing vegan almond bread twist, featuring a soft, vanilla-scented brioche-like dough generously filled with a sticky, sweet almond marzipan paste. This unique braided loaf ensures a delightful explosion of flavor in every single bite, offering a taste experience that is absolutely heavenly! Perfect for enjoying with your morning coffee or afternoon tea, this almond bread twist makes an exquisite snack or an indulgent breakfast treat.
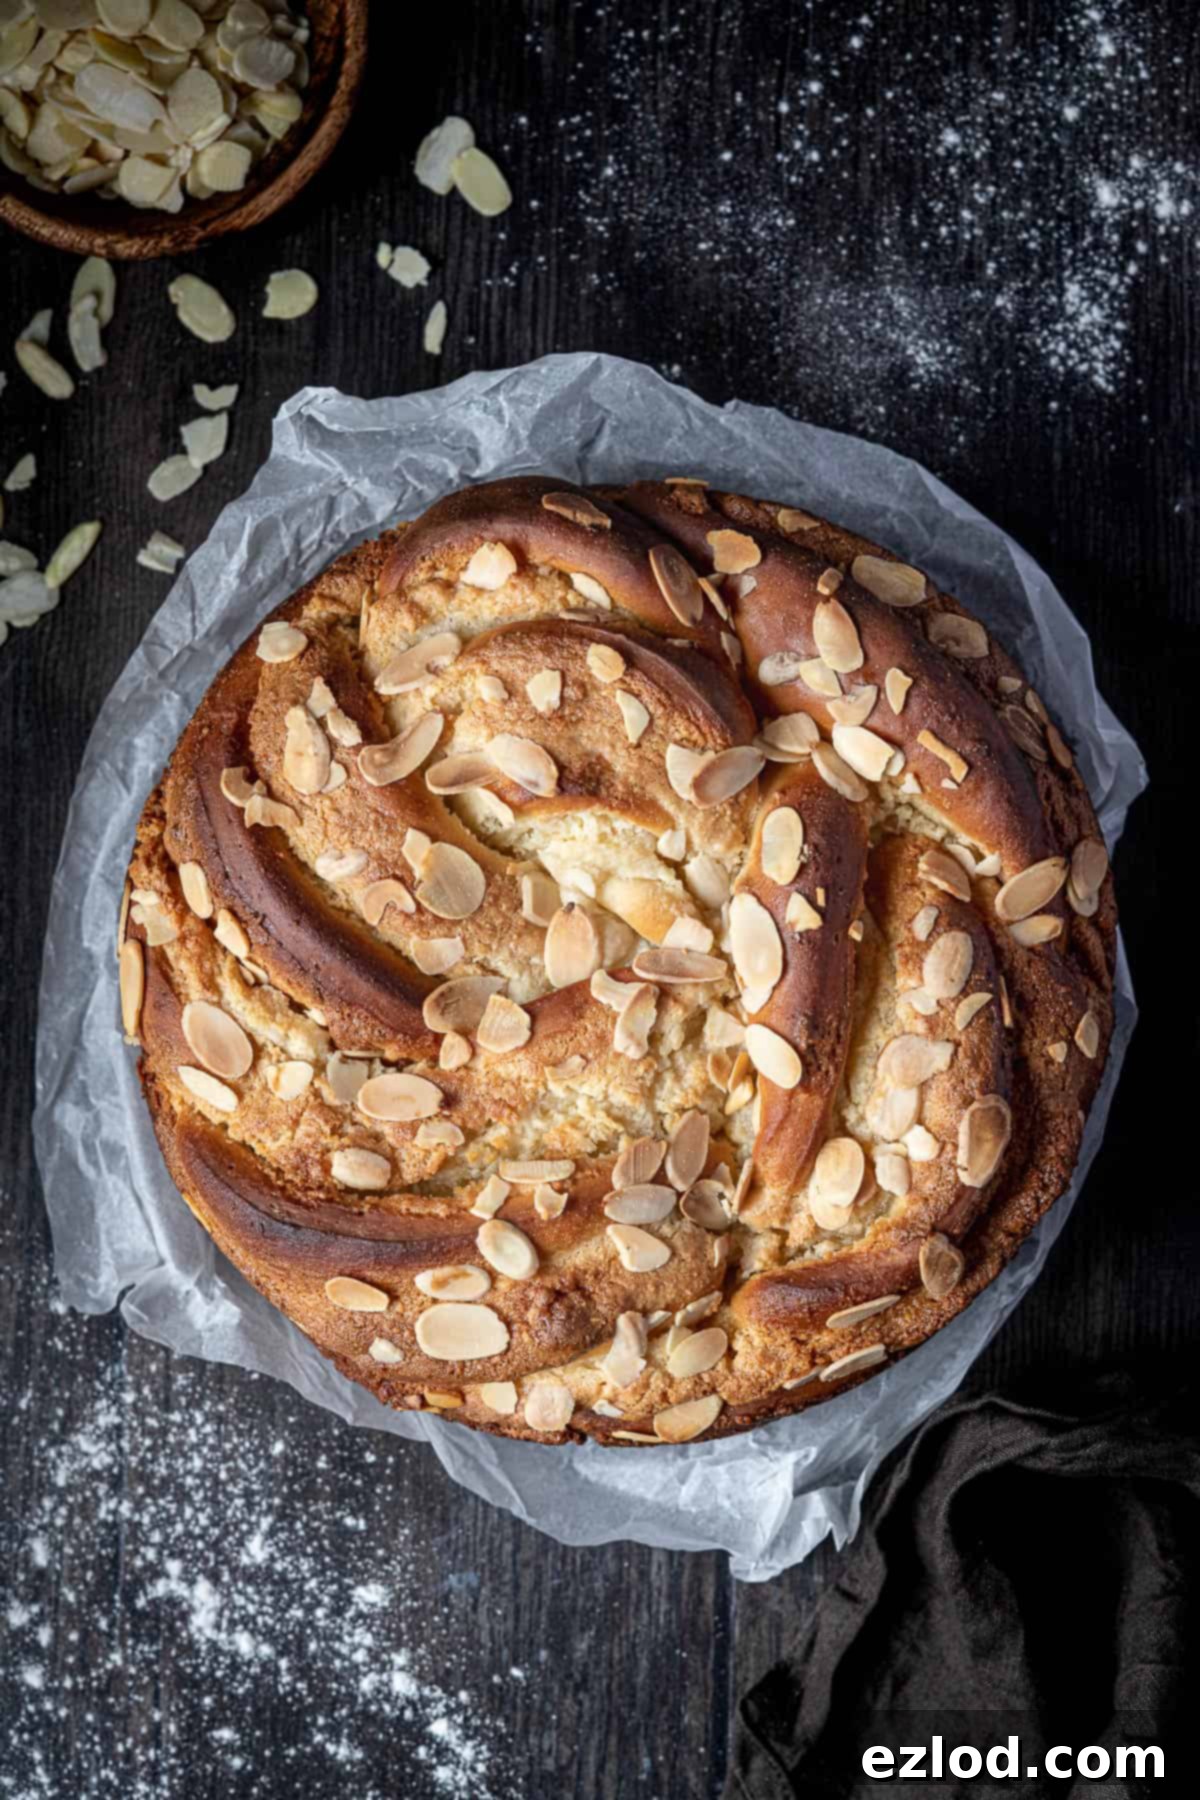
I originally crafted and shared this delightful almond bread twist recipe way back in 2015. Over the years, as my baking journey evolved, so did my commitment to creating more plant-based delights. That’s why I’ve passionately veganized this beloved recipe and given its presentation a fresh update with brand new photos. This updated version brings you all the incredible flavor and texture of the original, but now entirely plant-based and accessible to even more people. (For those who adored the original non-vegan recipe, I’ve included it at the very bottom of this post, so you can still find it).
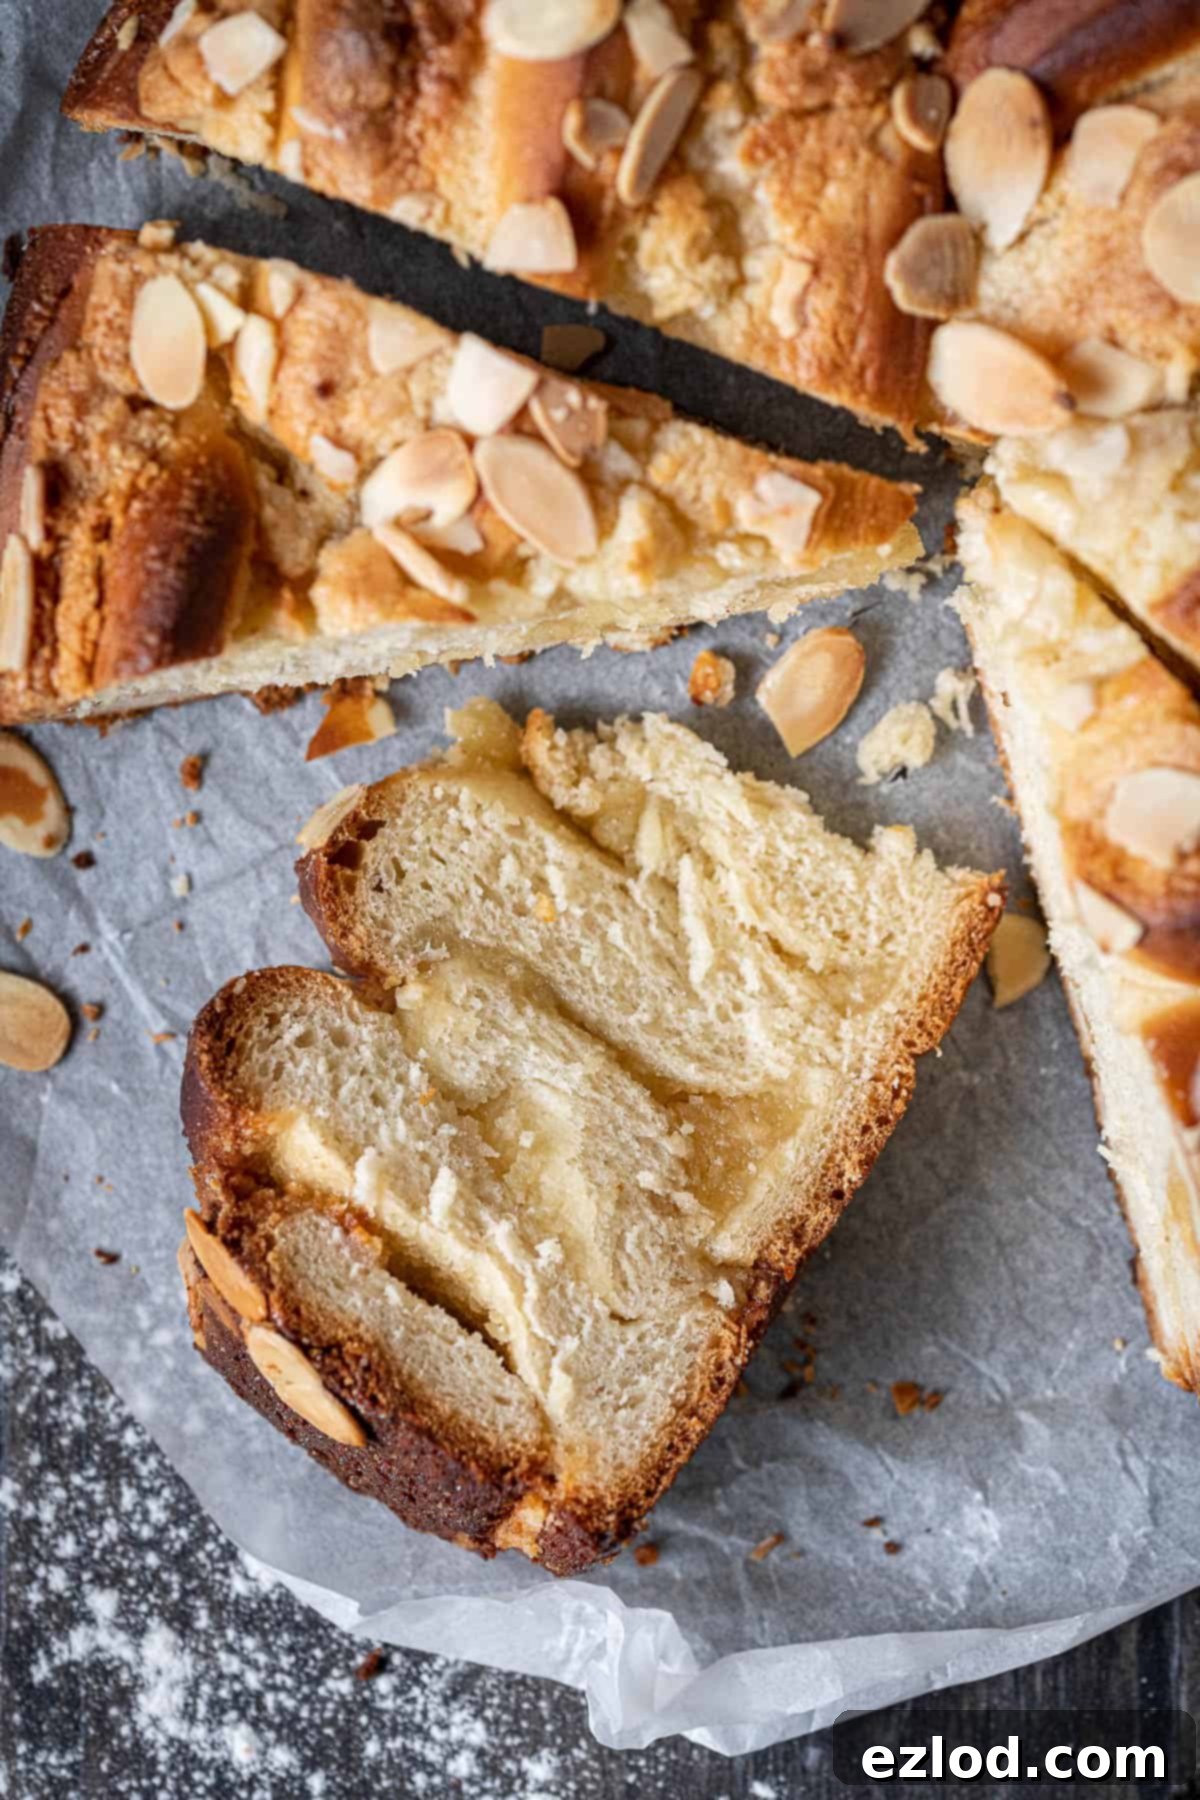
This bread is a masterclass in texture and flavor: imagine a pillowy soft, subtly sweet, and beautifully vanilla-scented bread, intertwined with a rich, sticky almond filling. The dough is expertly braided and then twisted into an elegant round shape before baking, creating a stunning centerpiece for any table.
The intentional way this bread is shaped isn’t just for aesthetics; it’s designed to guarantee that every single forkful or tear-off piece contains a generous amount of that irresistible almond filling. While the shaping process might get a little messy – don’t worry, that’s part of the fun! – the truly spectacular results are undeniably worth every sticky moment. Get ready to bake a loaf that will impress with its beauty and captivate with its taste!
Essential Ingredients for Your Vegan Almond Bread Twist
Creating this spectacular vegan almond bread twist requires a careful selection of ingredients, each playing a crucial role in achieving its perfect texture and flavor. Here’s a breakdown of what you’ll need and why:
Bread Flour: This is your secret weapon for that desirable soft, fluffy, and slightly chewy texture. White bread flour, with its higher protein content, develops gluten beautifully, resulting in a bread that holds its shape and has a wonderful bite. While plain (all-purpose) flour can be used in a pinch, be aware that the final texture won’t be quite as robust or airy. I strongly advise against using wholemeal (whole wheat) flour, as its higher fiber content will make the bread significantly denser and heavier, detracting from the light, tender crumb we’re aiming for.
Instant Yeast: For ease and reliability, instant yeast is my go-to choice when baking bread. It’s incredibly convenient because you can simply add it directly to your flour mixture without the need for prior activation in liquid. This saves time and simplifies the process. If you only have active dry yeast on hand, don’t fret; I’ve included specific instructions below on how to properly activate and use it.
Salt: A fundamental component in any good bread recipe, salt isn’t just for flavor; it also plays a vital role in controlling yeast activity and strengthening the gluten structure. Omitting salt will result in bland bread with an inferior texture, so it’s a non-negotiable ingredient.
Sugar: Caster sugar is my preference for the dough because its fine granules dissolve quickly and evenly, ensuring consistent sweetness throughout the loaf. Granulated sugar can be substituted if caster sugar isn’t available, but it might take a little longer to incorporate fully.
Vegan Block Butter: For superior baking results, I always opt for a block-style vegan butter or margarine. These varieties typically have a lower water content compared to spreadable margarines found in tubs, which means they contribute better to the dough’s structure and richness. My personal favorite is Naturli Vegan Block for its excellent performance. However, if spreadable vegan butter is all you have, it will still work, though the final texture might vary slightly.
Non-Dairy Milk: Soy milk is my top recommendation for baking due to its higher protein content, which most closely mimics the properties of dairy milk, contributing to a richer, more tender crumb. However, any variety of unsweetened non-dairy milk (almond, oat, or cashew) will work effectively. Always choose an unsweetened version to control the sweetness of your bread, and definitely reach for soy milk if it’s an option.
Vanilla Extract: A touch of vanilla extract in the dough adds a wonderful aromatic depth and complements the almond flavors beautifully. While optional, it elevates the overall taste profile significantly. If you don’t have it, the bread will still be delicious, but vanilla enhances that comforting, sweet aroma.
Marzipan: This recipe specifically calls for marzipan, not almond paste. While both are almond-based, marzipan typically contains more sugar and a finer texture, making it ideal for our sticky, sweet filling. They are not interchangeable, but I believe almond paste would likely work adequately, though I can’t confirm since it’s less common here in the UK.
Ground Almonds: Also known as almond flour in the US, ground almonds add body and an intense almond flavor to the filling, making it even more decadent and rich. This ingredient is key to achieving that deep, nutty taste.
Almond Extract: To truly amplify and celebrate the almond flavor in this bread, a dash of almond extract is essential for the filling. It provides a concentrated boost that makes the almond notes sing. You can omit it if you don’t have it, but it really enhances the overall experience.
Flaked Almonds: These are an optional but highly recommended garnish. A scattering of flaked almonds over the top of the loaf just before baking adds a lovely crunch and a beautiful golden-brown finish, enhancing both the texture and visual appeal.
Crafting Your Vegan Almond Bread Twist: A Step-by-Step Guide
(For precise measurements and detailed instructions, please refer to the comprehensive recipe card located at the bottom of this page.)
To begin your dough, combine the non-dairy milk and vegan block butter in a saucepan over a gentle, low heat. Stir continuously until the butter has completely melted and is fully incorporated into the milk. Once melted, remove the pan from the heat and set the mixture aside to cool down until it reaches a comfortable lukewarm temperature. It is absolutely crucial that this mixture is not hot when you add it to the other ingredients, as excessive heat can unfortunately kill the yeast, preventing your bread from rising. A simple test is to dip your finger into the milk; you should be able to hold it there comfortably without it feeling too warm.

Once your milk and butter mixture has cooled sufficiently, transfer the bread flour into the bowl of a stand mixer. If you have one, fit your mixer with a dough hook attachment. Carefully add the instant yeast to one side of the bowl, and the sugar and salt to the opposite side – keeping them separate initially helps the yeast to activate properly without direct contact with salt. Briefly mix these dry ingredients to combine them evenly.
Now, pour in the lukewarm butter and milk mixture along with the vanilla extract. Mix on a low speed until the ingredients come together to form a shaggy, rough dough. Increase the speed to medium and continue kneading for about 5-10 minutes. During this time, the dough will transform: it will become smooth, elastic, and beautifully stretchy. It should still possess a slight stickiness, but crucially, it should begin to pull away cleanly from the sides of the mixing bowl.
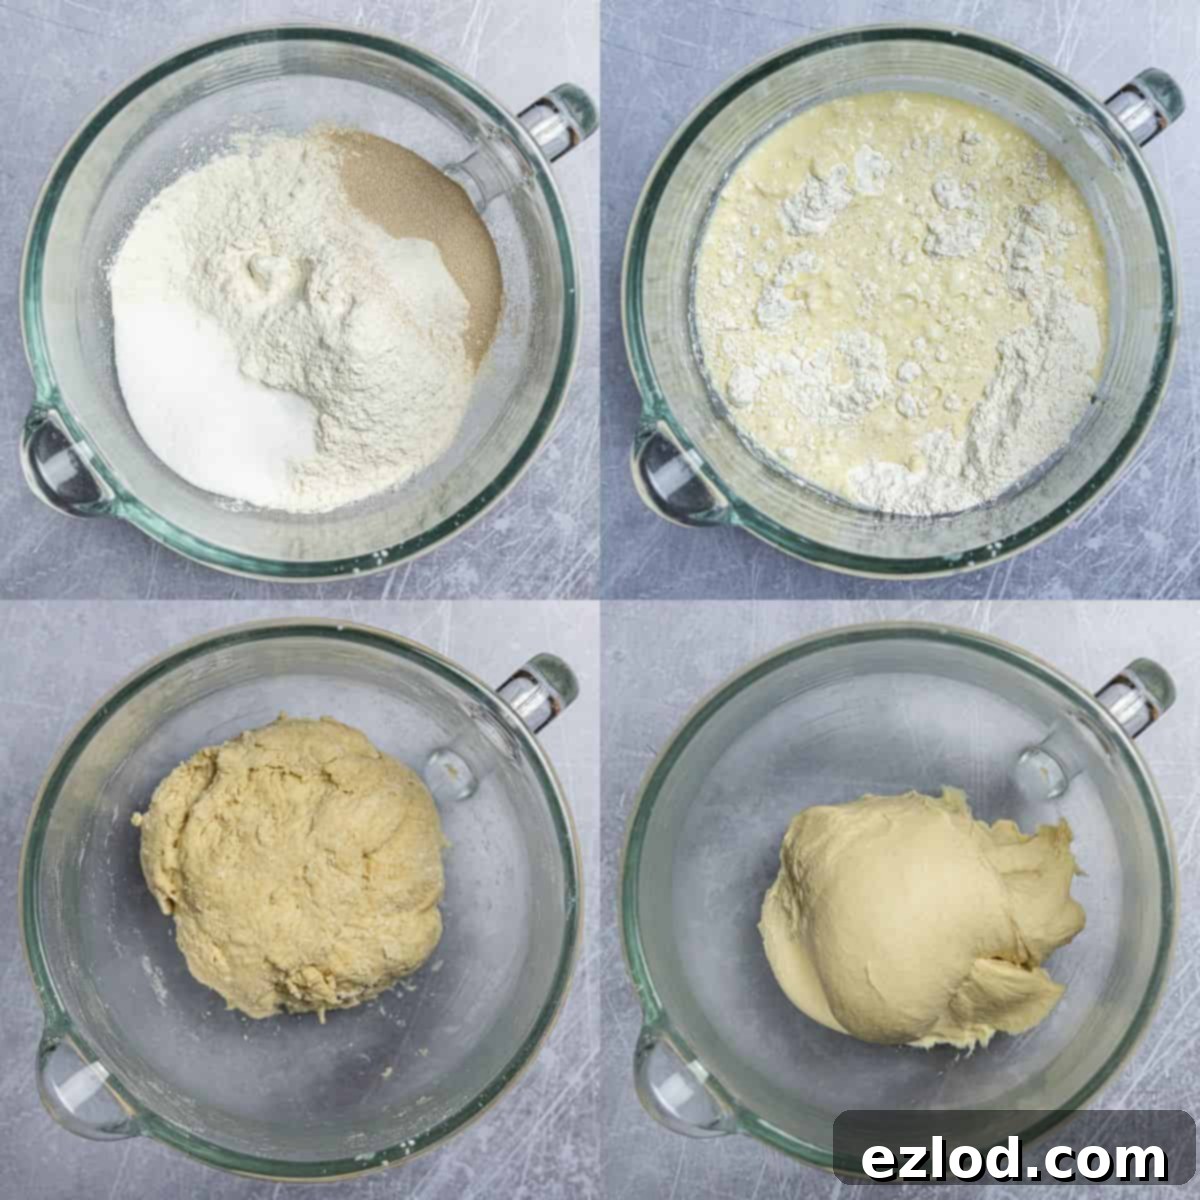
If, after kneading, your dough appears excessively wet or too sticky to handle, you can incorporate a small amount of additional flour, adding it one tablespoon at a time. Exercise caution and add very gradually, as introducing too much flour can lead to a dry, dense, and less appealing bread texture. For those without a stand mixer, the dough can be kneaded just as effectively by hand. Simply transfer the dough to a clean, unfloured work surface and knead vigorously for 10-15 minutes until it achieves that smooth, stretchy consistency.
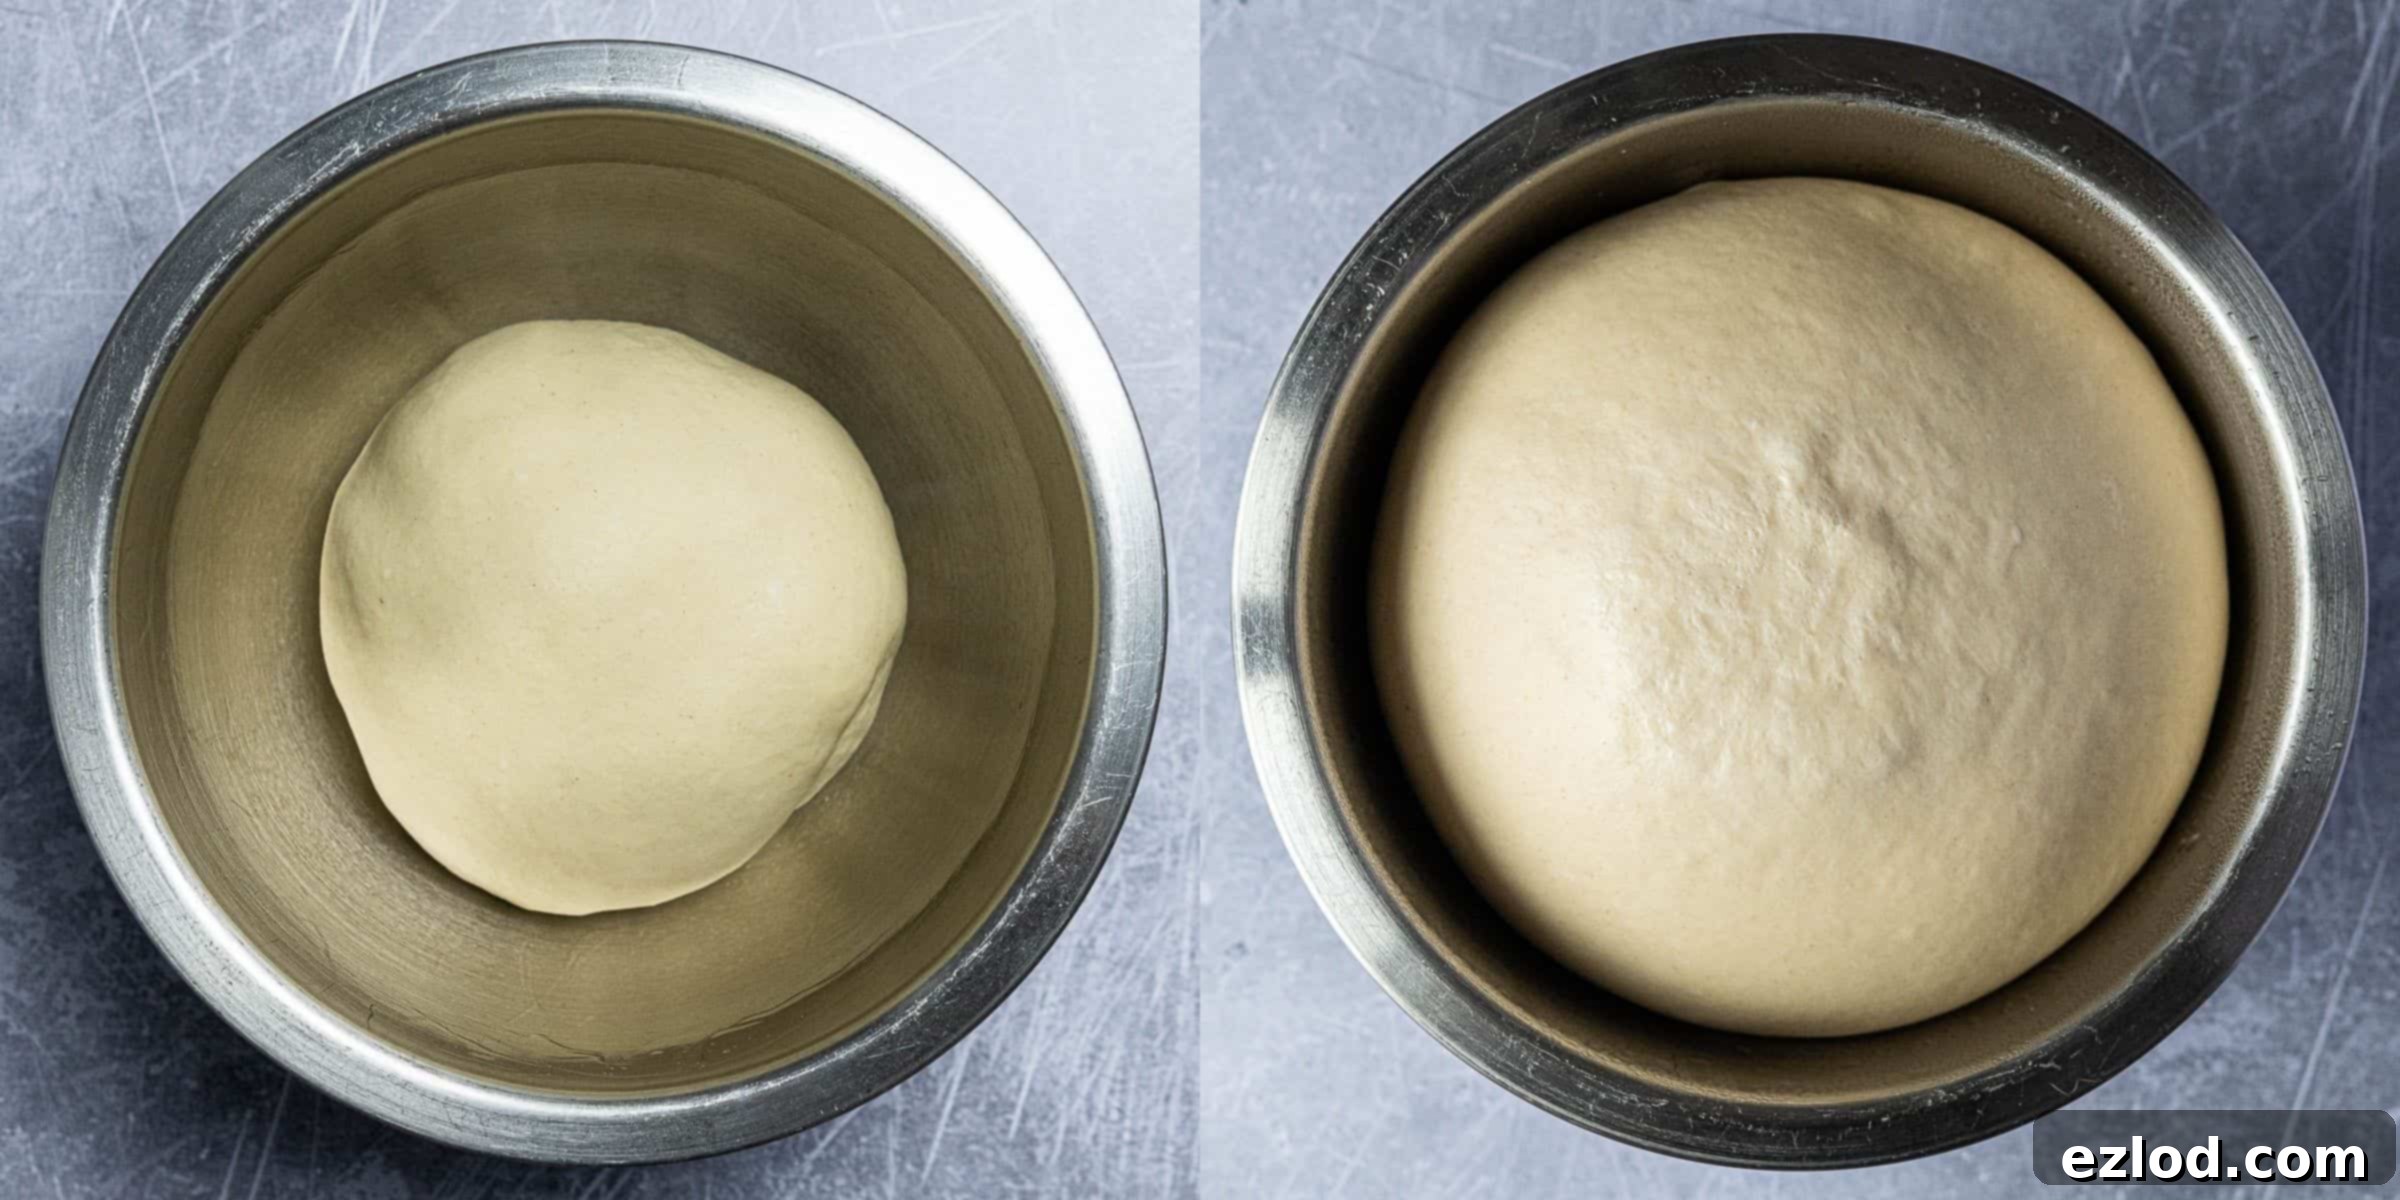
Once adequately kneaded, gently form the dough into a ball and place it into a lightly oiled bowl. Turn the dough once to ensure it’s coated evenly with oil, then cover the bowl securely with a lid or plastic wrap. Allow the dough to rise in a warm place until it has visibly doubled in size. This typically takes between 1 to 2 hours, depending on the ambient temperature. Alternatively, for a slower, deeper flavor development, you can place the covered bowl in the refrigerator to rise overnight.
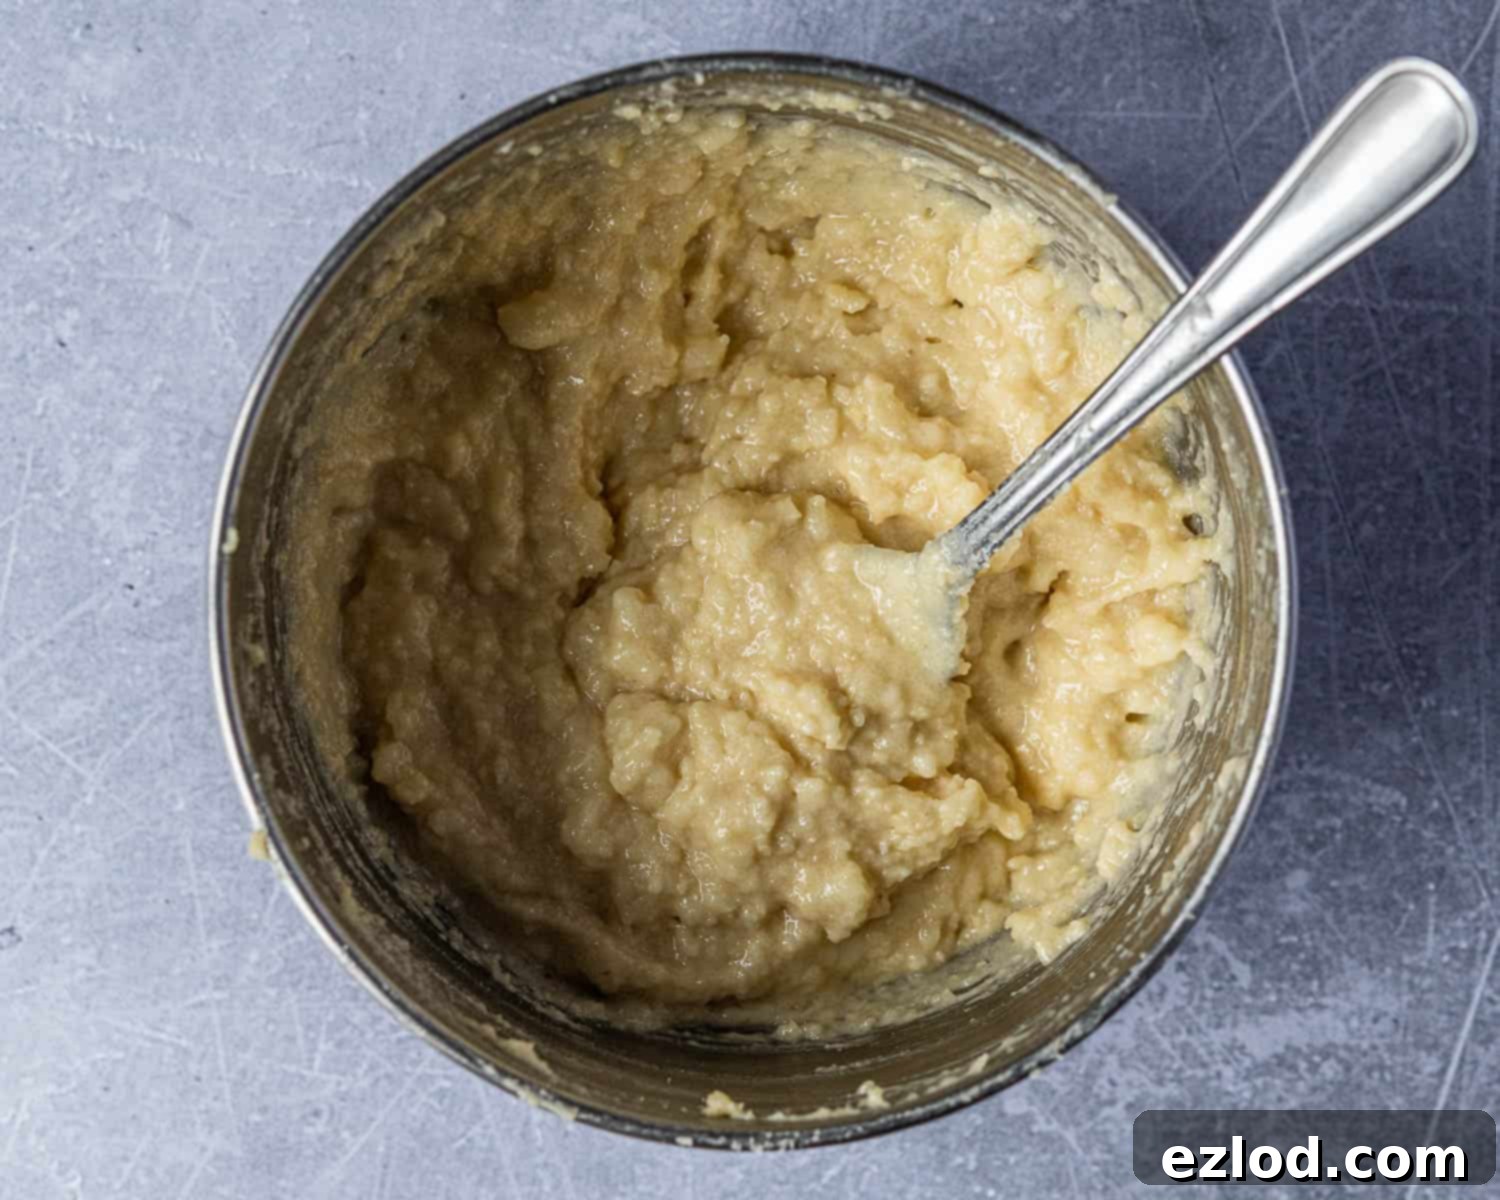
While your dough is undergoing its first rise, it’s the perfect time to prepare the delectable almond filling. In a medium-sized bowl, combine the melted vegan butter, ground almonds, sugar, non-dairy milk, and almond extract. Stir these ingredients thoroughly until they are well combined and form a thick paste.
Next, crumble the marzipan directly into this almond mixture. Using a fork, mash the marzipan into the paste. Don’t worry about achieving a perfectly smooth consistency; in fact, having a few small lumps of marzipan in the filling adds wonderful pockets of intense almond flavor and texture to the finished bread. This rustic approach contributes to the charm and deliciousness of the twist.
Mastering the Art of Shaping Your Almond Bread Twist
Once your dough has successfully doubled in size, gently punch it down to release the accumulated air. Give it a brief, approximately 30-second, knead to ensure the air is evenly distributed and the dough is pliable.
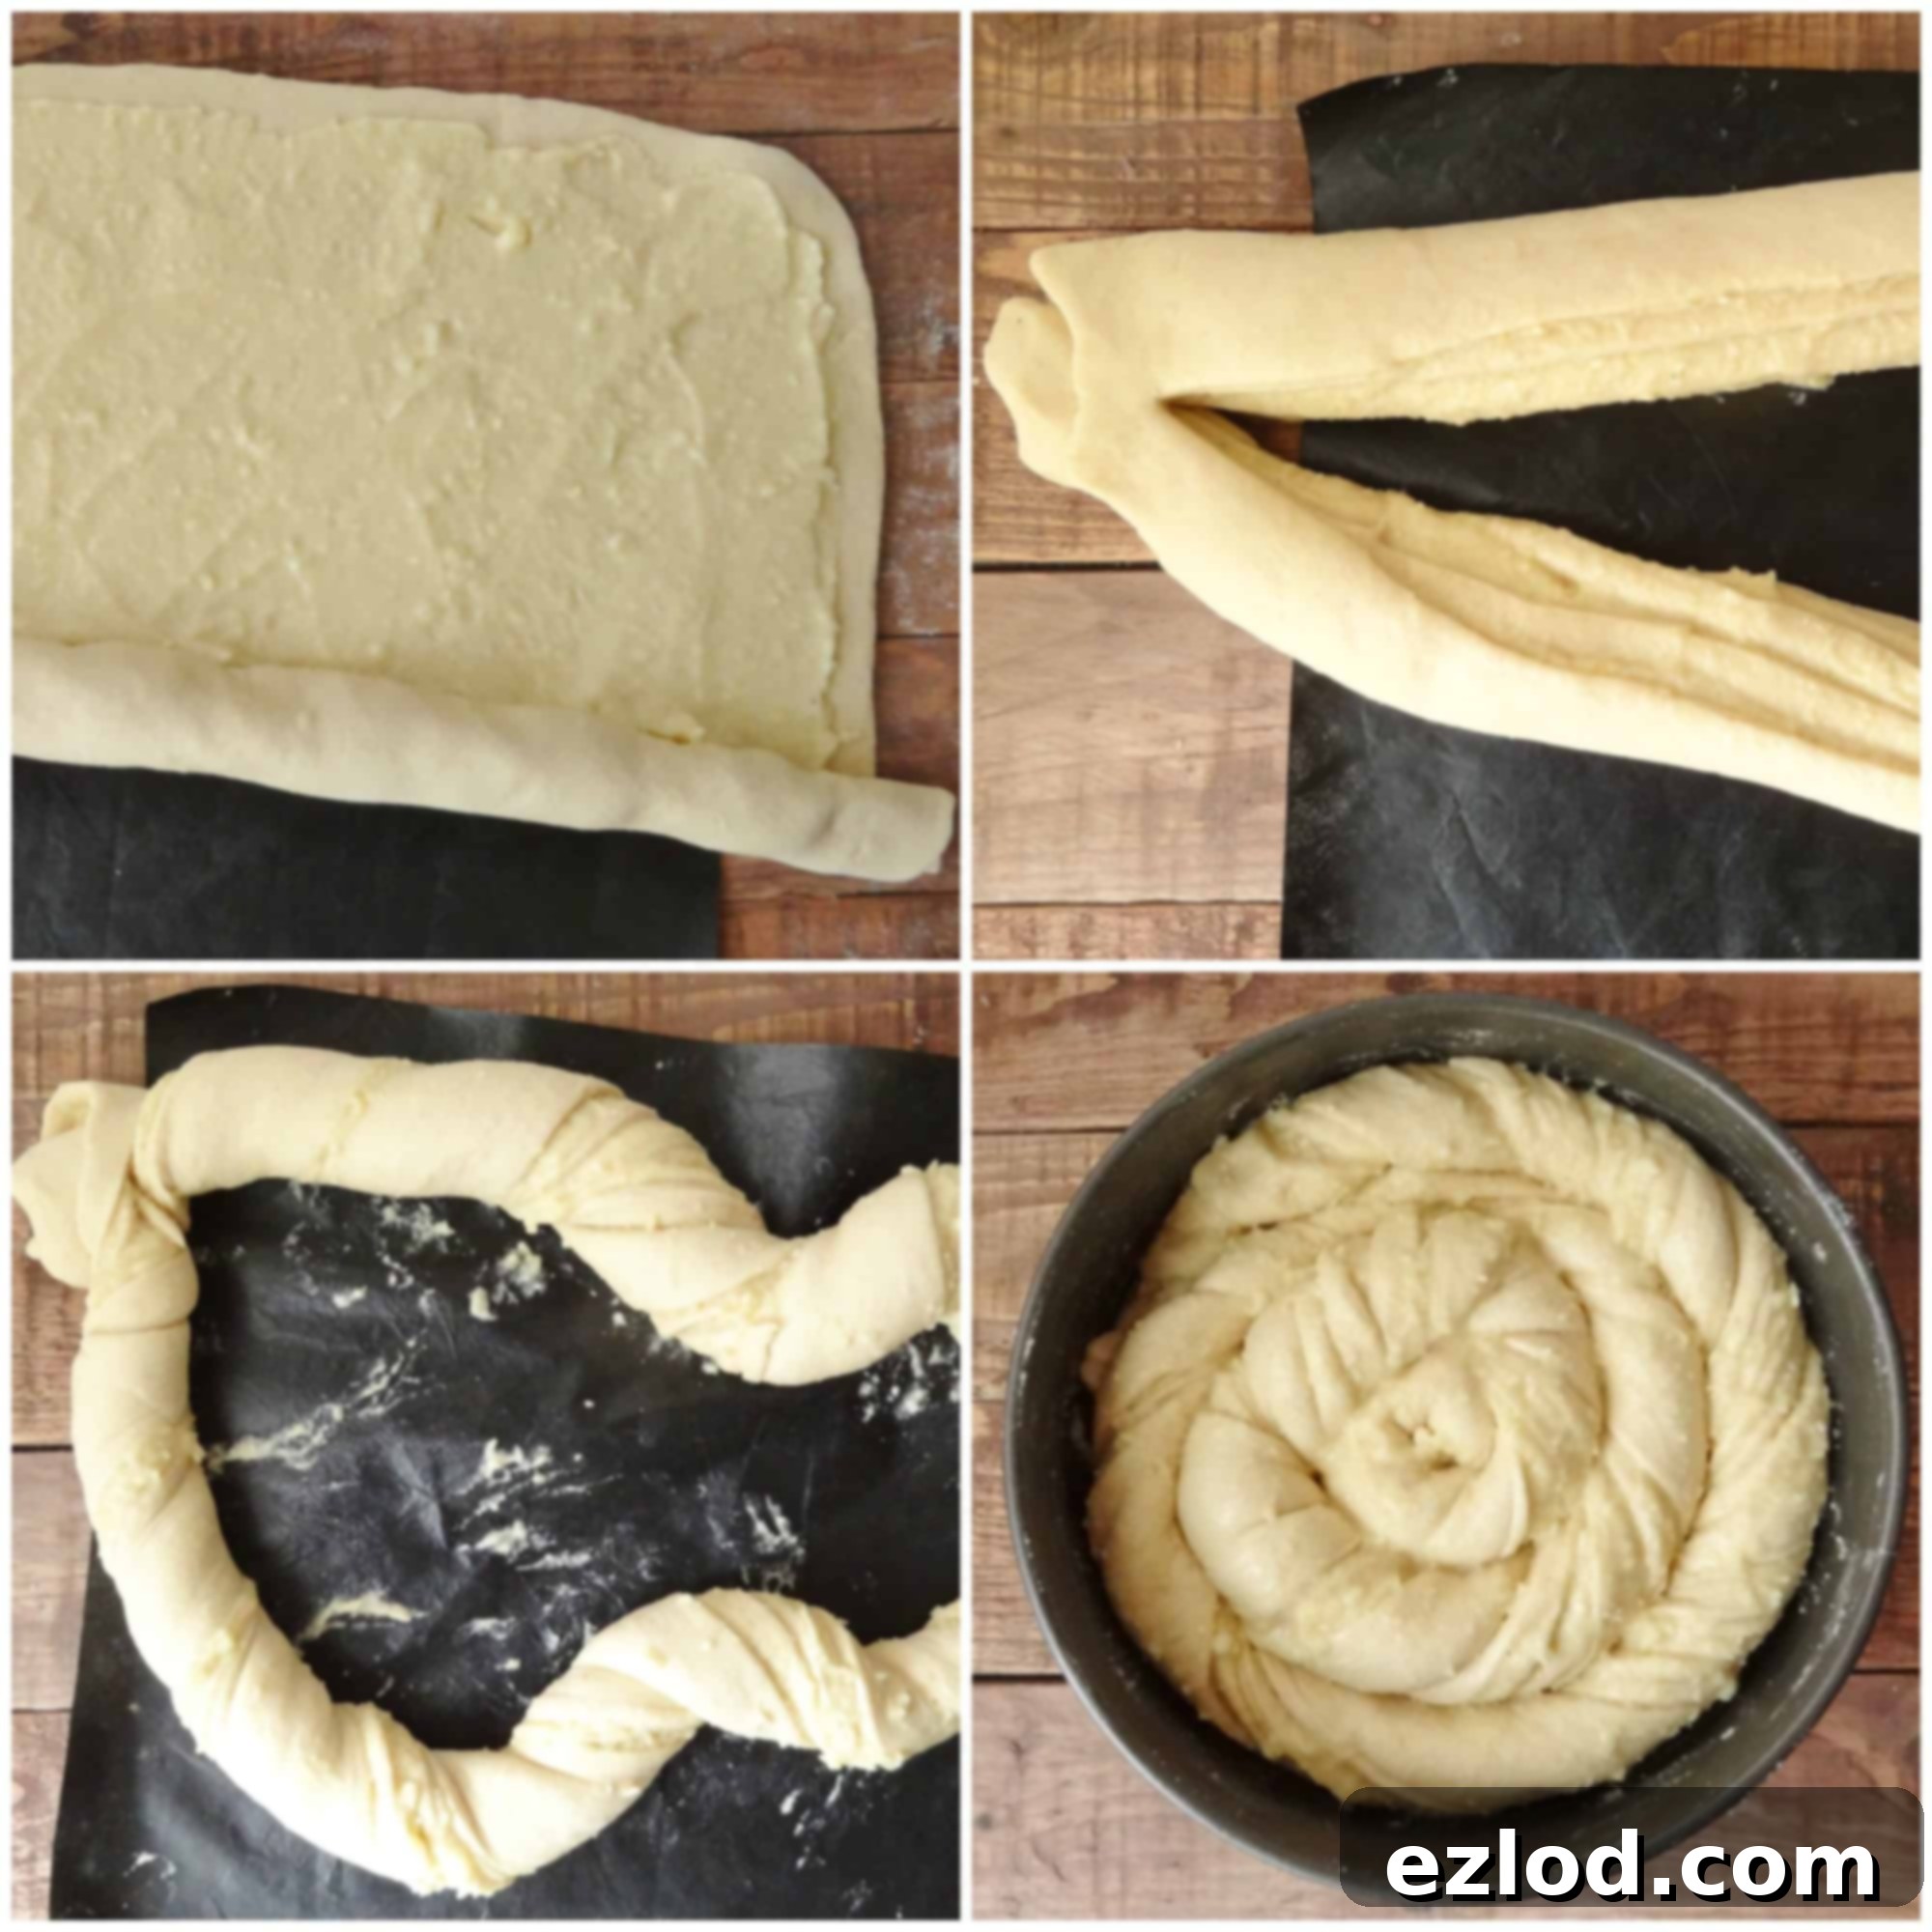
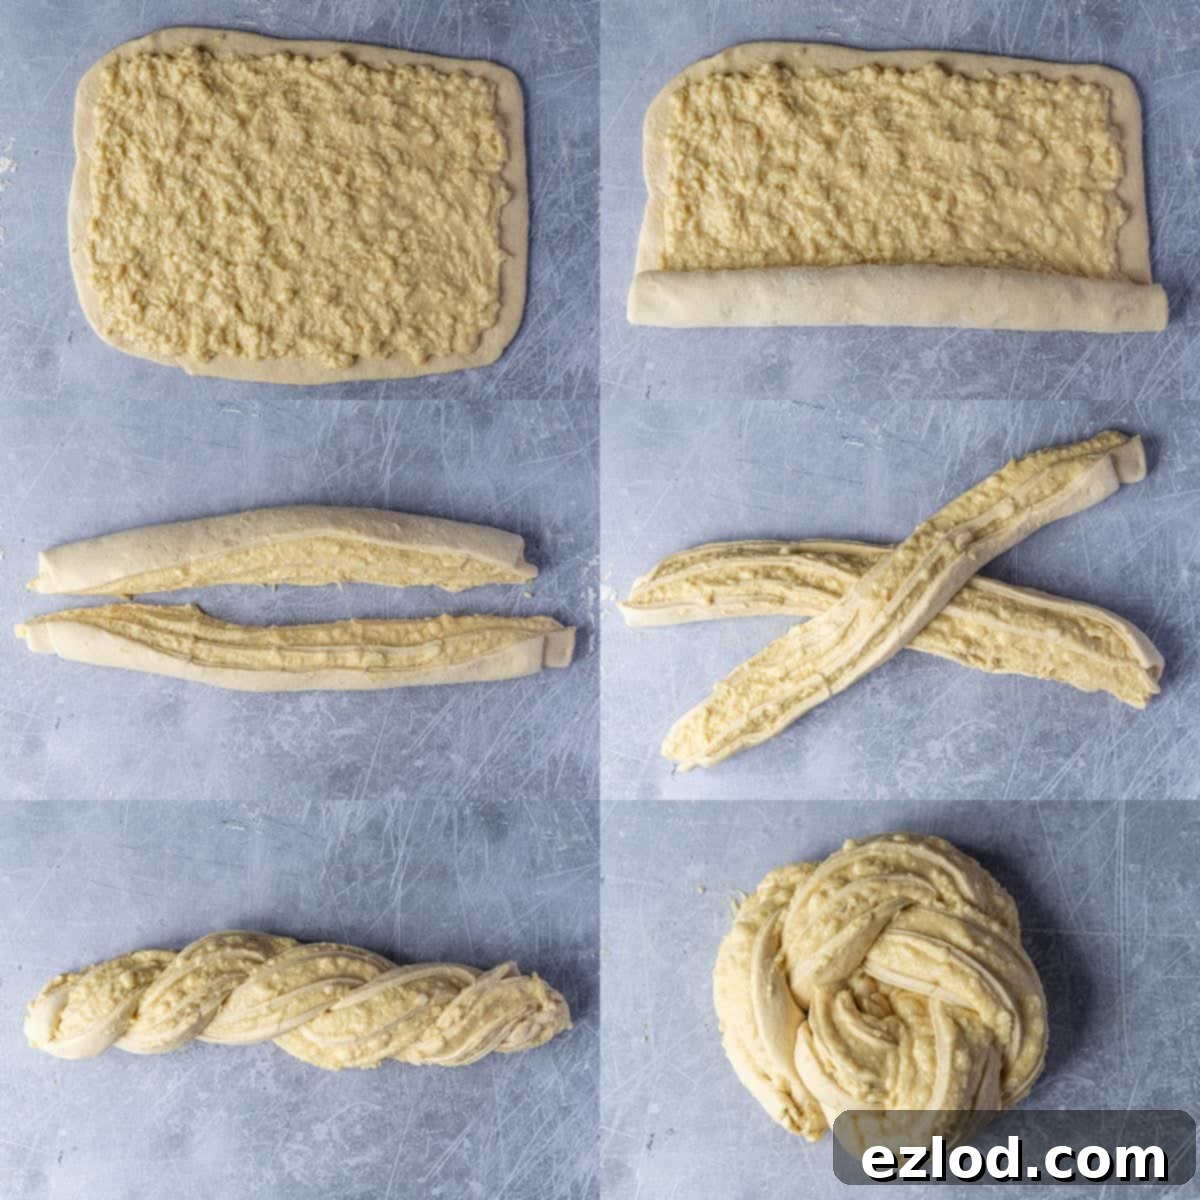
Lightly flour your work surface and roll the dough out into a large rectangle, aiming for dimensions of approximately 30 x 40 cm (12 x 16 inches). With the rectangle laid out, carefully spread the prepared almond marzipan filling evenly across the entire surface, making sure to leave a small 1 cm (½ inch) border clear around the edges. I personally find that using my hands is the easiest and most effective way to spread the sticky filling without tearing the dough.
Starting from one of the long edges, tightly roll the dough up into a log. Once rolled, use a very sharp knife or a dough scraper to carefully slice the log in half lengthwise, from one end to the other. This will expose the beautiful layers of dough and filling.
Now, prepare for a little delightful mess – this is where the magic happens! Turn the two halves of the dough so that their cut, exposed sides are facing upwards. Lay one half over the other in the middle, creating an “X” shape.
Proceed to twist these two halves together. To do this, simply lay one side over the other repeatedly, always ensuring the cut, filling-exposed side remains facing upwards. Continue this twisting motion until all of the dough is intertwined, forming a beautiful, rustic braid. The exposed filling will create stunning stripes of almond goodness.
Finally, take your twisted braid and gently curl it from one end into a round, spiral shape. Carefully transfer this round into your prepared 23cm (9-inch) round cake tin, which should already be greased and lined with baking parchment.
Once shaped, loosely cover the cake tin with plastic wrap or a clean kitchen towel and allow the dough to undergo its second rise. This usually takes approximately 45 minutes to 1½ hours, or until the bread appears visibly puffy and has significantly increased in size. To test if it’s ready, gently press a finger into the dough; if it springs back slowly, it’s perfectly risen. If it springs back quickly, it needs a little more time to proof. During this second rise, preheat your oven to 180°C/160°C fan/350°F/gas mark 4.
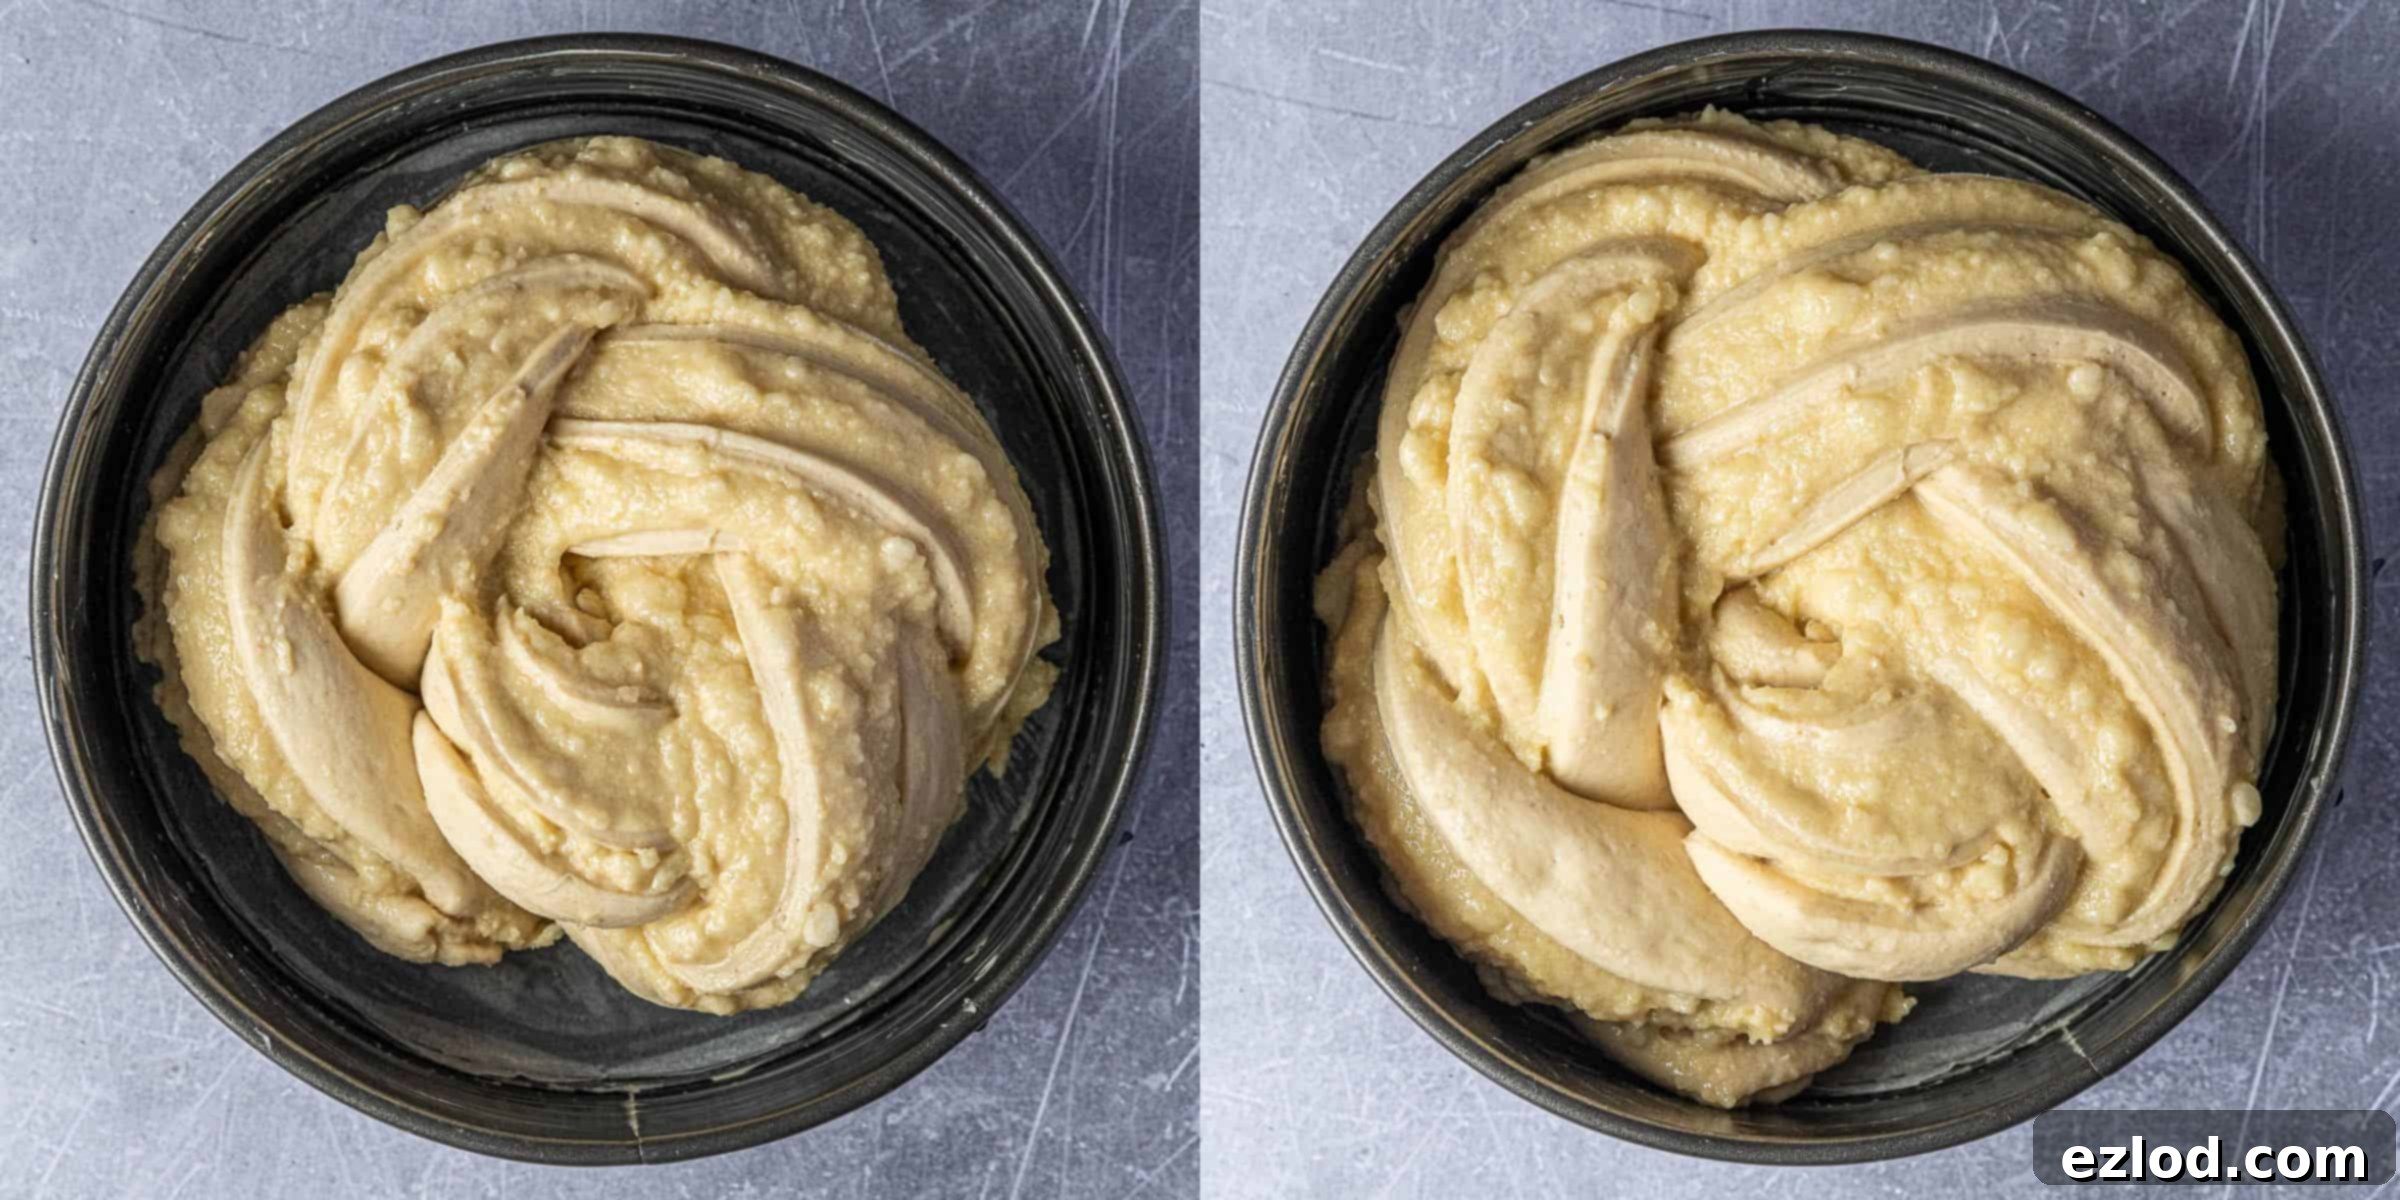
When the bread is perfectly proofed and ready for baking, gently brush any exposed areas of the dough with a little non-dairy milk. This helps to achieve a beautiful golden crust. Generously scatter a handful of flaked almonds over the top of the loaf for added texture and visual appeal.
Place the tin into your preheated oven and bake for 50-60 minutes. Keep a close eye on it; if the top begins to brown too quickly, loosely cover it with a sheet of tin foil to prevent burning. The bread is fully baked when its internal temperature, measured with a probe thermometer inserted into the center, reaches at least 90°C (194°F).
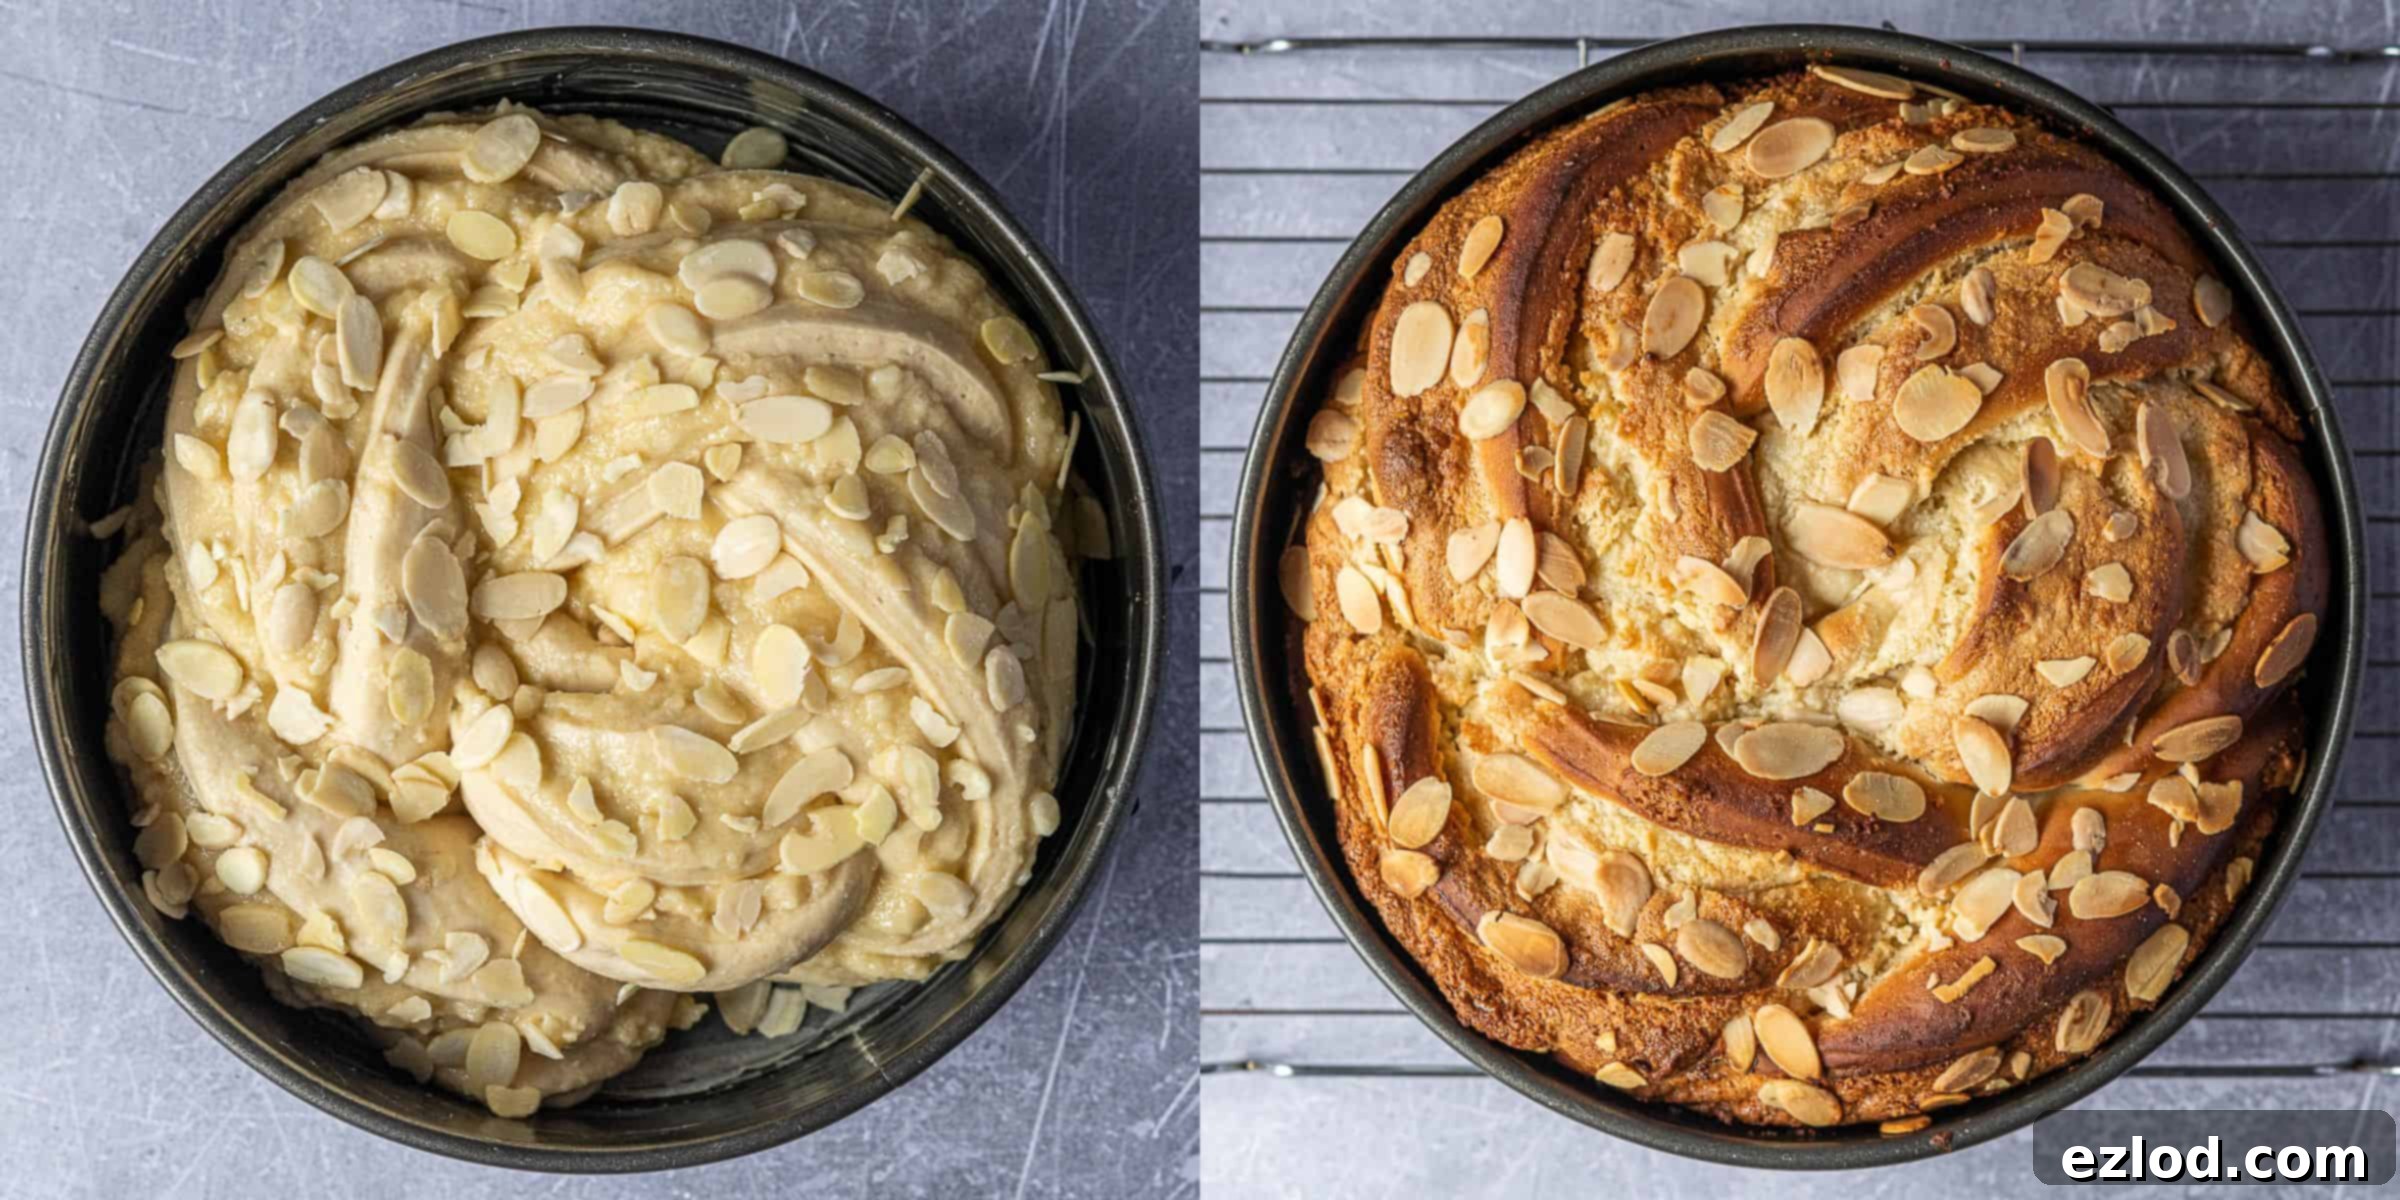
Once baked, remove the almond bread twist from the oven and allow it to cool in the tin on a wire rack for at least 30 minutes. This crucial cooling period allows the bread to set properly and makes it easier to unmould without losing its shape or stickiness from the filling.
Expert Tips for a Perfect Vegan Almond Bread Twist
Achieving the best possible results with this vegan almond bread twist relies on a few key practices. Here are my top tips to ensure your loaf turns out perfectly every time:
- For truly consistent and reliable results, I cannot stress enough the importance of weighing your ingredients using a digital scale and focusing on gram measurements rather than cup conversions. Cup measurements are inherently less precise for baking, and variations in how ingredients are packed can significantly impact the outcome. A gram is always a gram, ensuring accuracy and predictability in your bake.
- Always double-check the expiration date of your yeast! Using old or inactive yeast is one of the most common reasons bread fails to rise properly, leading to disappointment. Fresh yeast is key to a light and airy loaf.
- Resist the temptation to add extra flour to your dough, even if it feels a bit soft and sticky. This consistency is intentional and crucial for the final texture. Over-flouring the dough will result in a dry, dense, and heavy bread, rather than the desired light and fluffy texture. Trust the process!
- Be mindful that the rising time for your dough will vary considerably depending on the ambient temperature of your kitchen. On warmer days, the yeast will be more active, and your dough will rise much faster. Conversely, in colder conditions, it will take longer to proof. Be patient and observe the dough, rather than strictly adhering to time estimates.
- While bread flour provides the ideal texture due to its higher protein content, you can substitute plain (all-purpose) flour if bread flour isn’t available. However, be prepared for a slight difference in chewiness. As mentioned, wholemeal or whole wheat flour is not recommended, as it will lead to a dense and heavy loaf.
- This almond bread twist can be prepared entirely within a single day, but for enhanced flavor and convenience, consider making the dough the evening before. Simply place the covered dough in the refrigerator to proof slowly overnight. If you choose this method, allow the cold dough to come to room temperature for about 30-60 minutes before proceeding with the shaping and second rise steps in the morning. Note that the second rise might take a little longer for cold dough.
- This bread is at its absolute best when enjoyed on the day it is baked, when it’s wonderfully fresh and soft. However, it will keep well in an airtight container for a couple of days. If you’re enjoying it on the second or third day, I highly recommend warming it gently in the microwave for a few seconds before serving to revive its soft texture and delicious aroma.
Understanding Yeast: Instant vs. Active Dry
The type of yeast you use can slightly alter your baking process. I consistently opt for instant yeast for my bread recipes because of its sheer convenience. Unlike active dry yeast, instant yeast doesn’t require activation in liquid first; you can simply add it directly to your dry ingredients, saving you a step and some time. If possible, I highly recommend stocking up on instant yeast for your bread-making endeavors.
However, if active dry yeast is what you have on hand, you can certainly still use it, though the method will differ slightly:
- After you’ve gently heated your non-dairy milk and vegan butter mixture, ensure it cools down to a lukewarm temperature – it must NOT be hot. Again, test it by comfortably holding your finger in the liquid; anything too hot will kill the delicate yeast.
- Once lukewarm, stir in 12g (which is about 3 rounded teaspoons) of active dry yeast along with a small pinch of sugar. The sugar provides food for the yeast, helping it to activate.
- Allow this mixture to sit undisturbed for 10 to 20 minutes. You’ll know it’s ready when a visible layer of foam or bubbles forms on the surface, indicating the yeast is active and alive. Once bubbly, proceed with the rest of the recipe as outlined.
Clever Ways to Accelerate Dough Rising Time
If your kitchen is on the cooler side and you’re eager to speed up the dough’s rising process, there are a couple of effective tricks you can employ:
- One method involves using your oven as a proofing box. Preheat your oven to its absolute lowest temperature for just a couple of minutes – literally, just enough to take the chill off. Then, switch the oven off completely and open the door for about 30 seconds to release some of the intense heat. Carefully test the internal temperature with your hand; it should feel pleasantly warm, akin to a warm summer day, not hot. Crucially, if it’s too hot, it will kill the yeast, so exercise caution! Place your covered dough inside the warm, switched-off oven and close the door. On particularly cold days, you might need to briefly re-warm the oven once more after an hour or so, but often, a single warming is sufficient.
- Alternatively, create a steam-filled environment. Place an oven-safe bowl or a small loaf tin in the bottom of your (cold, switched-off) oven. Position your covered dough on the middle shelf above it. Carefully fill the bowl at the bottom with boiling water and then quickly close the oven door. The steam generated from the boiling water will create a wonderfully warm and humid atmosphere, perfect for encouraging your dough to rise efficiently.
Knowing When Your Almond Bread Twist is Perfectly Baked
The most accurate and reliable way to ensure your bread is baked through to perfection is by checking its internal temperature with a probe thermometer. For this almond bread twist, the center should register at least 90°C (194°F). This precise measurement removes all guesswork and guarantees a perfectly cooked loaf.
Baking bread is a delicate balance; an under-baked loaf will be unpleasantly gummy and doughy in the center, a truly unappetizing experience. Conversely, over-baked bread will turn out dry and potentially tough. Relying solely on visual cues or a fixed baking time can be misleading, as oven temperatures can vary significantly. Therefore, investing in a good probe thermometer is an incredibly handy kitchen tool that I wholeheartedly recommend for consistent baking success.
If you don’t have a thermometer, an alternative (though less precise) test is to insert a long toothpick or skewer into the very center of the loaf. It should slide in and out smoothly with minimal resistance and emerge clean, indicating that the bread is cooked through.
Freezing Your Vegan Almond Bread Twist for Later Enjoyment
Yes, this vegan almond bread twist freezes exceptionally well, making it a fantastic make-ahead option! You can freeze it either as a whole loaf or conveniently sliced. To preserve its peak freshness and quality, ensure the bread has cooled completely to room temperature before freezing, and ideally, freeze it on the same day it was baked.
For optimal protection against freezer burn, wrap the loaf or slices tightly in plastic wrap, then place them in an airtight freezer-safe container or a heavy-duty freezer bag. When you’re ready to enjoy it, simply allow it to defrost at room temperature.
If you’ve frozen the entire loaf, you can refresh it beautifully by warming it in a low oven (around 150°C/300°F) for 5-10 minutes after it has defrosted. This will bring back some of that freshly baked warmth and softness.
Can This Recipe Be Made Gluten-Free?
Unfortunately, this particular recipe is not suitable for gluten-free flour substitutions. The complex structure and rise of this yeast-based bread rely heavily on the gluten development in white bread flour. Attempting to adapt it with gluten-free flours would fundamentally alter the chemistry and texture, requiring a complete rework of the recipe.
Gluten-free baking is a specialized area, and it’s not my primary area of expertise, so I’m unable to provide reliable guidance on converting this specific recipe. For successful gluten-free bread, it is always best to seek out and use a recipe that has been specifically developed and tested for gluten-free ingredients, rather than trying to modify a traditional gluten-containing recipe.
More Irresistible Sweet Vegan Bread Recipes:
- Maple Pecan Bread Wreath
- Vegan Chocolate Babka
- Vegan Cinnamon Rolls
- Vegan Pulla Bread
- Gingerbread Cinnamon Rolls
- Vegan Hot Cross Buns
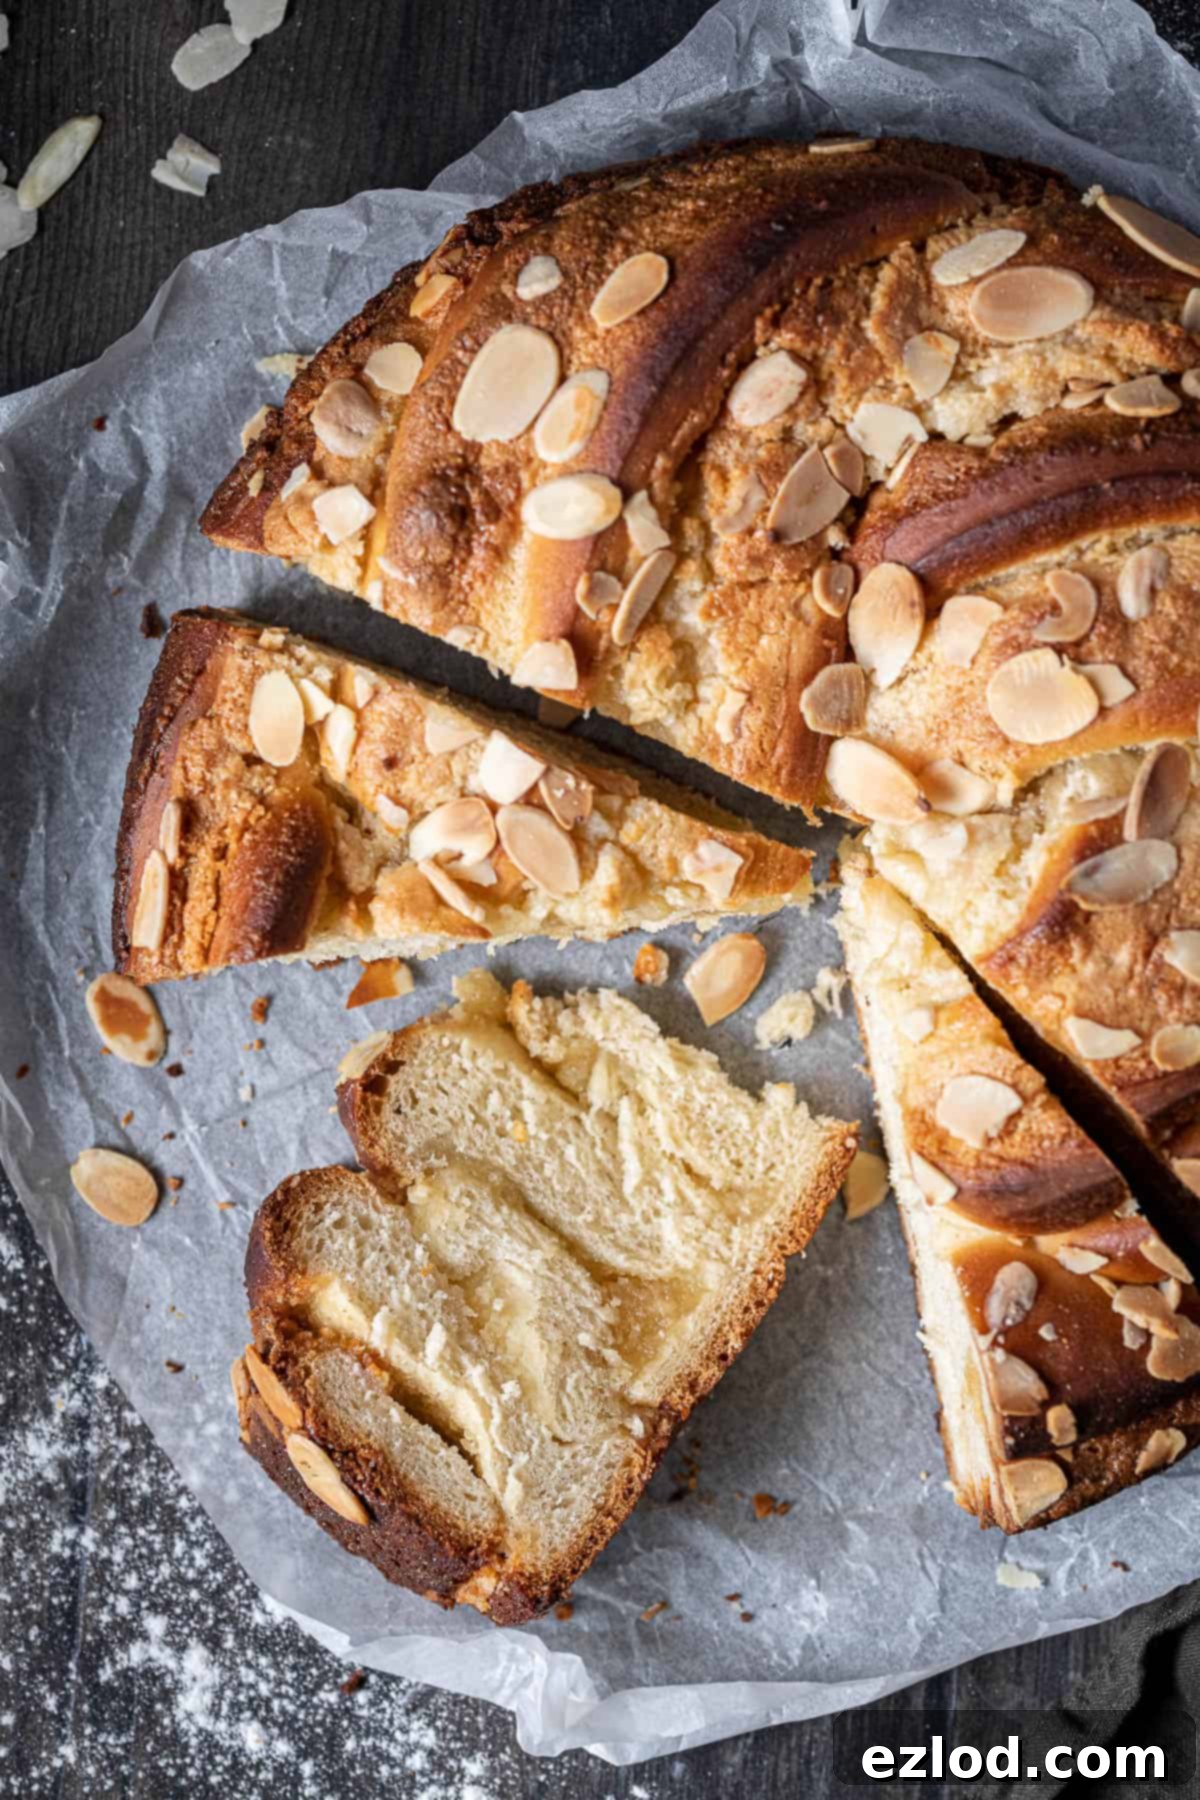
If you tried this delightful recipe, I would love to hear how it went! Please take a moment to rate it, leave a comment below, or share your creation on Instagram by tagging @domestic_gothess and using the hashtag #domesticgothess. Your feedback and shares are incredibly valuable!
All images and content featured on Domestic Gothess are protected by copyright. If you wish to share this recipe with others, please do so by utilizing the provided share buttons. Kindly refrain from screenshotting or posting the full recipe or its content; instead, we kindly request that you include a direct link to this post for the recipe. Thank you for your understanding and support.

Almond Bread Twist (Vegan)
Ingredients
Dough:
- 300 ml (1 + ¼ cups) unsweetened non-dairy milk (I use soy)
- 60 g (¼ cup) vegan block butter (I use Naturli Vegan Block)
- 500 g (4 cups) white bread flour
- 50 g (¼ cup) caster or granulated sugar
- 1 tsp salt
- 10 g (3 tsp) instant/fast action yeast
- 2 Tbsp vanilla extract
Filling:
- 50 g (3 Tbsp + 1 tsp) vegan butter/margarine melted
- 30 g (2 Tbsp) caster or granulated sugar
- 100 g (scant cup) ground almonds
- 3 Tbsp non-dairy milk
- ½ tsp almond extract
- 250 g (9oz) marzipan
To Finish:
- a little non-dairy milk for brushing
- a handful flaked almonds
Instructions
-
Grease a 23cm / 9in round loose-bottomed cake tin and line both the base and sides with baking parchment.
-
To make the dough, place the non-dairy milk and butter in a pan over a low heat and stir until the butter has melted. Set it aside to cool until it is lukewarm. Do not add it to the other ingredients while it is hot or it may kill the yeast. You should be able to comfortably hold your finger in the milk.
-
Once the milk has cooled, place the bread flour in the bowl of a stand mixer fitted with a dough hook. Add the yeast to one side and the sugar and salt to the other. Mix to combine.
-
Add the butter and milk mixture and the vanilla extract and stir to form a rough dough then knead on a medium speed for 5-10 minutes until the dough is smooth and stretchy. It should still be a bit sticky but should pull away from the sides of the bowl cleanly.
-
If it seems too wet you can add a little more flour, a tablespoon at a time but be careful not to add too much or the bread will be dry. If you don’t have a stand mixer then you can knead the dough by hand on an unfloured surface.
-
Place the kneaded dough in a lightly oiled bowl, cover and leave to rise until doubled in size – about 1-2 hours in a warm spot or overnight in the fridge.
-
Meanwhile prepare the filling; mix the melted butter, ground almonds, sugar, milk and almond extract together in a bowl. Crumble in the marzipan and mash it in a bit with a fork, there is no need to get it smooth, you want some lumps of marzipan in there.
-
Once the dough has doubled in size, punch it down and give it a brief 30 second knead to knock out the excess air.
-
Roll the dough out on a lightly floured surface into a rectangle approx 30 x 40 cm. Spread over the filling evenly, leaving a 1cm border around the edge. I find it easiest to use my hands to spread the filling over.
-
Roll the dough up from one of the long edges into a log. Use a very sharp knife to slice the log in half lengthwise. Here is where it gets messy. Turn the two halves so that the cut side is facing up then lay one over the other so that they make an X shape.
-
Twist them together by laying one side over the other, keeping the cut side up, until all of the dough is twisted and you are left with a braid.
-
Curl the braid up from one end into a round. Place the round into the greased and lined 23cm round cake tin. (See post above for step-by-step images of how to shape the dough).
-
Loosely cover and leave to rise until it is puffy and increased in size, about 45 minutes to 1 ½ hours. The dough should spring back slowly if you gently press it with a finger, if it springs back quickly then it needs a little longer. Meanwhile preheat the oven to 180°C/160°C fan/350°F/gas mark 4.
-
When the bread is ready to bake, gently brush any exposed dough with milk and scatter over a handful of flaked almonds.
-
Bake for 50-60 minutes, covering with tin foil once the top is brown. It is done when the centre measures at least 90°C/194°F on a probe thermometer.
-
Leave to cool in the tin on a wire rack for about half an hour before unmoulding.
Notes
- For the best results make sure that you follow the recipe closely. As always, I highly recommend weighing your ingredients using the gram measurements (with a digital scale), rather than the cup conversions. Cup measurements are simply not accurate enough for baking and I cannot guarantee the best results if you use them. A gram is always a gram, but a cup won’t always measure out the same amount.
- Don’t be tempted to add more flour to the dough, it is supposed to be a bit soft and sticky. If you add too much flour the bread will end up being dry and dense, not light and fluffy.
- The rising time of the dough will vary depending on how warm it is; on hot days it will rise much faster than on cold ones.
- See the main post above for additional expert tips, detailed explanations, and helpful step-by-step images to guide you through the process.
Original (Non-Vegan) Almond Bread Twist Recipe (Published 2015):
This recipe was originally published in 2015. While I have since updated and veganized it for a broader audience, I’ve included the original version below for those who may have loved it.
Ingredients
Bread:
- 240 ml (1 cup) whole milk
- 50 g (scant ¼ cup) butter
- 1 vanilla pod/2 tbsp vanilla extract
- 500 g (4 + scant ¼ cups) strong white bread flour
- 50 g (¼ cup) sugar
- 1 tsp salt
- 10 g (3 tsp) fast action yeast
- 1 egg beaten
Filling
- 2 medium egg whites
- 200 g (7oz) marzipan
- 50 g (scant ¼ cup) softened butter
- 2 tbsp sugar
- 50 g (2 oz) ground almonds
To Finish
- 1 egg yolk beaten with a little milk
- handful flaked almonds
Instructions
- Place the milk, butter and vanilla in a pan and heat until just boiling. Remove from the heat and leave to cool until lukewarm (scalding the milk like this helps to make the finished loaf softer).
- Place the flour in a large bowl (the bowl of your stand mixer if you have one) and add the yeast to one side and the sugar and salt to the other.
- Add the egg and the lukewarm milk (scrape the seeds out of the vanilla pod if using, then remove the pod) and mix it all together until it forms a sticky dough.
- Knead either with the mixer or by hand on an un-floured surface until the dough is smooth and stretchy. If you are kneading by hand it will be quite sticky to start with, but after a few minutes of kneading it will become smooth (you may need to prise it off the work surface with a dough scraper).
- Place in a clean lightly oiled bowl and cover with oiled clingfilm. At this point you can either let it rise for an hour or so at room temperature until doubled in size, or place the dough in the fridge to rise overnight.
- If you have left the dough in the fridge overnight, let it sit out for about half an hour to come up to room temperature. Meanwhile, make the filling. Place the egg whites in a food processor and pulse until they are frothy. Crumble in the marzipan and continue to pulse until smooth. Add the butter, sugar and ground almonds and pulse again until combined.
- Line the base and sides of a deep, 23cm/9in round, removable base cake tin with greaseproof paper.
- Roll the dough out on a lightly floured surface into an 36x46cm/18x14in rectangle. Spread the filling all over the dough leaving an inch gap around the edges. Roll the dough up from the long side (like making cinnamon rolls),cut the roll of dough in half lengthways, leaving an inch or so at the top uncut.
- This next part is messy, be prepared to get almond filling everywhere…Twist the dough all the way along so that it so that it has a coiled appearance. Coil the length of twisted dough into the prepared cake tin in a spiral shape.
- Cover loosely with oiled clingfilm and set aside to rise for an hour or so until risen and puffy.
- Heat the oven to 180C/160C fan/350F/gas mark 4. Brush the risen dough with the beaten egg yolk and scatter over the flaked almonds.
- Bake for 50-60 minutes, covering with tin foil once the top is brown. It is done when the centre measures 90°C/194°F on a probe thermometer. Leave to cool in the tin on a wire rack for at least half an hour before unmoulding.
