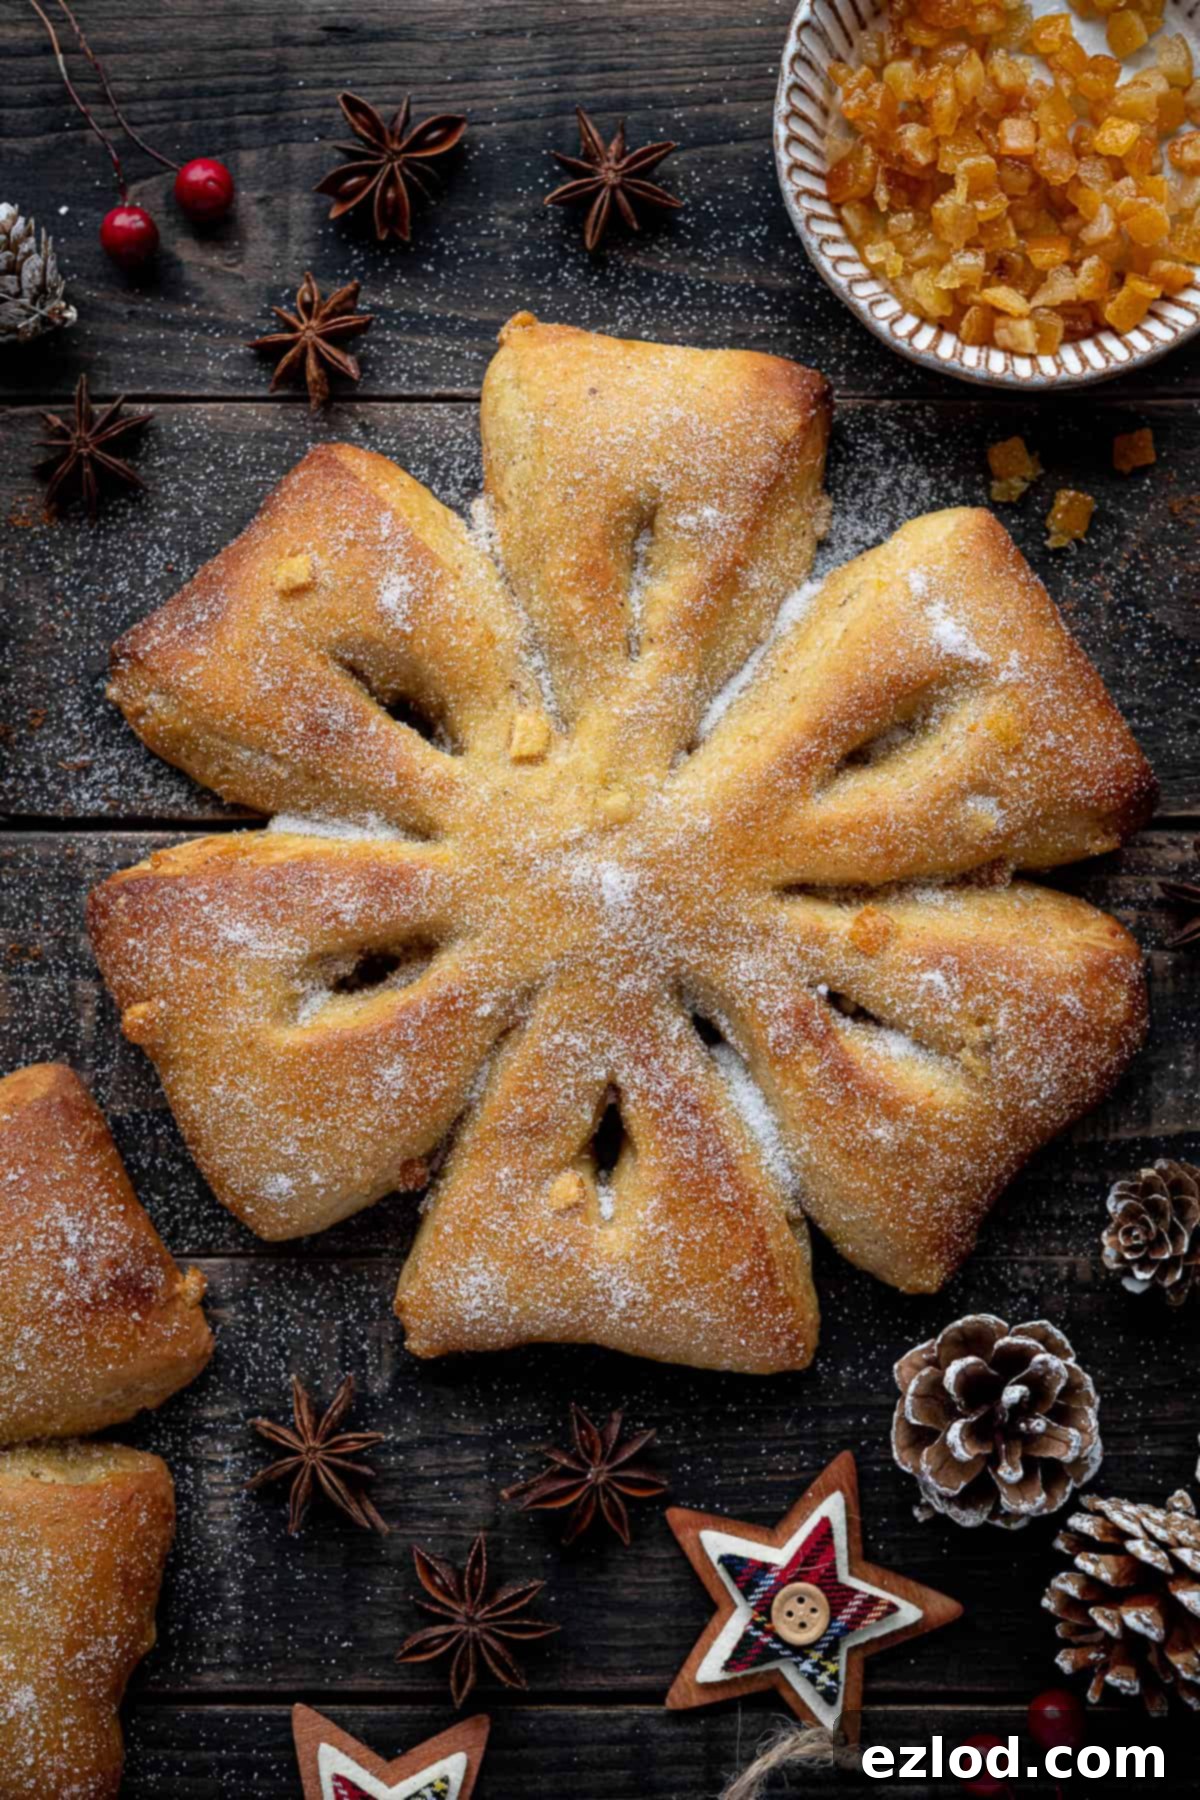
Vegan Orange & Anise Snowflake Bread: A Festive Gibassier Recipe for Christmas
Embrace the spirit of the holidays with our exquisite Vegan Orange & Anise Snowflake Bread. This Christmassy vegan rendition of the classic French Gibassier offers a delightful blend of soft, sweet, light, and wonderfully buttery textures, infused with the enchanting flavors of orange and anise. Each loaf is artfully shaped like a delicate snowflake, making it a truly perfect and impressive centrepiece for your Christmas gatherings and festive celebrations.
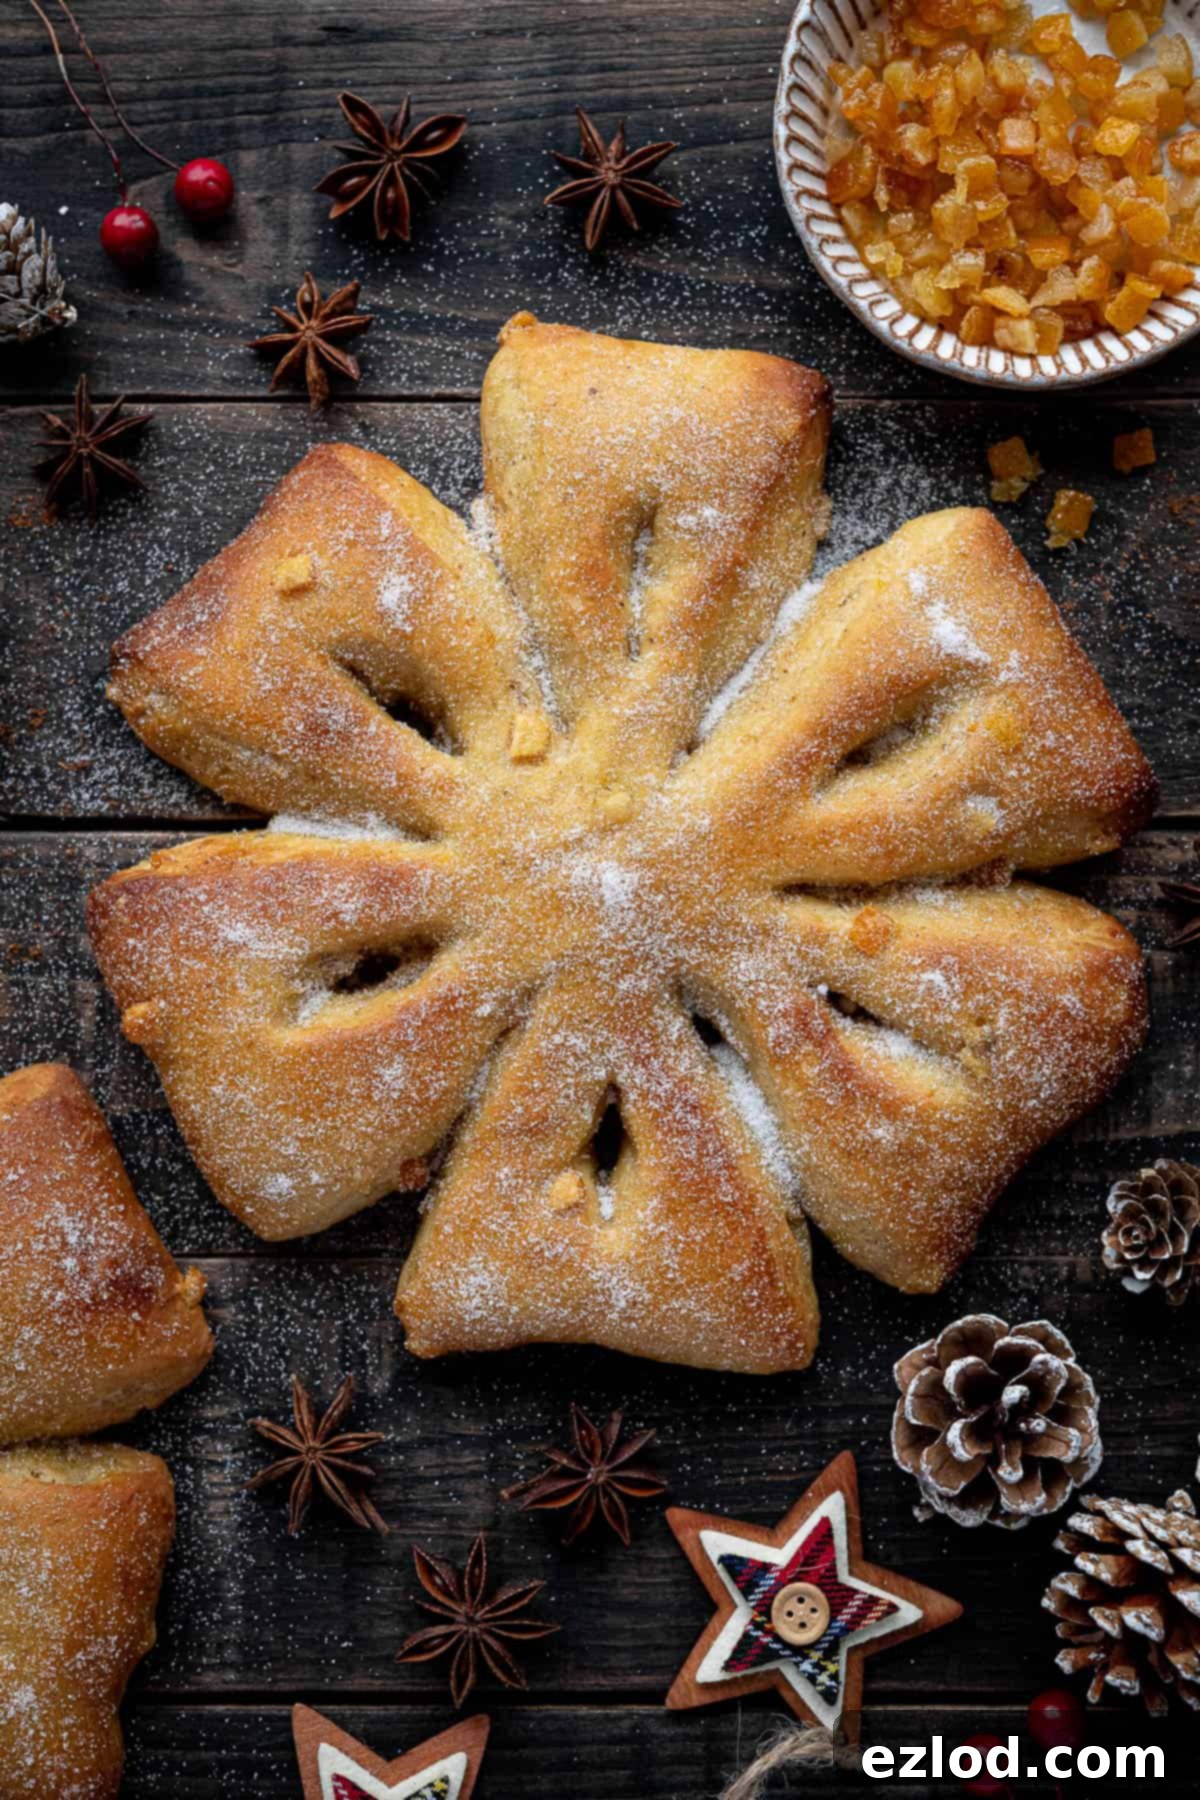
These vegan orange and anise snowflake breads are more than just a festive bake; they are an experience. Imagine waking up to the aromatic scent of orange and star anise wafting through your home, promising a truly special breakfast, a delightful addition to your Christmas brunch spread, or a comforting snack to enjoy with a warm cup of tea during the holiday season. Their unique snowflake shape not only makes them visually stunning but also incredibly fun to pull apart and share.
Discovering the Magic of Gibassier
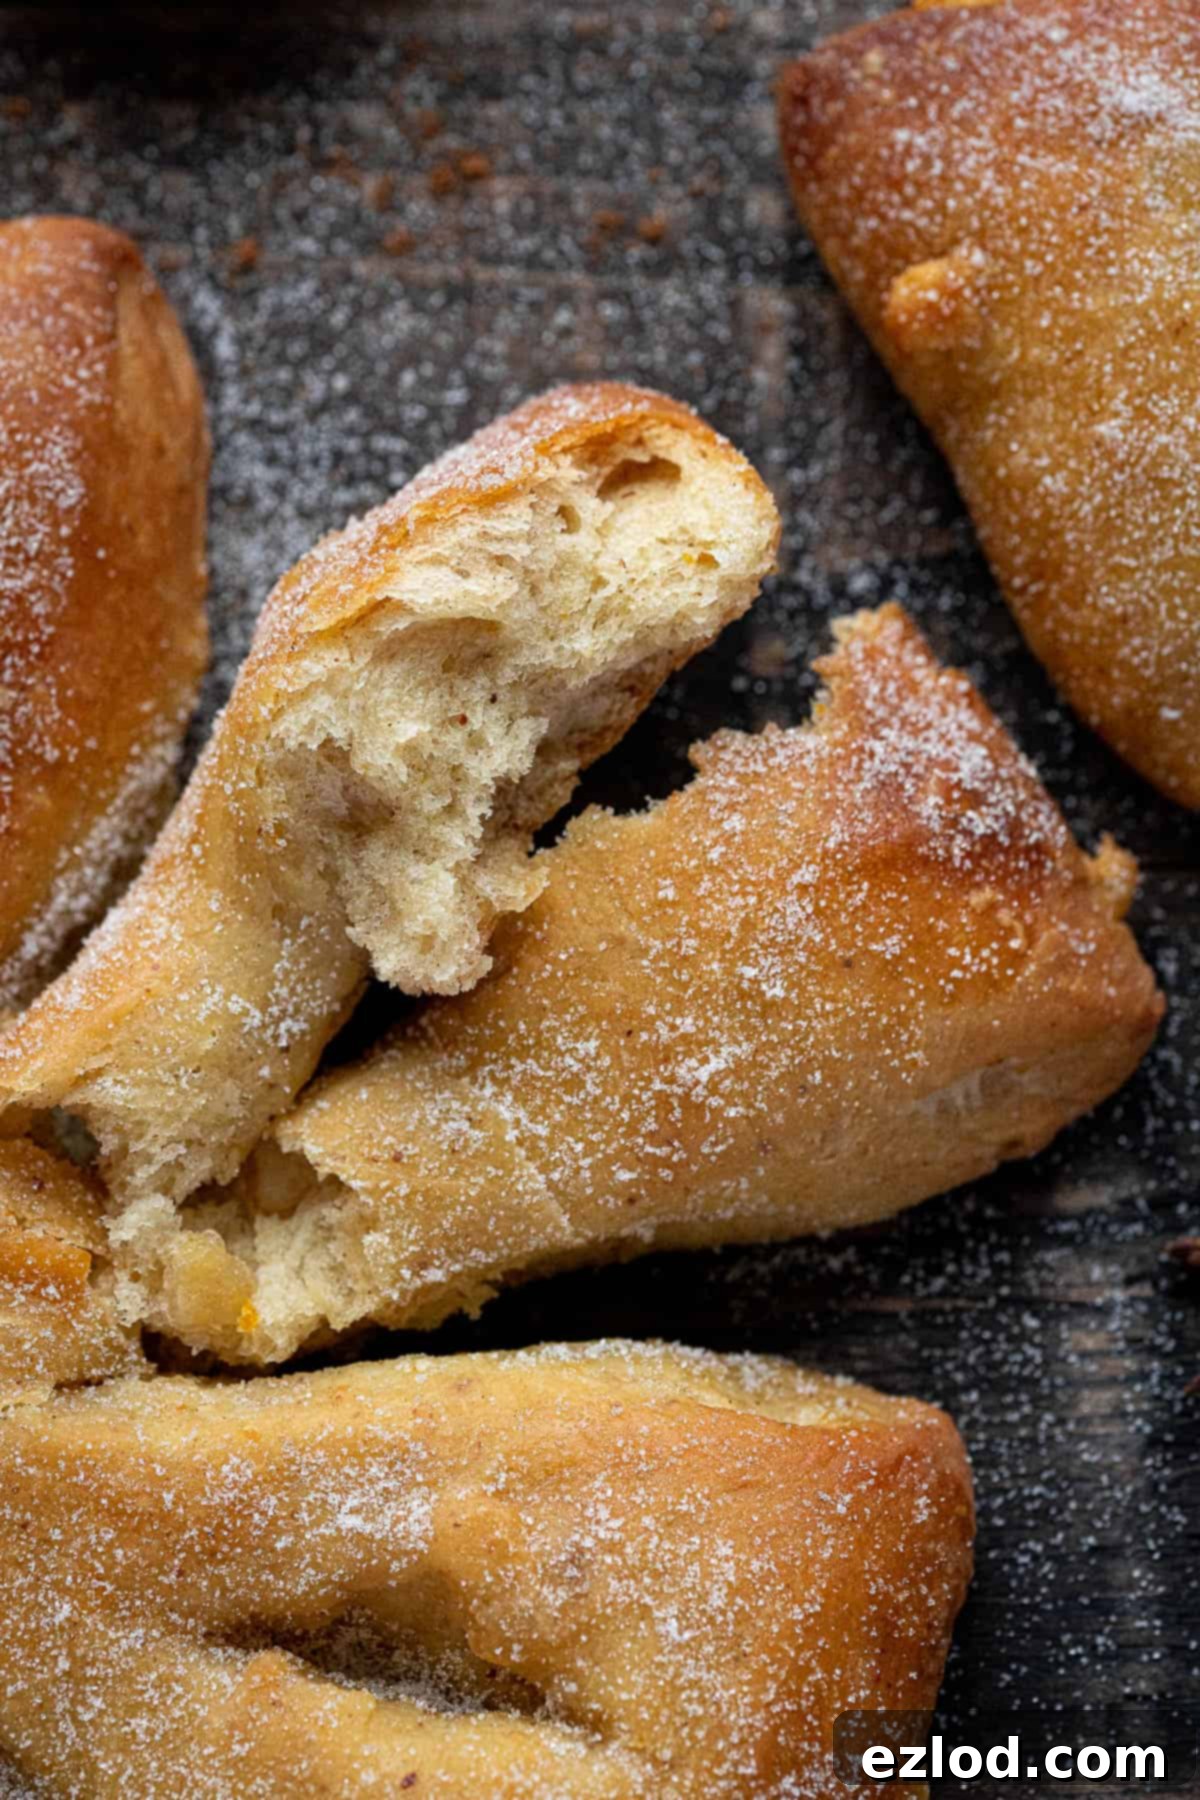
My inspiration for this enchanting bread comes from the traditional French Gibassier, a cherished sweet bread originating from the sun-drenched Provence region. Historically, Gibassier is a cousin to other enriched breads like panettone or brioche, characterized by its tender crumb and rich flavor profile. What sets Gibassier apart is its unique blend of olive oil and butter, along with aromatic additions like anise, orange blossom water, and succulent candied peel. The result is a bread that is beautifully soft, remarkably light, luxuriously buttery, intensely fragrant, and utterly bursting with flavor. It’s a fantastic way to start any day, especially around Christmas, and can be enjoyed simply on its own or generously slathered with extra vegan butter for an even more decadent treat.
The impressive snowflake shaping, which makes these loaves ideal for a festive tear-and-share style bread, was inspired by a creative idea I found here. It’s surprisingly easy to achieve, yet the outcome is a truly show-stopping festive loaf that will impress your family and friends.
Why You’ll Adore This Vegan Orange & Anise Snowflake Bread
- Irresistibly Soft & Flavorful: Experience the perfect balance of sweetness, delicate orange citrus, and the warm, aromatic notes of anise in every bite.
- Impressive Festive Appearance: The unique snowflake shape makes this bread a stunning addition to any holiday table, perfect for sharing.
- Vegan-Friendly: A delightful treat that caters to all, ensuring everyone can enjoy the festive spirit without compromise.
- Versatile Delight: Ideal for a holiday breakfast, a special brunch, an afternoon snack, or even a light dessert.
- Easier Than It Looks: While the shaping might seem intricate, it’s a straightforward process that yields incredibly rewarding results.
What Do I Need To Make Orange And Anise Snowflake Bread? A Deep Dive into Ingredients
Crafting the perfect vegan Gibassier requires careful selection of ingredients, each playing a crucial role in achieving its signature soft, light, and flavorful texture:
Bread flour: For that wonderfully soft, fluffy, and slightly chewy texture, white bread flour is paramount. Its higher protein content facilitates excellent gluten development, which is essential for enriched breads like this. While plain (all-purpose) flour can be used in a pinch, be aware that the final texture won’t be quite as airy or chewy. I strongly advise against using wholemeal flour, as its coarser texture and higher fiber content will result in a much denser loaf, altering the delicate nature of this bread.
Instant/fast action yeast: My go-to is always fast action yeast for its convenience – it doesn’t require prior activation. If you opt for active dry yeast, remember to increase the quantity slightly to 9g (from 7g) and activate it in a portion of the lukewarm milk and a pinch of sugar until frothy before combining with other ingredients. Always ensure your yeast is fresh and not past its expiration date, as old yeast is the most common culprit for bread that fails to rise.
Salt: A non-negotiable ingredient in bread making! Salt is vital not only for enhancing the overall flavor but also for controlling the yeast’s activity and strengthening the gluten structure. Do not omit it, as your bread will taste bland and could have an inferior texture.
Non-dairy milk: Soy milk is my preferred choice for baking due to its higher protein content, which most closely mimics dairy milk and contributes to a richer crumb. However, any variety of unsweetened non-dairy milk (like almond, oat, or cashew milk) will work beautifully. Just ensure it’s unsweetened to control the sugar level in the final product.
Sugar: Caster (superfine) sugar is ideal for the dough as its fine granules dissolve quickly and evenly, ensuring consistent sweetness throughout. Granulated sugar can be used as a substitute if that’s all you have on hand. Additionally, you’ll need extra caster sugar for sprinkling over the baked breads, which not only adds a touch of sweetness but also creates a beautiful, glistening, “frosty” appearance, enhancing the snowflake theme.
Vegan butter: For optimal results in baking, I typically recommend a block-style vegan butter for its firm consistency. However, for this particular recipe, a good quality tub variety (like Flora Original, as I used) is perfectly acceptable, as the dough is already enriched with olive oil. Just be sure to avoid any low-fat or diet spreads, as these contain too much water and not enough fat, which can negatively impact the bread’s texture and richness.
Olive oil: The choice of olive oil can significantly influence the final flavor. A good quality extra virgin olive oil will impart a lovely depth and richness. If you’re not particularly fond of a strong olive oil flavor, a mild-flavored light olive oil can be used instead without compromising the texture.
Orange blossom water: This ingredient provides a wonderfully delicate and fragrant floral note that perfectly complements the orange zest and anise. If orange blossom water is difficult to source, orange extract can be used as a suitable substitute, though the flavor will be more concentrated and less floral, so adjust to taste.
Ground star anise: Star anise has a unique, liquorice-like flavor that pairs exquisitely with orange. If you can’t find ground star anise, whole star anise pods can be ground in a spice grinder. For those who dislike the flavor of anise, alternatives such as mixed spice, pumpkin spice, or even a touch of ground cinnamon or cardamom can be used to impart a warm, festive aroma.
Orange zest: The finely grated zest of one large, unwaxed orange is crucial for intensifying the fresh orange flavor. Always opt for unwaxed oranges, as the wax coating can contain chemicals and affect the taste. The zest holds the majority of the fruit’s essential oils and provides a bright, aromatic punch that cannot be replicated by juice alone.
Candied peel: This provides delightful bursts of sweet, chewy texture and concentrated citrus flavor. If you’re not a fan of candied peel, feel free to omit it or swap it out for other delicious additions like vegan chocolate chips, plump raisins, or tart dried cranberries for a different twist.
How To Make Orange And Anise Snowflake Bread: Step-by-Step Guide
(Full detailed measurements and instructions, including precise timings, can be found in the comprehensive recipe card at the bottom of this page)
Step 1: Preparing the Starter
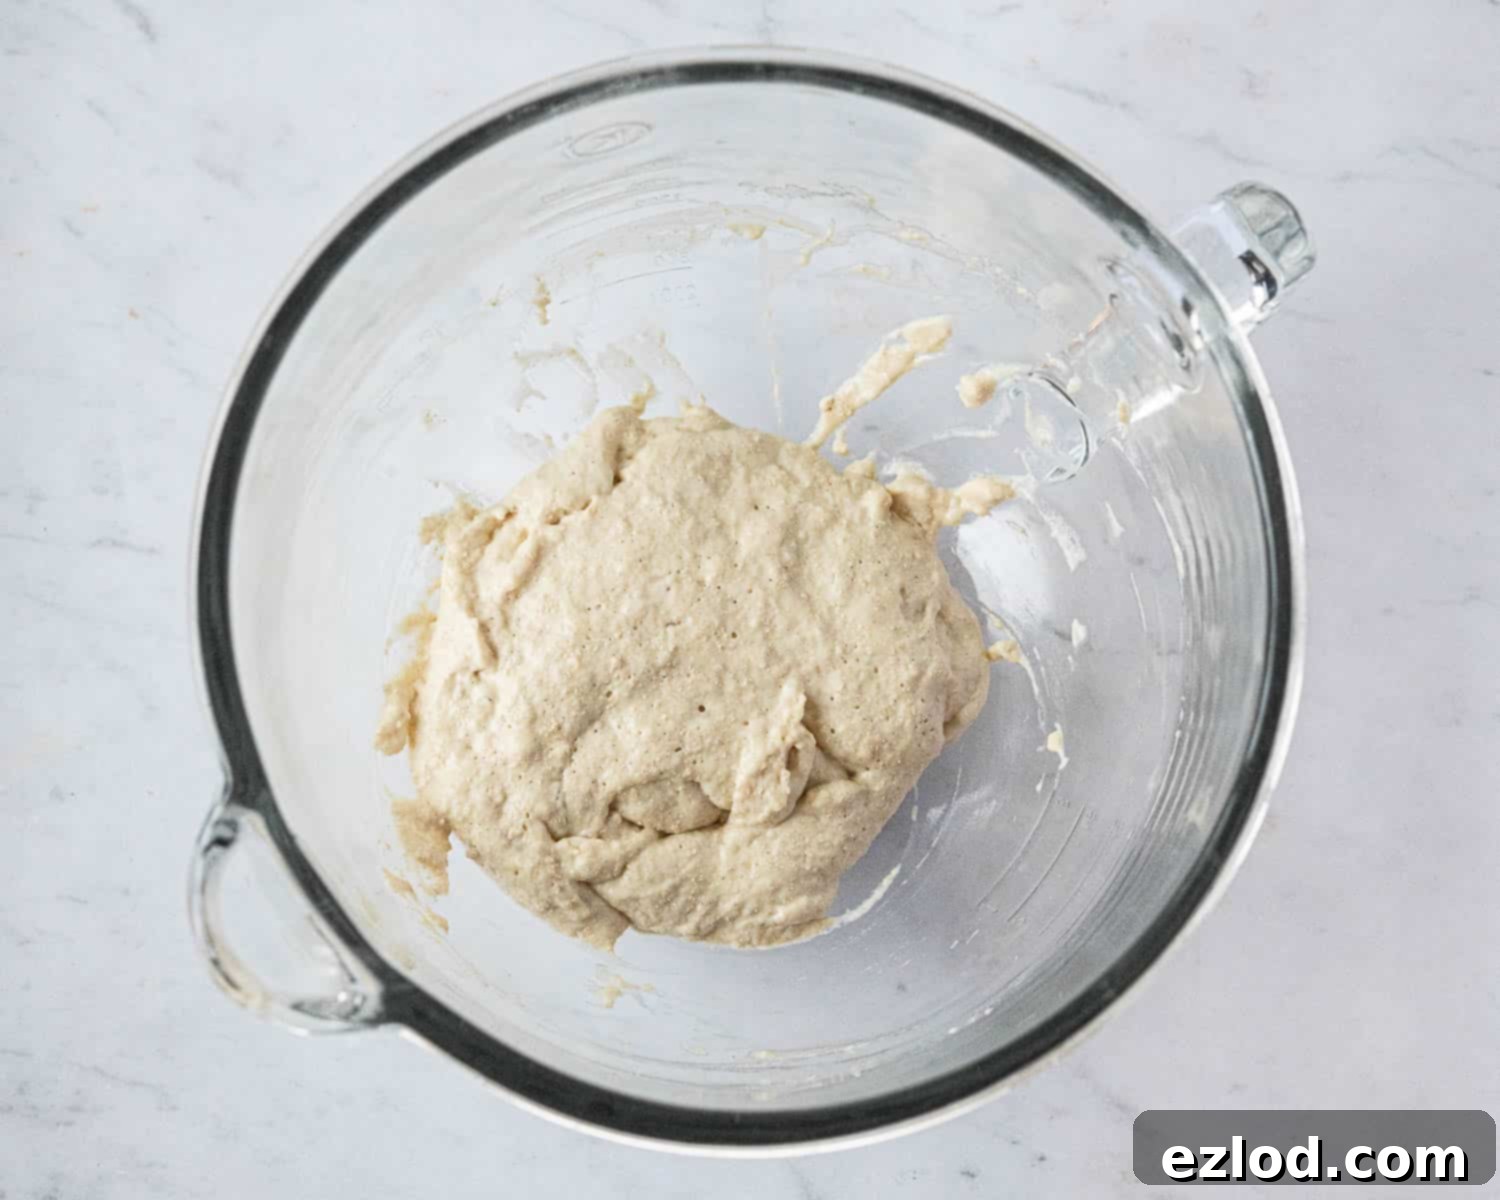
Begin by creating your starter, a crucial step for developing deep flavor and active yeast. Gently warm the non-dairy milk until it’s lukewarm (around 105-115°F or 40-46°C), being careful not to make it too hot, which can kill the yeast. In a large bowl (preferably your stand mixer bowl if you’re using one), combine the bread flour and instant yeast. Gradually beat in the lukewarm milk until you have a smooth, thin batter. Cover the bowl loosely with clingfilm or a clean kitchen towel and let it rest in a warm, draft-free place for approximately 30 minutes. During this time, the yeast will activate, and the starter should become noticeably bubbly and slightly expanded.
Step 2: Incorporating the Wet Ingredients
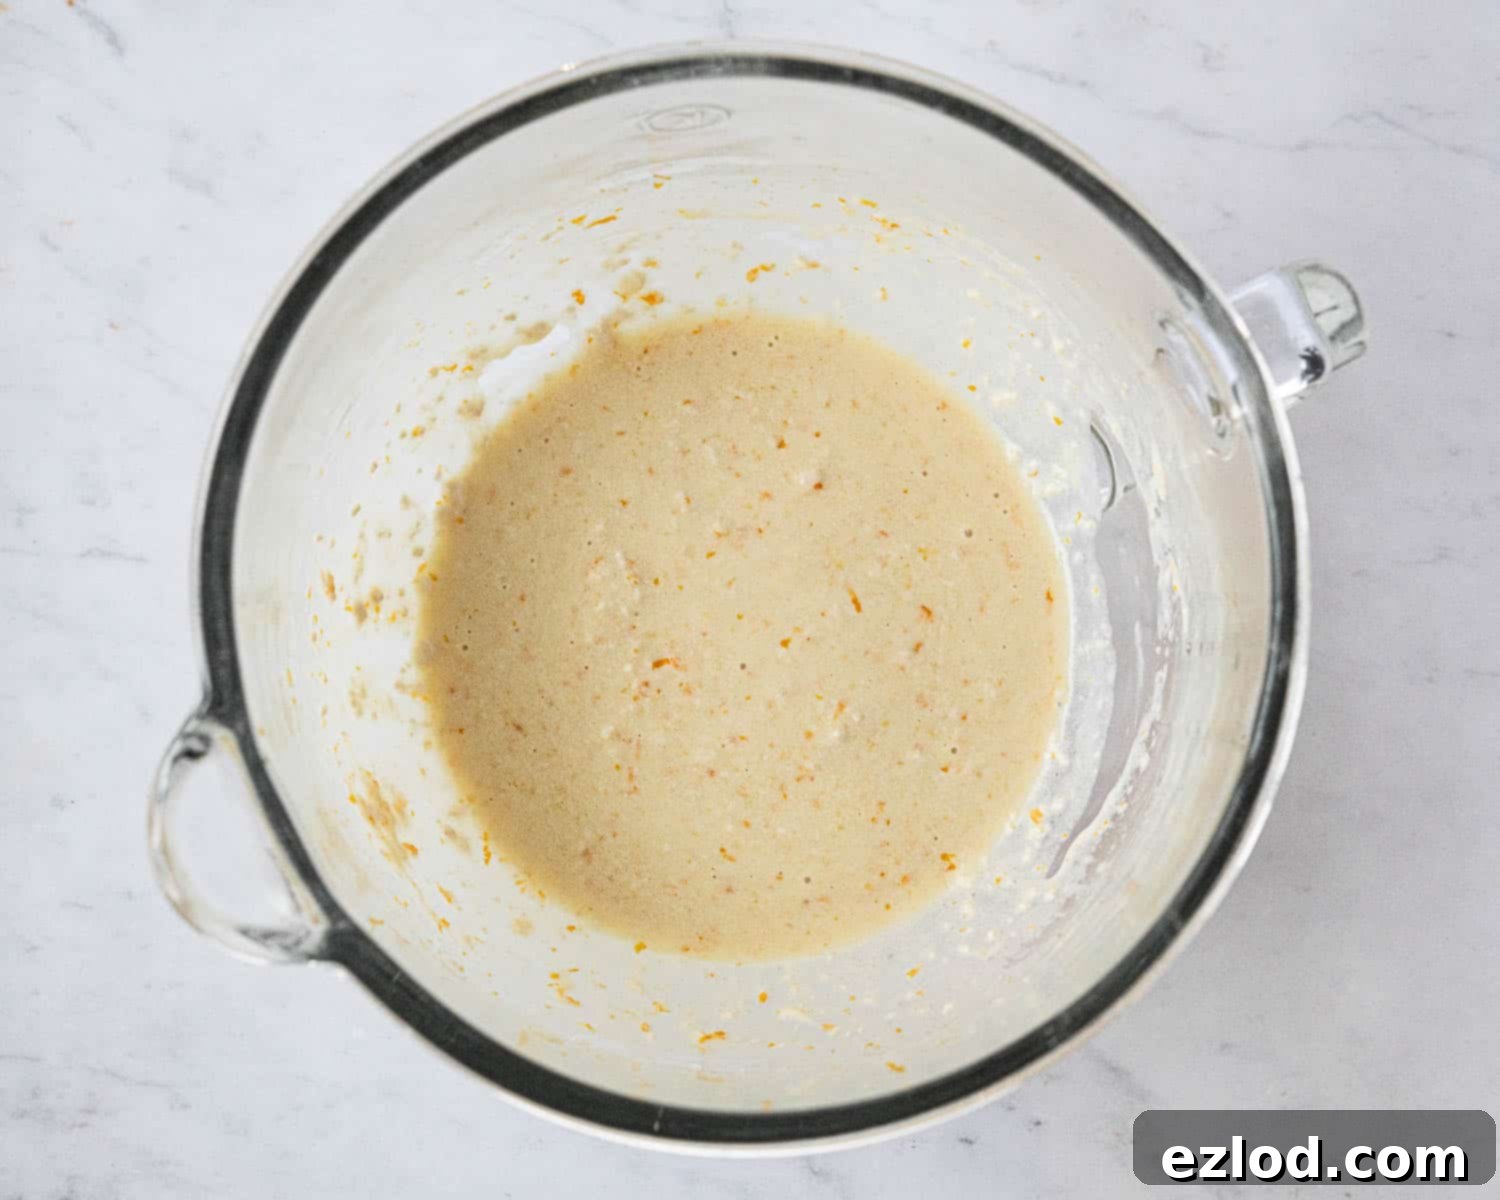
To the bubbly starter, add the remaining non-dairy milk, olive oil, the fragrant orange zest, and the delicate orange blossom water. Beat these wet ingredients into the starter until they are well combined. Don’t worry if the mixture isn’t perfectly smooth at this stage; lumps will disappear as you add the flour.
Step 3: Forming the Dough
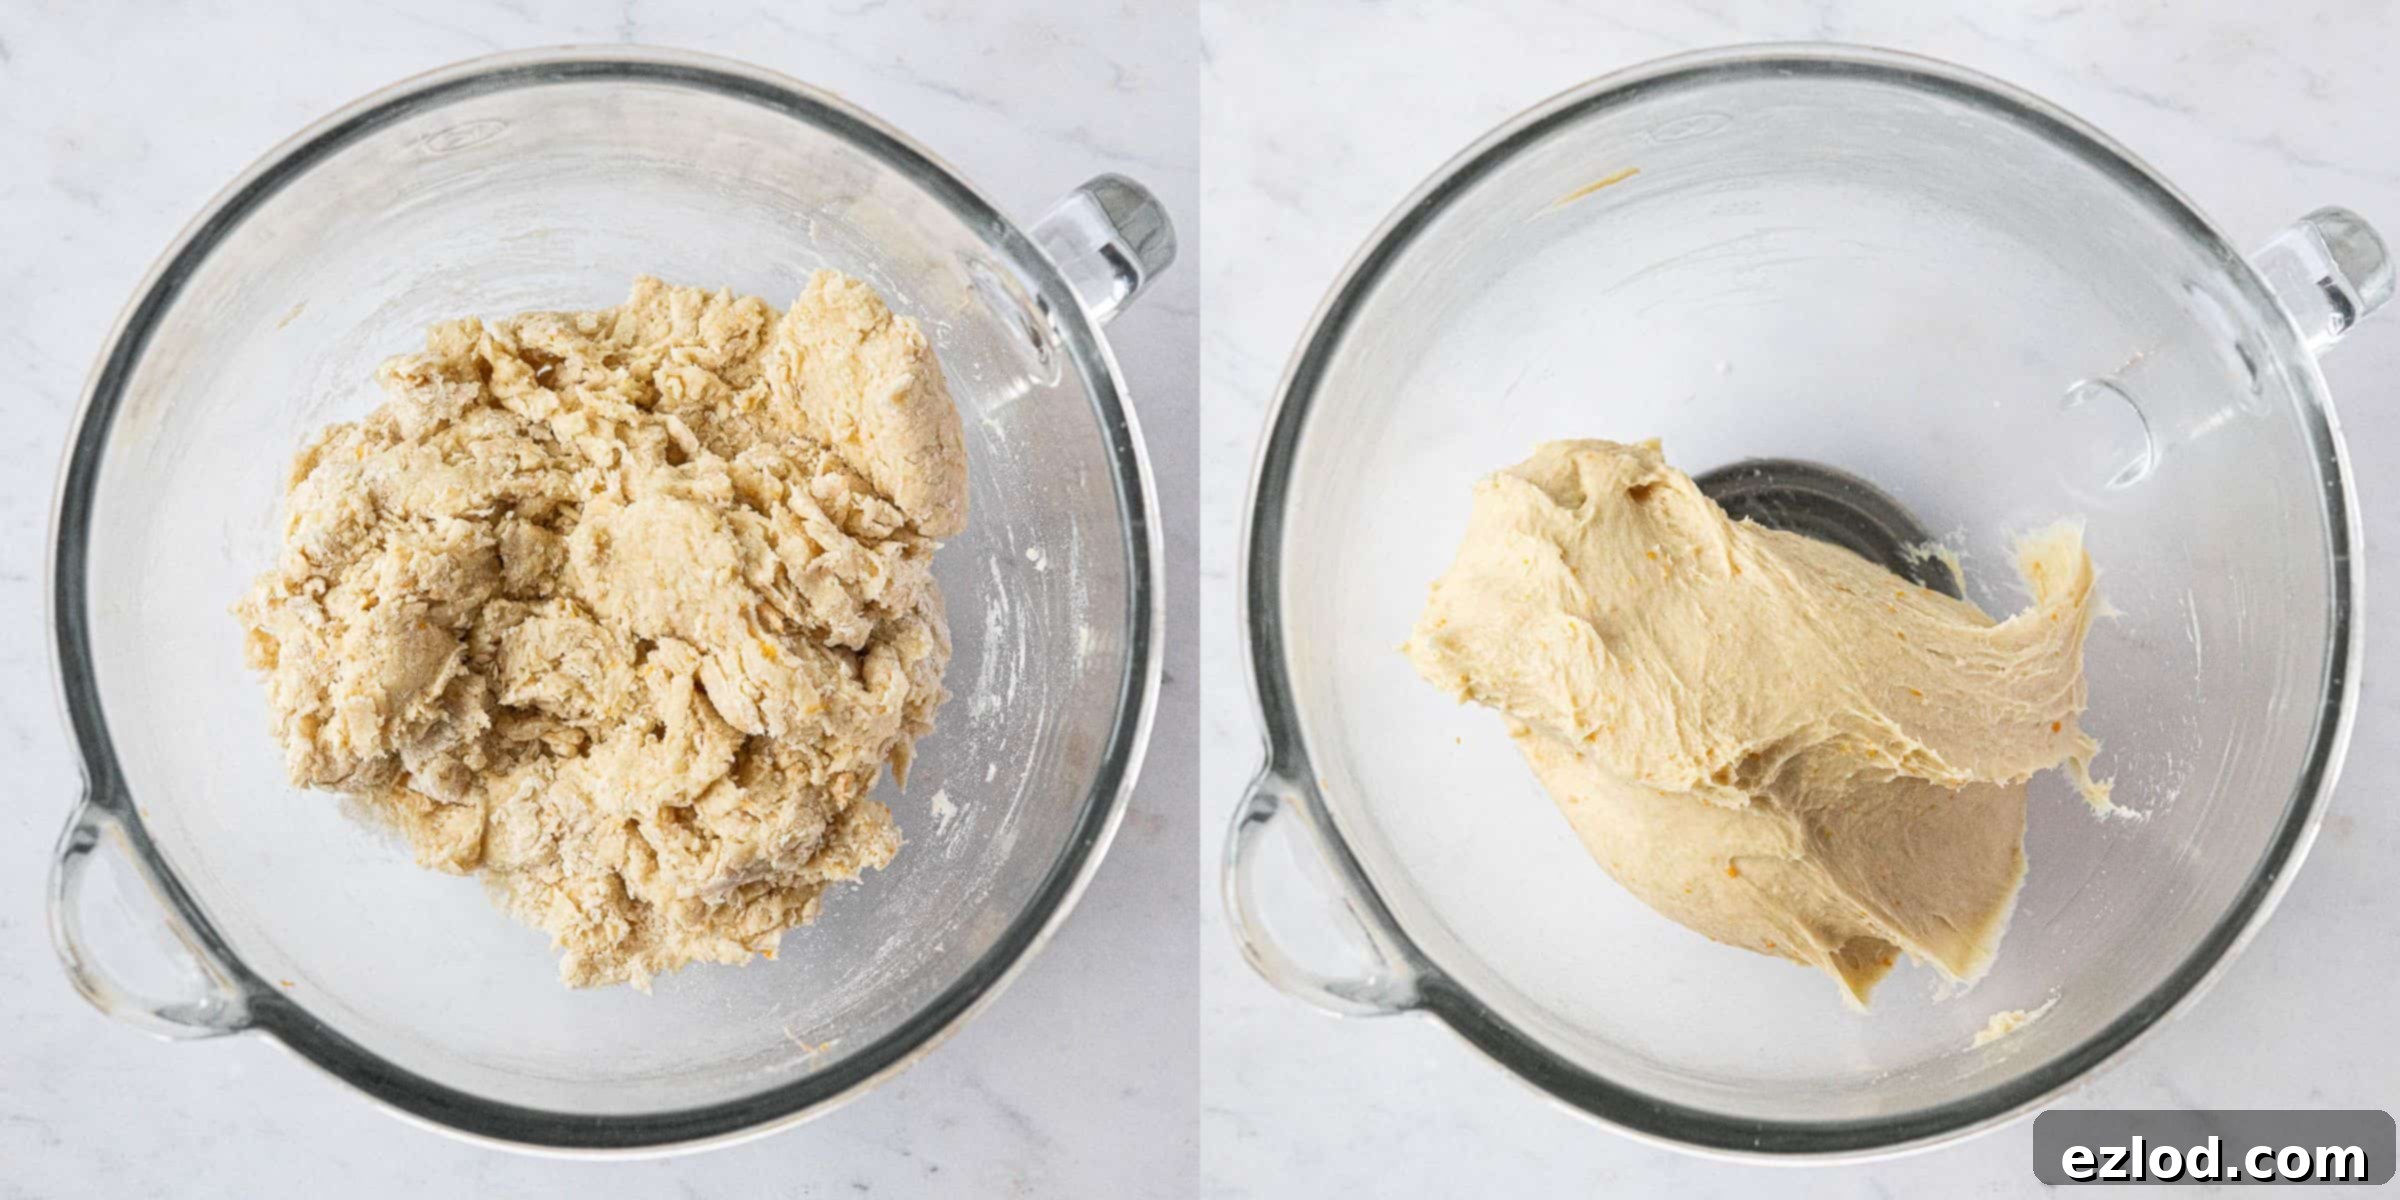
Now, add the strong white bread flour, caster sugar, and salt to the bowl. If using a stand mixer with a dough hook, mix on low speed for about 6 minutes. If kneading by hand, be prepared for a sticky dough and knead for at least 10-12 minutes. Scrape down the sides of the bowl occasionally to ensure all ingredients are incorporated. After this initial mixing, increase the speed to high (or continue vigorous hand kneading) for another 2 minutes until the dough becomes beautifully smooth, elastic, and pulls away from the sides of the bowl. It should be able to pass the “windowpane test.”
Step 4: The Windowpane Test
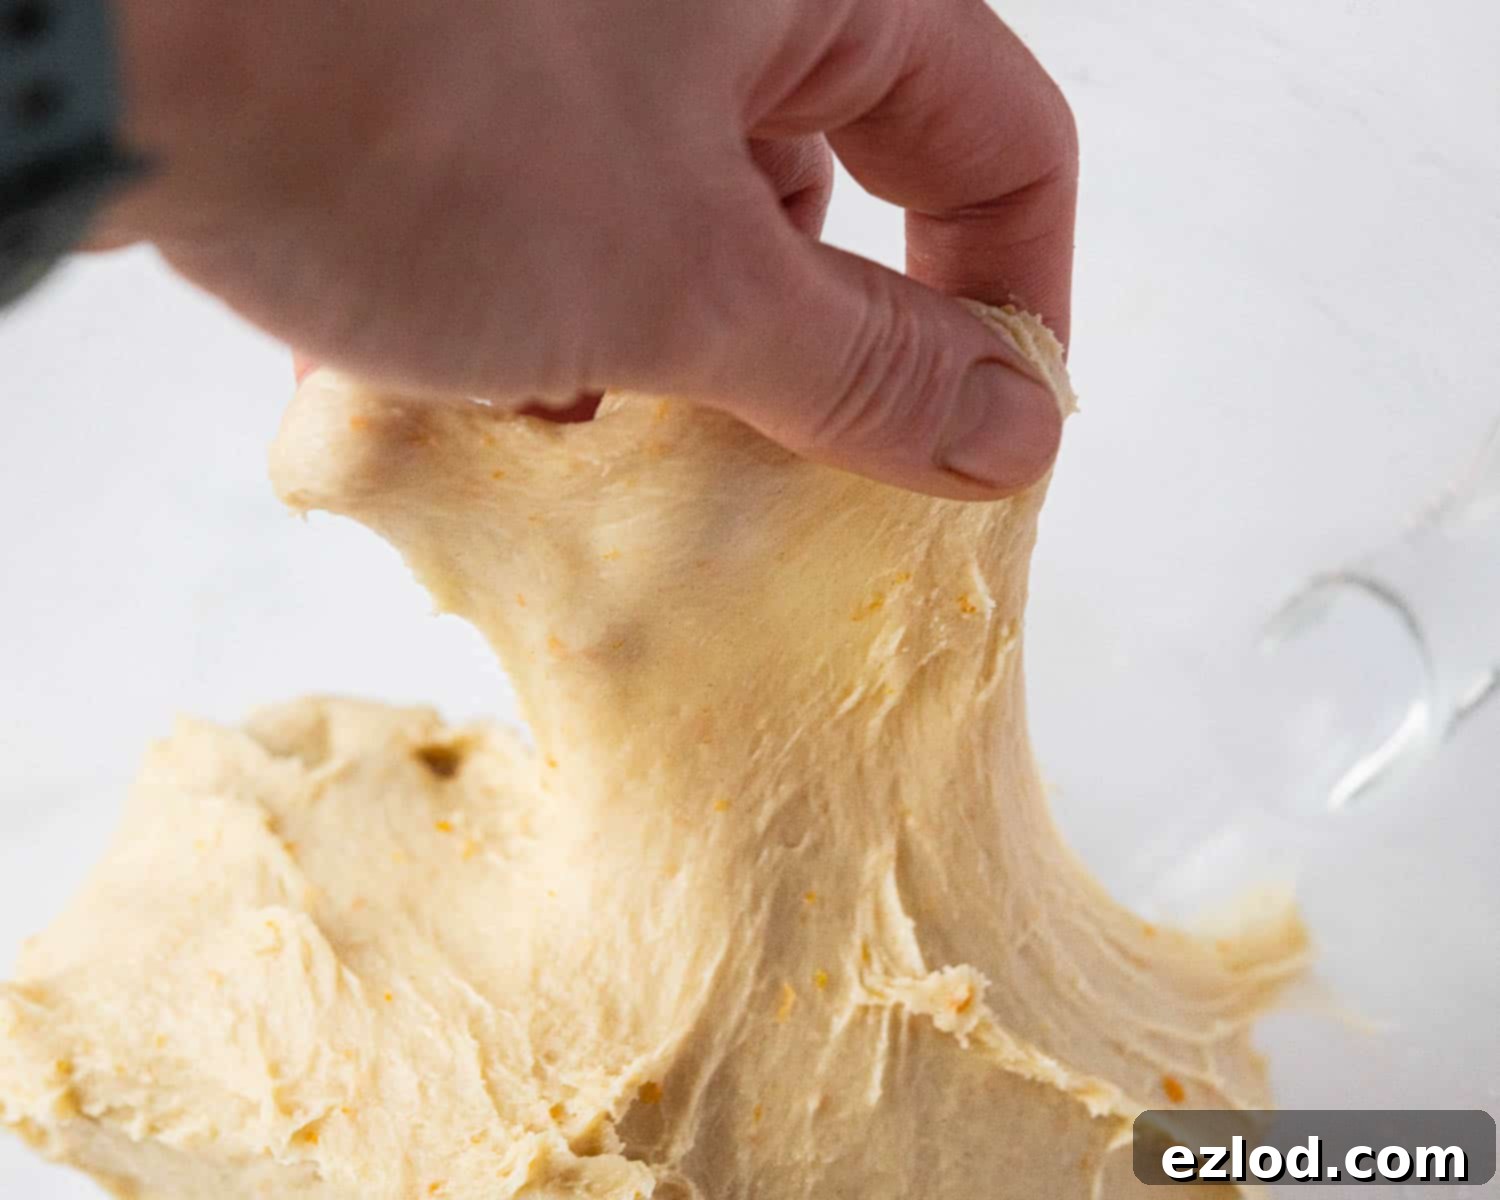
To perform the windowpane test, gently pull a small piece of dough from the main mass and stretch it between your fingers. If you can stretch it thin enough to see light pass through without tearing, it has developed sufficient gluten and is ready for the next step. If it tears easily, continue kneading for a few more minutes and test again.
Step 5: Enriching with Vegan Butter
Add the softened vegan butter to the dough. Mix on a medium speed. Initially, the dough will look quite greasy and messy, possibly separating or clinging to the dough hook. Don’t be alarmed; this is normal for enriched doughs. Continue mixing, scraping down the bowl as needed, and eventually, the butter will be fully incorporated, and the dough will come back together, becoming smooth, supple, and elastic. This process might take a few minutes.
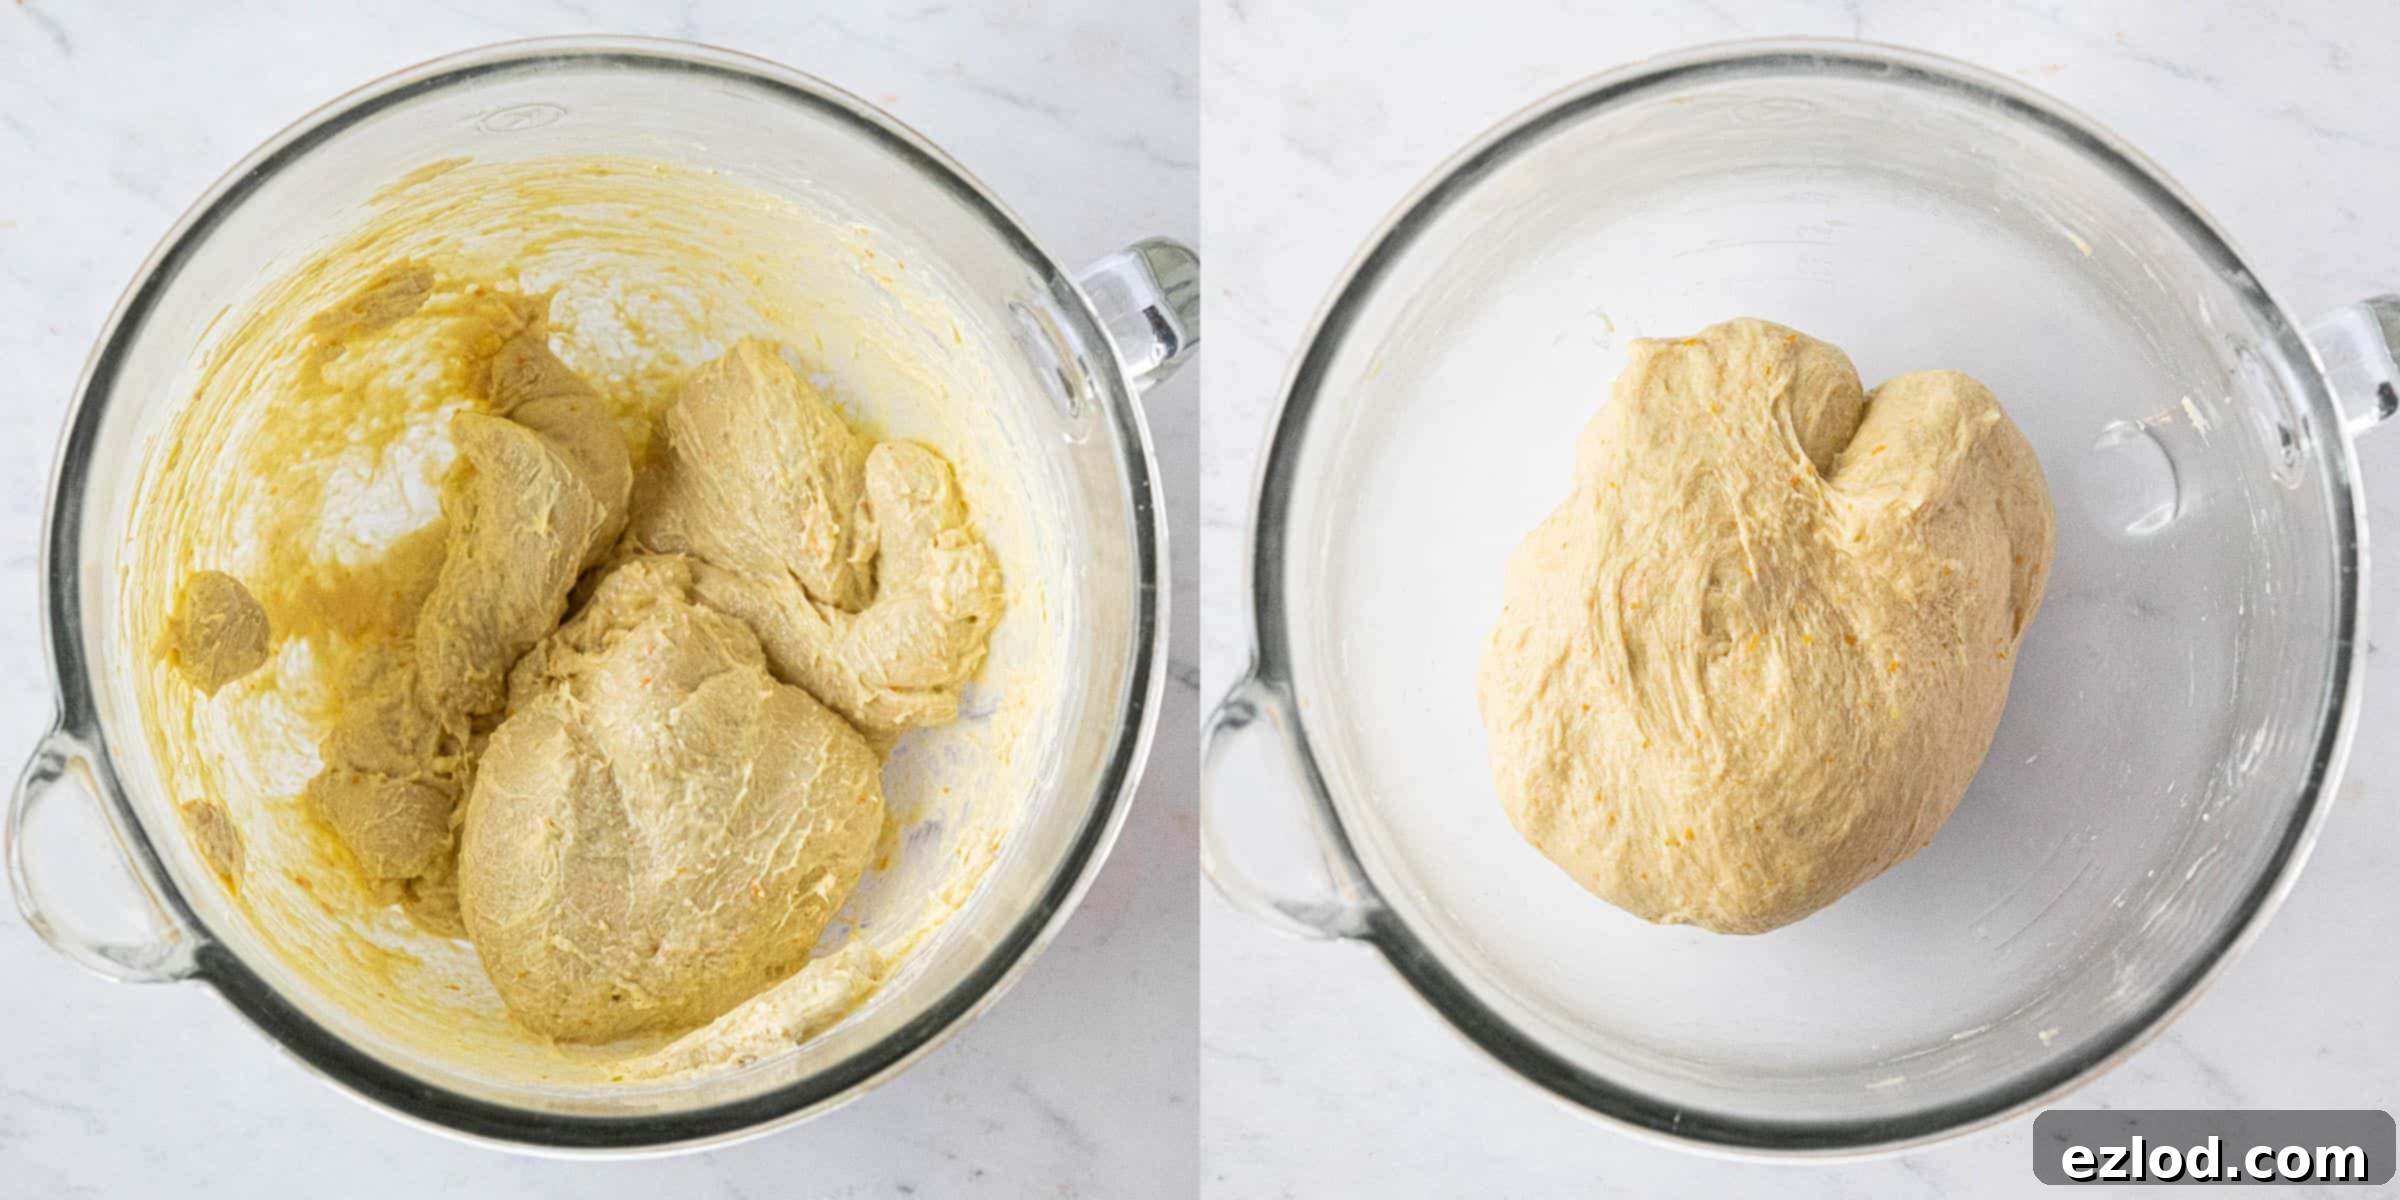
Step 6: Adding Final Flavors and First Rise
Finally, add the ground star anise and candied peel to the dough. Mix on low speed until these delightful additions are evenly distributed throughout the dough. Once fully combined, transfer the dough to a lightly oiled clean bowl, turning it once to coat all sides. Cover the bowl loosely with oiled clingfilm or a damp kitchen towel and leave it to rise in a warm place until it has doubled in size. This typically takes about 1 ½ to 2 hours, but rising times can vary depending on the ambient temperature.
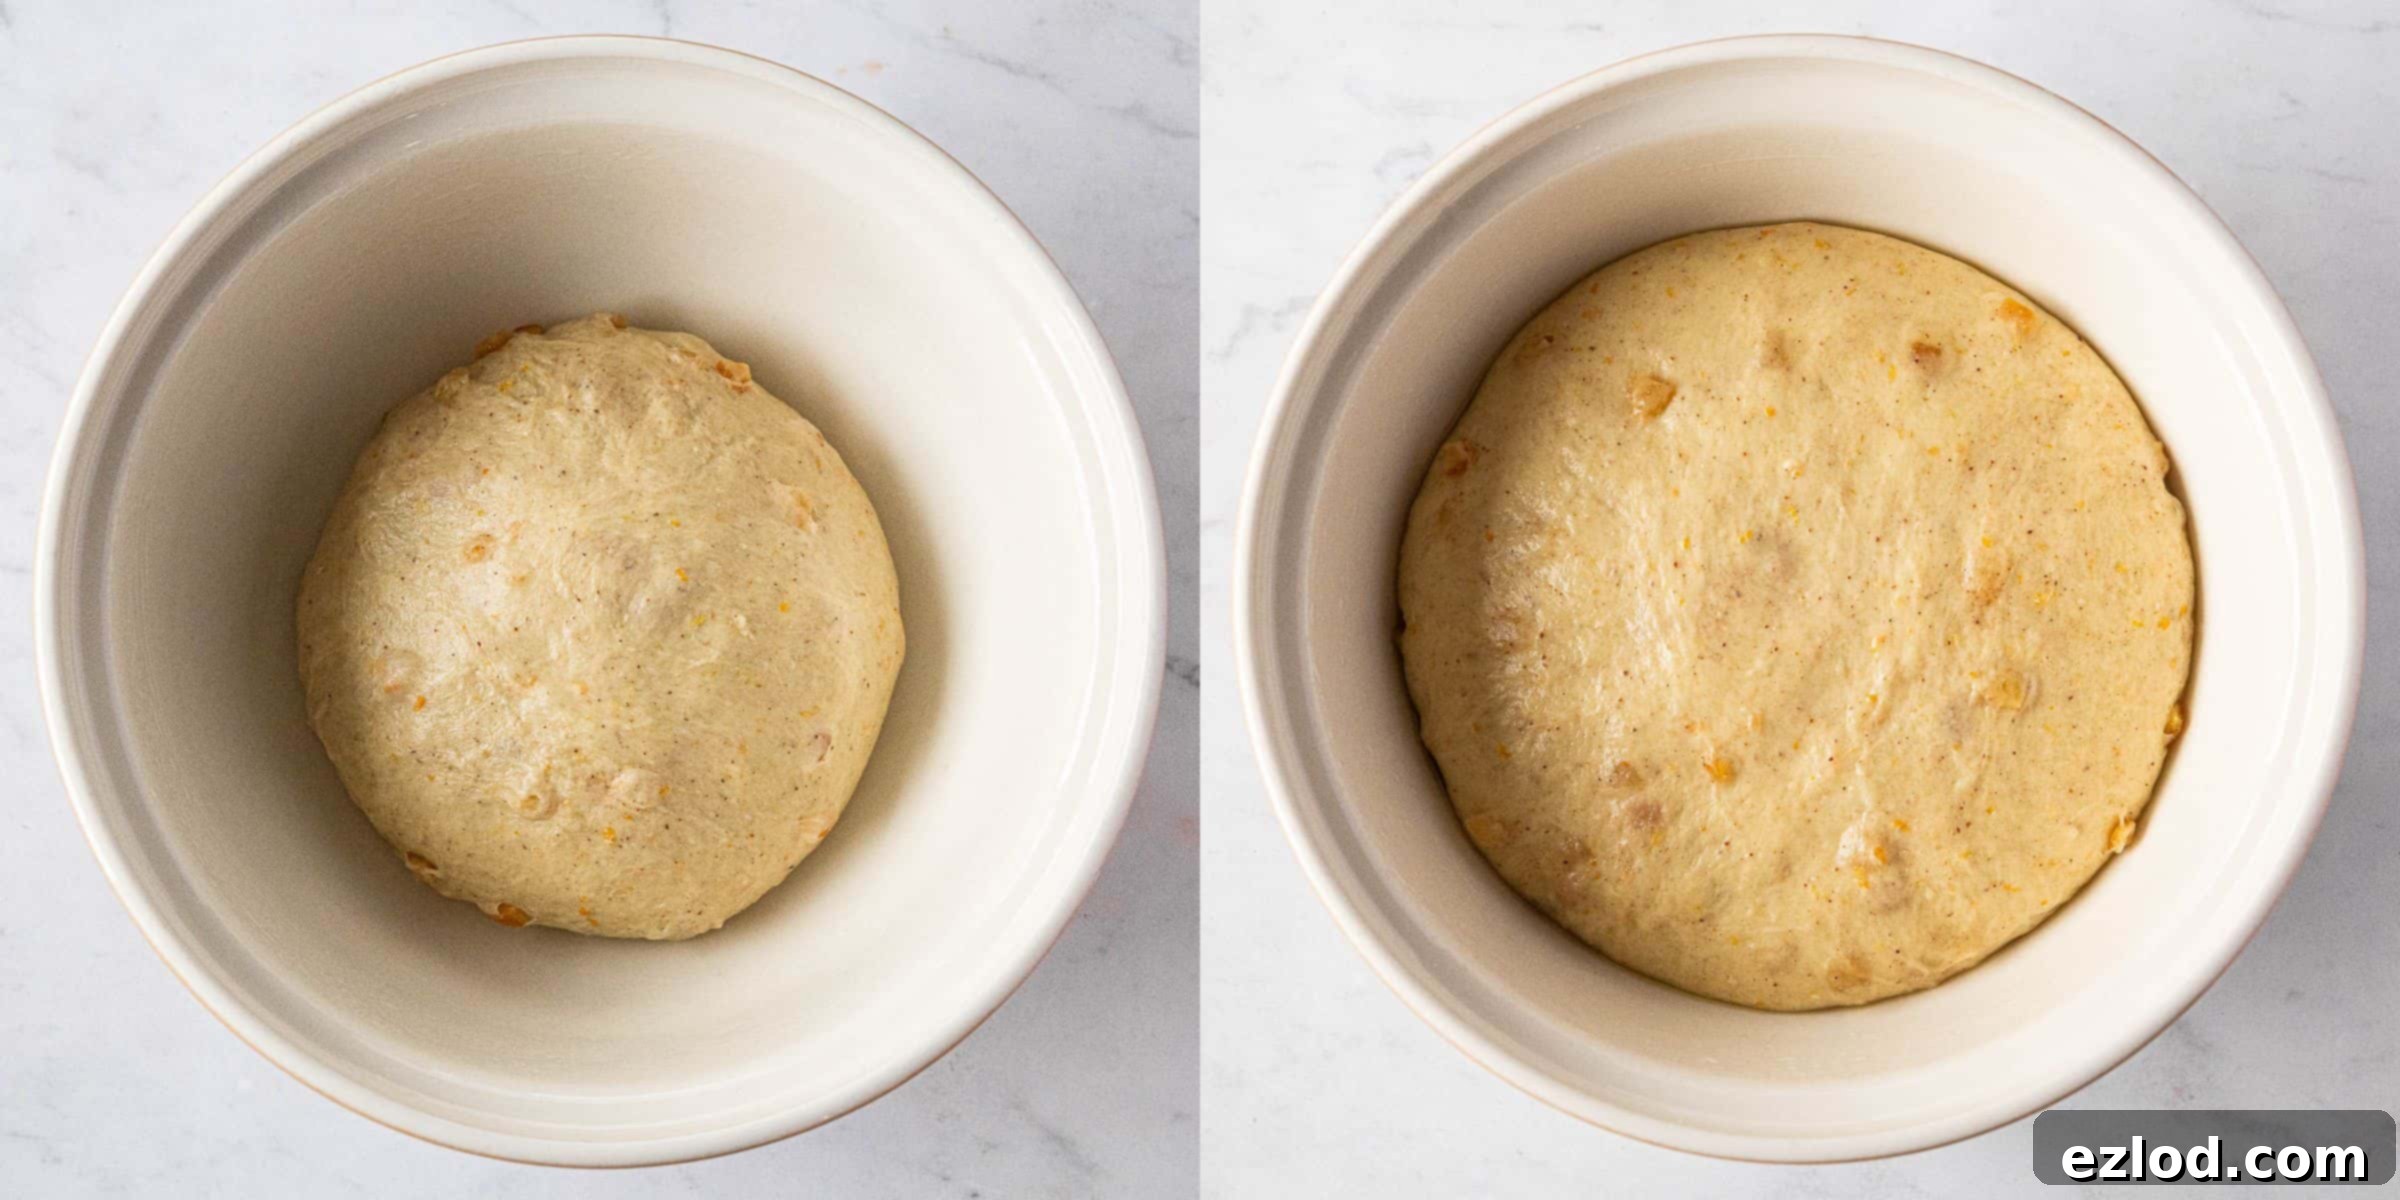
Step 7: Shaping the Snowflake Loaves (Part 1)
Once the dough has risen, gently “knock it back” by lightly pressing on it to release the air. Turn the dough out onto a lightly floured surface. Divide the dough into two equal pieces and gently shape each piece into a smooth ball. Prepare two baking sheets by lining them with baking parchment. Flatten each dough ball into a neat disc, about 1.5 cm (½ to ¾ inch) thick, and place each disc onto its prepared baking sheet. Using a sharp knife or dough cutter, carefully cut each disc into six equal sections, ensuring they remain connected at the very center, much like the spokes of a wheel.
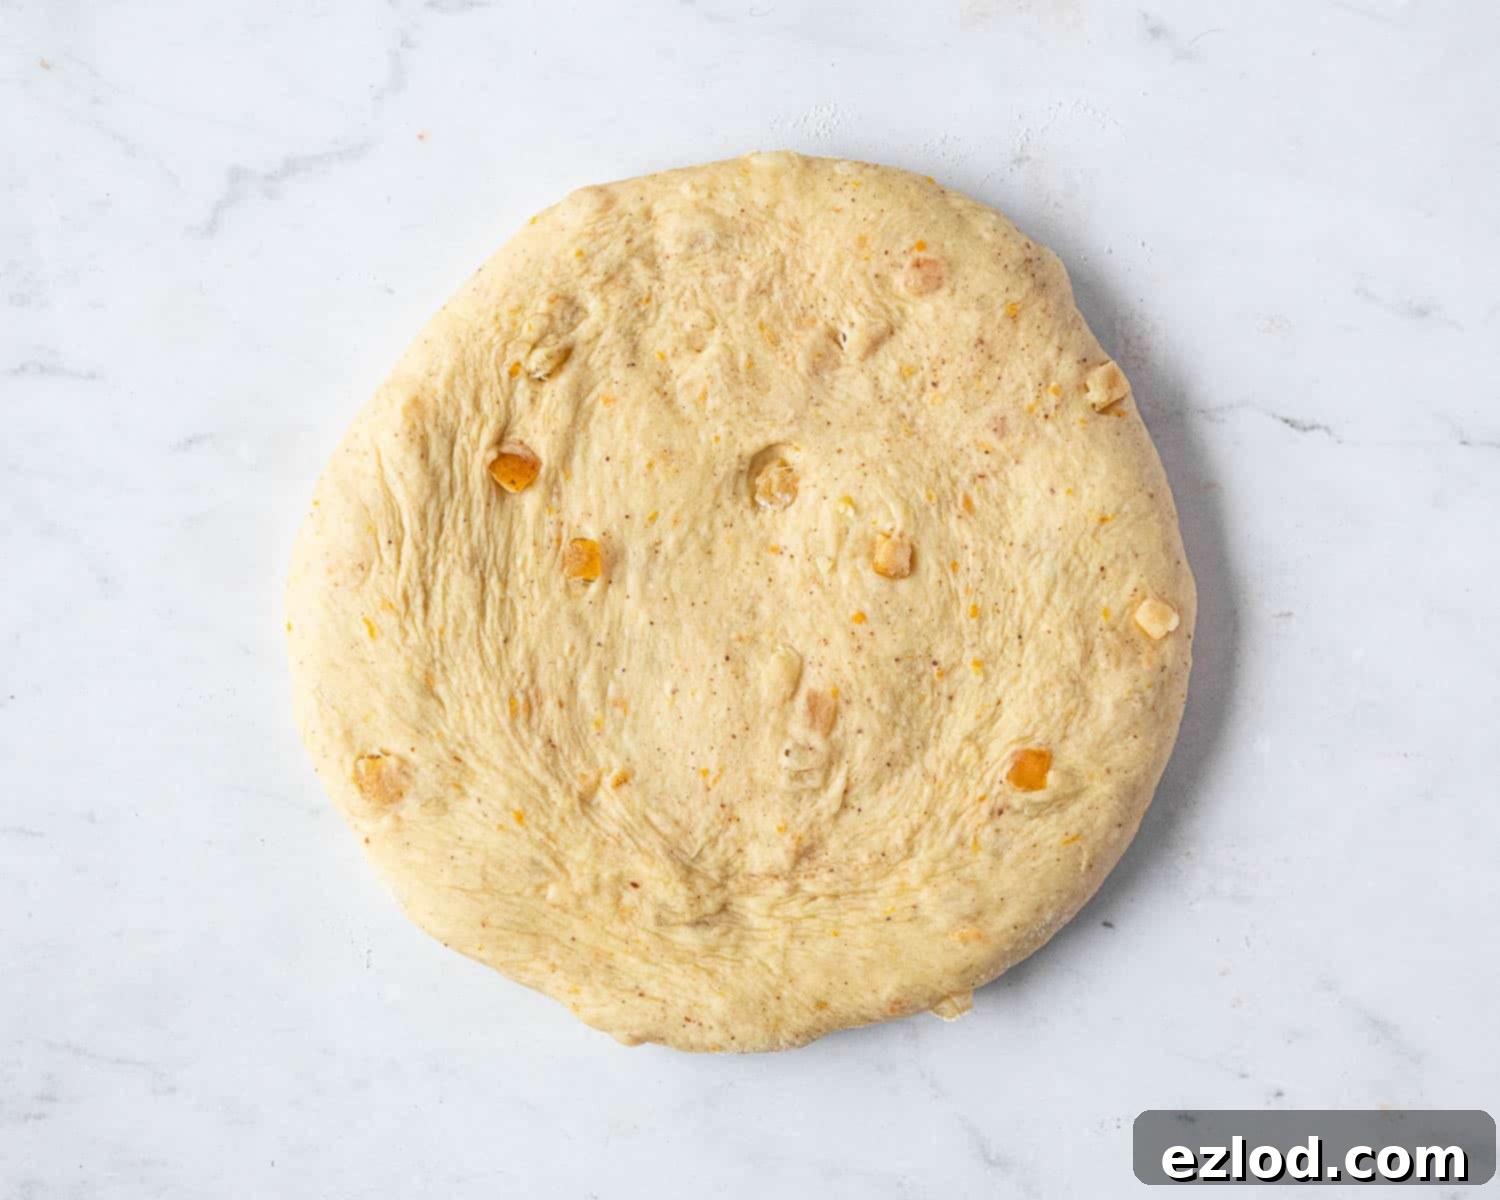
Step 8: Shaping the Snowflake Loaves (Part 2)
Next, create the distinctive snowflake pattern. In the center of each of the six sections you just cut, make another slit. For the cleanest cuts, it’s best to use a straight, rigid tool (like a metal bench scraper or a plastic ruler) to press straight down through the dough, rather than dragging a knife, which can distort the shape. Make sure not to cut all the way to the outer edge of each section.
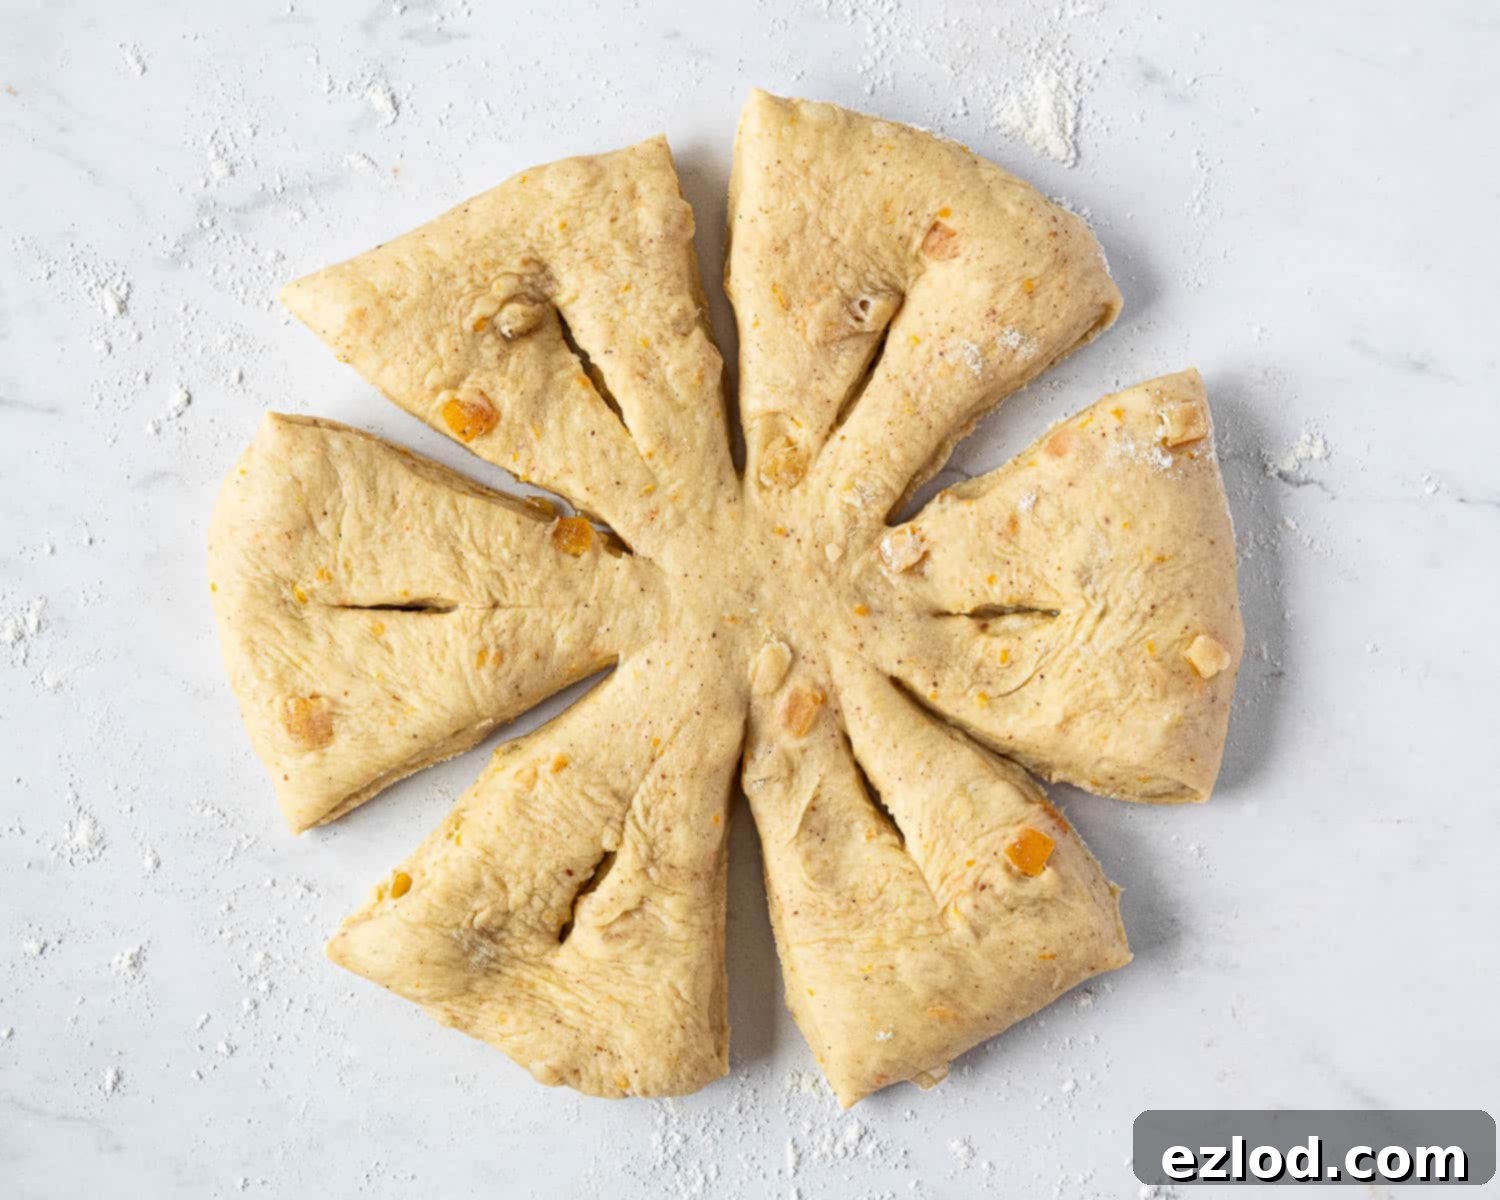
Step 9: Final Snowflake Definition
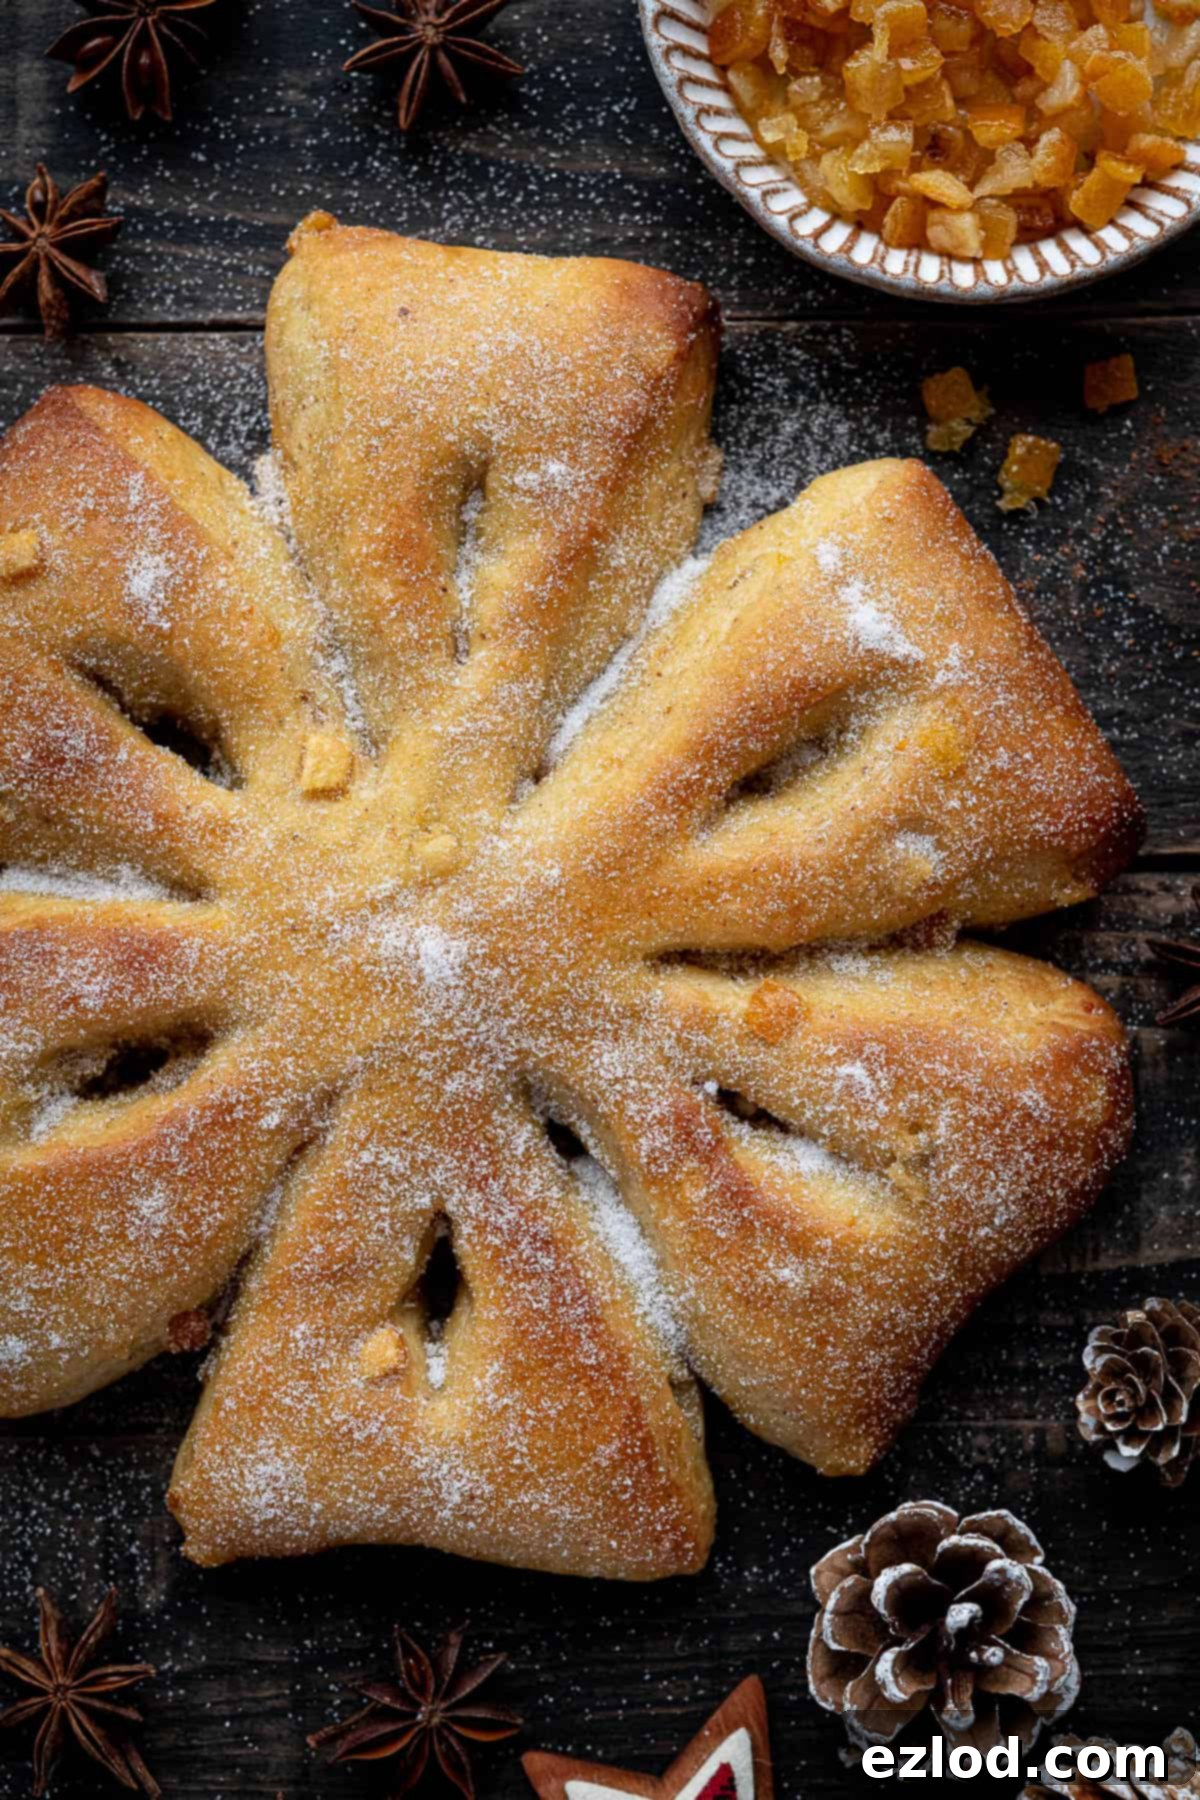
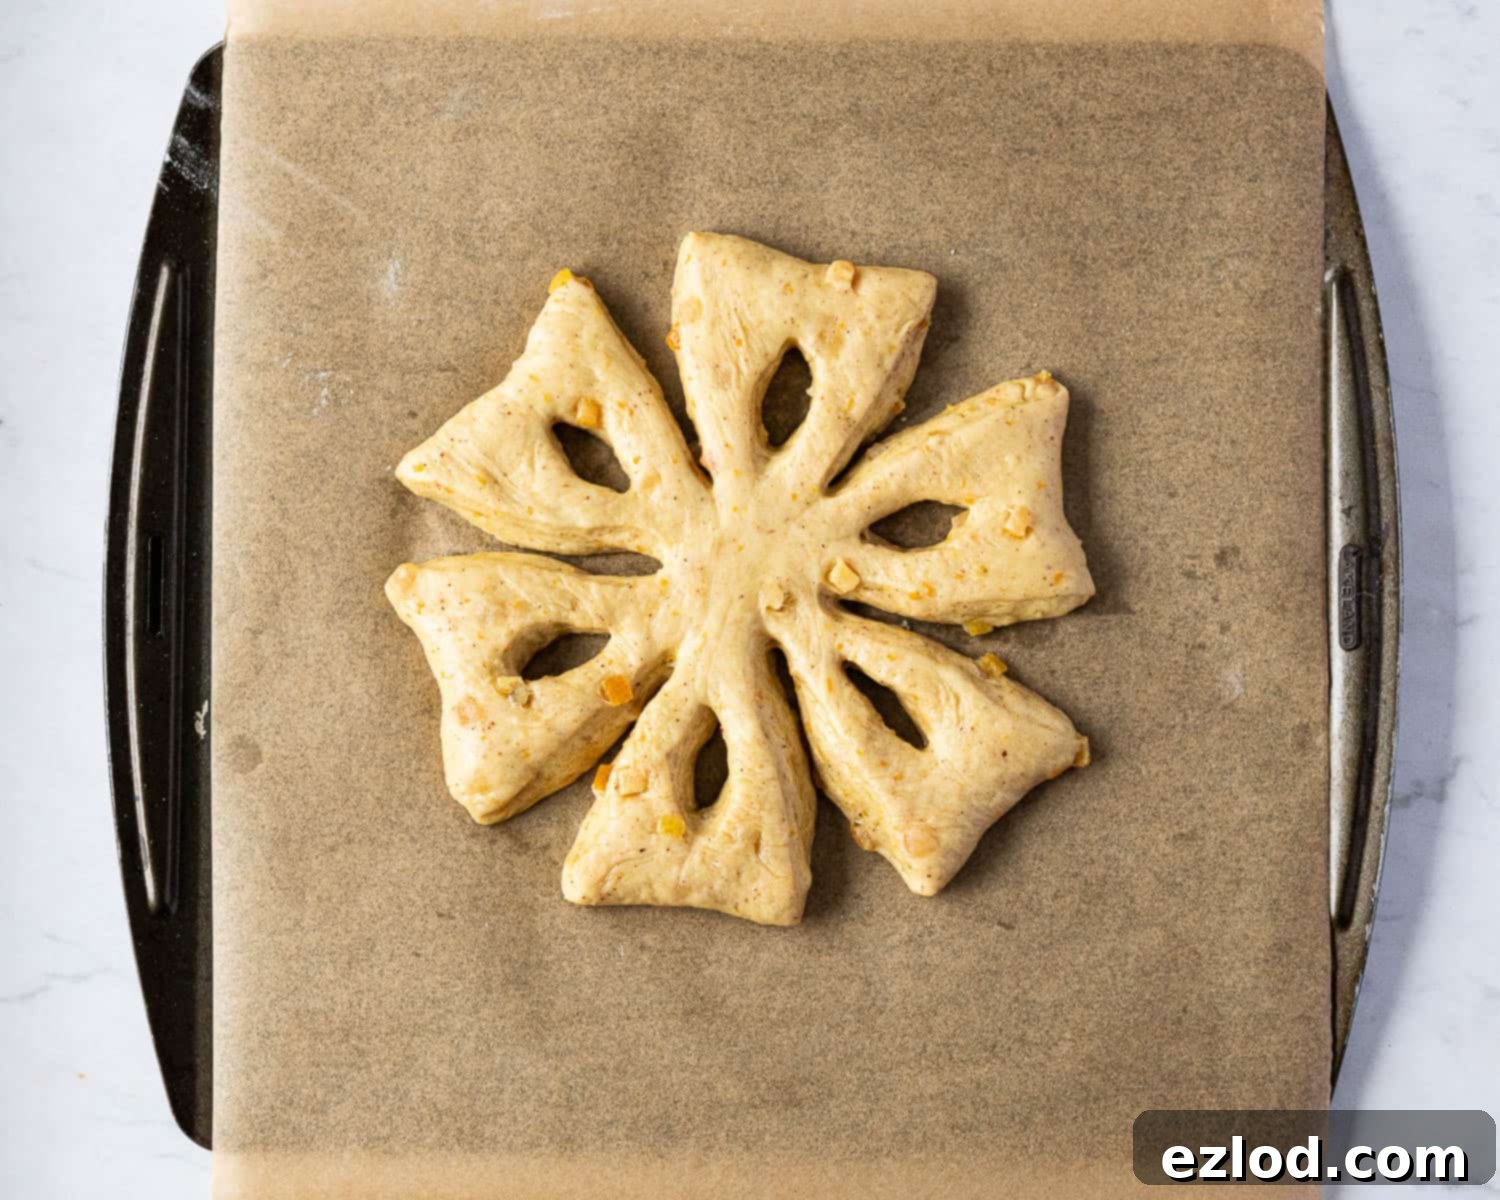
Carefully pull each of the six sections outward a little, separating them slightly and elongating them to enhance the snowflake shape. Then, using your fingers, gently open out the slits you just made in the center of each section to form a distinct V-shape at the top of each “petal.” This gives the bread its beautiful, intricate snowflake appearance.

Step 10: Second Rise (Proofing)
Loosely cover each shaped loaf with lightly oiled clingfilm or a clean, damp cloth. Set them aside in a warm, draft-free place for their second rise, or “proofing,” for about 45 minutes to 1 hour, or until they look visibly puffy and have increased in size. To check if they’re ready, gently press the dough lightly with a fingertip; it should feel light and spring back slowly, leaving a slight indentation. If it springs back quickly, it needs a little more time to rise. Meanwhile, preheat your oven to 180°C/160°C fan/350°F/gas mark 4.
Step 11: Baking and Finishing
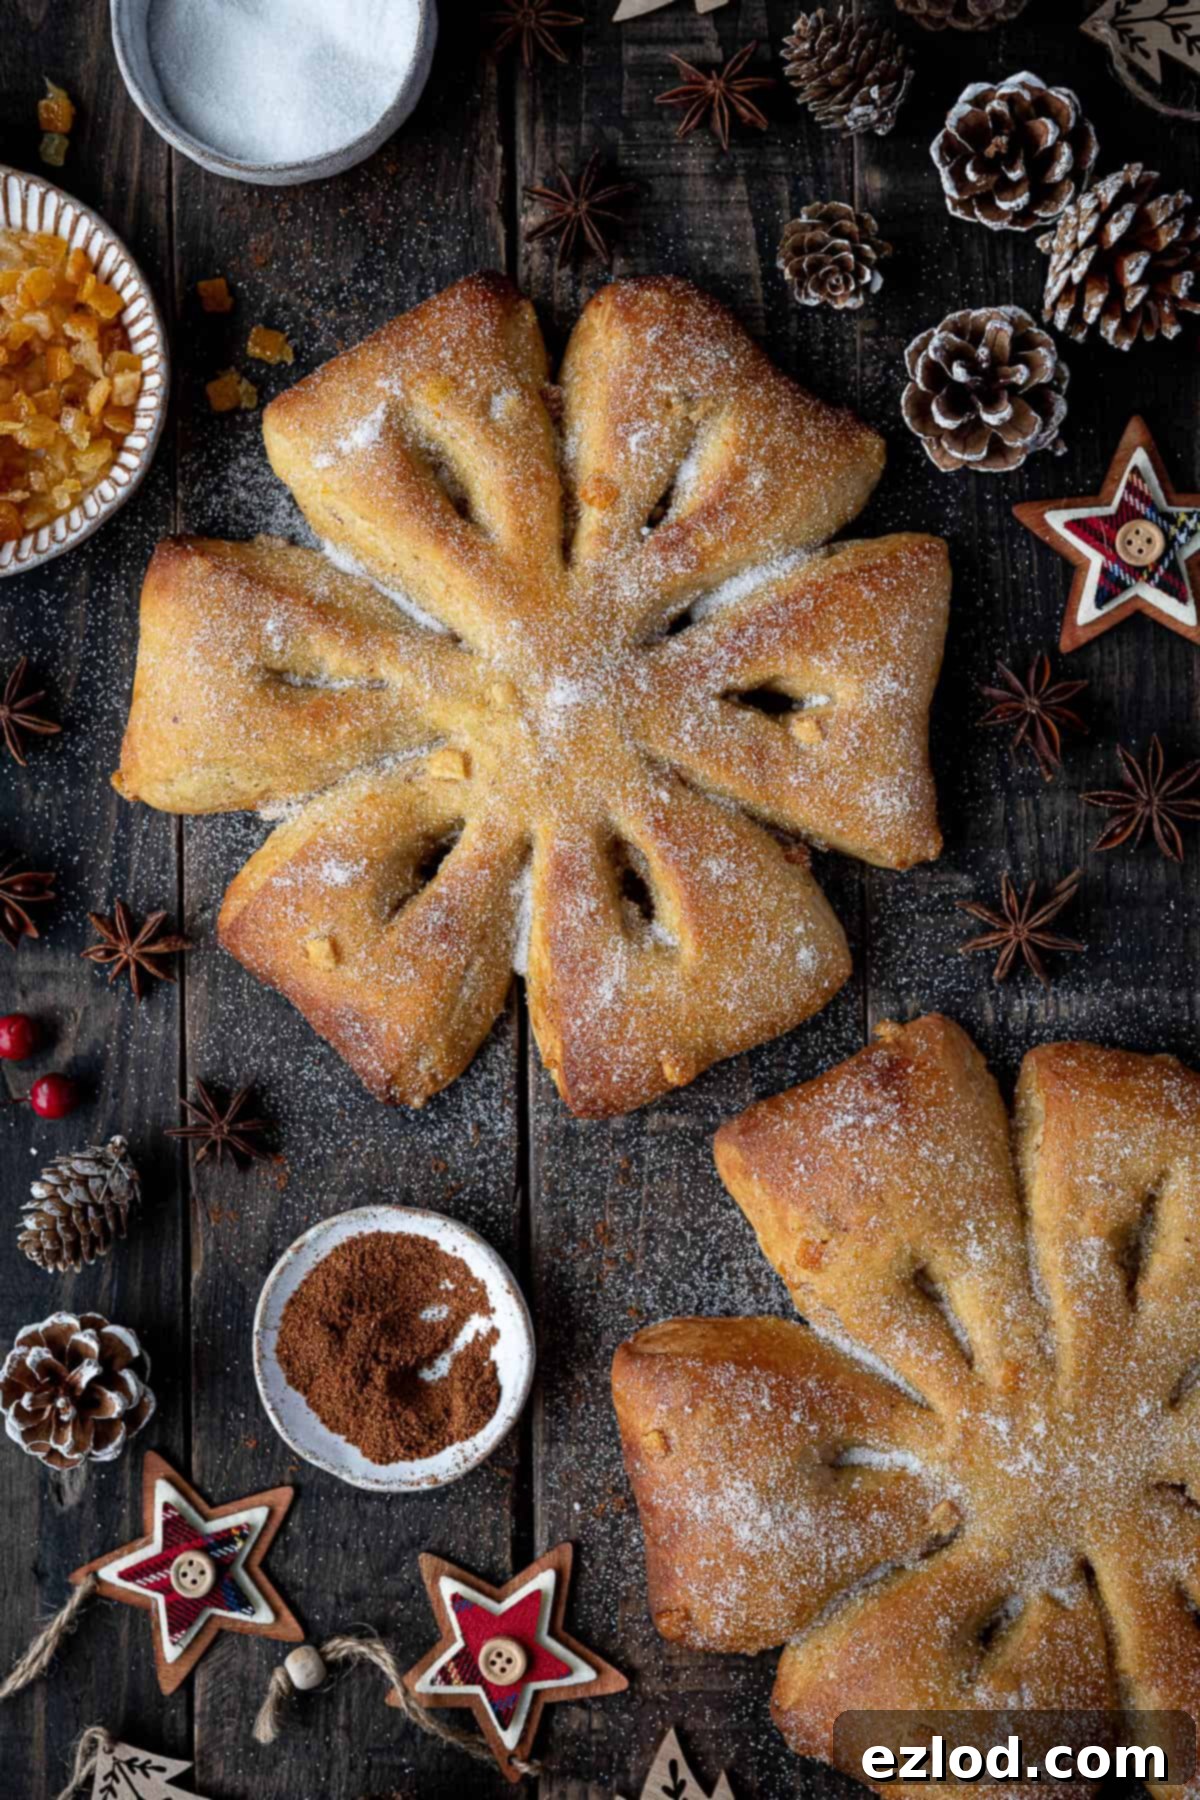
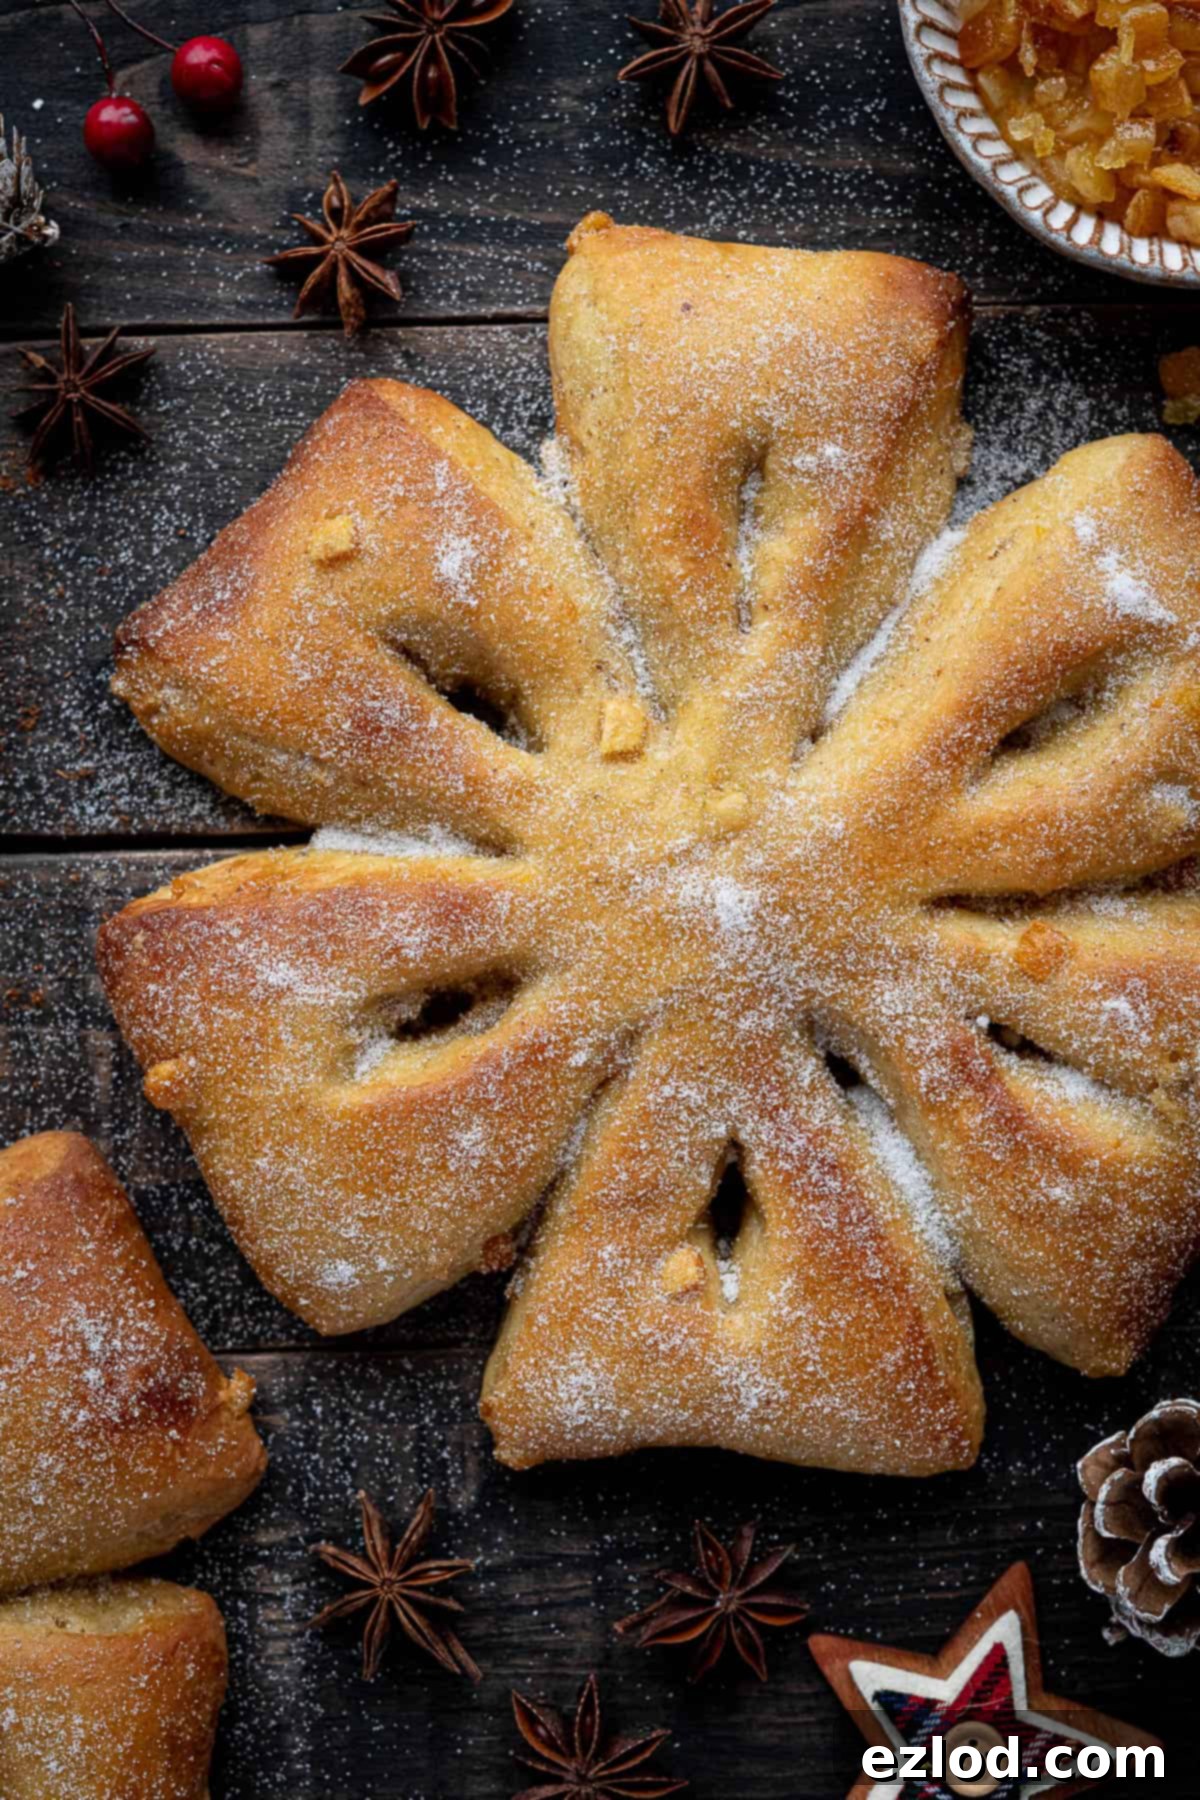
Just before baking, gently brush the surface of each loaf with a little non-dairy milk; this will help achieve a beautiful golden crust. Bake for 20-25 minutes, or until the breads are golden brown and cooked through. To ensure they are fully baked, the internal temperature should register 94°C (200°F) on a probe thermometer. Remember to rotate the baking trays halfway through baking for even browning. Once baked, slide the warm loaves onto a wire rack. While still warm, brush them generously with melted vegan butter and sprinkle them with caster sugar for that delightful “frosty” effect, or for a simpler finish, dust lightly with icing sugar. Serve warm and enjoy!
Top Tips for Baking Perfect Vegan Gibassier Snowflake Bread
Achieving bakery-quality bread at home is incredibly rewarding, and these tips will help ensure your vegan orange and anise snowflake bread turns out perfectly every time:
- Precision with Measurements: As with all my baking recipes, I wholeheartedly recommend using metric measurements with a digital scale rather than relying on cup conversions. Cups are notoriously inaccurate and inconsistent, leading to varied results. A digital scale ensures precise ingredient amounts, which is crucial for the delicate balance in bread making, and it’s often less messy too!
- Dough Consistency: This dough is purposefully designed to be quite soft and sticky due to its enrichment with milk, sugar, olive oil, and butter. If you own a stand mixer with a dough hook, I highly advise using it, as it will make the kneading process much easier and less messy. If you’re kneading by hand, be prepared for a sticky endeavor; a bench scraper can be very helpful for managing the dough.
- Yeast Vitality: Always double-check the expiration date on your yeast. Old or inactive yeast is the most common reason for bread failing to rise, leading to disappointment. Store yeast in an airtight container in the fridge or freezer to prolong its potency.
- Flour Adjustments: The exact amount of flour needed can fluctuate slightly. Factors such as different flour brands (which absorb liquid differently) and even environmental humidity can affect dough consistency. Always start with the quantity specified in the recipe. If your dough feels excessively wet and unmanageable after kneading, add a tiny bit more flour, a spoonful at a time, until it reaches a soft, slightly sticky but workable texture. Resist the urge to add too much flour, as this will result in a dry, dense bread rather than the desired soft crumb.
- Cold Proofing for Flavor: For an even richer, more complex flavor profile and improved texture, consider giving the dough its first rise overnight in the refrigerator instead of at room temperature. This slow, cold fermentation develops deeper nuances in the bread and also breaks up the workload, making bake day less rushed. If you opt for cold proofing, remember that the second rise will naturally take a bit longer once the dough comes to room temperature.
- Temperature and Rising Time: The ambient temperature of your kitchen significantly impacts rising times. On warmer days, your dough will rise much faster than on cooler days. Always observe the dough itself (e.g., doubled in size, puffy, windowpane test) rather than strictly adhering to the exact time given in the recipe.
- Serving & Reheating: If you plan to serve this bread for breakfast, I suggest baking it the evening before. Once cooled, store it in an airtight container overnight. Before serving, gently re-warm it in a low oven (around 150°C/300°F) for 5-10 minutes. While it won’t be quite as soft as freshly baked, it will still be incredibly delicious, saving you from an early morning bake or a hungry wait!
- Freezing for Later: This bread freezes beautifully! Once completely cooled, wrap the loaves tightly in clingfilm, then in foil, and place them in an airtight freezer bag. They can be frozen for up to 3 months. To serve, simply allow them to defrost at room temperature, then re-warm in a preheated oven for 5-10 minutes to bring back their warmth and freshness.
Can I Make Them Gluten-Free?
Unfortunately, this particular recipe is not suitable for a direct gluten-free flour substitution. The delicate structure, elasticity, and chewy crumb of this bread heavily rely on the gluten development from strong white bread flour. Making truly excellent gluten-free bread is a complex art that requires a completely different approach, often involving a blend of various gluten-free flours, binders, and specific techniques to replicate the qualities of gluten. As gluten-free baking is not my area of expertise, I cannot confidently advise on adapting this recipe.
For the best results and to avoid disappointment, I strongly recommend seeking out and using a recipe that has been specifically developed and tested to be gluten-free, rather than attempting to adapt a traditional gluten-containing recipe like this one.
More Vegan Christmas Breads to Brighten Your Holidays:
- Almond Bread Twist
- Vegan Stollen Bars
- Gingerbread Cinnamon Rolls
- Maple Pecan Bread Wreath
- Vegan Stollen Wreath
- Mincemeat, Marzipan and Apple Bread Wreath
- Vegan Garlic Dough Balls
- Vegan Chocolate Babka
If you tried this delightful recipe, please let me know how it went! Rate it, leave a comment below, or tag @domestic_gothess on Instagram and hashtag it #domesticgothess – I love seeing your creations!
All images and content on Domestic Gothess are copyright protected. If you wish to share this recipe, please do so by using the provided share buttons. Do not screenshot or post the recipe or content in full; instead, include a direct link to this post for the complete recipe. Thank you for respecting my work!

Orange and Anise Snowflake Bread (Vegan Gibassier)
Course
Breakfast, Snack
Cuisine
French
Keyword
bread
Prep Time
40 minutes
Cook Time
20 minutes
Rising Time
4 hours
Servings
2
loaves
Author
Domestic Gothess
Ingredients
Starter
-
100
ml (⅓ cup + 1tbsp + 1tsp)
unsweetened non-dairy milk (I use soy) -
80
g (⅔ cup)
white bread flour -
7
g (2 tsp)
fast action yeast
Dough
-
100
ml (⅓ cup + 1tbsp + 1tsp)
unsweetened non-dairy milk (I use soy) -
42
g (50 ml/scant ¼ cup)
olive oil - finely grated zest of 1 large orange
-
2
teaspoons
orange blossom water -
280
g (2 + ⅓ cups)
strong white bread flour -
85
g (⅓ cup + 1tbsp)
caster (superfine) sugar -
1
teaspoon
salt -
60
g (¼ cup)
softened vegan butter -
1
teaspoon
ground star anise -
75
g (2.65 oz)
candied peel - milk to glaze
- melted butter and caster sugar to finish
Instructions
-
To make the starter, heat the milk until it is lukewarm (not hot). Mix together the flour and yeast in a large bowl (the bowl of your stand mixer if you have one), beat in the milk until smooth then cover and leave in a warm place for about 30 mins until risen and bubbly.
-
To make the dough, beat the milk, olive oil, orange zest and orange blossom water into the starter. It doesn’t matter if it isn’t smooth.
-
Add the flour, sugar and salt and mix on low for about 6 minutes, scraping down the sides of the bowl occasionally. Increase the speed to high and mix for 2 more minutes until the dough is smooth and elastic. It should pass the windowpane test.
-
Add the butter and mix on a medium speed until fully combined and smooth. It will look greasy and messy at first but it will come together eventually! Scrape down the sides of the bowl a few times as needed. The dough should be smooth and elastic and slightly sticky but not wet. If it is too wet you can add a bit more flour, a spoonful at a time.
-
Finally add the star anise and candied peel and knead through until well distributed.
-
Place the dough in a lightly oiled bowl, cover and leave to rise in a warm place until about doubled in size, about 1 ½ to 2 hours.
-
Knock back the risen dough and turn out onto a lightly floured surface. Divide into two equal pieces and shape each one into a ball. Line two baking sheets with baking parchment.
-
Flatten each ball of dough with your hands into a disc about 1.5cm thick and place each one on one of the baking sheets. Cut the disc into six sections, leaving them connected at the center.
-
Cut a slit in the center of each section. It is best to use a straight, rigid piece of metal or plastic to press straight down through the dough, guillotine-style, rather than dragging a knife through the dough.
-
Pull the sections outward to separate and elongate them a little. Use your fingers to open out the slits and form a V-shape in the top of each section.
-
Cover each loaf loosely with oiled clingfilm and set aside to rise in a warm place for about 45 minutes to 1 hour until puffy. If you press the dough lightly with a fingertip it should feel light and spring back slowly, leaving a slight indentation. If it springs back quickly it needs to rise for a little longer.
-
Meanwhile preheat the oven to 180°C/160°C fan/350°F/gas mark 4.
-
Gently brush each loaf with a little milk then bake for 20-25 minutes until golden and cooked through (the internal temperature should register 94°C/200°F on a probe thermometer). Rotate the trays halfway through baking.
-
Slide the loaves onto a wire rack and brush with melted butter and sprinkle with caster sugar (or dust with icing sugar) while still warm.
Notes
- As with all of my baking recipes I really do recommend using the metric measurements with a digital scale rather than the cup conversions. Cups are a wildly inaccurate measuring system and you will get far better, more consistent results using a scale, not to mention that it is also easier and less messy than cups!
- See post above for tips, details and step-by-step photos.
- You can mix the dough by hand if you don’t have a stand mixer but it is very sticky and messy and will need to be kneaded for at least 10 minutes until very smooth and elastic before mixing in the butter then the anise and peel.
Original (non-vegan) Recipe:
I originally published this recipe in 2015 and have since updated and veganised it. For anyone who loved the original recipe, I have included it below as a reference to its traditional roots.
Ingredients:
Starter:
- 100ml (⅓ cup + 1tbsp + 1tsp) full fat milk
- 80g (⅔ cup) strong white bread flour
- 7g (2 tsp) fast action yeast
Dough:
- 2 eggs
- 50ml (scant ¼ cup) olive oil
- finely grated zest of 1 large orange
- 2 tsp orange blossom water
- 280g (2 + ⅓ cups) strong white bread flour
- 85g (⅓ cup + 1tbsp) caster (superfine) sugar
- 1 tsp salt
- 60g (¼ cup) softened butter
- 1 tsp ground star anise
- 75g (2.65 oz) candied peel
- 1 egg, beaten, to glaze
- melted butter and caster sugar to finish
Instructions:
To make the starter, heat the milk until it is lukewarm (not hot), mix together the flour and yeast in a large bowl (the bowl of your stand mixer if you have one), beat in the milk until smooth then cover and leave in a warm place for 30 mins – 1 hour until risen.
To make the dough, beat the eggs, olive oil, orange zest and orange blossom water into the starter (use a stand mixer fitted with a dough hook). Add the flour, sugar and salt and mix on low for 6 minutes, scraping down the sides of the bowl occasionally. Increase the speed to high and mix for 2 more minutes until the dough is smooth and elastic. Add the butter gradually while the mixer is on medium speed and mix until smooth. Finally add the star anise and candied peel. You can mix the dough by hand if you don’t have a stand mixer but it is very sticky and messy and will need to be kneaded for at least 10 minutes until very smooth and elastic before mixing in the butter then the anise and peel.
Place the dough in a lightly oiled bowl, cover and leave to rise in a warm place until doubled in size, about 1 ½ to 2 hours.
Knock back the risen dough and turn out onto a lightly floured surface. Divide into two equal pieces and shape each one into a ball. Line two baking sheets with baking parchment. Flatten each ball of dough into a disc about 1.5cm thick and place each one on one of the baking sheets. Cut the disc into six sections, leaving them connected at the center.
Make a cut through the center of each section; don’t cut all the way through to the edge; it is best to use a straight, rigid piece of metal or plastic to press straight down through the dough, guillotine-style rather than dragging a knife through the dough. Pull the sections outward to separate and elongate them a little. Use your fingers to open out the slits and form a V-shape in the top of each section.
Cover each loaf loosely with oiled clingfilm and set aside to rise in a warm place for 45 minutes to 1 hour until puffy, if you press the dough lightly with a fingertip it should feel light and spring back slowly, if it springs back quickly it needs to rise for a little longer. Meanwhile preheat the oven to 180C/350F/gas mark 4.
Brush each loaf with a little beaten egg then bake for 20-25 minutes until golden and cooked through (a skewer inserted should come out clean and the internal temperature should register 94C/200F), rotate the trays halfway through baking.
Slide the loaves onto a wire rack and brush with melted butter and sprinkle with caster sugar (or dust with icing sugar) while still warm.
