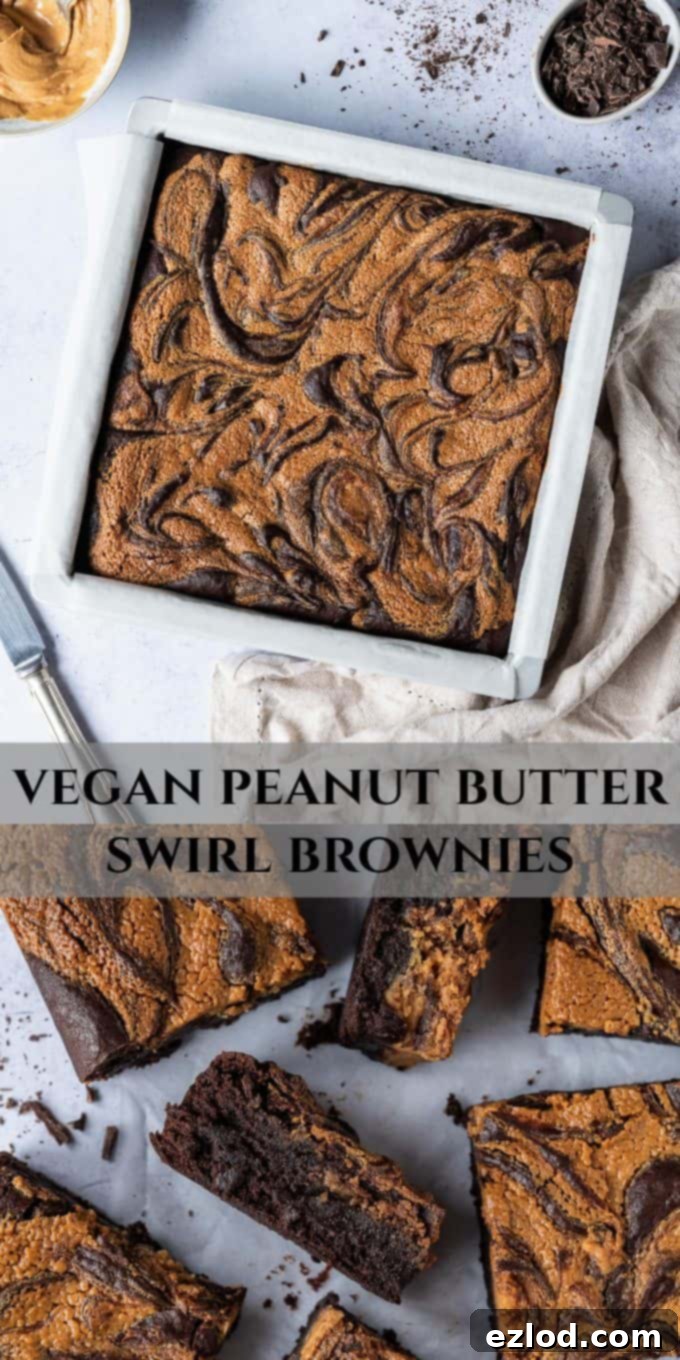
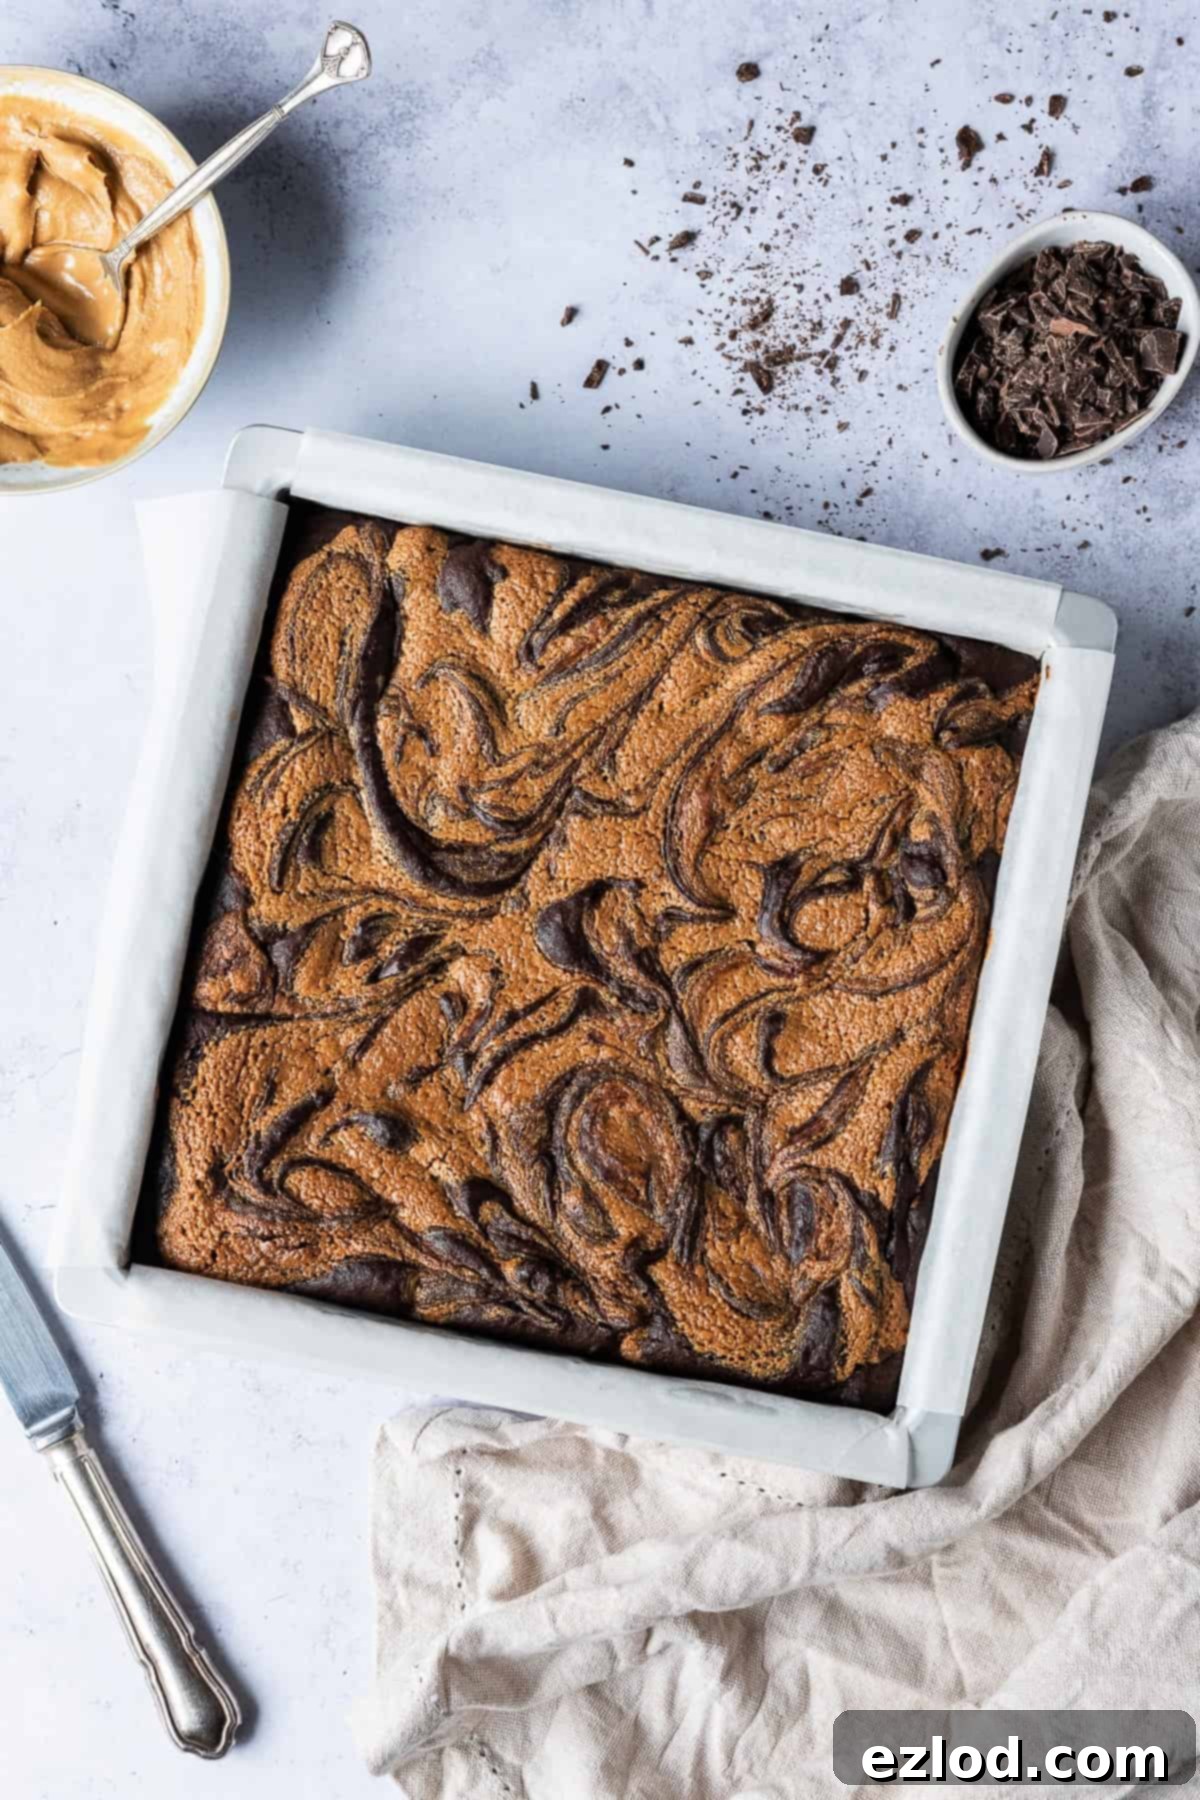
Indulgent Fudgy Vegan Peanut Butter Swirl Brownies: The Ultimate Dairy-Free Chocolate Treat
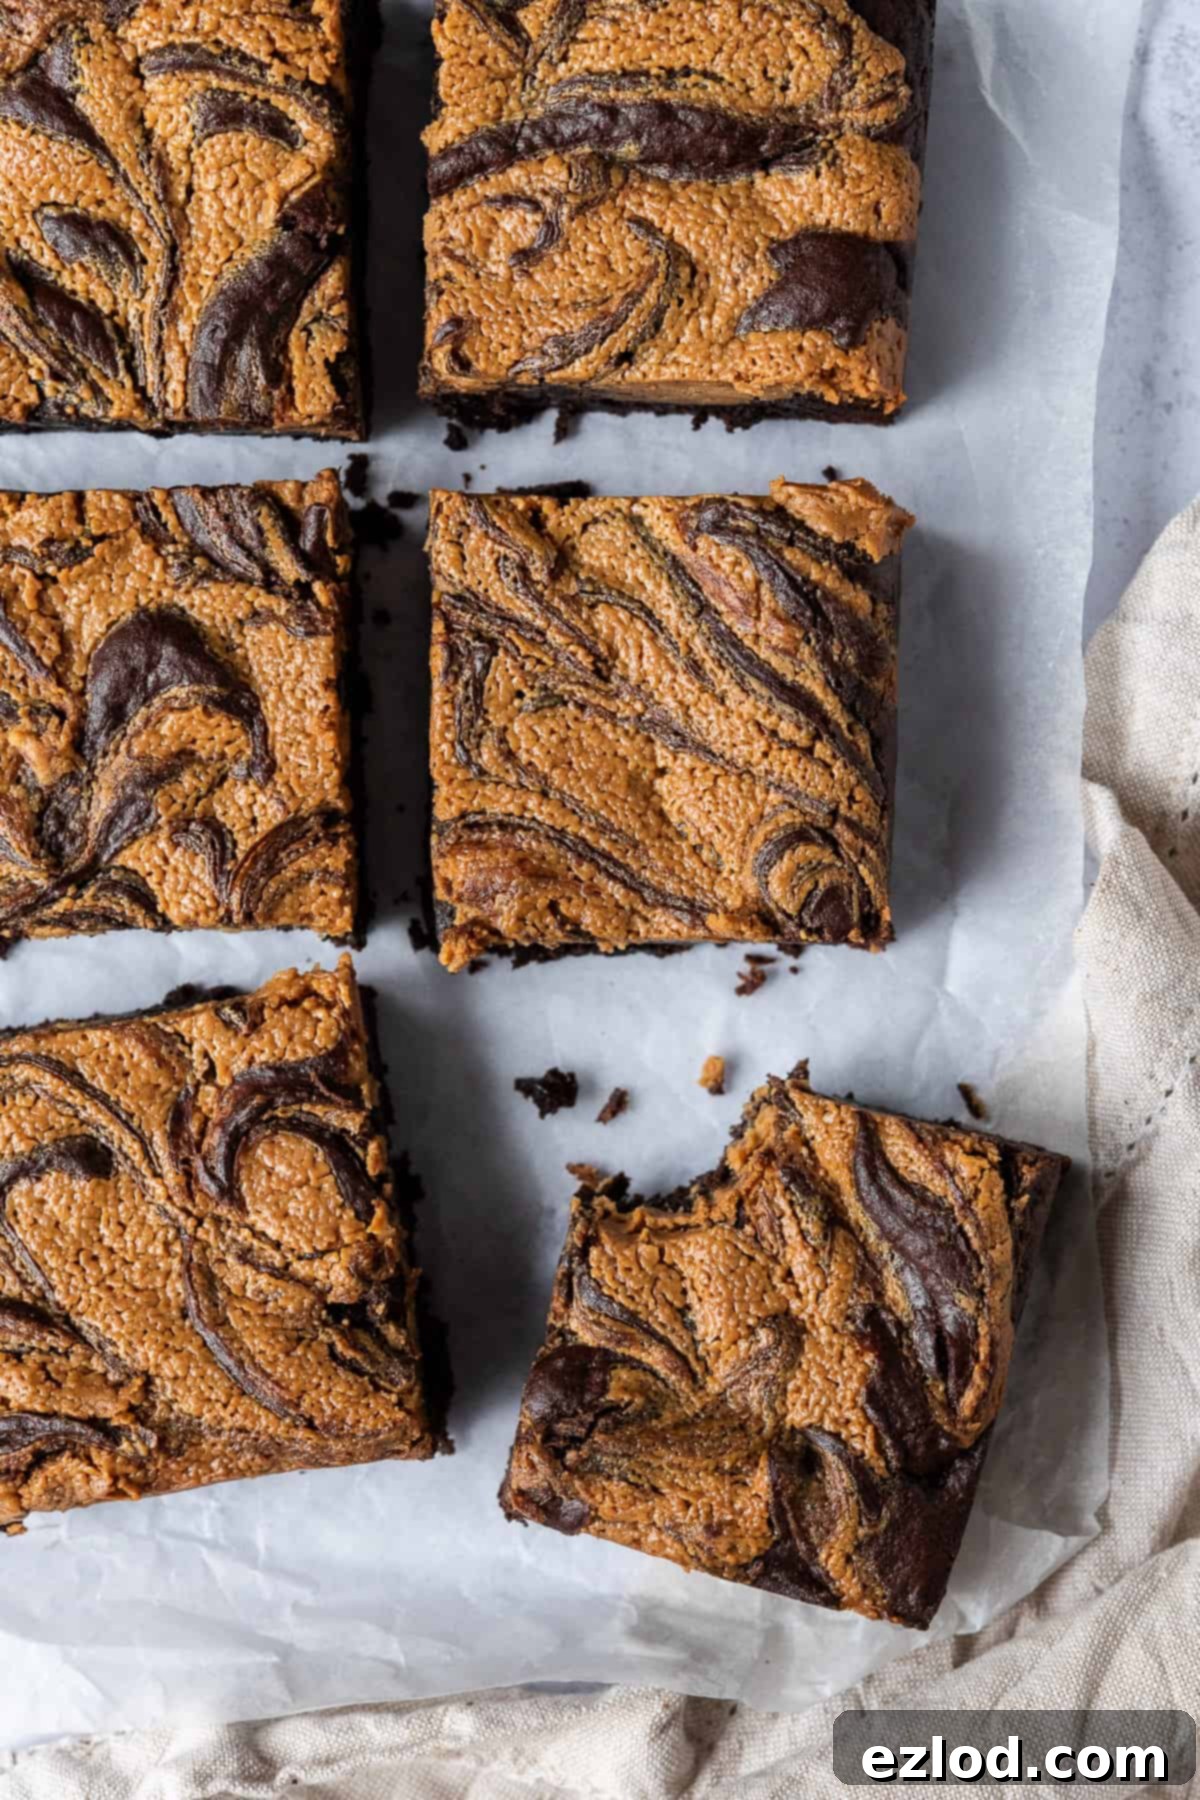
Discover how to bake these incredible vegan peanut butter swirl brownies – a truly indulgent treat that’s fudgy, perfectly chewy, and bursting with intense chocolate flavor. Crowned with a generous, creamy peanut butter swirl, these eggless and dairy-free delights are utterly irresistible!
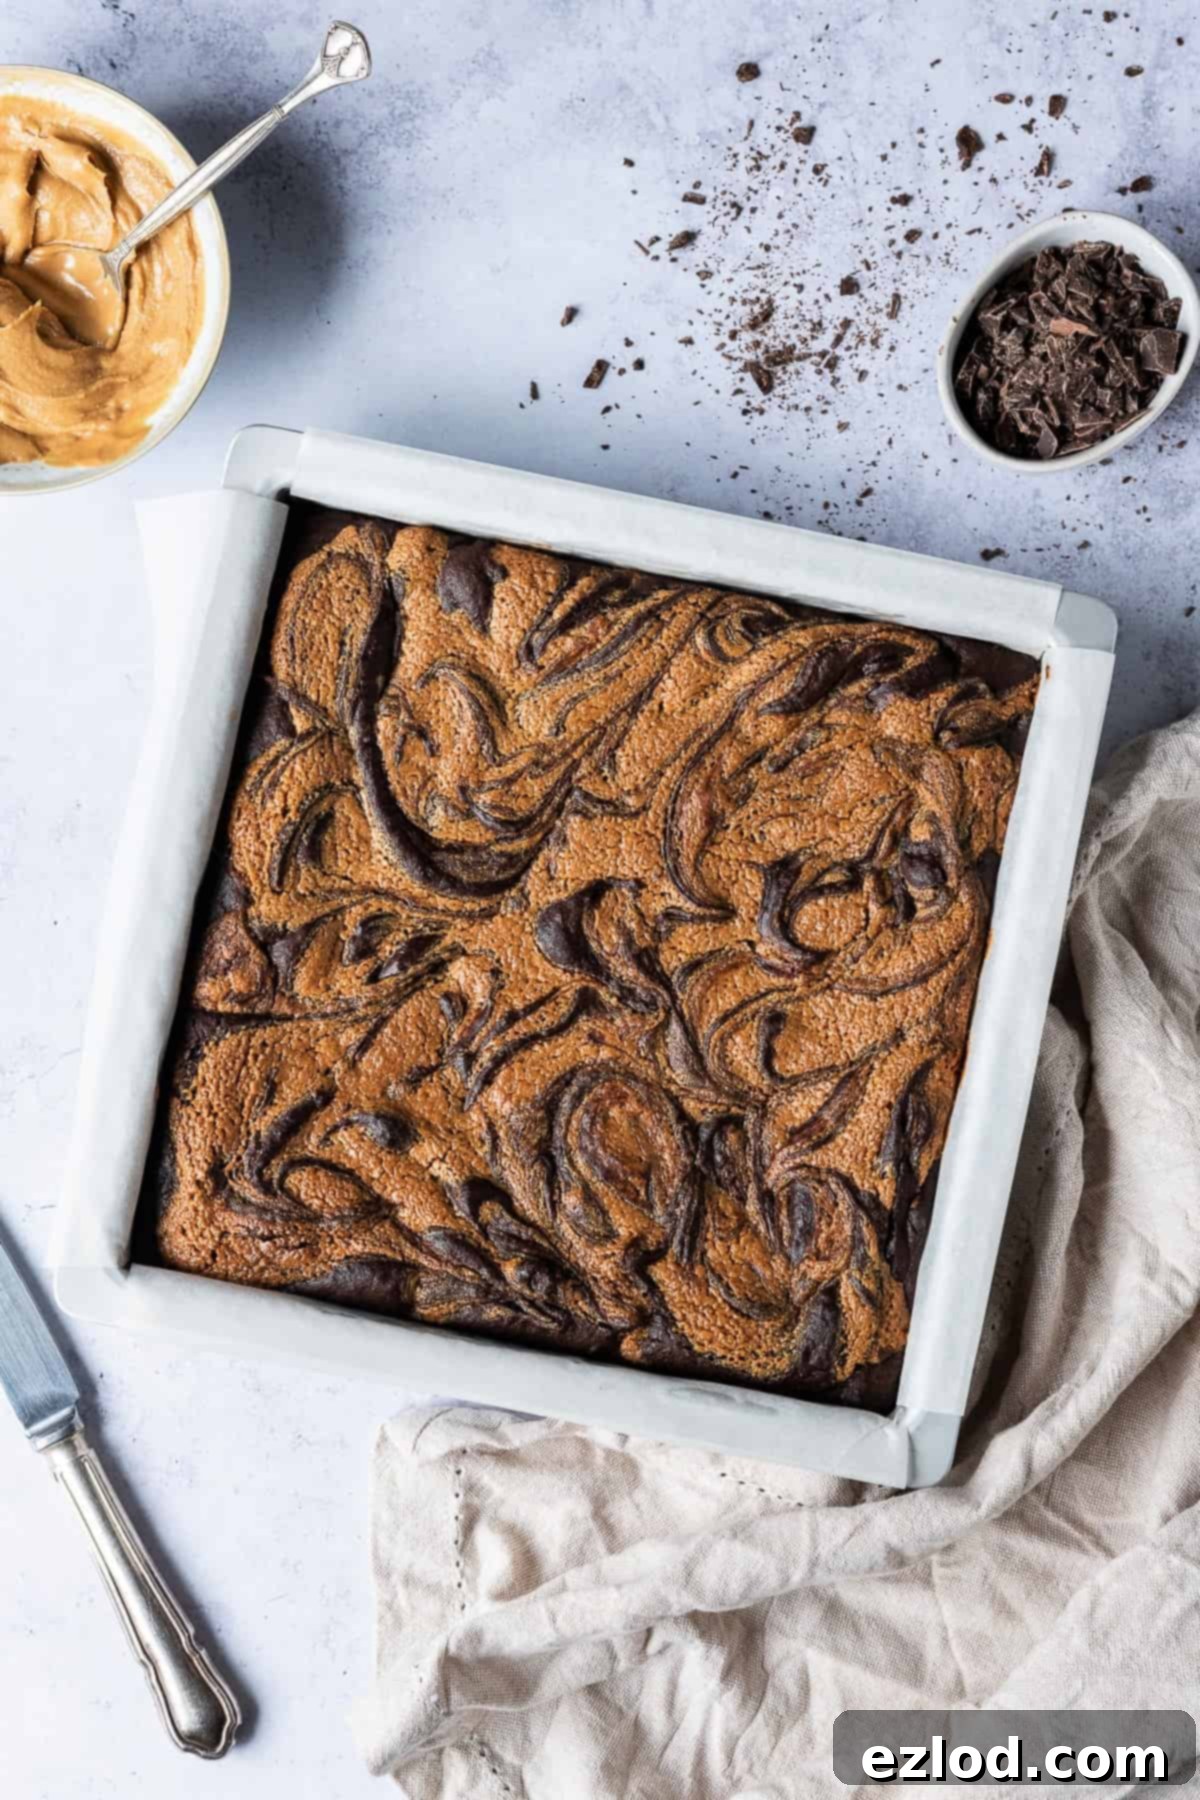
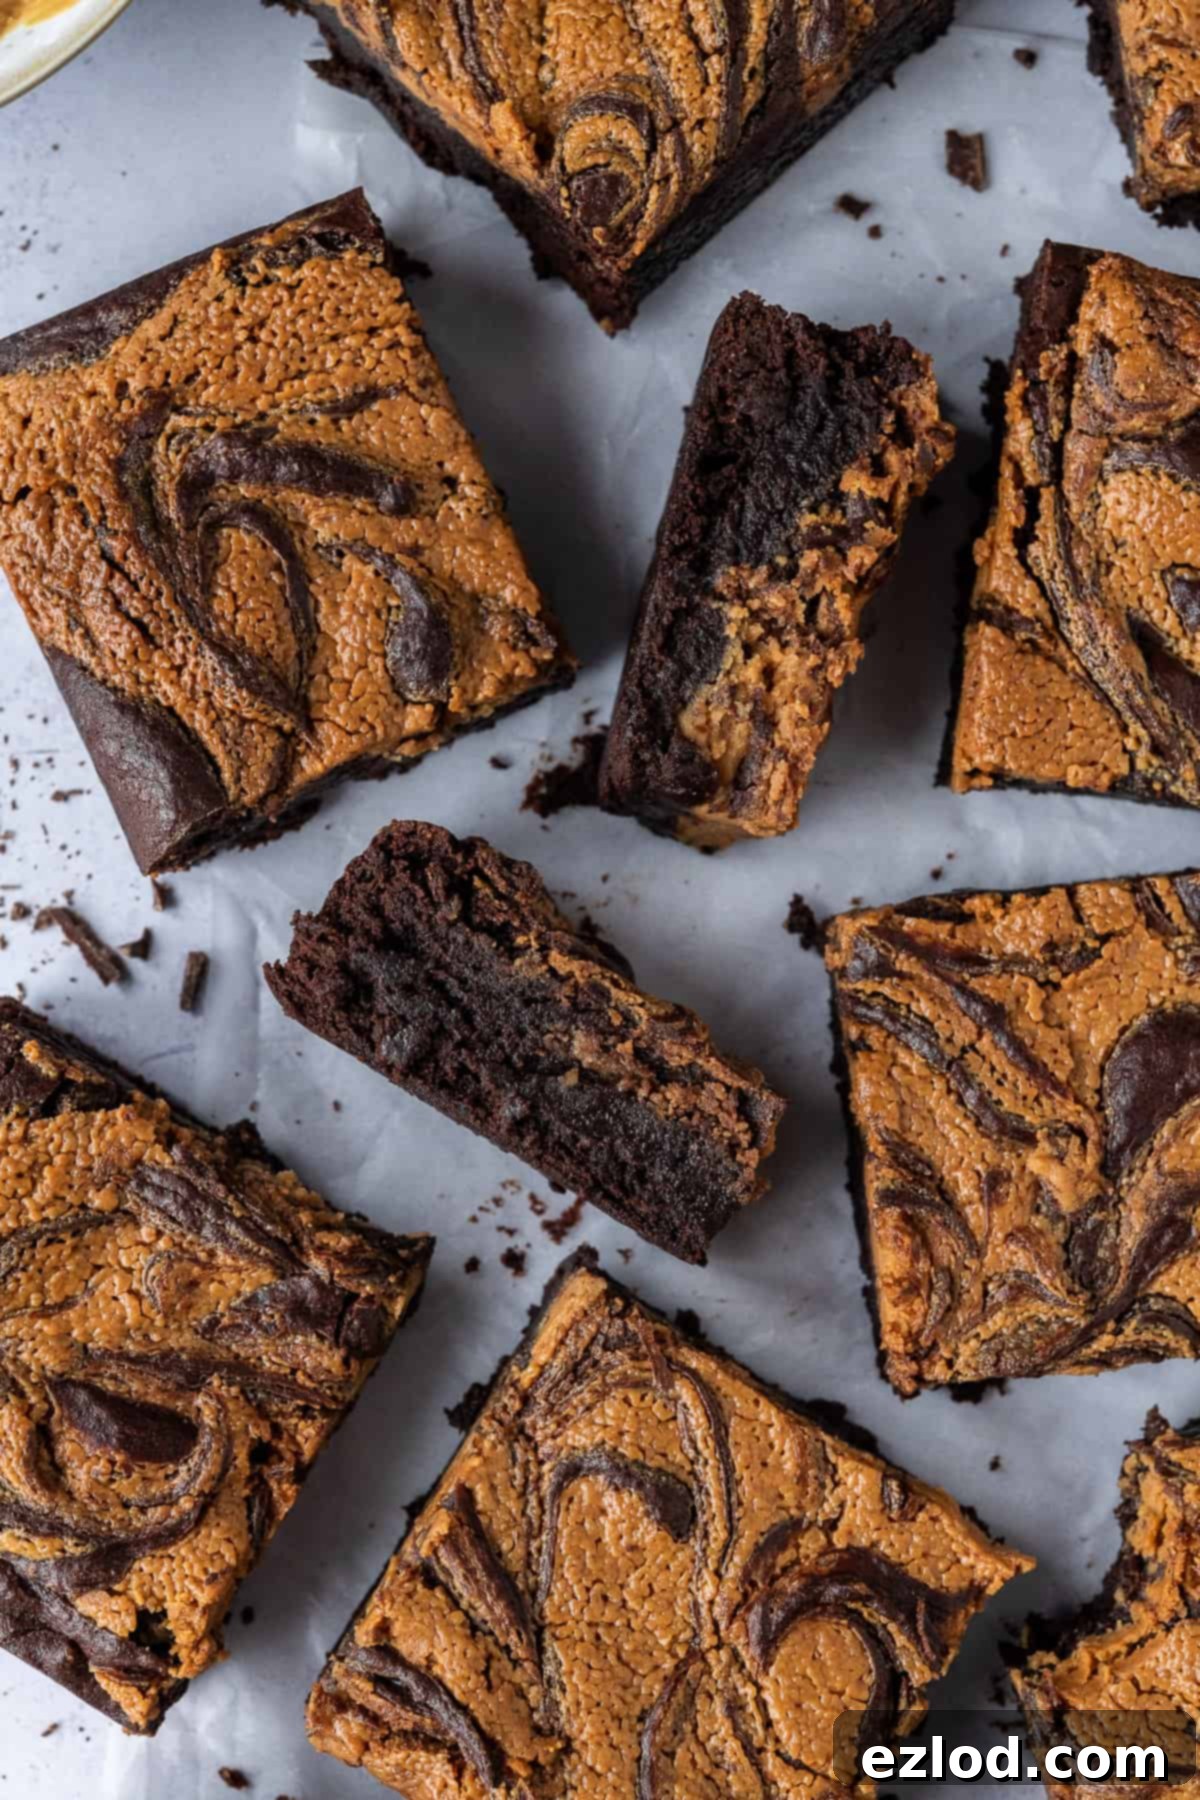
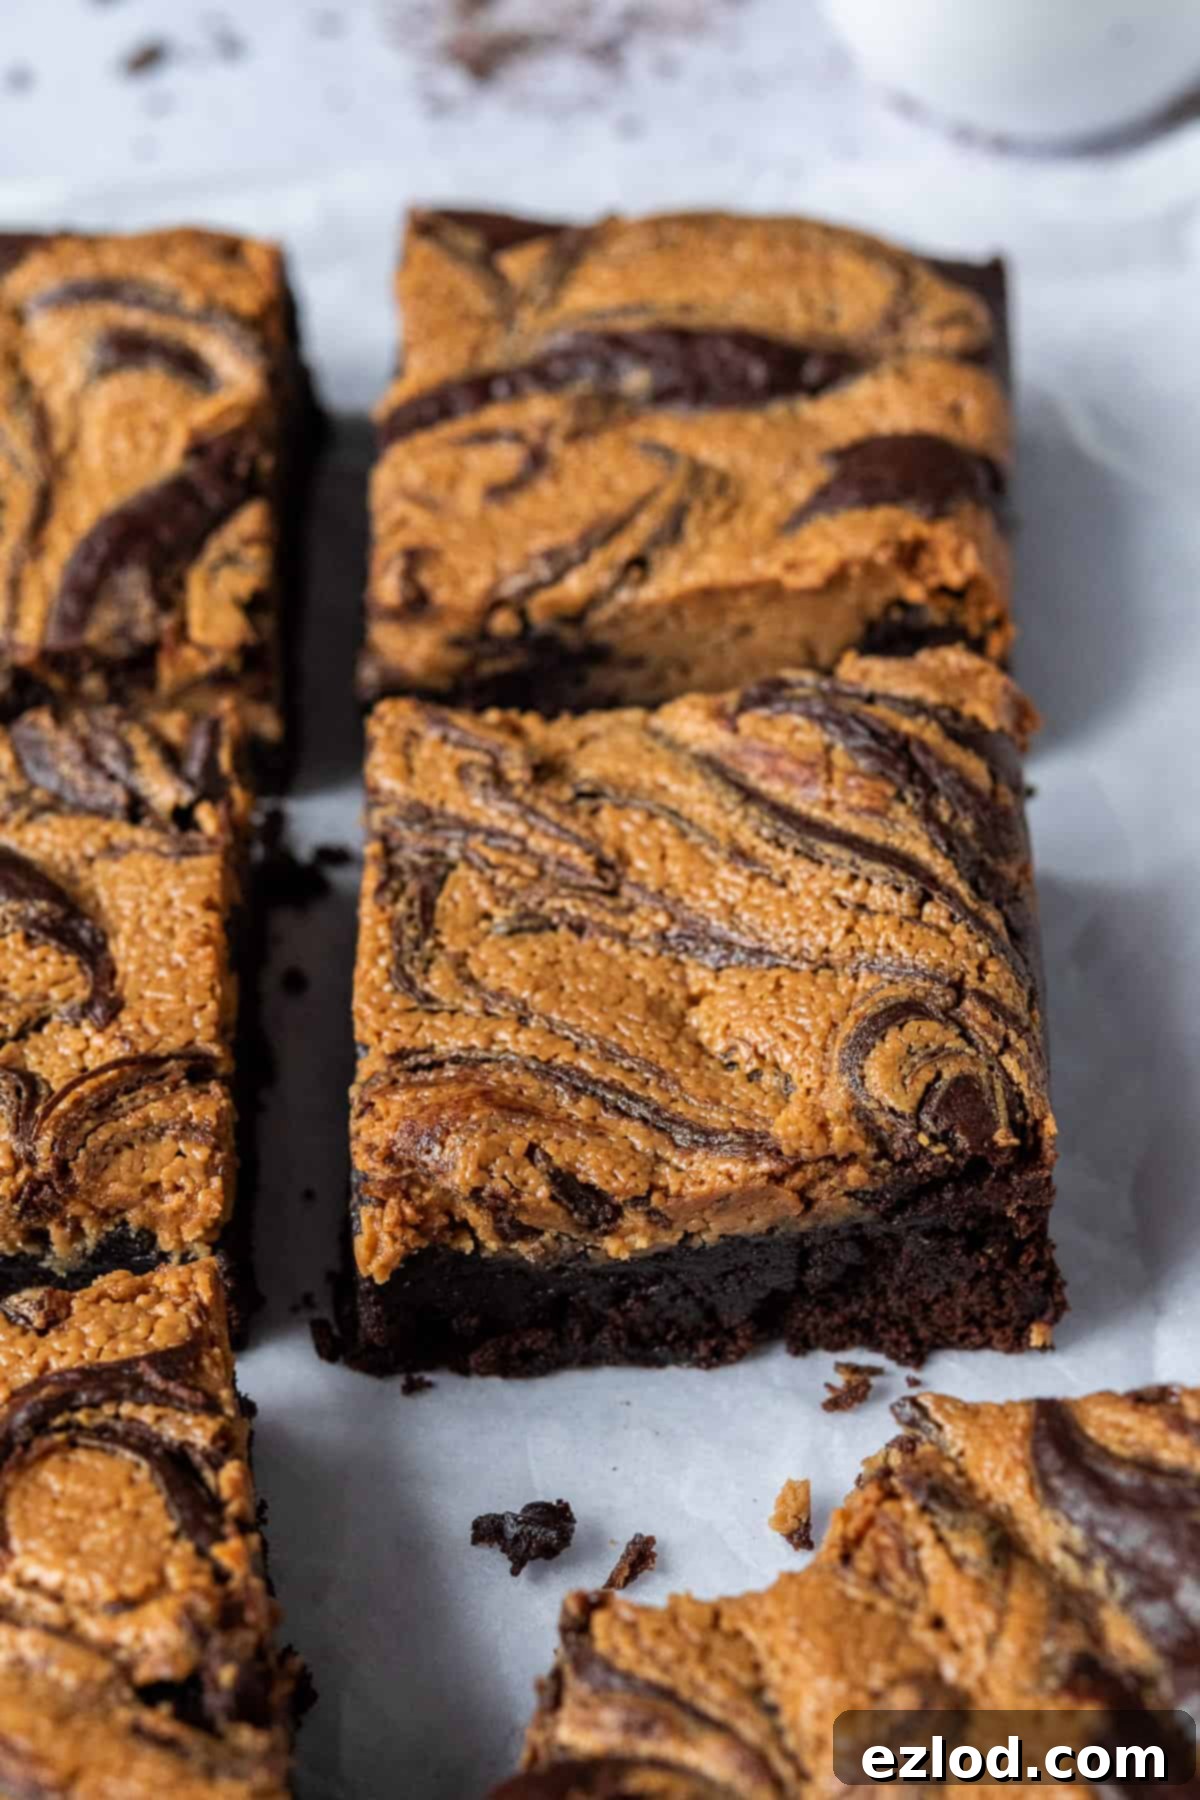
Prepare to fall in love with these vegan peanut butter swirl brownies – the epitome of indulgent baking. Imagine a rich, incredibly fudgy, and intensely chocolatey brownie that’s completely eggless and dairy-free, yet tastes every bit as decadent as its traditional counterparts. What truly elevates this dessert is the generous, creamy swirl of peanut butter on top. It’s a match made in heaven, as the classic combination of peanut butter and chocolate creates an unparalleled flavor experience that will have everyone reaching for another piece.
Beyond their sensational taste and texture, these brownies are surprisingly quick and easy to whip up. You’ll be amazed at how effortlessly you can create such a gourmet-quality dessert right in your own kitchen. Seriously, there’s no way anyone would guess they are vegan; they truly stand shoulder-to-shoulder with the very best non-vegan brownies you’ve ever tasted. Their fudgy texture and deep chocolate notes are so satisfying, making them a fantastic option for anyone seeking delicious plant-based treats.
A word of caution: these brownies are incredibly moreish! Make sure you have plenty of friends, family, or colleagues to share them with, because it would be dangerously easy to devour the entire batch yourself. Each bite offers a perfect balance of rich chocolate and creamy peanut butter, guaranteeing pure bliss.
This fantastic recipe is an adaptation of my ultimate chewy vegan brownies recipe. If you’re ever in the mood for a classic, plain vegan brownie that’s just as amazing, be sure to give that recipe a try too. It’s a staple for any vegan baker looking for that perfect, chewy chocolate square.
Essential Ingredients for Your Vegan Peanut Butter Swirl Brownies:
Crafting the perfect vegan brownie, especially one with a delightful peanut butter swirl, relies on a few key ingredients. Each component plays a vital role in achieving that rich, fudgy, and chewy texture without any animal products. Let’s delve into what you’ll need:
Cocoa Butter: This is truly the secret ingredient for achieving an exceptionally dense and chewy texture in these vegan brownies. As cocoa butter is naturally solid at room temperature, it provides the structural integrity often provided by eggs in traditional recipes. It helps keep the brownies wonderfully firm and moist, preventing them from becoming crumbly or dry. Furthermore, it significantly enhances the overall chocolatey flavor profile, adding a luxurious depth. You can typically find cocoa butter, sometimes labeled cacao butter, quite easily online or at health food stores (Holland and Barrett is a good source). If, however, you’re unable to source it, coconut oil or a good quality vegan block butter can be used as alternatives, though the texture might vary slightly.
Non-Dairy Yogurt: A small but mighty addition, non-dairy yogurt helps to replace some of the protein and moisture that eggs would typically provide. I personally prefer a thick, unsweetened vanilla-flavored coconut yogurt, such as The Coconut Collaborative one, due to its creamy texture and subtle flavor. However, since only a small quantity is used, a thinner variety made from coconut or soy should also work perfectly fine, contributing to the brownies’ overall moistness and rich crumb.
Non-Dairy Milk: Essential for providing the necessary moisture, non-dairy milk helps to bind the ingredients together. For baking, I almost exclusively use soy milk because of its higher protein content, which contributes to a better structure in baked goods. However, feel free to use any variety of non-dairy milk you have on hand – almond, oat, or cashew milk will also work well, ensuring your brownies are perfectly hydrated and tender.
Sugar: In these brownies, sugar is far more than just a sweetener; it’s absolutely crucial for achieving the characteristic texture. It’s responsible for that irresistible crisp brownie crust and contributes significantly to the fudgy interior. For these reasons, I strongly advise against reducing the amount of sugar. To ensure that crisp crust, we make sure the sugar is fully dissolved by gently heating it with the non-dairy milk and yogurt before mixing it into the dry ingredients. This step is key to unlocking the perfect brownie texture.
Chocolate: To achieve the deepest, most complex chocolate flavor, this recipe ingeniously combines both high-quality cocoa powder and melted dark chocolate. The melted chocolate, particularly one with about 70% cocoa solids (I highly recommend Lindt 70% for its superior taste), is vital for creating that dense, fudgy, and utterly decadent texture that defines a perfect brownie. Always opt for a good quality chocolate, as it makes a noticeable difference in the final product’s flavor.
Espresso Powder: This optional but highly recommended ingredient is a game-changer for chocolate desserts. A touch of instant espresso powder doesn’t make your brownies taste like coffee; instead, it magically intensifies and deepens the chocolate flavor, making it richer and more profound. You won’t taste the coffee at all, but the brownies will be undeniably more delicious. If you don’t have any, you can certainly omit it, but I encourage you to try it if possible.
Plain Flour: Vegan brownies often require a slightly higher proportion of flour compared to their non-vegan counterparts to compensate for the absence of eggs and to maintain structural integrity. But don’t let that worry you – these brownies are designed to be fudgy and chewy, not cakey in the slightest! The carefully balanced amount ensures a dense, satisfying chew without becoming dry or crumbly.
Baking Powder: A modest amount of baking powder is included to provide just the right amount of lift. This tiny leavening agent replaces the slight rise that eggs would typically provide, ensuring your brownies are perfectly textured without veering into unwanted cake territory. The goal here is fudgy, not fluffy!
Cocoa Powder: As mentioned, using both melted dark chocolate and cocoa powder is the secret to an incredibly deep and rich chocolate flavor. I specifically recommend a dark Dutch process cocoa powder for its smooth flavor and darker color, which contributes to the brownies’ intense appearance and taste.
Vanilla Extract: Another optional but highly recommended ingredient, a good quality vanilla extract enhances all the other flavors, adding a layer of warmth and complexity. It’s a subtle addition that truly rounds out the overall taste experience.
Salt: Almost all sweet recipes, and especially those featuring chocolate, benefit immensely from a pinch of salt. It’s not there to make things salty, but rather to perfectly balance the sweetness and to heighten and bring out the rich chocolate flavors. Don’t skip it!
Peanut Butter: For the iconic swirl, you’ll achieve the best results using a creamy, processed peanut butter, such as Skippy or Jif, rather than a natural, oil-separated variety. While both smooth or crunchy can technically work, creamy provides the smoothest swirl. I combine it with a little melted vegan butter, sifted icing sugar, vanilla extract, and a pinch of salt to create a beautifully smooth and flavorful swirl that contrasts perfectly with the rich brownie base.
How to Bake Delicious Vegan Peanut Butter Swirl Brownies:
Making these sensational vegan peanut butter swirl brownies is a straightforward process, ensuring you get perfect results every time. Follow these steps carefully, and you’ll be enjoying fudgy, chocolatey goodness in no time! (For precise ingredient quantities and comprehensive instructions, please refer to the detailed recipe card below.)
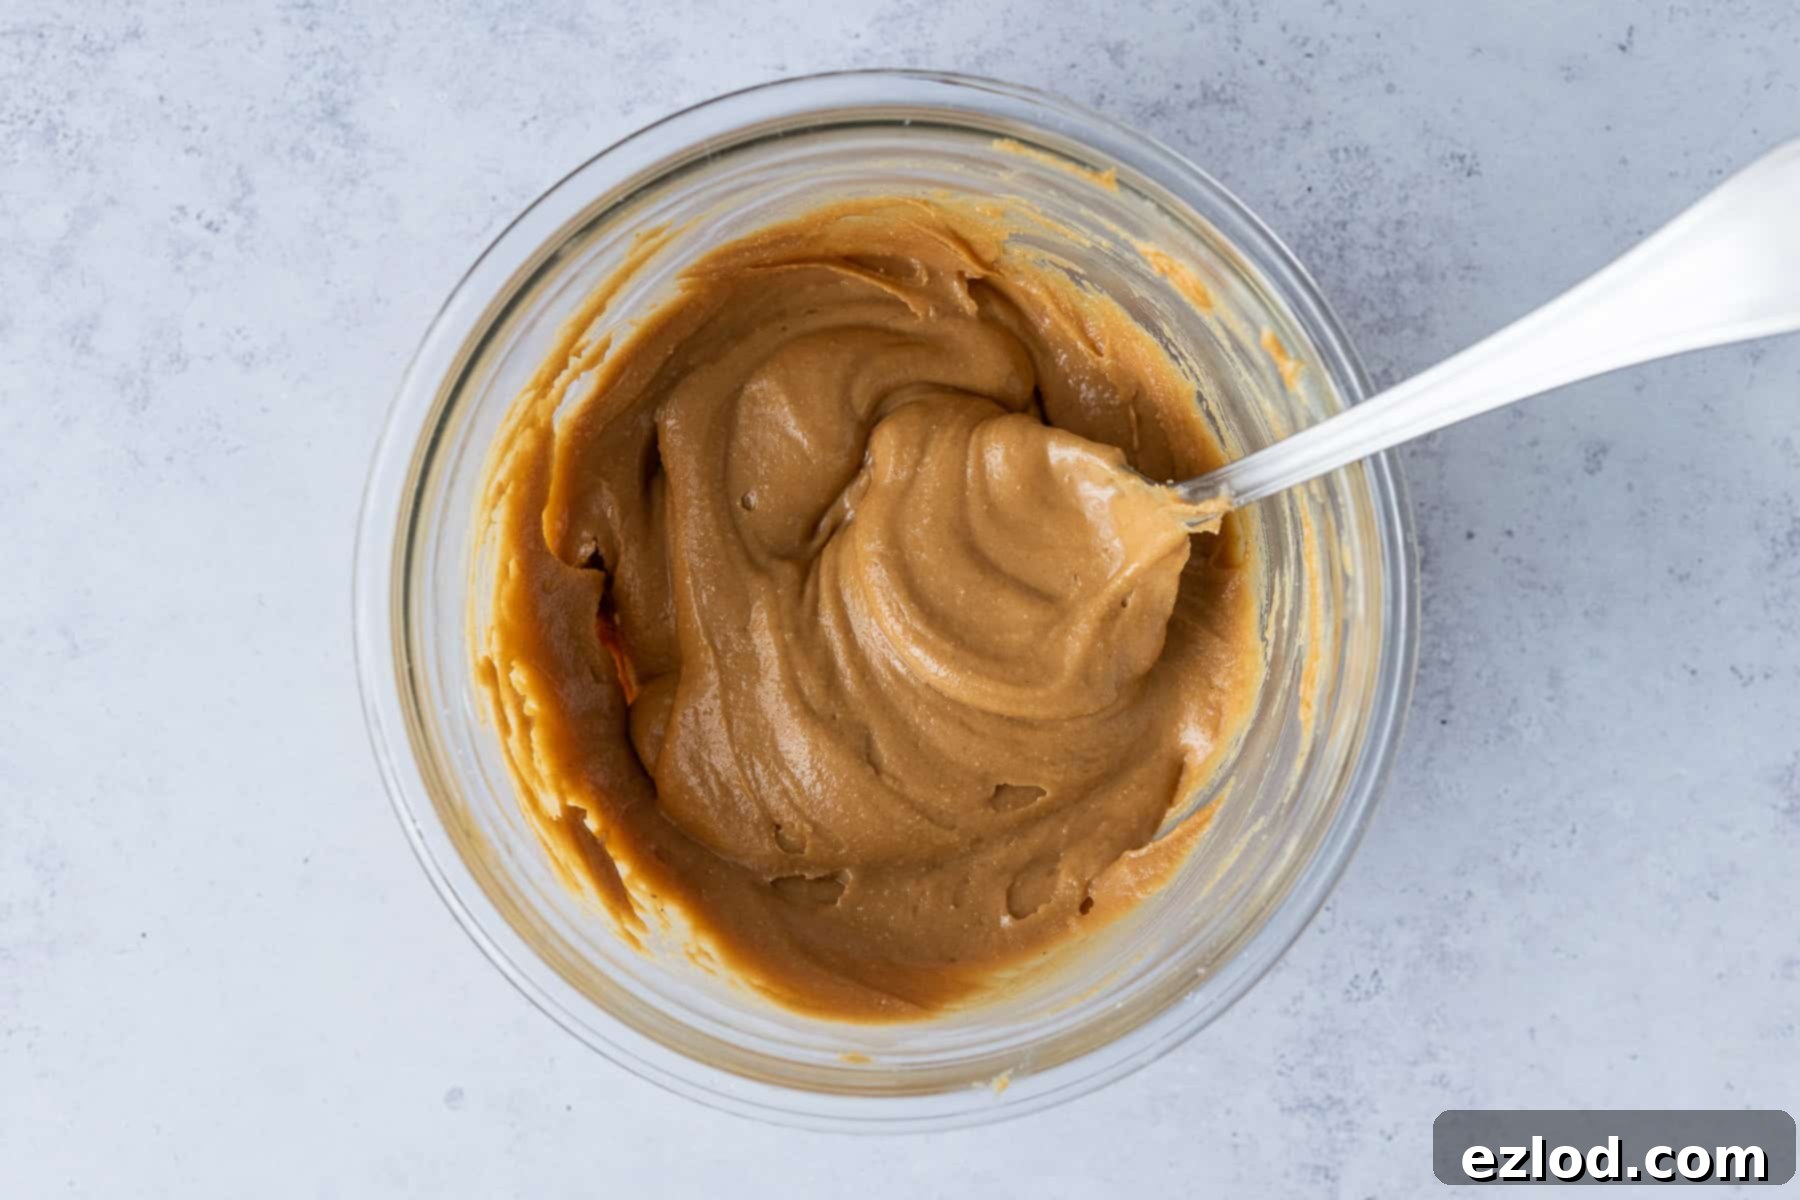
First, let’s prepare that signature peanut butter swirl. In a bowl, simply combine your creamy peanut butter (remember, not natural for the best texture), melted vegan butter, sifted icing sugar, vanilla extract, and a tiny pinch of salt. Stir everything together until the mixture is beautifully smooth and well combined. Set this aside for later.
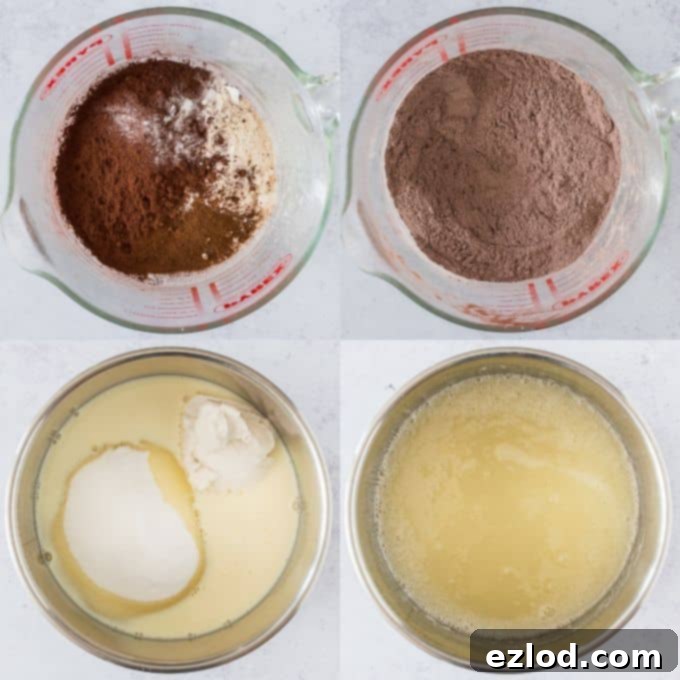
Next, we move on to the brownie batter. Begin by sifting together all your dry ingredients: the plain flour, rich cocoa powder, instant espresso powder (if using), baking powder, and salt. Sifting ensures there are no lumps and helps distribute them evenly. Once sifted, set this bowl aside.
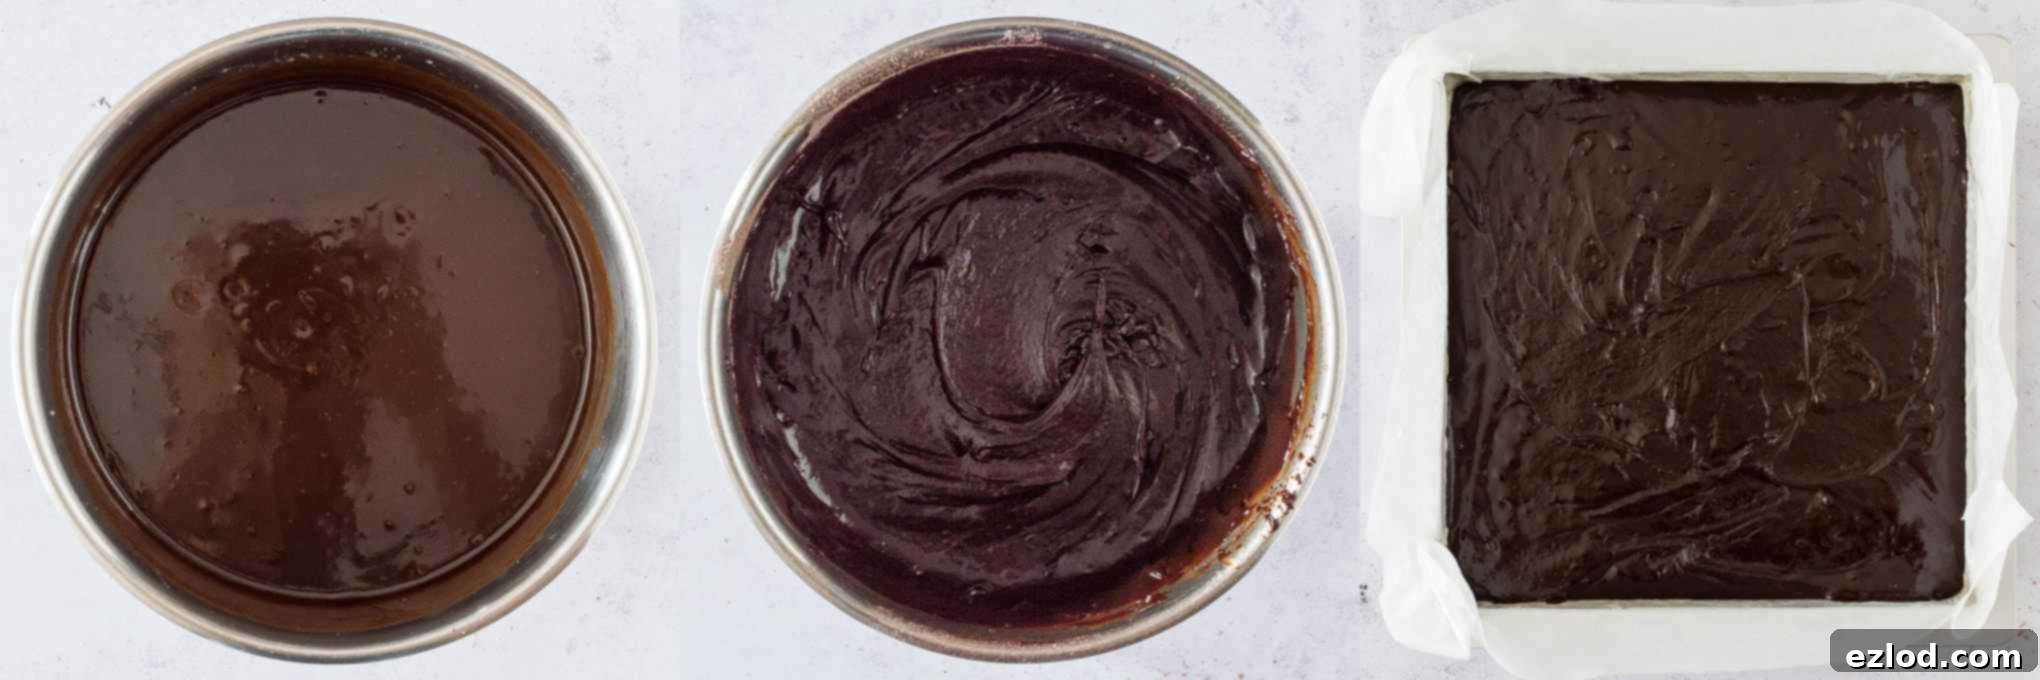
Now, take a medium-sized pan and combine the sugar, non-dairy yogurt, and non-dairy milk. Place the pan over a low heat. Stir this mixture regularly and gently until all the sugar has completely dissolved. You’re looking for a mixture that becomes hot and glossy, but it should not reach a full simmer or boil. This step is crucial for achieving that characteristic crisp brownie crust.
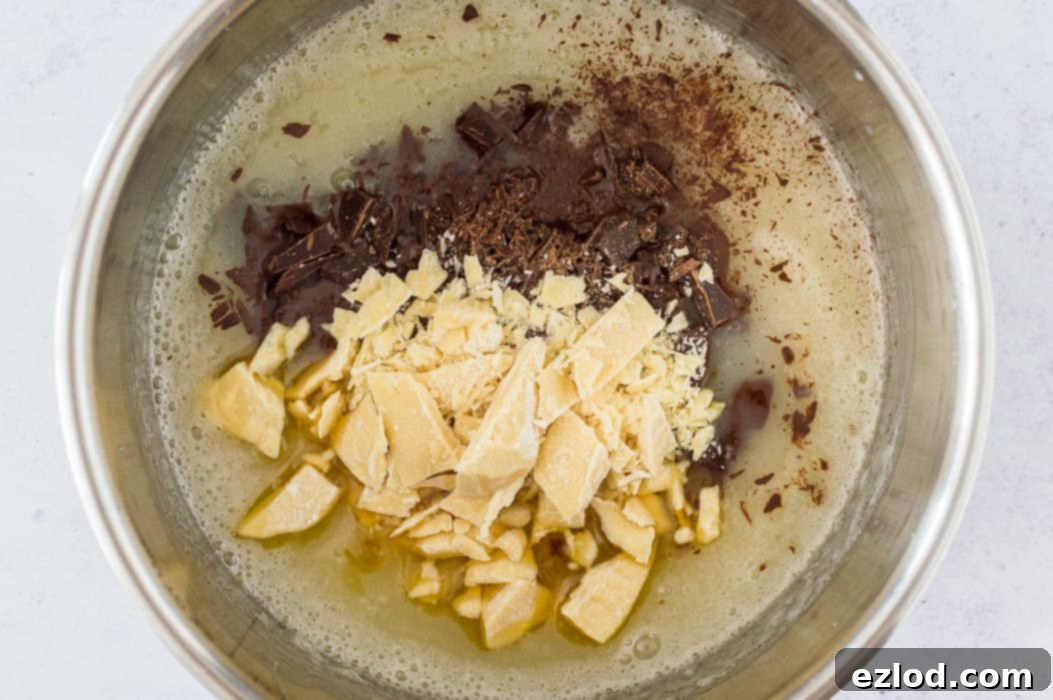
Once the sugar mixture is ready, remove the pan from the heat immediately. Add in your chopped dark chocolate, the cocoa butter (or your chosen alternative like coconut oil or vegan butter), and the vanilla extract. The residual heat from the mixture will gently melt these ingredients. Stir continuously until everything is thoroughly melted and you have a beautifully smooth, glossy chocolate mixture. This creates the base for your intensely chocolatey brownies.
It’s time to bring it all together! Add your pre-sifted dry ingredients into the melted chocolate mixture. Stir gently but thoroughly until no dry lumps of flour or cocoa powder remain. Be careful not to overmix at this stage; just mix until everything is just combined. If you’re adding any additional mix-ins (like chocolate chips or nuts), incorporate them now. You’ll notice the batter will be quite thick, which is exactly what we want for fudgy brownies. Carefully pour this rich batter into your prepared 20cm/8-inch square metal baking tin, which should already be greased and lined with baking parchment.
Once the batter is in the tin, use a spatula or the back of a spoon to spread it out as evenly as possible. Take your time to smooth the top, creating a perfect canvas for our peanut butter swirl.
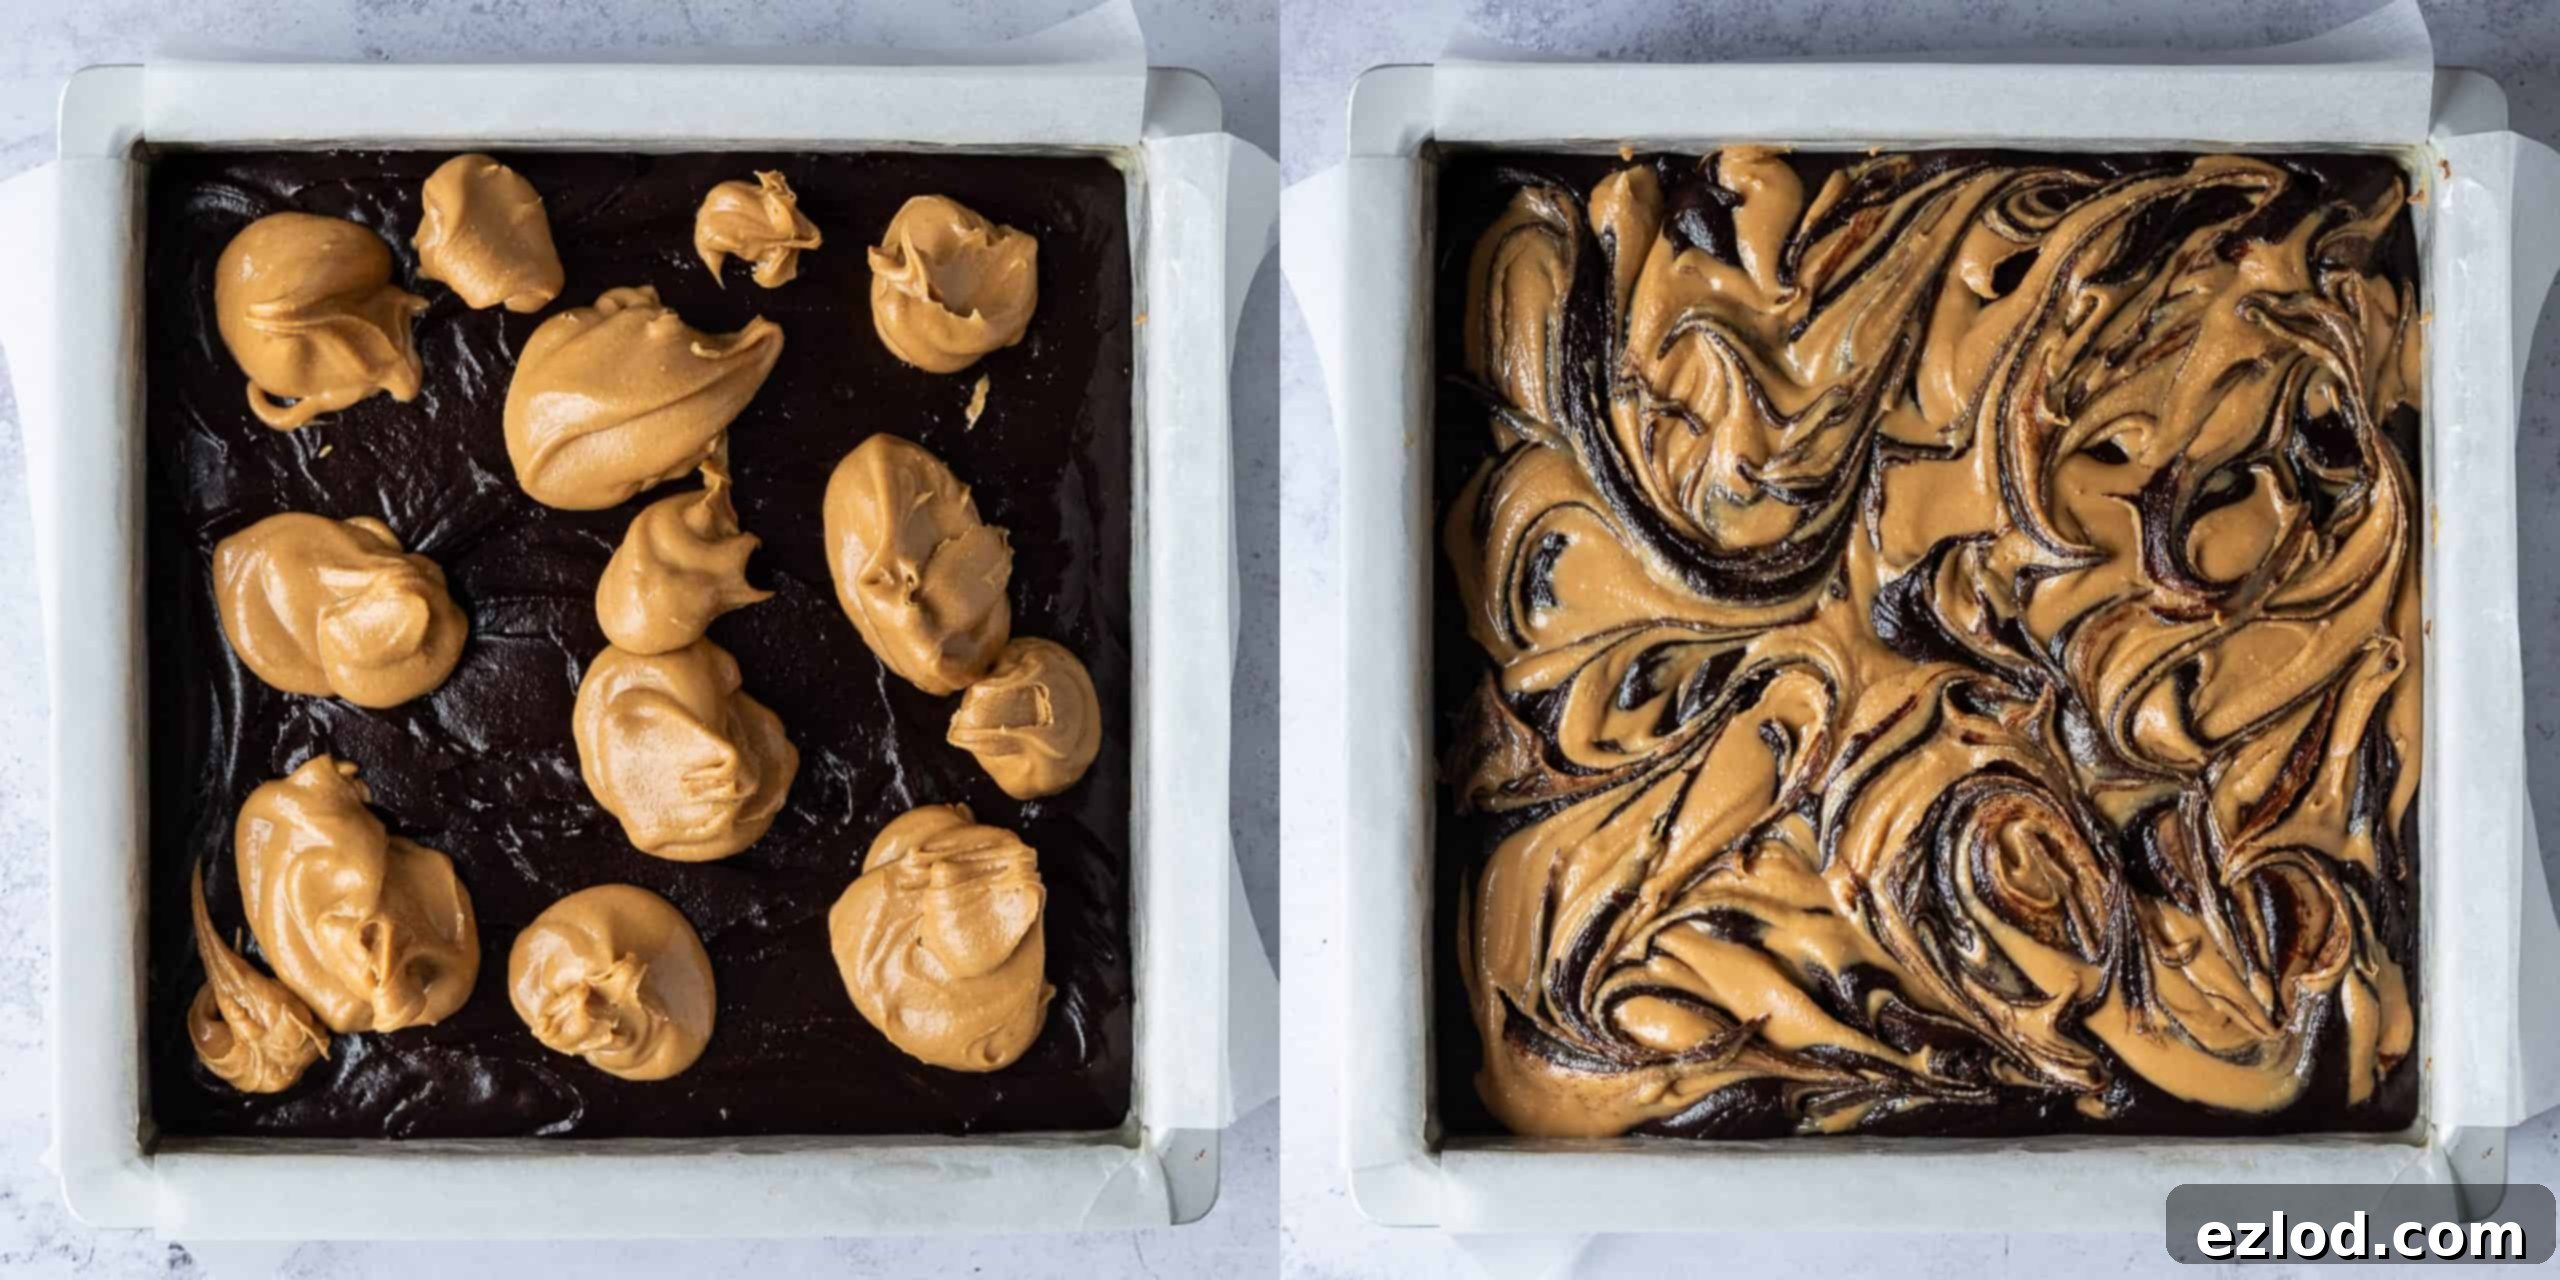
Now, let’s create that stunning swirl! Take your prepared peanut butter mixture. If it has thickened too much while waiting, you can warm it in the microwave for just a few seconds – be very cautious not to overheat it, as it will become too runny. The ideal consistency is for the peanut butter mixture to be roughly the same thickness as your brownie batter for easy swirling. Spoon dollops of the peanut butter mixture over the top of the chocolate brownie batter.
Using a knife or a skewer, gently swirl the two mixtures together. Create elegant patterns, being careful not to over-mix, as you want distinct streaks of peanut butter throughout the chocolate. This creates the beautiful marbled effect.
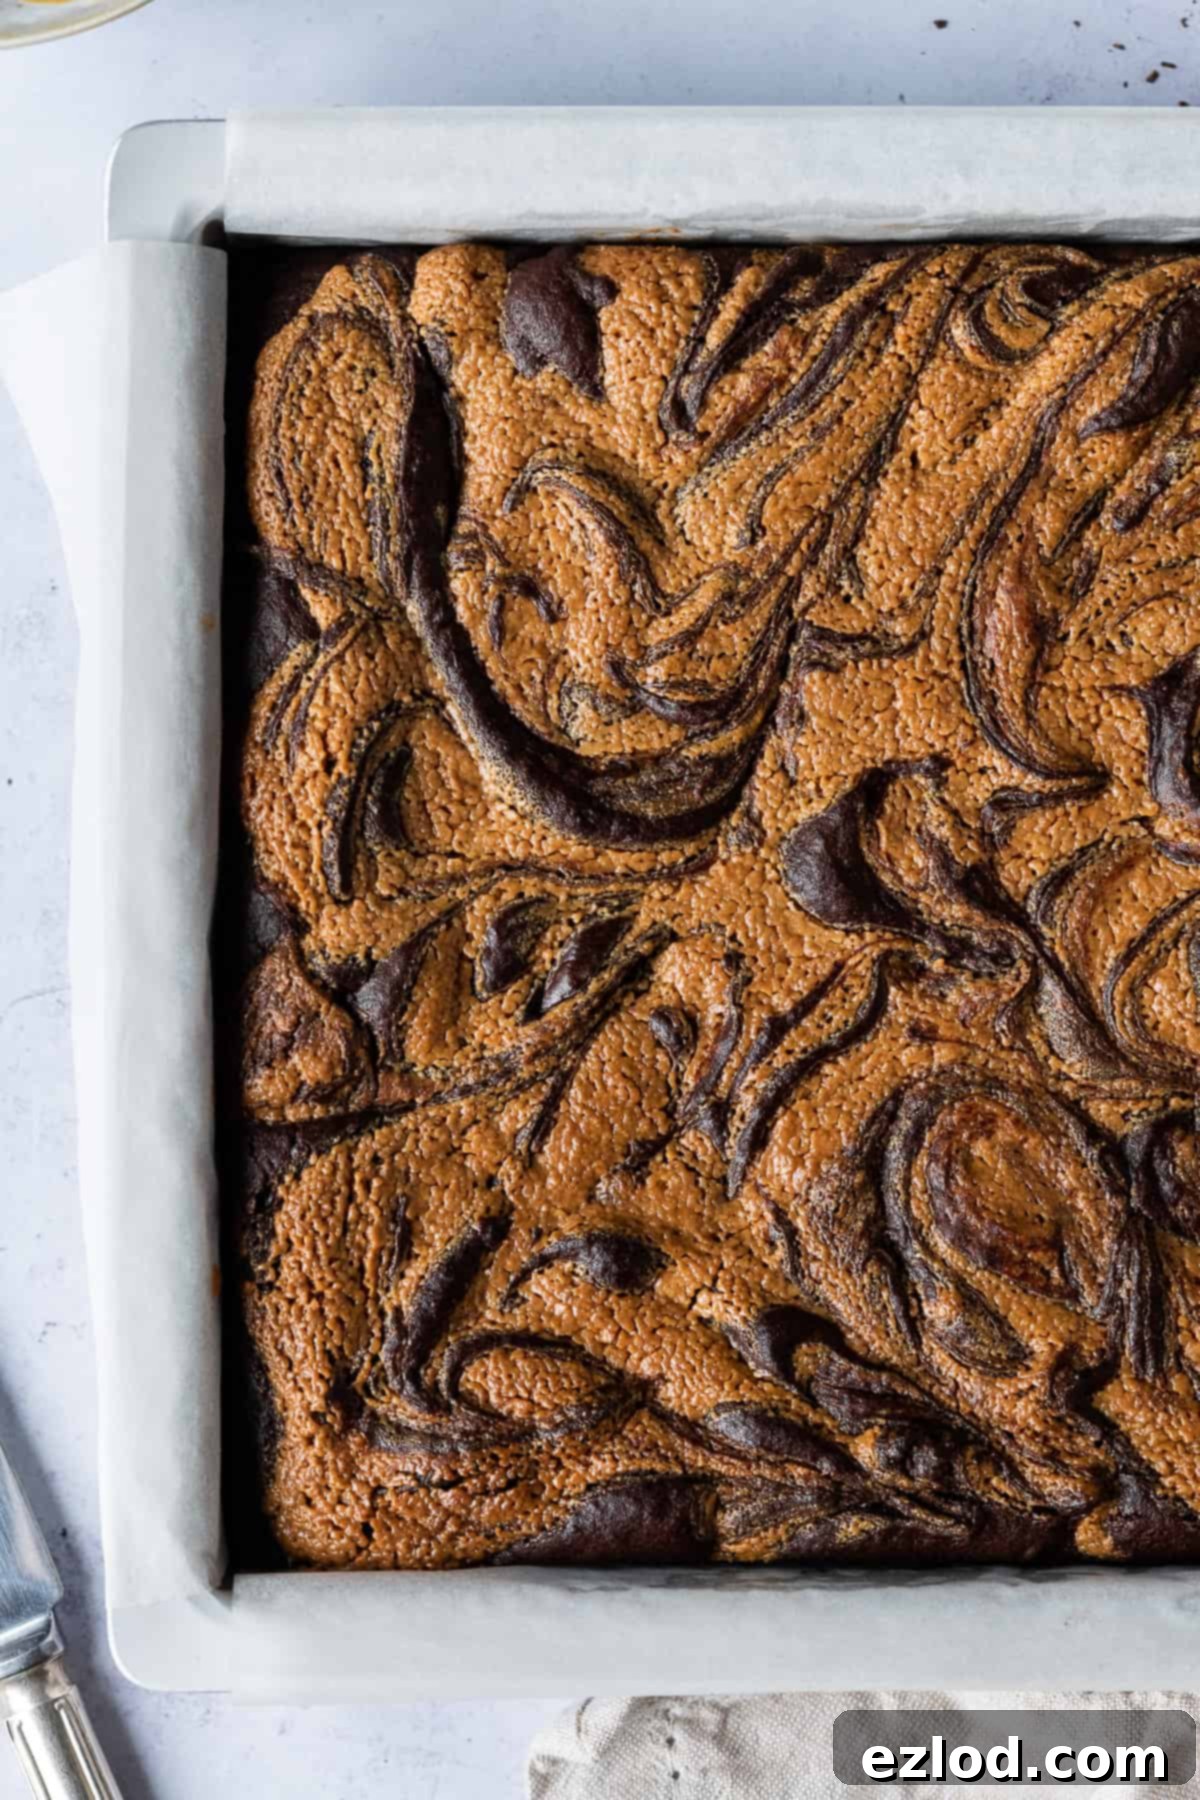
Bake your brownies in the preheated oven for approximately 30 minutes. The key to perfect brownies is knowing when they’re done – a skewer inserted into the center should come out “gunky” with moist crumbs, but without any wet batter. If the skewer comes out completely clean, it means they are over-baked, which can result in a dry brownie. So, keep a very close eye on them, especially after the 25-minute mark!
Once baked, the hardest part is waiting! It is absolutely essential to leave the brownies to cool completely in the tin before attempting to slice them. While it’s tempting to cut into them warm, they will be very difficult to slice neatly and may crumble. Allowing them to cool fully (ideally for several hours or even overnight) will firm them up, making it much easier to achieve those perfect, neat squares.
Top Tips for Baking the Best Vegan Peanut Butter Swirl Brownies:
Achieving brownie perfection, especially with a vegan recipe, often comes down to a few key techniques and considerations. Here are my essential tips to ensure your vegan peanut butter swirl brownies turn out absolutely flawless every single time:
- Embrace Precision with Gram Measurements: For consistently excellent results, always follow the recipe closely, and I cannot stress this enough: use a digital scale for gram measurements rather than cup conversions. Cup measurements are simply not accurate enough for baking, where precise ratios of ingredients can make a huge difference to the final texture and outcome. Using a scale will guarantee the best possible results, ensuring your brownies are perfectly fudgy and chewy.
- Never Overbake Your Brownies: This is perhaps the most crucial rule for any brownie recipe! Overbaked brownies will turn dry and cakey, losing that desirable fudgy texture. Keep a close eye on your brownies during the last few minutes of baking. You want to remove them from the oven when a skewer inserted into the center comes out slightly “gunky” with moist crumbs, but definitely no wet batter. If the skewer comes out perfectly clean, they are already overdone, so always err on the side of underbaking slightly.
- Choose the Right Baking Pan: Opt for a metal baking pan over a glass dish. Glass retains heat much more effectively and for longer, meaning your brownies will continue to cook even after they’ve been removed from the oven, increasing the risk of overbaking and drying them out. A metal pan allows for more even baking and cools down more quickly.
- Patience Pays Off: Cool Completely Before Slicing: As tempting as it is to dive into warm brownies, resist the urge! For neat, clean squares, let your brownies cool completely in the tin before slicing. This allows them to fully set and firm up, making them much easier to cut without crumbling or sticking. You can even refrigerate them for 30 minutes to an hour for extra firm slices.
- Enjoy Them Warm (Again!): If you prefer a softer, just-baked texture, or if your brownies have been sitting for a few days and you want to refresh them, simply pop a single brownie square into the microwave for about 10 seconds. This gentle warming will bring back some of that delicious melt-in-your-mouth quality. Warmed brownies are also absolutely divine served with a scoop of vegan vanilla ice cream for an extra-special dessert!
How Long Will These Brownies Keep Fresh?
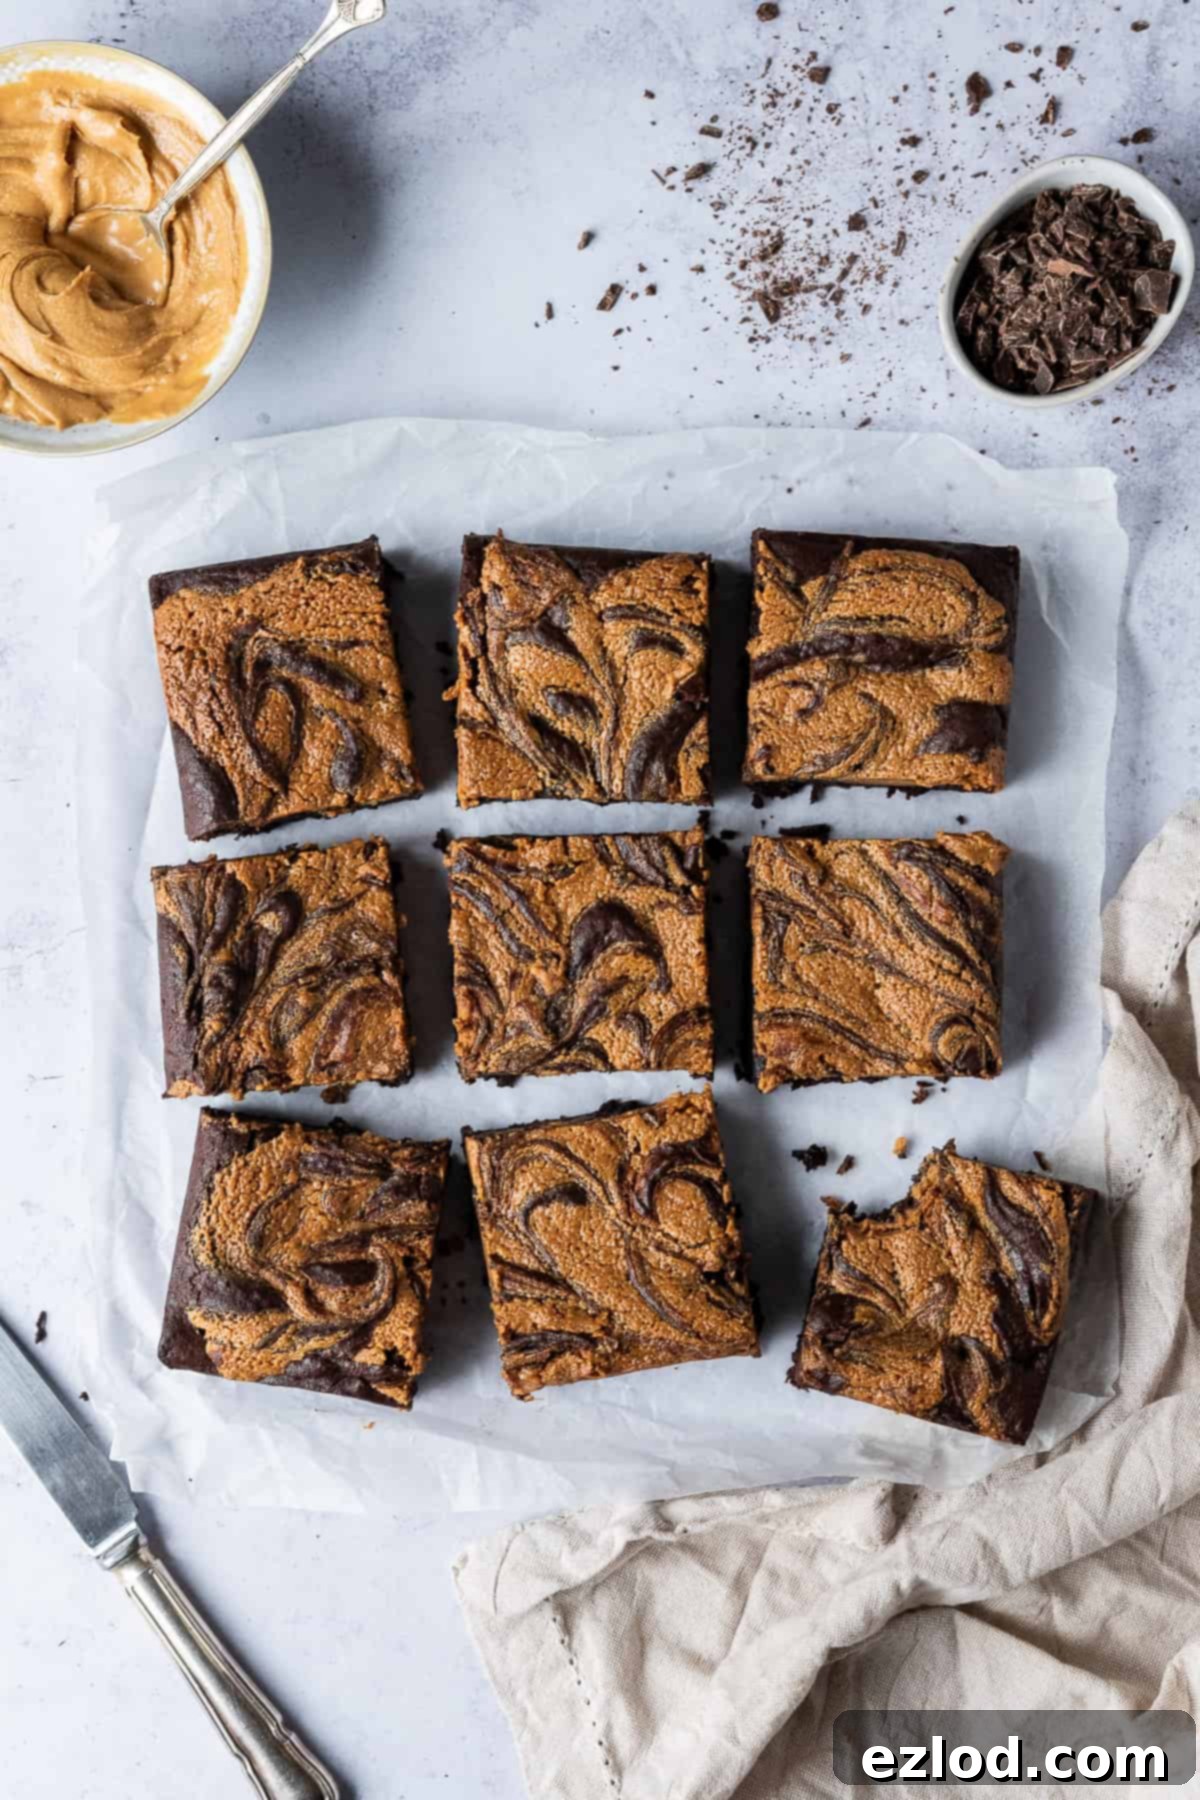
These delectable vegan peanut butter swirl brownies maintain their freshness beautifully. Stored in an airtight container, they will remain wonderfully moist and delicious for approximately four days. You can keep them either at room temperature, in a cool pantry, or in the refrigerator, depending on your preference and climate.
Can I Freeze These Vegan Brownies?
Absolutely! These brownies are excellent candidates for freezing, making them perfect for meal prepping desserts or saving for a rainy day treat. They freeze exceptionally well for up to three months. To serve, simply transfer them from the freezer to an airtight container and allow them to defrost overnight at room temperature or in the fridge. They will be just as fudgy and flavorful as when freshly baked!
More Irresistible Vegan Brownies and Bars to Try:
If you loved these peanut butter swirl brownies, you might also enjoy exploring some of my other fantastic vegan baking recipes. There’s a whole world of delicious plant-based treats waiting for you!
- Chewy vegan brownies
- Vegan banana blondies
- Small batch vegan brownies
- Pumpkin chocolate chip bars
- Mulled wine brownies
- Berry crumble bars
- Vegan fruit and nut flapjacks
- Vegan peanut butter chocolate chip pecan bars
If you tried this incredible recipe, I’d love to see your creations! Why not tag @domestic_gothess on Instagram and use the hashtag #domesticgothess to share your delicious results? Happy baking!
*All images and content on Domestic Gothess are copyright protected. If you want to share this recipe, then please do so by using the share buttons provided. Do not screenshot or post the recipe or content in full.*

Print
Vegan Peanut Butter Swirl Brownies
Ingredients
For the Peanut Butter Swirl:
- 180 g (¾ cup) creamy peanut butter (not natural) (either smooth or crunchy is fine)
- 15 g (1 Tbsp) vegan butter/margarine melted
- 1 Tbsp icing (powdered) sugar sifted
- 1 tsp vanilla extract
- ⅛ tsp salt
For the Fudgy Brownies:
- 150 g (1 ¼ cups) plain (all-purpose) flour
- 70 g (¾ cup + 1 Tbsp) cocoa powder (Dutch processed)
- ½ tsp baking powder
- 1 tsp instant espresso powder (optional, but highly recommended for enhanced chocolate flavor)
- ½ tsp salt
- 120 ml (½ cup) unsweetened non-dairy milk (soy is best for baking due to protein content)
- 80 g (⅓ cup) unsweetened non-dairy yogurt (I use coconut, but soy works too)
- 300 g (1 ½ cups) caster (superfine) sugar or granulated sugar
- 100 g (3 ½ oz) dark chocolate (about 70% cocoa solids) finely chopped
- 60 g (2 oz) cocoa/cacao butter (or coconut oil/vegan block butter) chopped into small pieces
- 2 tsp vanilla extract
Instructions
-
Preheat your oven to 180°C/160°C fan/350°F/gas mark 4. Lightly grease a 20cm/8-inch square metal cake tin and line it with baking parchment, leaving an overhang on two sides for easy removal.
-
To make the delightful peanut butter swirl, combine all the designated ingredients (creamy peanut butter, melted vegan butter, sifted icing sugar, vanilla extract, and salt) in a medium bowl. Stir thoroughly until the mixture is smooth and uniform. Set this aside.
-
For the brownie batter, sift together the plain flour, cocoa powder, baking powder, instant espresso powder (if using), and salt in a separate large bowl. Sifting ensures all dry ingredients are well combined and lump-free. Set aside.
-
In a medium-sized saucepan, combine the non-dairy milk, non-dairy yogurt, and sugar. Place the pan over a low heat and stir frequently. Continue stirring until the sugar has completely dissolved and the mixture appears hot and glossy, just before it comes to a simmer (do not boil). This step is key for a crisp top crust.
-
Remove the pan from the heat. Immediately add the finely chopped dark chocolate, the chopped cocoa butter (or your chosen alternative), and the vanilla extract. Stir continuously until all the chocolate and cocoa butter have fully melted and the mixture is smooth and luxurious.
-
Pour the sifted dry ingredients into the warm chocolate mixture. Stir gently with a spatula until no dry lumps of flour or cocoa powder are visible. Be careful not to overmix; just combine until smooth. The batter will be notably thick – this is ideal for fudgy brownies.
-
Transfer the thick brownie batter into your prepared 20cm/8-inch square metal tin. Use a spatula or the back of a spoon to spread the batter evenly across the bottom of the tin, smoothing the top surface.
-
Check the consistency of your peanut butter mixture. If it has become too thick to swirl easily, warm it in the microwave for just a few seconds (5-10 seconds should suffice). Be very careful not to let it get too warm or it will become too runny. You want both the peanut butter mixture and the brownie batter to have a roughly similar, spoonable texture for the best swirl.
-
Spoon dollops of the peanut butter mixture over the top of the brownie batter, distributing them evenly. Take a knife or a skewer and gently swirl the peanut butter through the brownie batter to create beautiful marbling. Avoid over-mixing, as you want distinct layers of chocolate and peanut butter.
-
Bake in the preheated oven for approximately 30 minutes. The brownies are ready when a skewer inserted into the center comes out with moist, fudgy crumbs clinging to it, but no wet batter. If the skewer comes out completely clean, they are over-baked and might be dry. Start checking them from 25 minutes onwards to prevent overbaking.
-
Once baked, remove the brownies from the oven and let them cool completely in the tin on a wire rack. This step is crucial for achieving clean, neat slices. They will be too soft and difficult to cut when warm. Patience will reward you with perfect squares!
Notes
- For the best possible results, it is highly recommended to follow the recipe very closely, especially regarding measurements. Always use a digital scale for gram measurements, as cup conversions are not precise enough for baking and may lead to varied outcomes.
- To avoid dry, cakey brownies, do not overbake! The ideal doneness is when a skewer inserted into the center comes out with moist crumbs, not wet batter. A clean skewer indicates they are overdone.
- A metal baking pan is preferred over glass. Glass dishes retain heat longer, which can cause brownies to continue cooking and potentially overbake after being removed from the oven.
- Allow the brownies to cool completely in the pan before attempting to slice them. This ensures they firm up properly, allowing for neat, clean cuts and preventing crumbling.
