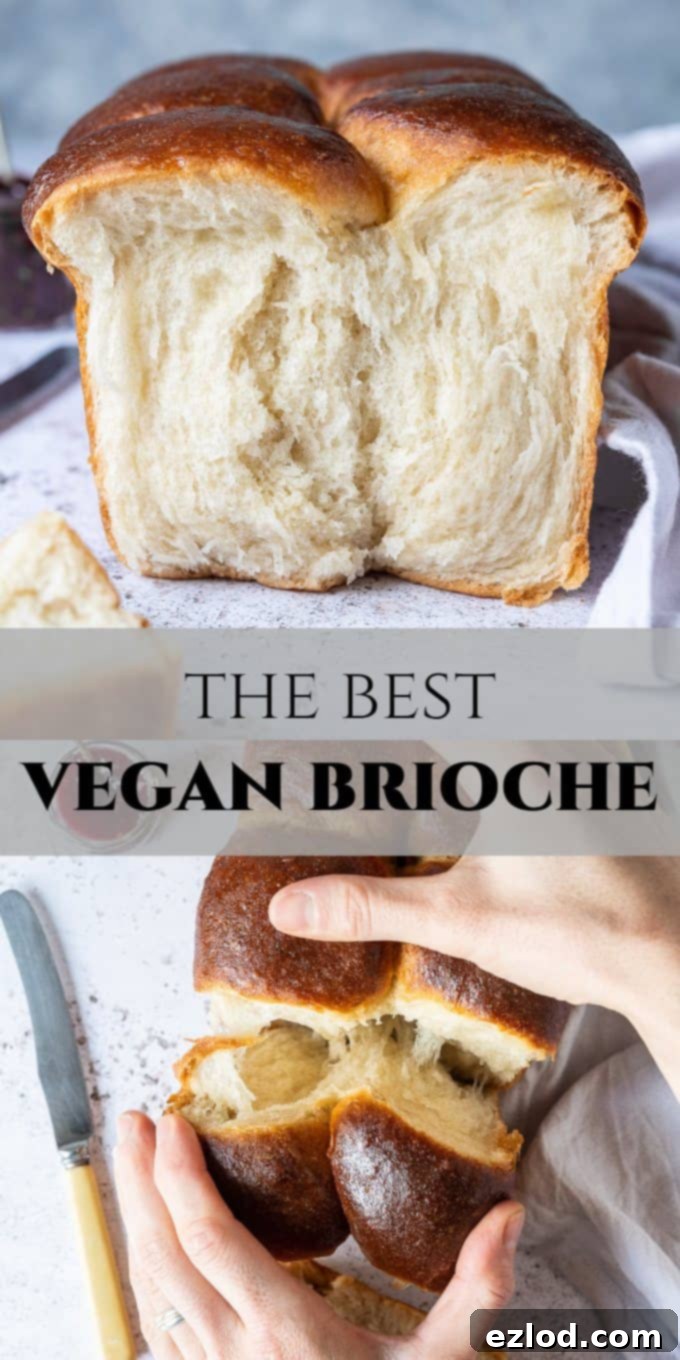
The Ultimate Guide to Delicious Vegan Brioche: Soft, Fluffy, and Egg-Free with Aquafaba
Discover the secret to incredibly soft, fluffy, and rich vegan brioche! This eggless version of the classic French bread uses aquafaba, offering an irresistible flavor and texture. Choose between vegan butter or olive oil to create your perfect plant-based masterpiece.
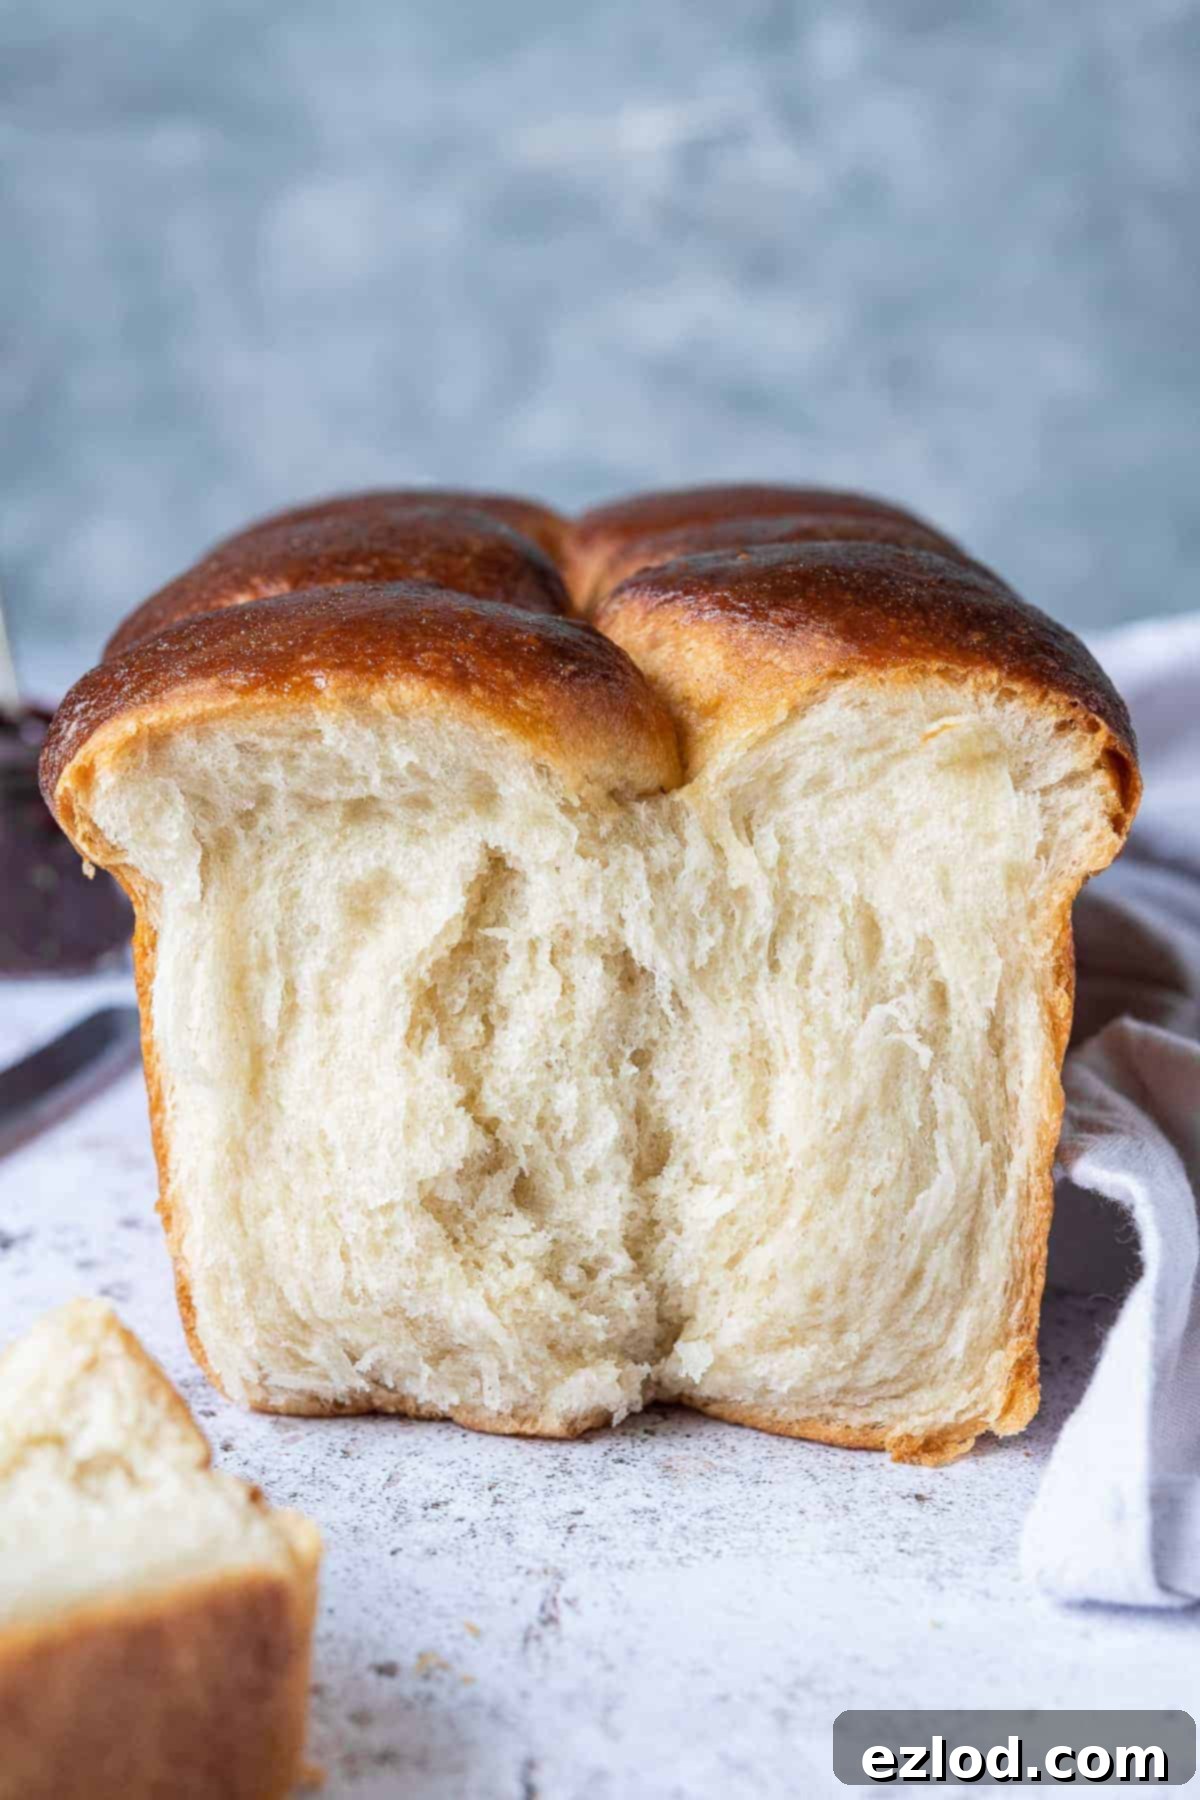
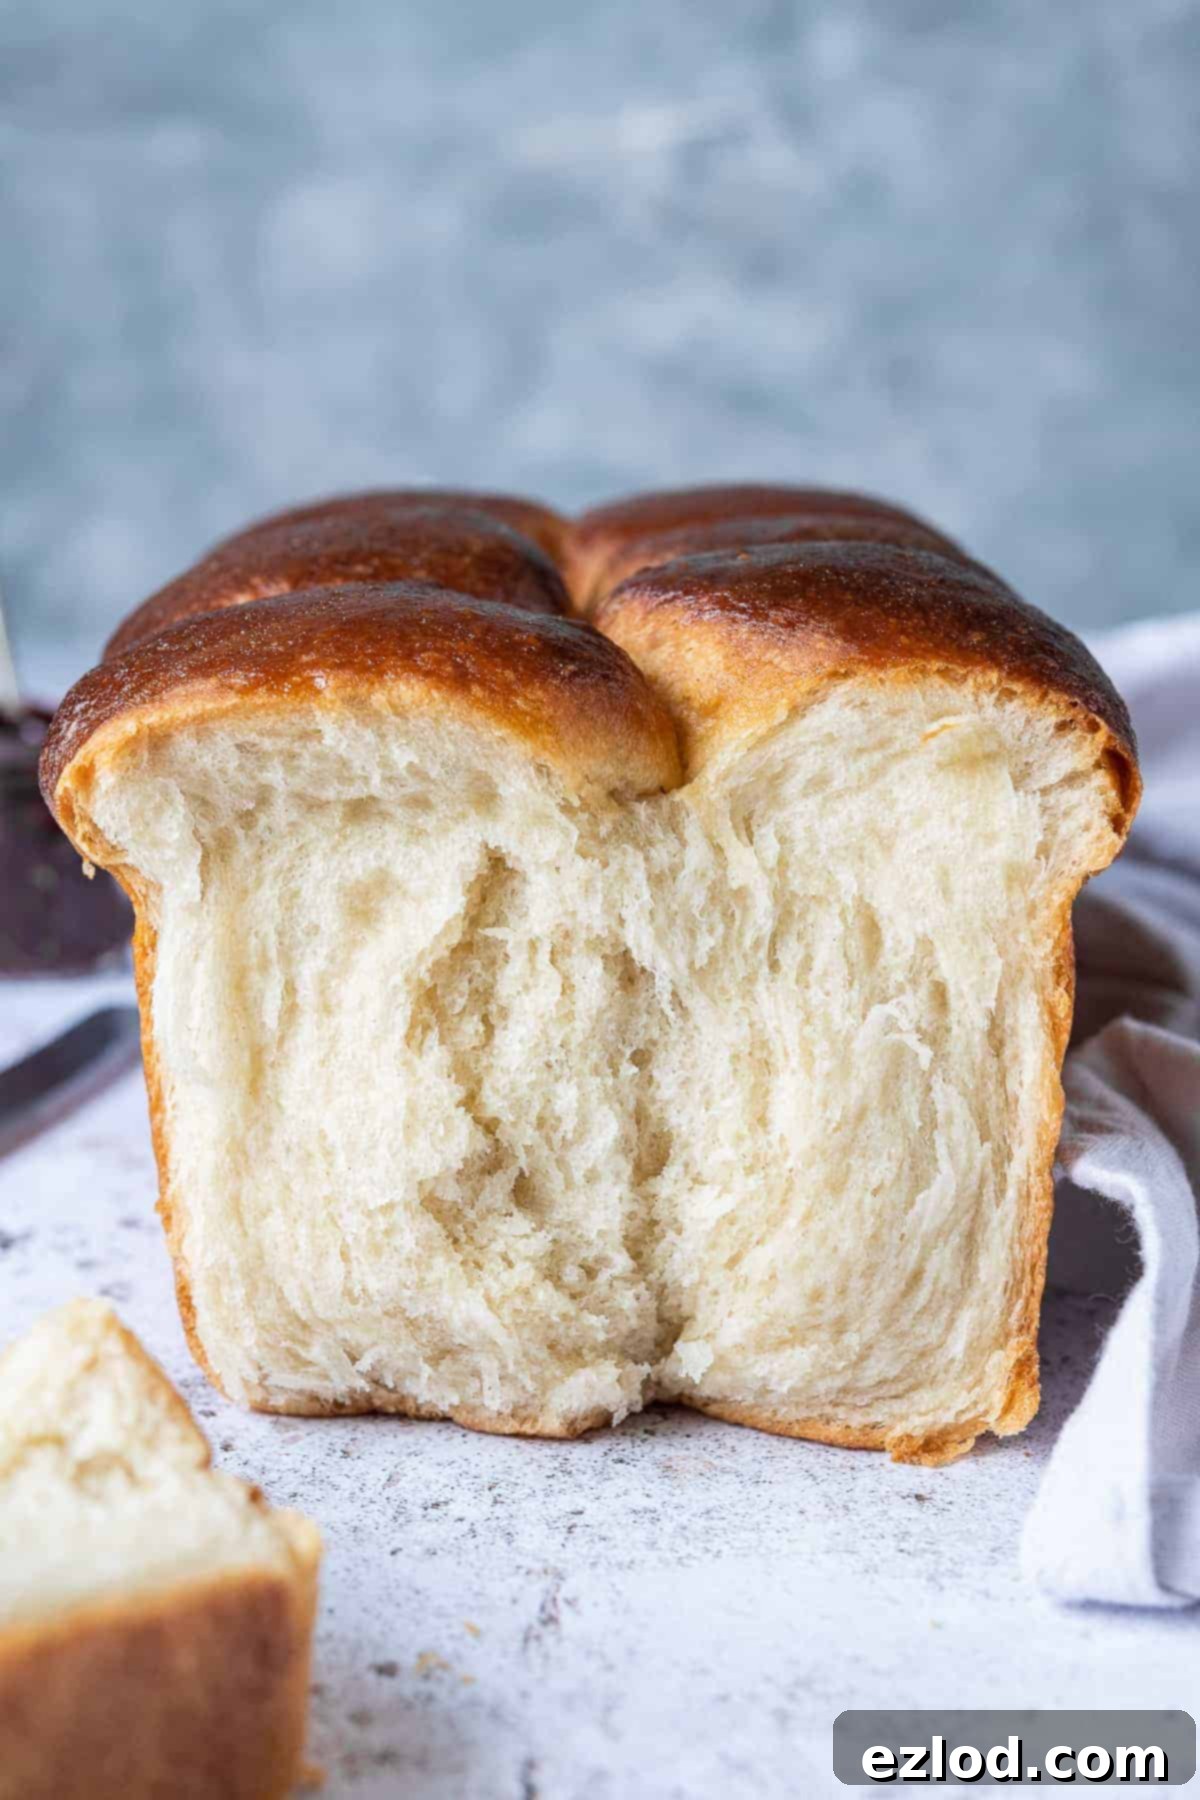
Prepare yourself for a truly addictive baking experience with this vegan brioche recipe! Once you bake a loaf, it’s highly unlikely it will last more than a day or two in your home, even if you’re only sharing it with one other person. This isn’t just a bread; it’s a soft, tender, and incredibly rich indulgence that you won’t be able to resist.
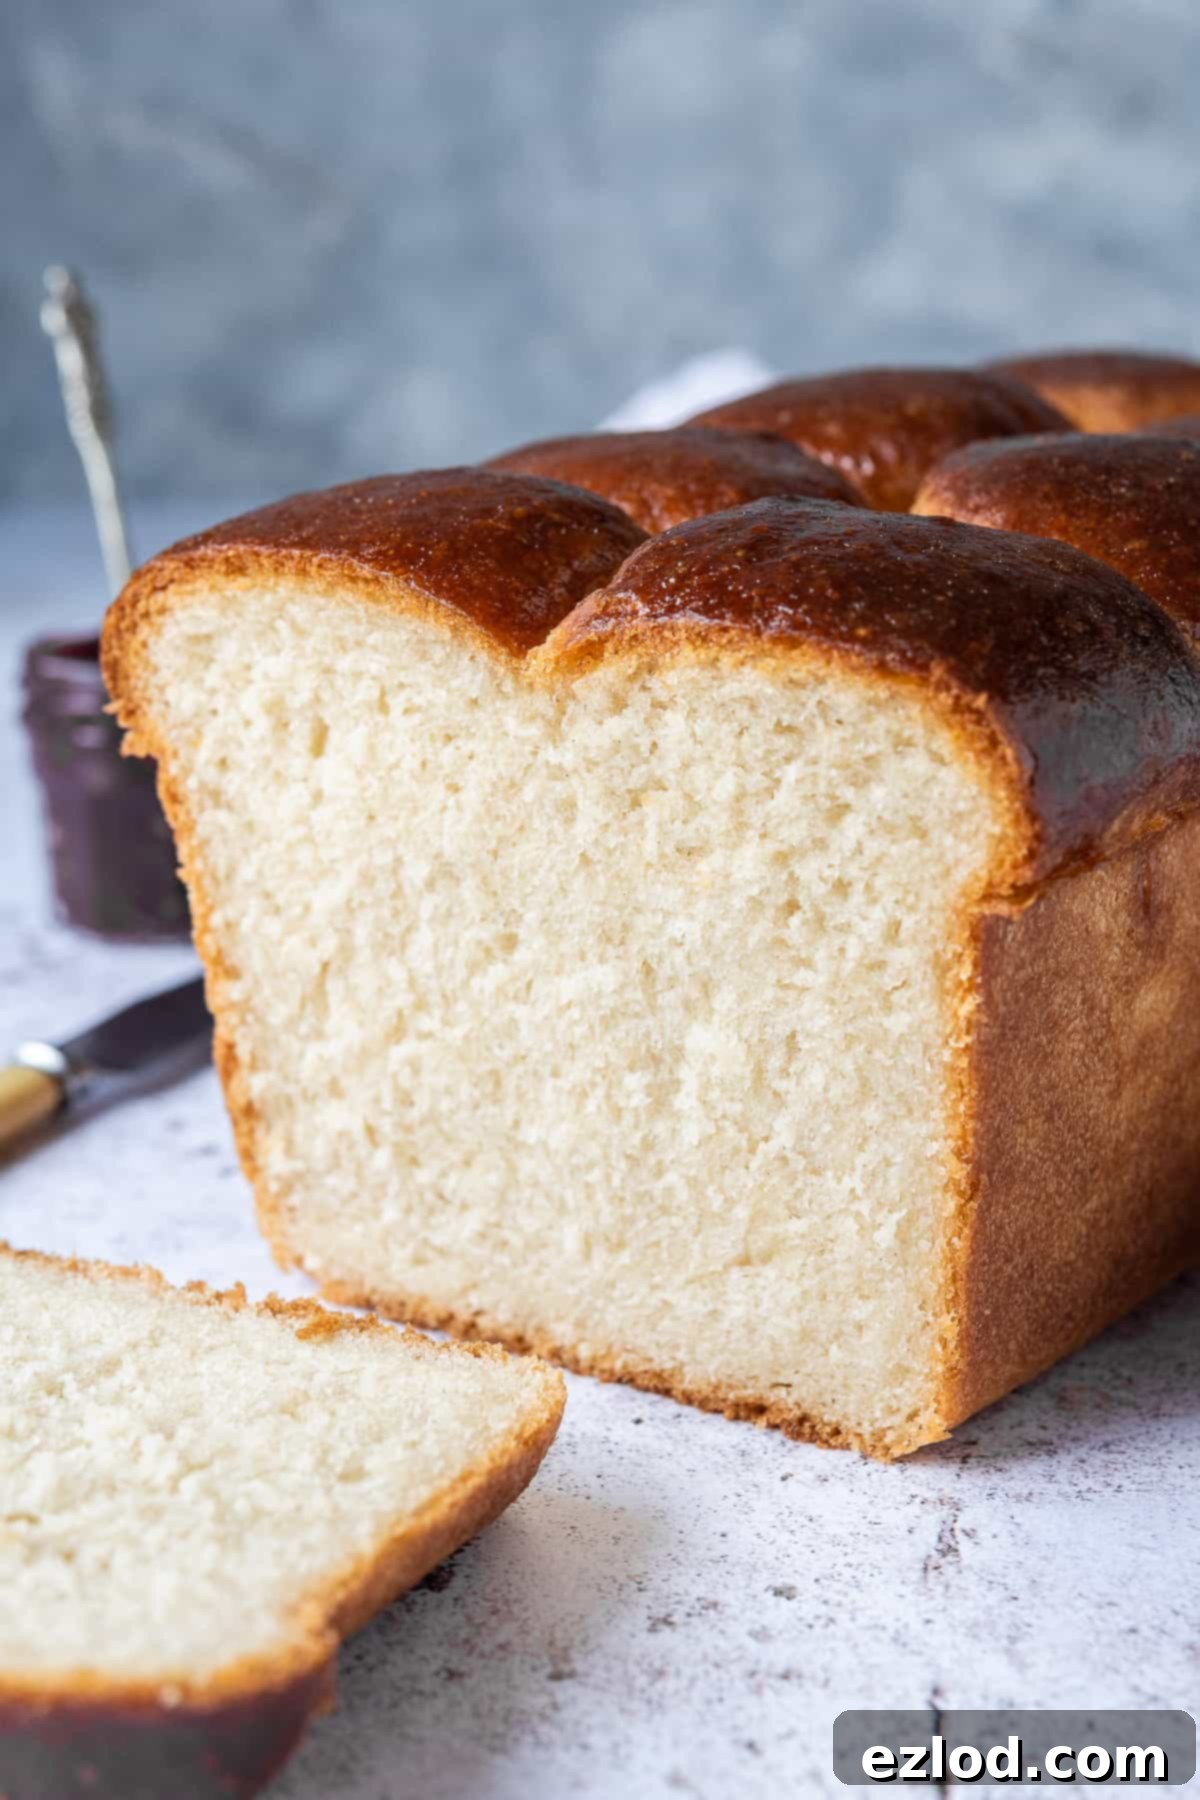
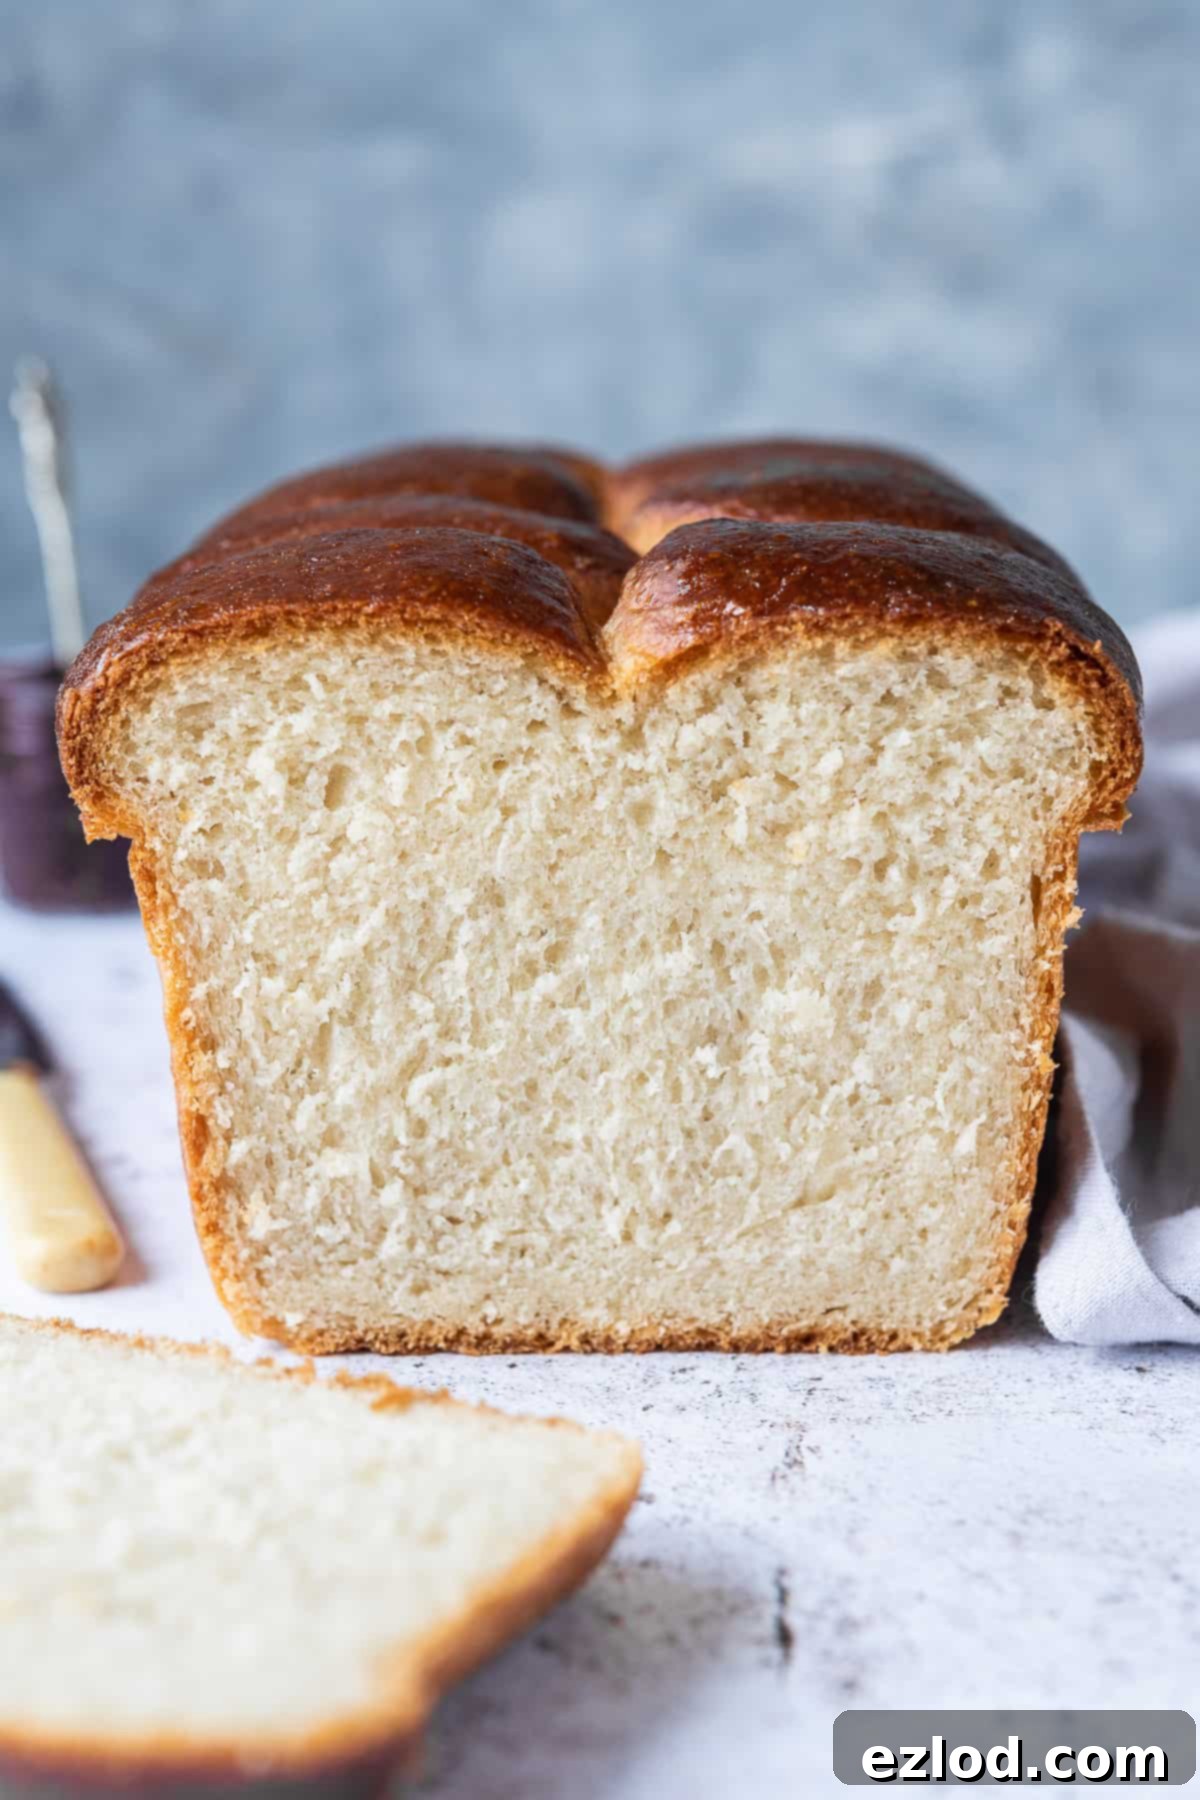
The luscious texture and delicate flavor of this plant-based brioche are so captivating that it’s absolutely wonderful eaten plain, allowing its natural richness to shine. However, if you’re looking for an extra layer of delight, slathering a slice with your favorite raspberry jam creates a heavenly combination that’s hard to beat.
While making this vegan brioche does require a bit of patience, mainly due to an essential overnight rise in the fridge, most of the process is hands-off. The minimal effort involved is undeniably worth it once you taste the exquisite results. Get ready to impress yourself and your loved ones with this incredible eggless brioche!
What Exactly Is Brioche, and How Does This Vegan Version Compare?
Brioche is a renowned French bread, celebrated for its incredibly rich and tender crumb. Traditionally, it’s classified as a “viennoiserie” – a category of baked goods that includes croissants – primarily because of its exceptionally high content of butter and eggs. A classic brioche recipe can often call for as much as 250g of butter and five or six eggs per loaf, making it remarkably close to a pastry in richness and texture. This generous amount of dairy and eggs is what gives traditional brioche its signature soft, almost cake-like crumb and irresistible flavor, but it also makes it decidedly non-vegan.
The Magic of Aquafaba: Our Egg Replacement
To achieve that characteristic tender crumb without using any eggs, our vegan brioche recipe harnesses the power of a truly magical ingredient: aquafaba. If you’re unfamiliar, aquafaba is simply the liquid drained from a can of chickpeas. This unassuming liquid possesses incredible emulsifying, binding, and leavening properties, making it an ideal egg substitute in various vegan baking applications. In this recipe, aquafaba performs perfectly, contributing to the soft, delicate, and light texture that is the hallmark of a great brioche, all while keeping the bread entirely egg-free and dairy-free.
Butter or Olive Oil: Your Richness Choice
When it comes to replacing the significant amount of butter found in traditional brioche, we offer two excellent vegan options, both of which deliver wonderfully rich and flavorful results:
- Vegan Block Butter/Margarine: For this option, it’s crucial to use a solid, foil-wrapped block of vegan butter or margarine. Avoid the spreadable kinds that come in tubs, as these typically have a higher water content and will not yield the same rich, tender crumb. Brands like Naturli Vegan Block, Stork block, Tormor block, or Vitalite block are excellent choices in the UK. In the US, look for Earth Balance Buttery Sticks or similar solid vegan butter alternatives. The solid fat content is key to the brioche’s structure and richness.
- Mild Olive Oil: If solid vegan butter isn’t readily available, or if you simply prefer not to use it, a mild-flavored olive oil works exceptionally well. The key here is “mild” – steer clear of extra virgin olive oil, as its robust flavor will be too strong and will dominate the delicate taste of the brioche. A light or pure olive oil will impart a subtle fruitiness without overpowering the bread.
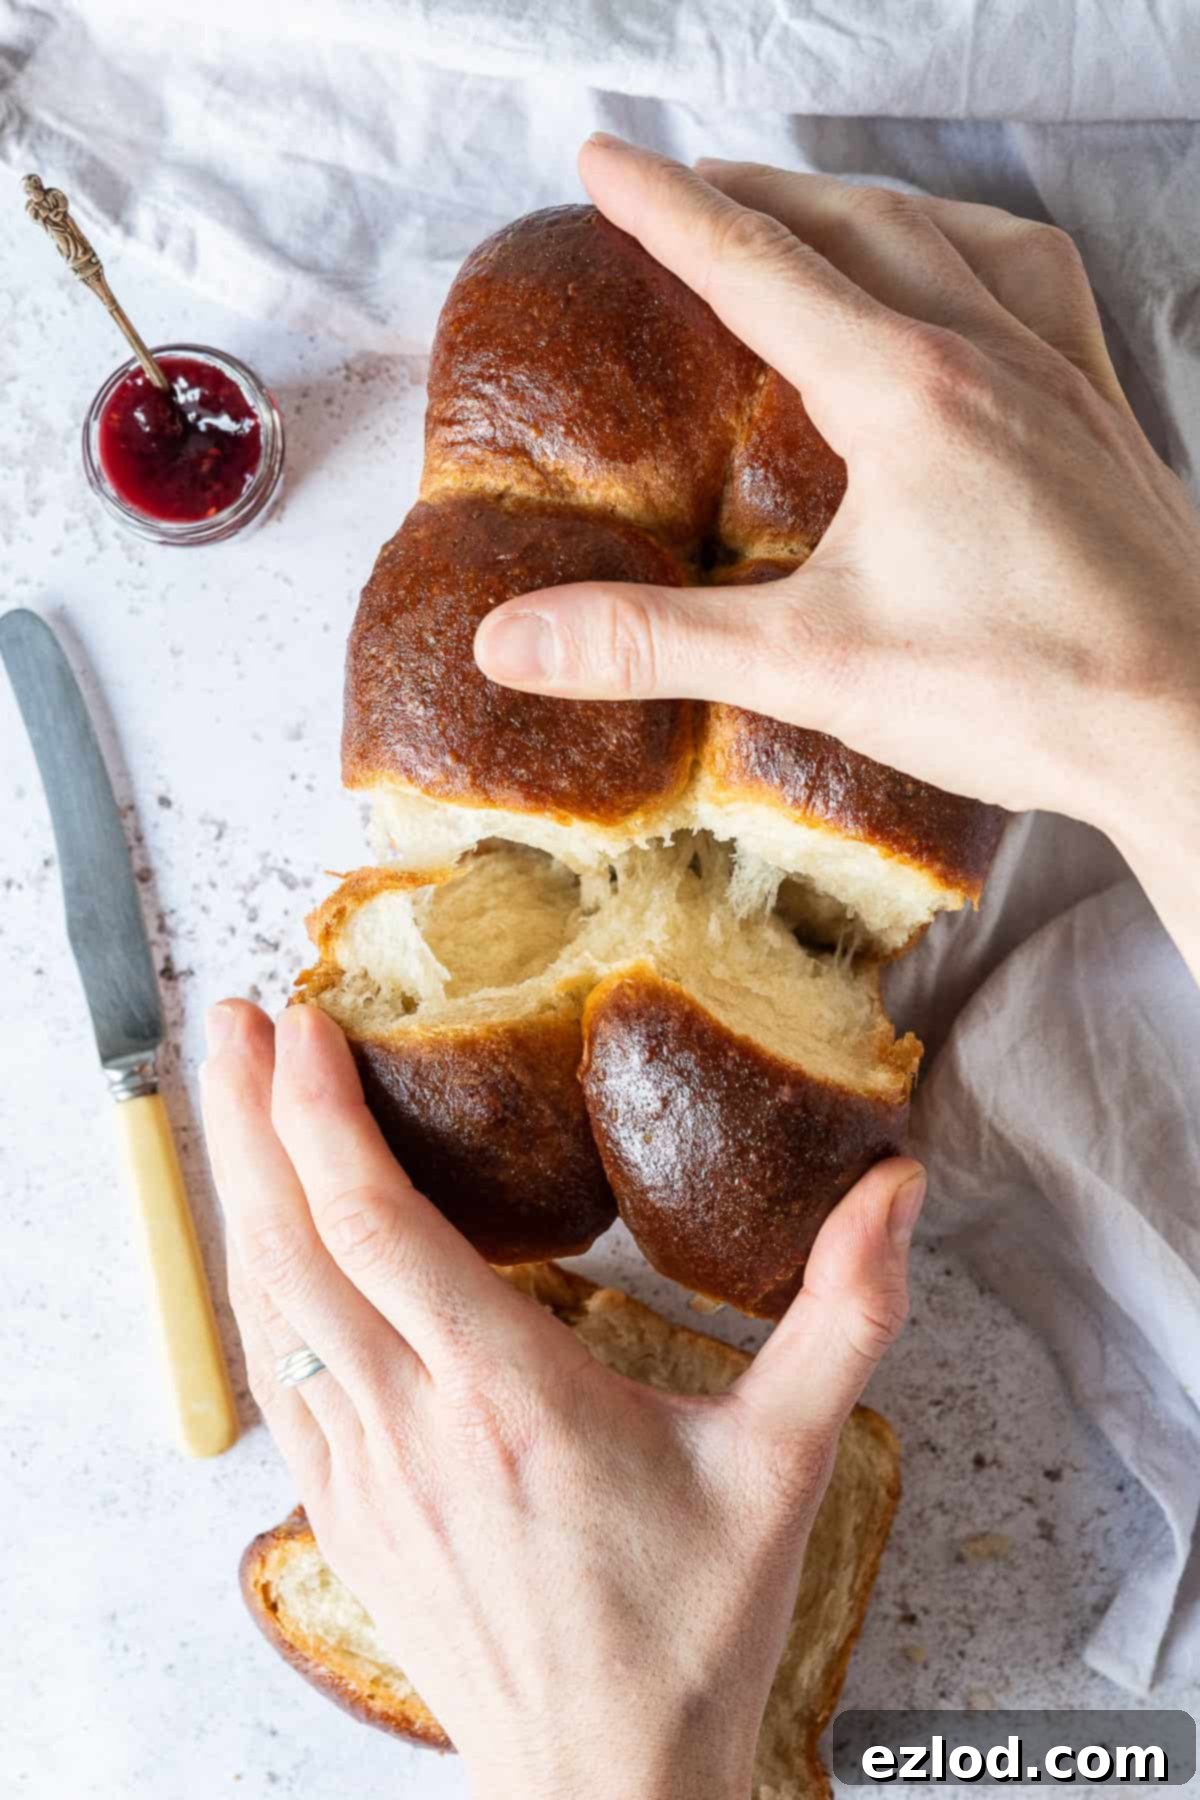
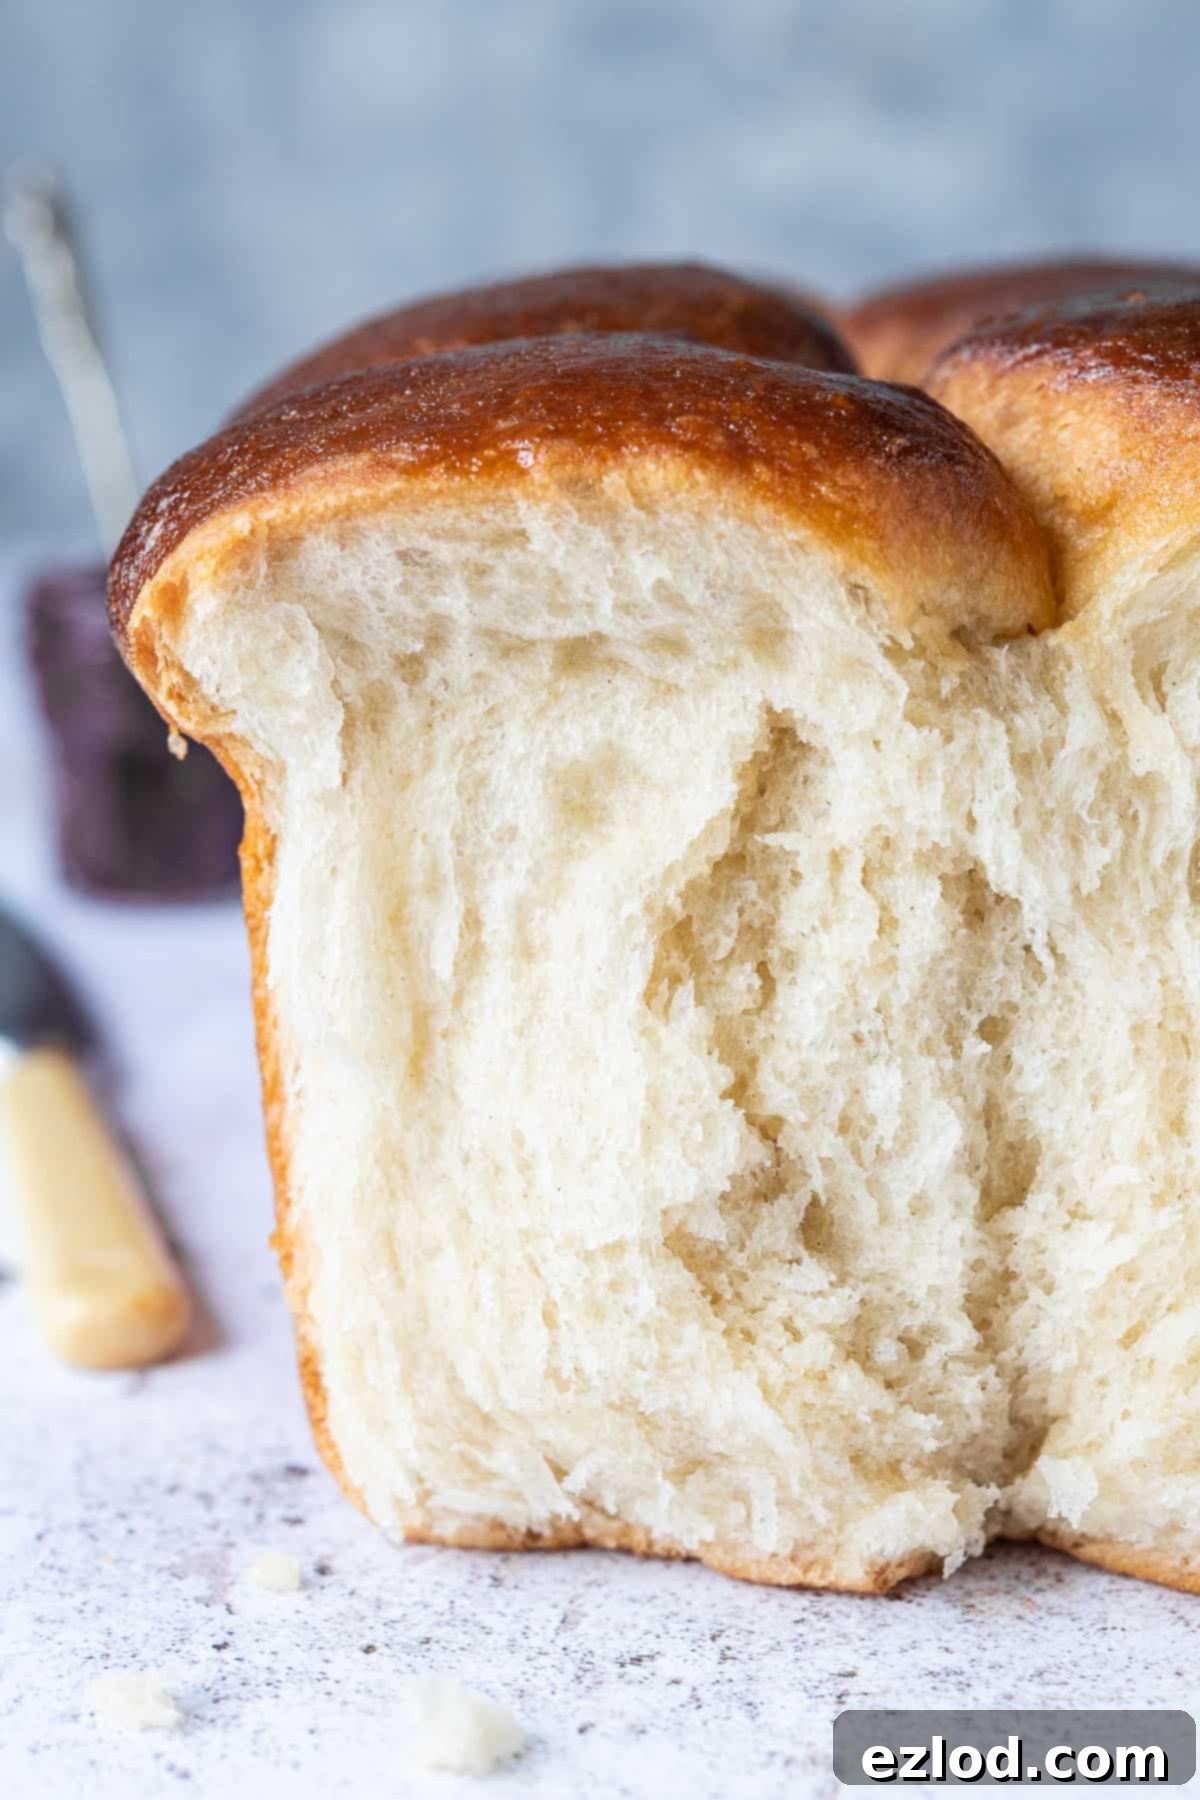
Interestingly, during testing, I found it challenging to discern a significant taste difference between loaves made with vegan butter and those made with olive oil. The butter version did seem to rise ever-so-slightly higher, but both produced an addictively good loaf. So, rest assured, either option will lead to a delicious outcome! (The beautiful loaf shown in the accompanying pictures was made using the olive oil version, demonstrating just how similar the final appearance is).
How to Make This Incredible Vegan Brioche: A Step-by-Step Guide
(For a complete list of ingredients and detailed instructions, please refer to the recipe card below.)
Getting Started: The Overnight Rise
To achieve the best flavor and texture, you’ll need to begin preparing your vegan brioche the day before you plan to bake it, as it requires an overnight rise in the refrigerator. This slow, cold fermentation significantly deepens the flavor profile and improves the dough’s workability.
Mixing the Dough: Building the Foundation
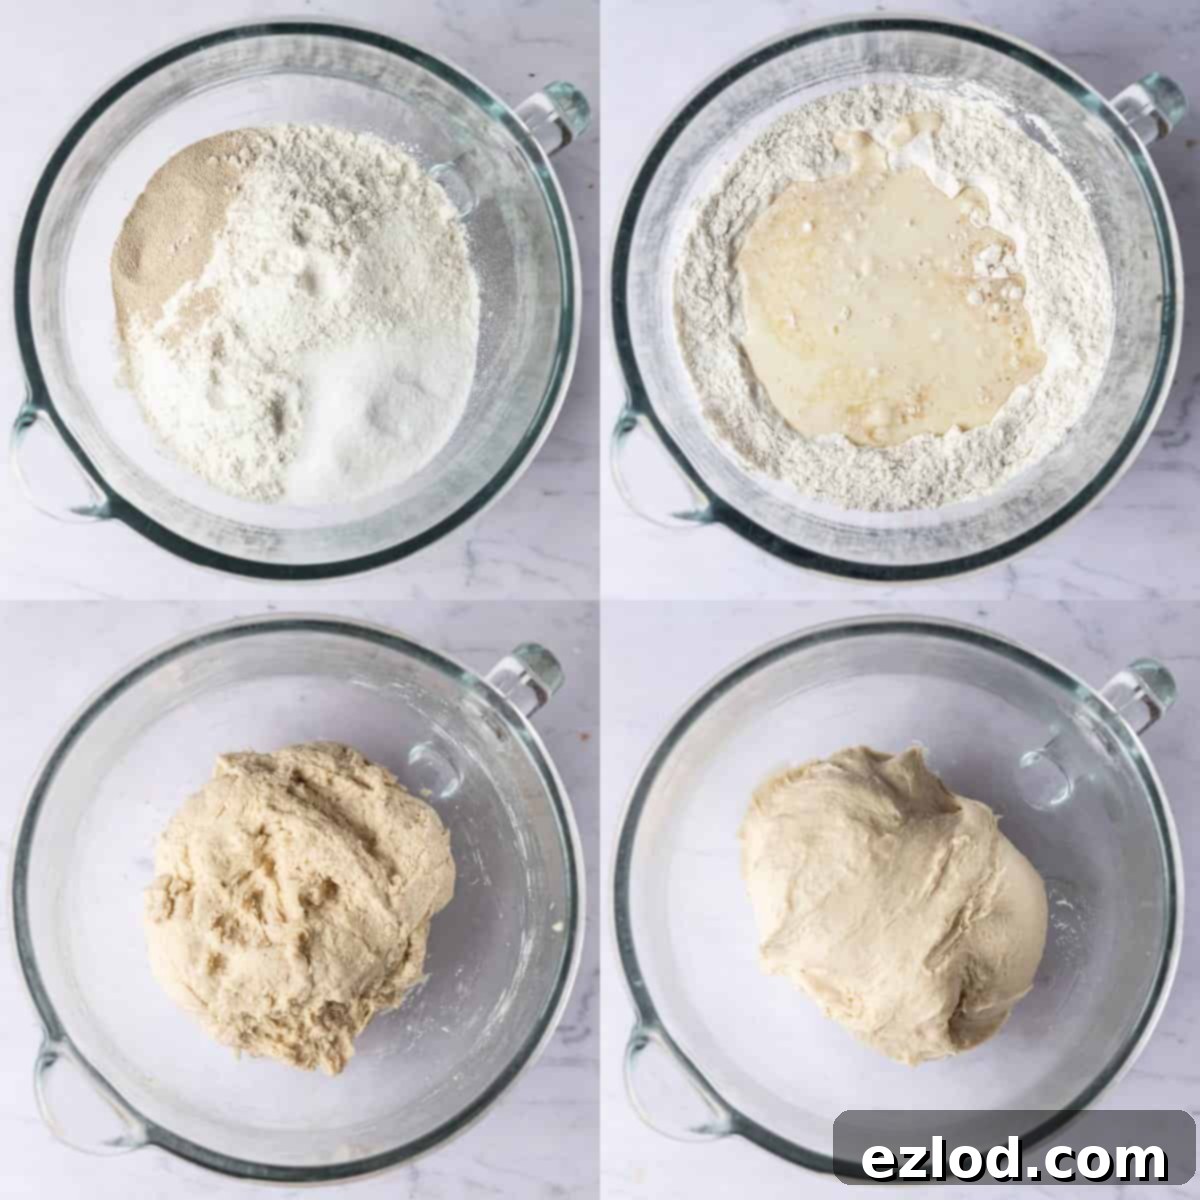
In the bowl of a stand mixer fitted with a dough hook, combine your bread flour and plain flour. Bread flour provides the necessary gluten structure for a chewy yet soft crumb, while plain flour contributes to the delicate tenderness. Add the instant yeast to one side of the bowl and the salt and sugar to the other. It’s important to keep the yeast separate from the salt at this initial stage, as direct contact can inhibit yeast activity. Once added, mix these dry ingredients briefly to combine.
Next, pour in the aquafaba, non-dairy milk (unsweetened soy milk is highly recommended for its protein and fat content), and vanilla extract. Stir these wet ingredients into the dry mix until a rough, shaggy dough forms. Now, turn your stand mixer to a medium speed and let it knead the dough until it becomes beautifully smooth and elastic. This process typically takes about 8-10 minutes. If you prefer, or don’t have a stand mixer, you can also knead the dough by hand on a lightly floured surface until it reaches the desired smooth, elastic consistency.
Incorporating the Fat: The Key to Richness
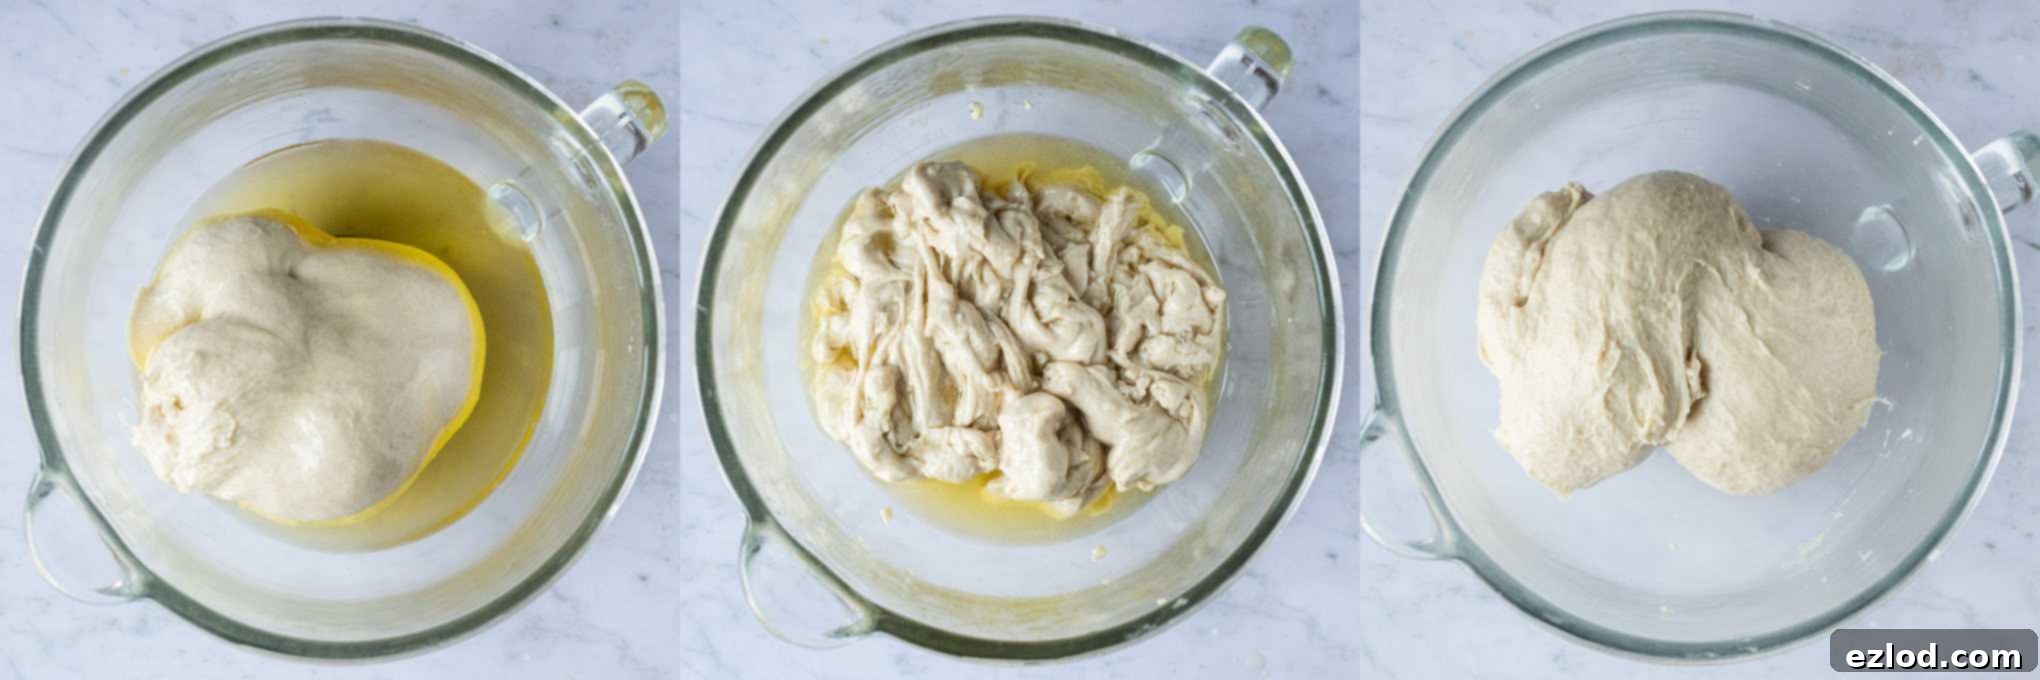
Now comes the crucial step of adding the softened vegan butter or olive oil. Add it to the dough and continue mixing until the fat is fully incorporated and the dough returns to a smooth consistency. Be prepared for this stage to be a bit messy and seemingly uncooperative at first; the dough will be quite soft and sticky. I often find it easier to switch to mixing the fat in by hand within the bowl, rather than on a surface, especially if using olive oil. It will feel like an “oh my god, this isn’t working” moment as the dough breaks apart and becomes greasy, but trust the process! Keep kneading patiently, and it will eventually come back together, becoming smooth and cohesive.
Once the fat is completely mixed in, continue kneading for a few more minutes until the dough pulls away cleanly from the sides of the bowl. Even when properly kneaded, this is an enriched dough, so it will remain notably soft and somewhat sticky – this is perfectly normal and desired for a tender brioche.
The First Rise: Overnight in the Fridge
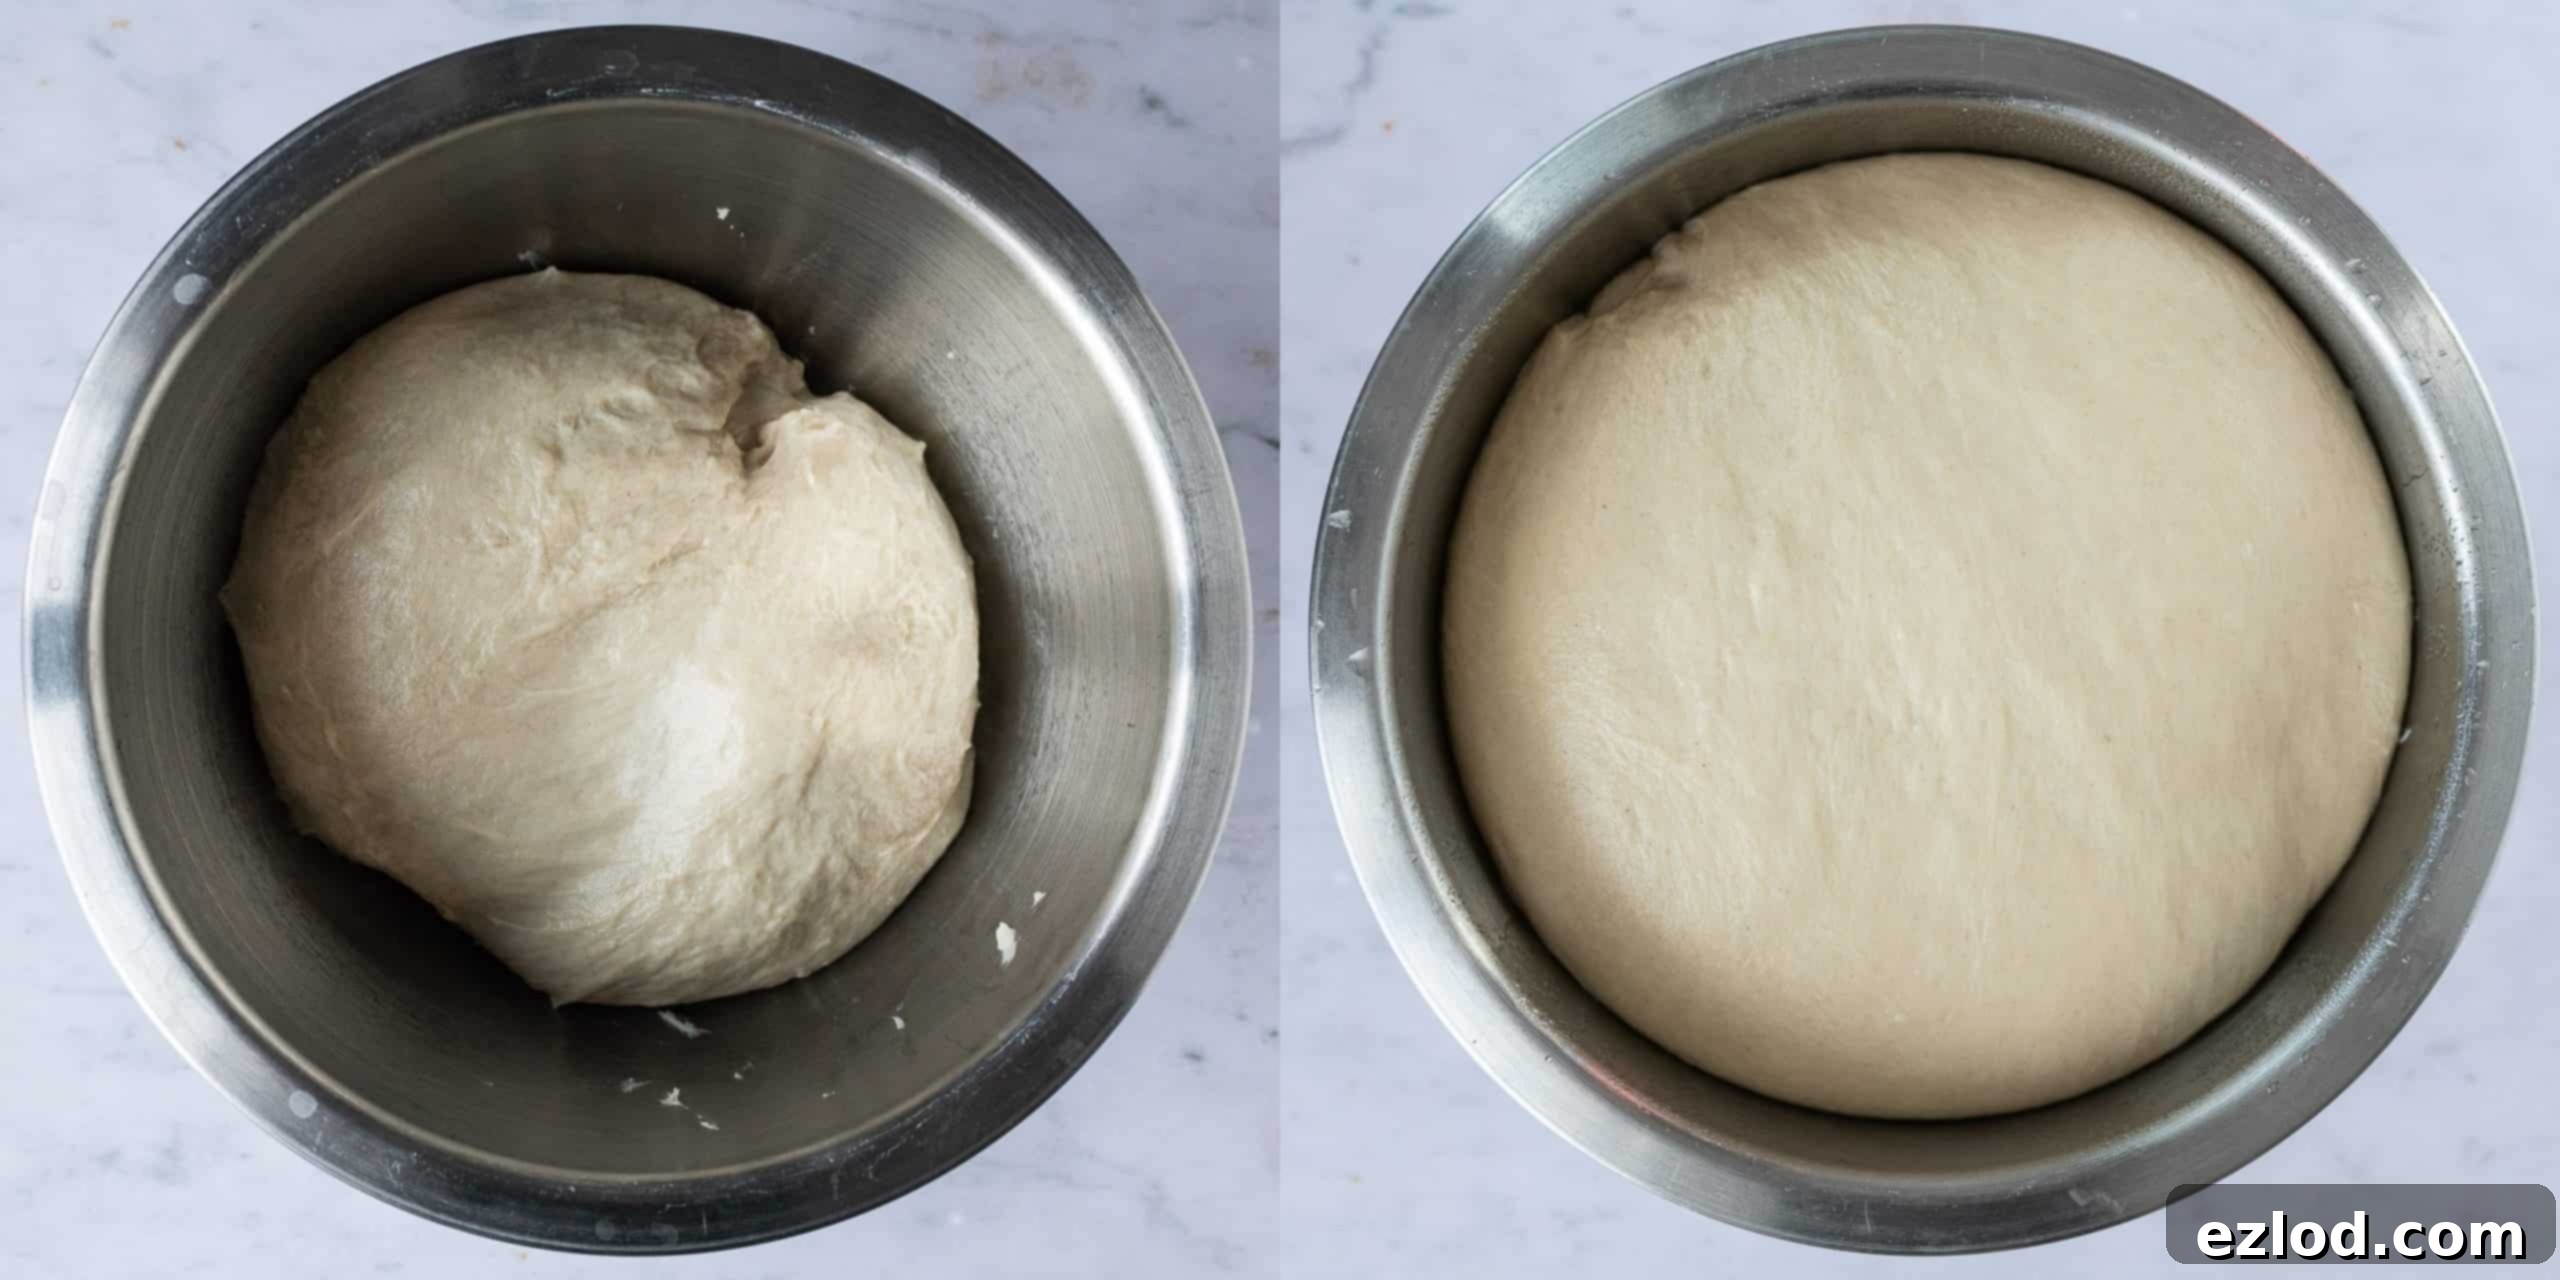
Transfer the kneaded dough to a clean bowl, cover it tightly with plastic wrap or a damp tea towel, and place it in the refrigerator to rise overnight. This cold fermentation period, lasting typically 8-12 hours, is essential. It not only allows the yeast to work slowly, developing complex flavors, but also firms up the soft, enriched dough, making it much easier to handle and shape the following day.
The next morning, you’ll be greeted by a dough that has at least doubled in size, plump and ready for shaping.
How to Shape Your Vegan Brioche Loaf
First, prepare your loaf tin. Line a 2 – 2 ½ lb loaf tin with baking parchment. An ideal size is around 11.5 x 21.5 cm (4.5 x 8.5 inches), but a 13 x 23cm (9 x 5 inches) tin will also work perfectly. Avoid using a tin significantly smaller than these dimensions.
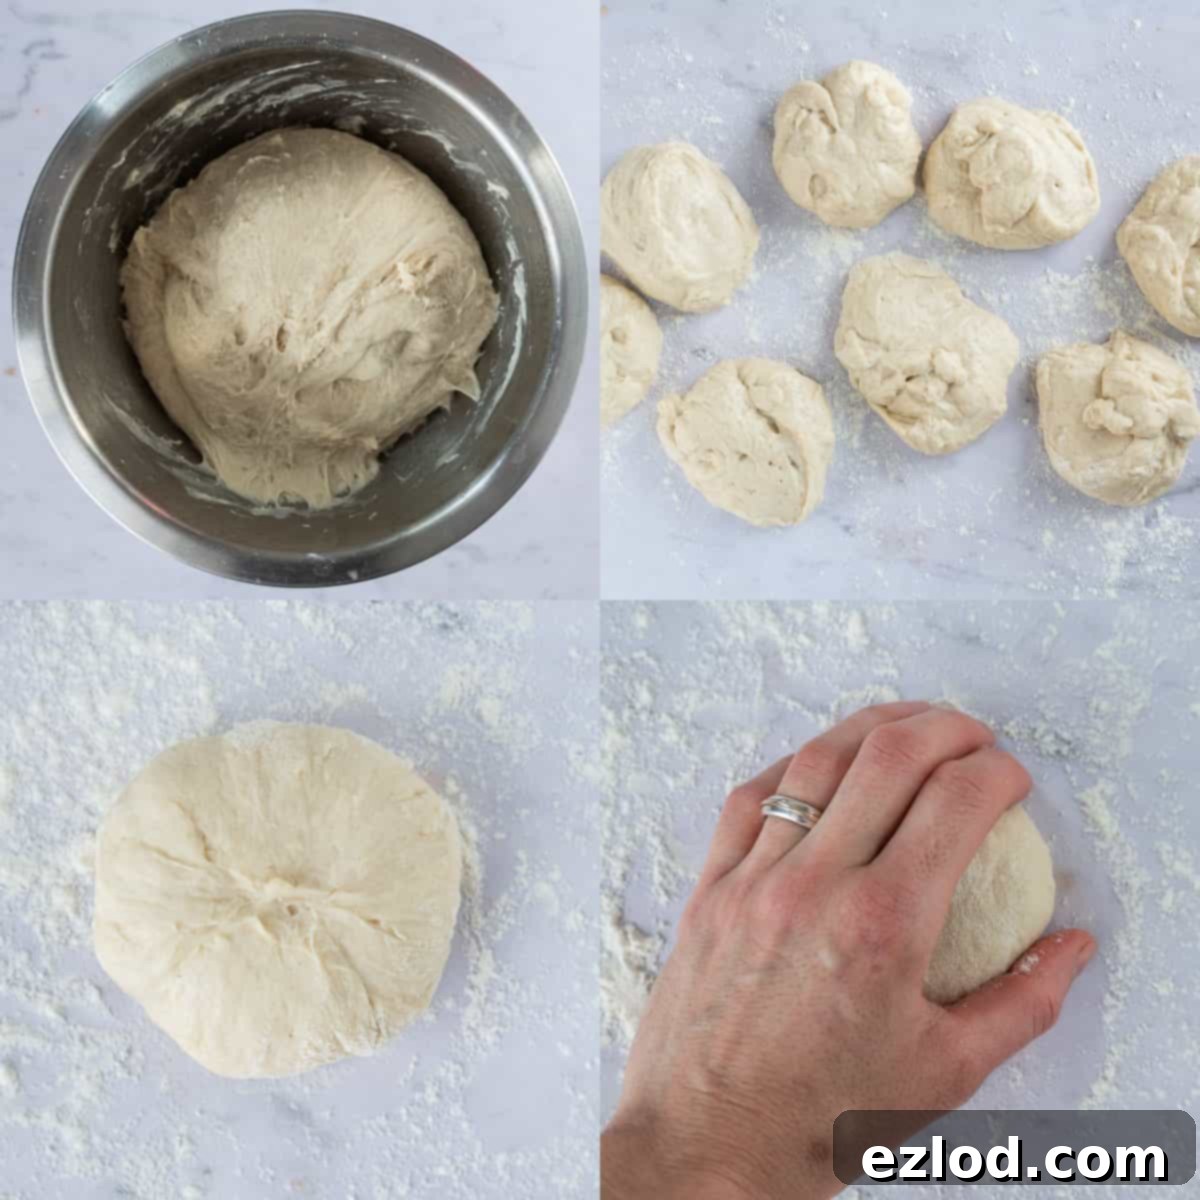
Gently punch down the risen dough to release the air. Now, you have a couple of options for shaping:
- Simple Loaf: For a straightforward loaf, simply shape the dough into a cohesive log and place it directly into the prepared tin.
- Pull-Apart Loaf (as pictured): To create the visually appealing pull-apart loaf, divide the dough into either 6 or 8 equal pieces (8 pieces often makes for a neater look). Take each piece and form it into a smooth ball. To do this, gently pull the edges of the dough towards the center and pinch them together at the bottom to create tension. Flip the ball over onto a lightly floured surface, cup your hand around it, and roll it gently against the work surface in a circular motion until it forms a perfectly smooth, taut ball. Repeat this process for all the remaining dough portions.
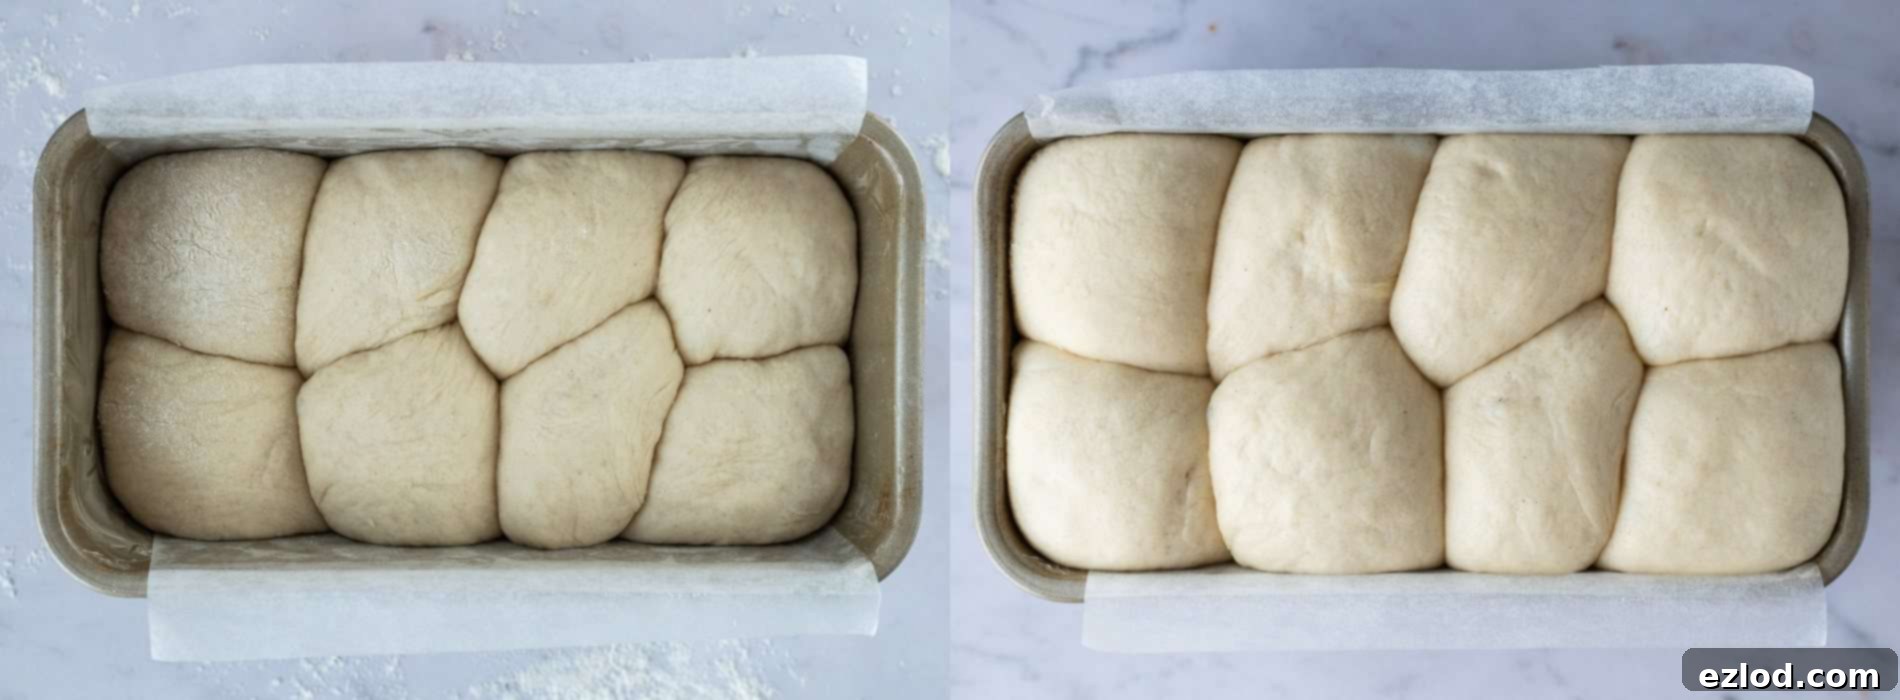
Once all your balls are shaped, arrange them snugly in two rows within your lined loaf tin. You’ll likely need to squish them together a bit to get them to fit – this close arrangement is what creates that wonderful pull-apart texture.
The Second Rise: Proofing for Perfection
Loosely cover the tin with plastic wrap or a clean tea towel and set it aside in a warm place to rise until the dough has doubled in size. Because this is a heavily enriched dough, it will take longer to proof than a leaner bread dough. The exact time can vary significantly, ranging from 1 to 2.5 hours, depending on the ambient temperature of your kitchen. For example, on a warmer day, a loaf might be ready in just an hour, while on a cooler day, it could take over two hours. Keep a close eye on it!
The dough is ready when it looks visibly puffy and feels light. To test, gently poke it with a floured finger; if it springs back slowly, it’s perfectly proofed. If it springs back quickly, it needs more time. If your finger indentation remains or the dough deflates, it is unfortunately over-proved. In this case, you can gently punch it down, reshape it, and allow it to rise again. However, you can only successfully do this once; over-proving the dough twice means you’ll need to discard it and start fresh.
Baking and Glazing: Achieving a Golden Crust
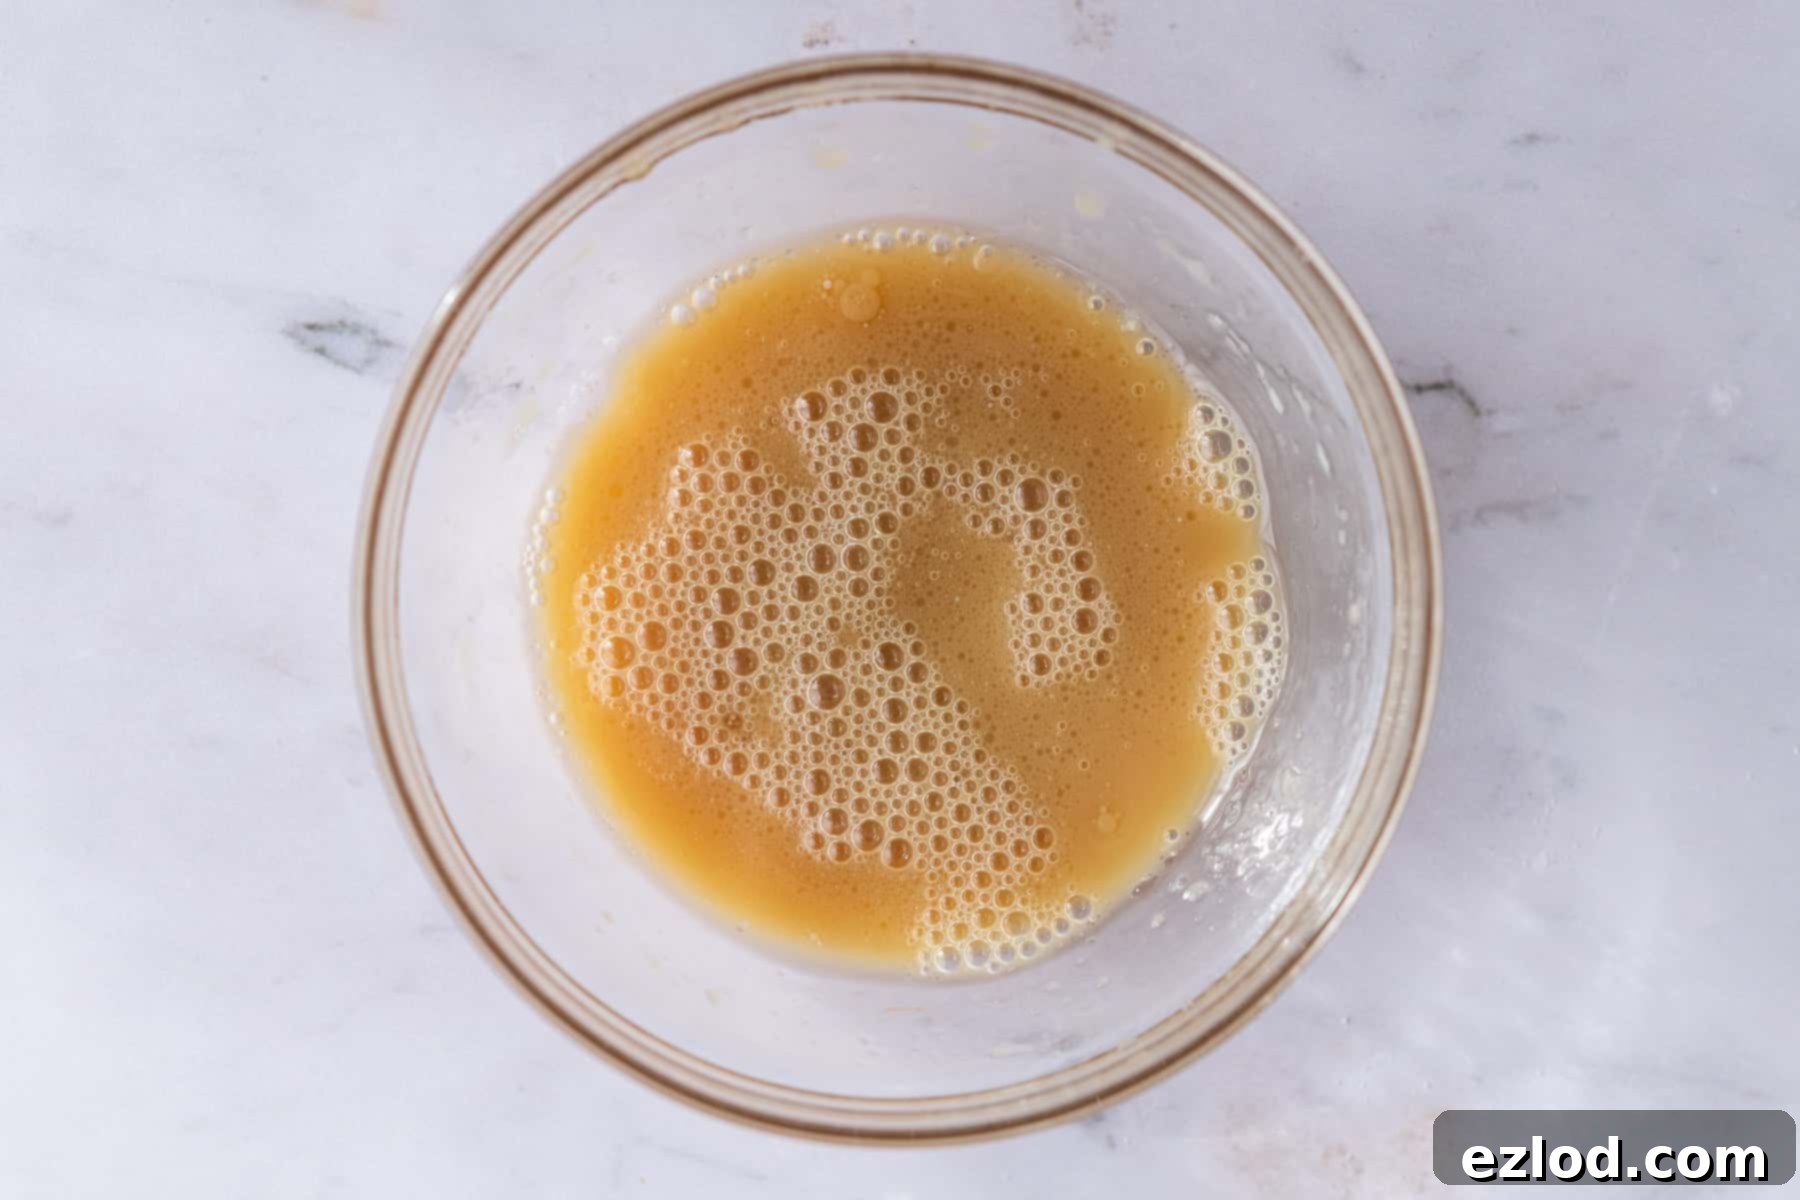
As your loaf nears the end of its second rise, preheat your oven to 180°C/350°F/gas mark 4. While the oven heats, prepare the simple glaze by whisking together non-dairy milk, maple syrup, and a touch of neutral oil in a small bowl. This glaze will give your brioche a beautiful golden hue and a soft, shiny crust.
Once the loaf is perfectly proofed, gently brush it with some of the prepared glaze. Be careful not to let the glaze drip down the sides of the tin, as this can cause the bread to stick and potentially hinder its oven spring (the final burst of rising in the oven).
Bake the vegan brioche for 20 minutes. After this initial bake, remove the loaf from the oven and brush it with more of the glaze. This second application helps create an even softer, more lustrous crust. Reduce the oven temperature to 160°C/320°F/gas mark 3 and continue baking for another 25-30 minutes, or until the internal temperature reaches 94°C (201°F) when checked with a probe thermometer. If you don’t have a thermometer, a wooden skewer inserted into the center of the loaf should come out clean. If the top starts to brown too quickly before it’s fully baked, loosely tent it with aluminum foil to prevent over-darkening.
Cooling and Storing Your Vegan Brioche
Once baked, allow the brioche to cool in its tin for about 15 minutes. This brief cooling period helps the loaf to set. After 15 minutes, carefully turn the loaf out onto a wire rack and let it cool completely before attempting to slice it. Cooling completely is important for the crumb structure. Avoid leaving it in the tin for too long, as trapped steam can make the bottom soggy. Once entirely cool, store your delicious vegan brioche in an airtight container at room temperature to maintain its freshness.
Can I Adapt This Recipe to Make Vegan Brioche Bread Rolls?
While this recipe was developed and tested for a loaf, there’s no reason why it wouldn’t work wonderfully for individual vegan brioche bread rolls. However, given the dough’s inherently soft and enriched nature – especially the olive oil version, which tends to be even slacker – I wouldn’t recommend shaping them as free-form rolls. This soft dough might struggle to hold its shape during proofing and baking, leading to flatter buns.
Instead, I highly suggest baking pull-apart rolls in a square cake tin, approximately 20cm (8 inches) to 23cm (9 inches) in size, lined with baking parchment. This method will ensure the buns maintain their beautiful shape and rise nicely. You could divide the dough into 9 equal portions, shaping each into a smooth ball as described for the loaf, and arrange them in a 3×3 grid in the square tin. Keep in mind that rolls will likely cook faster than a large loaf, so keep a closer eye on them during baking and check for doneness sooner.
How Long Does Vegan Brioche Stay Fresh?
Like most homemade breads, this vegan brioche is truly at its peak on the day it’s baked, offering the freshest, softest experience. However, it will maintain its deliciousness for up to three days when stored properly in an airtight container at room temperature. To prevent it from drying out, ensure the container is well-sealed.
After the first couple of days, I find that the brioche benefits greatly from being refreshed. It makes absolutely amazing toast, with a rich, slightly crisp exterior and a tender interior. Alternatively, you can gently warm slices through in the microwave or oven to revive their softness before serving. This versatile bread is also perfect for transforming into other treats, such as decadent vegan French toast or a comforting bread pudding!
Can I Freeze Vegan Brioche?
Absolutely! Vegan brioche freezes exceptionally well, making it a fantastic candidate for meal prep or simply having a delicious treat on hand. I prefer to freeze individual slices. This way, you can easily pop them straight from the freezer into a toaster or under a grill (broiler) whenever a craving strikes, enjoying perfectly warmed brioche without having to thaw an entire loaf.
Top Tips for Baking the Best Vegan Brioche
Achieving a perfect vegan brioche is entirely possible with a few key considerations. Follow these tips for consistently excellent results:
- Precision is Key: For the most consistent and best results, always follow the recipe closely. I cannot stress enough the importance of using gram measurements with a digital scale rather than cup conversions. Cup measurements are simply not accurate enough for baking, where precise ratios are crucial for success.
- Don’t Skimp on Fat: Brioche is by definition a very high-fat bread. Do not be tempted to reduce the amount of fat in this recipe, as it is essential for the characteristic soft, rich, and tender crumb. If you’re looking for a wonderfully soft and fluffy loaf that’s lower in fat, I recommend trying my vegan Hokkaido milk bread recipe instead.
- Choose the Right Vegan Butter: If you opt for the vegan butter (margarine) version, you *must* use the solid block type, not the spreadable kind from a tub. Spreadable margarines have a much higher water content, which will negatively affect the dough’s consistency and the final texture of your brioche. Brands like Naturli Vegan Block or Stork Block are ideal. If you cannot find a suitable block margarine, the olive oil version is a fantastic alternative.
- Embrace Enriched Dough Properties: This is an enriched bread dough, meaning it contains higher amounts of milk, fat, and sugar compared to a lean bread dough (which is just water, flour, yeast, salt). While these ingredients make the brioche incredibly soft and delicious, they also mean the dough will take longer to rise. Be patient! The exact rising time will depend on the warmth of your kitchen.
- The Benefits of a Cold Rise: Giving the dough its first rise overnight in the fridge is more than just convenient. It significantly improves the flavor by allowing the yeast to ferment slowly, developing deeper, more nuanced tastes. Additionally, the cold temperature firms up the typically soft and sticky enriched dough, making it much easier to handle and shape the following day.
- Sugar is Essential (Within Reason): This vegan brioche is designed to be sweet, contributing to its rich flavor profile. If you prefer it slightly less sweet, you can halve the amount of sugar. However, *do not* omit it entirely. Sugar plays a vital role beyond just taste; it contributes to the brioche’s tender texture, helps with browning, and provides food for the yeast, aiding in the rise.
- Aquafaba Sourcing: To get aquafaba, simply drain the liquid from a can of chickpeas. The liquid from one standard tin should yield approximately 120ml (½ cup), which is generally sufficient for this recipe. If you find slightly less than this amount in your can, you can top it up to the 120ml (½ cup) line with a little non-dairy milk or water. Unfortunately, I haven’t tested any other egg substitutes for this recipe and cannot confidently recommend an alternative to aquafaba that would yield the same results.
- Best Non-Dairy Milk: Unsweetened soy milk is the top choice for this recipe. While other non-dairy milks can be used, soy milk most closely mimics dairy milk in terms of its protein and fat content. Soy also contains lecithin, a natural emulsifier, which further aids in creating a superior crumb structure for your brioche.
- Flour Combination: The recipe calls for a combination of bread flour and plain (all-purpose) flour to achieve the best balance of texture – a delightful blend of chewiness and tenderness. However, if you only have one type on hand, you can certainly use all bread flour or all plain flour. The texture might vary slightly but will still be delicious.
- Verify Doneness with a Thermometer: The most accurate way to tell if your loaf of bread is fully cooked in the middle is by using a probe thermometer. Ovens can vary wildly in temperature and efficiency, so relying solely on a fixed baking time can be misleading. Aim for an internal temperature of 94°C (201°F) for perfectly baked brioche.
More Delicious Vegan Bread Recipes to Explore:
Vegan Hokkaido milk bread
Gingerbread cinnamon rolls
Vegan hot cross buns
Banana bread cinnamon rolls
Pumpkin bread rolls
Vegan lemon blueberry rolls
Maple pecan bread wreath
Vegan wholemeal maple cinnamon rolls
If you tried this recipe, we’d love to see it! Tag @domestic_gothess on Instagram and use the hashtag #domesticgothess. Your creations inspire us!
*All images and content on Domestic Gothess are copyright protected. If you wish to share this recipe, please do so by using the provided share buttons. Do not screenshot or post the recipe or content in full.*
Print
Vegan Brioche
Ingredients
Dough:
- 300 g (2 ½ cups) white bread flour
- 200 g (1 ⅔ cups) plain (all-purpose) flour
- 10 g (3 tsp) fast action/instant yeast
- 50 g (¼ cup) caster/granulated sugar
- 1 tsp salt
- 120 ml (½ cup) aquafaba (from 1 tin of chickpeas)*
- 200 ml (½ + ⅓ cup) unsweetened non-dairy milk (soy is best)**
- 1 Tbsp vanilla extract
- 200 g (7 oz / ½ + ⅓ cup) vegan block butter (NOT the spreadable kind. I use Naturli Vegan Block) OR 160ml (⅔ cup) mild olive oil (softened if using butter)
Glaze:
- 1 Tbsp non-dairy milk
- 1 Tbsp maple syrup
- ½ tsp sunflower/vegetable oil
Instructions
-
Begin your preparation the day before you intend to bake. In the bowl of a stand mixer equipped with a dough hook, combine the bread flour and plain flour. Add the yeast to one side of the bowl and the salt and sugar to the opposite side to prevent direct contact, then mix briefly to combine all dry ingredients.
-
Pour in the aquafaba, non-dairy milk, and vanilla extract. Stir these wet ingredients into the dry mixture until a rough dough forms. Then, set your mixer to a medium speed and knead the dough until it achieves a smooth and elastic consistency, typically taking 8-10 minutes. Alternatively, you can knead the dough by hand on an unfloured surface.
-
Add the softened vegan butter or olive oil to the dough. Continue mixing until the fat is fully incorporated and the dough is smooth again, though it will remain soft and sticky. I often find it easier to mix the fat in by hand within the bowl. It might seem challenging at first, but keep kneading, and the dough will come together beautifully.
-
Once the fat is completely mixed, continue kneading until the dough pulls cleanly away from the sides of the bowl. It will still be quite soft and sticky, which is desirable for brioche. Transfer the dough to a clean bowl, cover it securely, and place it in the refrigerator to rise overnight (8-12 hours).
-
The following day, your dough should have at least doubled in size. Line a 2 – 2 ½ lb loaf tin with baking parchment. An ideal tin measures 11.5 x 21.5 cm (4.5 x 8.5 in); a 13 x 23cm (9 x 5 in) tin also works well. Avoid smaller tins.
-
Gently punch down the dough to release the air. For shaping, you can simply form it into a single loaf and place it in the tin, or for a pull-apart loaf (as pictured), divide the dough into 6 or 8 even pieces (8 pieces are often preferred).
-
To shape each piece into a smooth ball: pull the edges of the dough towards the center and pinch them together. Flip the ball over onto a lightly floured surface, cup your hand around it, and gently roll it on the work surface until a smooth, taut ball forms. Repeat for all portions.
-
Arrange the shaped balls in two rows within your prepared loaf tin, gently squishing them together to ensure a snug fit.
-
Loosely cover the tin and set it aside in a warm place for its second rise until the dough has doubled in size. This can take 1 to 2.5 hours, depending on room temperature. The dough is ready when it’s puffy and springs back slowly if gently poked with a finger. If it springs back quickly, it needs more time. If it deflates, it’s over-proved; you can punch it down, reshape, and allow it to rise again once.
-
When the loaf is almost ready for baking, preheat your oven to 180°C/350°F/gas mark 4. Prepare the glaze by whisking together the non-dairy milk, maple syrup, and oil in a small bowl.
-
Once the loaf is perfectly proofed, gently brush it with some of the glaze. Be careful to avoid dripping glaze down the sides of the tin, as this can cause sticking and inhibit oven spring.
-
Bake the brioche for 20 minutes. After 20 minutes, brush it with more glaze to create a lovely shiny, soft crust. Reduce the oven temperature to 160°C/320°F/gas mark 3 and continue baking for an additional 25-30 minutes, or until the internal temperature reaches 94°C/201°F using a probe thermometer. If you don’t have a thermometer, a skewer inserted into the center should come out clean. If the top begins to darken excessively, loosely cover it with tin foil.
-
Once the loaf is baked, let it cool in the tin for 15 minutes before turning it out onto a wire rack to cool completely. Do not leave it in the tin too long, as steam can make it soggy. Once entirely cool, store the brioche in an airtight container to maintain freshness.
Notes
- For the best results, ensure you follow the recipe closely. As always, I highly recommend using gram measurements with a digital scale rather than cup conversions, which are often not accurate enough for baking.
- Do not reduce the amount of fat. Brioche is inherently a very high-fat bread, and this fat is crucial for its wonderfully soft and fluffy texture. If you desire a lower-fat, soft bread, consider trying my vegan Hokkaido milk bread instead.
- If you opt for the vegan butter (margarine) version, it is essential to use a solid block stick, NOT the spreadable kind from a tub, as spreadable varieties contain too much water, which will negatively impact the dough. I use Naturli Vegan Block or Stork Block. If block margarine isn’t available, the olive oil version is a great alternative.
- This is an enriched bread dough (meaning it contains milk, fat, and sugar). Enriched doughs are soft and delicious but take longer to rise than lean doughs. Rising times will vary depending on your kitchen’s temperature.
- Allowing the dough to have its first rise overnight in the fridge significantly improves the flavor and firms up the soft dough, making it much easier to handle and shape.
- This vegan brioche is intended to be sweet. If you prefer it less sweet, you can halve the amount of sugar. However, DO NOT omit sugar completely, as it is necessary for both the texture and to aid the yeast in rising.
- *To obtain aquafaba, simply drain the liquid from a can of chickpeas. The liquid from one standard tin (approximately 120ml or ½ cup) should be sufficient for this recipe. If you have slightly less, you can top it up to the 120ml/½ cup line with non-dairy milk or water.
- I have not tested any other substitutes for aquafaba in this recipe and cannot confirm if they would work in the same way.
- **Unsweetened soy milk is the best choice for this recipe. While other non-dairy milks can be used, soy milk most closely resembles dairy milk due to its higher protein and fat content. Soy also contains lecithin, which helps create a better crumb structure.
- I use a combination of bread flour and plain white flour for the optimal texture, but you can use all bread flour or all plain flour if that’s what you have available.
- The most accurate method to determine if a loaf of bread is cooked through is by using a probe thermometer. Due to variations in ovens, a universal baking time cannot be guaranteed.
