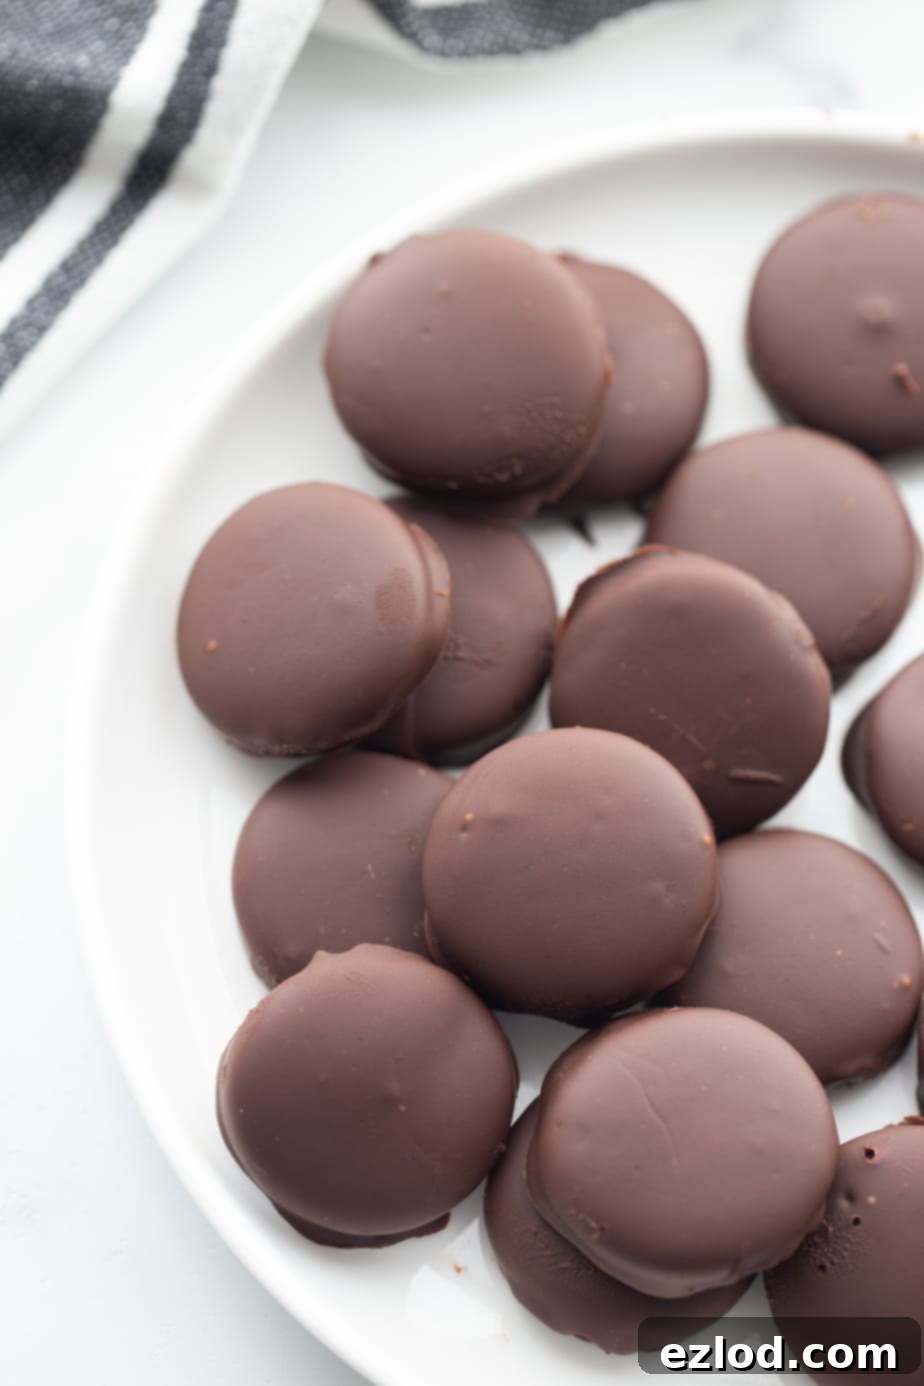
Healthy Thin Mints: The Ultimate Gluten-Free & Vegan Copycat Recipe
These Homemade Healthy Thin Mints cookies capture all the beloved minty, chocolatey essence of the classic, but are thoughtfully crafted to be gluten-free, vegan, and made with wholesome, clean, and simple ingredients. Get ready to indulge without the guilt!
The moment you’ve been dreaming of is finally here! For years, ever since perfecting my Healthy Samoas Cookie Bars, I’ve been on a mission. A quest to recreate another iconic Girl Scout cookie, but with a healthier, more inclusive twist. After countless attempts and much dedication, I have finally cracked the code to truly healthy Thin Mint cookies, and I simply cannot wait for you to experience this delicious breakthrough!
Confession time: I am completely and utterly obsessed with these cookies. My family and I enjoyed them three times in a single week because, honestly, they are just THAT good. Each bite delivers that unmistakable crisp, minty, chocolatey flavor that brings back all the nostalgic joy, but without any of the gluten or dairy.
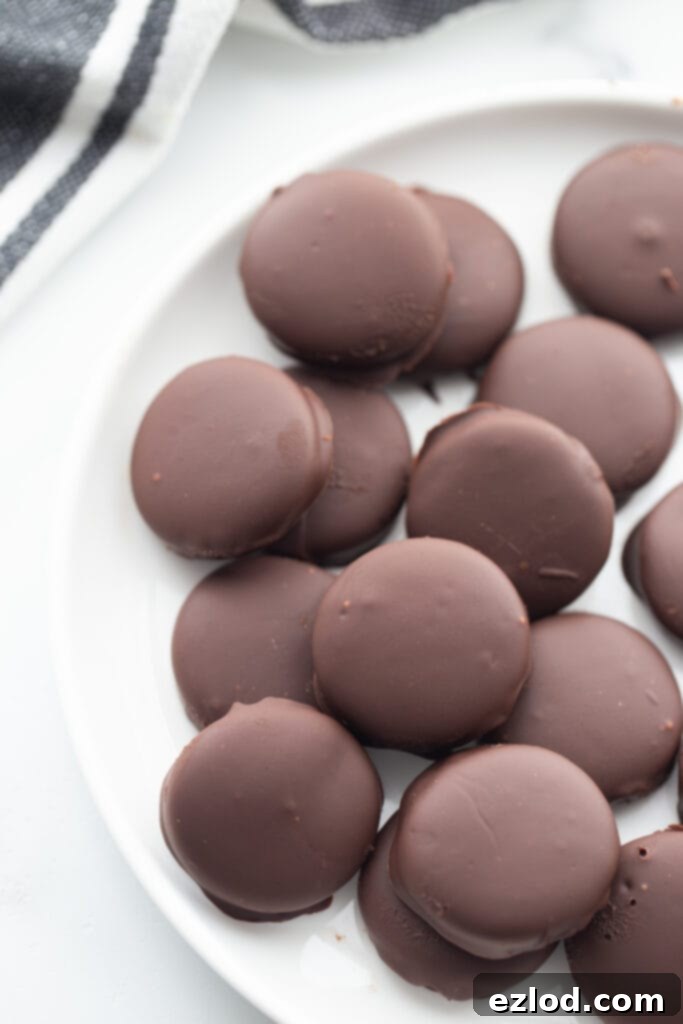
A little more backstory for my regular readers: my son, Max, navigates life with dairy and gluten sensitivities. This means he has never had the opportunity to experience the sheer delight of sitting down with a sleeve of Thin Mint cookies and enjoying every single one. He’s also never known the pure bliss of stashing a sleeve in the freezer, because, let’s be real, frozen Thin Mints are a next-level treat. As his mom, I simply couldn’t let another Girl Scout Cookie season pass without creating a copycat version that is not just comparable, but arguably even BETTER than the original. These homemade delights allow everyone to partake in the magic of mint and chocolate!
Looking for more delicious Girl Scout cookie copycat recipes? Don’t miss my Homemade Tagalongs for another wholesome treat!
Table of Contents
Toggle
Why These Healthy Thin Mints Are a Must-Try
These homemade Thin Mints aren’t just a substitute for the original; they’re a superior, healthier alternative that doesn’t compromise on flavor or texture. Here’s why they’ll quickly become your new favorite:
- The Perfect Balance of Chocolate and Peppermint: Each cookie delivers that quintessential refreshing mint flavor perfectly complemented by rich, dark chocolate. It’s a symphony for your taste buds, ensuring every bite is as satisfying as the last.
- Made with Clean and Simple Ingredients: Say goodbye to artificial flavors, high-fructose corn syrup, and other questionable additives. Our recipe uses wholesome, easy-to-find ingredients that you can feel good about enjoying and sharing with your family.
- Extra Fiber, Thanks to Oat Flour: Unlike traditional cookies made with refined white flour, these Thin Mints incorporate oat flour. This not only contributes to a delightful texture but also provides a welcome boost of dietary fiber, making them more filling and beneficial for digestion.
- Naturally Vegan and Gluten-Free: These cookies are designed to be enjoyed by everyone, regardless of dietary restrictions. They’re completely free of animal products and gluten, ensuring that even those with allergies or sensitivities can savor this classic treat.
- Just the Right Amount of Crunch: That satisfying snap when you bite into a Thin Mint is crucial, and we’ve nailed it! These cookies boast the ideal crisp texture, making them incredibly addictive – especially when chilled or frozen.
Essential Equipment for Perfect Thin Mints
To ensure your homemade Thin Mints turn out perfectly, having the right tools on hand can make a world of difference. Here’s what you’ll find helpful for this recipe:
- A sheet pan or cookie sheet: Essential for baking your cookies evenly and later for chilling the chocolate-dipped delights.
- Parchment Paper: A non-stick surface is crucial for rolling out the dough and preventing your cookies from sticking to the pan, ensuring easy removal and cleanup.
- A 1-1.5 inch round cookie cutter or a small circular object like a shot glass or jar: This helps create those perfectly uniform, bite-sized Thin Mint shapes. I personally love this set of various-sized cookie cutters for versatility.
- Cookie cooling rack: Allows air circulation around the cookies, which is vital for them to crisp up properly after baking.
- A medium-sized mixing bowl, a whisk, a rolling pin, and a fork for dipping are also basic but important tools you’ll need.
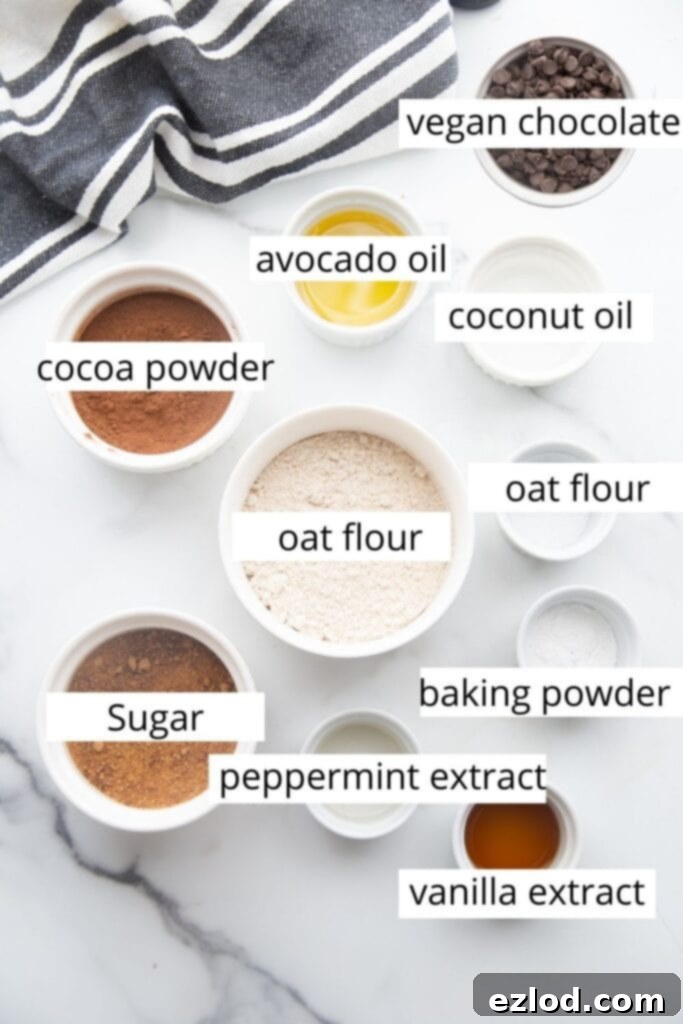
Ingredients for Copycat Gluten-Free Thin Mints
With just a few special yet accessible ingredients, you can whip up a batch of these crave-worthy Homemade Thin Mints anytime the craving strikes, no matter the season!
For the Cookies:
- Oat Flour: This is the star of our gluten-free cookie base. Oat flour provides a tender texture and a slightly nutty flavor that complements the chocolate beautifully. I’ve had great success with Gold Medal brand oat flour, which is both affordable and yields a perfect consistency. Alternatively, you can easily make your own by blending regular rolled oats in a high-speed blender or food processor until a fine flour forms. This also adds a fantastic fiber boost to your cookies!
- Cocoa Powder: Unsweetened cocoa powder is essential for that deep, rich chocolate flavor in the cookie itself. I typically reach for Hershey’s unsweetened cocoa powder, but any good quality unsweetened cocoa will work. For an even darker, more intense flavor, you could experiment with Dutch-processed cocoa.
- Raw Sugar: We use raw sugar to provide the perfect touch of sweetness. Its slightly coarser texture and subtle molasses notes add depth to the cookie. If you prefer, you can easily substitute this with coconut sugar for a lower glycemic option or even regular granulated sugar without affecting the outcome.
- Salt: A pinch of salt is incredibly important in chocolate baking. It doesn’t just add salinity; it brightens and deepens the chocolate flavor, making it taste even richer and more complex. Don’t skip it!
- Baking Powder: This acts as our primary leavening agent, giving the cookies a slight lift and contributing to their delicate, crisp texture without making them cakey.
- Avocado Oil: Chosen for its neutral flavor and healthy fat profile, avocado oil helps bind the dough and keeps the cookies moist. While I haven’t personally tested it for this specific recipe, melted and cooled refined coconut oil should work as a direct substitute. If you use unrefined coconut oil, be aware that you might detect a subtle coconut flavor, which some people enjoy!
- Vanilla Extract: A touch of vanilla extract always enhances chocolate flavors, adding a layer of warmth and complexity to the cookie dough. Opt for pure vanilla extract for the best results.
- Peppermint Extract: This is where the “mint” in Thin Mints truly comes alive! Be sure to use a good quality peppermint extract. Pure peppermint oil can also be used, but it’s much more concentrated, so you would need to significantly reduce the amount (start with half and adjust to taste) to avoid an overpowering mint flavor.
- Warm Water: Added gradually, warm water helps to bring the dough together, allowing the dry ingredients to hydrate properly and creating a pliable, easy-to-roll consistency. The amount needed can vary slightly depending on your oat flour and humidity.
For the Chocolate Coating:
- Vegan Chocolate Chips: The iconic outer coating! I recommend using a good quality vegan chocolate chip, such as Enjoy Life brand, to keep these cookies entirely plant-based. If you’re looking to cut down on calories or sugar, you could also use sugar-free chocolate chips like Lily’s, though technically those may not align with certain “fix” approved plans. Semi-sweet or dark chocolate chips work best for that classic Thin Mint taste.
- Refined Coconut Oil: This is the secret ingredient that gives the chocolate coating its smooth, dippable consistency and helps it set quickly and firmly, just like a classic Thin Mint. Refined coconut oil has a neutral flavor, so it won’t impart any coconut taste. Unrefined coconut oil can also be used, but like with the cookie dough, you might notice a slight coconut essence.
- Peppermint Extract: Another dose of peppermint is added to the chocolate coating to ensure every part of the cookie delivers that cool, refreshing minty kick. Again, you can use peppermint oil, but proceed with caution and use a much smaller amount, as it is very potent. Let me know if you try it!
Step-by-Step: How to Make Healthy Thin Mints
Recreating the magic of Thin Mints at home is easier than you think! Follow these simple steps to make delicious, healthy cookies that taste just like the real thing.
- Prep Your Workspace: Begin by preheating your oven to 350 degrees Fahrenheit (175°C). While the oven heats, line a large cookie sheet (or several, if making a big batch) with parchment paper. This will prevent sticking and make for easy cleanup later. Set this aside.
- Mix the Dry Ingredients: In a medium-sized mixing bowl, combine the oat flour, unsweetened cocoa powder, sugar, salt, and baking powder. Whisk these dry ingredients together thoroughly, ensuring there are no lumps of cocoa powder. A well-mixed dry base is key to uniform cookies.
- Form the Cookie Dough: Next, add the avocado oil, vanilla extract, and peppermint extract to your dry mixture. Stir well. Gradually add the warm water, one tablespoon at a time, until a thick, pliable cookie dough forms. You might find it easier to switch to using your hands to fully incorporate all ingredients and bring the dough together into a cohesive ball.
- Roll and Cut the Cookies: Take the ball of dough and place it between two sheets of parchment paper. Using a rolling pin (or even a clean, heavy can or jar), roll the dough out evenly until it’s about ¼ to 1/8 inch thick. Aim for consistent thickness for even baking. Then, use your small round cookie cutter (1-1.5 inches in diameter) or a shot glass to cut out individual cookies. Carefully transfer them to your prepared parchment-lined baking sheet. Gather any leftover dough scraps, re-roll, and cut more cookies until all the dough is used. This batch should yield approximately 30-40 cookies, depending on size.
- Bake to Perfection: Place your baking sheet in the preheated oven and bake for 12-15 minutes. Keep a close eye on them; the cookies should be firm to the touch and just slightly crisp, but be careful not to over-bake them, as they can burn easily due to the cocoa powder. Once baked, immediately transfer the cookies to a wire cooling rack and let them cool completely. Retain your used parchment paper for the next crucial step!
- Prepare the Mint Chocolate Coating: While your cookies cool, it’s time to create that iconic chocolate coating. In a microwave-safe bowl, melt the vegan chocolate chips. Do this in 15-second intervals, stirring vigorously after each interval to prevent burning. Chocolate can seize if overheated. In a separate small bowl, melt the refined coconut oil, then stir in the peppermint extract. Combine this peppermint-infused coconut oil mixture with your melted chocolate, stirring until perfectly smooth and glossy. The coconut oil helps keep the chocolate fluid and prevents it from seizing when the extract is added.
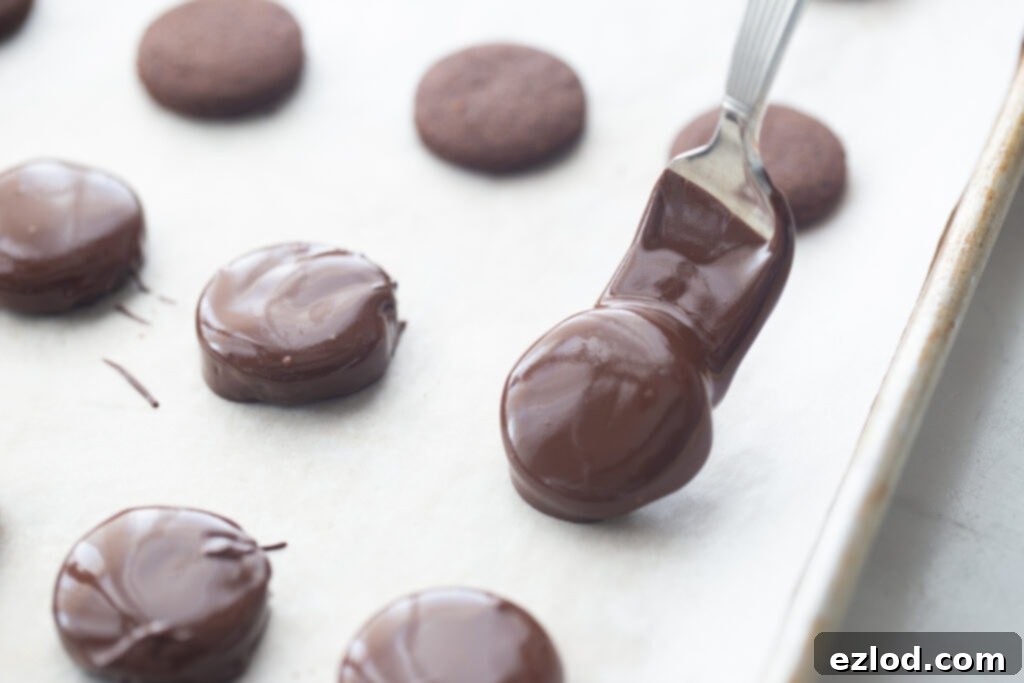
- Dip and Coat: Now for the fun part! Using a fork, gently dip each cooled cookie into the melted mint chocolate, ensuring it’s fully coated. Lift the cookie, allowing any excess chocolate to drip off, or gently scrape the bottom against the edge of your bowl. Place the chocolate-coated cookies back onto your parchment-lined baking sheet. For a quicker, albeit messier, method, you can use your fingers!
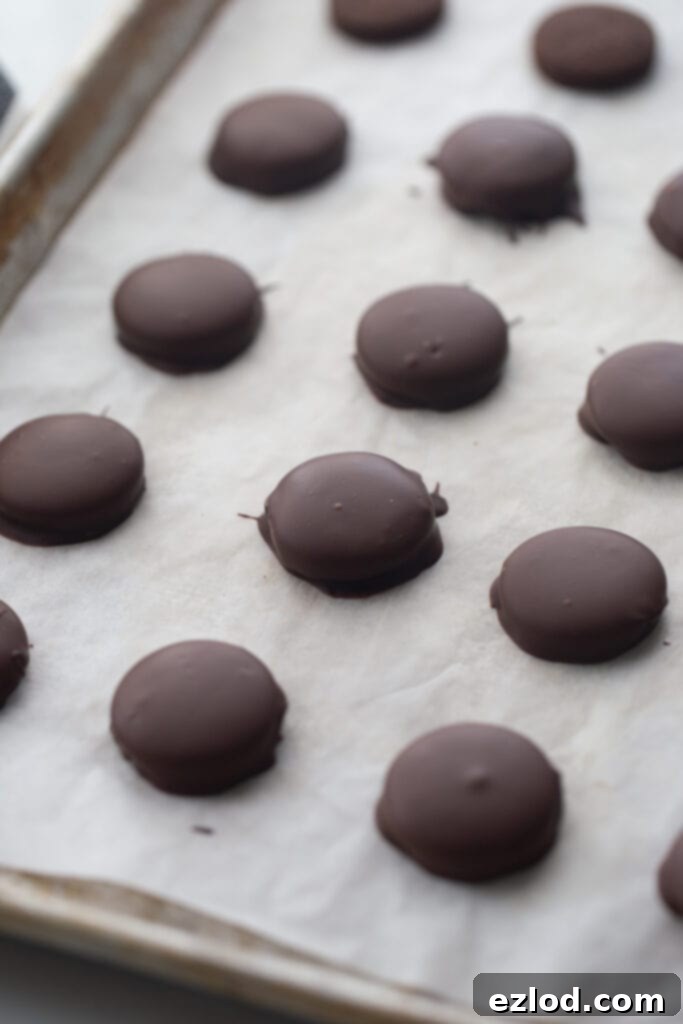
- Chill to Set: Once all cookies are dipped, place the baking sheet into the freezer for 10-15 minutes. This chilling time is essential for the chocolate coating to firm up and set beautifully. Once firm, they’re ready to enjoy! Store these delicious Thin Mints in an airtight container in the refrigerator for up to a week, or freeze them for up to three months for a delightful frozen treat.
What Kind of Chocolate Should I Use for the Coating?
For this recipe, achieving that authentic Thin Mint flavor means selecting the right chocolate. I highly recommend using vegan semi-sweet chocolate chips or chunks. These will give you the closest match to the traditional taste profile – a perfect balance of sweetness and rich cocoa. While dark chocolate chips are a valid option if you prefer a more intense, less sweet chocolate experience, they will alter the classic flavor slightly. You can absolutely use chocolate chunks or a chopped chocolate bar; just remember to melt them in short 15-second intervals, stirring meticulously between each, to ensure a smooth, burn-free consistency.
How Do I Make Oat Flour if I Can’t Find it in Stores?
Don’t fret if oat flour isn’t readily available at your local grocery store – it’s incredibly simple to make at home! All you need are certified gluten-free rolled oats (to ensure your cookies remain gluten-free) and a high-speed blender or food processor. Simply pour the oats into your appliance and blend them on high until they transform into a fine, powdery flour consistency. It’s truly that straightforward! Store any leftover oat flour in an airtight container in a cool, dry place for future baking adventures.
Are These Thin Mint Cookies 21 Day Fix Approved?
For those following the 21 Day Fix program, these Thin Mint cookies, as written with the vegan chocolate chips for the coating, are considered a yellow treat swap. While they are a healthier alternative, the chocolate chips do contribute to the “treat” category. However, I personally believe that enjoying 4 of these delightful cookies is absolutely worth it, especially considering they inherently combine components that would typically count as a yellow container anyway. They offer such satisfying flavor and texture that makes them a perfect portion-controlled indulgence.
If you’re looking to avoid using a treat swap altogether, there’s a fantastic alternative for the chocolate coating: my homemade Magic Shell Chocolate! This ingenious coating sets firm without relying on traditional chocolate chips. Here’s how you can quickly mix and heat it up:
- 1/2 cup of pure cocoa powder
- 1/2 cup of melted coconut oil
- 1/3 cup of honey (or maple syrup for a fully vegan option)
- 1/2 tsp vanilla extract
- 1/2 tsp peppermint extract
- A pinch of salt
Simply combine all ingredients and gently heat until melted and smooth. Dip your cooled cookies as usual. If you opt for this Magic Shell method, four cookies would approximately equal 3/4 YELLOW, 4 teaspoons (from the coconut oil), and 4 sweetener teaspoons (from the honey/maple syrup), offering a slightly different nutritional breakdown that might better fit your daily macros.

More Healthy Cookie Recipes You’ll Love
If you loved these healthy Thin Mints, be sure to explore my other delicious and health-conscious cookie recipes. From classic copycats to no-bake wonders, there’s a treat for everyone!
Healthy Samoas Cookie Bars: Another fantastic Girl Scout cookie reimagined in a healthier bar form!
Homemade Tagalongs: Peanut butter and chocolate perfection, made healthier.
No Bake Peanut Butter Cookies: Quick, easy, vegan, and gluten-free cookies without turning on the oven.
Gluten Free Monster Cookies: A crowd-pleasing cookie loaded with oats, chocolate chips, and peanut butter, all dairy-free.
Easy Chocolate Macaroons [Allergy Friendly]: Simple, chewy, and naturally gluten-free and dairy-free.
Healthy Edible Cookie Dough: Indulge in cookie dough safely with this healthy and delicious recipe.

Healthy Thin Mints
Nancylynn
30 -40 cookies
Pin Recipe
20 minutes
15 minutes
35 minutes
Ingredients
For the Cookies
-
1 cup oat flour Make it at home using oats and blending or using your food processor to blend into a fine flour – I also love Gold Medal Oat Flour – a great find at my market! -
¼ cup unsweetened cocoa powder -
6 tablespoons raw, regular, or coconut sugar -
¼ teaspoon salt -
¼ teaspoon baking powder -
3 Tablespoons avocado oil or you should be able to sub melted and cooled refined coconut oil – unrefined works, too, but you might get a tiny hint of coconut -
1 teaspoon vanilla extract -
3/4 teaspoon peppermint extract -
2-4 Tablespoons warm water
For the Chocolate Coating
-
1 cup vegan chocolate chips To cut calories, you could also use something like Lily’s chocolate, but technically these aren’t “fix” approved. -
1 teaspoon refined coconut oil -
½-3/4 teaspoon peppermint extract
Instructions
-
In a medium-size bowl, whisk oat flour and cocoa powder together. Then mix in sugar, salt, and baking powder until everything is well incorporated and no lumps of cocoa powder remain.
-
Next, mix in the oil and extract and stir until everything is well incorporated and a thick dough forms, adding water by the tablespoon to create a pliable dough. You might also need to use your hands to help form the dough.
-
Preheat oven to 350 degrees Fahrenheit (175°C) and line a cookie sheet with parchment paper.
-
Form the dough into a ball and place it between two pieces of parchment paper. Press it down with the palm of your hand and then use a rolling pin or can/jar to roll the dough out until it is about ¼-1/8 inch thick. Use a small shot glass or circular cookie cutter (about 1-1.5 inch in diameter) to cut out cookies and place them on your parchment-lined cookie sheet. Gather leftover cookie dough and repeat steps until all dough has been used (should make 30-40 cookies, depending on the size). Alternatively, you can roll the dough into a log and slice cookies around 1/4 inch thick.
-
Bake cookies at 350 F (175°C) for 12-15 minutes until firm and a little crisp, being careful not to let them burn. Transfer onto a wire cooling rack and let cool completely. Save your parchment paper for the next step!
-
While the cookies are cooling, make the chocolate coating by melting chocolate chips. Melt in 15-second intervals, stirring in between each to avoid burning. Then melt coconut oil and mix it with the peppermint extract. Stir this peppermint oil mixture into the melted chocolate, stirring well to keep the chocolate from seizing and to ensure a smooth, even coating.
-
Using a fork (or your fingers – my method. Messy on your hands, but quicker), dip the cookies in the melted chocolate. Let any excess drip off or scrape off the side of your bowl before placing them back on your parchment-lined baking sheet.
-
Chill thin mint cookies in freezer for 10-15 minutes to allow chocolate to set. Enjoy! Store in the refrigerator for a week or in the freezer for up to 3 months for a wonderful frozen treat.
Video
Notes
21 Day Fix: 1 YELLOW Treat Swap (per 4 cookies, as written)
WW: 4 points (per cookie) [Calculated using raw sugar and avocado oil]
**Calories listed below are per cookie, not per serving!
Nutrition
Carbohydrates: 9g
Protein: 1g
Fat: 4g
Saturated Fat: 2g
Polyunsaturated Fat: 0.3g
Monounsaturated Fat: 1g
Sodium: 24mg
Potassium: 26mg
Fiber: 1g
Sugar: 5g
Calcium: 13mg
Iron: 1mg
Tried this Recipe? Tag me Today!Tag @confessionsofafitfoodie on Instagram and hashtag it #confessionsofafitfoodie!
